5. Branch Parameters
This chapter contains the following sections:
- Section 5.1, "Branch Parameter Maintenance"
- Section 5.2, "Maintaining Tax Cycle"
- Section 5.3.1, "Maintaining Role to Head Mapping at Branch Level"
5.1 Branch Parameter Maintenance
This section contains the following topics:
- Section 5.1.1, "Creating Branches"
- Section 5.1.2, "System Features"
- Section 5.1.3, "Creating Reporting Structure"
- Section 5.1.4, "Maintaining Branch Parameters"
- Section 5.1.5, "General Details Tab"
- Section 5.1.6, "Account Financial Details Tab"
- Section 5.1.7, "Duplication Check Details Tab"
- Section 5.1.8, "International Bank Account Number Details Tab"
- Section 5.1.9, "SWIFT Address Button"
- Section 5.1.10, "Account Mask Button"
- Section 5.1.11, "CIF Range Button"
- Section 5.1.12, "Global Interdict Functions Button"
- Section 5.1.13, "Preferences Button"
- Section 5.1.14, "Fields Button"
- Section 5.1.15, "Tax Button"
- Section 5.1.16, "Branch Currency Button"
- Section 5.1.17, "Account Statement Handoff"
- Section 5.1.18, "Account Statement Generation"
5.1.1 Creating Branches
In the ‘Branch Parameters’ screen you create the various branches of your bank, define their reporting hierarchy, and maintain parameters such as their names, their address of location, SWIFT, TELEX, and HOST addresses.
In this screen you can do the following:
- Create the Regional Offices and branches of your bank by assigning each a unique branch code
- Maintain the address of location of each of the branches and also their SWIFT, TELEX and HOST addresses
- Specify the Suspense GL for posting all those accounting entries for which no GL has been specified or the specified GL has been closed
- Define preferences, such as - the retention duration, a CIF number for walk-in customers and the GL for netting FX contracts
- Maintain customer number range for generation of CIF numbers for customers of your bank.
The HO creates the branches at the bank level. All subsequent modifications on the table are done from the respective branches.
5.1.2 System Features
Oracle FLEXCUBE supports a three level reporting structure.
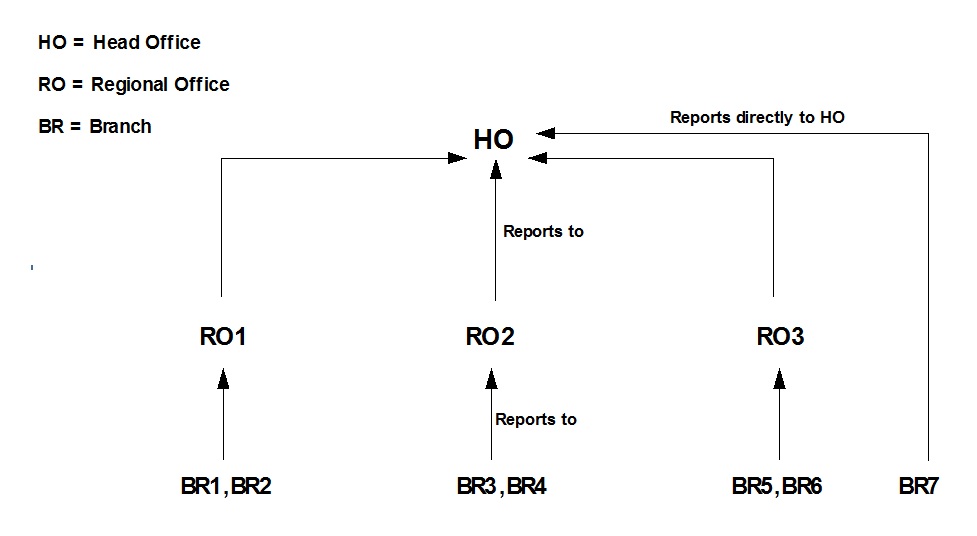
At the top stands the Head Office followed by the Regional Offices. At the lowest level are the branches. There can be any number of branches, but the number of regional offices is restricted to six. The system validates to check that the number of parent branches is not more than six. If the number of parent branches is more than six, system will give an error and restrict the number to six.
The branches report to the RO; and the ROs in turn report to the HO. Within this three level structure you can also have a branch reporting independently to the Head office (as branch, BR7 in the diagram).
It is also possible to have a two level reporting structure with only the HO and the branches, where each individual branch reports directly to the HO.
5.1.3 Creating Reporting Structure
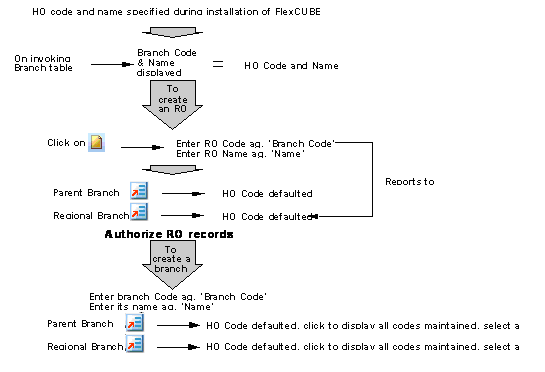
The order in which you create the HO, the ROs and the branches should follow the hierarchy. Hence, the first branch to be created should be the HO, followed by the ROs, and then the branches.
The Head Office of your bank is created during installation. You only have to create the Regional Offices and the various branches. During installation, the system automatically populates this screen with the branch code and name of your Head Office that you have specified to the implementer. The ‘Parent branch’ and the Regional Office fields’ also default to this branch code.
To create an RO, invoke a new screen. Then, enter the code and name of the RO against ‘Branch Code’ and ‘Name’ respectively. You do not need to specify the ‘Regional office’ because the HO Code is the default for the field. (All ROs report to the HO).
Then create all the branches. If a branch reports to an RO, to specify that RO is the branch’s ‘Regional Office’, select the code you want from the option list provided for this field.
But before designating, you should authorize all the RO records you have created; the system will not allow you to use any unauthorized record.
(Diagrammatic Representation)
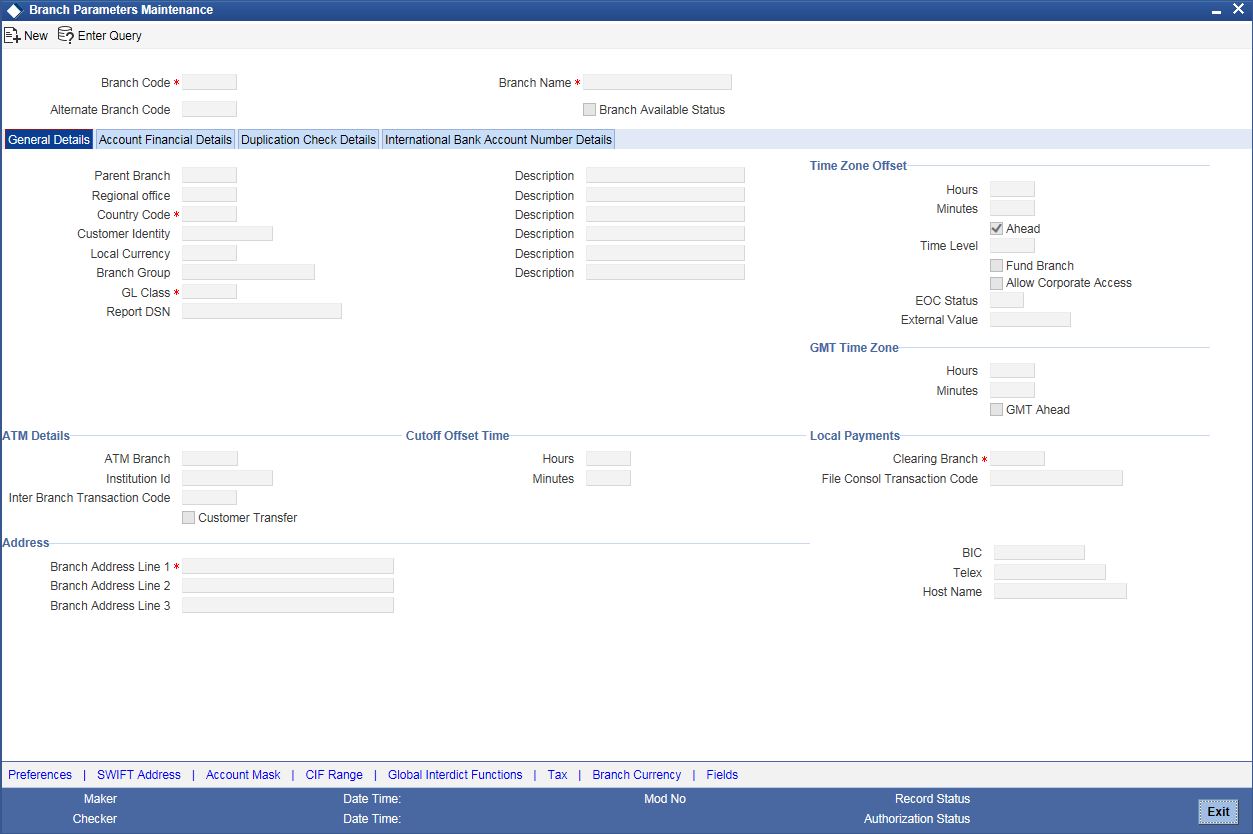
5.1.4 Maintaining Branch Parameters
In Oracle FLEXCUBE, the Head Office and the Regional Offices are defined as branches. You can maintain the details of the Head Office, regional offices and branches in the ‘Branch Parameters Maintenance’ screen. Invoke this screen by typing ‘STDBRANC’ in the field at the top right corner of the Application tool bar and clicking the adjoining arrow button.
You can specify the following details here:
Branch Code
This is the code you assign to the office or branch. The code acts as an identifier in the system for the office / branch. Input a code using a maximum of 3 characters, alphanumeric.
Branch Name
This is the name of the office or branch, the code of which is input. Enter the name using a max. Of 35 characters, alphanumeric
Alternate Branch Code
Specify the alternate name of the branch code. This field is an optional field. Alternate Branch Code would be maintained as a part of account mask maintenance. The alternate branch code will be used for the generation of CASA and TD account numbers (including Islamic CASA and TD).
The alternate branch code will not be unique. Two separate branches may have the same alternate branch code. It will have a literal ‘r’ to represent that in the account mask.
Following validation will be done when the account mask has literal ‘r’:
- Alternate Branch code field should be mandatorily maintained in the branch maintenance.
- Account mask can have maximum of five ‘r’. If the account mask has five ‘r’ then the length of the data in the Alternate Branch code field should also be five characters long..
- If Alternate Branch code is maintained but account mask is not maintained at the branch level then the account mask maintained at the bank parameter will be considered for the above two validations.
- Account mask should not have both the branch code and the alternate Branch code in the same mask.
If Alternate Branch Code is not consistent, the system displays an error message “The Alternate Branch Code value is not consistent with the mask maintained”.
Branch Available
The system displays the Branch Available status. If the status is ‘Yes’, it indicates that the branch can accept transactions for the day and if the status is ‘No’ , then it indicates that the transactions will be accepted but it will be in effect only from the next business day.
Accordingly accounting entries will be passed checking the following, for tanking branch transactions:
- The Branch Available Status
- The Branch date and host date i.e. entries will be tanked if branch date is ahead of host date
When the Branch Available status is ‘NO’ or if branch date is ahead of host date, then the transactions will be tanked. These transactions will be untanked by the BOD program which runs post date change i.e. POSTDTCH.
Note
If you want to check whether the transaction is tanked or not, you should login to host and refer to the corresponding query function.
For more information on ‘Querying the Transactions’ refer Retail Teller, Clearing and Utility Payment Chapters under Oracle FLEXCUBE host module.
5.1.5 General Details Tab
You can maintain the branch details regarding the local currency, the parent branch, regional office of the branch, address details including telex, BIC etc.
Local Currency
Specify the currency of operation for your branch and the default currency for all transactions of your branch. The income and expense balances of your branch will also be maintained in this currency.
ARC Branch Group
Select the ARC branch group from the adjoining option list. All the ARC branch groups maintained in the ARC Branch Group Maintenance screen is displayed in this list.
Parent Branch
Parent Branch is to define an alternate reporting line, other than the three level HO-RO-Branch structure. The ‘Parent’ for all the branches you create is the HO code (default). To specify the Parent, other than the HO, select from the options displayed. The name of the parent branch is displayed alongside.
Regional Office
This is the branch code of the Head Office or Regional Office to which the branch (whose code is input eg. Branch Code) reports.
For a Head Office or a Regional office, this code should be the Head Office branch code, which is also the default for this field. For the branches, specify that branch as the RO, to which the branch reports. Select from the list of options displayed.
Country Code
Specify the country code in which the branch operates. Alternatively, you can select the country code from the option list. The list displays all the country codes maintained in the system. This is a mandatory field.Customer Identity
Specify the customer’s identity. During maintenance of payments & collections periodic instructions, system defaults the customer number here.
GL Class
Specify the GL Class. The adjoining option list displays a list of all the valid GL class codes and their description. You can choose the appropriate one.
Note
You can also select ‘ALL’ as an option. This indicates that all the GL codes are allowed for this branch.
Specifying ATM Details
Specify the following details
ATM Branch
Specify the ATM branch.
Institution Identification
Your bank may have a branch or multiple branches for different countries. You have to capture the identification code that uniquely identifies your bank branch in the ATM transactions interchange environment. Specify a code to identify the institution. This institution ID will help identify whether a particular transaction has been sent from an external network or whether it has originated from your bank branch.
Inter Branch Transaction Code
You can specify the Transaction Code through which accounting entries for inter-branch transactions should be settled.
Customer Transfer
Check this option to indicate that transfer transaction should be permitted through the ATM
Specifying Address Details
For each branch of your bank you maintain the following parameters:
Branch Address
Input the address of location of the branch. Each line can have a maximum of 35 characters.
BIC
Input the SWIFT address for a branch using 8 or 11 characters, alphanumeric
Telex
Specify the branch’s TELEX address, using a maximum of 14 characters, alphanumeric
Host Name
Against ‘HOST’ enter the name of the Host server for this branch, in not more than 35 characters, alphanumeric
Time Level
In this field is displayed the system time level status, represented by a number between 0 and 9
In Oracle FLEXCUBE, user access to the system can be controlled by assigning each user and the system, a time level. Both the system and the users are set to different time levels. Only those users who have a time level equal to or greater than the system time level can log into the system.
A control clerk, during the EOC process, does the change in time level status
Fund Branch
Even though the fund and the bank are in the same database, the fund is treated as a different legal entity and as such the books of the fund are maintained separately from those of the bank. Funds are created in a separate branch and any transaction initiated in the fund branch belongs to a fund. Check this box to indicate that the branch you are maintaining if is a fund branch. Since the fund is a different legal entity, it should not be possible to initiate inter-branch accounting entries from the fund branch.
Any settlement with an external entity is routed through the normal settlements interface. In order to facilitate this, all the account fields in the system accept only the accounts in the transaction branch, if the branch happens to be a fund branch.
Allow Corporate Access
Select this option to specify that the fund subscription/redemption operations in the fund branch can access the accounts of corporate branch.
Note
- You will not be allowed to change this field once the branch record has been authorized.
- This field will be enabled only if the branch is a fund branch.
External Value
Specify the name of the branch as maintained in an external system. This value can be used to interface with the external system.
EOC Status
Under EOC status one of the following alphabets will be displayed which stand for the following:
B - Beginning of financial input; indicates system transactions in progress
I -- Indicates that user transactions are in progress
T-- End of user transaction input; indicates system transactions in progress
F -- End of financial input; system transactions also completed
E -- End of Day, Branch awaiting date change
The values are updated by EOC process.
Specifying Time Zone Offset
For branches with different time zones, you can define the offset time that is to be displayed in maker/checker stamp and all the reports generated for the branch.
The offset time is specified in terms of hours and minutes, and the time will be added/subtracted from the Server Time maintained for the bank.
Hours
Specify the number of hours to be offset from Server Time to arrive at the local branch time.
This is the number of hours by which the branch leads or lags behind the Server Time
Minutes
Indicate the additional minutes by which the branch leads or lags behind the Server Time
Note
The reference of time is always the System Time (Server Time)
Ahead
The system calculates the local time of the Branch by adding/subtracting the Server Time and the Time Zone Offset time. When you maintain the offset time for the time zone, you need to specify whether the system should add or subtract the offset time from the Time Zone Offset.
Checking the Ahead box indicates that the offset time is added to the Server Time. Consequently, if the box is unchecked, the offset time is subtracted from the Server Time.
Additionally, the system validates the cutoff time depending on the time you specify here. The validation is based on following 3 parameters:
- Cutoff Time maintained for the currency in Currency Definition Screen
- Cutoff Offset Time maintained for the Branch in Branch Parameters Screen
- Time Zone Offset maintained for Branch in Branch Parameters Screen
GMT Time Zone
Hours
Specify the GMT hours of the Branch in hours. The format to be used is HH format.
Minutes
Specify the GMT minutes of the Branch in minutes. The format to be used is MM format.
GMT Ahead
Check this box if the given hour and minutes are ahead of GMT.
Indicating Cutoff Offset Time
When defining a currency, you can indicate a cut-off time for the currency. If your bank operates in branches located in different time zones, the cut-off time maintained for the bank will not be applicable across branches.
Therefore, you can set up an offset time for your branch based on the cut-off time set for the bank. You can specify an offset time for your branch in the Branch Parameters screen.
Hours & Minutes
The offset time is expressed in hours and minutes. The time you specify here is added or subtracted from the cut-off time maintained for the bank. This depends on the time difference between your branch and the Head Office.
Indicating Local Payments
Clearing Branch
Select the clearing branch from the adjoining option list.
Transaction Code for Consolidation Across Products
Select the transaction code for consolidation from the adjoining option list.
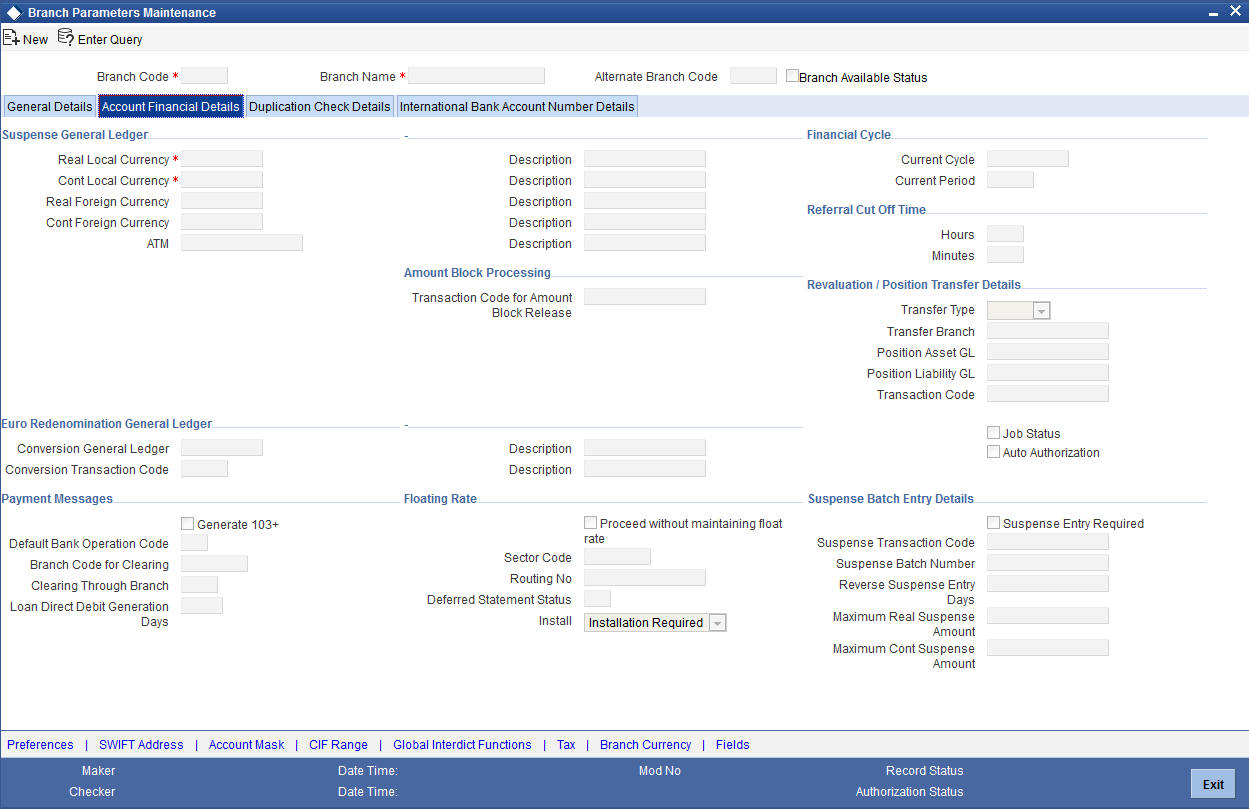
5.1.6 Account Financial Details Tab
You can specify the details regarding suspense GLs, Financial cycle, preference for floating rate, message generation (103,103+) for the branch in this screen. The screen appears as shown below:
Specifying Suspense GL
The accounting entries generated by different modules of Oracle FLEXCUBE will be passed into the specified ‘Suspense GL’ account if:
- The GL into which the entries are to be passed is not defined, or
- If the GL has been closed
Suspense GLs are of two types:
Real Suspense GL (Local and Foreign Currency)
The accounting entries that belong to asset, liability, income or expense GL categories will be passed to the ‘Real suspense GL’. To indicate the real suspense GL for a branch, click option list and select a GL code from the option list.
Contingent Suspense GL (Local and Foreign Currency)
The accounting entries that belong to contingent asset or contingent liability GL categories will be posted to a ‘Contingent Suspense GL’.
To indicate the contingent suspense GL for a branch, click option list and select a GL code from the option list.
Specifying Euro Redenomination GL
To facilitate the currency conversion process, you have to maintain a common Conversion GL and a Transaction Code.
The conversion GL that you specify in this screen will be identified as the common suspense GL for all balance conversions while re-denominating the currency of an account either for specific customers or for generic conversions.
In addition to the conversion GL you have to indicate a Transaction Code, which identifies conversion, related entries.
Indicating Payment Messages
Generate 103
As a branch level parameter, you have to indicate whether your customers can receive MT 103 as payment messages. Check the box positioned next to the Generate MT103 field to indicate that the customers of your branch are capacitated to receive payment messages in the MT 103 format. If you leave this box unchecked, the system will automatically send all payment messages to the counterparty bank in the MT 100 format.
Generate 103+
The ‘Generate MT 103 + option’ allows you to generate outgoing MT 103 messages in the MT 103 + format. This check box can be enabled only if you have enabled the generation of MT 103 messages as Payment Messages.
Note
The system will generate MT 103 messages as payment messages for transactions in the branch, and generate them in the MT 103 + format only if you have enabled this option in the following cases:
- For the counterparty of the transaction, in the BIC Code Maintenance
- By choosing the Generate 103+ option for currency in the Currency Definition
- For the product used by the transaction, in the Product Preferences
The system is also capable of processing incoming MT 103 messages in the MT 103 + format. During the upload process the system considers an MT 103 payment message to be of MT 103 + Format based on the presence of the STP code in the 119 field. Field 119 is present in the third block of the message i.e., {3: {119:STP}}.
Branch Code for Clearing
Indicate the code that identifies your branch in the Clearing Network. The code you specify for your branch should be the same as that defined in the Clearing Bank Code Maintenance screen.
Clearing Through Branch
If clearing transactions involving your branch are routed through another branch, specify the Oracle FLEXCUBE branch code of that branch in this field.
On the basis of the Routing Number Mask defined for your bank, and your specifications in this screen, Oracle FLEXCUBE automatically generates the Routing Number for clearing transactions involving your branch in the Routing Number field.
Loan Direct Debit Generation Days
Loan DD Generation days specifies the number of days before the schedule payment date, when a Direct Debit Contract is generated for the schedule due. This is applicable only for Loan Contracts in the local currency.
In order to facilitate the processing of loan repayments by customers who have their current or settlement accounts in some other bank of the clearing network you can initiate Direct Debits to these accounts. When a payment is due on a loan, a direct debit is generated ‘Loan DD Generation Days’ before the payment date.
As a result in Oracle FLEXCUBE the following entries will be passed:
| Dr/Cr | GL | ||
|---|---|---|---|
| Dr | Clearing suspense | ||
| Cr | Dummy Settlement Account |
During liquidation which is performed on the schedule date the entries passed are as follows:
| Dr/Cr | GL | ||
|---|---|---|---|
| Dr | Dummy Settlement Account | ||
| Cr | Loan Asset GL / Interest Income GL |
Refer the ‘Maintaining the attributes specific to PC products’ chapter of the PC manual along with the Branch Parameters section of the Core Services Manual for details on processing DDs originating from a Loan.
Processing Amount Block
Oracle FLEXCUBE passes the accounting entries for releasing an amount block through the ‘Transaction Code for Amount Block Release’ field. The system will check whether any amount block of type CASA for a branch is in open status. If an account is in open status, the system will group the amount blocks into primary account and primary account branch. Then, the system will remove the amount block from the cover account and debit the blocked amount of the cover account to the primary account.
Transaction Code for Amount Block Release
Specify the transaction code for the release of amount block. The adjoining option list displays all valid transaction codes maintained in the system. You can choose the appropriate one.
Indicating Financial Cycle
Current Cycle
This is the code for the current financial year as defined by you in the ‘Period Code’ screen.
Current Period
Each financial year is divided into accounting periods called ‘Period Codes’ defined in the ‘Period Code Maintenance’ Screen (for details refer ‘period Code screen’). The current accounting period of the financial year is displayed in this field.
Specifying Referral Cut-off Time
Referral refers to the process of handling customer transactions that force the accounts involved in such transaction to exceed the overdraft limit. Examples of typical transactions, which force an account to move into overdraft, are Payment and Collections, Funds Transfers, Standing Instructions or Clearing transactions. If an account is marked for referral, the details of transactions resulting in the account moving into Overdraft will be sent to the referral queue.
Hours & Minutes
In branch parameter, you have to specify the referral cut-off time for accepting / rejecting transactions in the referral queue.
In case a transaction is rejected from the referral queue after the cut-off time then system displays the override message as “‘Rejected after cut off time”.
Note
Transactions are accepted into the Referral Queue even after cut-off time if account goes into overdraft.
Auto Authorisation
Oracle FLEXCUBE enables you to allow certain users (of your choice, depending on your requirements at your installation) to automatically authorize transactions.
To indicate applicability of automatic authorization for users of the branch, you must enable the Auto Authorization option in the Branch Parameters screen. When you do, you can then allow automatic authorization rights to the appropriate users at the branch.
For more details about automatic authorization, refer the Security Management System and Procedures user manuals.
Deferred Statement Status
This is a display field. This field indicates whether or not the Branch is ready for Deferred Statement Generation. ‘Y’ indicates the Branch is ready for deferred statement generation.
For further details on Referrals refer to the Processing Referrals in Oracle FLEXCUBE chapter of the Core Entities manual.
Install
Select the appropriate value from the drop-down list to indicate whether Oracle FLEXCUBE installation is complete or incomplete.
Proceed Without Maintaining Floating Rate
Check this option to indicate that floating rates should be propagated across all branches,
Sector code
Specify the Sector Code of your branch, as specified in the Clearing Bank Code Maintenance screen.
Routing No
On the basis of the Routing Number Mask defined for your bank, and your specifications in this screen for clearing and sector, Oracle FLEXCUBE automatically generates the Routing Number for clearing transactions involving your branch in the Routing Number field.
Specifying Revaluation/Position Transfer Details
You can transfer the currency positions from the individual branches to the designated branch during EOD. The system transfers the position from the existing branch to the treasury branch. When the position is negative in the given GL, then the system will choose the Offset account as Position asset GL and when the position is positive in the given GL, then the system will choose the Offset account as Position liability GL. Sequence of the EOD between the designated branch and all other branches are operationally controlled.
You can maintain the following revaluation/position transfer details:
Transfer Type
Select the transfer type from the drop-down list. Following are the options available in the drop-down list:
- Position
- Reval
Note
- If the Transfer Type field is left blank then neither the position transfer nor revaluation transfer to the designated branch will be done.
- For position transfer, the ‘Inter Branch in Local Currency‘ check box in the Transaction Code maintenance screen, should be checked to avoid creating position due to IB posting.
Transfer Branch
The system will identify the branch to which the revaluation/position transfer should be done.
During account/GL revaluation process, the system considers this branch and the GL to pass one leg of the revaluation profit and loss entries. The other leg of the entries will be passed based on the revaluation profit/loss GL and the account branch. The account branch in this case is the ‘Revaluation Into’ branch maintained as part of branch parameters maintenance.
Position Asset GL
Specify the GL to which the notional asset needs to be transferred..
Position Liability GL
Specify the GL to which the notional liability needs to be transferred.
Transaction Code
Specify the transaction code used to pass the accounting for position transfer.
While saving, the system will validate the difference between negotiated rate input by the user and the base rate maintained against the tolerance limit at the product level. If the difference is not within the tolerance limit, then the system will display an error message.
Specifying Suspense Batch Entry Details
Specify the following details:
Suspense Entry Required
Check this box to indicate that automatic suspense entries can be posted for a branch. If a mismatch occurs between real entries or contingent entries during the batch, then the system will post the balancing entries and will continue the EOD without interruption, if you check the ‘Suspense Entry Required’ option and specify the Suspense Batch Entry details. You can correct those entries manually at later stages.
If you leave this box unchecked and if a mismatch occurs in Real or contingent entries then the EOD is stopped and the error is thrown. You have to correct the entries.
Suspense Transaction Code
Specify the transaction code against which the suspense entries are posted or /reversed.
Suspense Batch Number
Specify the batch number against which the suspense entries are posted or reversed.
Reverse Suspense Entry Days
Specify the days till which the system can sustain the mismatch entries once the batch is run for the same. You can specify a value within a range of 1 to 9999.
If the ‘Reverse Suspense Entry Days’ is greater than the EOD suspense entry date and if reversal action is not performed for the suspense entry then the EOD is stopped and system displays an error message.
Maximum Real Suspense Amount
Specify the maximum amount that the system can consider to post suspense entry for an EOD for real entry.
Maximum Cont Suspense Amount
Specify the maximum amount that the system can consider to post suspense entry for an EOD for contingent entry.
5.1.7 Duplication Check Details Tab
You can maintain the number of days for which the duplication check should be done for a transaction in ‘Duplication Check Details’ tab. A transaction is compared with all previous transactions entered during the number of days maintained here, for any possible duplication.
The duplicate check is done starting from booking date till the booking date minus the number of days for duplicate check. This duplication check is carried out based on the combination of the preferences maintained at the FT/SI product respectively.
Note
Duplicate transaction check is applicable only for FT and SI transactions.
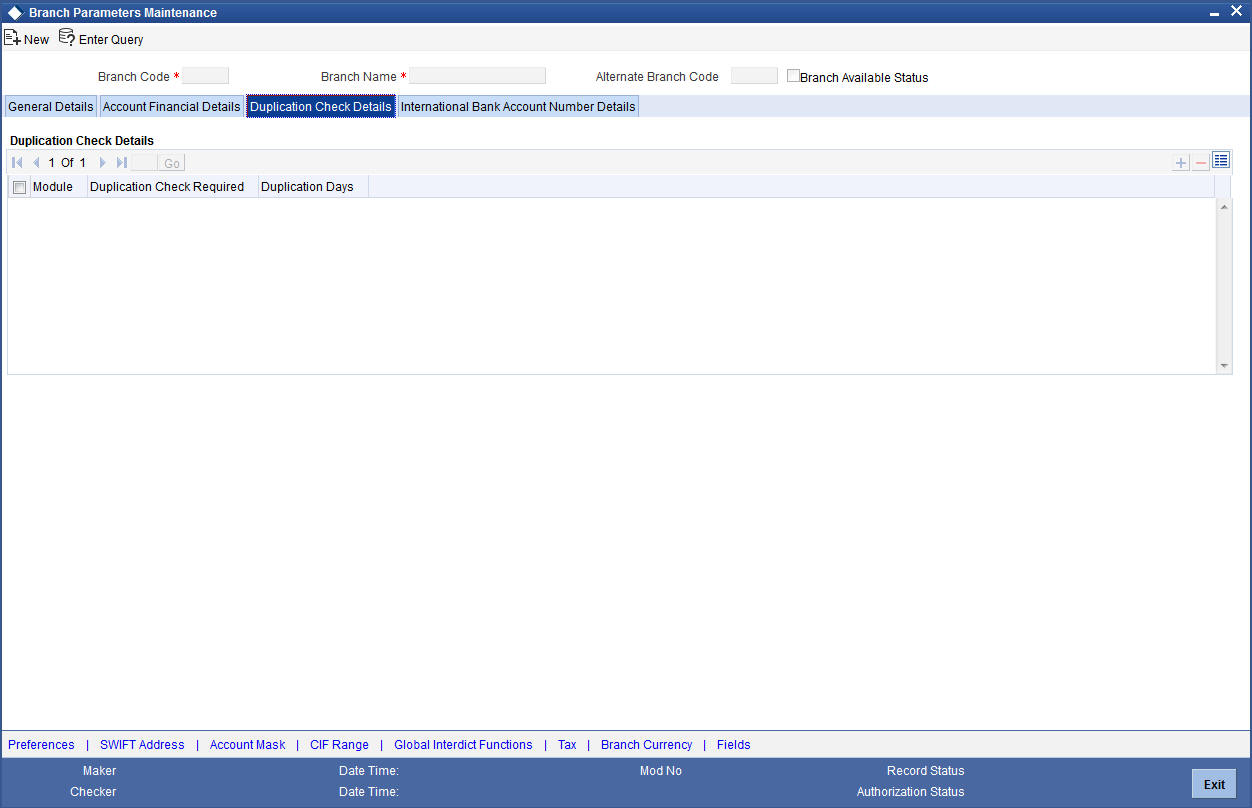
You can specify the following details here:
Module
Specify the module for which you wish to maintain duplicate check days or select the module from the option list provided.
Duplication Check Required
Check this box to indicate that duplication check is required for the transactions related to the module selected.
Note
- However, despite checking this box if the duplication check criteria are not specified in the following screens the system will not perform duplication checks for all the respective contracts under this branch.
- Payments and Collection Product Category Maintenance
- Funds Transfer Product Preference
- Standing Instruction Product Definition
Duplication Days
Specify the number of days for which the duplication checks for transactions need to be carried out. Calendar days are considered for duplication check.
Note
You need to specify a value here if ‘Duplicate Check Required’ option is selected. You cannot specify a negative value.
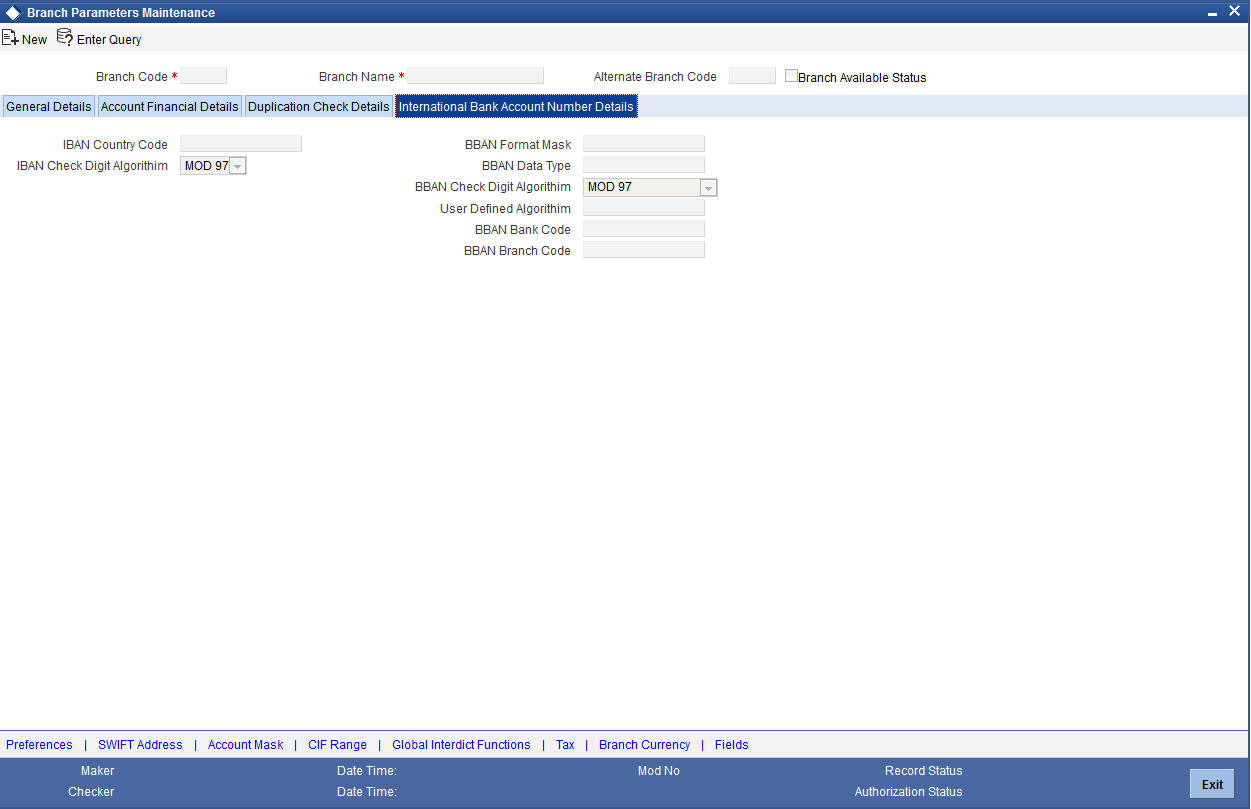
5.1.8 International Bank Account Number Details Tab
International Bank Account Number (IBAN) allows you to identify bank accounts across national borders. The IBAN consist of 34 alphanumeric characters out of which first two letters are the country code, next two characters being check digits followed by a country specific Basic Bank Account Number (BBAN).You can maintain IBAN and BBAN details in the 'International Bank Account Number Details' tab.
You can capture the following details:
IBAN Country Code
The system defaults the country code of the branch. The maximum allowed characters for IBAN country code is two. IBAN Country Code is mandatory.
IBAN Check Digit Algorithm
The system defaults MOD97 as IBAN check digit algorithm.
BBAN Format Mask
Specify the BBAN format mask. The maximum characters allowed for BBAN Format Mask is 30. The following mask characters are allowed in BBAN format
| Mask Character | BBAN Parameter | BBAN Generation Details | |||
|---|---|---|---|---|---|
| b | BBAN Bank Code | The value is based on branch parameters maintained in IBAN details | |||
| s | BBAN Branch Code | Branch code as maintained in IBAN details | |||
| z | Account Number | This will be defaulted as Account number | |||
| l | Alternate Account Number | This will be defaulted as Alternate Account number. | |||
| d | BBAN check digit | Based on BBAN check digit maintenance in IBAN details. | |||
| t | Account Type | This will be replaced with the IBAN account type maintained at account class level. | |||
| h | Number of account holders | The number of account holders at the time of BBAN generation is defaulted here. The maximum allowed length of 'h' for a BBAN mask is 1. | |||
| i | National Identifier | This will be the National ID of the account customer as maintained in STDCIF based on customer type. |
The mask characters will be repeated based on the length of each parameter in BBAN format.
The value for ‘h’ is derived as 1 if the account has a single account holder. The value of ‘h’ will vary between 2-9 depending on the number of joint account holders. If the total account holders are higher than 9, then the value of ‘h’ will be between A-Z. If the joint account holders along with the primary holder number are beyond 35, the system displays an error message upon IBAN generation.
The system displays an error message if:
- the account number is part of the BBAN mask and the length of the account mask maintained for the branch is greater than the corresponding BBAN mask account number length
- while generating IBAN the length of IBAN account type for the account class and account type (i) maintained in BBAN mask are not the same.
- characters other than b, s, z, l, d, h, i, t are used in BBAN mask
- there is a space between the characters in BBAN Mask
If the length of the account number or alternate account number is less than the BBAN mask account number length, then the account number will be prefixed with zeroes while generating the IBAN.
BBAN Data Type
Specify the data type of BBAN mask characters. BBAN Data Type is mandatory if BBAN format mask is maintained. BBAN Data Type can have only a (alphabet), n (number) and c (alphanumeric) as input.
BBAN Check Digit Algorithm
Select the algorithm to use for the generation from the drop-down list. The options available are:
- MOD 97
- MOD 10
- MOD 11
- MOD 11 with Weights
- User Defined
User Defined Algorithm
Select the user defined algorithm from the option list if the BBAN check digit algorithm is maintained as 'User Defined'.
BBAN Bank Code
Specify the BBAN bank code, which is used for IBAN generation. This field is mandatory if bank code is part of BBAN mask.
If the bank code is part of BBAN Mask and the value is not maintained in the branch IBAN details, then the system displays an override message.
BBAN Branch Code
Specify the BBAN branch code, which is used for IBAN generation. This field is mandatory if branch code is part of BBAN mask.
If the branch code is part of BBAN Mask and the value is not maintained in the IBAN details, the system displays an override message.
5.1.9 SWIFT Address Button
Click the ‘SWIFT Address’ in the Branch Parameters screen to invoke ‘Additional SWIFT Address’ screen.
The screen appears as shown below:
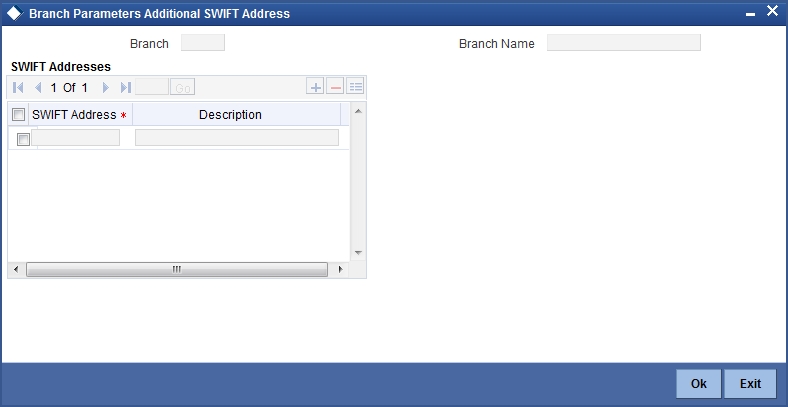
You can specify the SWIFT addresses related to the branch in this screen.
5.1.10 Account Mask Button
Customer Account Masks can be defined at the Branch Level or at the Bank Level
Click the ‘Account Mask’ in the Branch Parameters screen to invoke ‘Account Parameters’ screen.
The screen is as shown below:

For further details please refer the Section ‘Specifying Account Generation Parameters at Bank Level’’ under ’Defining Bank Level Parameters’.
Fund Subscription
You may wish the system to automatically create deposit accounts for customers at the time of fund subscription. These system-created deposit accounts are for use as settlement accounts.
Here, you need to specify the range of numbers available for such auto created accounts by mentioning a start and an end number.
If you wish to retain the facility of auto creation of current accounts at loan initiation, you will have to ensure that the account number mask does not have any user input character.
Note
- The range of numbers specified for the creation of current accounts should not overlap with the range specified for the creation of deposit (or contra deposit) account.
- Fund account number ranges are enabled only in the fund branch.
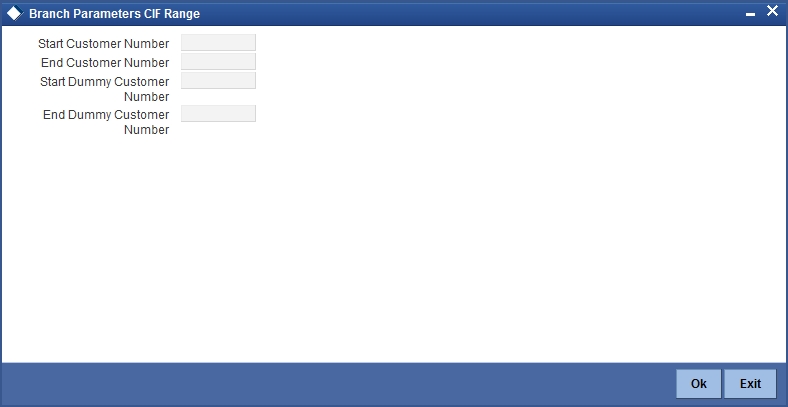
5.1.11 CIF Range Button
You can specify a number range based on which the customers of your bank will be assigned CIF numbers for identification. Since the number range is maintained at the branch level, you can specify different number ranges for different branches of your bank.
To maintain the number range, click the ‘CIF Range’ in the Branch Parameters screen. The ‘Customer Number Range’ screen is displayed:
Specify the following in this screen:
Start Customer No.
This number is the basis on which the system generates the CIF numbers for customers of your branch.
The CIF number generation is determined by the following details:
- The CIF mask maintained in the Bank-Wide Parameters screen. Assume that the mask is ‘bbbnnnnnn’ (where ‘bbb’ represents a 3-digit branch code and ‘nnnnnn’ is a 6-digit number).
- The start customer no – assume that this number is 100
While generating CIF numbers, the system will automatically assign the number ‘000000100’ to the first customer of your branch, assuming that the branch code is 000. This conforms to the CIF mask maintained for the bank. The next customer will be ‘000000101’ and so on.
If the option ‘Auto Generate CIF Numbers’ is checked in the ‘Bank Parameter Preferences’ screen and the start CIF is zero or null, the new customer number will be generated for the branch as per the current running sequence number of the Head Office.
End Customer No
Just as you specify a Start Customer Number, you have to indicate the End Customer Number also. You will not be allowed to maintain customers beyond this range.
Let us assume that the ‘End Customer No.’ is 99999. As per the mask and the end number, the last customer CIF number that is generated at your branch will be ‘000099999’.
Start Dummy Customer Number & End Dummy Customer Number
You should also maintain a dummy customer number range in this screen. When maintaining a dummy range, you should ensure that dummy CIFs and the actual range do not overlap with one another.
The dummy CIF range will be used for account number generation. As explained earlier, the account number can be generated based on the following account mask:
‘bbbTZCCCCCCSd’
Where,
- bbb – is the branch code
- T – indicates the account code
- Z – is the currency type
- CCCCCC – is the CIF number of the customer
- S – is the sequence number for a combination of account code, currency type and customer
- d – is the control number generated by ‘Modulo 11 with Weights’ algorithm (explained earlier)
To recall, the sequence number that is automatically generated by the system is for an account code + currency type + customer combination. The sequence number is a single digit number (from 1 to 9). This means that, for the same combination, you will be allowed to maintain only nine accounts. To eliminate this limitation and to allow maintenance of more than nine accounts for the same combination, the dummy customer number range will be utilized. This is explained with the help of an example.
For example, Assume that you have maintained the following CIF range for your branch:
| Number Type | Number | ||
|---|---|---|---|
| Start CIF No. | 100000 | ||
| End CIF No. | 198999 | ||
| Start Dummy No. | 199000 | ||
| End Dummy No. | 199999 |
Ms. Jennifer approaches your bank to open a savings account in your branch (branch code is ‘000’). Further, the CIF and account number masks maintained for the branch are ‘bbbnnnnnn’ and ‘bbbTZCCCCCCSd’ respectively.
As per the CIF mask, Ms. Jennifer is assigned the CIF number: 000123456. According to the account number mask, the 6th to 12th digits will be the last six digits of the CIF number, which is ‘123456’.
The account number of the first savings account, in USD opened for Ms. Jennifer is: 000411234561 (we will consider only 12-digits for this example since the 13th digit is auto generated by the system based on Modulo 11 with Weights algorithm).
The components of the account number 000-4-1-123456-1 are as follows:
- 000 – is the branch code
- 4 – is the account code
- 1 – is the currency type
- 123456 – is the CIF number for Ms. Jennifer
- 1 – is the sequence number for the combination of account code, currency type and customer i.e. the number ‘4-1-123456’ will be common for the first 9 accounts maintained for the same combination.
Now, Jennifer decides to open another account for the same combination. In this case, the sequence number gets incremented to 2 and the account will be assigned the number: 000-4-1-123456-2.
This will go on till the 9th account for the same combination. The 9th account number would be 000-4-1-123456-9.
If the customer decides to maintain the 10th account for the same combination, the sequence number will restart since it has reached the maximum allowed level. This would result in duplication of account numbers. To eliminate this, the system will now use the dummy CIF range to number the accounts.
Therefore, the 10th account number will be: 000-4-1-199000-1. This sequence will continue for subsequent accounts maintained for the same combination.
Note
You can view all the dummy CIF numbers linked to a customer in the ‘Customer Accounts – Allocated Dummy CIF’ screen.
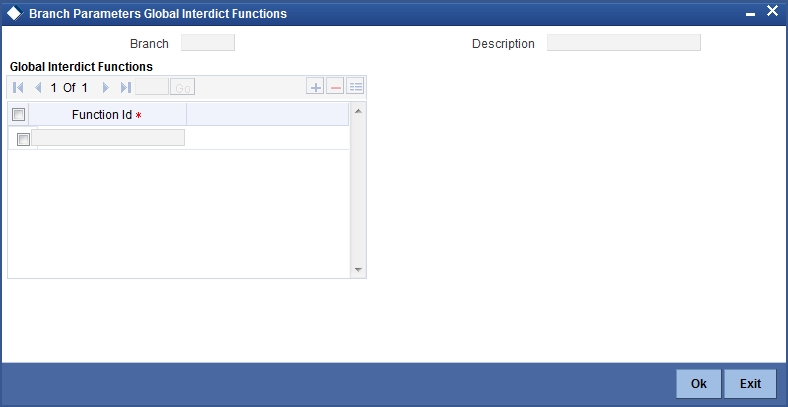
5.1.12 Global Interdict Functions Button
Click ‘GI Functions’ button in the Branch Parameters Maintenance screen to invoke ‘Branch Global Interdict Functions’ screen. Using this screen, you can integrate with Global Interdict System for online verification of transactions before authorisation in order to comply with ‘Office of Foreign Assets Control’ (OFAC) regulations in US.
5.1.13 Preferences Button
To specify your preferences, click ‘Preferences’ button from the ‘Branch-Wide Parameters’ screen. The ‘Preferences’ screen is displayed.
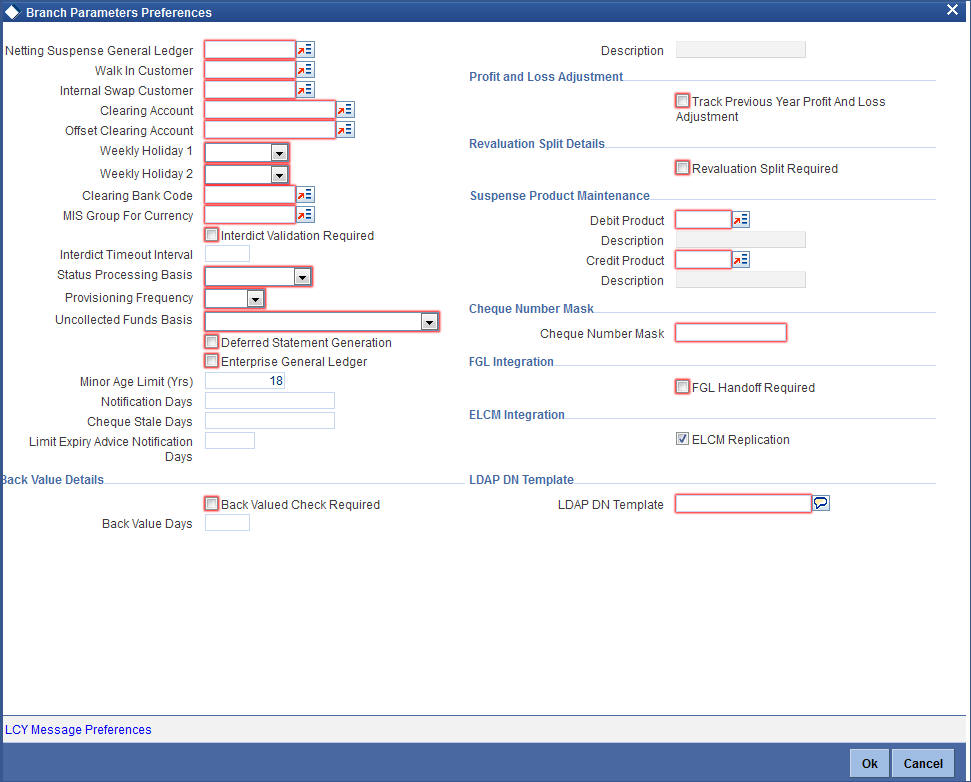
In this screen you define the following preferences:
- The netting suspense GL into which settlement entries for netted FX Contracts should be posted
- The CIF Number against which all Walk in customers should be identified
- The duration for which spool files should be stored in the spool file directory
- The directory into which the files should be spooled
- MIS codes for posting of automatic balancing entries
These details can be maintained by the respective branches. For a branch you maintain the following, in the ‘Preferences’ screen:
Netting Suspense GL
All settlement accounting entries relating to a netted FX contract, is passed into the specified ‘Netting suspense GL’. The net amount of the settlement is transferred through the Nostro accounts. For instance, let us take the following two outstanding contracts entered into by bank A; both settling on January 10, 1998:
- Bought from bank B 1 Million USD in exchange for 35 Million INR
- Sold to bank B 1/2 million USD in exchange for 18 million INR
The above contracts can be settled in either of the two ways given below, on the settlement date:
- Settle both contracts separately
- Net the settlements of the two contracts
If your bank has a netting agreement with the counterparty, the settlement entries are posted to this ‘Netting suspense GL’ and the net amounts are settled through the nostros.
Walk in Customer
For your branch you can create a walk in customer ID against which you track all those customers who do not hold a regular account with your bank but have approached the bank for a transaction, say, for encashment of traveler’s checks or for manager’s checks.
You need to specify an internal swap customer for processing internal swaps. The names of all the customers of your bank will be displayed in the option-list provided. This will be a unique customer meant for processing internal swaps.
Clearing Account
Specify the default GL account to be used for clearing transactions at the branch.
Offset Clearing Account
Specify the default offset GL account to be used for clearing transactions at the branch.
Weekly Holiday 1 & 2
Using this option you can indicate the holiday in a week for your branch. You can select the day for holiday from dropdown list. If you want to set only one holiday in a week for your branch, select the day for Weekly Holiday 1 and leave Weekly Holiday 2 Blank. If you want to opt for two holidays in a week, select the days for Weekly Holiday 1 & Weekly Holiday 2.
Clearing Bank Code
Specify the code by which your bank is identified in the Clearing Network you participate in. This has to the same as that specified for your bank in the Clearing Bank Code Maintenance screen.
MIS Group for Currency (Mismatch Entries)
If the posting of automatic balancing entries due to currency and value date mismatches has been specified for your bank, you can specify the MIS codes or groups to be used for posting the balancing entries.
Interdict Validation Required
For your branch you need to indicate whether Interdict Validation is required for all Customers, Customer Accounts, Funds Transfers, Standing Instructions, Foreign Exchange, Letter of Credit and DD transaction processed within your branch.
The options available are:
- Yes – the details of CIFs and Customer Accounts, captured in the specific branch of your bank will be sent to the GI system as and when they are captured in Oracle FLEXCUBE.
- No – the details maintained in the specific branch will not be sent to the GI system for online verification.
Interdict Timeout Interval
If you indicate that the details should be sent to the GI system, you will also have to specify the interdict timeout interval period. If the response time from the GI system takes longer than the time that you specify in this field, the transaction will be timed out since the processing time exceeds the time stipulated in this field.
If you enable this preference, you will have to identify the Code or ID of the function in Oracle FLEXCUBE for which such a validation should be performed by clicking on the ‘GI’ button in the Branch Parameters screen.
Status Processing Basis
In the Branch Parameters, you can indicate the basis upon which status processing must be done at the branch, for customer accounts as well as loan contracts.
Status processing can be done either at an individual contract / account level, or at a Group / CIF level.
If you opt for Group / CIF -level processing, it is done in two stages:
- The worst status among all contracts and accounts under a specific customer group or CIF is arrived at
- All accounts and contracts involving the customer group or CIF are then moved to the worst status that was arrived at
If you opt for status processing at individual contract / account level, the status of each contract or account would be assigned according to the status processing parameters that are operative for the contract or account.
If ‘Status Processing’ is at Individual Contract Level, then you can change the status and trigger the status change event along with accounting entry posting. However if the ‘Status Processing’ is at CIF/Group level individual module (LC, CI, MO, CA, IA and BC) batches will be updating common storage with the derived status of each contract and CIF/Group level status will be triggered by the common status change batch. The common status change batch will call the individual module function for status change processing.
For details about loan status processing and provisioning, consult the Loans user manual and the Core Entities user manual.
Provisioning Frequency
Provision processing depends upon status processing for accounts and contracts. The provisioning batch process executes after the status processing batch. If status processing is indicated to be processed at group / CIF level, you can indicate the frequency at which the provisioning batch is to be executed for your branch. The frequency options available are daily and monthly.
For details about loan status processing and provisioning, consult the Loans user manual and the Core Entities user manual.
(Withdrawable) Uncollected Funds Basis
You can define how the System enforces the allowable amount of uncollected funds (on an account) that can be withdrawn within a business day.
For each customer account, you designate a limit on the amount of uncollected funds that can be withdrawn (the Uncollected Funds Limit). You can also indicate whether, for a given business day, the System should consider the uncollected funds that are allowed to be withdrawn as:
- The funds scheduled to be released on the current date (today), OR,
- The total uncollected funds available against the account subject to the Uncollected Funds Limit
You can specify your preference by choosing any of the following options:
- Uncollected Funds : If you select this option, an amount up to or less than the uncollected funds limit defined for the account, is allowed to be withdrawn, on a given business day.
- Uncollected Funds Available Same Day: If you select this option, the funds allowed to be withdrawn against uncollected funds on a given business day are the funds scheduled to be released on the current date (today).
Deferred Statement Generation
Check this option to stop the automatic account statement generation at end of day.
If this option is checked, then the account statement generation will be deferred to whenever you initiate action for executing Batch Operations for statement generation. You can do this through the Branch Statement Status Change screen.
Enterprise GL
Check this option if this branch needs to have an enterprise GL hand-off. Once checked the system will identify the said branch for creating an ASCII hand-off file containing the relevant accounting entries to be sent to the external enterprise GL.
Minor Age Limit (Yrs)
Specify the minor age limit. This varies from nation to nation. However If user does not maintain the age limit, the system will automatically defaults it as 18 years during save.
Notification Days
Specify the intimation days to send advice prior to the customer turns major based on DOB.
Cheque Stale Days
Specify the cheque stale days. Here you can identify the number of days for which stale validation is done.
Limit Expiry Advice Notification Days
Specify the limit expiry advice notification days. The system will send advice to the customer these many days before the limit expiry date.
The limit expiry advice generated by the system provides information on the limit details. Multiple lines can be attached to a customer with different expiry dates. Advice sent to the customer contains the details of the line which is about to expire.
Specifying Back-Valued Details
For your branch you can specify the maximum period up to which back valued posting can be processed. This restriction can be made applicable by specifying the following preferences:
Back Value Check Required
It is used to indicate whether all back-valued transactions should be validated against a specific period.
Back Value Days
If you enable the Back Value Check Required option, you must indicate the number of calendar days up to which back-valued transactions can be allowed. During transaction processing you will be allowed to post back-valued transactions up to the specified date in the past (no check will be done). Further, if the option is checked but you have not maintained the ‘Back Value Days’ (maintained as NULL), the system will interpret it to be ‘Zero’ days allowed (for back valued transactions).
The restriction for the maximum period up to which back-valued posting can be allowed, will be made on transactions processed in following modules:
- Payment and collections
- Data Entry
- Retail Teller
- Utility Payments
- Foreign Exchange
- Money Market
- Expense Processing
- Fund Transfer
- Loans and Deposits
While saving transactions pertaining to any of these modules the System validates the Value Date of the contract to check whether it adheres to the restriction. You will be intimated with an override if the Value Date is earlier than the specified period. This restriction is made applicable on all uploads as well.
Refer the Contract Processing chapter of the individual modules for additional information.
Indicating Profit and Loss Adjustment
Track Previous Year Profit and Loss Adjustment
You can collect data pertaining to the unrealized income booked for each contract during the year by triggering the Year-end batch process. But, you will be allowed to trigger the batch process for splitting the unrealized profit and loss for the previous year and the current year only if you have specified this (Track PY PnL Adjustment) as a preferred option for your branch.
If you set this preference, the data pertaining to the unrealized income is collected at contract level for the following modules:
- Securities - Unrealized Interest, Discount and Premium accrued for the year.
- Derivatives - unrealized income
- Bills and Collections - unrealized income
- Letters of Credit - unrealized income
- Money Markets - unrealized income
Indicating Revaluation Split Details
Revaluation Split Required
You can choose to break-up revaluation profit/loss into:
- Trading P&L – P&L due to revaluation of foreign currency transactions during the day
- Revaluation P&L – P&L due to revaluation of opening balances (balances without current day’s turnover)
If you enable this preference, all GLs which are marked for revaluation split will have their revaluation profit/loss broken up into trading and revaluation P & L for entries posted from this branch.
For further details on Split Revaluation refer the GL user manual.
Specifying Suspense Product Maintenance
When a branch goes offline, user posts the transactions allowed in offline mode. Once the branch and host are online, branch starts posting these transactions as force post. If the force post fails, then the host needs to post these transactions as a suspense product in the branch.
Debit Product
Specify a valid debit product you need to maintain as Suspense Product. The adjoining option list displays all the valid debit products maintained in the system. You can select the appropriate one.
Description
The system displays the description based on the selected debit product
Credit Product
Specify a valid credit product you need to maintain as Suspense Product. The adjoining option list displays all the valid credit products maintained in the system. You can select the appropriate one.
Description
The system displays the description based on the selected credit product.
Indicating Cheque Number Mask
Cheque Number Mask
The system displays the cheque number mask maintained at bank parameter level.
The ‘Cheque Number Mask’ defined at branch parameter level cannot be changed once maintained and authorized.
If the cheque book is issued to non base branch accounts, the system populates or validates the cheque numbers based on the cheque mask of the account branch.
Indicating ELCM Integration
Check this box to indicate that the branch details will be replicated to ELCM system. System will select this option by default, but you can unselect it. System will not allow unselecting this option once it is selected.
LDAP DN Template
The LDAP DN template needs to be maintained here for each branch. This is used in Oracle FLEXCUBE user maintenance form to populate corresponding LDAP user-id automatically from the template.
5.1.13.1 LCY Message Preference Button
Click the ‘LCY Msg Pref’ button in the Preferences screen to invoke the ‘LCY Message Preference’ screen.
The screen is as shown below:
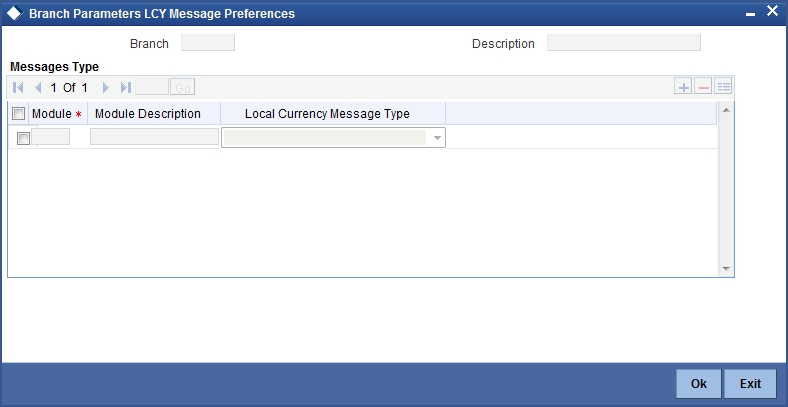
Branch
The system displays the branch details.
Description
The system displays the description.
Module
Specify the module details.
Module Description
Specify the description of the module.
Local Currency Message Type
Select the local currency message type from the drop-down list. Following are the options available in the drop-down list:
- Suppress LCY
- Generate LCY Message Thru SWIFT
- Generate PC Contract
5.1.14 Fields Button
You can associate values to all the User Defined fields created and attached to the Branch Parameters Screen. You can view the list of User Defined fields associated by clicking the ‘Fields’ button.
The screen appears as shown below:
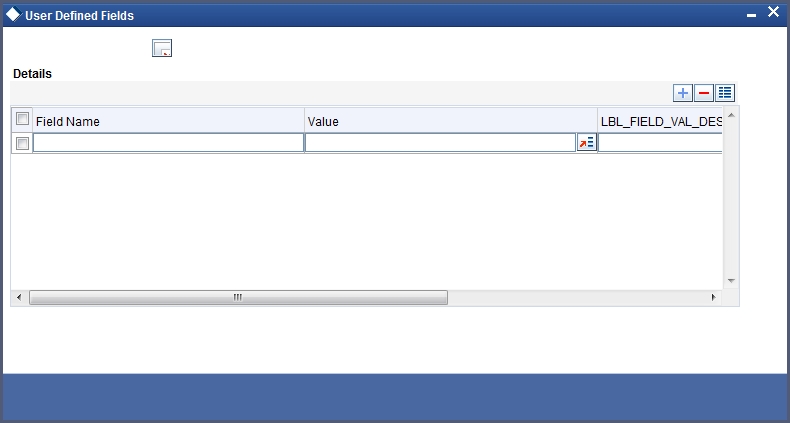
You can enter the value for the UDFs listed here in the ‘Value’ column.
For more details on how to create user Defined fields, refer chapter ‘Creating custom fields in Oracle FLEXCUBE’ in the User Defined Fields User Manual under Modularity.
5.1.15 Tax Button
To maintain Tax parameters at the branch level, click the ‘Tax’ button in the Branch Parameters Details screen. The screen appears as shown below:
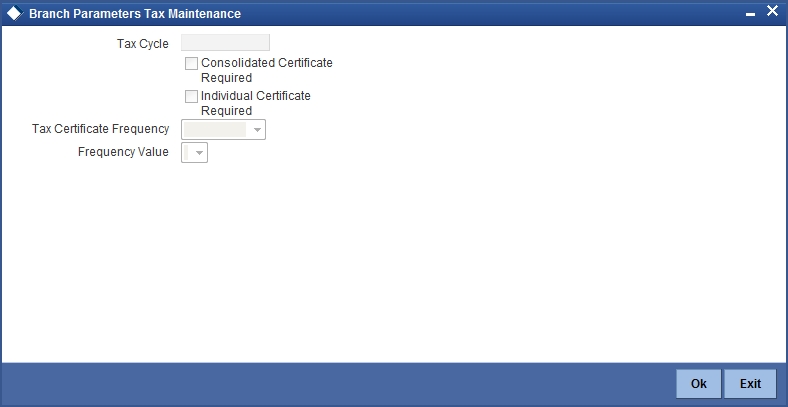
Tax Cycle
This is the current tax cycle for the branch. This is a display field. Whenever the tax cycle changes, the field is updated during the date change authorization for that day.
Consolidated Tax Certificate Required
Check this option to indicate Consolidated Tax Certificate is required for all the transactions done in the Tax Cycle. This option works in conjunction with a similar option in the Customer Information Maintenance and the Tax Category Maintenance screen.
The Consolidated Tax Certificate would be generated at the frequency specified at the branch level. Apart from this, the certificate would also be generated at the end of the Tax Cycle. The consolidated tax certificate would always display all the transactions pertaining to the current Tax Cycle.
Individual Tax Certificate Required
Check this option to indicate Individual Tax Certificate is required for individual transactions under the selected tax category. This option works in conjunction with a similar option in the Customer Information Maintenance and the Tax Category Maintenance screen.
Tax Certificate Frequency
This field is enabled only if the Consolidated Tax Certificate option is checked.
You need to specify the frequency with which the tax certificate should be generated. This would be a combination of the Tax Certificate Frequency and the Tax Certificate Day. It could be any of the following:
- Monthly - This indicates that the tax certificate would be generated every month. The day of the month on which the Tax Certificate would be generated is defined in the Tax Certificate Day field.
- Quarterly (Q) – This indicates that the tax certificate is generated once in three months. The end-month for the first quarter is defined in the Tax Certificate Day field. The Certificate would be generated on the last working day of the month defined in the Tax Certificate Day field. Subsequent end-months would be derived by the system.
- Half Yearly (H) – This indicates that the Tax Certificate would be generated once in six months. The end-month for the first half-year period is defined in the Tax Certificate Day field. The Certificate would be generated on the last working day of the month defined in the Tax Certificate day field. Subsequent end-months would be derived by the system.
- Yearly (Y) – This indicates that the tax certificate would be generated once a year. The month in which the certificate needs to be generated is defined in the Tax Certificate Day field. The Certificate would be generated on the last working day of the month defined in the Tax Certificate Day field.
Frequency Value
Select the appropriate month for tax certificate generation, from the adjoining drop-down list.
For more details on how to maintain tax cycles, refer section ‘Maintaining Tax Cycles’ in the chapter.
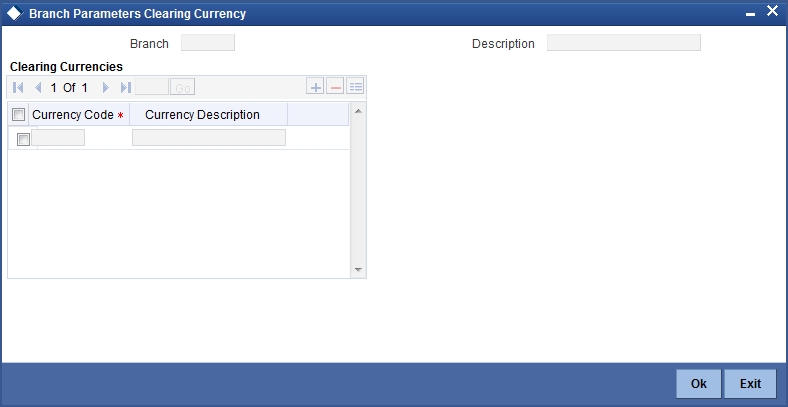
5.1.16 Branch Currency Button
You can maintain a list of currencies in which clearing transactions can be processed under a branch. In order to achieve this, you need to invoke the ‘Clearing Currency’ screen by clicking the ‘Branch Currency’ button in the ‘Branch Parameters – Detail View’ screen.
Here you can capture the following details:
Branch Code
The branch code gets defaulted from the ‘Branch Parameters – Detail View’ screen. A brief description of the branch is displayed alongside.
Currency Code
Specify the currency in which you wish to allow clearing transactions under this branch. You can specify multiple currencies for a branch. Click on the adjoining option list and select the appropriate code from the list of currencies maintained in the system.
Currency Description
A description of the chosen currency code is displayed here
5.1.17 Account Statement Handoff
The account statement handoff will consider the movements on accounts based on the Statement Date and not the Transaction Date. The Statement Status Change will itself run the Account Statement handoff for the previous working date before marking the Branch Statement Status as ready.
5.1.18 Account Statement Generation
Accounting entries with Statement Date lying between From Date and To Date populated in the handoff records will be picked up for Account Statement Generation processing.
5.2 Maintaining Tax Cycle
You can maintain tax cycle at the bank level through the ‘Tax Cycle Maintenance’ screen. Invoke this screen by typing ‘STDTXCYL’ in the field at the top right corner of the Application tool bar and clicking the adjoining arrow button.
The screen is as shown below:
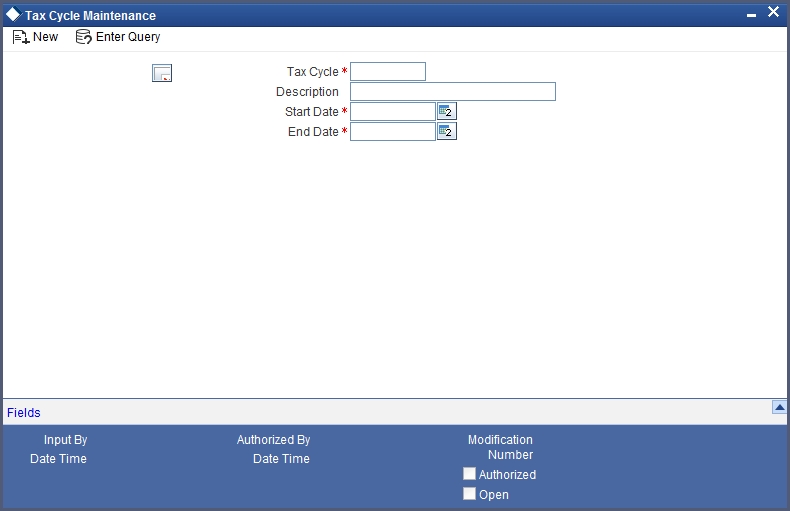
Tax Cycle
You need to define the tax cycle, which will be uniquely identified in the system
Start and End dates for tax cycle
You need to indicate the start and end date of the tax cycle you are defining, using the adjoining calendar.
Updating Tax Cycle
The Current Tax Cycle would be updated as and when the tax cycle changes. This would be done during authorization of date change function on the first day of the new Tax Cycle.
5.3 Branch Level Role to Head Mapping
This section contains the following topics:
- Section 5.3.1, "Maintaining Role to Head Mapping at Branch Level"
- Section 5.3.2, "Viewing Accounting Role to Head Mapping Details"
5.3.1 Maintaining Role to Head Mapping at Branch Level
You can maintain different General Ledgers for different branches for the accounting roles defined in the system. If you have maintained Role to Head mapping for a product at the branch level, the system uses these accounting heads instead of the heads maintained at the product level.
You can maintain Role to Head mapping for a combination of branch, product and status in ‘Branch Level Role to Head Mapping’ screen. You can invoke this screen by typing ‘CSDACRHM’ in the field at the top right corner of the Application tool bar and clicking the adjoining arrow button.
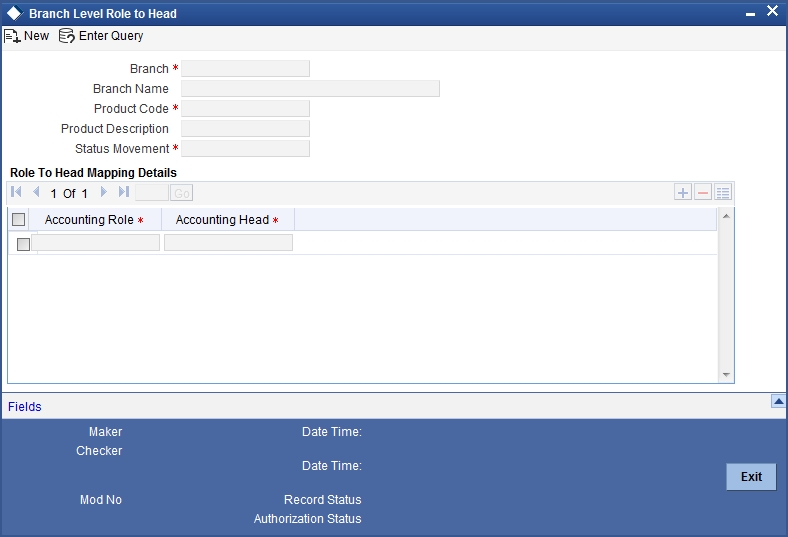
You can specify the following details in this screen:
Branch Code
The branch code of the current branch gets defaulted here.
Branch Name
The name of the current branch corresponding to the branch code gets displayed here.
Product Code
Specify the product code for which you wish to maintain role to head mapping or select the product code from the option list provided.
Status
Specify the status code for which you wish to maintain role to head mapping or select the status code from the option list provided.
Accounting Role
Select the accounting role to be used for role to head mapping, from the option list provided.
Accounting Head
Select the GL accounting head to be used for role to head mapping, from the option list provided.
You can add more rows to accounting role and heads by clicking the ‘plus’ icon provided. You can also delete a row from this table by selecting the required row and clicking the ‘minus’ icon.
Note
The accounting roles and heads maintained here will override the default role head mapping maintained for the product.
5.3.2 Viewing Accounting Role to Head Mapping Details
You can view the details related to accounting roles and heads for a branch in ‘Branch Level Role to Head Mapping Summary’ screen. You can invoke this screen by typing ‘CSSACRHM’ in the field at the top right corner of the Application tool bar and clicking the adjoining arrow button.
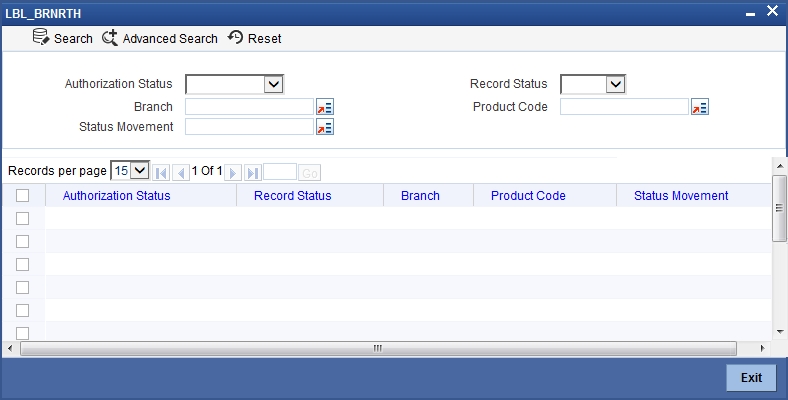
The following details get displayed in this screen:
- Authorization status
- Record status
- Branch code
- Product code
- Status