3. Maintenances
3.1 Introduction
For the retail bills module to be fully operational, you need to maintain certain basic information. This chapter explains the procedure to maintain such basic details.
This chapter contains the following sections:
- Section 3.2, "Branch Parameters"
- Section 3.3, "Instrument Details"
- Section 3.4, "Instrument Location"
- Section 3.5, "Instrument Status"
- Section 3.6, "Reason Codes"
- Section 3.7, "Notary Codes"
- Section 3.8, "Instrument Rules"
- Section 3.9, "Other Party Details"
- Section 3.10, "Drawer and Drawee Combination Limit"
3.2 Branch Parameters
This section contains the following topics:
- Section 3.2.1, "Maintaining Branch Parameters"
- Section 3.2.2, "General Preferences Tab"
- Section 3.2.3, "Float Days Tab"
- Section 3.2.4, "Transit Days Tab"
- Section 3.2.5, "User Defined Fields"
- Section 3.2.6, "Viewing Branch Parameters Summary"
3.2.1 Maintaining Branch Parameters
You can maintain the details of retail bills specific to a branch using ‘Retail Bills - Branch Parameters’ screen. The branch parameters may be maintained for each branch of your bank. To invoke this screen, type ‘RBDBRPRM’ in the field at the top right corner of the application toolbar and click the adjoining arrow button..
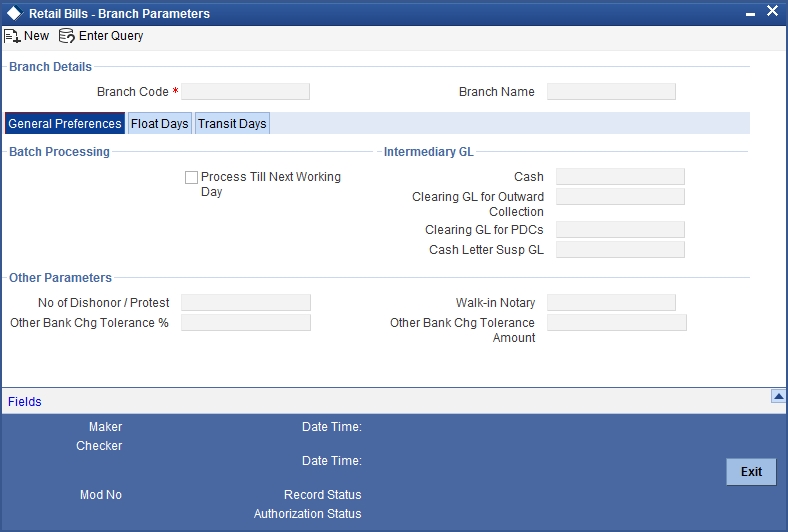
Specify the following details:
Branch Details
Branch Code
Specify the branch code for which you need to maintain the parameters.
The option list displays all authorized and active branch codes maintained in the system. You can select the appropriate branch code.
Branch Name
Based on the branch code selected, the system displays the name of the branch.
3.2.2 General Preferences Tab
You can capture the general branch parameters preferences in ‘General Preferences’ tab.
Specify the following details:
Batch Processing
Process Till Next Working Day
Check this box to handle the next working day processes.Based on the check box system decides the manner in which the contracts will be processed by batch operations for events/activities falling on holidays.
Intermediary GL
Cash
Specify the GL which should be debited when the other party pays by cash. In Retail Teller module, the system will credit the cash to this GL. The option list displays all the miscellaneous Cr type GLs maintained in the system. You can choose the appropriate one.
Clearing GL for PDCs
Specify the GL which should be debited during liquidation of the clearing cheques in the retail bills module. The option list displays all the miscellaneous Cr type GLs maintained in the system. You can select the appropriate GL code from the option list.
This GL is credited during the clearing batch process.
Clearing GL for Outward Collection
Specify the GL which should be debited during liquidation of the Outward Collection instruments in the Retail bills module, if the payment is settled through clearing. This GL is credited during the realization of clearing contract created in the Clearing module and is maintained in the Clearing product definition in the clearing module.This will be a Normal Type GL.
Cash Letter Susp GL
Specify the cash letter suspension GL from the option list. The option list displays all miscellaneous Cr type GLs maintained in the system.
Cash letter suspension GL is required for parking the cash letter proceeds by debit to nostro account.
Other Parameters
No Of Dishonour/Protest
Specify the maximum number of dishonour/protest transactions allowed before marking a drawee as defaulter. You can specify a number between 1 and 99.
Other Bank Chg Tolerance%
Specify the tolerance percentage value for other bank charges. You can specify a percentage between 0 and 99.99.
Walk-in Notary
Select a notary code from the adjoining option list.The list contains the open notary codes that were defined in the notary code maintenance screen.The selected code will be used as a walk in notary during the protest of an instrument.
Other Bank Chg Tolerance Amount
Specify the tolerance value amount for other bank charges.
During the validation of Other Bank charges, the least amount out of Other Bank Charges Tolerance Amount or the Other Bank Charges Tolerance % amount will be considered.
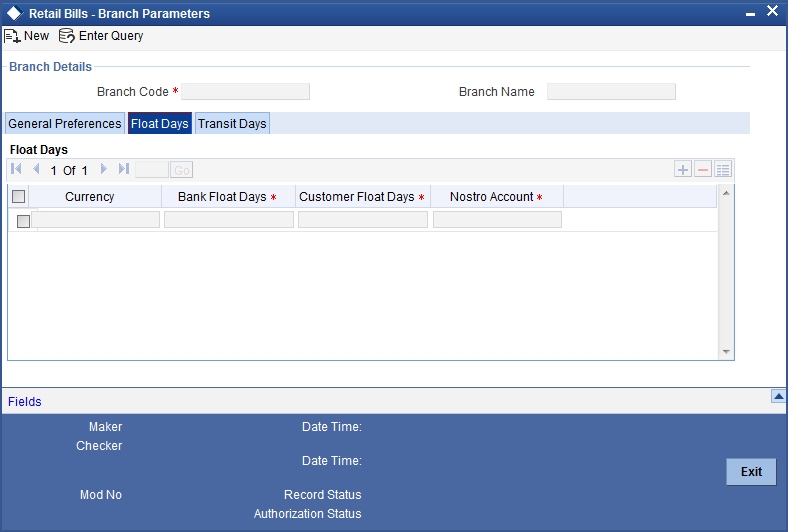
3.2.3 Float Days Tab
You can capture the details of float days for realization of foreign currency cheques sent on cash letter basis in ‘Float Days’ tab.
Specify the following details:
Float Days
Currency
Select the currency code from the option list.The option list displays all valid currency codes maintained in the system.
Bank Float Days
Specify the number of float days applicable for the cash letter credit. If you have selected a currency, then it is mandatory to specify the bank float days.
Customer Float Days
Specify the number of float days applicable for the realization of the instrument. If you have selected a currency, then it is mandatory to specify the customer float days. The customer float days should be between 1 and 99.
Nostro Account
Select a nostro account from the option list. The system uses this account for processing the cash letter cheques. If you have selected a currency, then it is mandatory to specify the nostro account.
3.2.4 Transit Days Tab
You can maintain transit days for currency-nostro account combination to facilitate realization of overseas cheques payable abroad under collection in the ‘Transit Days’ tab.
![]()
Specify the following details;
Transit Days
Currency
Select the currency code from the adjoining option list.The option list displays all valid currency codes maintained in the system.
You can add more rows and select the same currency code to maintain transit days for a different nostro account. The transit days will be applied to each currency-nostro account combination that you maintain here.
Nostro Account
Select a nostro account from the option list. The option list displays all valid nostro accounts maintained across branches for the currency selected above.
Note
For a currency-nostro account combination, you can define the transit days only once. If you select the same currency and nostro account again in another row, the system will not allow you to save the record.
Direct Transit Days
Specify the number of direct transit days applicable to the selected currency. The number of transit days should be between 1 and 99. If you have selected the currency, then it is mandatory to specify the direct transit days.
Indirect Transit Days
Specify the number of indirect transit days applicable to the selected currency. The number of transit days should be between 1 and 99. If you have selected the currency, then it is mandatory to specify the indirect transit days.
3.2.5 User Defined Fields
The details of user defined fields are captured in ‘Fields’ screen. Click ‘Fields’ button to invoke this screen.
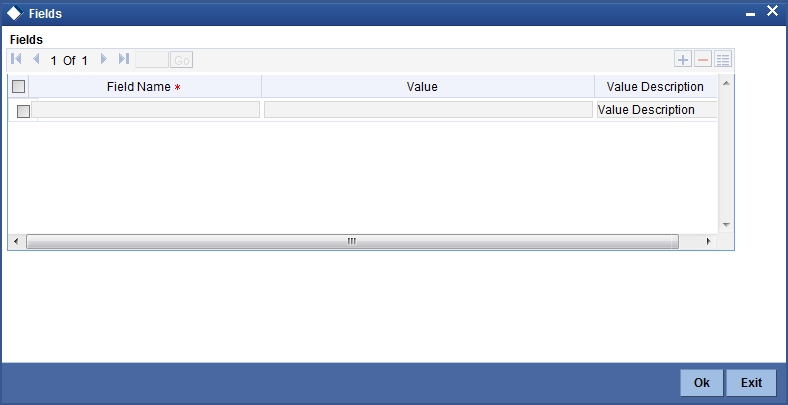
For further details on user defined fields, refer to the ‘User Defined Fields’ user manual.
Once you have specified the above details, click ‘Save’ button to save the maintenance.
3.2.6 Viewing Branch Parameters Summary
You can view a summary of branch parameters maintenance using ‘Retail Bills - Branch Parameters Summary’ screen. to invoke this screen, type ‘RBSBRPRM’ in the field at the top right corner of the application toolbar and click the adjoining arrow button.
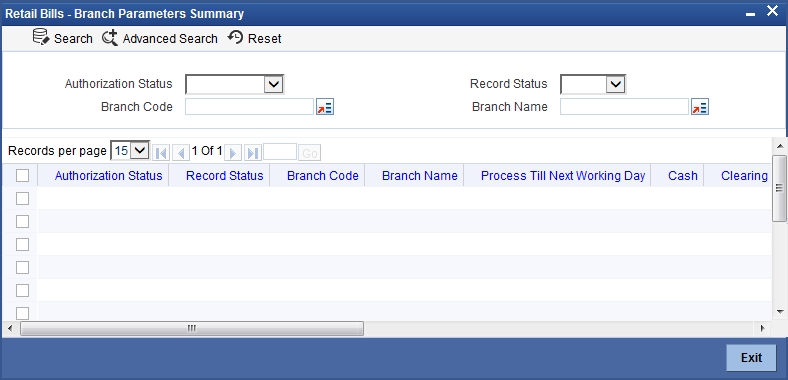
You can search for the records based on one or more of the following parameters:
- Authorization status
- Record status
- Branch code
- Branch name
Once you have specified the search parameters, click ‘Search’ button. The system displays the following details of the records that match the search criteria.
- Authorization Status
- Record Status
- Branch Code
- Branch Name
- Process Till Next Working Day
- Cash
- Clearing
- Cash Letter Susp GL
- No of Dishonor / Protest
- Other Bank Chg Tolerance %
- Other Bank Chg Tolerance Amount
- Walk-in Notary
3.3 Instrument Details
This section contains the following topics:
3.3.1 Maintaining Instrument Details
You can maintain the details of instruments using ‘Retail Bills - Instrument Maintenance’ screen. To invoke this screen, type ‘RBDINMNT’ in the field at the top right corner of the application toolbar and click the adjoining arrow button.
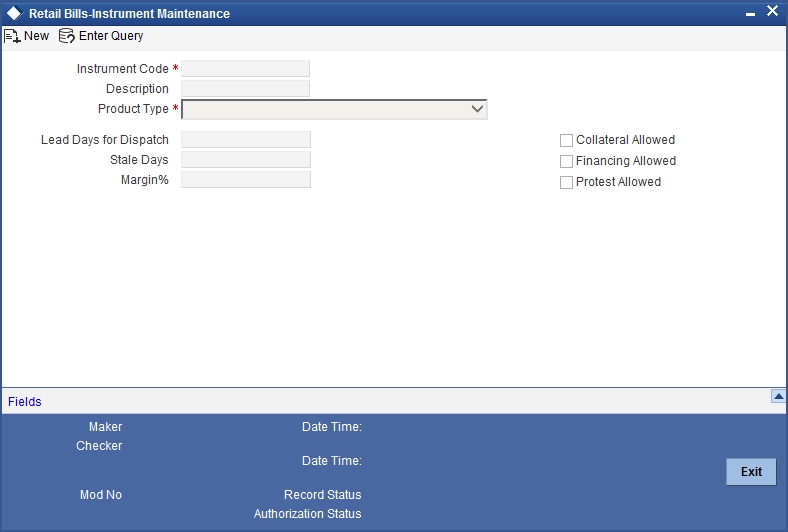
Specify the following details:
Instrument Code
In Oracle FLEXCUBE, each instrument that you maintain is identified by a unique instrument code. Specify a unique code to identify the instrument that you are maintaining. You can later use this code to identify this instrument while creating a product or during other operations.
Description
Enter a brief description of the instrument.
Product Type
Select the product type that should be associated with the instrument.
The option list displays the products of the following types that you create:
- Outward Bills for Collection
- Outward Cheques Collection
- Outward Cheques Clearing (PDCs)
- Inward Bills on Collection
- Inward Cheques on Collection
- FCY Cheques on Cash Letter Basis
- Overseas Cheques Payable Abroad under Collection
Lead Days For Dispatch
Specify the number of lead days for dispatch. The instrument is dispatched to the collecting bank these many days before the maturity date. The lead days should be between 0 and 99.
Lead days for dispatch is applicable only for product types outward bills for collection and outward cheques for collection.
Stale Days
Specify the number of stale days (from the instrument date) after which the instrument will become invalid. The number of stale days should be between 0 and 99.
Margin%
Specify the margin percentage that can be applied on the instrument amount when the instrument is considered for financing or collateral. The margin percentage should be between 0% and 99.99%.
Margin % is mandatory if financing/collateral is allowed.
Collateral Allowed
Check this box to indicate that the selected instrument is eligible for collateral.
Financing Allowed
Check this box to enable financing on the selected instruments.
Protest Allowed
Check this box to enable protest on instruments booked under a specific type.
Protest is not applicable for Outward Clearing cheques product type.
Note
Financing and Collateral are not applicable to Inward type of instruments.
Collateral is not applicable to FCY cheques under cash letter and Overseas cheques payable.
Click ‘Fields’ button to capture the user defined fields.
Once you have specified the above details, click ‘Save’ button to save the maintenance.
3.3.2 Viewing Instruments Summary
You can view a summary of instrument details using ‘Retail Bills - Instruments Summary’ screen. To invoke this screen, type ‘RBSINMNT’ in the field at the top right corner of the application toolbar and click the adjoining arrow button.
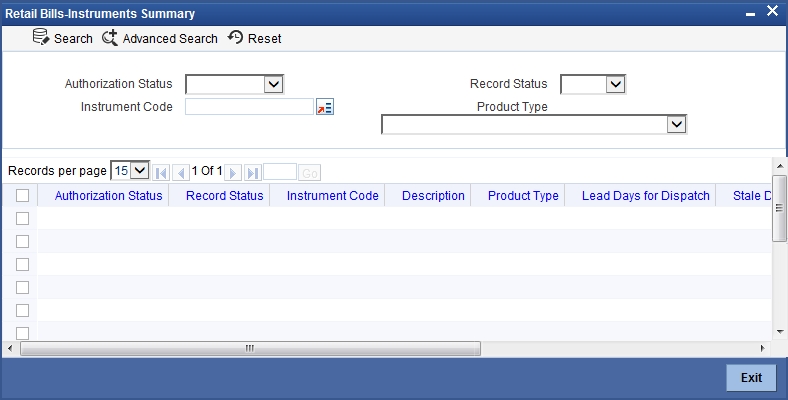
You can search for the records based on one or more of the following parameters:
- Authorization status
- Record status
- Instrument code
- Product type
Once you have specified the search parameters, click ‘Search’ button. The system displays the following details of the records that match the search criteria.
- Authorization Status
- Record Status
- Instrument Code
- Description
- Product Type
- Lead Days for Dispatch
- Stale Days
- Margin%
- Collateral Allowed
- Financing Allowed
- Protest Allowed
3.4 Instrument Location
This section contains the following topics:
- Section 3.4.1, "Maintaining Instrument Location"
- Section 3.4.2, "Viewing Instrument Location Summary"
3.4.1 Maintaining Instrument Location
You can maintain the instrument locations using ‘Retail Bills-Instrument Location Maintenance’ screen. To invoke this screen, type ‘RBDINLMT’ in the field at the top right corner of the application toolbar and click the adjoining arrow button.
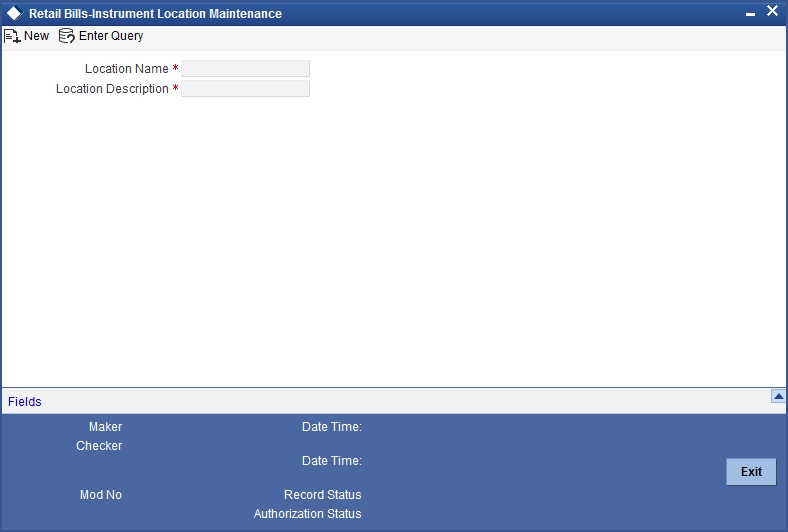
Specify the following details:
Location Name
Specify a unique name for the location.
Location Description
Specify a brief description of the location.
Click ‘Fields’ button to capture the user defined fields.
Once you have specified the above details, click ‘Save’ button to save the maintenance.
3.4.2 Viewing Instrument Location Summary
You can view a summary of instrument locations details using ‘Retail Bills - Instruments Location Summary’ screen. To invoke this screen, type ‘RBSINLMT’ in the field at the top right corner of the application toolbar and click the adjoining arrow button.
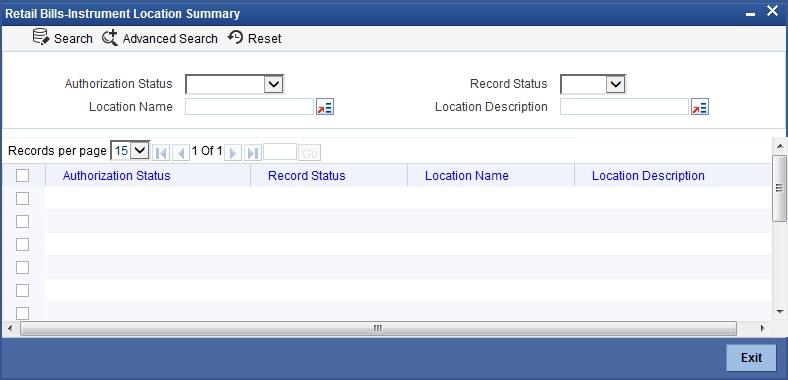
You can search for the records based on one or more of the following parameters:
- Authorization Status
- Location Name
- Record Status
- Location Description
Once you have specified the search parameters, click ‘Search’ button. The system displays the following details of the records that match the search criteria.
- Authorization Status
- Record Status
- Location Name
- Location Description
3.5 Instrument Status
This section contains the following topics:
3.5.1 Maintaining Instrument Status
You need to maintain the instrument status details using ‘Retail Bills - Instrument Status Maintenance’ screen. You can invoke this screen by typing ‘RBDINSMT’ in the field at the top right corner of the application tool bar and clicking on the adjoining arrow button.
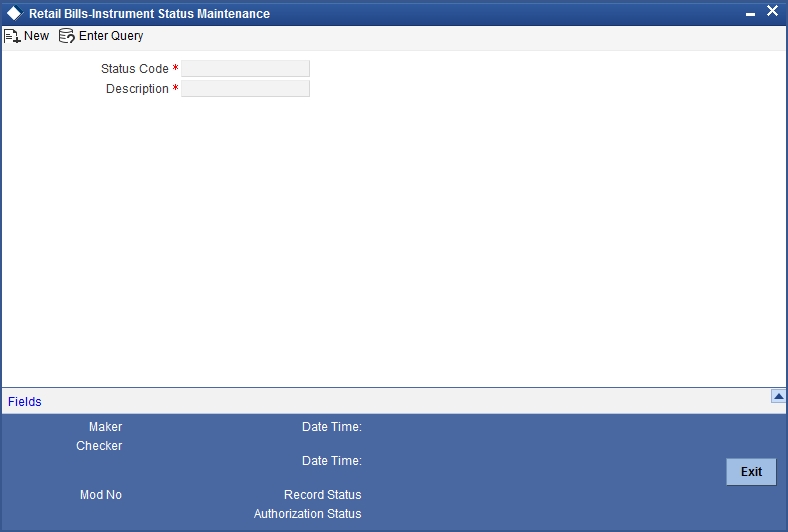
Specify the following details:
Status Code
Specify a unique code to identify the instrument status that you are maintaining.
Description
Specify a brief description of the status code.
Click ‘Fields’ button to capture the user defined fields.
Once you have specified the above details, click ‘Save’ button to save the maintenance.
3.5.2 Viewing Instrument Status Summary
You can view a summary of instrument locations details using ‘Retail Bills - Instruments Status Summary’ screen. To invoke this screen, type ‘RBSINSMT’ in the field at the top right corner of the application toolbar and click the adjoining arrow button.
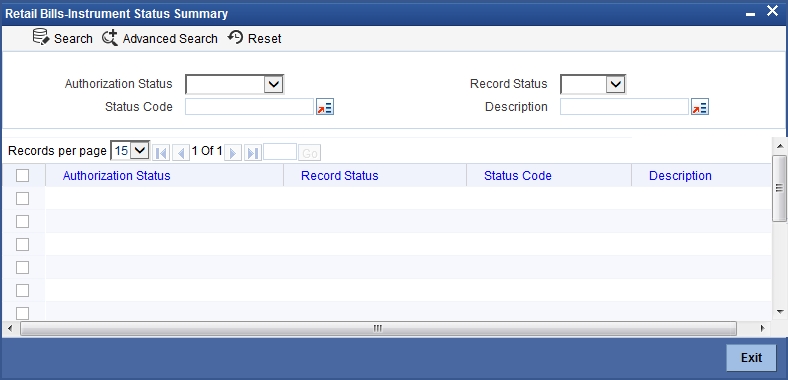
You can search for the records based on one or more of the following parameters:
- Authorization status
- Record status
- Status code
- Description
Once you have specified the search parameters, click ‘Search’ button. The system displays the following details of the records that match the search criteria.
- Authorization status
- Record status
- Status code
- Description
3.6 Reason Codes
This section contains the following topics:
3.6.1 Maintaining Reason Codes
You can invoke the ‘Reason Code Maintenance’ screen by typing ‘RBDRCMNT’ in the field at the top right corner of the application tool bar and clicking on the adjoining arrow button.

Specify the following details:
Reason Code
Specify a unique reason code.The reason code maintained here will be available for selection during dishonour event.
Description
Specify a brief description of the reason code.
Click ‘Fields’ button to capture the user defined fields.
Once you have specified the above details, click ‘Save’ button to save the maintenance.
3.6.2 Viewing Reason Codes Summary
You can view a summary of reason codes using ‘Reason Codes Summary’ screen. To invoke this screen, type ‘RBSRCMNT’ in the field at the top right corner of the application toolbar and click the adjoining arrow button.
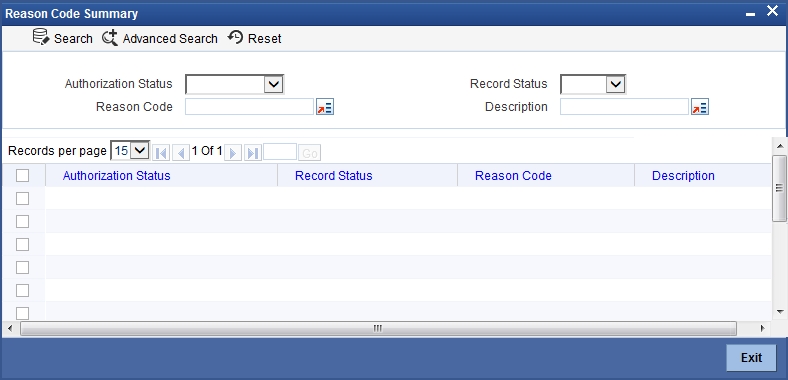
You can search for the records based on one or more of the following parameters:
- Authorization status
- Record status
- Reason code
- Description
Once you have specified the search parameters, click ‘Search’ button. The system displays the following details of the records that match the search criteria.
- Authorization status
- Record status
- Reason code
- Description
3.7 Notary Codes
This section contains the following topics:
3.7.1 Maintaining Notary Codes
You can maintain notary codes using ‘Notary Code Maintenance’ screen. To invoke this screen, type ‘RBDNCMNT’ in the field at the top right corner of the application toolbar and click the adjoining arrow button.
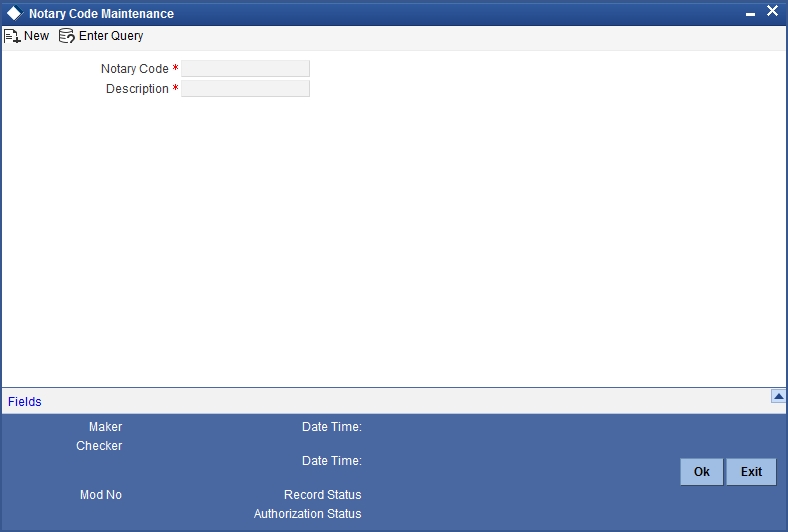
Specify the following details:
Notary Code
Specify a unique code that identifies the notary that you are maintaining.The code will be available for selection during protest events.
Description
Specify a brief description of the notary.
Click ‘Fields’ button to capture the user defined fields.
Once you have specified the above details, click ‘Save’ button to save the maintenance.
3.7.2 Viewing Notary Codes Summary
You can view a summary of notary codes maintained in the system using ‘Notary Code Summary’ screen. To invoke this screen, type ‘RBSNCMNT’ in the field at the top right corner of the application toolbar and click the adjoining arrow button.
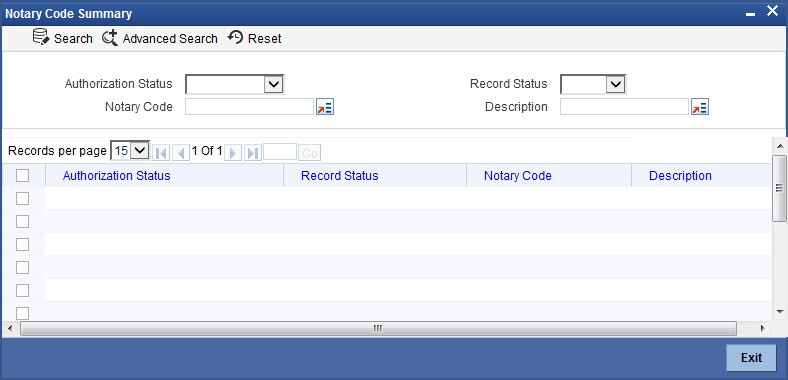
You can search for the records based on one or more of the following parameters:
- Authorization status
- Record status
- Notary code
- Description
Once you have specified the search parameters, click ‘Search’ button. The system displays the following details of the records that match the search criteria.
- Authorization Status
- Record Status
- Notary code
- Description of the notary code
3.8 Instrument Rules
This section contains the following topics:
3.8.1 Maintaining Instrument Rules
You can invoke the ‘Retail Bills-Instrument Rule Maintenance’ screen by typing ‘RBDRLMNT’ in the field at the top right corner of the application tool bar and clicking on the adjoining arrow button.
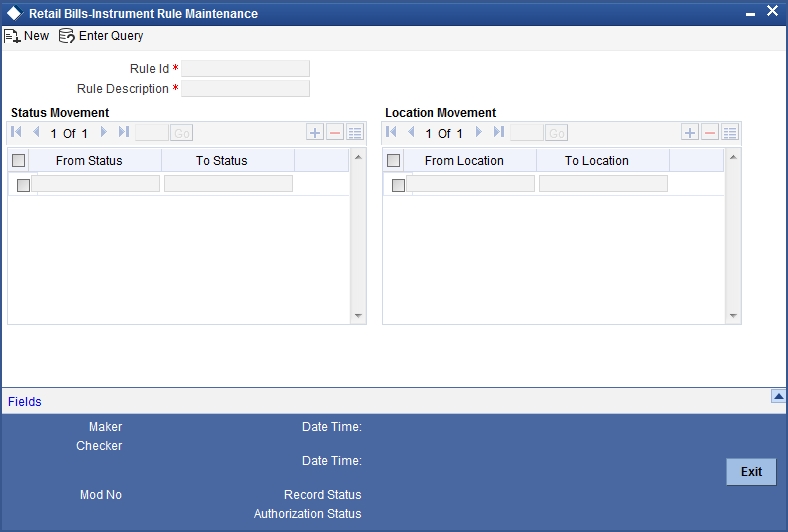
Specify the following details:
Rule ID
Specify a unique identifier for a rule.
Rule Description
Specify a brief description of the rule.
Status Movement
From Status
Select a ‘from status’ from the option list. The option list displays all valid status codes that were defined in the system using ‘Instrument Status Maintenance’ screen.
To Status
Select a ‘to status’ from the option list. The option list displays all valid status codes that were defined in the system using ‘Instrument Status Maintenance’ screen.
Location Movement
From Location
Select a ‘from location’ from the option list. The option list displays all valid location codes that were defined in the system using ‘Instrument Location Maintenance’ screen.
To Location
Select a ‘to location’ from the option list. The option list displays all valid location codes that were defined in the system using ‘Instrument Location Maintenance’ screen.
Note
- The from and To status can be same also, if the user wants the status change not to happen for that event.
- Multiple from and to status can have multiple from and to locations.
- Status change will happen only if the to status matches with the from status of the rule attached.
Click ‘Fields’ button to capture the user defined fields.
Once you have specified the above details, click ‘Save’ button to save the maintenance.
3.8.2 Viewing Instrument Rules Summary
You can view a summary of instrument rules maintained in the system using ‘Retail Bills - Instruments Rule Summary’ screen. To invoke this screen, type ‘RBSRLMNT’ in the field at the top right corner of the application toolbar and click the adjoining arrow button.
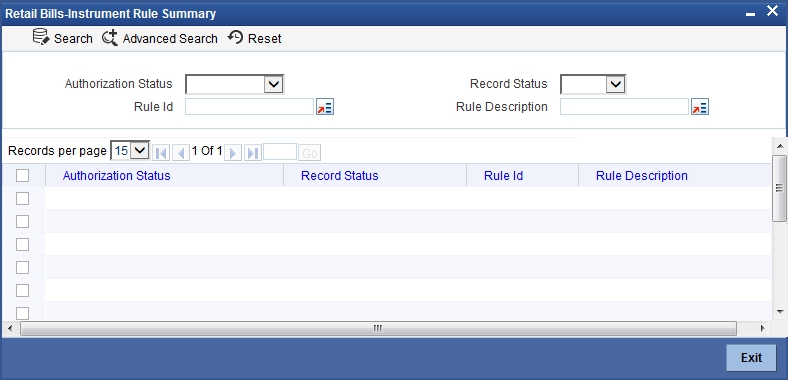
You can search for the records based on one or more of the following parameters:
- Authorization status
- Record status
- Rule ID
- Rule description
Once you have specified the search parameters, click ‘Search’ button. The system displays the following details of the records that match the search criteria.
- Authorization Status
- Record Status
- Rule ID
- Rule description
3.9 Other Party Details
This section contains the following topics:
3.9.1 Maintaining Other Party Details
You can maintain the other party details using ‘Other Party Maintenance’ screen. To invoke this screen, type ‘RBDOPMNT’ in the field at the top right corner of the application toolbar and click the adjoining arrow button.
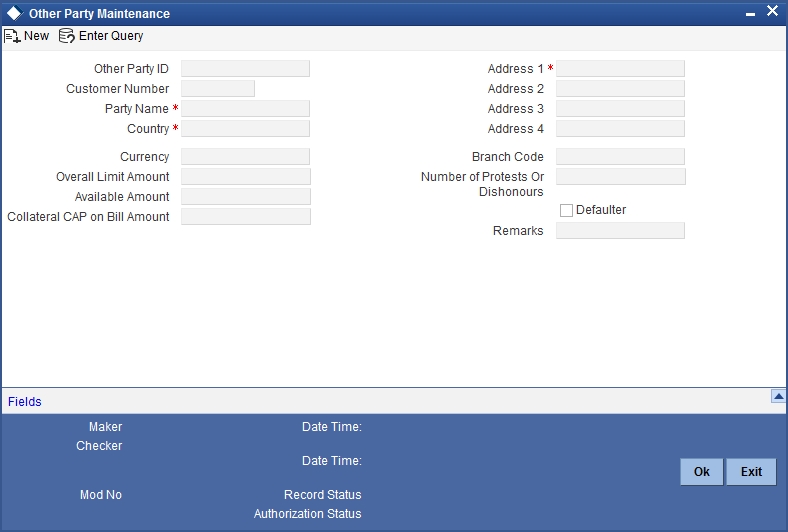
Specify the following details:
Other Party ID
The system generates and displays a unique identification code for the other party. This auto-generated ID is a seven digit serial number prefixed by the alphabets 'OP'.
Customer ID
Select a customer ID from the option list. The option list displays all valid Customer IDs that are not attached to any existing record.
Party Name
If you have selected the customer ID, then based on that the system displays the name of the other party. You cannot edit the name displayed by the system.
If you have not specified a customer ID, then you can manually enter the name of the party.
Country
Specify the country of the other party. The option list displays all valid country codes maintained in the system. Choose the appropriate one.
Currency
The system displays the currency code of the local branch. However, you can edit this currency and specify a different currency code.
Overall Limit Amount
Specify the maximum exposure amount for the selected party across all the counter parties. The overall limit amount should always be a positive value. Negative values are not allowed.
Available Amount
The system displays the available amount. This amount is revised if a utilization of the other party overall limits happens during the contract booking, amendment, finance or collateralization batch. This is applicable when the option ‘Other Party Limit Check’ is checked.
Here, Available amount = Overall limit amount - Utilization amount
Note
- If the overall limit amount is amended and if the available limit amount becomes negative due to that amendment, then the system will display an override.
- Modification of other party limit is not allowed, if the contract is pending for authorization.
Collateral CAP on Bill Amount
Specify the maximum amount in a bill which can be considered for collateral.
If the bill amount less margin is greater than the Cap amount, then Collateral cap amount will be considered as Collateral value and override 'Collateral value reduced to Collateral cap amount' will occurs on save.
Address 1
Specify the address of the party.
Address 2
Specify the address of the party.
Address 3
Specify the address of the party.
Address 4
Specify the address of the party.
Note
If the Other party is a customer of bank, then the address maintained at customer level will be defaulted as other party address.
Branch Code
The system displays the branch code of the branch to which you are currently logged in. You cannot change this.
Number of Protests/Dishonours
The system displays the number of protests and dishonours. Whenever a contract is dishonoured or protested, the system will increase the count by one against the other party in that contract and display the total value in this field.
If a contract is dishonoured once and then protested at a later stage, then the system will count the dishonour event only. There will not be any change in the number of protests/dishonours during the protest event.
Defaulter
If the number of protests or dishonours by the party is more than or equal to the number of protest or dishonours for default maintained in ‘Branch Parameters Maintenance’ screen, then the system displays the status of the box as checked. Otherwise, the status is displayed as unchecked.
You can modify this (check/uncheck) if required. If the status is checked, which indicates that the party is a defaulter and you manually uncheck this box, then the system will reset the number of protests or dishonour in ‘Other Party Maintenance’ to zero.
Note
- This check box cannot be checked during new operation. If you try to check this option for a new operation, then when you try to save the record, the system will display the error message ‘Defaulter flag cannot be checked in case of new other party’.
- The system checks this box automatically when the maximum count of dishonour and protest is reached.
- You can manually uncheck this box. If the other party is a defaulter, then when you book a bill with finance/collateral, the system will display the error message ‘Other Party is a Defaulter’.
Remarks
Specify your remarks on the transaction.
Click ‘Fields’ button to capture the user defined fields.
Once you have specified the above details, click ‘Save’ button to save the maintenance
3.9.2 Viewing Other Party Summary
You can view a summary of other party details maintained in the system using ‘Other Party Summary’ screen. To invoke this screen, type ‘RBSOPMNT’ in the field at the top right corner of the application toolbar and click the adjoining arrow button.
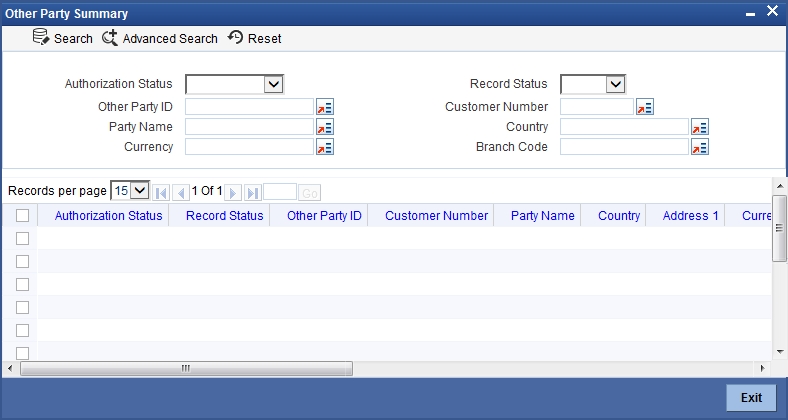
You can search for the records based on one or more of the following parameters:
- Authorization Status
- Other Party ID
- Party Name
- Currency
- Record Status
- Customer Number
- Country
- Branch Code
Once you have specified the search parameters, click ‘Search’ button. The system displays the following details of the records that match the search criteria.
- Authorization Status
- Record Status
- Other Party ID
- Customer Number
- Party Name
- Country
- Address 1
- Currency
- Branch Code
- Overall Limit Amount
- Available Amount
- Collateral CAP on Bill Amount
- Number of Protests Or Dishonours
- Defaulter
- Remarks
3.10 Drawer and Drawee Combination Limit
This section contains the following topics:
- Section 3.10.1, "Maintaining Drawer and Drawee Combination Limit"
- Section 3.10.2, "Viewing Drawer Drawee Summary"
3.10.1 Maintaining Drawer and Drawee Combination Limit
You can invoke the ‘Drawer Drawee Maintenance’ screen by typing ‘RBDDDMNT’ in the field at the top right corner of the application tool bar and clicking on the adjoining arrow button..
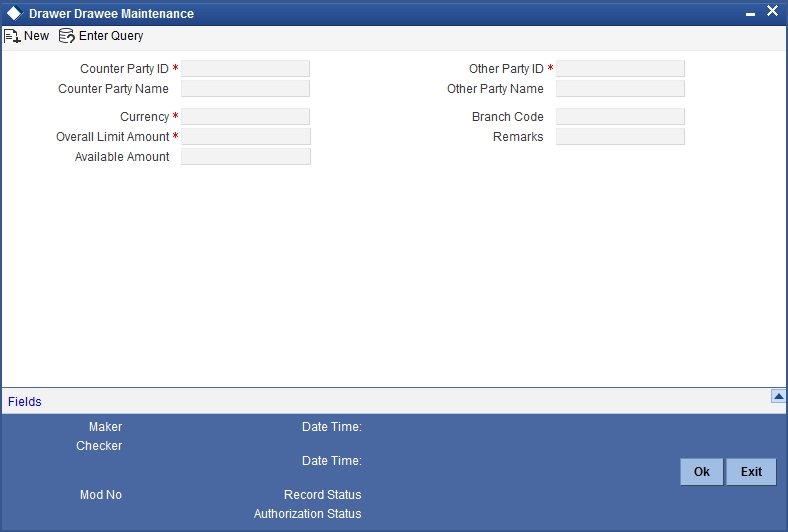
Specify the following details:
Counter Party ID
Specify the counter party ID. The adjoining option list displays all the customer numbers maintained in the system. You can choose the appropriate one.
Note
For a combination of counterparty and other party, you can maintain only one record. Counterparty and other party combination should be unique for each record that you create.
Counter Party Name
The system displays the name of the counter party based on the counter party ID selected.
Other Party ID
Specify the other party ID. The option list displays all the other party IDs maintained in the system. You can choose the appropriate one.
Other Party Name
The system displays the name of other party based on the other party ID selected above.
Currency
The system displays the currency of the local branch for the available limit and overall limit. You can edit this currency.
Overall Limit Amount
Specify the limit amount for the combination of customer and other party for financing and collateral.
Available Amount
The system computes and displays the available amount for the combination. The amount is calculated using the following formula.
Available amount = Limit amount - Utilized amount
The utilized amount is the sum of discount amount (or collateral value) of the contracts which are considered for financing (or collateral) and in which the drawer-drawee combination limit is tracked. This is applicable when the option ‘Other Party Limit Check’ is checked.
Whenever such contracts are Realized or Dishonoured or Protested or Returned the utilized amount will be reduced to the extent of the Discount amount (or collateral value)
Branch Code
The system displays the branch code of the current branch to which you have logged in.
Remarks
Specify your remarks on the transaction.
Click ‘Fields’ button to capture the user defined fields.
Once you have specified the above details, click ‘Save’ button to save the maintenance
3.10.2 Viewing Drawer Drawee Summary
You can view a summary of drawer and drawee details maintained in the system using ‘Drawer Drawee Summary’ screen. To invoke this screen, type ‘RBSDDMNT’ in the field at the top right corner of the application toolbar and click the adjoining arrow button.

You can search for the records based on one or more of the following parameters:
- Authorization Status
- Counterparty ID
- Branch Code
- Record Status
- Other Party ID
Once you have specified the search parameters, click ‘Search’ button. The system displays the following details of the records that match the search criteria.
- Authorization Status
- Record Status
- Counterparty ID
- Other Party ID
- Currency
- Overall Limit Amount
- Available Amount
- Branch Code