Modify the default network configuration
You can use the Web Administration Interface to modify the default network card configuration on an appliance to a more typical configuration.
The following example shows how to reconfigure the configuration to have each of three network interfaces residing on a different network. These networks correspond to:
- An administration network (behind the inward facing firewall)
- The inbound network (external traffic inbound to API Gateway)
- The outbound network (traffic destined for the Intranet, outbound to API Gateway)
For the purposes of the example the following IP addresses are used:
|
Administration
|
192.168.0.10/24
|
|
Inbound
|
200.0.0.10/24
|
|
Outbound
|
10.0.0.10/24
|
Change the IP addresses to suit your particular network topology.
Configure the network interfaces in the WAI
To modify the network configuration, perform the following steps:
- Click Network Configuration in the WAI menu on the left.
- Click the Network Interfaces icon.
- Click the Activated at Boot tab.
- This shows the default configuration for the interfaces on the appliance. The device eth0 is configured to use DHCP, and eth1 is set up with the static IP address 192.168.200.200.
- Click eth0 to configure it as the interface residing on the administration network.
- This displays the configuration page for that interface. By default it uses DHCP.
- Select Static configuration and enter the new IPv4 address and Netmask.
- Select Automatic for the Broadcast address.
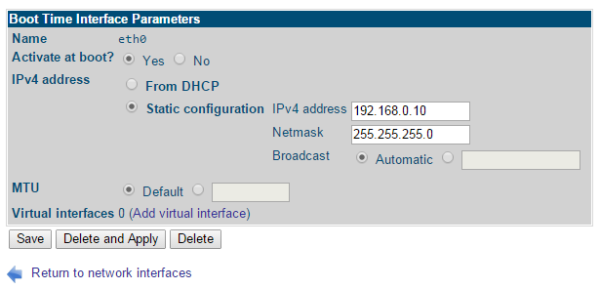
- Click Save.
- This returns you to the Network Interfaces page. You can see the new IPv4 address and Netmask for eth0.
- Click eth1 to configure it as the interface residing on the inbound network. By default it has the static IP address of 192.168.200.200.
- Change this to your inbound static IP address and click Save.
- This returns you to the Network Interfaces page. You can see the new IPv4 address and Netmask for eth1.
- Click eth2 to configure it as the interface residing on the outbound network. By default it does not have an IP address configured.
- Modify this interface to enter your outbound static IP address. By default this interface is not activated.
- Select the Yes check box next to the Activate field at the top right and click Save.
- This returns you to the Network Interfaces page. You can see the new IPv4 address and Netmask for eth2. The Activate column for eth2 is now set to Yes.
- To apply the changes select the check boxes next to the interfaces that you have changed and click the Apply Selected Interfaces button.
|
Note
|
If your administration IP address has changed you might have to log in again to the Web Administration Interface. |
- Click the Active Now tab in the Network Interfaces page to show the new IP addresses.
Configure the inbound network interface in API Gateway
After configuring the IP address that API Gateway will listen for requests on (the inbound interface) you can configure API Gateway to only bind to this particular address. This ensures that API Gateway will only listen for requests arriving on that network interface. By default, API Gateway listens on all interfaces and addresses.
Perform the following steps in Policy Studio:
- In the navigation tree, select Listeners > API Gateway > Default Services > Ports.
- Select the Traffic HTTP Interface and click Edit to display the Configure HTTP Interface dialog.
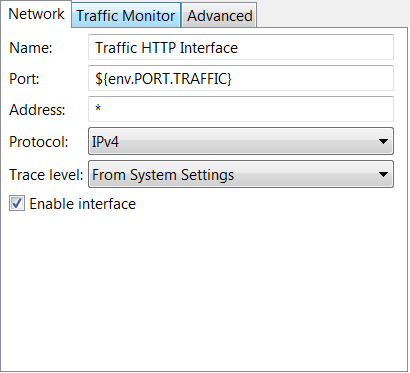
- Enter the address of your inbound interface in the Address field (200.0.0.10).
- Click OK to save the changes.
- Click the Deploy button on the toolbar to deploy the configuration.
For more information, see the API Gateway Policy Developer Guide.
Network configuration scripts
The WAI provides an easy to use layer which manipulates the system network scripts.These scripts are located under /etc/sysconfig/network/ifcfg-eth<number>.
Advanced users who are familiar with the layout of these files can modify the network configuration directly by editing the system network scrips as the root user. Any changes made to these files will also be reflected in the WAI.