- Carefully disconnect the disk backplane power cable from the motherboard by pressing on the connector latch and pulling the connector out.
- To eject the FIM cable connector, open both side latches.
Figure 1: Motherboard removal
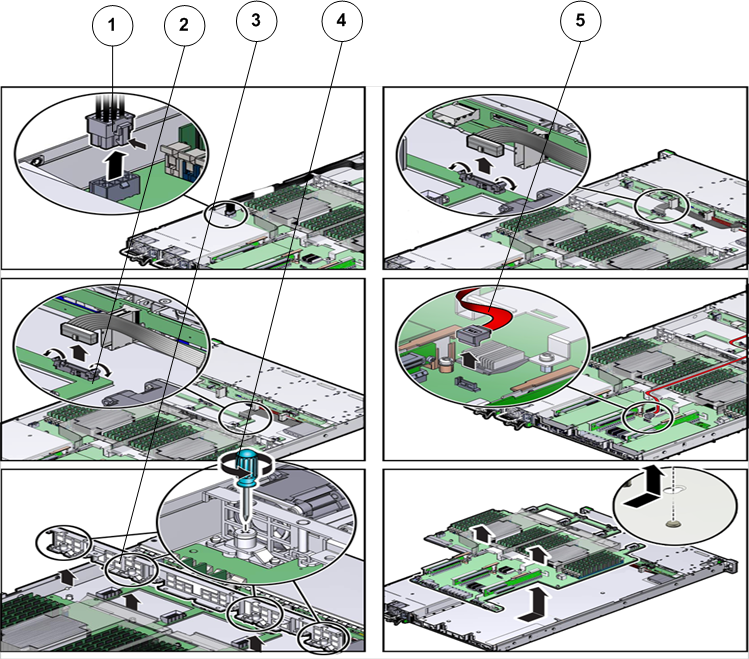
- Legend
1 Disk backplane power cable 4 Phillips screwdriver to disengage the captive screws 2 FIM cable connector side latches 5 SAS cable bundle 3 Midwall
- Carefully disconnect the SAS cable bundle that you disconnected from the SAS HBA out of the cable trough.
- Using a Phillips Number 2 screwdriver, loosen the four captive screws that secure the Pilot mid-wall to the Pilot chassis.
- Lift the Pilot mid-wall slightly up and toward the front of the Pilot to disengage it from the mushroom standoffs that are located one on each end of the Pilot chassis mid-wall. Note: Place the mid-wall and the SAS cable bundle towards the front of the Pilot out of the way of the motherboard.
- Grasp the middle of the air deflector in the front and back and slide the motherboard towards the front of the Pilot and lift it slightly to disengage the six mushroom standoffs that are located on the Pilot’s chassis under the motherboard.
- Lift the motherboard out of the Pilot chassis and place it on an antistatic mat.