- Press on the retention
clip that secures faceplate of the riser and release the riser from
the Pilot motherboard.Note: There are three riser board assemblies inside the Pilot chassis. The SAS HBA is located on the third riser and the other risers are empty.CautionDo not disconnect the SAS cable from the internal SAS HBA until after you have removed the riser from the Pilot.
- Carefully pull
up the PCIe riser lever on the riser to release the riser and HBA
card (if any).
Figure 1: Remove the riser
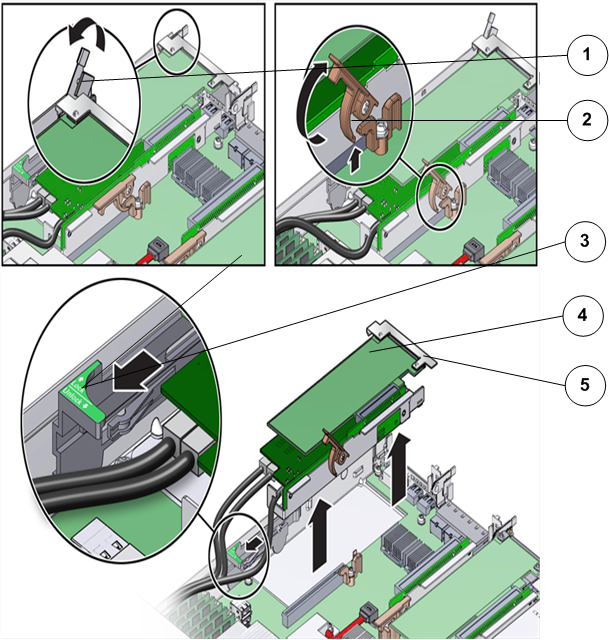
- Legend
1 Retention clip 2 PCIe riser lever 3 Slide card retainer 4 Riser and HBA assembly 5 Riser faceplate
- Unlock the slide
card retainer to release the riser from the Pilot.Tip: You might need to remove fan module (FM–0), which is the left most fan when viewing the Pilot from the front.
- Using the PCIe riser lever, pull the riser straight up.
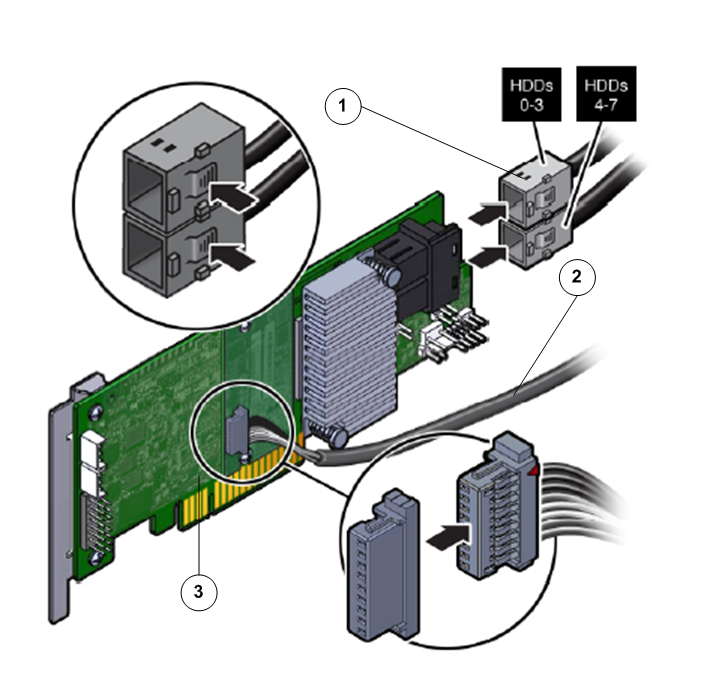
- Disconnect the SAS cable bundle that connects the SAS HBA and the Pilot disk backplane and set aside.
Figure 2: Disconnect SAS cable bundle
- Hold the riser in one hand and use your other hand to carefully remove the SAS HBA card from PCIe slot 4 of riser 3.
- Using a Phillips Number 2 screwdriver, remove the two screws to disconnect the rear bracket attached to the SAS HBA from the rear of the PCIe riser.
Figure 3: Disconnect the bracket from the SAS HBA
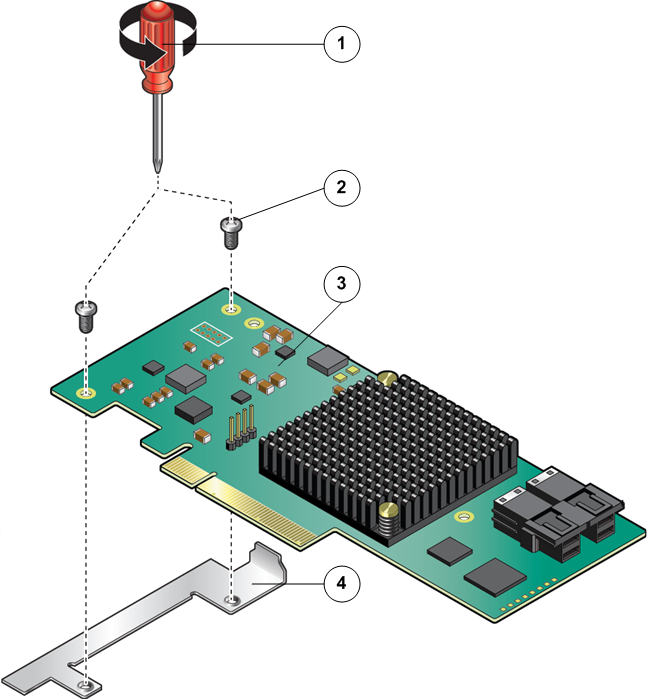
- Legend
1 Phillips Number 2 screwdriver 2 Screws that secure the bracket 3 SAS HBA 4 Bracket