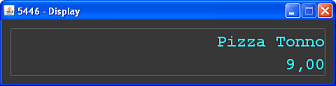
Virtual display
The program description deals with the following:
- Remarks on Program function
- Remarks on Data fields
- Use the Index to find the field explanation required
Remarks on program function
The data for configuration of a virtual display can be updated, i.e. created, changed or deleted, with this program. Data which has already been stored can also be displayed.
The interface and link to an interface, processing unit should be defined and the device-specific operating mode of the printer set.
Note:
Virtual devices are only intended for test purposes if connection of devices is not possible for whatever reason. Java 1.4 or newer versions should be installed if virtual devices (printer, display, drawer, lock or EFT) are to be tested.
A device interface,type IP address should be configured and the device name, the local IP no. (localhost) and the port no. (5440) (locahost:5440) entered. In this example 5442 should be used as port no. for the virtual display.
Remarks on data fields
All options available for update of the basic data have been described below.
As with nearly all programs the following also applies here:
- The entry mask in the application program may differ for this program. Some data fields may be missing
- There may be some defaults or firmly defined selection options for some data fields. These cannot be updated in the current program.
- The entry mask contains fields where entry is optional and fields with enforced entry defined.
- If the data record is updated over several pages of entry masks, the dialog window is reached by clicking onto the appropriate button with <Mouse key 1>.
- The same procedure also applies to call-up of another update program from this program.
- In some cases, you may find so-called "Switches" which are activated or deactivated by the user with <Mouse key 1> depending on the setting. Activated switches have a dark top, deactivated switches are lighter.
Debug
Field with firmly defined selection options
Select one of the offered debug levels by clicking on this field and with a second click selecting the level required.
The system offers the following:
- 0 = no protocol of data communication in file "errlog"
- 1 =
- 2 = all communication data in file "errlog"
Note:
Only select a value higher than "0" for
the debug level if a protocol for communication of the terminal is necessary
for error analysis.
Portnumber
Entry range permitted: numeric, 1 - 99999
Enter the port no. of the virtual display.
Example:
"locahost:5440" should be entered for the interface type IP address.
Port no. 5442 should be entered in this example for the virtual display.
Columns
Default 32
An entry here defines the number of characters per line which are to appear on the virtual display.
Lines
Default 32
A value entered here defines the number of lines which are to appear on the virtual display.
Usage
Field with firmly defined selection options
Select one of the operating modes offered for use on the virtual display by clicking on this field and with a second click confirming the option selected.
The system offers the following:
- Operator display (Default)
- Customer display
Conversion
Select whether a conversion upper/lower case is to be carried out on the display. Select the option required by clicking on this field and then clicking again to confirm the selected option.
The system offers the following:
- Without(Default)
- UPPER CASE
- Lower case
Cursor LEDs
Field with firmly defined selection options
Choose whether the Status LEDs are to be shown on the bottom line of the display. The option is selected with a click on the field and a second click to confirm the option required.
The system offers the following:
- NO (Default)
- YES
Start scroll area
Entry range permitted: numeric, 1 - 99
Enter a number to identify the line to be used for the start of the scroll area.
End scroll area
Entry range permitted: numeric, 1 - 99
Enter a number to identify the line to be used for the end of the scroll area. The value here must be higher than the value for the start scroll area.
Index
Salzufer 8
D-10587 Berlin