| Oracle® Health Sciences Mobile Clinical Research Associate Server Installation and Configuration Guide Release 2.0 E61215-01 |
|
|
PDF · Mobi · ePub |
| Oracle® Health Sciences Mobile Clinical Research Associate Server Installation and Configuration Guide Release 2.0 E61215-01 |
|
|
PDF · Mobi · ePub |
This chapter details the deployment of the Mobile CRA Configuration Utility. It includes the following sections:
Section 6.2, "Configuring Data Sources for Mobile CRA Configuration Utility"
Section 6.3, "Configuring Security for Mobile CRA Configuration Utility"
Section 6.5, "Deploying Mobile CRA Server Configuration Utility"
Section 6.6, "Customizing the Configuration File for Mobile CRA Configuration Utility"
You must validate the installation package before deploying. To validate, ensure that:
The Install package is deployed as an Enterprise Archive file called Mobile CRA_AdminUI.ear.
The EAR file contains ADF related application files.
The EAR file also includes the WAR file, which contains the actual web application.
The file name contains the build version as mentioned in the Release Notes.
Note:
For deploying the Mobile CRA Configuration Utility, see Oracle WebLogic Administration Guide.You need to configure the following data sources for the Mobile CRA Configuration Utility:
jdbc/ae - Connects to the alerts schema and handles the alert generation.
jdbc/mobileaq - Connects to the Oracle AQ schema and handles the asynchronous message handling of trip report.
jdbc/mobilecda - Connects to the CDA schema and handles the CDA adapter related functionality.
jdbc/mobilecra - Connects to the Mobile CRA server schema and handles the Mobile CRA server functionality.
jdbc/mobilectms - Connects to the Mobile CRA Trip Report schema and handles the trip report configuration and other Mobile CRA Configuration Utility related functionality.
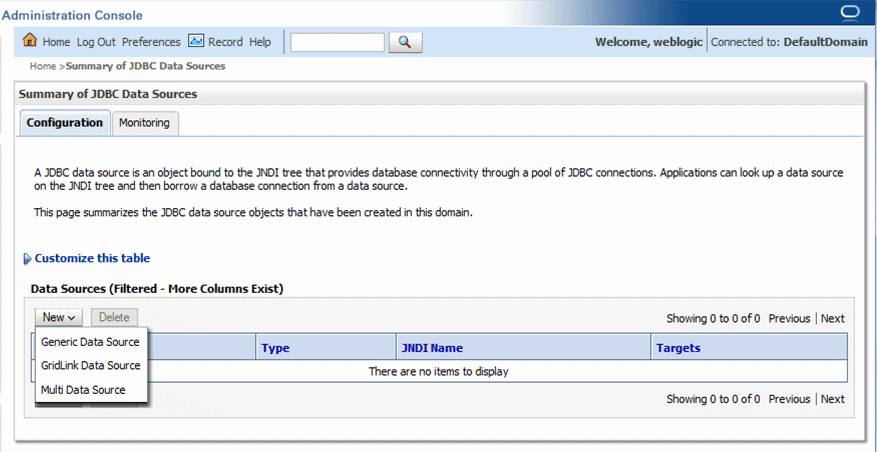
The following steps explain how to create jdbc/mobilecda data source:
Within the Server Administration Console, select Data Sources under Services.
The Summary of JDBC Data Sources screen is displayed.
Select New and then select Generic Data Source from the drop-down list.
Figure 6-2 Summary of JDBC Data Sources Screen
The Create a New JDBC Data Source screen is displayed.
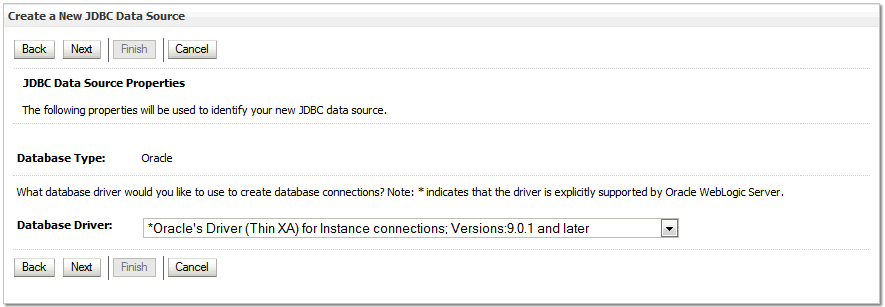
Enter jdbc/mobilecda as the name and JNDI name to connect to MCRE_ADMIN schema.
Figure 6-3 Creating a New JDBC Data Source Screen
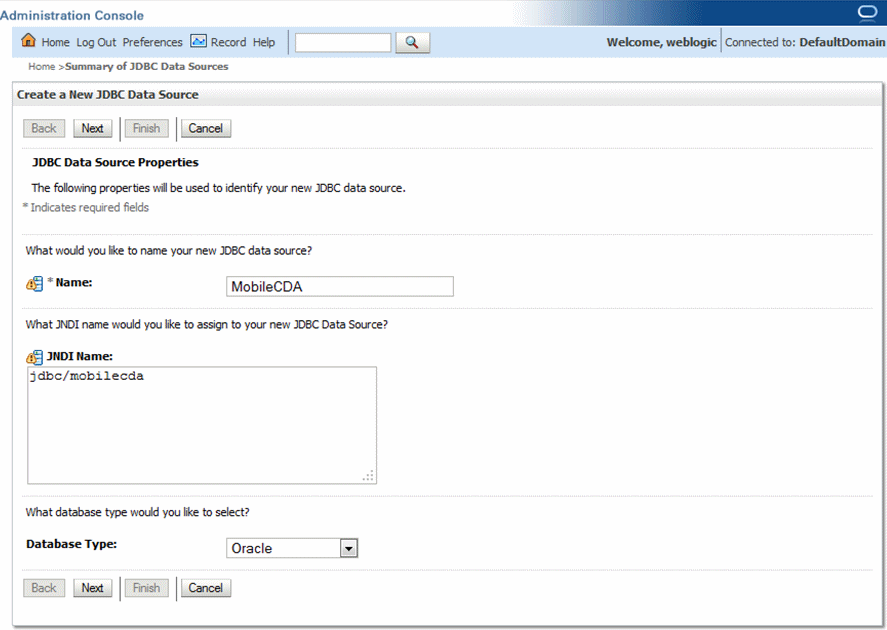
Select database driver as Oracle Driver (Thin XA) (versions: 9.0.1 and later).
Note:
In case the WebLogic Server version is 10.3.6.0 (the default is 10.3.5.0), for jdbc/mobilecda, you should select Database Driver as Oracle's Driver (Thin) during the installation.Select default settings as displayed in Figure 6-5.
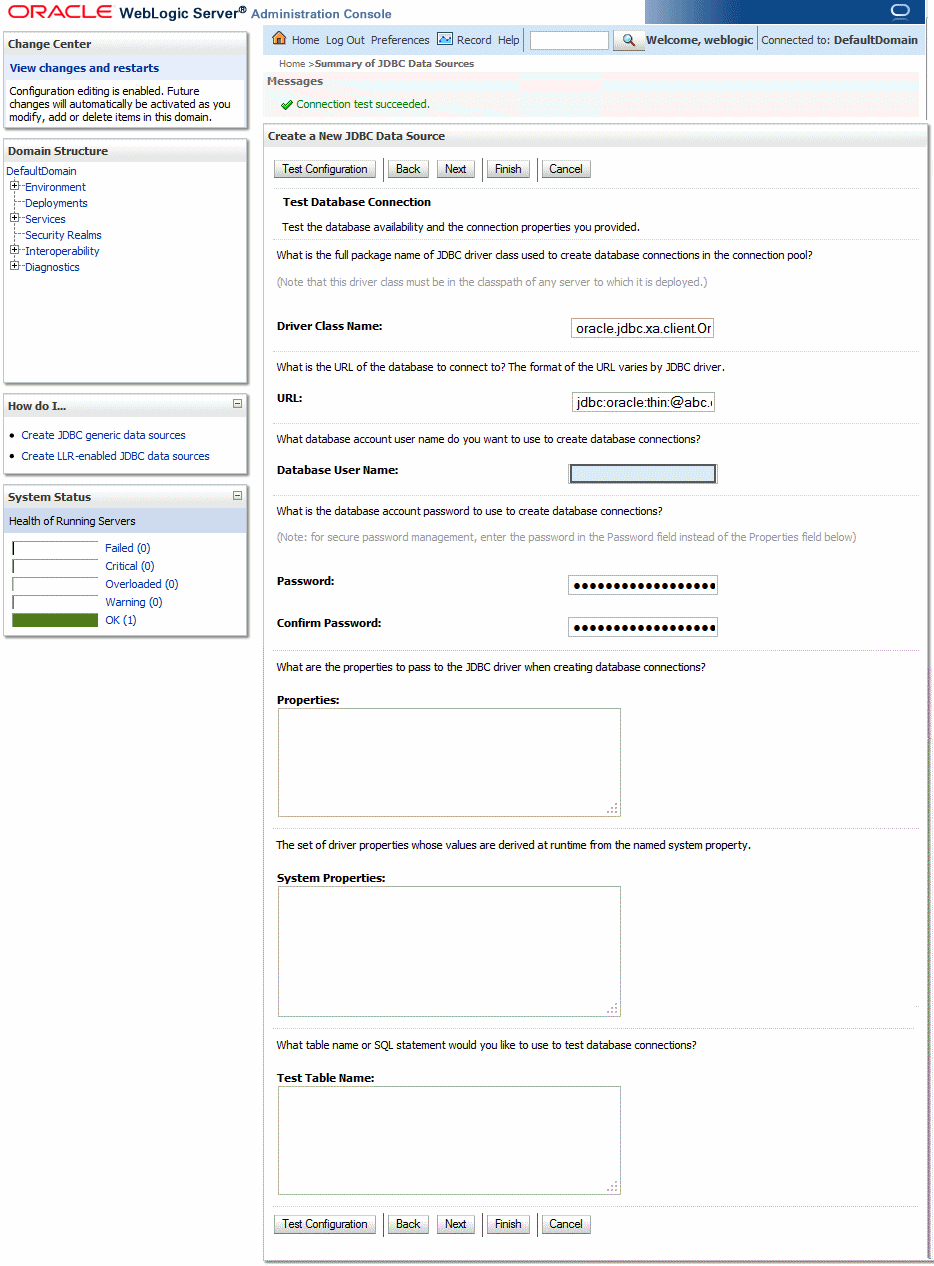
Configure connection properties as displayed in Figure 6-6.
Figure 6-6 Configuring Connection Properties
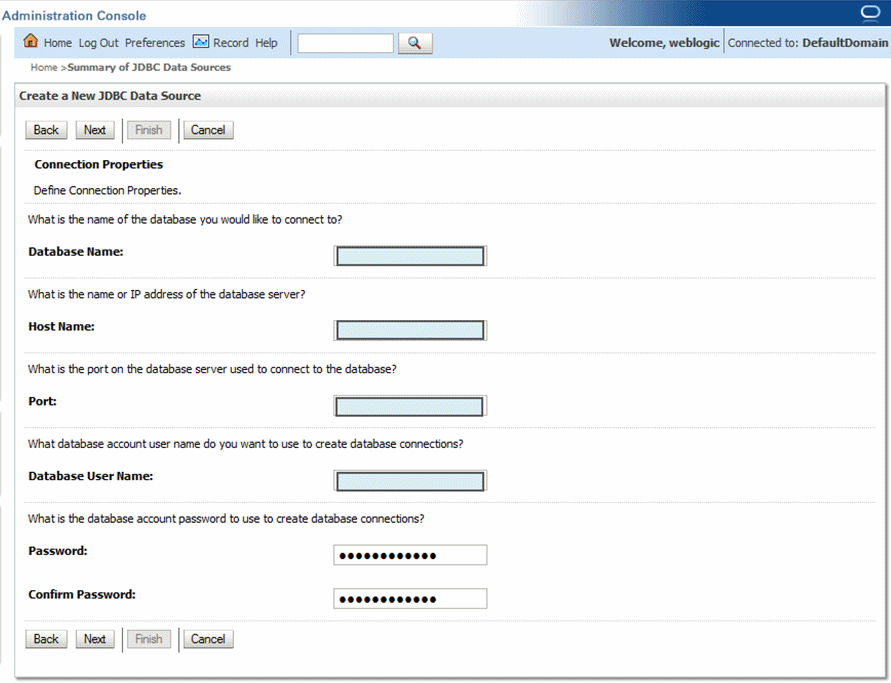
Upon completion, select Test Configuration to validate the connection.
The Connection test succeeded message is displayed.
Repeat Step 3 to 7 to create jdbc/ae, jdbc/mobileaq, jdbc/mobilecra, and jdbc/mobilectms.
Note:
For jdbc/mobilectms, you should select Database Driver as Oracle's Driver (Thin) instead of (Thin XA) during the installation.Note:
For information about the NS_ADMIN data source, see the Oracle Health Sciences Mobile Clinical Research Associate Health Sciences Push Notification Service Installation and Configuration Guide.For information about configuring security for Mobile CRA Server, see Oracle Health Sciences Mobile Clinical Research Associate Server Security Guide.
To use Single Sign On (SSO) and Lightweight Directory Access Protocol (LDAP), see the following documents:
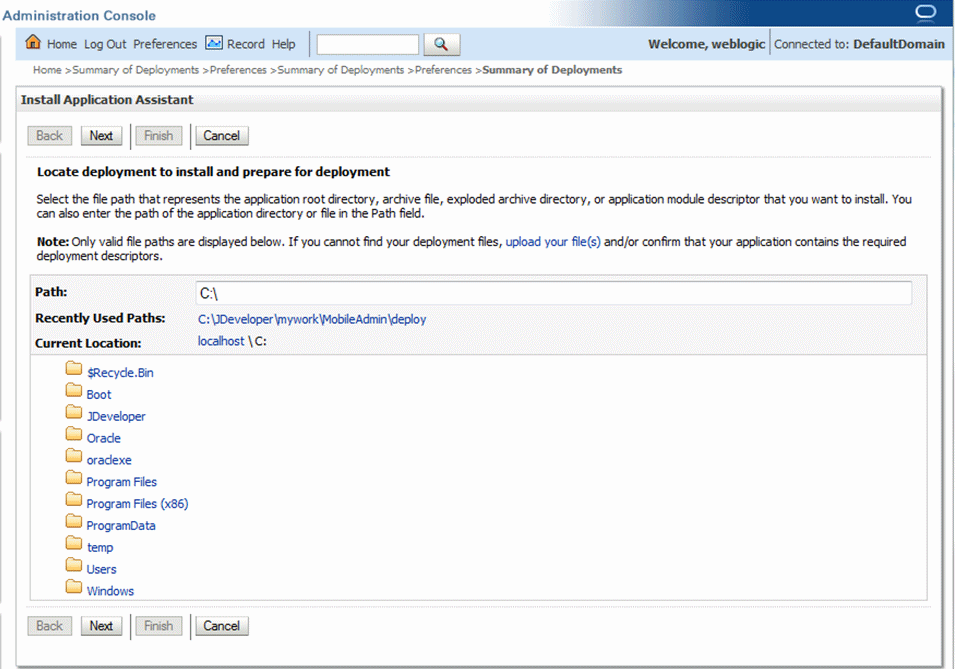
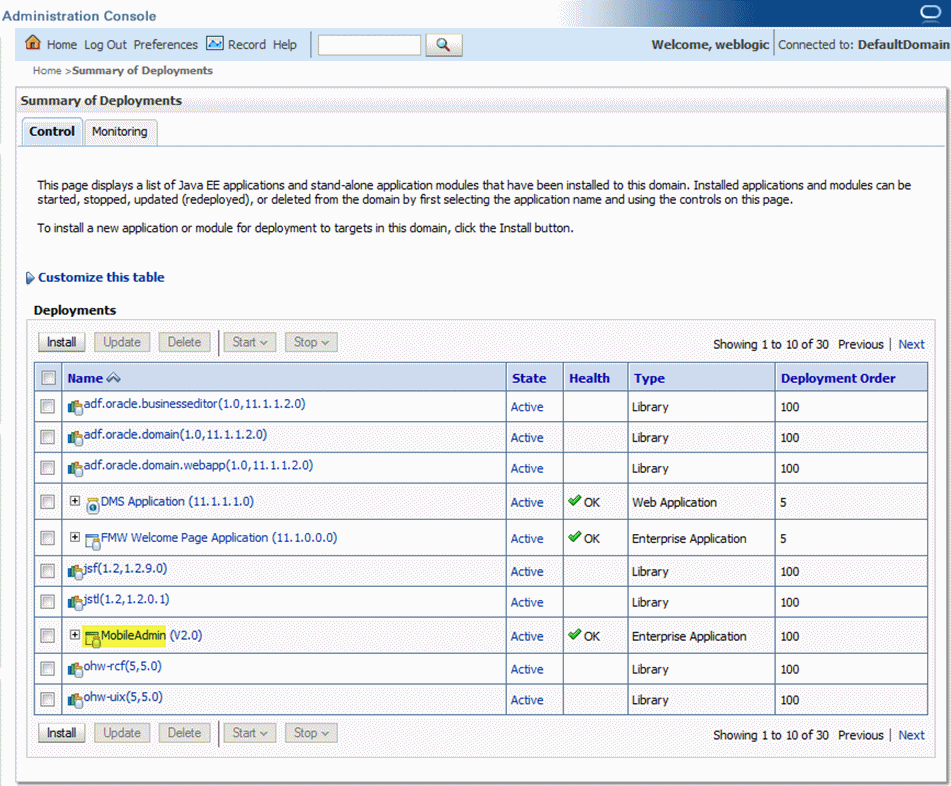
To deploy Mobile CRA Server Configuration Utility, perform the following:
Log in to the Oracle WebLogic Server Administration Console.
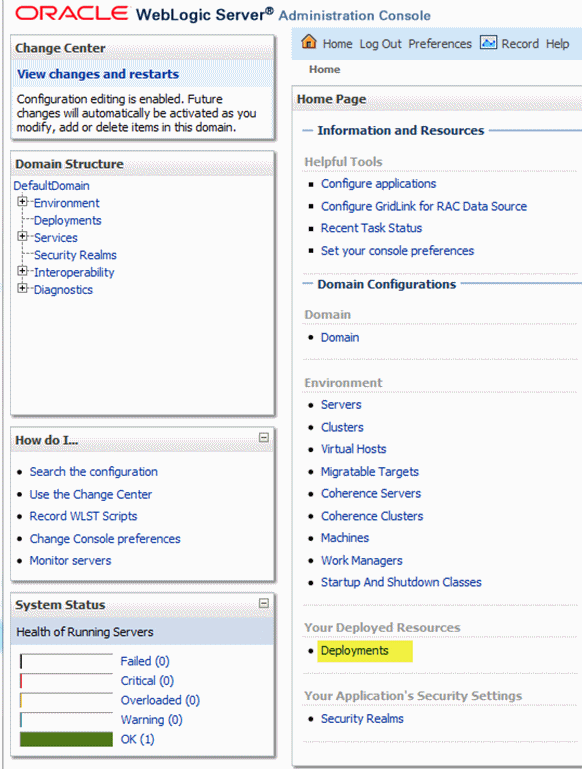
Within Server Administration, select Deployments.
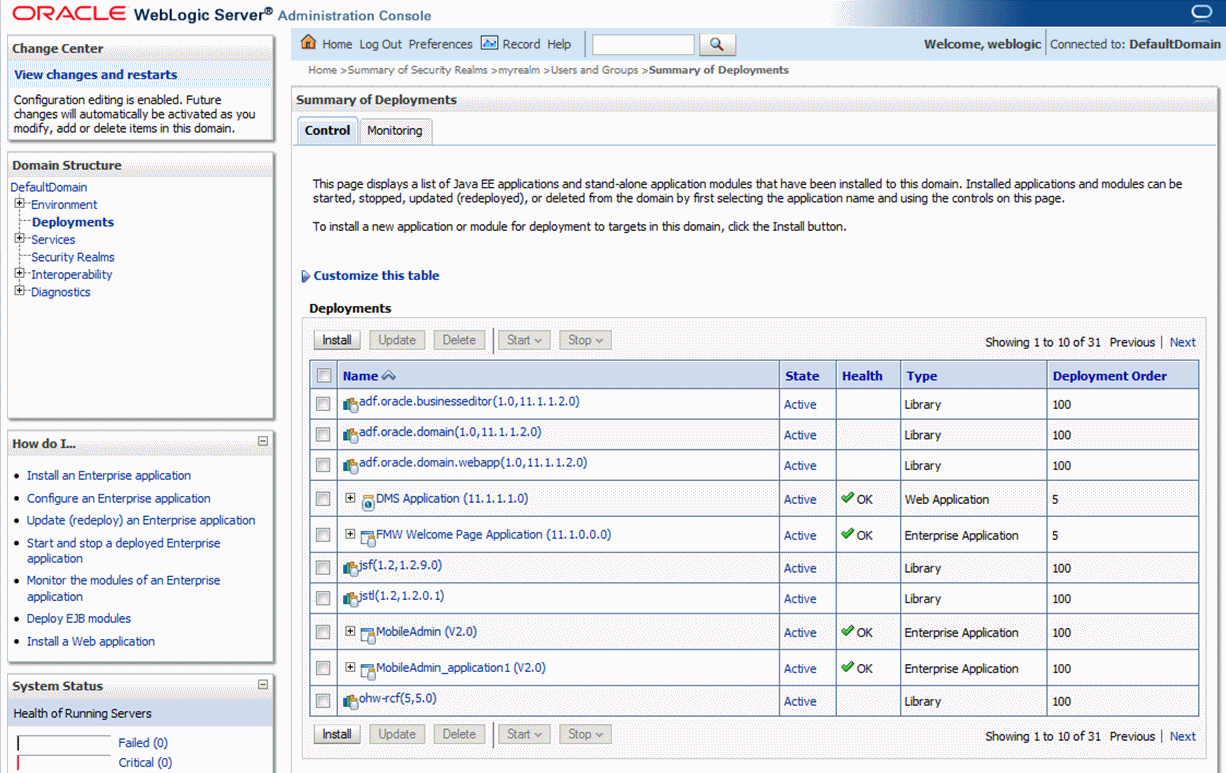
The Summary of Deployments screen is displayed.
Select Install to deploy application.
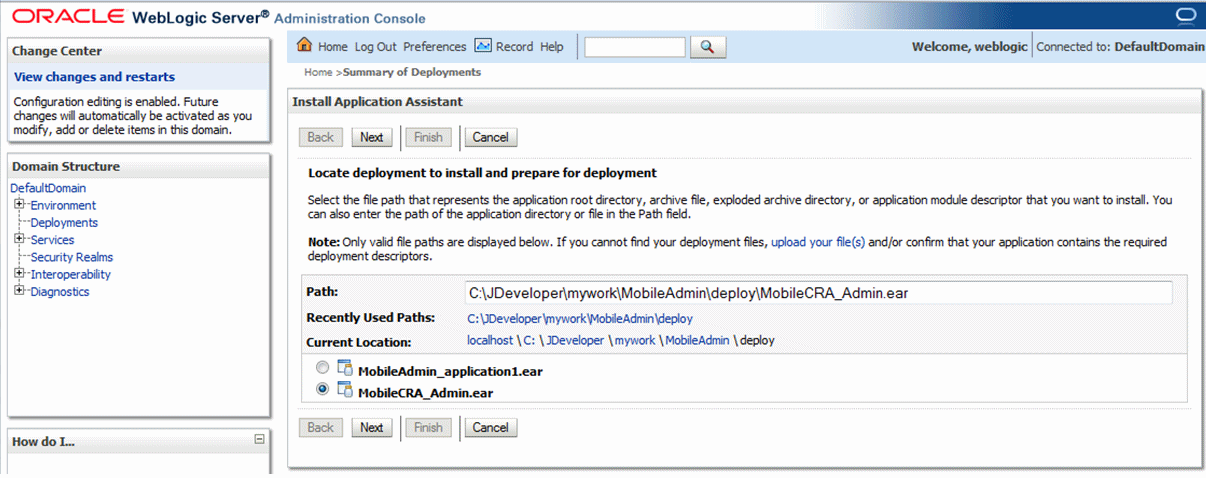
Browse the directory where the install package is located.
Select the Mobile CRA_AdminUI_v1.3.ear file.
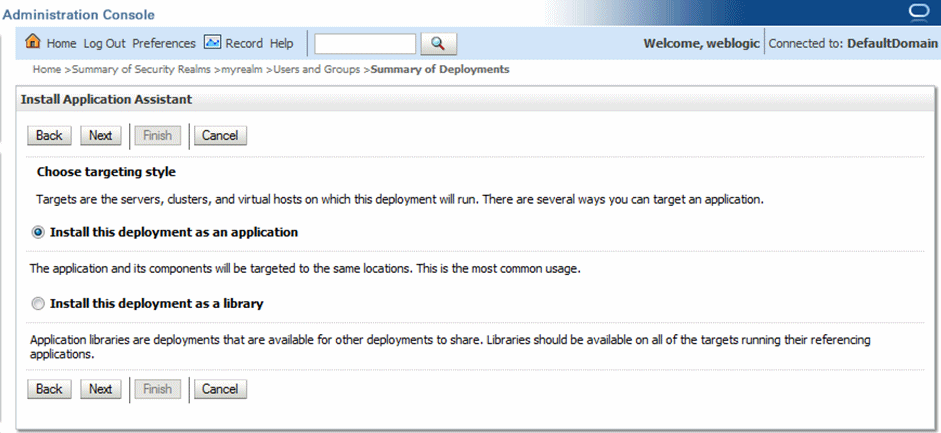
Select the Install this deployment as an application option.
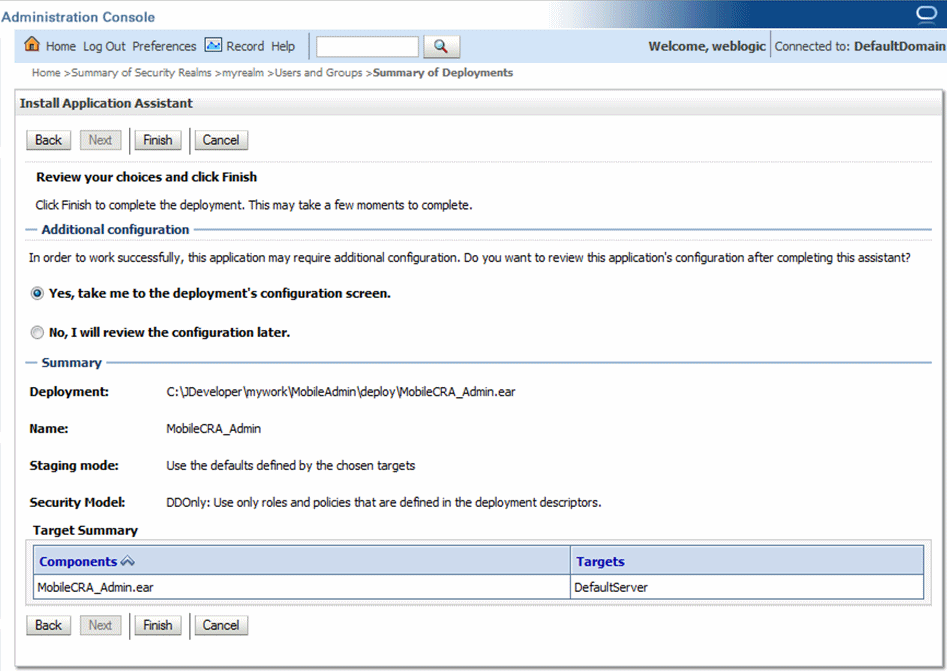
Select default settings as displayed in Figure 6-13.
Figure 6-13 Selecting the Default Settings
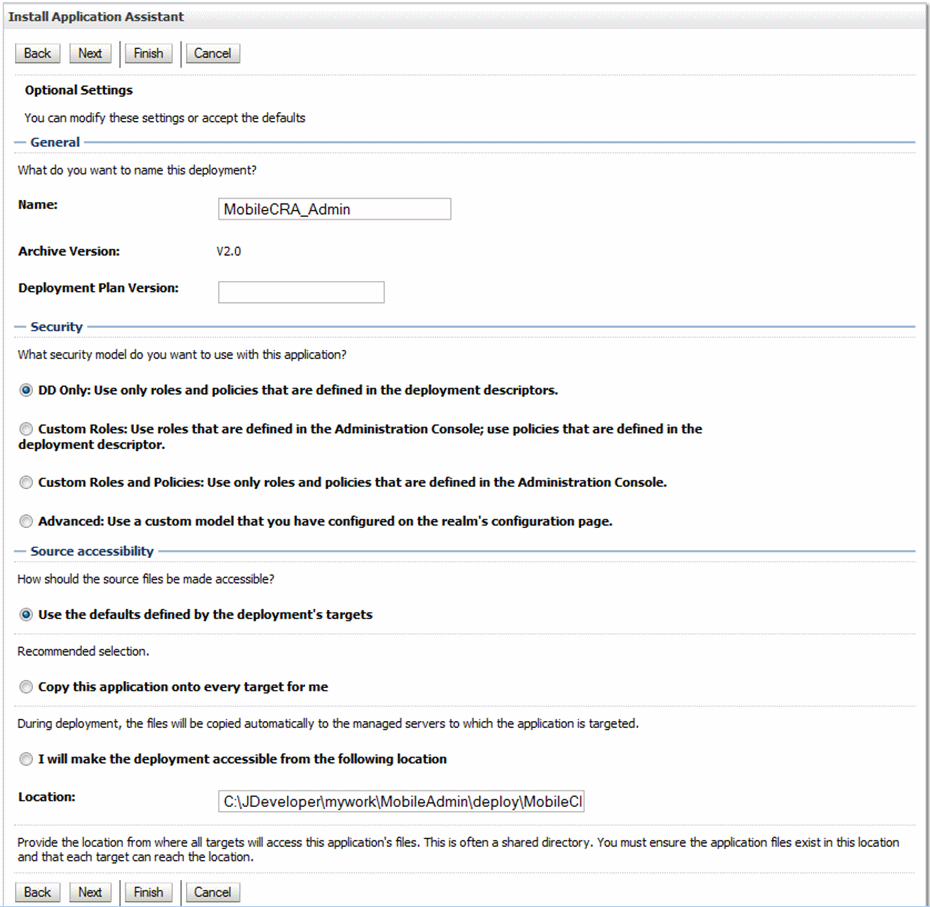
Select Finish to complete installation.
Validate that the installed application is listed on the Deployments screen.
To customize the configuration file config_adminui.xml for Mobile CRA Configuration Utility, perform the following:
From the Config folder of the media pack, select config_adminui.xml.
This is a template file where you have to update values for customization.
Create a copy of config_adminui.xml and save it as adminui_plan.xml.
For an example of config_adminui.xml, see Appendix B.
Modify configuration values for your environment.
The adminui_plan.xml file lets you configure your Mobile CRA Configuration Application to point to the right CTMS and ASAAG servers.
Change the following basic settings in the adminui_plan.xml file:
Note:
The ctmsAdapter.hostname, ctmsAdapter.port, and adaptiveSaag.url properties in the adminui_plan.xml file should match the respective values defined in the plan.xml file for MobileCRA Server Application. For more information, see Section 5.1.5.ctmsAdapter.hostname - The name of the CTMS host to which the mobile instance should connect for accessing and manipulating data. For example, server.domain.com.
Note:
If you use CTMS IP 2015, enter the IP address instead of host name.ctmsAdapter.port - The CTMS port host. For example, 8080. If the default port is used, enter a value 0 instead of null.
adaptiveSaag.url - Host name of the ASAAG server. For example, server.domain.com.
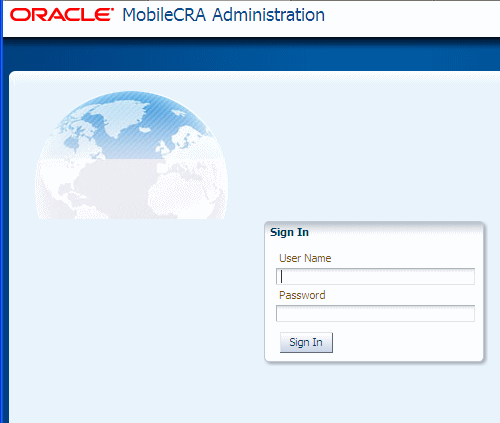
To verify deployment, perform the following:
Enter the following URL for the Mobile CRAConfiguration Utility:
http://<server:port>/MobileAdminCRA/faces/login.jspx?
The Login page is displayed.
Enter the user name and password.
The Mobile CRA Configutation Utility Home Page is displayed.
Figure 6-17 The Mobile CRA Configuration Utility Home Page

|
Copyright © 2012, 2015, Oracle and/or its affiliates. All rights reserved. Legal Notices |
|