| Oracle® Retail Insights Cloud Service Suite Administration Guide Release 17.0.004 F10059-01 |
|

 Previous |
 Next |
| Oracle® Retail Insights Cloud Service Suite Administration Guide Release 17.0.004 F10059-01 |
|
Previous |
Next |
This chapter describes the processes for maintaining users and roles as well as batch processes. For information regarding standard end user activities like creating and viewing reports, please see the Oracle Retail Insights User Guide.
It is considered to be a best practice to have all Oracle Retail Insights Cloud Service Suite supports requests submitted through a single point of contact for that customer environment; the client designated administrator is usually designated to perform this role.
The link to use when submitting Service Requests (SR) is:
Before users can access the Oracle Retail Insights Cloud Service Suite applications it is necessary to provision each user access to the system, and assign roles to each user to control what functionality will be available to them. The access provisioning is done using Oracle Identity Management (OIM). The following steps explain how to define users, assign roles and revoke access for users when needed. The OIM Application URL and the login with the required administrator access would be needed to execute the below steps:
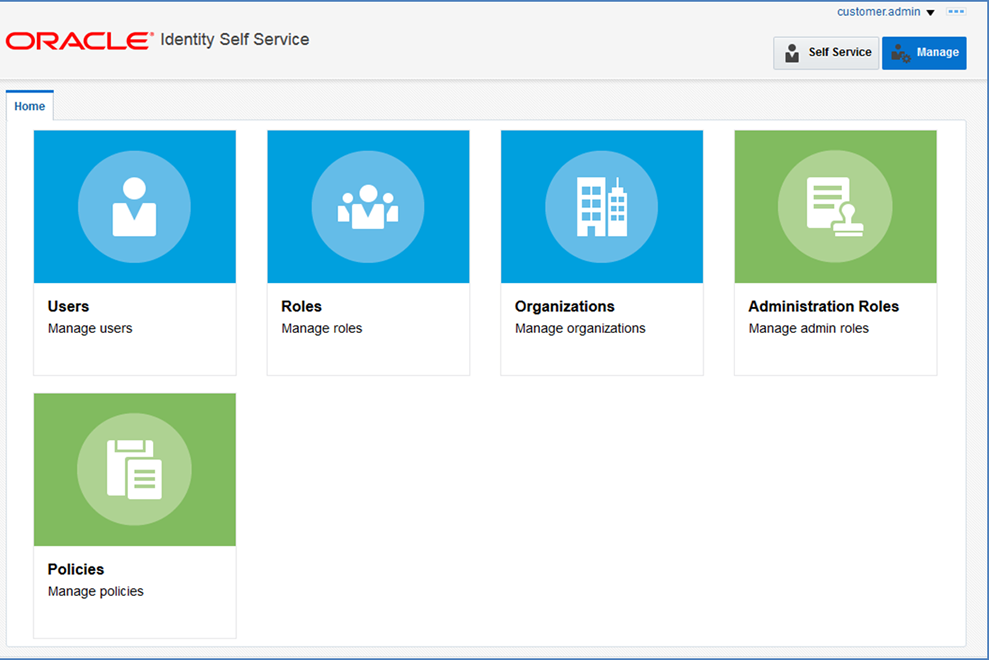
Log into the OIM application.
Under Administration, click Users.
Under Actions, click Create.
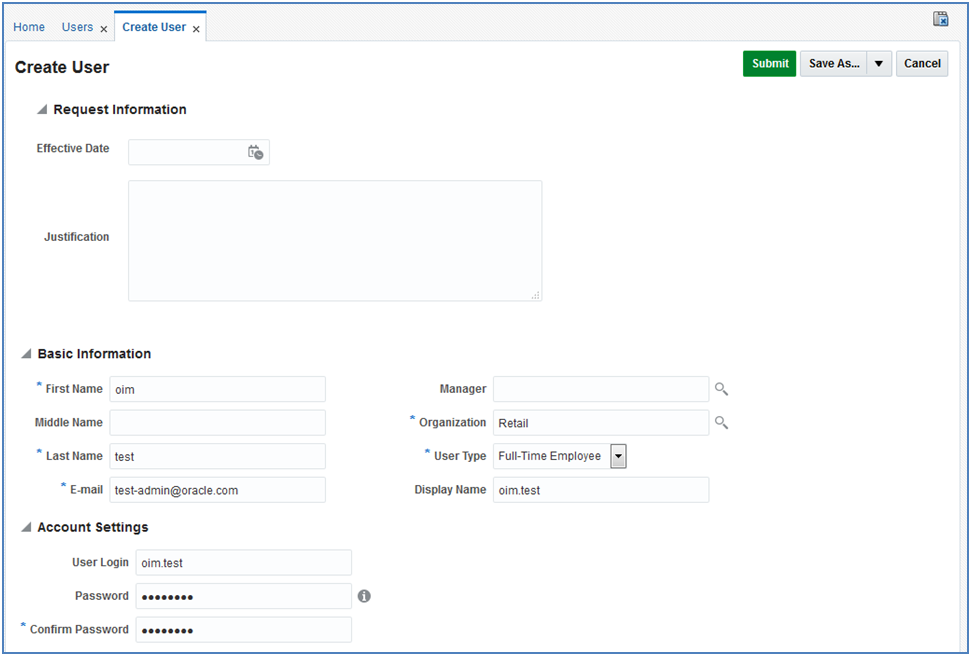
The Create User screen appears.
Under Basic Information, enter the following:
First Name
Last Name
For Organization, enter Retail
For User Type, enter Full time employee
E-mail: Email address of the employee
Under Account Settings, enter:
User Login: <firstname>.<lastname>
Password:
Confirm Password
Click Submit.
To assign members to a role, complete the following:
Log into the OIM application.
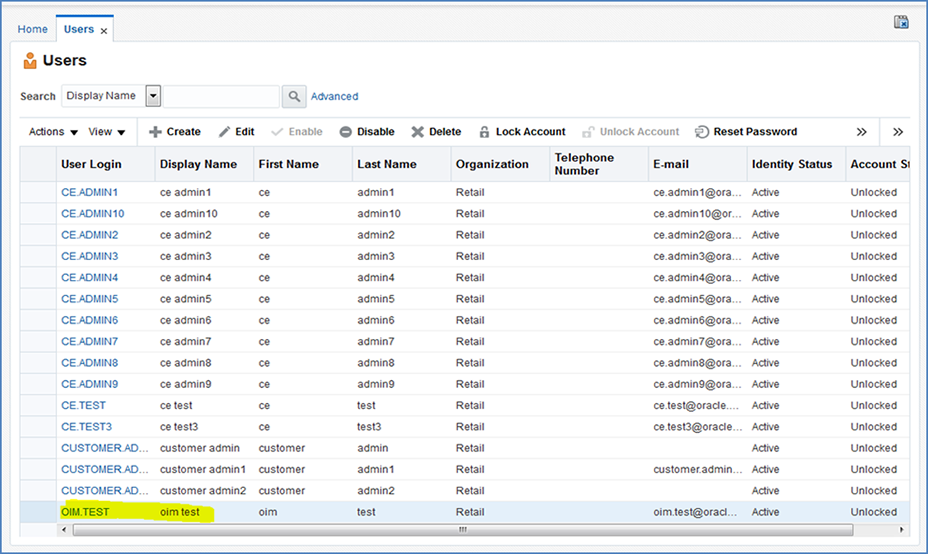
Click Users.
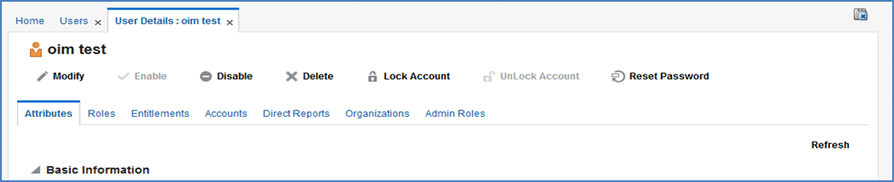
Click the oim.test user.
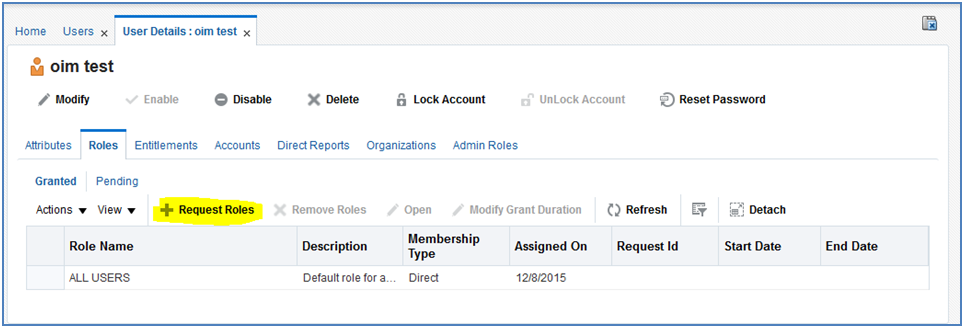
Click the Roles tab.
Click the Request Roles button.
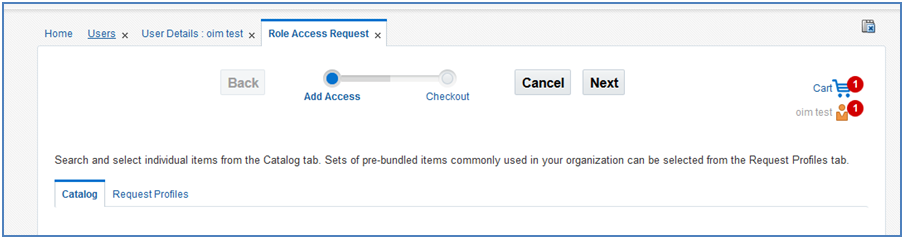
Click the Add to Cart button next to the role you want to assign.
Click Next.
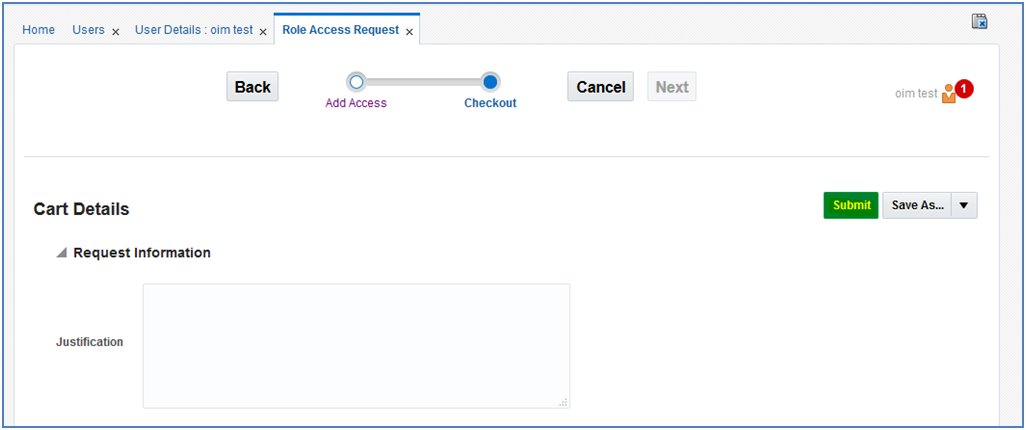
Click Submit.
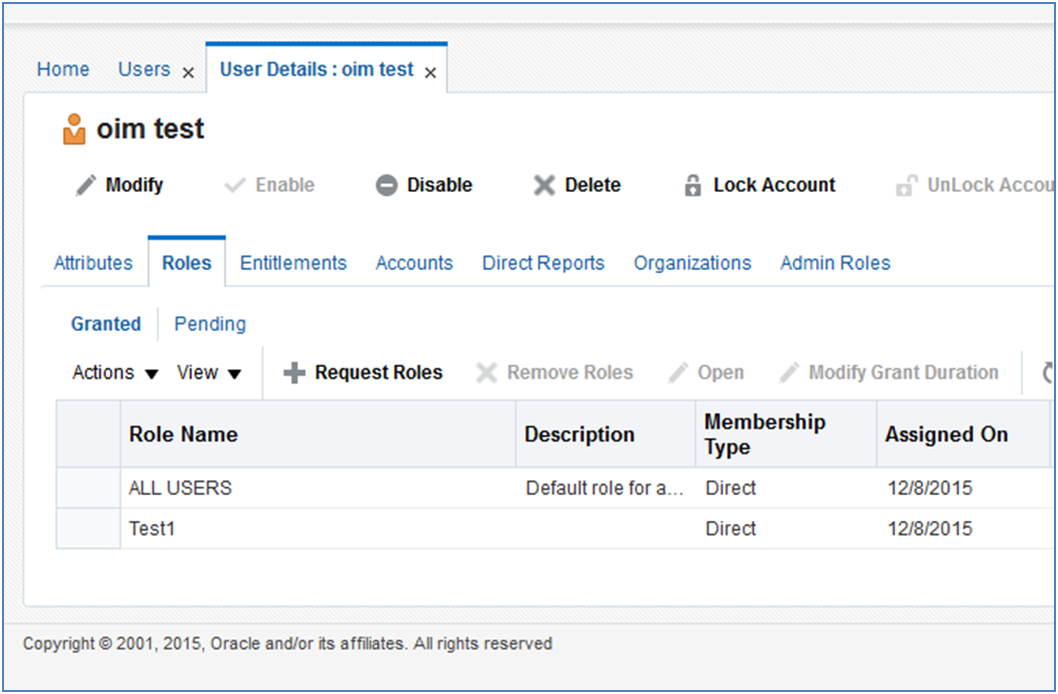
The role is now assigned to the User.
Retail Insights Cloud Services is built with role-based access. Permissions are associated with roles.
The following roles are available:
Table 1-1 Retail Insights Cloud Services Default Enterprise Roles
| Application Module | Default Enterprise Roles | Corresponding Application Roles |
|---|---|---|
|
ORMI/ORCI |
AltHierarchyInsights_Job |
AltHierarchyInsights |
|
ORCI |
ConsumerInsights_Job |
ConsumerInsights |
|
ORCI |
CustomerInsights_Job |
CustomerInsights |
|
ORCI |
CustomerDetailInsights_Job |
CustomerDetailInsights |
|
ORCI |
CustomerLoyaltyInsights_Job |
CustomerLoyaltyInsights |
|
ORMI/ORCI |
CustomerOrderInsights_Job |
CustomerOrderInsights |
|
ORCI |
CustomerSegmentInsights_Job |
CustomerSegmentInsights |
|
ORMI/ORCI |
EmployeeInsights_Job |
EmployeeInsights |
|
ORMI |
FranchiseInsights_Job |
FranchiseInsights |
|
ORMI |
InventoryInsights_Job |
InventoryInsights |
|
ORMI |
PlanningInsights_Job |
PlanningInsights |
|
ORMI/ORCI |
PromotionInsights_Job |
PromotionInsights |
|
ORMI |
PurchaseOrderInsights_Job |
PurchaseOrderInsights |
|
ORMI/ORCI |
SalesInsights_Job |
SalesInsights |
|
ORMI |
SupplierInsights_Job |
SupplierInsights |
|
ORMI/ORCI |
RetailAnalysts |
RetailAnalyst |
|
ORMI/ORCI |
RIApplicationAdministrators |
RIApplicationAdministrator |
Using a combination of the roles above will grant access to sets of metrics and attributes in RI in an additive fashion. One exception is the CustomerDetailInsights role, which is a special role intended to grant access to detailed customer information, such as their name and phone number. This role must be used in combination with the CustomerInsights role to get access to these attributes, and can be limited to a subset of RI users. Without the additional role, the CustomerInsights role only grants access to basic non-identifying customer information such as the customer ID and generic user-defined attributes.
Additionally, the following Oracle Business Intelligence roles are used in combination with the application roles above. Assign a combination of these system roles depending on the level of access required for each user. For example, a local systems administrator could be granted all of the roles in this table, and the permissions will be additive.
Table 1-2 Retail Insights Cloud Services OBIEE Roles
| Application Module | Application Roles | Permissions Level |
|---|---|---|
|
ORMI/ORCI |
BI Consumer |
Ability to view content created by others. Cannot create new content. |
|
ORMI/ORCI |
BI Author |
Ability to create and share new content, including analyses and dashboards. |
|
ORMI/ORCI |
BI Application Administrator |
Ability to modify and share user content, restrict access to objects, and configure advanced OBI features such as scheduled agents and BI Publisher reports. |
Assign the above roles to the user following the steps mentioned in the previous section as per your requirement.
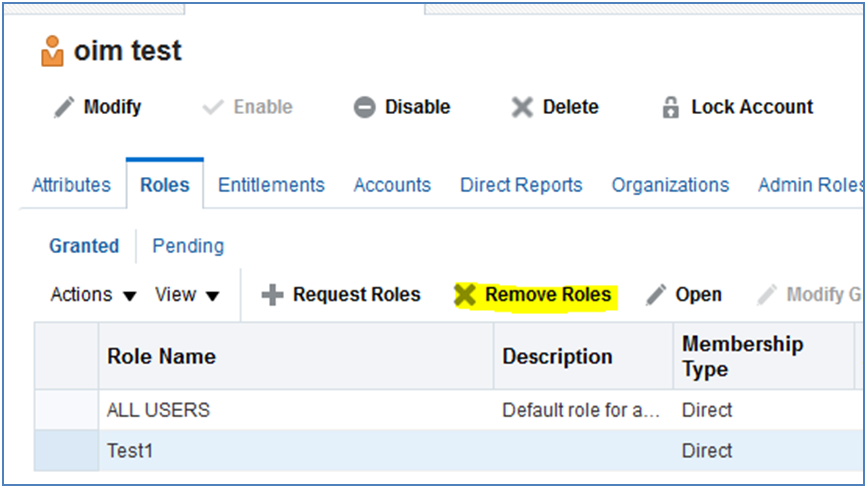
To revoke the membership of a member in a role:
Log into the OIM application.
Click Users.
Click the oim.test user.
Click the Roles tab.
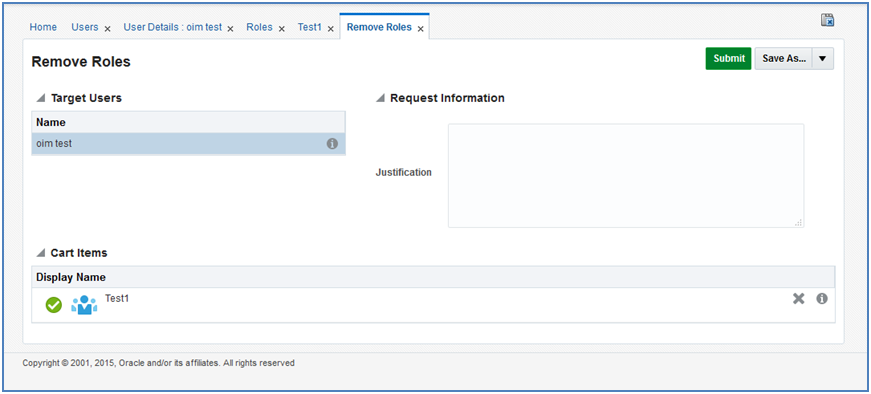
Select the Role you want to revoke and click the Remove Role button.
In the Remove Roles screen, click Submit.
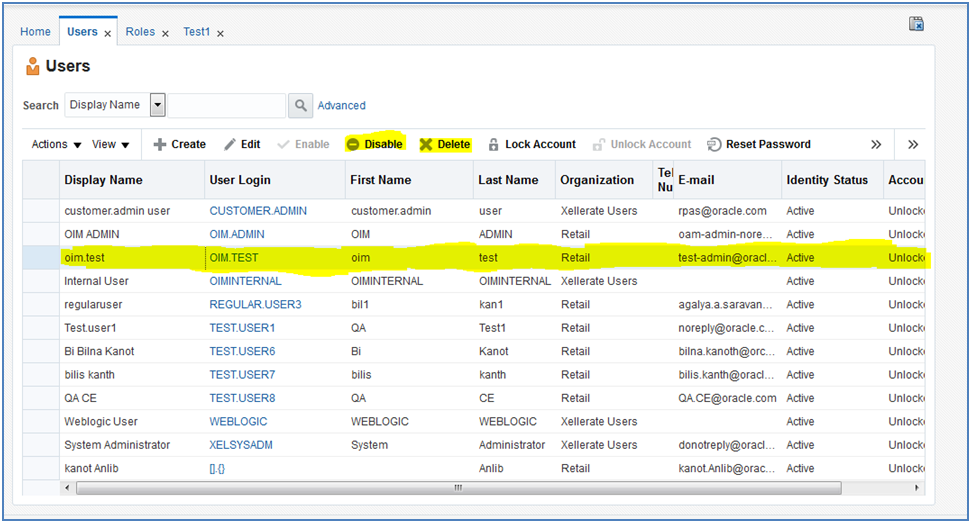
To delete or disable a user
Log into the OIM application.
Under Administration, click Users.
Select the user and click Disable or Delete as necessary.
You can also Lock or Unlock a particular user from the same screen if needed.
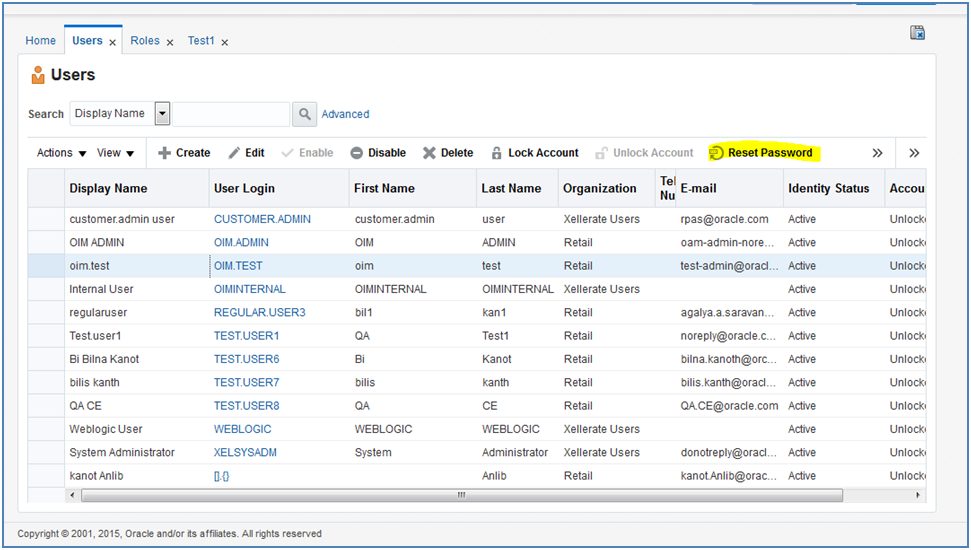
To reset the password of a user:
Log into the OIM application.
Under Administration, click Users.
Click the Search tab and then select on the User you want to reset the password.
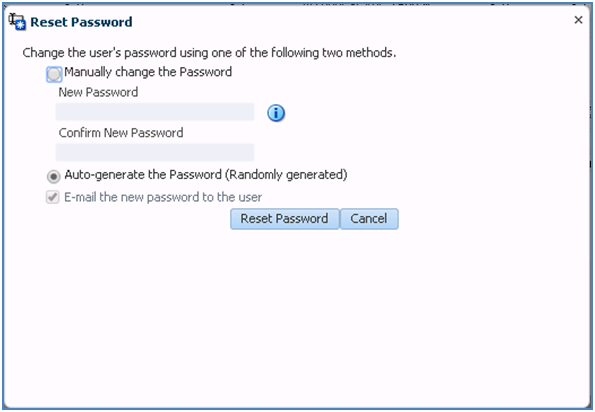
Click on Reset Password.
In the Reset Password screen, make sure Auto-generate the Password is selected and Click on Reset Password. (The system will auto generate the password and will email it to the user.)
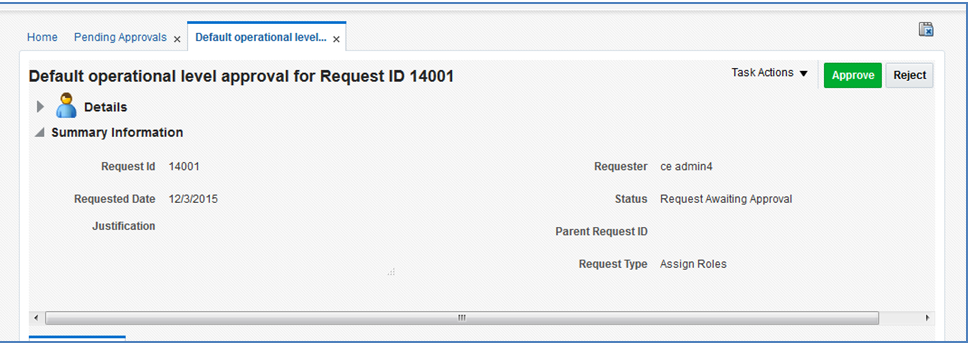
The users can also request for the Roles or revoke those that are available for him to access the RIS Service. Below are the steps to approve the request from the User.
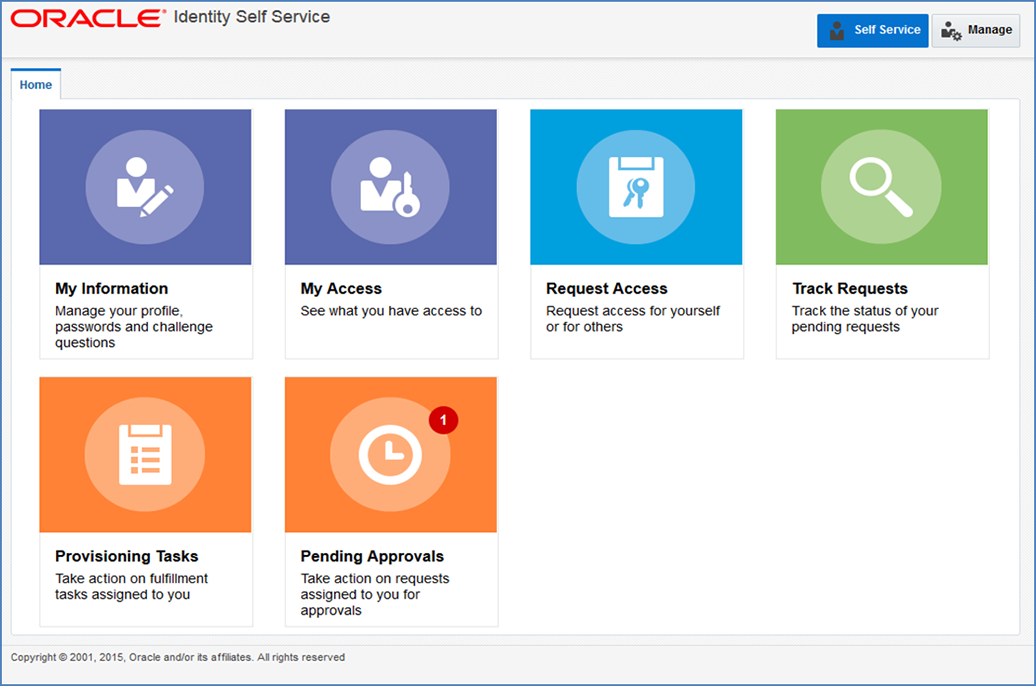
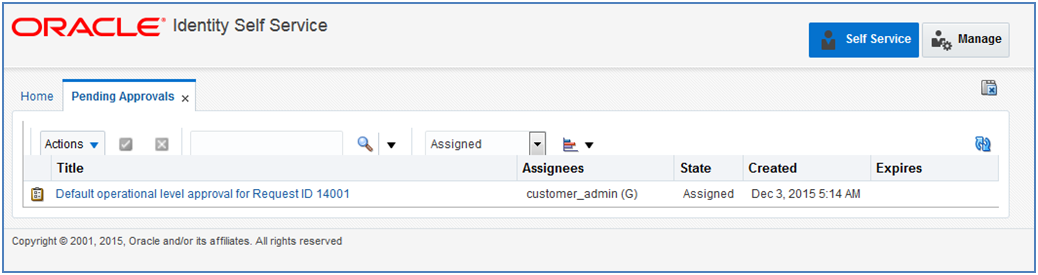
Login into OIM Application.
Click Pending Approvals.
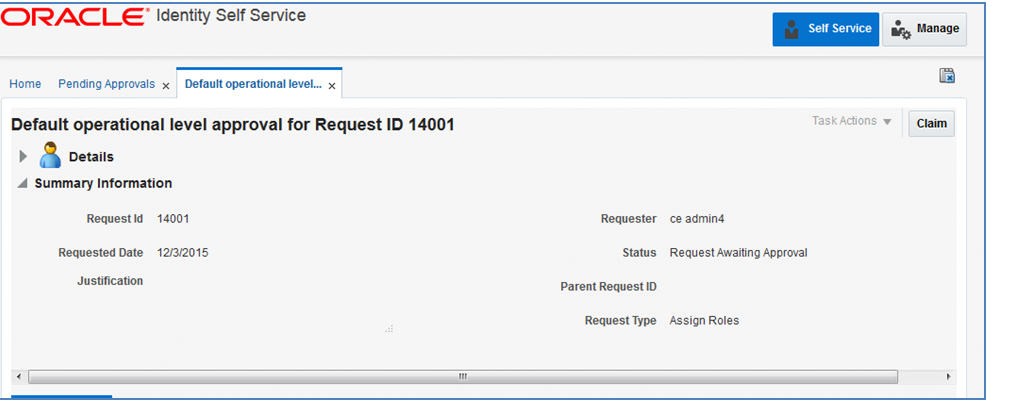
Click on the Action that is assigned to you.
Click the Claim button.
Click Approve or Reject.
Once done the request is completed.
The users can also request for the multiple Roles or revoke them if they are available for him to access the RIS Service. Below are the steps to approve the request from the User.
Login into OIM Application.
Click Pending Approvals.
Click on the Action that is assigned to you.
Click the Claim button.
Click Approve or Reject.
Once done, if approved, the request is split into multiple requests, one for each role for each user. Approve all of them by following steps 3 to 5.
Once all the requests are approved, all the roles will be assigned to users.
|
Note: The customer administrator can request multiple roles for multiple users. Once this request is made, the customer administrator is required to approve the request using the Approve Requests from User for Multiple Roles process. |
If you have batch of users that have to be created, the Oracle team can bulk load the users into the OIM Application. When users are bulk loaded their initial password will be set to the current password of a template user. The new users will be required to change their password on first login.
To request the creation of accounts by bulk loading, follow the below steps.
Create CSV file listing all users to create (see example below).
Create or identify a user to whose password will be used as the initial password for all created users.
Open an SR with Oracle support and provide the CSV file and user from steps 1 and 2.
##################
 filename.csv
###################
##########################################
USR_LOGIN,USR_FIRST_NAME,USR_LAST_NAME,USR_EMAIL,ORG_NAME
ce.admin1,ce,admin1,ce.admin1@oracle.com,Retail
ce.admin2,ce,admin2,ce.admin2@oracle.com,Retail
ce.admin3,ce,admin3,ce.admin3@oracle.com,Retail
ce.admin4,ce,admin4,ce.admin4@oracle.com,Retail
ce.admin5,ce,admin5,ce.admin5@oracle.com,Retail
ce.admin6,ce,admin6,ce.admin6@oracle.com,Retail
ce.admin7,ce,admin7,ce.admin7@oracle.com,Retail
ce.admin8,ce,admin8,ce.admin8@oracle.com,Retail
ce.admin9,ce,admin9,ce.admin9@oracle.com,Retail
ce.admin10,ce,admin10,ce.admin10@oracle.com,Retail
##########################################
If you have quite a few users that have roles to be assigned to, the Oracle team can bulk update the role membership into the OIM Application.
To update the membership of the by bulk update, follow the below steps.
Create CSV file with the user role mapping. Please note that the user name must be in upper case (see example below).
Open an SR with Oracle support and provide the CSV file and user from steps 1.
##################
 role.csv
###################
##########################################
UGP_NAME,USR_LOGIN
Role1,CE.ADMIN1
Role2,CE.ADMIN1
Role1,CE.ADMIN2
Role3,CE.ADMIN3
Role4,CE.ADMIN4
Role5,CE.ADMIN5
Role6,CE.ADMIN6
Role7,CE.ADMIN7
Role8,CE.ADMIN8
Role2,CE.ADMIN8
Role2,CE.ADMIN9
##########################################
|
Note: If you want more than one role attached to a particular user, add one more row with the role that you want the user to have and the user name. Refer to the CE.ADMIN1 in above table for example. |
The following is the file upload process. For details regarding file contents and formatting please refer to the Oracle Retail Insights Cloud Services Integration Guide. The Private/Public Keys must be generated and the public Key must be associated with your SFTP Account for the file uploads. The Adding Authorized Keys section describes the step-by-step method to generate the Keys (2048 bit RSA Keys).
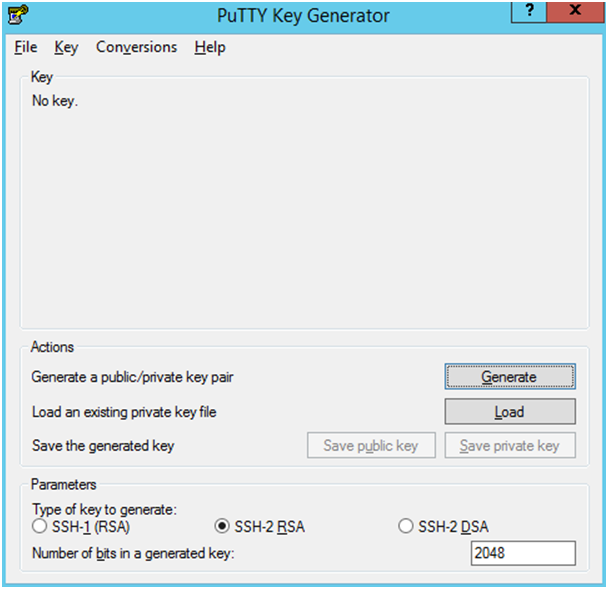
The following is the process to generate a 2048 bit RSA key and add the same to the SFTP server. This is done with the help of WinSCP tool on Windows. However the same can be done using ssh-keygen on Linux as well.
Launch WinSCP and select Tools -> Run PuttyGen.
Select "SSH-2 RSA" for the type of key to generate and enter "2048" for the number of bits in a generated key field and click Generate.
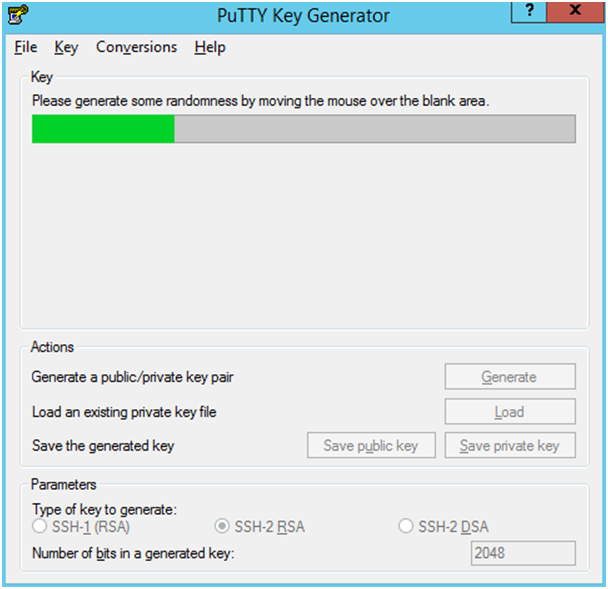
Move the mouse over the blank space in the window until the key is generated.
Once the key is generated, click the Save public key button to save the public key to a file.
Click the Save private key button to save the Private key to a file. Confirm to save it with/without a passphrase.
Open an SR with Oracle Support, to associate the Public half of the Key with your SFTP account (attach the Key with the SR).
The Upload steps uses the private key generated in the earlier section.
Launch WinSCP and connect to <SFTP Server> using port 22.
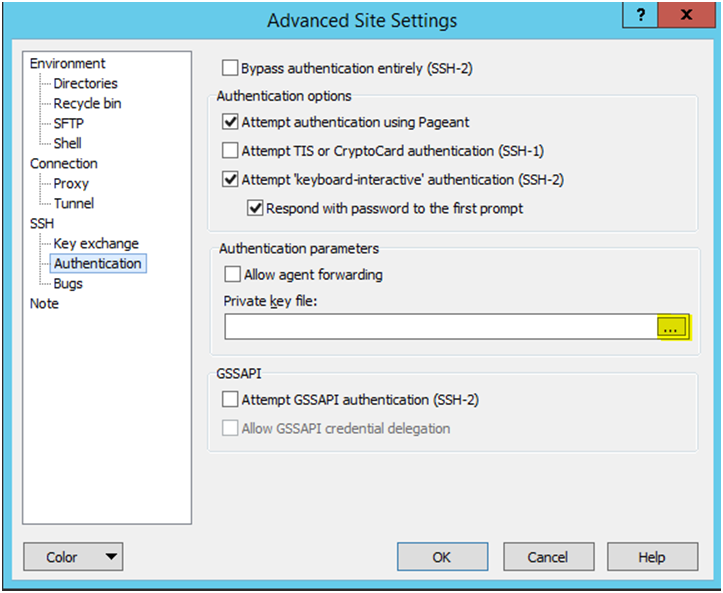
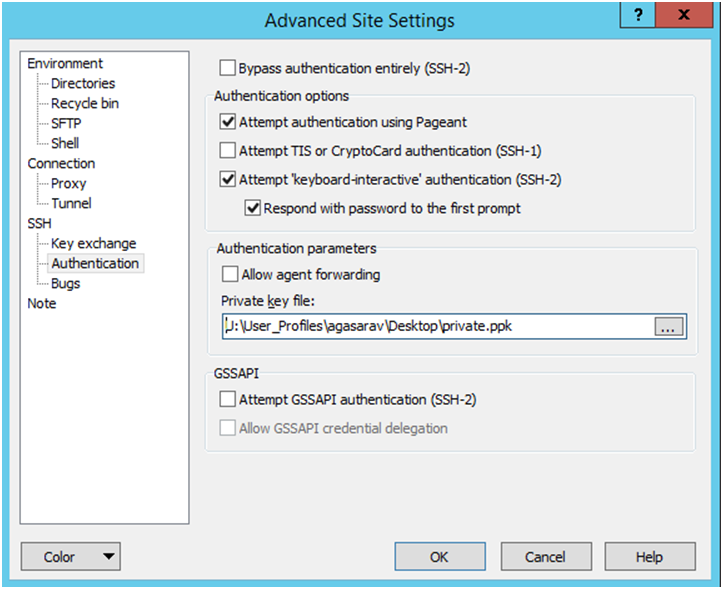
Enter the username and click Advanced.
Click Authentication.
In the Private Key File field, click the Browse button and select the private key created in the earlier section.
After loading the private key file, click OK.
Click Login. The window does not prompt for a password and logs into the SFTP server. Provide a passphrase if one has been set up.
Login to the WinSCP by Following the Steps – Login to WinSCP section.
Transfer all data files to the directory /<SFTP User>.
Create a directory called COMMAND under /<SFTP User>if it does not already exist.
Change to the /<SFTP User>/COMMAND directory.
Transfer an empty file called COMPLETE.
Login to the WinSCP by following the Steps – Login to WinSCP section. The following is the download file process.
Change directory to /<SFTP User>/EXPORT.
Download all data files.
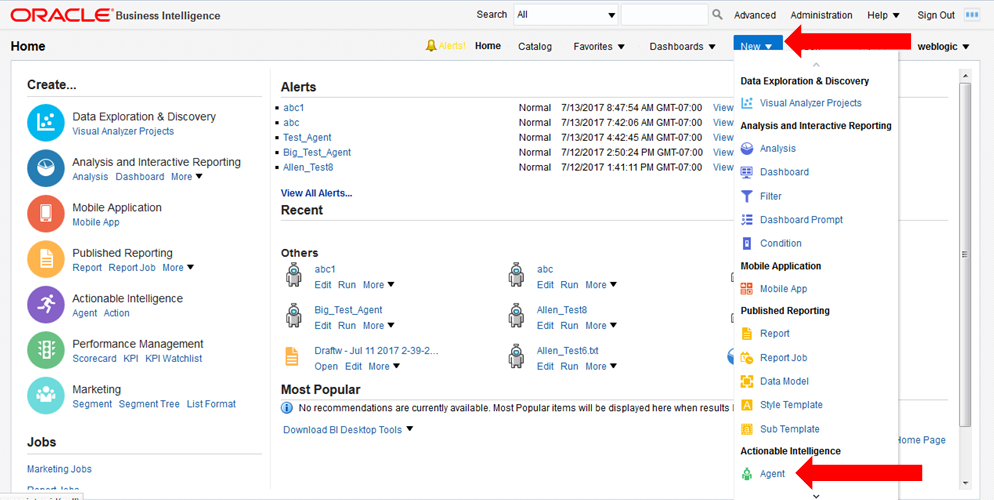
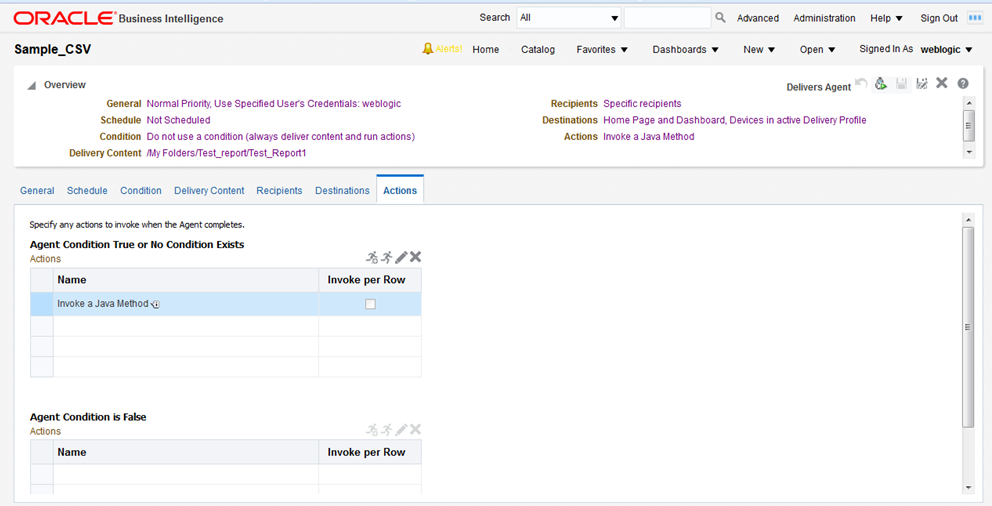
After creating an Analysis (report) that is needed to be refreshed and saved to a file for downloading, from the OBIEE home screen select New -> Agent.
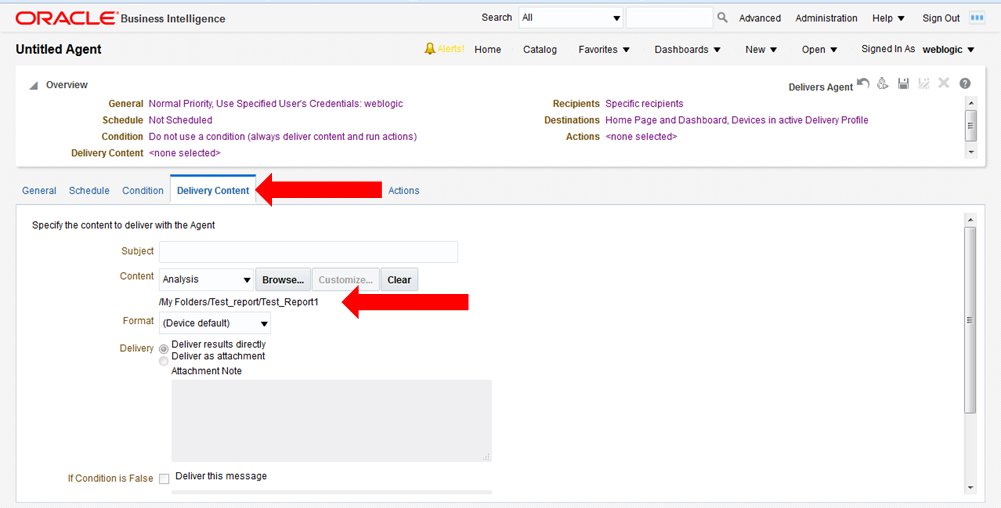
After setting the schedule for the Agent execution, go to the Delivery Content tab and select the analysis report, don't worry about the other settings on this tab such as format because these will be overridden by other selections on the Actions tab.
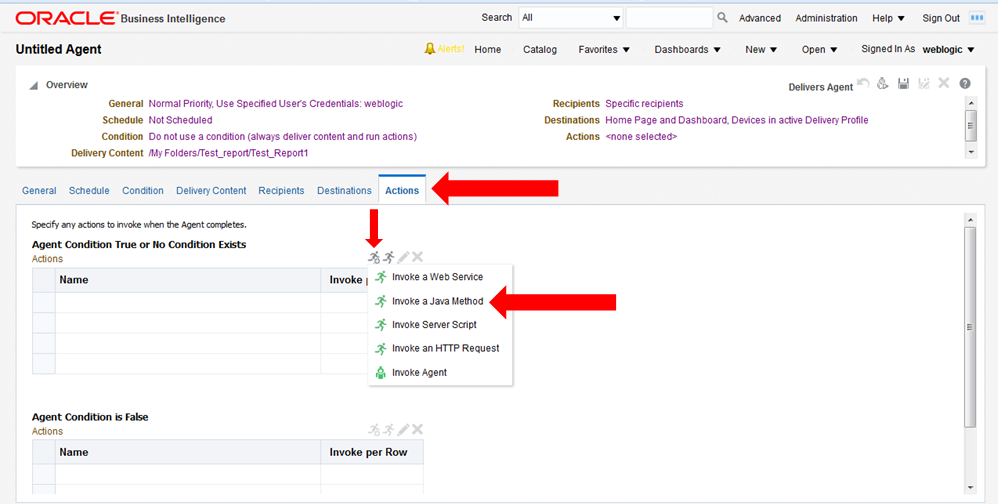
Ignore the Recipients and Destinations tabs, go to the Actions tab and add a new Action that "Invokes a Java Method".
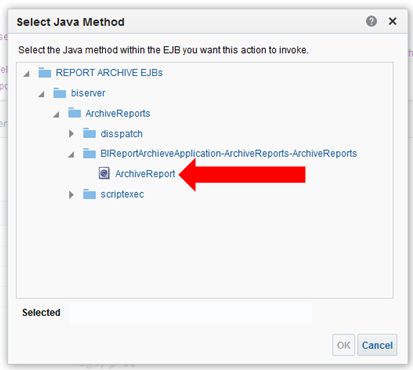
Select "REPORT ARCHIVE EJBs / biserver / ArchiveReports / BIReportArchieveApplication-ArchiveReports-ArchiveReports / ArchiveReport".
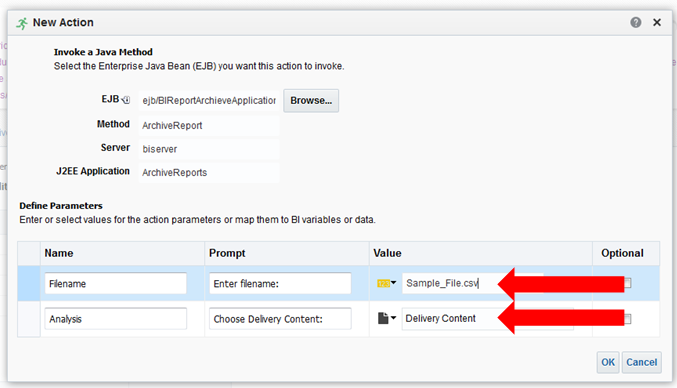
Enter the filename that the report should be written into, and select "Delivery Content".
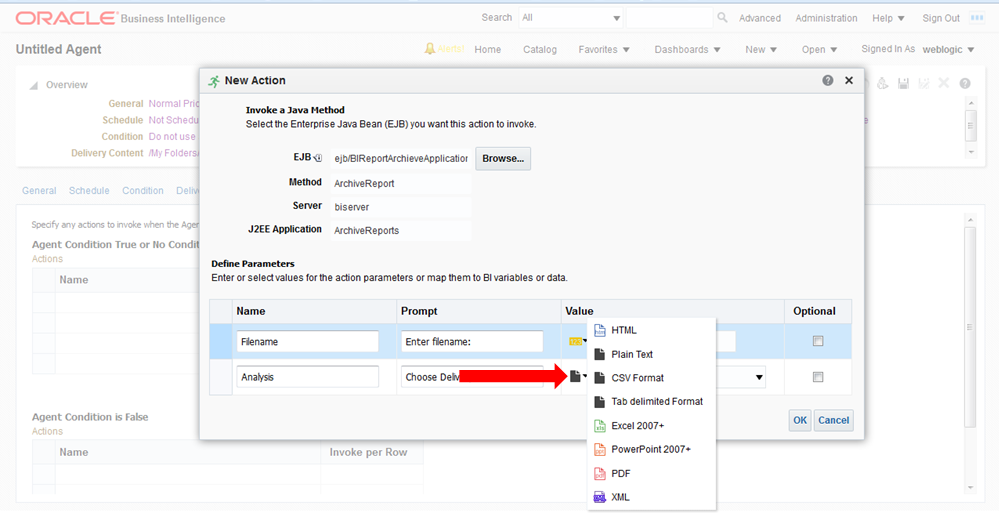
Click the small black page icon with the turned corner and select the file format to be written, then click OK.
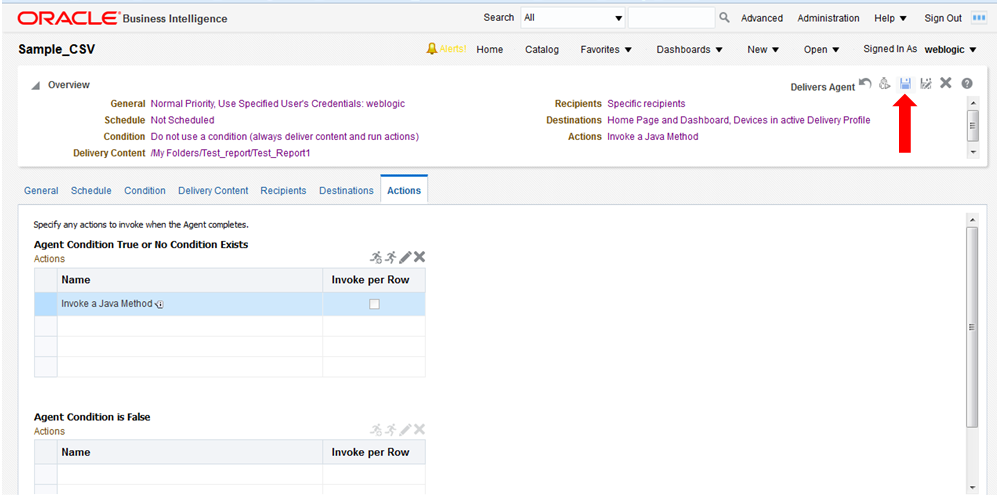
Click Save Agent and give the Agent a name. At this point the Agent has been defined and will execute according to the defined schedule.
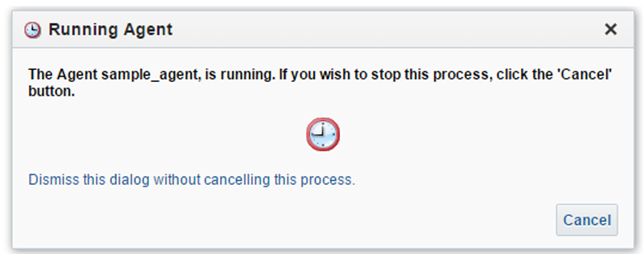
If you would like to do an immediate execution of the Agent you can click Run Agent Now.
The following dialog displays while the agent is running:
This section provides a detailed approach of configuring the dashboard detailed reports and InfoTiles created within OBIEE 12C. The new column and Info-Tile configuration optimizes the hard-coding of column (exception) values in Conditional Format and in case of InfoTiles, severity formula by storing the column range (min and max) values in the database and rendering it to the dashboard using presentation variables. At present, this has been implemented in CEO dashboard. User can change the dashboard column and tile configuration if required by following the steps mentioned below.
Perform the following procedures to configure the dashboard column values.
RI_DASHBOARD_CONFIG is the table to store the dashboard configuration. Below is the screenshot for the field values of the RI_DASHBOARD_CONFIG table.
Where,
Table 1-3 RI_DASHBOARD_CONFIG Table Fields
| FIELD_NAME | Regular OBIEE Analysis | INFO-TILE Analysis |
|---|---|---|
|
REPORT_NAME |
Name of the detailed report |
Tile Title |
|
PARAM_NAME |
Name of the column whose values need to be dynamic |
Tile Title |
|
PARAM_TYPE |
Tells whether it is a detailed report or tile. Value to be inserted: Column |
Tells whether it is a detailed report or tile. Value to be inserted: Tile |
|
ATTR1, ATTR1_MAX_VALUE, ATTR1_MIN_VALUE |
Name of the column whose values need to be dynamic. Max column value above which the column appears green and Min column value below which the column appears red. |
If the Tile Main Metric value (sub-metric value can also be compared by editing severity formula) lies between the MIN_VALUE and MAX_VALUE, the tile appears to be red (critical). ATTR1 must represent the severity value "critical" |
|
ATTR2, ATTR2_MAX_VALUE, ATTR2_MIN_VALUE |
Can be added in future. |
If the Tile Main Metric value lies between the MAX_VALUE and MIN_VALUE, the tile appears to be yellow. ATTR2 must represent the severity value "important" |
|
ATTR3, ATTR3_MAX_VALUE, ATTR3_MIN_VALUE |
Can be added in future. |
If the Tile Main Metric value lies between the MAX_VALUE and MIN_VALUE, the tile appears to be green. ATTR3 must represent the severity value "normal" |
|
ATTR4, ATTR4_MAX_VALUE, ATTR4_MIN_VALUE |
Can be added in future. |
If the Tile Main Metric value lies between the MAX_VALUE and MIN_VALUE, the tile appears to be blue. ATTR4 must represent the severity value "no severity" |
|
Note: For detailed reports columns, currently only ATTR1 is used. ATTR2, ATTR3,…ATTR8 can also be inserted in the future based on the requirement. For Info-Tiles, ATTR5, ATTR6, ATTR7, ATTR8 can also be inserted in the future based on the requirement. |
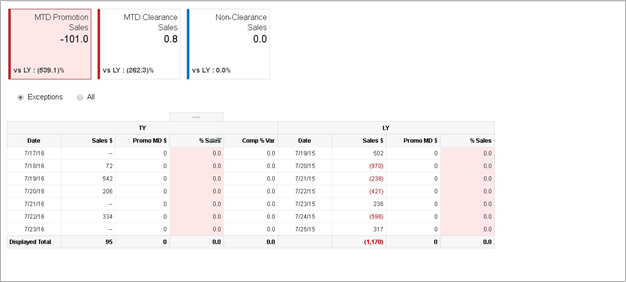
The MAX_VALUE and MIN_VALUE depend on the Tile severity logic. Example: For a dashboard containing Net Sales Amt Info-Tile, the tile severity is critical if the Main Metric value lies below the MIN_VALUE. For a dashboard containing Return Items Info-Tile, the tile severity is critical if the Main Metric value lies above the MAX_VALUE.
Now, a table for dashboard configuration is created. Let's now insert values into the table to get started. The following typical SQL insert query can be written to insert entries into the RI_DASHBOARD_CONFIG table.
The RI_DASHBOARD_CONFIG table has been exposed in the Retail Merchandising Analytics As-Was. It can be directly rendered in the front-end.
Now, we're going to create an Exceptions Threshold prompt to set the presentation variables.
Create a Dashboard Prompt by clicking New?Dashboard Prompt.
|
Note: Each page in the dashboard must have a single Exceptions Threshold Prompt.For example, if the dashboard has two pages namely Promotions and Sales, the prompts must be named Promotions Exceptions Threshold Prompt and Sales Exceptions Threshold Prompt respectively. |
Click the New icon ![]() and select variable prompt.
and select variable prompt.
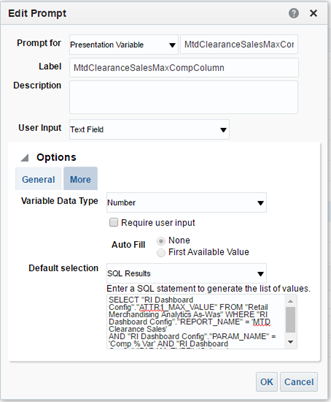
In the Edit Prompt Dialog Box, provide a name for the Presentation variable and select User Input as Text Field.
The naming for the Presentation variable should be logical to the context and camel cased.
For example: MtdClearanceSalesMaxCompColumn, MtdClearanceSalesMinCompColumn
We can have our own label for the variable.
Expand the Options pane and under General tab, the Variable Data Type can be based on the column type. Select 'SQL Results' for Default selection and enter a SQL statement in text box.
The SQL query added in the text field is explained below:
    SELECT "RI Dashboard Config"."ATTR1_MAX_VALUE" FROM "Retail Merchandising Analytics As-Was"
    WHERE "RI Dashboard Config"."REPORT_NAME" = 'MTD Clearance Sales' AND "RI Dashboard Config".
     "PARAM_NAME" = 'Comp % Var' AND "RI Dashboard Config"."PARAM_TYPE"='Column'
The above query fetches the max value of the column "Comp % Var" of the report "MTD Clearance Sales" from the table "RI DASHBOARD CONFIG".
The number of Presentation variables depends on the number of attributes we added in the table.
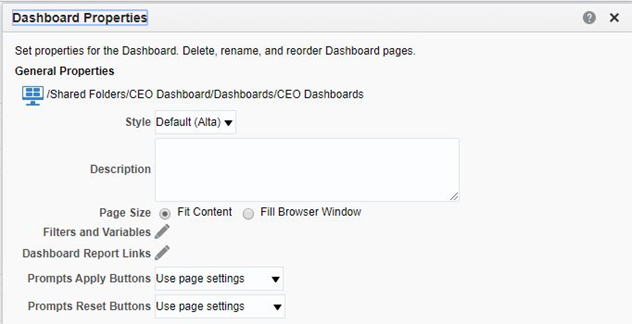
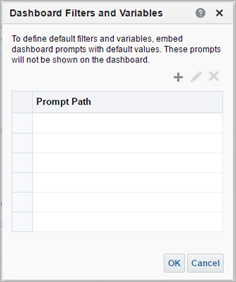
Go to Edit Dashboard. Click on Tools icon ![]() on the right and select Dashboard Properties. In the Dashboard Properties dialog box, click edit Filters and Variables icon.
on the right and select Dashboard Properties. In the Dashboard Properties dialog box, click edit Filters and Variables icon.
Load the prompt by clicking on the plus icon.
After loading the prompt the Dashboard Filters and Variables dialog box looks like:
Open the report in the dashboard (Make sure all the reports in the dashboard are formatted).
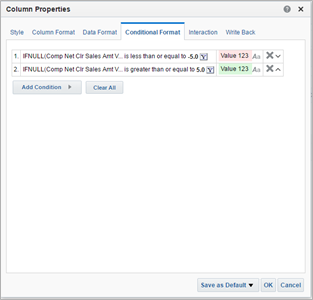
Go to criteria tab and choose Column Properties for the column that needs to be conditional formatted.
Go to Conditional Format tab in the Column Properties dialog box. Before including the presentation variables, the conditions look like:
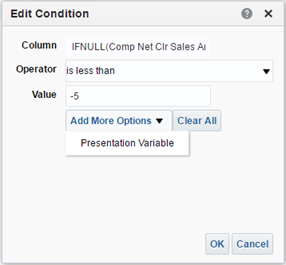
Click on the condition to add presentation variable. Click Add more options in the Edit Condition dialog box and select Presentation variables.
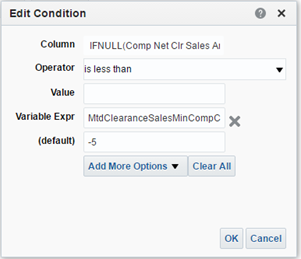
Empty the Value field. Fill the Variable Expr field with the corresponding Presentation Variable. Click OK. Repeat the same for all the required exception columns. Refer the snapshot below for sample.
|
Note: For union-criteria analysis that has multiple criteria, include the Presentation Variable in three places:
|
We have configured the detailed reports using Presentation variables. Now, we are going to configure Info-Tile inside the dashboard.
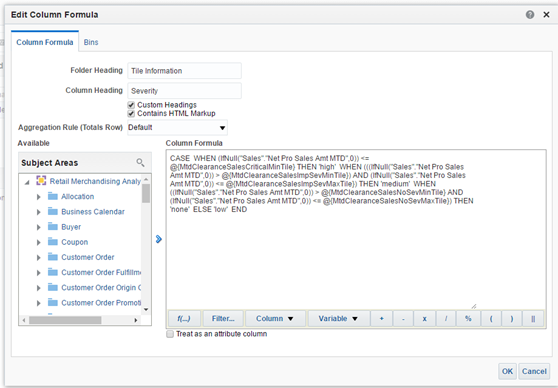
Click on Edit formula on the severity column for the required Info-Tile.
Write CASE statements in the formula as below.
CASE
WHEN (IfNull("Sales"."Net Pro Sales Amt MTD",0)) <= @{MtdPromotionSalesCriticalMinTile} THEN 'high'
WHEN (((IfNull("Sales"."Net Pro Sales Amt MTD",0)) > @{MtdPromotionSalesImpSevMinTile}) AND
(IfNull("Sales"."Net Pro Sales Amt MTD",0)) <= @{MtdPromotionSalesImpSevMaxTile}) THEN 'medium'
WHEN ((IfNull("Sales"."Net Pro Sales Amt MTD",0)) > @{MtdPromotionSalesNoSevMinTile} AND
(IfNull("Sales"."Net Pro Sales Amt MTD",0)) <= @{MtdPromotionSalesNoSevMaxTile}) THEN 'none'
ELSE 'low'
END
The above CASE statement returns the severity value of the tile:
If the main metric value is lesser than the MtdPromotionSalesCriticalMinTile, the severity is high.
If the main metric value is between the MtdPromotionSalesImpSevMinTile and MtdPromotionSalesImpSevMaxTile, the severity is medium.
If the main metric value is between the MtdPromotionSalesNoSevMinTile and MtdPromotionSalesNoSevMaxTile, the severity is none.
Otherwise, the severity is low.