| Oracle® Retail Brand Compliance Management Cloud Service Reports User Guide Release 18.0 E99003-04 |
|

 Previous |
 Next |
| Oracle® Retail Brand Compliance Management Cloud Service Reports User Guide Release 18.0 E99003-04 |
|
Previous |
Next |
This chapter describes the facilities for extracting the full contents of certain records to Comma-Separated Value (CSV) format files. The files can be viewed as spreadsheets or processed for further analysis by an external system.
The records that can be exported to CSV are Supplier, Site, Product Record, and Product Specification. Users with the Advanced Reporting Administrator authority profile have access to the export options.
The extract options are available from the list views of the supported record types. The Advanced Search facility can be used to filter the list view to the desired set of records to extract. The extract is run as a batch job, with an email notification being sent on completion. The generated CSV files are stored in the Report Outputs library.
In order to avoid the generation of excessively large CSV files, a size limit is imposed, based on the setting of the portal's File Attachment Size Limit system parameter.
To extract Suppliers:
Open a list view of Suppliers.
Use the Advanced Search facility to filter the contents to the suppliers you wish to extract.
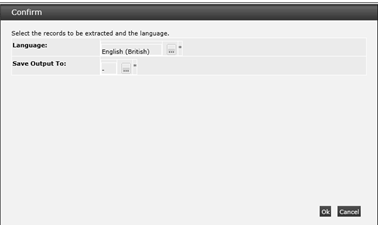
Select the Extract Data action. The Confirm Data Extract dialog box appears.
Click the icon to select a language for which locale-dependent fields are to appear in the extract file. The default is your locale/language. This is a mandatory field.
Click the icon to select a report output folder where the generated data file is to be saved.
To continue with the extract, click Ok. To return to the list view, click Cancel.
A submission confirmation message box is shown. Click Ok to return to the Suppliers list view.
A Supplier-Site Data Extract batch job is submitted to create the extract file. On completion, you will receive an email notification with a link to the file in the Data Extracts area of the Report Outputs (see "Viewing Extract Files").
|
Note: In the event of the maximum file size being exceeded, the extract file will truncated at the end of the last complete record and a final row output, reading: FILE TRUNCATED - SIZE LIMIT EXCEEDED. In this case, the file name will be prefixed:* INCOMPLETE. |
The same extract file is used for both supplier and site data extracts. The CSV file name is SupplierExtract, with the batch job number appended.
The file contains a row for each of the supplier's sites, but for the supplier extract, the only site data included is the site name (both local and business languages), site code, and site status.
The first row will contain the unique system text for the field; the second row will contain the system text specifically for reporting (both shown in the selected language). The first column will contain an incrementing sequence number, starting from 1 (this is of use to reset the file to the original sequence after making changes in Excel). The second column will contain an automatically assigned unique compound key based on the record type and field.
All fields on the Supplier record will be output, including any custom fields, but excluding change history data. The contents of any embedded list views (such as the list of Contacts) are not output.
The individual rows of tables are output as separate rows (the parent data is not repeated). For example, a supplier with two sites, each with two entries in their References table would output as:
| 1 | Supplier A details | Supplier A, Site 1 details | Site A-1 | Reference 1 |
| 2 | Reference 2 | |||
| 3 | Supplier A, Site 2 details | Site A-2 | Reference 1 | |
| 4 | Site A-2 | Reference 2 | ||
| 5 | Supplier B details | Supplier B, Site 1 details | Site B-1 | Reference 1 |
| 6 | Reference 2 | |||
| 7 | Supplier B, Site 2 details | Site B-2 | Reference 1 | |
| 8 | Site B-2 | Reference 2 |
Columns that relate to a glossary (such as Business Category) contain the Description (not the Code) of the glossary record. Contact information is included, but not contact roles.
To extract Sites:
Open a list view of Sites.
Use the Advanced Search facility to filter the contents to the sites you wish to extract.
Select the Extract Data action. The Confirm Data Extract dialog box appears.
Click the icon to select a language for which locale-dependent fields are to appear in the extract file. The default is your locale/language. This is a mandatory field.
Click the icon to select a report output folder where the generated data file is to be saved.
To continue with the extract, click Ok. To return to the list view, click Cancel.
A submission confirmation message box is shown. Click Ok to return to the Sites list view.
A Supplier-Site Data Extract batch job is submitted to create the extract file. On completion, you will receive an email notification with a link to the file in the Data Extracts area of the Report Outputs (see "Viewing Extract Files").
|
Note: In the event of the maximum file size being exceeded, the extract file will truncated at the end of the last complete record and a final row output, reading: FILE TRUNCATED - SIZE LIMIT EXCEEDED. In this case, the file name will be prefixed:* INCOMPLETE. |
The same extract file is used for both supplier and site data extracts (see "Extracting Suppliers"). The CSV file name is SiteExtract, with the batch job number appended.
The file contains a row for each site, with the parent supplier name (both local and business languages) and supplier code on the first site row.
All fields on the Site record will be output, including any custom fields, but excluding change history data. The contents of any embedded list views (such as the list of Contacts) are not output. The Growers List table is excluded.
|
Note: If a full combination of supplier and site data is required, two separate Supplier and Site extract files must be created and manually merged using the common Supplier Code as the key. |
To extract Product Records:
Open a list view of Product Records or Produce Product Records.
Use the Advanced Search facility to filter the contents to the products you wish to extract.
Select the Extract Data action. The Confirm Data Extract dialog box appears.
Click the icon to select a language for which locale-dependent fields are to appear in the extract file. The default is your locale/language. This is a mandatory field.
Click the icon to select a report output folder where the generated data file is to be saved.
To continue with the extract, click Ok. To return to the list view, click Cancel.
A submission confirmation message box is shown. Click Ok to return to the Product Records list view.
A Product Record Data Extract batch job is submitted to create the extract file. On completion, you will receive an email notification with a link to the file in the Data Extracts area of the Report Outputs (see "Viewing Extract Files").
|
Note: In the event of the maximum file size being exceeded, the extract file will truncated at the end of the last complete record and a final row output, reading: FILE TRUNCATED - SIZE LIMIT EXCEEDED. In this case, the file name will be prefixed:* INCOMPLETE. |
The CSV file name is ProductRecordExtract for non-Produce Product Records and ProduceProductRecordExtract for Produce Product Records, with the batch job number appended.
The first row will contain the unique system text for the field; the second row will contain the system text specifically for reporting (both shown in the selected language). The first column will contain an incrementing sequence number, starting from 1 (this is of use to reset the file to the original sequence after making changes in Excel). The second column will contain an automatically assigned unique compound key based on the record type and field.
All fields on the Product Record will be output, including any custom fields, but excluding change history data. The contents of any embedded list views (such as the list of Specifications) are not output.
Columns that relate to a glossary (such as Business Category) contain the Description (not the Code) of the glossary record.
To extract Product Specifications or Produce Product Specifications:
Open a list view of Specifications or Produce Specifications.
Use the Advanced Search facility to filter the contents to the specifications you wish to extract.
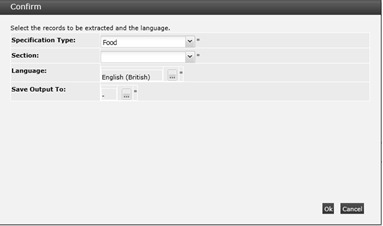
Select the Extract Data action. The Confirm Specification Data Extract dialog box appears.
Select the specification type. If no specifications of the selected type appear in the list view, the extract file will be empty. This field is omitted if extracting Produce specifications, otherwise it is mandatory.
Select which section's data is to be extracted. The options are filtered based on the selected Specification Type. If no specifications of the selected type that appear in the list view contain the selected section type, the extract file will be empty. The field is mandatory.
Click the icon to select a language for which locale-dependent fields are to appear in the extract file. The default is your locale/language. This is a mandatory field.
Click the icon to select a report output folder where the generated data file is to be saved.
To continue with the extract, click Ok. To return to the Confirm dialog box, click Cancel.
A submission confirmation message box is shown. Click Cancel to return to the Specifications list view.
A Product Specification Data Extract batch job is submitted to create the extract file. On completion, you will receive an email notification with a link to the file in the Data Extracts area of the Report Outputs (see "Viewing Extract Files").
|
Note: In the event of the maximum file size being exceeded, the extract file will truncated at the end of the last complete record and a final row output, reading: FILE TRUNCATED - SIZE LIMIT EXCEEDED. In this case, the file name will be prefixed:* INCOMPLETE. |
The CSV file name is ProductSpecificationExtract, with the batch job number appended.
The file contains details for the selected specification section.
The first row will contain the unique system text for the field; the second row will contain the system text specifically for reporting (both shown in the selected language). The first column will contain an incrementing sequence number, starting from 1 (this is of use to reset the file to the original sequence after making changes in Excel). The second column will contain an automatically assigned unique compound key based on the record type and field.
All fields on the Specification section will be output, including any custom fields, but excluding change history data.
In order to identify the specification, the left most columns of the output for any section will consist of the following from the Main Details section:
Specification Name; Spec Number; Version; Product Coverage (Quantity/Product Number/Alt. Product No. (comma-separated if multiple); Brand; Business Categories; Supplier Name & Code; Site Name & Code (comma-separated if multiple); Product Technologist; Specification Status.
The individual rows of tables are output as separate rows (the parent data is not repeated). For example, a specification with a recipe containing two ingredients, each with two raw materials would output as:
| 1 | Spec 1 details | Ingredient A details | Ingredient A raw material 1 details |
| 2 | Ingredient A raw material 2 details | ||
| 3 | Ingredient B details | Ingredient B raw material 1 details | |
| 4 | Ingredient B raw material 2 details | ||
| 5 | Spec 2 details | Ingredient A details | Ingredient A raw material 1 details |
| 6 | Ingredient A raw material 2 details | ||
| 7 | Ingredient B details | Ingredient B raw material 1 details | |
| 8 | Ingredient B raw material 2 details |
Columns that relate to a glossary (such as Business Category) contain the Description (not the Code) of the glossary record. Columns that have translations contain the value in the selected language, regardless of the specification's Pack Copy Language.
The generated data files are stored as Report Output records in a similar way as report and KPI outputs. See "Viewing Report Outputs."
To access the Data Extract files, select the Report Outputs option in the Reports navigation menu.
The extract files are located in the Data Extracts area, as a library of folders. The folder is specified when the extract is submitted.
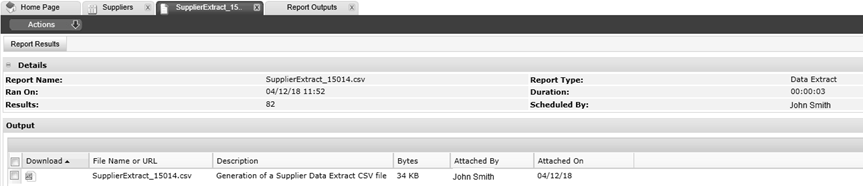
Locate an extract file by navigating through the folder hierarchy, or using the search box. The columns can be sorted in ascending or descending sequence. The Report Name column shows the name of the extract file.
To see the details for an extract, double-click the row. A tab opens with the details. You can also open the actual file clicking the icon in the Open column, then choosing to open or save the file.
Table 8-1 Data Extract Report Output Details Page
| Details | Description |
|---|---|
|
Report Name |
The name of the generated data extract CSV file. |
|
Report Type |
This will show as Data Extract. |
|
Ran On |
The date and time the extract ran. |
|
Duration |
The length of time it took to generate the file. |
|
Results |
The number of records in the file. |
|
Scheduled By |
The name of the user who scheduled the extract. |
|
Output |
A list of the actual extract files, held as attachments, with columns showing an icon of the file format, the file name, the report description, the size of the file in bytes, the name of the user who scheduled the extract, and the date it was created. |
Click the icon in the Download column to view the extract, then choose to open or save the file.