![]()
![]()
![]()
![]()
|
|
|
|
|
Caution: You must perform this step. If the upgrade is not successful, you might need to restore the database to attempt to install again.
To export a user with the following information:
Use the following command:
exp designer@db1_dev1 file=file_to_export.dmp buffer=99999
Note: When you execute this command, you are prompted for the user password.
The setup.exe program is available the Oracle Software Delivery Cloud (https://edelivery.oracle.com).
The InstallShield Wizard prepares to install the application server.
You are prompted to delete the previous installation of the application server.
A welcome page appears.
A message about the upgrade appears.
The Customer Information page appears.
Note: You must enter the company URL that you specified during the original Central Designer installation.
The following page appears.
Note: The instructions, paths, and Start Menu navigation in this guide assume you are installing to the default location. Oracle strongly recommends that you install the software to the default location.
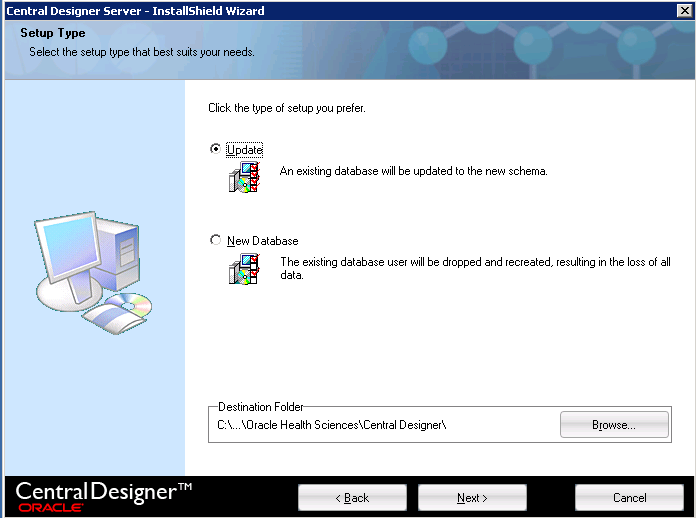
The following page appears.
Because you are upgrading, the Create New Database checkbox is grayed out.
|
Field |
Database |
|---|---|
|
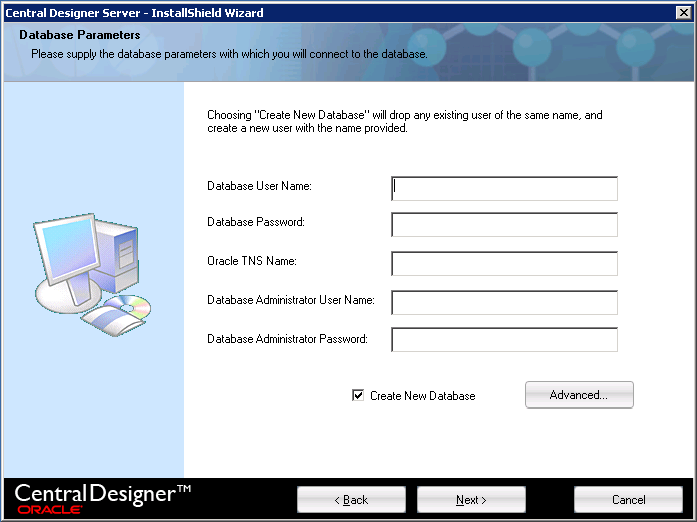
Database User Name |
The Oracle user name for the Central Designer database user. Note: The password must not contain any of the following characters: @ & ( ) [ or ]. |
|
Database Password |
The password for the Central Designer database user. |
|
Oracle TNS Name |
Alias from TNSnames.ora file. This TNS name is used to connect to the Central Designer database instance. |
|
Database Administrator User Name |
The Oracle user account for the database administrator. This account is used to create the database user. If you provide a database administrator user name different from the one in your original database, you must enter the new user name. Note: The user name cannot be a SYSDBA user account. |
|
Database Administrator Password |
The password for the database administrator. If you provide a database administrator password different from the one in your original database, you must enter the new password. Note: The password must not contain any of the following characters: @ & ( ) [ or ]. |
Note: Do not use Oracle reserved words for user names or passwords.
The following page appears.
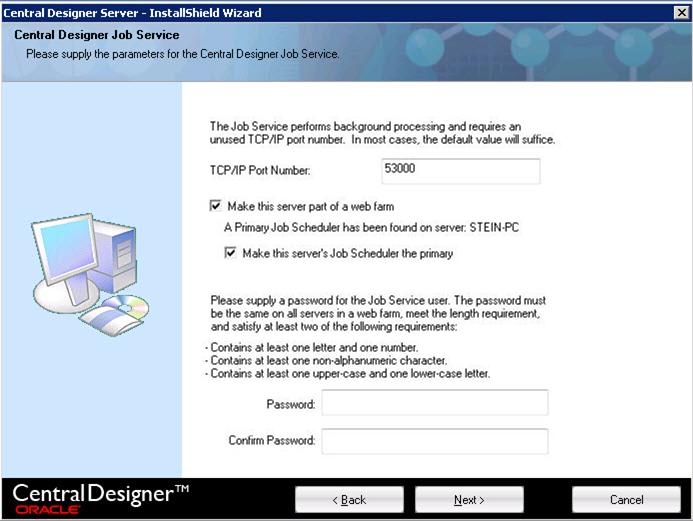
Note: If you are installing the server as part of a web farm, all of the servers can use the same port number, as long as the port is unused.
After you select the checkbox, the installation checks the database to see if a primary Job Scheduler has been specified. Additional options appear, depending on whether you are installing the first or second (or higher) server.
Note: Make sure that the user password meets the requirements listed on the page.
The Network Parameters page appears.
Note: When the application server is installed in an environment that includes a hardware networking switch, the URL that you enter for the Web server URL root field must match the URL that the networking switch uses to address the application server.
As you enter a value in the Web server URL root field, the Public server URL root field is automatically updated with the same value. If you edit the value in the Public server URL root field, the field is no longer updated automatically when the Web server URL root field is updated.
If the value for the Public server URL root field does not need to be different from the Web server URL root field, make sure that the values in both fields match.
The Choose Certificate dialog box appears.
The Issued to, Issuer, Expiration, and Friendly name fields are populated.
Note: On each Central Designer application server, an administrator must install the certificate that is used for signing web service authorizations to the LOCAL_MACHINE\MY store. The Central Designer installation process grants Full Control to access the certificate private keys to the IIS AppPool\DefaultAppPool user and the NETWORK SERVICE user.
If a user other than the IIS AppPool\DefaultAppPool user is running the DefaultAppPool application pool, you must grant the user Full Control to access the private keys, or the user is unable to sign using the certificates. For more information, see Installing certificates for signing web service authorizations and deployment packages.
The Client Installation Configuration page appears.
The environment name appears on the web page to which you navigate to start the Central Designer application.
The InForm Deployment page appears.
The Choose Certificate dialog box appears.
The Issued to, Issuer, Expiration, and Friendly name fields are populated.
Note: For studies hosted by Oracle Cloud for Industry, the certificate must be issued by a trusted commercial Certificate Authority.
The Start Copying Files page appears.
The installation begins. The Setup Status page appears, showing the status of the installation.
When the installation is complete, the InstallShield Wizard Complete page appears.
Copyright © 2007, 2016 Oracle and/or its affiliates. All rights reserved.