This topic describes how to change the value of the skipAutoProvisioning property in a Hive table.
When a Hive table has a skipAutoProvisioning property set to true, the BDD Hive Table Detector will skip the table for data processing. For details, see DP CLI overview.
You can change the value of skipAutoProvisioning property by issuing an SQL ALTER TABLE statement via the Cloudera Manager's Query Editor or as a Hive command.
To change the value of the skipAutoProvisioning property in a Hive table:
-
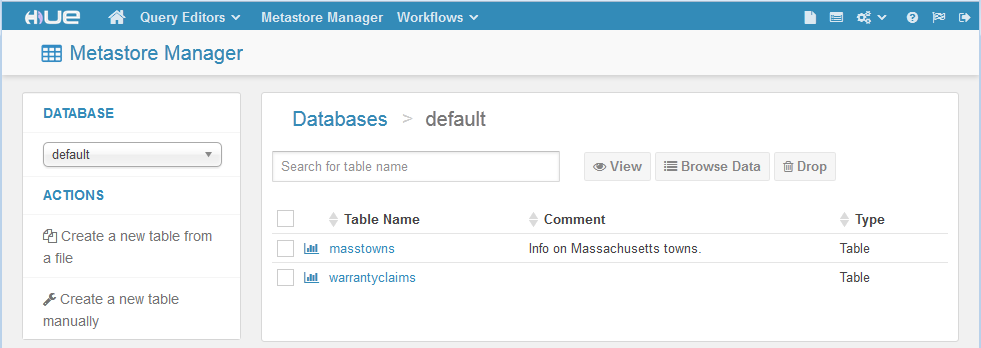
From the Hue Web UI page, click
Metastore Manager. As a result, you should see
your Hive tables in the default database, as in this example:
-
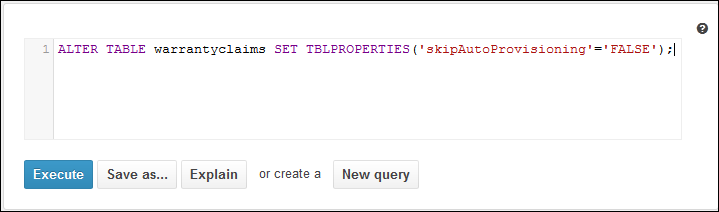
In the Query Editor, enter an
ALTER TABLE statement similar to the following
example (which is altering the warrantyclaims table) and click
Execute.
An alternative to using the UI is to issue the
ALTER TABLE statement as a Hive command:
hive -e "ALTER TABLE warrantyclaims SET TBLPROPERTIES('skipAutoProvisioning'='FALSE');"
