Configuring the layer name and display options

On the Layer Properties tab for the map layer, you configure the layer name and options for displaying the map locations, and, for heat map layers, the cloud overlay.

On the Layer Properties tab:

  1. In the Layer name field, type the name of the layer.

    The layer name is used to identify the layer on the map legend.

    For numbered point layers, the name is also used in the layer list on the numbered point list.

  2. If the view contains multiple geocode attributes, then from the Geo filtering attribute list, select the attribute to use when searching or filtering the locations.

    By default, the map layer uses the same geocode attribute for both the map points and the filtering.

  3. For point layers and heat map layers, from the Size of points list, select the size of the map location points.
  4. For numbered point and point map layers, from the Layer color list, select the color to use to display the points.
  5. For a heat map layer, to configure the color and metric value range:
    Layer properties for a heat map layer
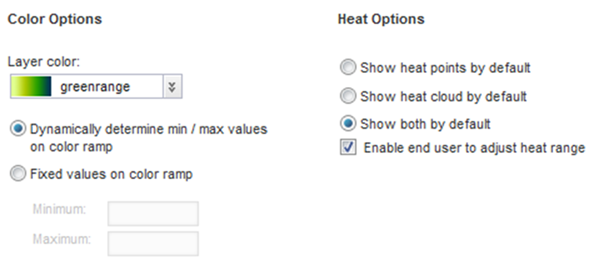
    1. From the Layer color list, select the color range to use for the map points and cloud.
    2. To automatically calculate the minimum and maximum metric values for the color range, click Dynamically determine min/max values on color ramp.
    3. To specify the minimum and maximum values, click Fixed values on color ramp, then in the Minimum and Maximum fields, type the minimum and maximum values.
  6. For a heat map layer, under Heat Options:
    1. Click the radio button to indicate whether to display by default the location points, heat cloud, or both.
    2. To allow end users to adjust the heat range, check the Enable end user to adjust heat range check box.