You can add a new attribute to a project data set by specifying Groovy code to produce the attribute and by specifying a new attribute name and data type for the result. You then preview the change. If the result is what you expect, you can add it to the transformation script.
To add an attribute:
-
In the
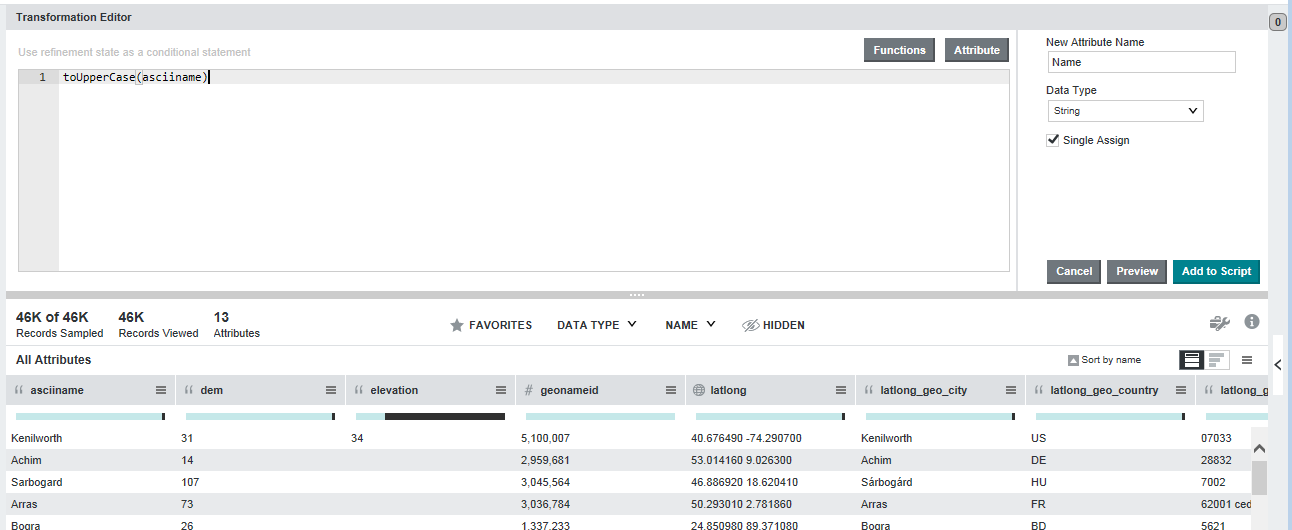
Transformation Editor, specify the Groovy code
necessary add the attribute.
This code can be as simple or as complicated as necessary for your use case.In this simple example, the toUpperCase function examines the asciiname attribute, converts its values to upper case, and creates a new attribute called Name:
If you are done making changes to the project data set, you can commit the changes. See Running the transformation script against a project data set.
