9 Configuring App Settings
This chapter describes how to update data sources and how to configure the app settings such as parameters, caching, and translations.
It includes the following sections:
9.1 Updating or Refreshing the Data Source
9.1.1 Add Multiple Subject Areas to a Data Source
You can add multiple subject areas to your app data source:
-
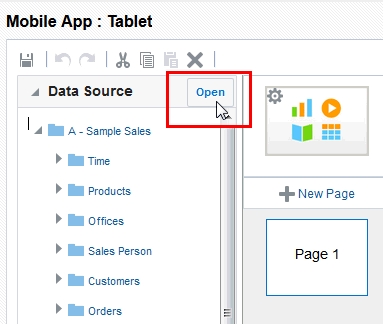
In the Data Source pane, click Open.
-
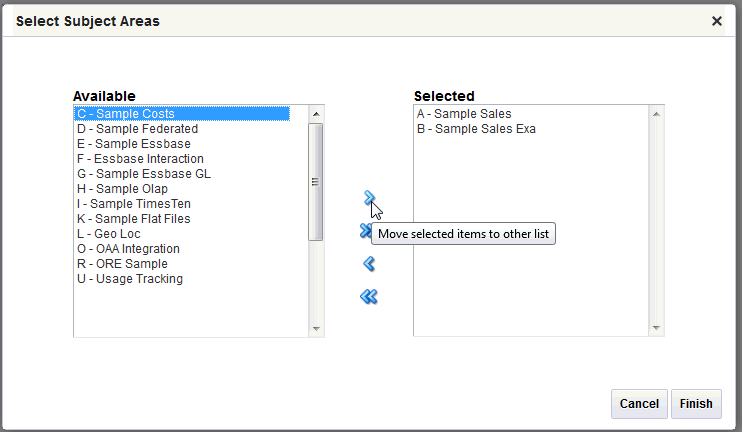
In the Select Subject Areas dialog, from the Available list, select one or more subject areas.
-
Click Move to move the subject areas to the Selected list.
-
Click Finish.
9.1.2 Refresh Excel Data
To refresh or re-upload your Excel data source:
-
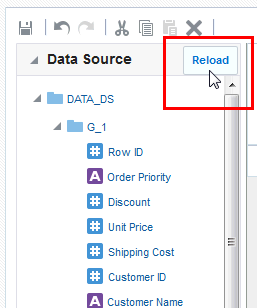
In the Data Source pane, click Reload. (This option is enabled only when the data source is Excel.)
-
In the Refresh Excel dialog, either drag the new file from your desktop and drop it on the dialog, or click browse to locate the file in your file system.

9.1.3 Update or Switch a BI Publisher Data Model
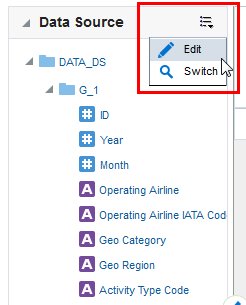
In the Data Source pane, click the menu and choose Edit or Switch.
-
Edit:
-
Opens the BI Publisher Data Model editor. Update the data model following the guidelines in the Oracle Fusion Middleware Data Modeling Guide for Oracle Business Intelligence Publisher.
-
Click Return to return to the Mobile App Designer.
-
-
Switch:
-
Select the BI Publisher data model you wish to switch to.
-
Click OK to return to the Mobile App Designer.
-
9.2 Accessing App Settings
There are two ways to access the app-level properties and settings:
-
Click the app icon
-
Click the Setting button

See the following sections for tasks you can perform from the Setting menu:
9.3 Configuring Parameters
How you configure parameters depends on whether your data source is a BI Publisher data model or a BI subject area.
9.3.1 Configure Parameters for a BI Subject Area Data Source
To add parameters to a subject area data source:
-
In the Setting properties, under Parameters click Open.
-
In the Parameters dialog, click Add.

-
In the Select a Column to Define Parameter dialog, select the column to define the parameter and click OK. In this example, the Per Name Year column is chosen to create the parameter.

-
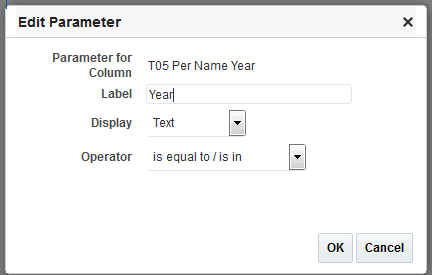
Define the parameter settings in the Edit Parameter dialog.
-
Enter the label to display for the parameter in the app.
-
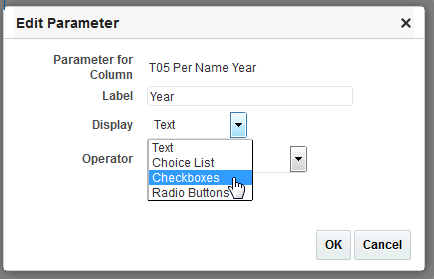
Select a parameter display option.
-
Calendar - Provides users with a field into which they can enter a specific date, as well as a calendar pop-up to select a date. This display option is only available for selection if the parameter has a date column type.
-
Choice List - Provides users with a collapsed list of all prompt values. This display option is useful for a long list of values where you want to provide the user with the ability to search for a specific value.
-
Checkboxes - Provides users with a visible list of all prompt values where a small, selectable box displays before each value item. This display option is suitable for a prompt that contains a smaller set of data.
-
Radio Buttons - Provides users with a visible list of all prompt values where a radio button is displayed before each prompt value. This display option is useful for short lists of values where the user is to select only one prompt value.
-
Text - Provides users with a field into which they can enter a specific prompt value. This display option cannot be used for multiple prompt values. Only the field and the field label are displayed for this option.
-
-
Click OK.
-
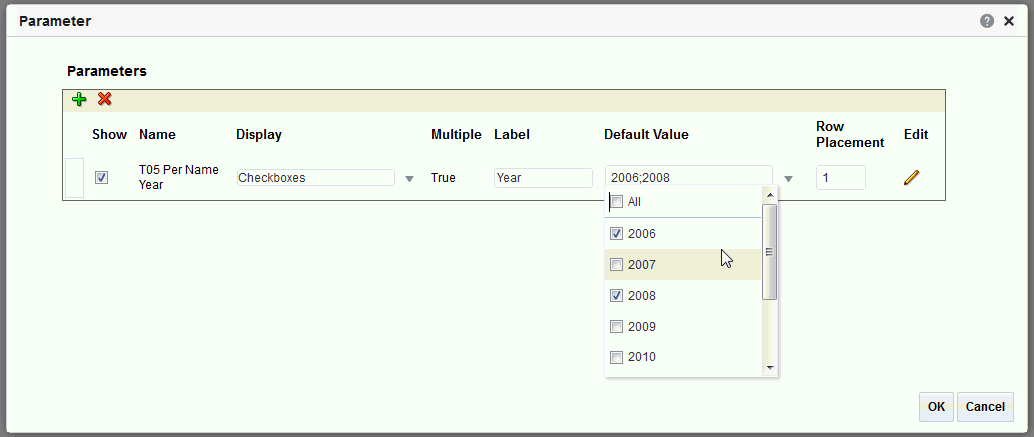
In the Parameters dialog, enter a default value for the parameter.
-
Click OK.
9.3.2 Configure Parameters for a BI Publisher Data Model Data Source
Parameters are defined in the BI Publisher data model. To add a new parameter, see Section 9.1.3, "Update or Switch a BI Publisher Data Model."
The app editor enables you to configure the parameter settings specifically for each app that uses the data model.
To configure the parameters for this app:
-
In the Setting properties, under Parameters click Open.

-
Customize the parameter settings for this app by making selections for the following display options:
This property controls whether the parameter is displayed to the user. Disable the Show property if you do not want the user to see or change the parameter values that are passed to the data model.
This property is customizable for menu type parameters only. For menu type parameters, the following display options are available:
-
Menu - Provides users with a collapsed list of all prompt values. This display option is useful for a long list of values where you want to provide the user with the ability to search for a specific value.
-
Checkboxes - Provides users with a visible list of all prompt values where a small, selectable box displays before each value item. This display option is suitable for a prompt that contains a smaller set of data.
-
Radio Buttons - Provides users with a visible list of all prompt values where a radio button is displayed before each prompt value. This display option is useful for short lists of values where the user is to select only one prompt value.
This property indicates whether multiple values may be selected for a menu parameter. This property is defined in the BI Publisher data model and is display only here.
Use this property to edit the display labels shown for each parameter. The default values are defined in the data model.
Use this property to configure the default value. Choose "Default" to pass the default value defined in the data model.
Not used.
9.4 Using BI Repository Variables in Parameters
When your data source is a BI Subject Area, you can pass the value of your Oracle BI repository variables to parameters in Mobile App Designer.
9.4.1 What Are BI Repository Variables?
Oracle BI Enterprise Edition supports system-defined variables such as system date and current login user, as well as user-defined variables. For information about the Oracle BI Enterprise Edition variables, see "Using Variables" in Oracle Fusion Middleware User's Guide for Oracle Business Intelligence Enterprise Edition.
9.4.2 Syntax for Referencing the Variable
To reference a variable from OBI EE use the syntax:
@{variable_name}

Example:

@{system.currentTime}
9.4.3 Example
In this example, you use the value of the system.currentTime variable to view orders from the previous week.
-
Click Settings to view the App Properties.
-
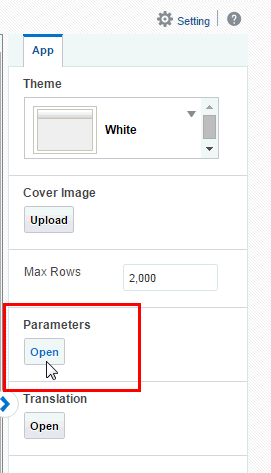
Under Parameters click Open.
-
In the Parameters dialog, click Add.

-
In the Select a Column to Define Parameter dialog, select the column to define the parameter and click OK. In this example, the Per Name Year column is chosen to create the parameter.

-
Define the parameter settings in the Edit Parameter dialog.

-
Enter the valuable for the variable to pass to the app. In your expression, refer to the RPD variable using the syntax:
@{variable_name}For example, to use the RPD variable for system time to show only orders from the previous year, you would enter:
CAST ((year(@{system.currentTime})-1) AS CHAR)
Refreshing Metadata:
If you add new RPD variables (such as user defined variables), you must refresh the metadata from the analytics Administration screen before using it. You refresh the metadata by navigating to the Administration page, then under Maintenance and Troubleshooting, click Reload Files and Metadata.9.5 Setting App Caching Properties
For BI Publisher and Excel data sources, you can Enable Data Caching.
9.5.1 Enable Data Caching
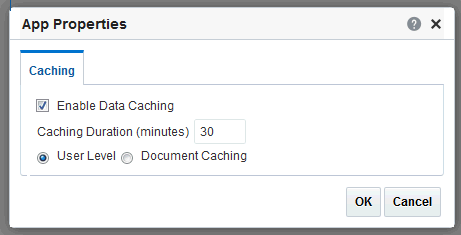
When data caching is enabled, the data generated by the app is stored in the cache. Subsequent requests to view this app with the same parameter selections display the app using the data that is stored in the cache. This setting enhances performance by using stored data to generate the app rather than regenerating the data from the source. The data remains in the cache according to the time limit that is specified in the Cache Duration property.
When you enable caching you can choose between two types of caching:
-
User Level cache - stores a separate cache for each user. The data shown to each user comes only from the private cache. When enabled, this property ensures that each user can only see data that they are authorized to view. Be aware that user-level cache has less efficient performance. If the data is not user sensitive, you can disable this property to enhance performance.
-
Document cache - stores the app in cache. When a user views the app, the document (data plus app layout) is placed in the cache. When any other user views the same app with the same parameter selections, the app is retrieved from the cache. The app document remains in the cache according to the caching duration specified.
To configure caching for your app:
-
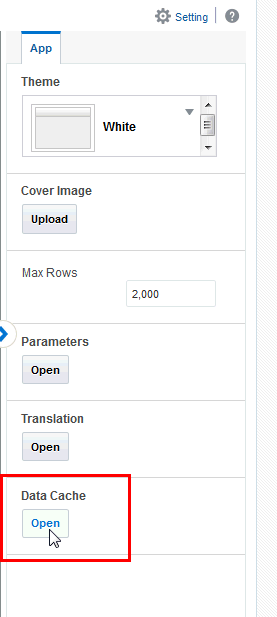
Click Setting to view the App Properties. Under Data Cache click Open.
-
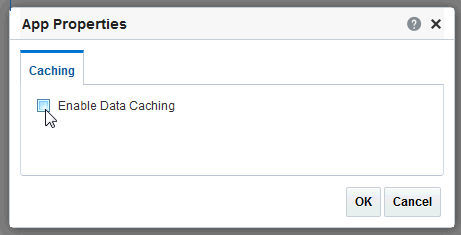
On the App Properties dialog, select Enable Data Caching.
-
Choose User Level or Document Caching and enter the length of time in minutes for the data to remain in the cache.
-
Click OK.
9.6 Adding Translations
This section describes translation support in the Mobile App Designer. It includes the following topics:
9.6.1 What Is App Translation?
App translation is a feature of Mobile App Designer that enables you to extract the translatable strings from an app layout into an industry-standard XLIFF translation file.
You can translate these strings within your organization or send the file to a localization provider. You then upload the translated XLIFF file back to the app and assign it the appropriate locale.
At run time, when a user's Locale preference is set to the locale of an available XLIFF translation file, the translated strings from the XLIFF are applied to the app and the user sees the translations of the text strings appropriate for his locale.
9.6.2 Downloading a Translation File
To generate and download the XLIFF file for an app:
-
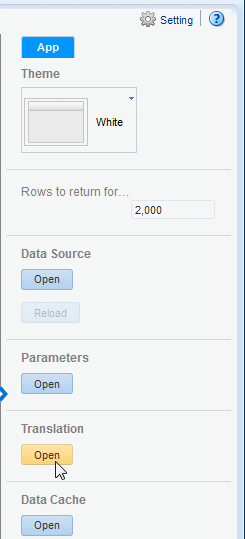
In the Setting properties, under Translation click Open.
-
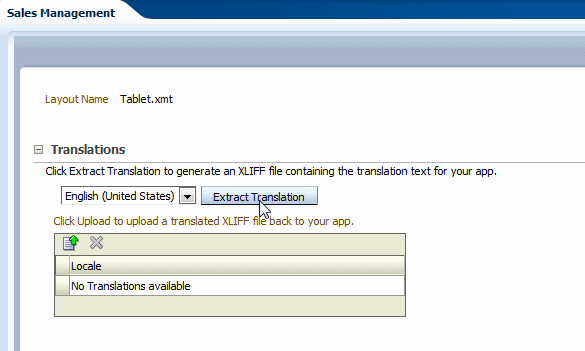
In the Translations region, click Extract Translation.
BI Mobile App Designer extracts the translatable strings from the template and exports them to an XLIFF (.xlf) file.
-
When prompted, save the XLIFF file to a local directory.
9.6.3 Translating the XLIFF File
After downloading the XLIFF file, you can send it to a translation provider, or using a text editor, you can enter the translation for each string. For information about how to edit an XLIFF file, see the chapter "Translation Support Overview and Concepts" in the Oracle Fusion Middleware Report Designer's Guide for Oracle Business Intelligence Publisher.
A "translatable string" is any text in the app that is intended for display, such as table headers and field labels. Text supplied at run time from the data is not translatable.
You can translate the app XLIFF file into as many languages as desired and associate these translations to the original app for multiple language support in a single app.
Important:
Ensure that when you save your translated file, you save it with UTF-8 encoding.9.6.4 Uploading the Translated File
To upload the translated XLIFF:
-
Open the app for editing and select Translation from the Settings menu.
-
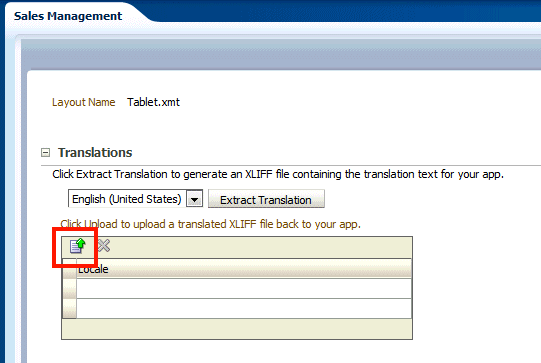
In the Translations region, click the Upload toolbar button.
-
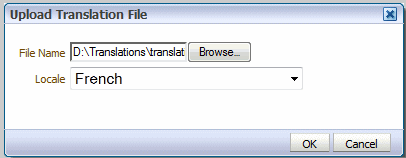
In the Upload Translation File dialog locate the file in a local directory and select the Locale for this translation.
-
Click OK to upload the file and view it in the Translations table.
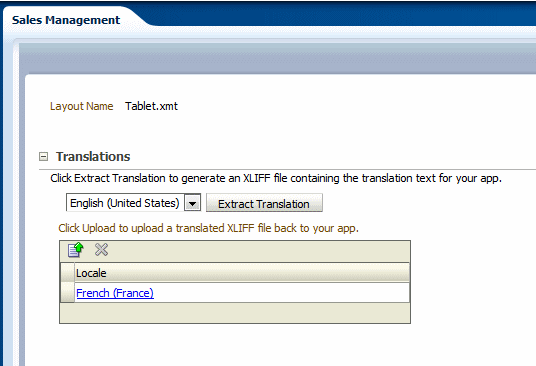
Now users whose locale setting matches the locale assigned to this translation see the translated strings when viewing this app.