To complete these steps, you will need to be in the Customer Service -> Stores portion of the Site Manager. If you are unsure where that section is, see Work with a Store.
You will edit the store that you are adding the event to.
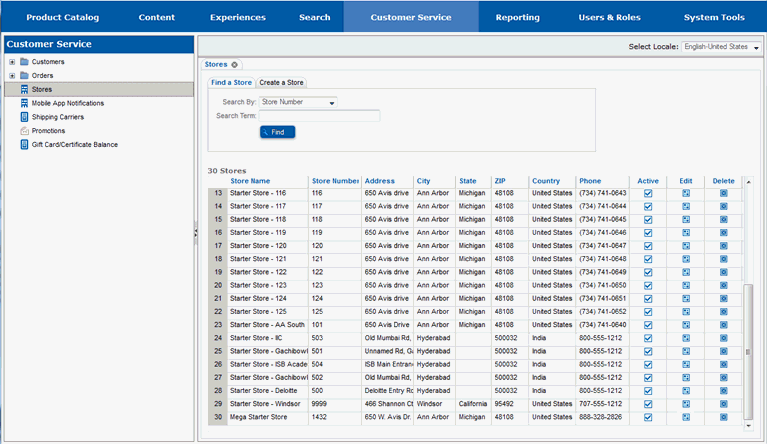
Locate the store you will be adding the event to.
Select the Edit button for the store.
The page will redraw and you will see multiple tabs for the store.
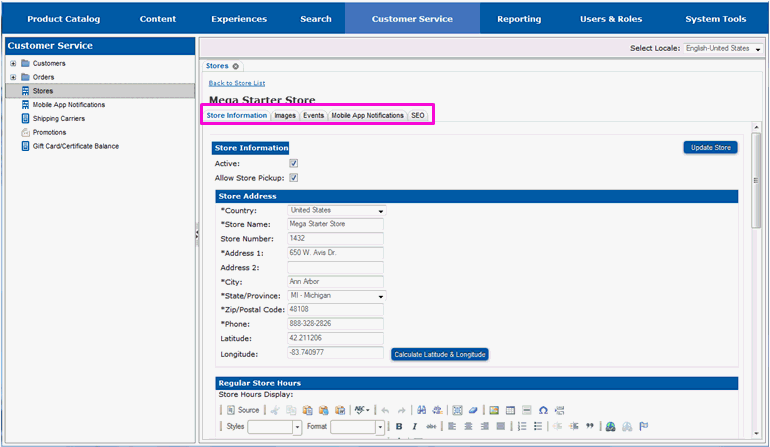
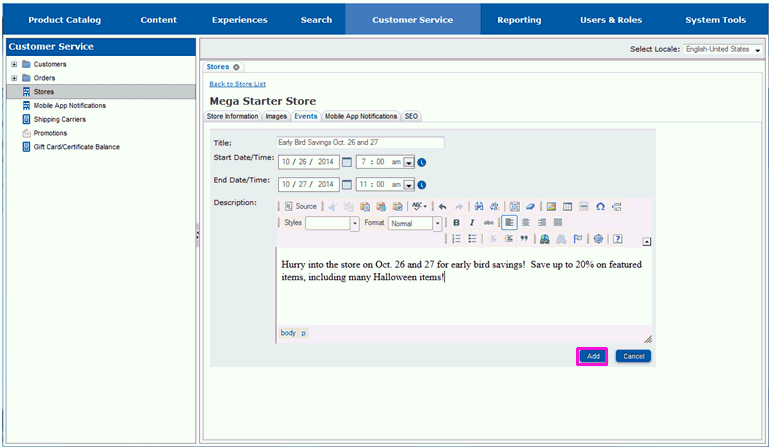
You will be working in the Events tab.
Select the Events tab.
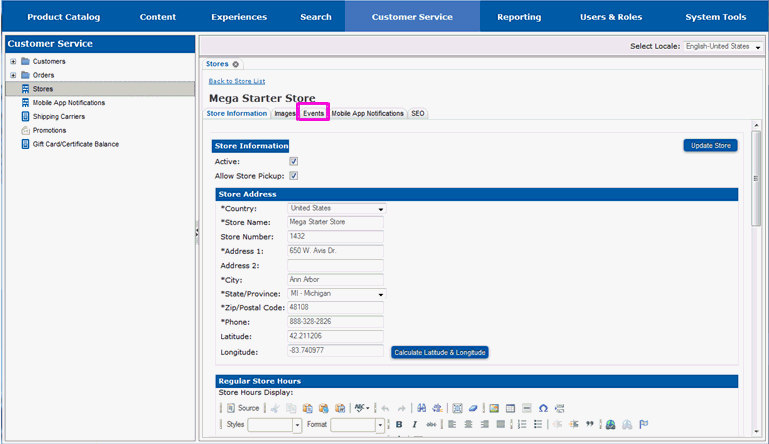
The page will redraw and you will see fields to define events for the store, along with a list of any events currently defined for the store.

Enter a title for the event in the Title entry box.
Enter the date the event should start appearing on the web site in the Start Date field. You can also use the calendar icon to select the date.
In the Start Time field, enter the time on the start date when the event should appear on the web site. You can also use the clock icon to select a time.
Enter the date the event should stop appearing on the web site in the End Date field. You can also use the calendar icon to select the date.
In the End Time field, enter the time on the end date when the event should stop appearing on the web site. You can also use the calendar icon to select the time.
Enter a description for the event in the Description edit box. Use the edit controls to format the description as you like.
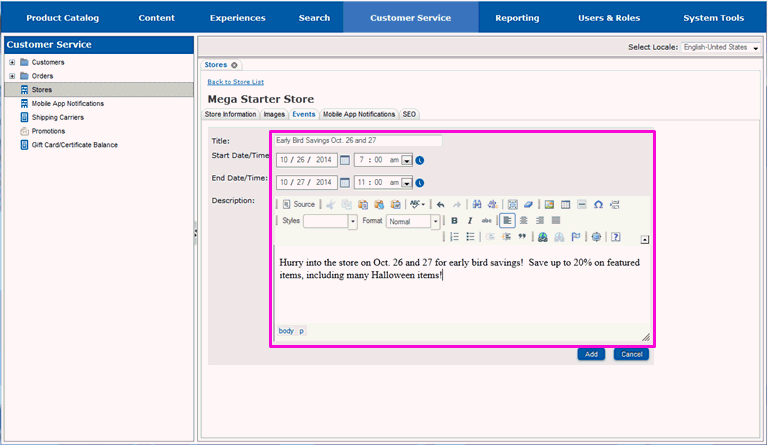
When you have completed adding the title and description for the event, the event should be saved.
Select Add.
The page will redraw and you will see your event added the list of events defined for the store.
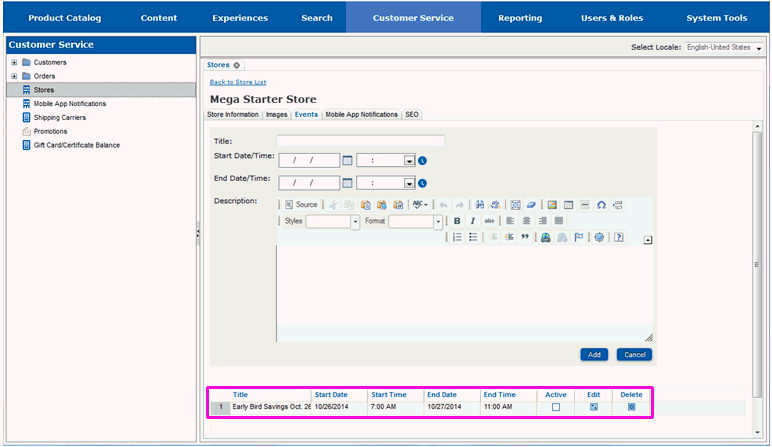
Newly added events are not active and will not be shown on the store locator page until they are activated.
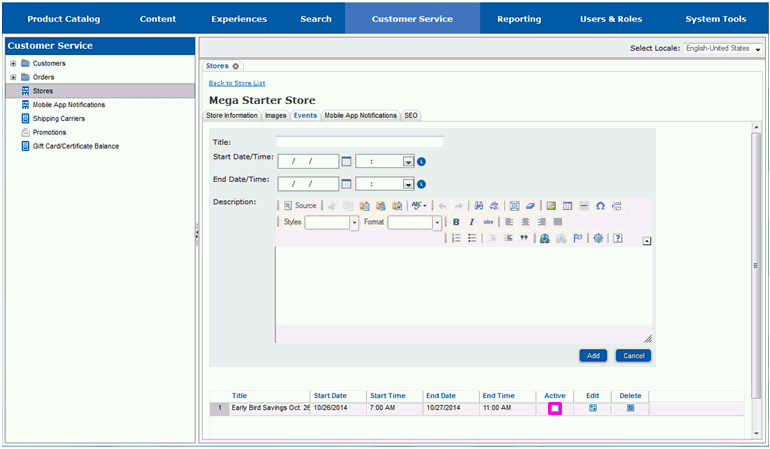
Select the Active checkbox to the right of the store event.
The page will redraw and you will see a message indicating the event has been activated.
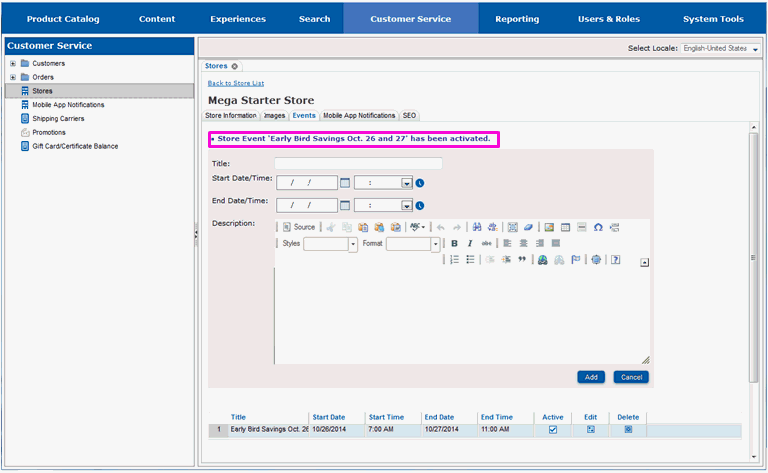
The event is now available for display on the store locator page on the website. Continue on to section View New Items on a Store Locator Page if you want to view the new event on the store locator page.