
In the Content, Product Catalog, and Experience Management sections of the Site Manager, a WYSIWYG text editor is used.
The text editor works similar to Microsoft Word, where you have various formatting and feature options presented through toolbars. A few special items that are unique to the text editor that is used are noted below.
Use the "Paste from Word" option  when pasting text in from Word. The regular paste option may paste in formatting from Word that can overwrite the formatting you set up in the text editor.
In the text editor, highlight the text you want to make a hyperlink.
On the WYSIWYG text editor toolbar, select the Hyperlink button  .
.
In the Link windowthat opens, leave the link type as URL and choose the protocol type (e.g., http:, https:, etc.) from the drop down.
Enter the URL you would like the selected text to link to.
Select OK. The dialog box closes and you see the selected text highlighted and linked. Save the content and preview it to confirm the link works as you want it to. If you want this link to launch a new browser window when selected, toggle to the HTML text view and insert html before the “a href” tag as follows: "<a target=”_blank” a href=….>". Preview to confirm the link works as you want it to.
On the WYSIWYG Text editor toolbar, select the Image button  to advance to the Image Properties window.
In the Image Properties window, enter the full image location on the file server (e.g., assets/images/header_nav/logo.gif) or from an external Web site (e.g. http://www.google.com/images/logo.gif). Images can be uploaded to the image server using the Upload media function of the Content section of Site Manager. You can also use Upload media to find the path URL to paste in the dialog box. Enter alternative text and you can leave the rest of the information blank.
Select OK. The Image Properties window closes and you see the selected image inserted in the WYSIWYG text editor.
On the WYSIWYG text editor toolbar, select the Horizontal Rule icon  .
.
A horizontal rule will be drawn just below the position of the cursor.
In the WYSIWYG text editor, select the Source icon  .
.
If you were in rich text, the text now appears as HTML and you can see the HTML commands used to format the text. 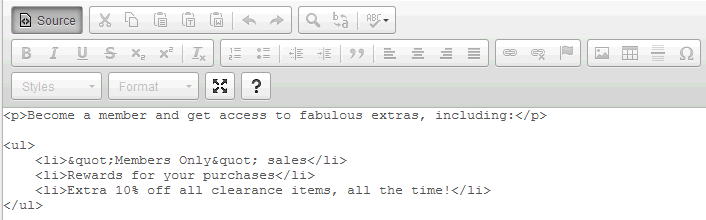
You can now enter new HTML, paste HTML, or modify existing HTML.
To toggle back to rich text, select the Source icon again.
Text in the text editor will appear in Arial font, but the display on the web site according to style sheets employed by the web site. Please note that only when you preview the content do you see the style sheets applied.
Although the text editor provides dropdown menus for font and size, you should avoid using them. You should instead insert the appropriate web site class styles for text and/or links via the text editor’s HTML mode. If you do set the font and size in the text editor, realize you are overwriting the style for that text.
Unlike Microsoft Word, the text editor does not wrap text within the window that you see. As a result you have to scroll over to the right, unless you enter a line break or paragraph (2 lines) break. The following table shows how you can enter a line break and paragraph break in the text editor.

There is no way for the text editor to perform a character count. Also, you will not see your style sheets applied until you preview the selected content.