4 Configuring Fraud Monitor
This chapter describes how to configure Oracle Communications Fraud Monitor.
About Configuring Fraud Detection Rules
The Settings page of the Fraud Monitor user interface lets you configure the rules, manage the users, adapt the notifications and whitelists, as well as perform the Mediation Engine configuration which sets up the data source needed for a successful operation of Fraud Monitor.
The Rules section enables you to configure the patterns that are used to detect fraud and trigger incidents. If the current settings do not trigger any incidents, you may need to change the patterns or raise the points.
Note:
Go to the Platform Setup Application and refer to Session Monitor Installation Guide for settings (for example, network interfaces, DNS, or SMTP) that affect the server running Fraud Monitor.Configuring Rules
Fraud Monitor uses configurable rules to find call patterns which are considered fraudulent and classify the severity of the incident with a points system. On the Rules section, you can decide which rules are used, configure them, and restrict their use.
The navigation bar on the right-hand side of the page lists the preconfigured fixed set of rules you can use.
Figure 4-1 shows the navigation bar on the Settings page.
Figure 4-1 Navigation Bar on the Settings Page
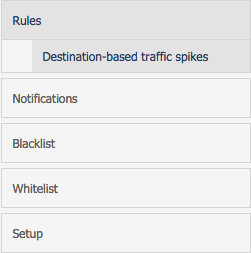
Description of ''Figure 4-1 Navigation Bar on the Settings Page''
Clicking on a rule opens up its configuration panel in the left column. Use the check boxes next to the rule name in the left column to enable and disable the rule.
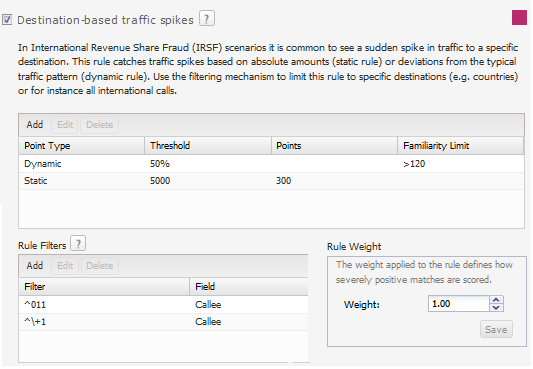
Figure 4-2 shows an example of rules configuration.
Every configuration panel has Add and Delete buttons, which you can use to configure that specific rule. A brief help text is shown above the panel to aid you in the configuration process.
Every rule is assigned a weight. The default is 1.00. The rule weight can be used to make some rules more important than others.
To restrict the applicability of the rule, click the Filters button and enter the caller or callee information in the dialog box.
Figure 4-2 Example of Rules Configuration
Description of ''Figure 4-2 Example of Rules Configuration''
Managing User Permissions
On the User section, you can manage several user accounts to work with Fraud Monitor. By default, only the admin account exists.
Figure 4-3 shows an example of the users list.
To add another user and enable the user to access Fraud Monitor, click on Add users... A window appears where you enter the user name and the email. Then, enter an initial password in the two Password fields. Click Next to go to the Permission Settings dialog where you specify which actions the new user can perform within the product.
Note:
The new user will then be able to connect using the credentials you have chosen. It is recommended that the user change this password at the first connection.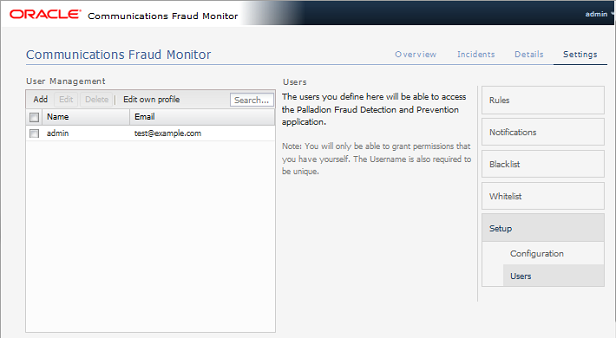
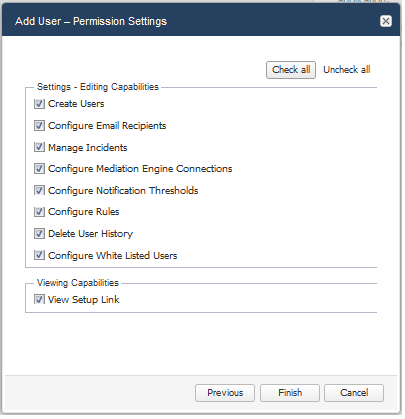
You are presented with a list of the editing and viewing capabilities a user can have. Each capability is named after a feature of the product. Refer to the corresponding section of this guide for more details. Select the boxes of those that you want to grant. You can use the Check all and Uncheck all buttons on the top right to check or uncheck all the boxes at once.
Figure 4-4 shows the user permission settings.
Figure 4-4 Granting Capabilities to the New User
Description of ''Figure 4-4 Granting Capabilities to the New User''
Setting Up Email Notifications
When Fraud Monitor detects an incident, it notifies the users by email.
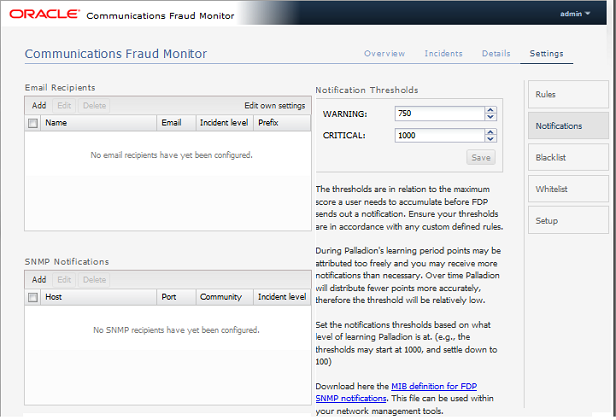
Figure 4-5 shows an example of the notification settings.
To send email notifications, click on Add recipient... In the window that appears, enter the following settings:
-
Name: A name to identify the new entry in the list of recipients
-
Email: The email address to which notifications will be sent
-
Incident level: Select WARNING + CRITICAL to receive all notifications, or CRITICAL to only receive notification on critical incidents
-
Prefix: Emails from the system will contain this prefix in the Subject: field of the recipient inbox
Figure 4-5 Notification Settings for an Email Recipient
Description of ''Figure 4-5 Notification Settings for an Email Recipient''
Adjusting the Notification Levels
To receive more or less notifications, you can adjust the two levels, warning and critical, in number of Incident points. The rules specified in the Rules page assign points to each user of the network. If the number of points for a user exceeds the threshold warning (1000 by default), an email is sent to all recipients of level WARNING. If it exceeds the level critical (1500 by default), the notification is sent to all recipients.
This is a global sensitivity adjustment. You can choose the amount of points each single rule attributes in the Rules section.
Specifying Blacklist Phone Numbers
The Blacklist contains phone numbers, IP addresses, and SIP User Agents which have been verified in fraudulent activity. You can enable and disable the Blacklist feature for specific data types in the configuration menu.
The Blacklist information provided by Oracle is in the international format. You can append a prefix to international numbers or provide a regular expression to transform the number.
The Global Blacklist is read-only and can be uploaded using the Update menu. You can also add and remove individual entries in the Custom Blacklist area.
Specifying Whitelist Phone Numbers
You can add and remove whitelist entries. Both IP addresses and phone numbers are possible. After adding or removing white-list entries, click Save. The new rules will go into effect immediately.
Phone numbers or IP addresses matching a whitelist entry are not used for point calculation. This filtering is done before any processing by any rule.
Calls which match a whitelist entry can still raise incidents. For example, if you block a certain caller IP address a call can still trigger an incident if the callee phone number is on the blacklist.
Both the phone number and the IP address of the caller and of the callee are tested against the list. The comparison is against the complete value, so there are no regular expressions or substring comparisons. If there are alphanumeric letters in the number, these will be treated as case sensitive.
Some rules only check against the caller's IP address or phone number. Filtering based on values you would expect in the callee won't significantly effect these rules.
Specifying Mediation Engine Configuration
Note:
For the Mediation Engine to allow connections with the Fraud Monitor, you must enable, Enable call events publisher on the Mediation Engine web interface under System Settings.The Mediation Engine Configuration section lists the Mediation Engines which are used as a source for the call data. Fraud Monitor won't have any data to analyze unless it's connected to a Mediation Engine.
On first use, Fraud Monitor will ask for the name, IP number, and port number of the Mediation Engine (see "Overview of Fraud Monitor Installation"). That information may be changed under this section if needed.
Name is free-form and merely a reminder for the system administrator. IP number is the IP address to which Fraud Monitor will try to connect. Port is 12000 by default, and configured in the Mediation Engine.
After adding or changing a connection, Fraud Monitor will test the connection. Any errors will display in a dialog box.
After changing an existing entry the entry will have a small red marking to show it has unsaved changes. To save the data, click Save on the lower right. Adding a new instance does not require saving.
It is possible to configure multiple Mediation Engines. All their call data will be used for all rules. Fraud Monitor does not distinguish which Mediation Engine a call comes from.