5. Reports
The chapter contains the following sections:
- Section 5.1, "Events Log Report"
- Section 5.2, "Security Management System Violations Log Report"
- Section 5.3, "User Profile Report"
- Section 5.4, "Changes Report"
- Section 5.5, "Inactive Users Aging Analysis Report"
- Section 5.6, "SMS User Inactive Log Report"
- Section 5.7, "Online Performance Statistics Report"
- Section 5.8, "Batch Performance Statistics Report"
- Section 5.8, "Batch Performance Statistics Report"
- Section 5.9, "Change Control Log Report"
- Section 5.10, "Event Log Report"
- Section 5.11, "Changes Log Report"
- Section 5.12, "New User Created Report"
- Section 5.13, "Role Profile Created Report"
- Section 5.14, "User Profile Report"
- Section 5.15, "Role Profile Report"
- Section 5.16, "User Role Summary Report"
- Section 5.17, "User Entitlement Report"
5.1 Events Log Report
This section contains the following topics:
5.1.1 Generating Event Logs Report
The Events Log report gives details of all events that occurred over a period in time. You can specify the period for which you require the report when you invoke the report function.
To invoke the screen to generate this report, type ‘SMRPEVLG’ in the field at top right corner of the Application tool bar and click the adjoining arrow button.
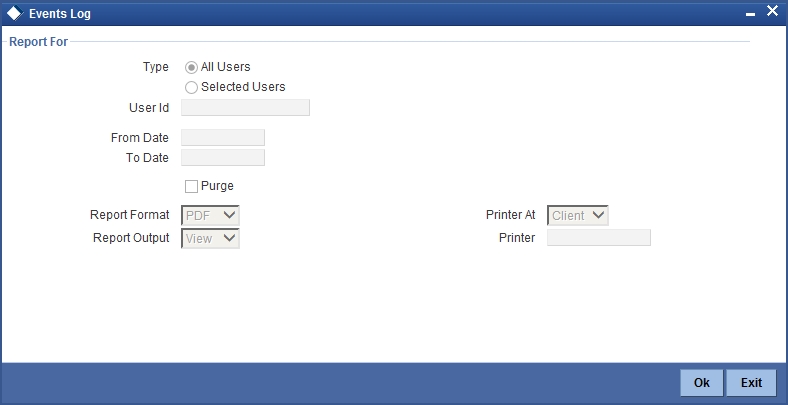
Report For
Indicate the user of the report by choosing one of the options.
- All Users
- Selected Users
From Date
Indicate the start date by using the adjoining calendar.
To Date
Indicate the end date by using the adjoining calendar.
Purge
Check this box to purge the document.
Click ‘OK’ to generate the report.
5.1.2 Contents of the Events Log
The contents of this report are discussed under the following heads:
Header
The Header carries the title of the report, information on the branch code, the ID of the user who generated the report, the date and time at which it was generated, the branch date, the modules covered in the report.
Body of the report
The following details are displayed in the report.
| Field Name | Field Description | ||
|---|---|---|---|
| User ID | The user who initiated the event. | ||
| Function Description | The name of the function that activated the event. | ||
| Start Time | The time at which the event was initiated. | ||
| End Time | The time at which the event was successfully completed or was aborted. If the event has not been completed, or ‘Not Yet’ is displayed here. | ||
| Branch Code | The code allotted to the branch . | ||
| Terminal ID | The system ID where the application is launched | ||
| System Start Time | The time when the user starts the application | ||
| System End Time | The time when the user signs out of the application |
Total time spent on individual functions by individual users is also provided.
5.2 Security Management System Violations Log Report
This section contains the following topics:
- Section 5.2.1, "Generating Security Management System Violations Log Report"
- Section 5.2.2, "Contents of the Security Management System Violations Log Report"
5.2.1 Generating Security Management System Violations Log Report
Any attempt at violating the security of the system will be reported in the Security Violations report. You can generate this report for a particular period.
To invoke the screen to generate this report, type ‘SMRPVLLG’ in the field at top right corner of the Application tool bar and click the adjoining arrow button.
The screen is as shown below:
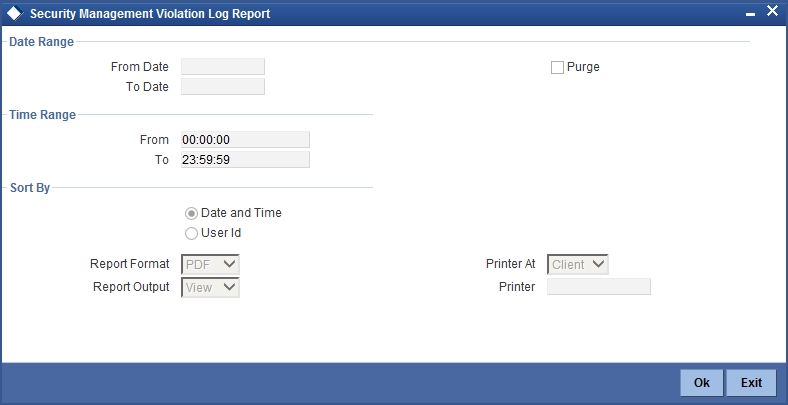
Indicate the following details:
Date Range
Indicate the date range.
From Date
Indicate the date from which you want to generate the violations report, using the adjoining calendar.
To Date
Indicate the date until which you want to generate the violations report, using the adjoining calendar.
Time Range
Specify the time range that should be considered for the violations report.
Sort By
Indicate the mode of sorting data in the report by choosing one of the following options:
- Date and Time
- User Identification
Purge
Check this box to indicate that the report can be purged.
Click ‘OK’ button to generate the report.
5.2.2 Contents of the Security Management System Violations Log Report
The contents of this report are discussed under the following heads:
Header
The Header carries the title of the report, information on the branch code, the ID of the user who generated the report, the date and time at which it was generated, the branch date, the modules covered in the report.
Body of the report
The following details are displayed in the report
| Field Name | Field Description | ||
|---|---|---|---|
| User-ID | The user who was involved in the security management system violation. | ||
| Start Time | The time at which the security management system was violated. | ||
| Message | The error message if any displayed by the system during validation | ||
| Function Description | The description of the function that was executed by the user, which resulted in the violation. | ||
| Terminal ID | The terminal-ID of the terminal onto which the user was logged. |
5.3 User Profile Report
This section contains the following topics:
- Section 5.3.1, "Generating User Profile Report"
- Section 5.3.2, "Contents of the User Profile Report"
5.3.1 Generating User Profile Report
The details of all the user profiles that have been defined are available in the form of a report. The User Profile Report gives details of user profiles maintained for all or specific users. It includes:
- The functions attached to the role.
- The roles to which the user is attached.
- Amount limits for each user.
- Branches in which the user can operate.
- Currencies the user can use.
- Customers the user can deal with.
- Restrictive passwords defined for the user.
To invoke the screen to generate this report, type ‘SMDCUUSR’ in the field at the top right corner of the Application tool bar and click the adjoining arrow button.
The screen is as shown below:
5.3.2 Contents of the User Profile Report
| Field Name | Field Description | ||
|---|---|---|---|
| Branch Code and Name | The code allotted to the branch and the full name of the branch. | ||
| Date and Time | At which the report was generated. | ||
| Printed by | The user who has generated the report. | ||
| Spool File | If the report has been printed onto a spool file, the name of the spool file is given here. | ||
| Sort on | The criteria on which the details have been sorted. | ||
| Date Range | The period for which the report is generated. | ||
| User-ID | The ID of the user whose details are being reported. | ||
| Name | The name of the user whose details are being reported. | ||
| Time Level | The time level of the user. | ||
| Language Code | The language assigned to the user. | ||
| Profile Expires On | The date on which the user profile is due to expire. | ||
| Status | The status of the user - enabled, on hold or disabled. | ||
| Function-ID | The function allowed for the user. | ||
| Function Description | The description of the function. | ||
| Link with Role Definition | If the user has been linked to a role, the role-ID is given here. | ||
| Maximum Transaction Amount | The maximum amount that the user can enter in a single transaction. | ||
| Maximum Authorization Amount | The maximum amount that a transaction can have if it has to be authorized by this user. | ||
| Branch Code | The branch in which the user profile is defined. | ||
| Branch Name | The name of the branch in which the user has signed on. | ||
| Currency Code | The S.W.I.F.T code of the currency in which the user can operate. | ||
| Currency Name | The name of the currency in which the user can operate. | ||
| Customer Code | The customer whose accounts can be handled by the user. | ||
| Customer Name | The name of the customer whose accounts can be handled by this user. | ||
| Restrictive Passwords - User | The passwords defined as restrictive passwords for the user. |
5.4 Changes Report
This section contains the following reports:
5.4.1 Generating Change Report
This report gives details of maintenance done on the following screen:
- Static Parameters screen
- Static User Profile Details screen
- Dynamic User Profile Details screen
- Static Role Profile Details
- Static User Profile Details
You can generate this report for a particular period using the ‘Report’ screen To invoke this screen type ‘SMRPCHLG’ in the field at top right corner of the Application tool bar and click the adjoining arrow button.
5.4.2 Contents of the Changes Report
The contents of this report are discussed under the following heads:
Header
The Header carries the title of the report, information on the branch code, the ID of the user who generated the report, the date and time at which it was generated, the branch date, the modules covered in the report.
Body of the report
The following details are displayed in the report
| Field Name | The field that has been maintained | ||
|---|---|---|---|
| Input by | The Id of the person who input the details of the transaction | ||
| Old Value | The value in the field before it was modified | ||
| New Value | The value in the field after it was modified | ||
| Date & Time | The date and time of the transaction | ||
| Authorizer ID | The Id of the person who authorized the transaction | ||
| Date & Time | The date and time when the transaction was authorized | ||
| Record Stat | The status of the record | ||
| Auth Stat | The authorization status | ||
| Function ID | The function ID | ||
| Mod Number | The module number | ||
| Table Name | The table name |
5.5 Inactive Users Aging Analysis Report
This sections contains the following topics:
- Section 5.5.1, "Generating Inactive Users Aging Analysis Report"
- Section 5.5.2, "Contents of the Inactive Users Aging Analysis Report"
5.5.1 Generating Inactive Users Aging Analysis Report
This report gives details of users who have not used the system over a certain period. You should enter the period when you invoke the report. The details are sorted in ascending order of the date from which the user has not used the system.
Click ‘OK’ button if you want to generate this report. To come out of this screen without generating the report click ‘Exit’ button.
5.5.2 Contents of the Inactive Users Aging Analysis Report
| Field Name | Field Description | ||
|---|---|---|---|
| User-ID | The ID of the user who has not been using the system | ||
| Inactive Since | The date from which the user has not accessed the system | ||
| Status | The status of the user - enabled, disabled, hold, inactive | ||
| Inactivity Period | The number of days for which the user has not used the system |
5.6 SMS User Inactive Log Report
This section contains the following topics:
- Section 5.6.1, "Generating SMS User Inactive Log Report"
- Section 5.6.2, "Contents of the Inactive Users Log Report"
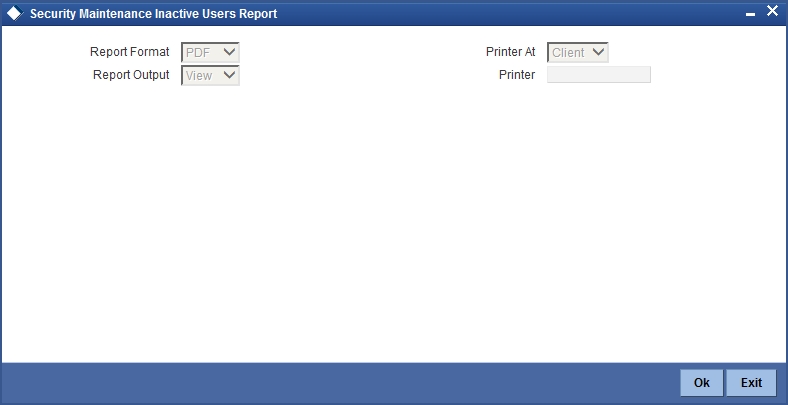
5.6.1 Generating SMS User Inactive Log Report
This report gives details of users who have not used the system over a certain period. You should enter the period when you invoke the report. The details are sorted in ascending order of the date from which the user has not used the system. In the Application Browser, this report is available under the SM module.
To invoke the screen ‘Security Maintenance Inactive Users Report’ type ‘SMRPINST’ in the field at top right corner of the Application tool bar and click the adjoining arrow button.
5.6.2 Contents of the Inactive Users Log Report
The contents of this report are discussed under the following heads:
Header
The Header carries the title of the report, information on the branch code, the ID of the user who generated the report, the date and time at which it was generated, the branch date, the modules covered in the report.
Body of the report
The following details are displayed in the report.
| Field Name | Field Description | ||
|---|---|---|---|
| User-ID | The ID of the user who has not been using the system | ||
| Home Branch | The home branch of the bank. | ||
| Last Signed On | The date from which the user has not accessed the system | ||
| Inactive For (In days) | The number of days for which the user has not used the system |
5.7 Online Performance Statistics Report
The section contains the following topics:
- Section 5.7.1, "Generating Online Performance Statistics Report"
- Section 5.7.2, "Contents of the Online Performance Statistics Report"
5.7.1 Generating Online Performance Statistics Report
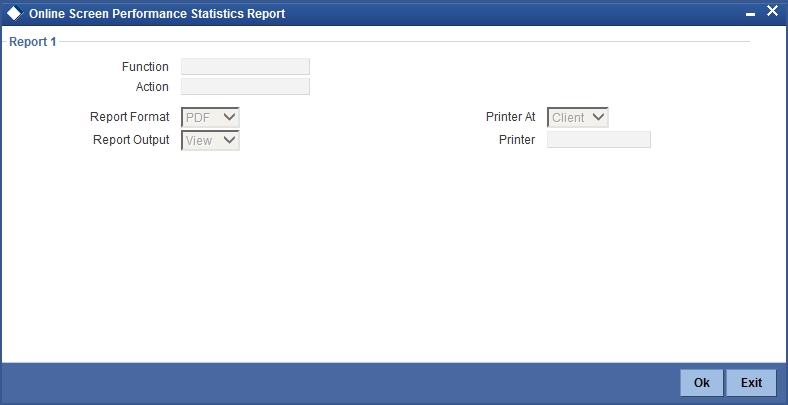
This report lists the maximum, minimum and average execution time for different actions across transactions in Oracle FLEXCUBE. You can generate this report using the ‘Online Screen Performance Statistics Report’ screen. To invoke this screen, type ‘SMRONSTA’ in the field at top right corner of the Application tool bar and click the adjoining arrow button.
Specify the following details:
Function
Specify the function ID for which performance statistics need to be collected. The adjoining option list displays all transaction related function IDs available in the system. You can select the appropriate one. You can also leave this field blank if you have mentioned the action. This will imply that the report needs to be generated for the given action across all function IDs.
Action
Specify the action that needs to be performed on the function ID. The adjoining option list displays all operations for the functions IDs available in the system. You can select the appropriate one. You can also leave this field blank if you have mentioned the action. This will imply that the report needs to be generated for the given function ID across all actions.
Note
Both the function and the action cannot be null at a time.
5.7.2 Contents of the Online Performance Statistics Report
The parameters specified while generating the report are printed at the beginning of the report. The contents of this report are discussed under the following heads:
Header
The Header carries the title of the report, information on the branch code, the ID of the user who generated the report, the date and time at which it was generated, the branch date, the modules covered in the report.
Body of the report
The following details are displayed in the report.
| Term | Description | ||
|---|---|---|---|
| Function Id | This indicates function action of the screen. | ||
| Function Id | This indicates function ID of the screen. | ||
| Action | This indicates the action performed on the Function ID. | ||
| Source | This indicates the source of the report. | ||
| Max Response | This indicates the maximum execution time for the action on the Function ID. | ||
| Min Response | This indicates the minimum execution time for the action on the Function ID. | ||
| Average | This indicates the average execution time of the report to be generated. | ||
| Count | This indicates the execution count for the report to be generated. | ||
| Log Time | Time of execution. |
5.8 Batch Performance Statistics Report
This section contains the following topics:
- Section 5.8.1, "Generating Batch Performance Statistics Report"
- Section 5.8.2, "Contents of the Performance Statistics report"
5.8.1 Generating Batch Performance Statistics Report
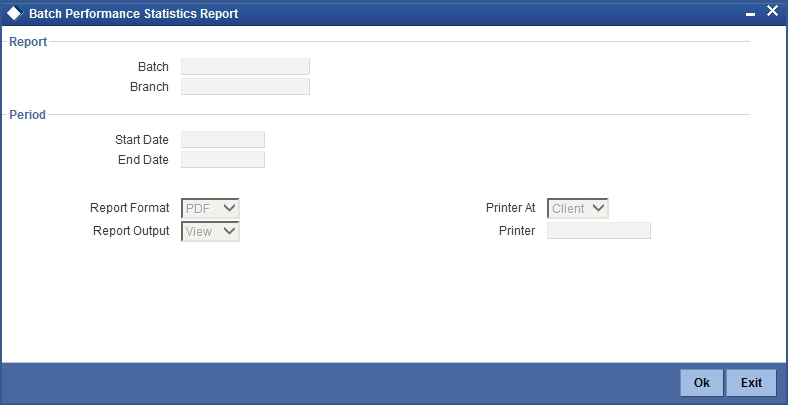
This report provides the maximum, minimum and average performance record of each batch operation across all the branches in Oracle FLEXCUBE. It also has the option of generating report within a given date and time range. You can generate this report using the ‘Batch Performance Statistics Report’ screen. To invoke this screen, type ‘SMRBASTA’ in the field at top right corner of the Application tool bar and click the adjoining arrow button.
Specify the following details:
Report
You can indicate the following details for report generation:
Batch
Specify the batch for which the report has to be generated. The adjoining option list displays the list of all batches available in the system. You can select the appropriate one. However, you can leave this field blank if you have mentioned the branch. This will imply that the report needs to be generated for the given branch across all batches.
Branch
Specify the branch for which the report has to be generated. The adjoining option list displays the list of all branches available in the system. You can select the appropriate one. However, you can also leave this field blank if you have mentioned the batch. This will imply that the report needs to be generated for the given batch across all branches.
Period
Select the period within which the data for report generation should be fetched.
Start Date.
Indicate the date from which records should be considered for report generation, using the adjoining calendar.
End Date
Indicate the date until which records should be considered for report generation, using the adjoining calendar.
5.8.2 Contents of the Performance Statistics report
The parameters specified while generating the report are printed at the beginning of the report. Other content displayed in the report is as follows:
Header
The Header carries the title of the report, information on the branch code, the ID of the user who generated the report, the date and time at which it was generated, the branch date, the modules covered in the report.
Body of the report
The following details are displayed in the report.
| Term | Description | ||
|---|---|---|---|
| EOC Stage | This indicates the End of Cycle stage. | ||
| Branch Code | This indicates the code of the branch. | ||
| Start Time | This indicates the start time from which the records have been considered for report generation. | ||
| End Time | This indicates the end time until which the records have been considered for report generation. | ||
| Maximum Time | This indicates the maximum time taken for the batch operation. | ||
| Minimum Time | This indicates the minimum time taken for batch operation. | ||
| Average Time | This indicatess the average time taken for batch operation. |
5.9 Change Control Log Report
This section contains the following topics:
5.9.1 Generating Change Control Log Report
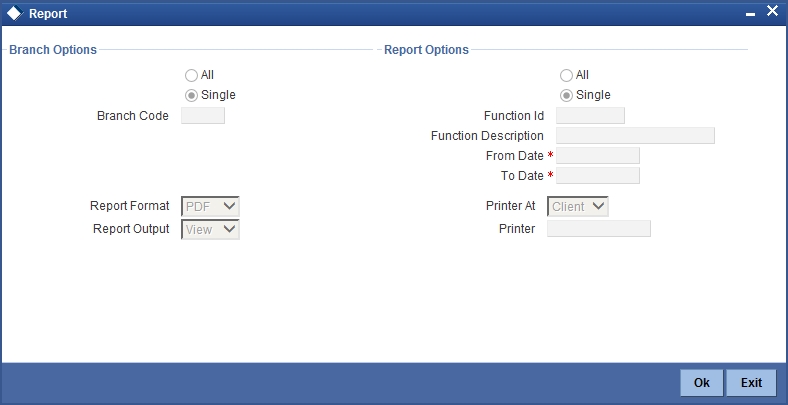
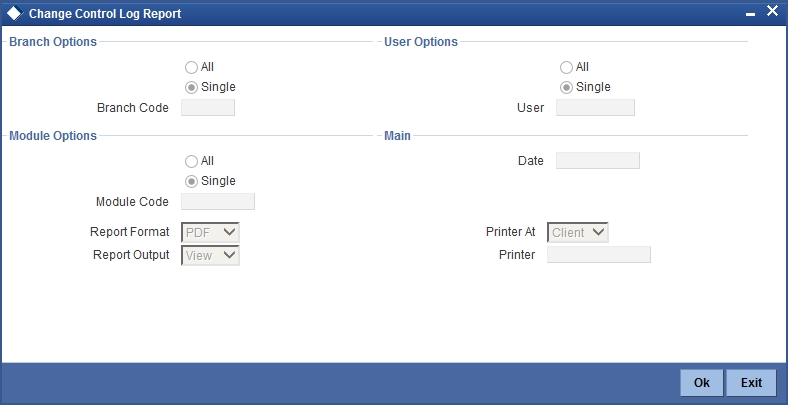
The Change Control Log report provides change control log details. You can invoke the screen by typing the code ‘SMRCONTL’ in the field at the top right corner of the Application tool bar and click on the adjoining arrow button.
You can specify the following parameters:
Branch Options
You can generate the report based on the following branch criteria. The following options are available for section:
- All
- Single
Branch Code
Specify a valid branch code for which you want to generate the report from the adjoining option list, if you have selected ‘Single’.
User Options
You can generate the report based on the following User criteria. The following options are available for section:
- All
- Single
User
Specify a valid User ID for which you want to generate the report from the adjoining option list, if you have selected ‘Single’.
Module Options
You can generate the report based on the following Module criteria. The following options are available for section:
- All
- Single
Module Code
Specify a valid module code for which you want to generate the report from the adjoining option list, if you have selected ‘Single’.
Main
You can specify the following parameters:
Date
Specify a valid date for which you want to generate the report from the adjoining calendar.
5.9.2 Contents of the Report
The parameters specified while generating the report are printed at the beginning of the report. Other content displayed in the report is as follows:
Header
The following details are displayed in the header section:
| Field Name | Field Description | ||
|---|---|---|---|
| Branch | Indicates Branch Code and Branch Name | ||
| Branch Date | Indicates Current Date of the Branch | ||
| User ID | Indicates User ID | ||
| Date & Time | Indicates the Date and Time when the report was generated | ||
| Module | Indicates module for which report is generated. |
Body of the Report
The following details are displayed as body of the generated report:
| Field Name | Field Description | ||
|---|---|---|---|
| Branch | Indicates Branch Code | ||
| User ID | Indicates User ID | ||
| Module | Indicates Module | ||
| Function Modified | Indicates Function Modified | ||
| Modification Number | Indicates Modification Number | ||
| Field Name | Indicates Field Name | ||
| Status | Indicates Status | ||
| Old Value | Indicates Amount | ||
| New Value | Indicates Currency code | ||
| Maker Date Checker ID | Indicates Maker Date and Checker ID |
5.10 Event Log Report
This section contains the following topics:
5.10.1 Generating Event Log Report
The Event Log report provides event log details. You can invoke the screen by typing the code ‘SMREVNLO’ in the field at the top right corner of the Application tool bar and click on the adjoining arrow button.

You can specify the following parameters:
Input User
You can generate the report based on the following User criteria. The following options are available for section:
- All
- Single
User
Specify a valid User ID for which you want to generate the report from the adjoining option list, if you have selected ‘Single’.
Start Date
Specify start date of the event for which you want to generate the report from the adjoining calendar.
5.10.2 Contents of the Report
The parameters specified while generating the report are printed at the beginning of the report. Other content displayed in the report is as follows:
Header
The following details are displayed in the header section:
| Field Name | Field Description | ||
|---|---|---|---|
| Branch | Indicates Branch Code and Branch Name | ||
| Branch Date | Indicates Current Date of the Branch | ||
| User ID | Indicates User ID | ||
| Date & Time | Indicates the Date and Time when the report was generated | ||
| Module | Indicates module for which report is generated. |
Body of the Report
The following details are displayed as body of the generated report:
| Field Name | Field Description | ||
|---|---|---|---|
| Start Date | Indicates the start date of the event | ||
| End Date | Indicates the end date of the event | ||
| Application | Indicates application details | ||
| Current Branch | Indicates current branch code | ||
| Transaction Branch | Indicates transaction branch code | ||
| User ID | Indicates User ID |
5.11 Changes Log Report
This section contains the following topics:
5.11.1 Generating Changes Log Report
The Changes Log report provides changes log details. You can invoke the screen by typing the code ‘SMRMCLOG’ in the field at the top right corner of the Application tool bar and click on the adjoining arrow button.
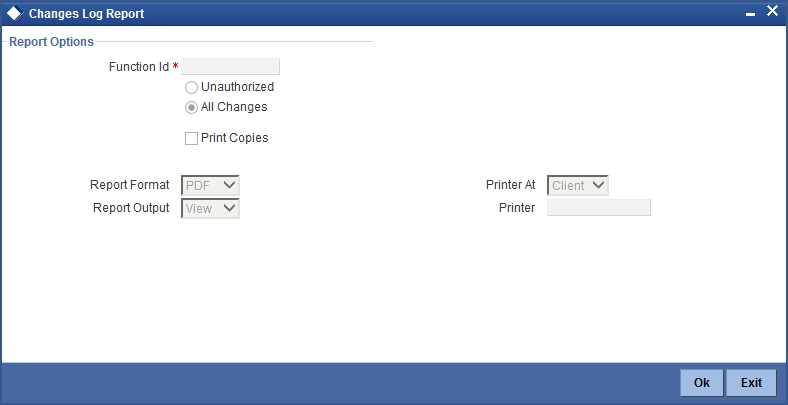
You can specify the following parameters:
Report Options
You can specify the following parameters:
Function ID
Specify a valid Function ID for which you want to generate the report from the adjoining option list.
You can generate the report based on the following change criteria. The following options are available for section:
- Unauthorized
- All changes
Print Copies
Check this box if you wish to print copies of the report.
5.11.2 Contents of the Report
The parameters specified while generating the report are printed at the beginning of the report. Other content displayed in the report is as follows:
Header
The following details are displayed in the header section:
| Field Name | Field Description | ||
|---|---|---|---|
| Branch | Indicates Branch Code and Branch Name | ||
| Branch Date | Indicates Current Date of the Branch | ||
| User ID | Indicates User ID | ||
| Date & Time | Indicates the Date and Time when the report was generated | ||
| Module | Indicates module for which report is generated. |
Body of the Report
The following details are displayed as body of the generated report:
| Field Name | Field Description | ||
|---|---|---|---|
| Maintenance Program | Indicates Maintenance Program | ||
| Action | Indicates Action | ||
| Modification Number | Indicates Modification Number | ||
| Field Name | Indicates Field Name | ||
| New Value | Indicates New Value | ||
| Old Value | Indicates Old Value | ||
| Maker ID | Indicates Maker ID | ||
| Maker Date | Indicates Maker Date | ||
| Checker ID | Indicates Checker ID | ||
| Checker Date | Indicates Checker Date |
5.12 New User Created Report
This section contains the following topics:
5.12.1 Generating New User Created Report
The New User Created report provides details of the new users created. You can invoke the screen by typing the code ‘SMRNWUSR’ in the field at the top right corner of the Application tool bar and click on the adjoining arrow button.
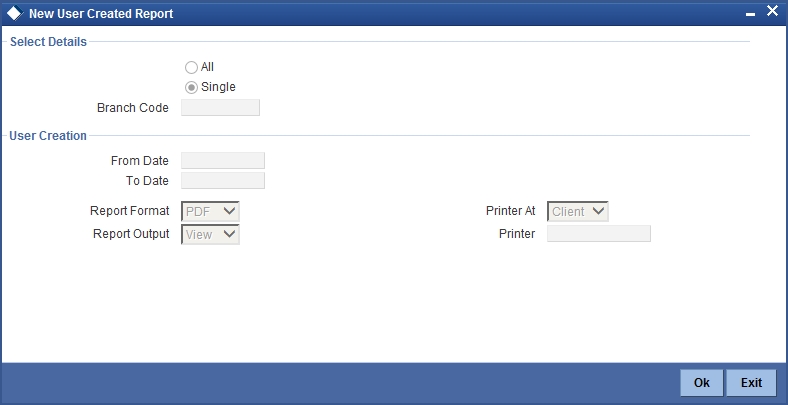
You can specify the following parameters:
Branch Options
You can generate the report based on the following branch criteria. The following options are available for section:
- All
- Single
Branch Code
Specify a valid branch code for which you want to generate the report from the adjoining option list, if you have selected ‘Single’.
User Creation
You can specify the following parameter:
From Date
Specify date from when you want to generate the report from the adjoining calendar.
To Date
Specify date till when you want to generate the report from the adjoining calendar
5.12.2 Contents of the Report
The parameters specified while generating the report are printed at the beginning of the report. Other content displayed in the report is as follows:
Header
The following details are displayed in the header section:
| Field Name | Field Description | ||
|---|---|---|---|
| Branch | Indicates Branch Code and Branch Name | ||
| Branch Date | Indicates Current Date of the Branch | ||
| User ID | Indicates User ID | ||
| Date & Time | Indicates the Date and Time when the report was generated | ||
| Module | Indicates module for which report is generated. |
Body of the Report
The following details are displayed as body of the generated report:
| Field Name | Field Description | ||
|---|---|---|---|
| Start Date | Indicates the start date of the event | ||
| User ID | Indicates user ID | ||
| Creator | Indicates creator’s ID | ||
| Authorizer | Indicates authorizer’s ID code | ||
| Home Branch | Indicates home branch code | ||
| Role ID | Indicates role ID to which the user ID is mapped |
5.13 Role Profile Created Report
This section contains the following topics:
5.13.1 Generating Role Profile Created Report
The Role Profile Created report provides details of the role profile created. You can invoke the screen by typing the code in the field at the top right corner of the Application tool bar and click on the adjoining arrow button. ‘’

You can specify the following parameters:
Report For
You can generate the report based on the following role criteria. The following options are available for section:
- All Roles
- Selected
Role ID
Specify a valid Role ID for which you want to generate the report from the adjoining option list, if you have selected ‘Selected’.
5.13.2 Contents of the Report
The parameters specified while generating the report are printed at the beginning of the report. Other content displayed in the report is as follows:
Header
The following details are displayed in the header section:
| Field Name | Field Description | ||
|---|---|---|---|
| Branch | Indicates Branch Code and Branch Name | ||
| Branch Date | Indicates Current Date of the Branch | ||
| User ID | Indicates User ID | ||
| Date & Time | Indicates the Date and Time when the report was generated | ||
| Module | Indicates module for which report is generated. |
Body of the Report
The following details are displayed as body of the generated report:
| Field Name | Field Description | ||
|---|---|---|---|
| Role ID | Indicates role ID | ||
| Role Description | Indicates role description | ||
| Functions Allowed | Indicates function allowed for the role | ||
| Branches Allowed | Indicates branch code and name of the branches allowed | ||
| Account Class Allowed | Indicates the account class and description of the account classes allowed | ||
| Users Attached | Indicates the User ID, Name and the branch of the Users attached |
5.14 User Profile Report
This section contains the following topics:
5.14.1 Generating User Profile Report
The User Profile report provides details of the user profile. You can invoke the screen by typing the code ‘SMRPUSPR’ in the field at the top right corner of the Application tool bar and click on the adjoining arrow button.
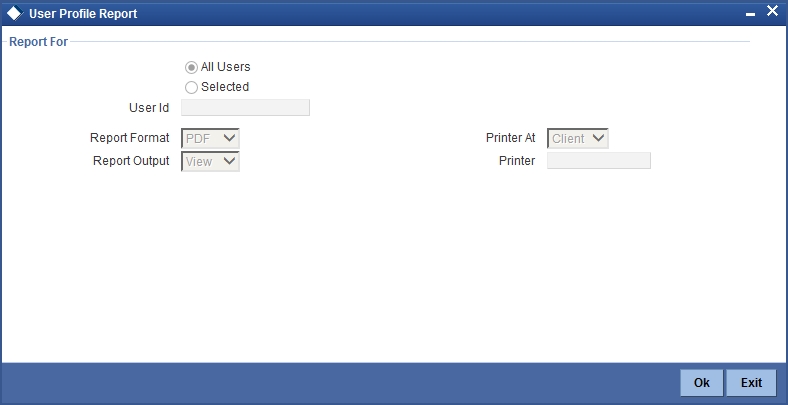
You can specify the following parameters:
Report For
You can generate the report based on the following user criteria. The following options are available for section:
- All Users
- Selected
User ID
Specify a valid User ID for which you want to generate the report from the adjoining option list, if you have selected ‘Selected’.
5.14.2 Contents of the Report
The parameters specified while generating the report are printed at the beginning of the report. Other content displayed in the report is as follows:
Header
The following details are displayed in the header section:
| Field Name | Field Description | ||
|---|---|---|---|
| Branch | Indicates Branch Code and Branch Name | ||
| Branch Date | Indicates Current Date of the Branch | ||
| User ID | Indicates User ID | ||
| Date & Time | Indicates the Date and Time when the report was generated | ||
| Module | Indicates module for which report is generated. |
Body of the Report
The following details are displayed as body of the generated report:
| Field Name | Field Description | ||
|---|---|---|---|
| Branch | Indicates branch code | ||
| User ID | Indicates User ID | ||
| User name | Indicates User name | ||
| Category | Indicates Category | ||
| Language | Indicates Language | ||
| Time Level | Indicates Time Level | ||
| Status | Indicates Status | ||
| Status Changed On | Indicates Status Changed On | ||
| Last Signed On | Indicates Last Signed On | ||
| Password Changed | Indicates Password Changed | ||
| Cumulative Invalid Logins | Indicates Cumulative Invalid Logins | ||
| Start Date | Indicates Start Date | ||
| End Date | Indicates End Date | ||
| Successive Invalid Logins | Indicates Successive Invalid Login | ||
| Max Input Limit | Indicates Maximum Input Limit | ||
| Max Authorization Limit | Indicates Maximum Authorization Limit | ||
| Max Online Authorization Limit | Indicates Maximum Online Authorization Limit | ||
| Roles Attached | Indicates ID and description of the roles attached for the User | ||
| Functions Allowed | Indicates ID and description of the functions allowed for the User | ||
| Functions Disallowed | Indicates ID and description of the functions disallowed for the User | ||
| Branches Allowed | Indicates branch code and name of the branches allowed | ||
| Account Class Allowed | Indicates the account class and description of the account classes allowed | ||
| Branches Allowed | Indicates ID and Name of the tills allowed | ||
| Tills Allowed | Indicates the code and description of the tills allowed | ||
| Products Allowed | Indicates the code and description of the product allowed |
5.15 Role Profile Report
This section contains the following topics:
5.15.1 Generating Role Profile Report
The Role Profile report provides details of the role profiles. You can invoke the screen by typing the code ‘SMRROLPR’ in the field at the top right corner of the Application tool bar and click on the adjoining arrow button.
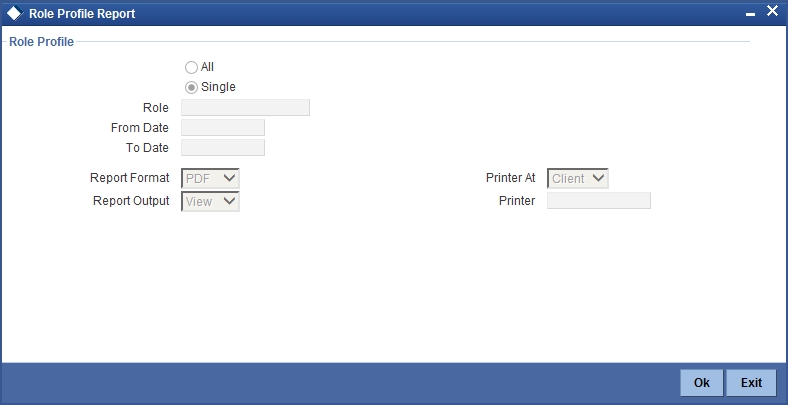
You can specify the following parameters:
Role Profile
You can generate the report based on the following role criteria. The following options are available for section:
- All
- Single
Role
Specify a valid Role ID for which you want to generate the report from the adjoining option list, if you have selected ‘Single’.
5.15.2 Contents of the Report
The parameters specified while generating the report are printed at the beginning of the report. Other content displayed in the report is as follows:
Header
The following details are displayed in the header section:
| Field Name | Field Description | ||
|---|---|---|---|
| Branch | Indicates Branch Code and Branch Name | ||
| Branch Date | Indicates Current Date of the Branch | ||
| User ID | Indicates User ID | ||
| Date & Time | Indicates the Date and Time when the report was generated | ||
| Module | Indicates module for which report is generated. |
Body of the Report
The following details are displayed as body of the generated report:
| Field Name | Field Description | ||
|---|---|---|---|
| Role | Indicates Role ID | ||
| Function | Indicates Function name | ||
| Function Description | Indicates Function description | ||
| Branch Allowed | Indicates branches allowed for the role | ||
| Acc Class Allowed | Indicates account classes allowed for the role | ||
| Limit Currency | Indicates limit currency for the role | ||
| Input Limit | Indicates input limit for the role | ||
| Authorizer Limit | Indicates authorization limit for the role |
5.16 User Role Summary Report
This section contains the following topics:
5.16.1 Generating Role Summary Report
The User Role Summary report provides user role summary details. You can invoke the screen by typing the code ‘SMRSUMRY’ in the field at the top right corner of the Application tool bar and click on the adjoining arrow button.
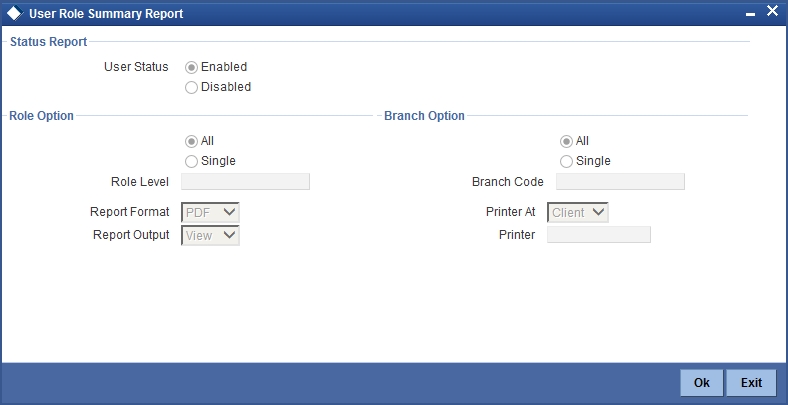
You can specify the following parameters:
Status Report
You can specify the following parameters
User Status
You can generate the report based on the following user status criteria. The following options are available for section:
- Enabled
- Disabled
Role Options
You can generate the report based on the following role criteria. The following options are available for section:
- All
- Single
Role Level
Specify a valid role level for which you want to generate the report from the adjoining option list, if you have selected ‘Single’.
Branch Options
You can generate the report based on the following branch criteria. The following options are available for section:
- All
- Single
Branch Code
Specify a valid branch code for which you want to generate the report from the adjoining option list, if you have selected ‘Single’.
5.16.2 Contents of the Report
The parameters specified while generating the report are printed at the beginning of the report. Other content displayed in the report is as follows:
Header
The following details are displayed in the header section:
| Field Name | Field Description | ||
|---|---|---|---|
| Branch | Indicates Branch Code and Branch Name | ||
| Branch Date | Indicates Current Date of the Branch | ||
| User ID | Indicates User ID | ||
| Date & Time | Indicates the Date and Time when the report was generated | ||
| Module | Indicates module for which report is generated. |
Body of the Report
The following details are displayed as body of the generated report:
| Field Name | Field Description | ||
|---|---|---|---|
| Branch | Indicates Branch Code | ||
| Branch Name | Indicates Branch name | ||
| Role ID | Indicates Role ID | ||
| User ID | Indicates User ID | ||
| Status | Indicates Status | ||
| No of Users | This indicates the total number of users |
5.17 User Entitlement Report
This section contains the following topics:
5.17.1 Generating User Entitlement Report
The User Entitlement report provides user entitlement details. You can invoke the screen by typing the code ‘SMRUSREN’ in the field at the top right corner of the Application tool bar and click on the adjoining arrow button.
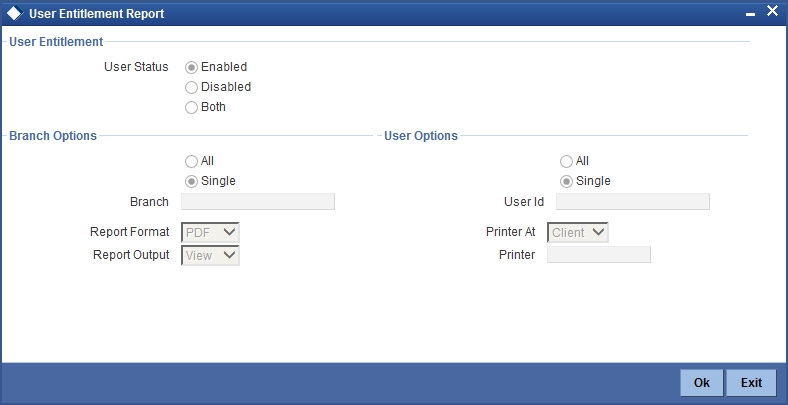
You can specify the following parameters:
User Entitlement
You can specify the following parameters
User Status
You can generate the report based on the following user status criteria. The following options are available for section:
- Enabled
- Disabled
Branch Options
You can generate the report based on the following branch criteria. The following options are available for section:
- All
- Single
Branch Code
Specify a valid branch code for which you want to generate the report from the adjoining option list, if you have selected ‘Single’.
User Options
You can generate the report based on the following user criteria. The following options are available for section:
- All
- Single
User ID
Specify a valid user ID for which you want to generate the report from the adjoining option list, if you have selected ‘Single’.
5.17.2 Contents of the Report
The parameters specified while generating the report are printed at the beginning of the report. Other content displayed in the report is as follows:
Header
The following details are displayed in the header section:
| Field Name | Field Description | ||
|---|---|---|---|
| Branch | Indicates Branch Code and Branch Name | ||
| Branch Date | Indicates Current Date of the Branch | ||
| User ID | Indicates User ID | ||
| Date & Time | Indicates the Date and Time when the report was generated | ||
| Module | Indicates module for which report is generated. |
Body of the Report
The following details are displayed as body of the generated report:
| Field Name | Field Description | ||
|---|---|---|---|
| Home Branch | Indicates Home Branch | ||
| Branch Name | Indicates Branch Name | ||
| User ID | Indicates User ID | ||
| User Name | Indicates User Name | ||
| User Category | Indicates User Category | ||
| Created On | Indicates Created On date | ||
| Last Signed On | Indicates Last Signed On date | ||
| Password Changed On | Indicates Password Changed On date | ||
| Status | Indicates Status | ||
| Branch Allowed | Indicates Branch Allowed for user | ||
| Account Class Allowed | Indicates Account Class Allowed for user | ||
| GL Allowed | Indicates GL Allowed | ||
| Product Allowed | Indicates Product Allowed for user | ||
| Max Input Limit | Indicates Max Input Limit | ||
| Cumulative Invalid Login | Indicates Cumulative Invalid Login | ||
| No of Successive Login | Indicates No of Successive Login | ||
| Max Authorization Limit | Indicates Max Authorization Limit |