| Oracle® Retail Predictive Application Server Cloud Edition Administration Guide Release 19.0 F25569-31 |
|

 Previous |
 Next |
| Oracle® Retail Predictive Application Server Cloud Edition Administration Guide Release 19.0 F25569-31 |
|
Previous |
Next |
This chapter describes the file upload/download process.
This chapter contains the following sections:
For the batches that load data, the Administrator must upload the relevant input files for the data to the SFTP server before running the batch. After running any export task, the exported files can be found in the export location of the SFTP server.
For details regarding file contents and formatting of the upload and download files, see the Oracle Retail Merchandise Financial Planning Cloud Service Implementation Guide.
This section describes the process to generate a 2048 bit RSA key and add the same to the SFTP server. This is done with the help of the WinSCP tool on Windows. However, the same can be done using ssh-keygen on Linux as well.
Prerequisites:
The WinSCP tool must be installed before performing the following process.
The Private/Public keys must be generated and the Public key must be associated with your SFTP Account for the file upload/Download.
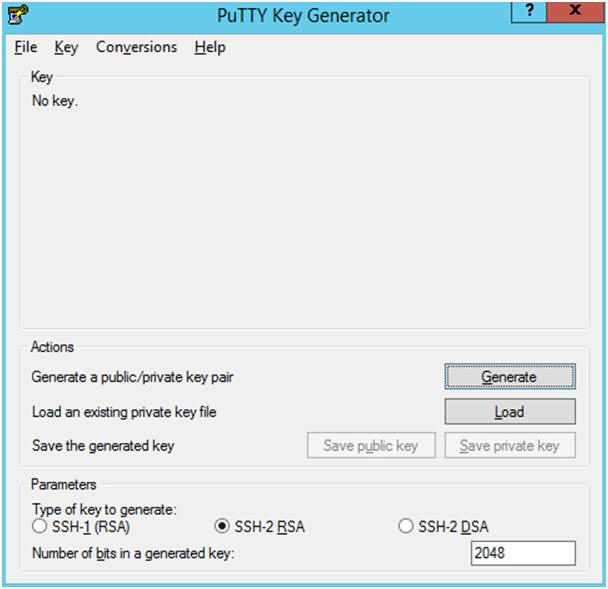
Launch WinSCP and select Tools > Run PuttyGen.
Select SSH-2 RSA for the type of key to generate and enter 2048 for the number of bits in a generated key field. Click Generate.
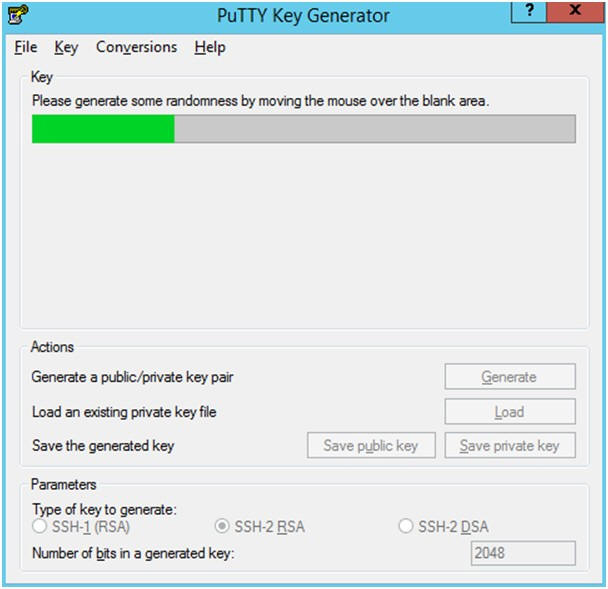
Move the mouse over the blank space in the window until the key is generated. Moving the mouse over the blank space creates a random pattern which is used for key generation.
Once the key is generated, click Save public key to save the public key to a file.
Click Save private key to save the private key to a file. Confirm to save it with or without a passphrase.
Open an SR with Oracle Support, to associate the public key with your SFTP account (attach the key with the SR).
The upload steps use the private key generated in the Adding Authorized Keys section.
Launch WinSCP and connect to <SFTP Server> using port 22.
Enter the user name and click Advanced.
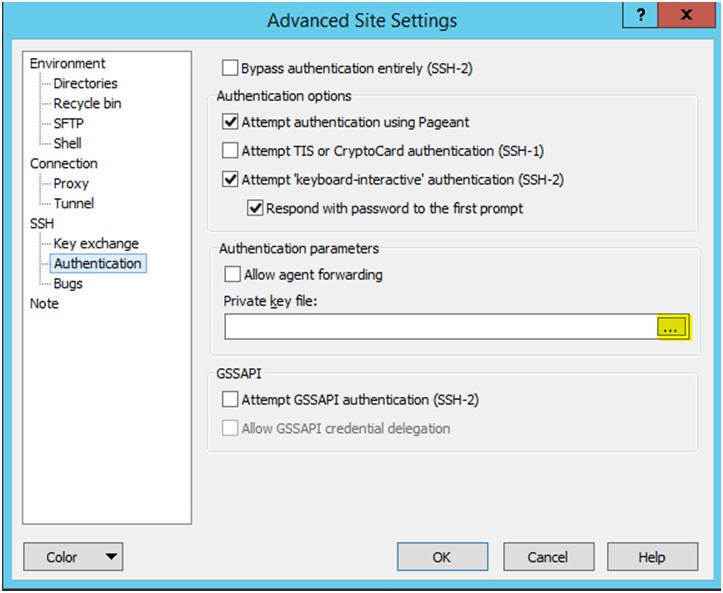
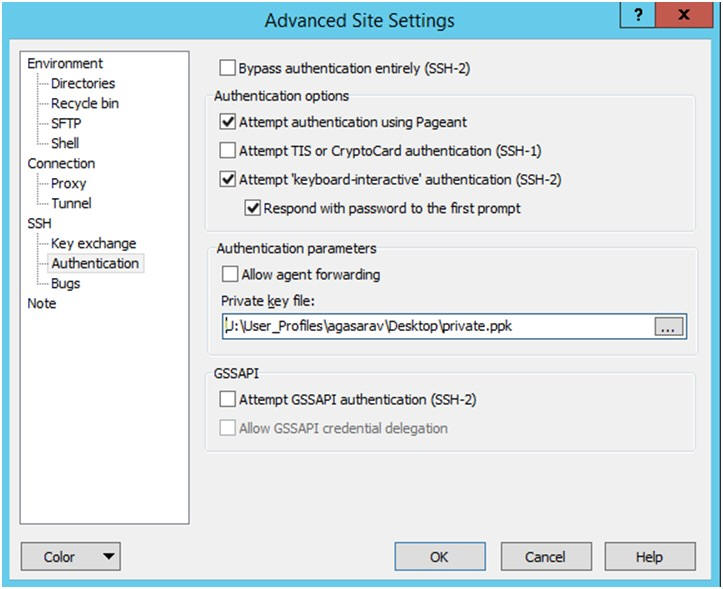
Click Authentication.
In the Private Key File field, click Browse and select the private key created in the Adding Authorized Keys section.
After loading the private key file, click OK.
Click Login. The window does not prompt for a password and logs in to the SFTP server. Provide a passphrase if one has been set up.
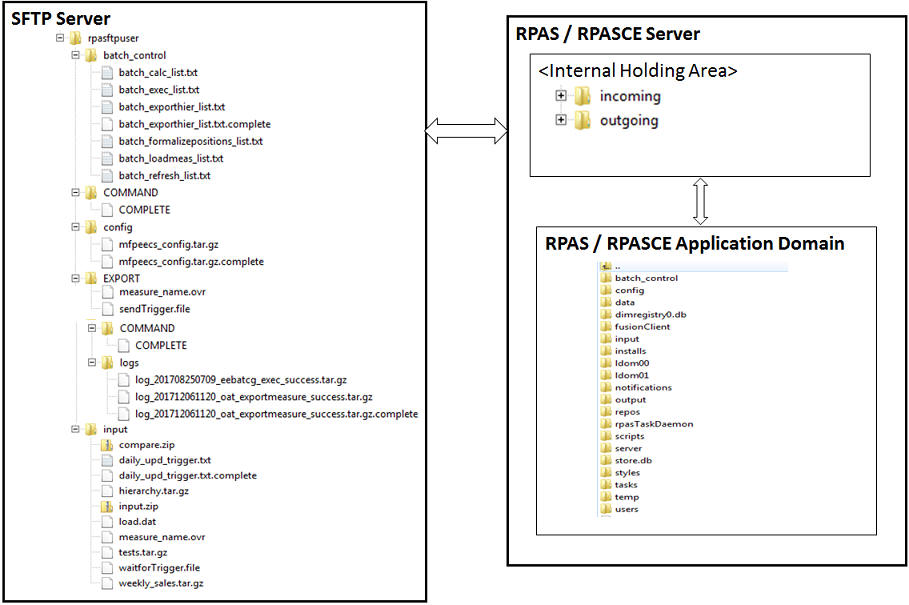
The following diagram provides an overview of the FTP/internal holding area/domain and how the files move.
Figure 13-5 File Movement Between Internal Holding Area and Domain
The following steps walk you through the process to upload batch (data/Hierarchy) file. For information about the administration tasks that require uploading batch files, see "Batch Administration."
For information about the file contents of various exports and formatting, see the information on data load in the Oracle Retail Merchandise Financial Planning Cloud Edition Implementation Guide.
To upload the batch file:
Log in to WinSCP. Follow the steps in "Logging In to WinSCP."
Transfer all the data files to the directory /<SFTP User>.
Create a directory named COMMAND under /<SFTP User> if it does not already exist.
Change to the /<SFTP User>/COMMAND directory.
Transfer an empty file named COMPLETE.
Run the required batch/task from the Online Administration Tools.
The following steps walk you through the process of accessing download files. For information about the administration tasks that create different exports from the applications, see "Batch Administration."
For information about the file contents of various exports and formatting, see the information on exports in the Oracle Retail Merchandise Financial Planning Cloud Service Implementation Guide.
To download files:
Log in to WinSCP. Follow the steps in "Logging In to WinSCP."
Change the directory to /<SFTP User>/EXPORT or /<SFTP User>/Export/logs (for log files).
Create a directory named COMMAND under /<SFTP User>/EXPORT if it does not already exist.
Change to the /<SFTP User>/EXPORT/COMMAND directory.
Transfer an empty file named COMPLETE.
Run the required batch/task from the Online Administration Tools.
Download all the data files. The log files are in tar.gz format.
|
Note: The log file names are appended with the success/fail text in it along with the time stamp for easy identification.The format is the status of the task, followed by the task name and timestamp. For example, success.eebatch_exec.batch_daily.20190611220325.tar.gz. For a failure, the code return is also appended. For example, failure.1.eebatch_exportmeas.lpcp.20190604020554.tar.gz. |
All downloads for exporting to Excel, exporting text, and exporting task status log files are asynchronous in order to prevent timeouts.
The times are expressed in milliseconds and are positive integers. The polling interval must be less than the timeout. Ideally there must be multiple polling request prior to a timeout. The default polling interval is 1000 (1 sec) and the default timeout is 3600000 (1 hr).
The config properties are:
download.pollinterval - The polling interval from the client's browser to the application server. The polling interval is the period of time between each network request used to check if the download is ready. Once the download is ready or timed out the polling will stop.
download.pollinterval=1000
download.timeout - The time to wait for the download to be ready before cancelling the request.
download.timeout=3600000