| Oracle® Retail Predictive Application Server Cloud Edition User Guide Release 19.0 F24877-28 |
|

 Previous |
 Next |
| Oracle® Retail Predictive Application Server Cloud Edition User Guide Release 19.0 F24877-28 |
|
Previous |
Next |
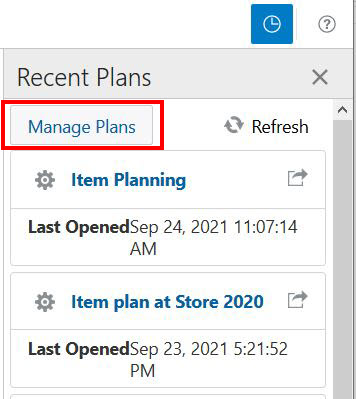
Workspace management has been streamlined by providing a single view of all the workspaces. This module also allows all users (Administrators and Non-administrators) to view each workspace in a centralized space. With manage storage functionality, you can receive information on space consumption in the application and take necessary actions to clear the unwanted workspace or files. You can periodically check the space consumption and take actions. It offers to view size of each workspace, create date, time, and so on for each workspace. You can access the Manage Workspace window from the Manage Plans button located above the Recent Plans list. Figure 20-1 shows where the Manage Workspace is accessed from Recent Plans list.
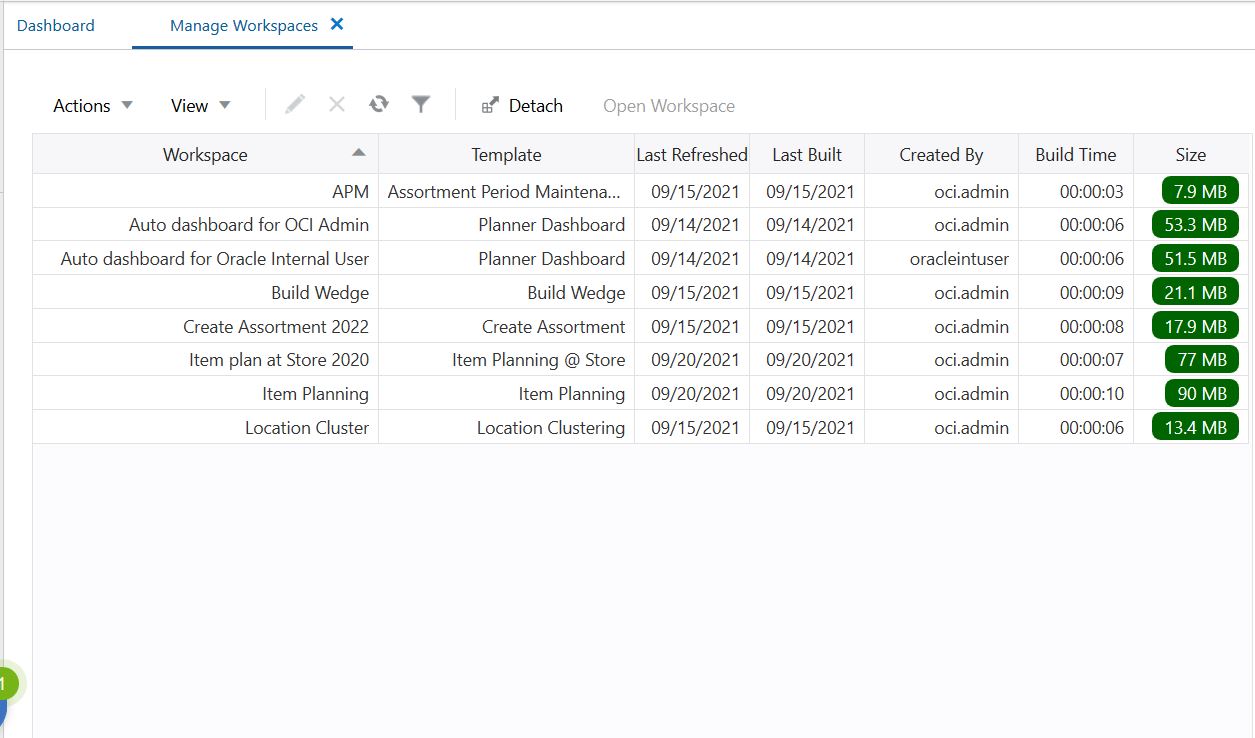
Manage Workspaces can be accessed by all users. Administrators have visibility to all workspaces in the environment and each individual user has visibility to see all the workspaces created by the corresponding user. The table displays the following fields:
Workspace
Template
Last Opened
Last Refreshed
Last Built
Created By
Built Time
Size (of the workspace)
This table helps users manage the workspaces in one central location and provides better utilization of the disk space.
You can edit a workspace directly from Manage Workspaces. Select the workspace to be edited and then click the Edit icon. The wizard window opens for you to make selections of the positions. Edit functionality is also available from the Actions list.
You can delete a workspace directly from Manage Workspaces. Select one or more workspace from the list and click the Delete icon. You can delete more than one workspace from the list at a time. Delete functionality is also available from the Actions list. If you try to delete a workspace which is already opened in a session, a message appears prompting you to close the workspace and then delete.
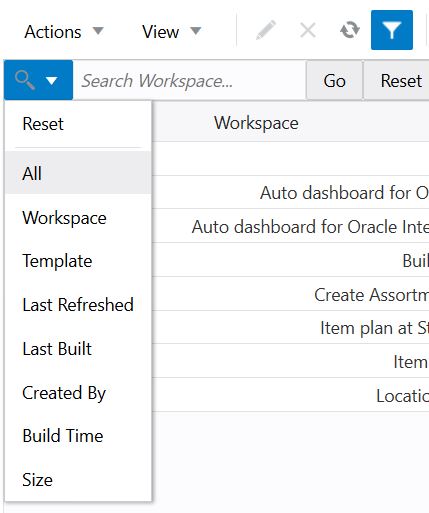
To filter the Manage Workspace table, use the filter icon available on the tool bar. The filter icon allows you to filter any one of the columns as per requirement. Click the filter icon to open the search option. Use the drop-down list to select the column at which you need to apply filter and then type in the desired keyword. The format for the search keyword changes with the type of column you are applying the search to. To reset the table, click the Refresh icon to display all the workspaces again.
To refresh the Manage Workspaces table, click the Refresh icon available on the tool bar.
To detach the Manage Workspaces table, click Detach available on the tool bar.
To open any workspace from the Manage Workspaces table, select the workspaces and click Open Workspace available on the tool bar.
To download the manage workspaces table, select the Download icon available on the tool bar.
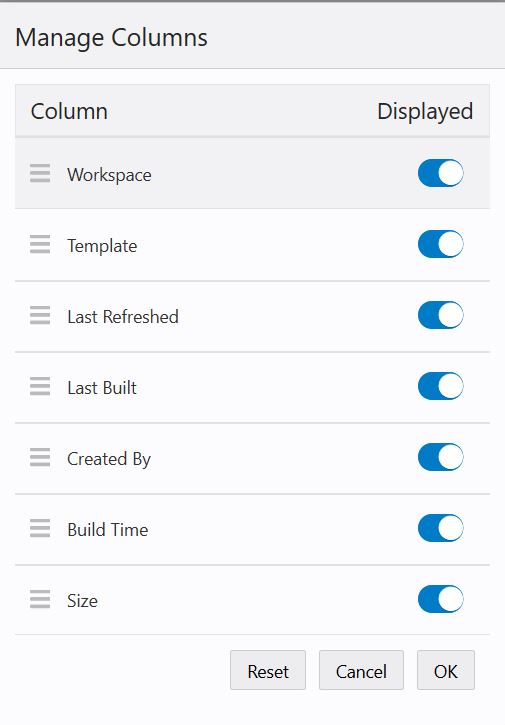
You can manage this view to see the information that is of the most interest to you. To manage the columns of the Manage Workspaces table, use the Manage Columns option available from the View list on the tool bar.
Each column has a Displayed toggle option that allows you to show or hide that column. A full toggle indicates that the column displays and an empty toggle means the column is hidden.
You can change the order of the columns displayed in the table. To reorder the columns, drag the columns up or down to the desired placement.
To revert to the default settings, click Reset.