| Oracle® Retail Demand Forecasting Cloud Service Administration Guide Release 23.1.101.0 F76813-01 |
|

 Previous |
 Next |
| Oracle® Retail Demand Forecasting Cloud Service Administration Guide Release 23.1.101.0 F76813-01 |
|
Previous |
Next |
The Oracle Retail Demand Forecasting Cloud Service (RDF CS) batch task is a powerful tool provided to the Administrator to manage periodic load/export of Data/Hierarchy from the front end.
RDF Cloud Service uses the Oracle Retail Predictive Application Server Cloud Edition (RPAS CE) Online Administration Tools as part of scheduling RPAS utilities and scripts that must be scheduled to run batch on Cloud, as the users do not have access to directly schedule scripts or run utilities on the domain server. Administrative users can view the results of the scheduled services in the log on a dashboard through the RPAS CE front end.
RPAS CE Online Administration Tools support the scheduling of standard RPAS utilities and, in addition, scheduling application-specific services. For a more detailed understanding of the Online Administration Tools and standard administration tasks, see the Oracle Retail Predictive Application Server Cloud Edition Administration Guide.
The Oracle Retail Job Orchestration and Scheduler (JOS) and Process Orchestration and Monitoring (POM) are used to schedule pre-configured jobs from RDF CS. Any jobs scheduled using JOS/POM from planning applications, in turn will only schedule the jobs as an OAT task which can also be monitored using OAT dashboards like any other tasks scheduled directly within the application.
The following sections explain the application-specific administration tasks that are pre-configured for RDF CS. Customers can also customize the tasks by changing the control files as part of the Extensibility framework. For allowed changes, refer to the Oracle Retail Demand Forecasting Cloud Service Implementation Guide.
The application-specific batch tasks are a set of tasks which help the Administrator to load/export a predefined set of measures and hierarchies. These tasks are found in the Online Administration Tools as Configured Batch Tasks.
Each task in turn calls predefined batch services to do the required tasks. RDF Cloud Service uses the batch framework to define the batch process.
Some tasks require input data files or hierarchy files as input. These files must be uploaded before the tasks are scheduled. Some tasks export files out of the application. Those files are copied to the Object Store, and Administrators can download these exported files.
For more details about how to upload files to Object Storage and file name convention used for different type of files, see the Oracle Retail Predictive Application Server Cloud Edition Implementation Guide.
The following list shows the application-specific administration tasks that are pre-configured for RDF Cloud Service under Configured Batch Tasks:
These batch tasks are explained in detail in subsequent sections. There are some additional tasks available under Configured Batch Tasks which are generic RPAS-specific tasks. Details about the RPAS-specific tasks can be found in the Batch Administration section in the Oracle Retail Predictive Application Server Cloud Edition Administration Guide.
Use this task to load a predefined set of measures grouped as a measure set in the batch control file batch_loadmeas_list.txt. The predefined measure load option, load_weekly, is a named set of load measures in the batch control file. If the Administrator decides to load the measure set for load_weekly, the Administrator needs to load data for measures which includes measures such as regular sales, promotional sales and clearance sales. All required data files must be uploaded to the ObjectStore location before scheduling this task. If there is no file present to load a particular measure in that measure set, it will be logged as not found and skipped.
This process will only load the data into those measures and will not run any subsequent calculations after it. The Administrator may need to schedule the necessary Run Batch Calc Group task after scheduling this task in order to process the loaded data.
The Predefined Measure Load Options in RDF CS are:
Load New Item Facts - Load attribute weights, forecast start override, and new item rate of sales for new items.
For details about the list of measure files, file format, and source information, see the Oracle Retail Demand Forecasting Cloud Service Implementation Guide.
The retailer can customize this task to load different sets of measures by customizing the batch control files. For information about customizing/extensibility of the batch control files and how to upload them, see the Oracle Retail Demand Forecasting Cloud Service Implementation Guide.
Use this task to run a predefined set of batch rules (as batch calc sets) on the data as defined in the batch control file batch_calc_list.txt.
The following predefined batch calculation sets are available in RDF CS:
Data Synchronization after Data Loading – Calculate facts based on loaded data.
Use this task to schedule a predefined set of batch tasks such as load measure, batch calc, and batch exports in a sequential order. The batch control file batch_exec_list.txt defines the steps in the specific order that will be executed during batch task execution. This task is used to schedule a typical weekly (or daily) RDF Cloud Service batch. The customer may need to use this only if they are not using JOS/POM to schedule their batch jobs. If they use the JOS/POM to schedule the daily or weekly batch jobs, they in turn call this pre-configured batch task.If any task aborts, a log is created and the process terminates. This task has the option to restart from the last failed service rather than running all the completed services again.
|
Note: Typically, the Administrator must schedule this task within a time frame after a domain backup and when no users are logged into the domain because this task runs in domain exclusive mode. The Administrator must work with Oracle to find out the time of backups and any other jobs. |
The following predefined batch sets are available:
Export Approved Forecast – Export the approved forecast to RDX.
Export Forecast Parameters – Export forecast parameters to RDX.
Import Facts – Import facts from RDX.
Import Flexible Grouping – Import flexible groups from RDX.
Import Forecast and Preprocess Components – Import forecast components and preprocess components from RDX.
Import Hierarchies – Import standard hierarchies from RDX.
Load Facts – Load facts from ObjectStore.
Load Hierarchies – Load hierarchies from ObjectStore.
Post Build – Batch run directly after building the application for the first time.
Post Forecast Batch – After importing forecast and preprocess components, calculate alerts and approve forecasts.
Pre-Forecast Batch – Prepare forecast parameters for export to RDX.
This section walks through an example of the process for scheduling and monitoring the Configured Batch Administration task in the Run Batch Task Group. The steps for scheduling all other tasks are similar, and most of the tasks do not have additional input parameters specific to that task. For more details about scheduling and monitoring Online Administration Tools tasks, see the Oracle Retail Predictive Application Server Cloud Edition Administration Guide.
To schedule and monitor a Configured Batch Administration task:
Log in to the RDF CS application as an Administration user.
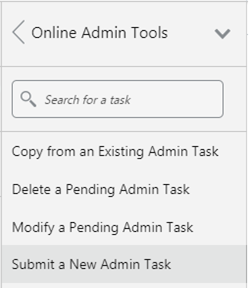
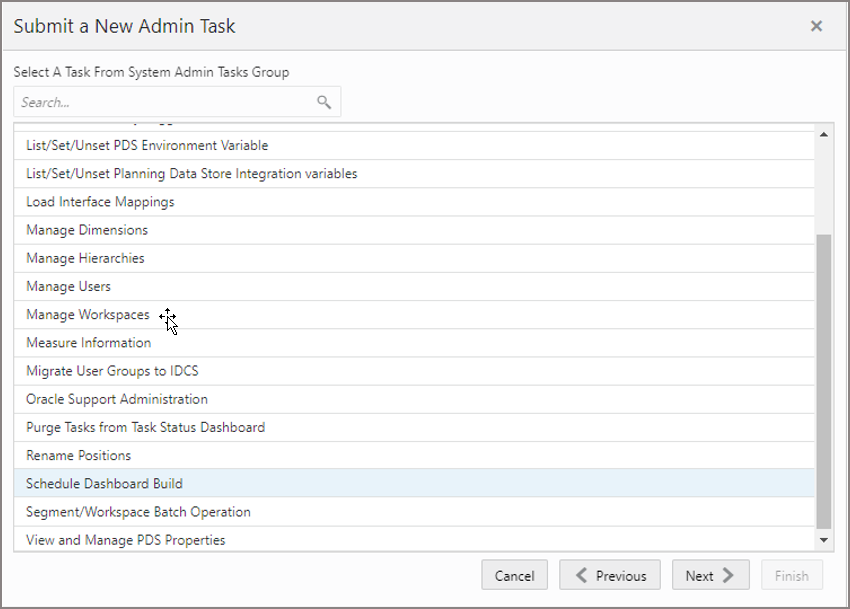
In the Tasks list, select Admin Tasks for RDF CS Customer Domain and then Online Admin Tools. Click Submit a New Admin Task.
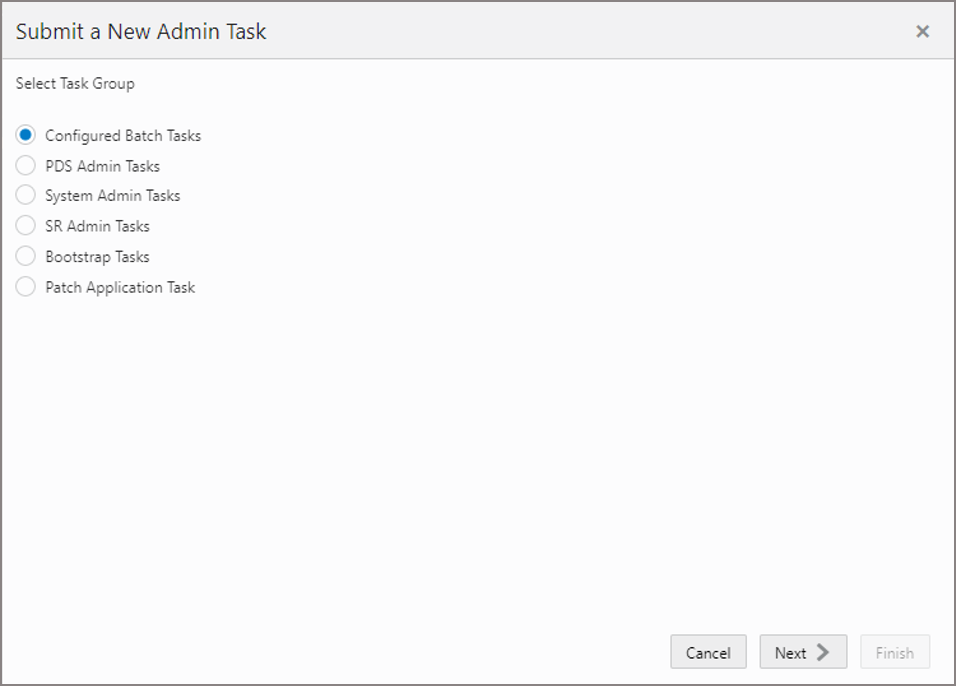
Select Configured Batch Tasks and click Next.
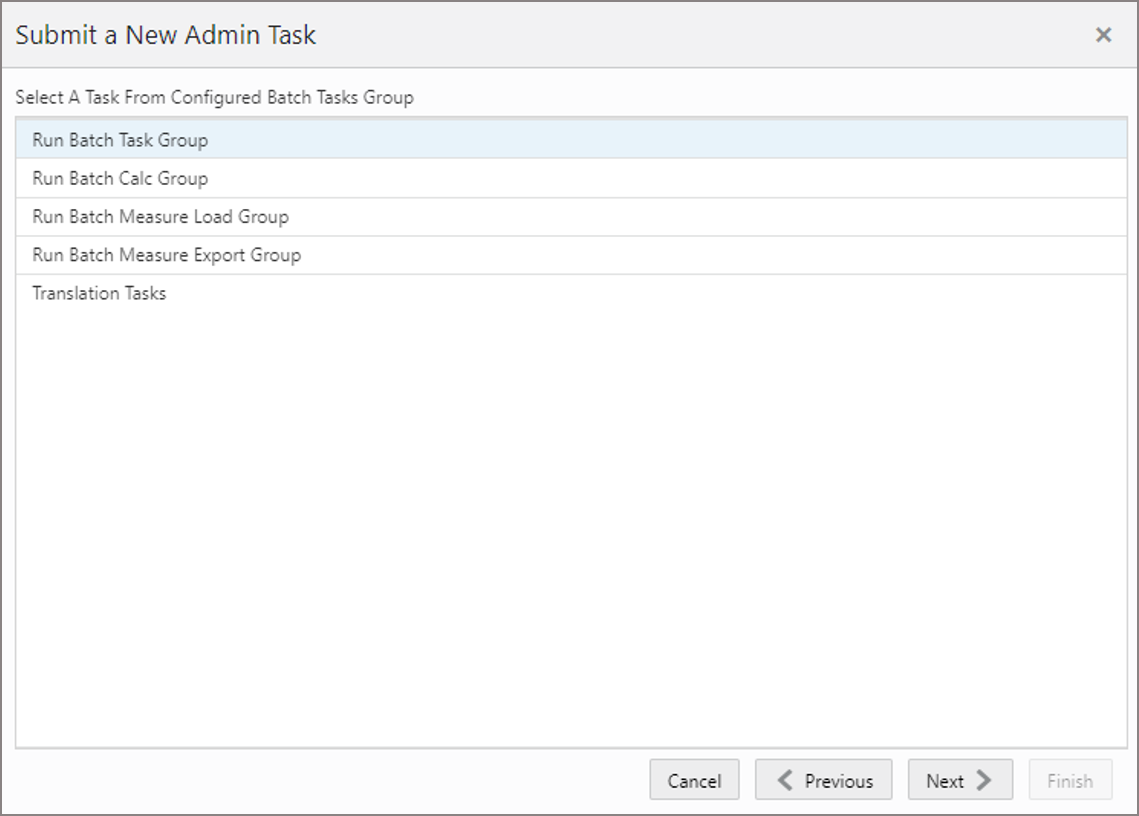
In the task list, select Run Batch Task Group and click Next.
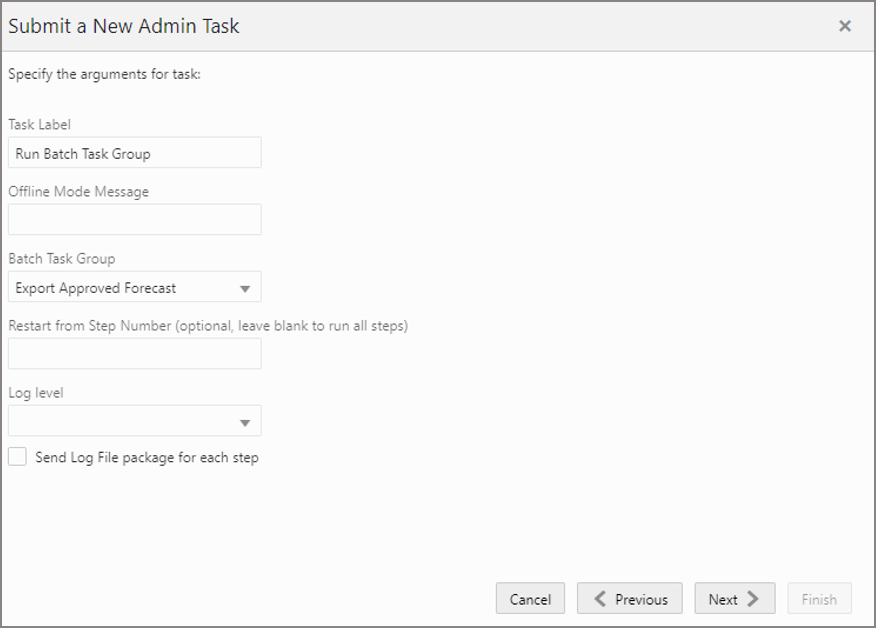
Enter the Task Label. This task has an additional parameter to choose the Batch Task Group to be run. In Figure 1-4, as an example, Export Approved Forecast is selected. Click Next.
To schedule the task to run immediately, select Run ASAP and click Next. To run on a particular date and time, select Run on a schedule (One time, Hourly, Daily, Weekly, or Monthly). Provide the Server Start and Stop Date/Time and click Next.
In the Confirm Action window, review the task scheduling details. To confirm the scheduling and submit the task, click Finish.
The task submitted confirmation message appears.
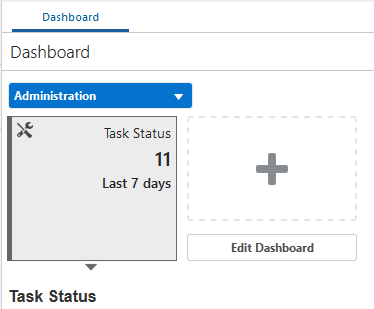
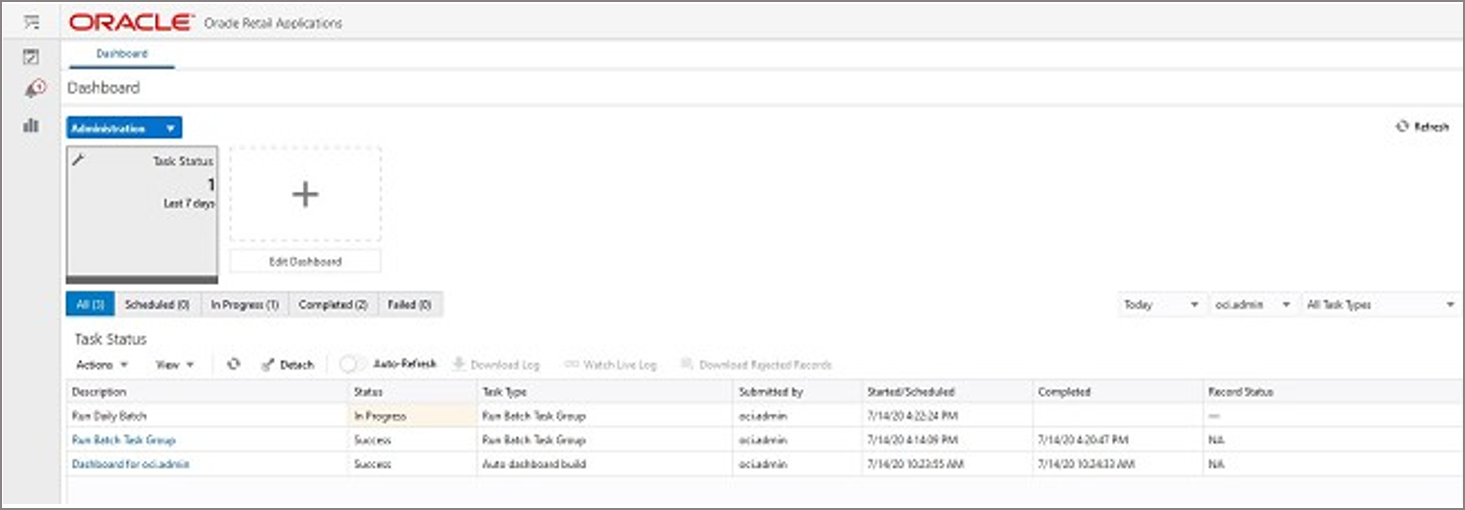
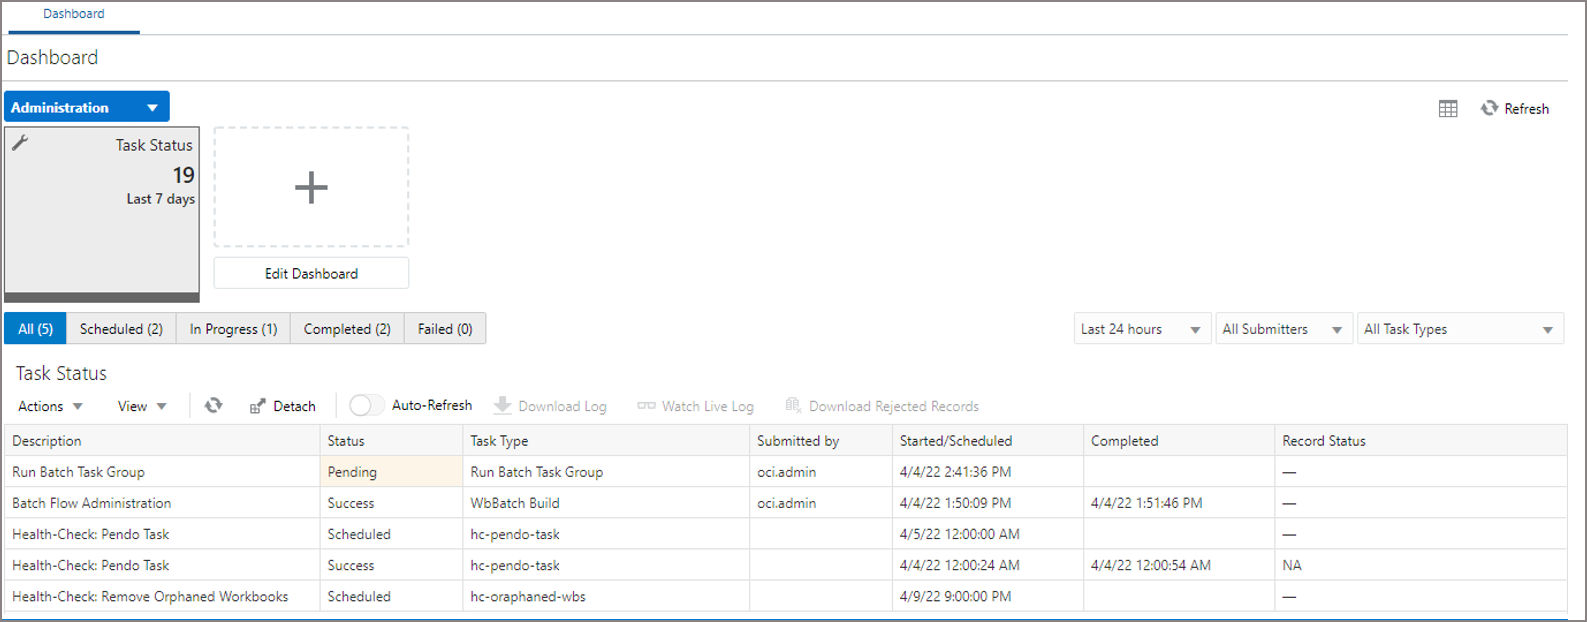
To check the status of all submitted tasks in the Dashboard, click Dashboard and select Administration from the list of Dashboard Profiles in the drop-down list.
At the bottom of the dashboard, it contains the lists of tasks submitted and their status.
The Status column shows whether a job has completed successfully, failed, or is pending (Scheduled). For any completed (Success/Failed) tasks, click the job name to view the subtask details if any for that job. To view the log, select the task and click Download Log. For failed tasks, the logs show the error details
Following is an example of a log showing the cause of an error:

|
Note: The detailed log file is also uploaded to Object Store so it is available for customers to download. The log file names are first appended with planning/outgoing/logs/ and with the text success/failure (with error code) along with the process name and control file entry set names and the time stamp for easy identification.For example:
|
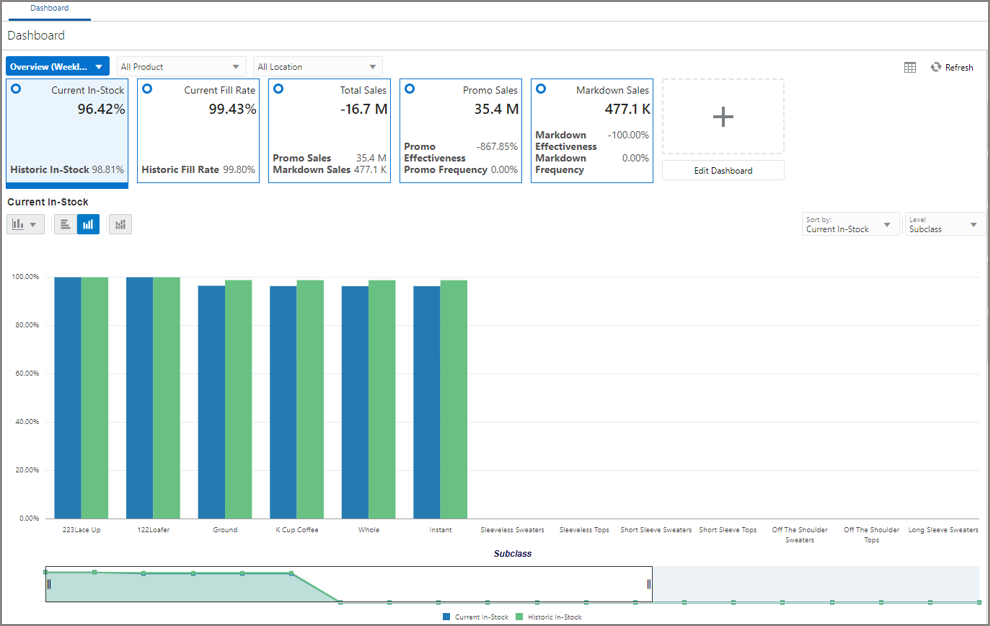
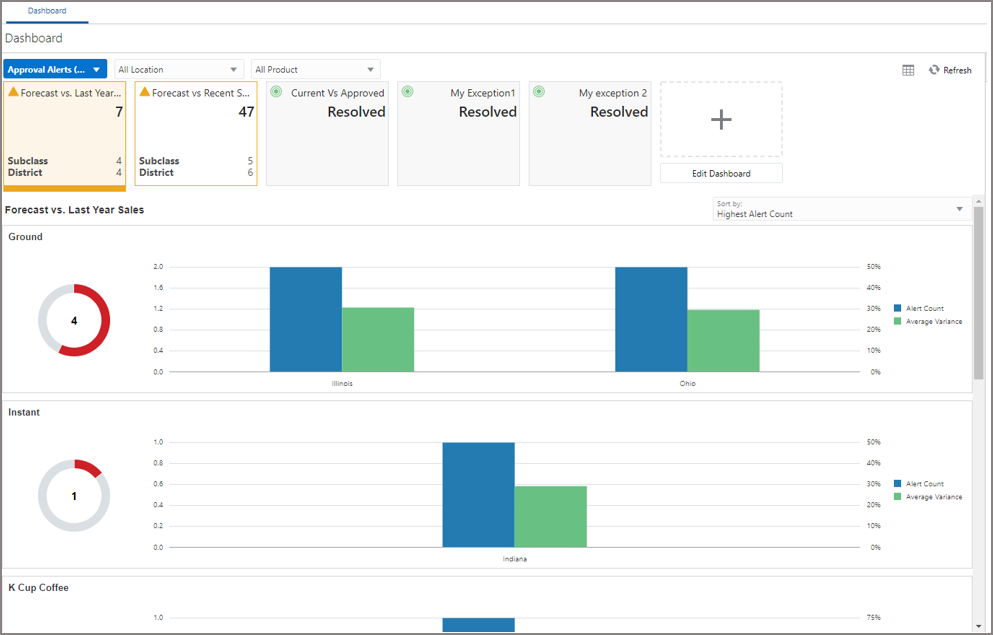
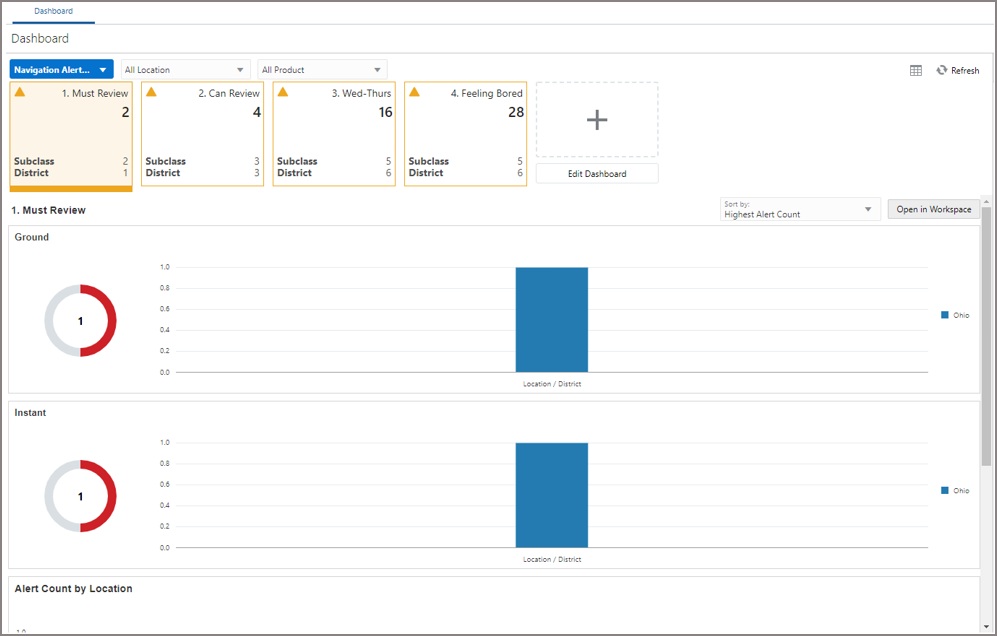
The Dashboard provides pre-configured dashboard profiles to the user once logged into the application. There are five profiles pre-configured for RDF CS:
Administration (task status)
Overview (one per final level)
Scorecard (one per final level)
Approval Alerts (one per final level)
Navigation Alerts (one per final level)
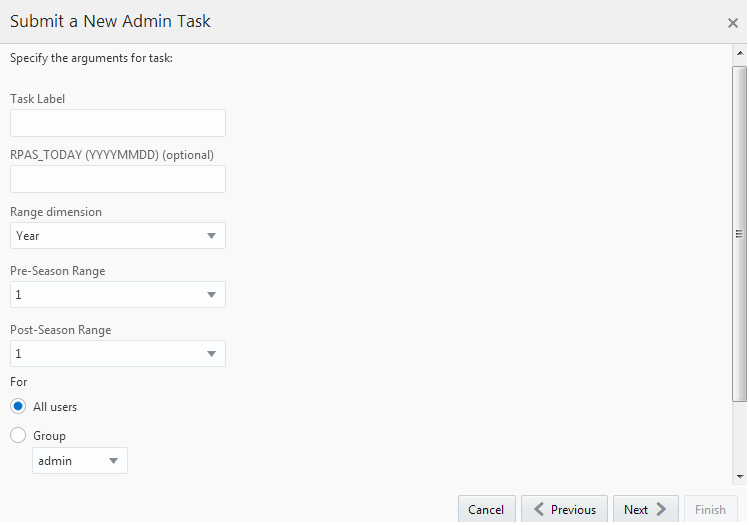
The dashboard pulls the data from an admin workbook built from the Online Administration Tool. In order to view the dashboard, an Administrator must schedule the dashboard build from the System Admin Tasks.
Task Label – Enter the name of the build task to review the status of build.
RPAS_TODAY – Optional if we need to build dashboard as of some other day other than the current date.
Range dimension – Calendar dimension against which the dashboard will be pre-ranged.
Pre-Season Range – Number of periods of Range dimension that needs to be included before RPAS_TODAY.
Post-Season Range – Number of periods of Range dimension that needs to be included after RPAS_TODAY.
Users – Select All Users or User Groups who can access that dashboard.
|
Note: For RDF, all of the dashboard profiles are calendar-independent so Range Dimension, Pre-Season Range, and Post-Season Range are not relevant and the defaults can be used. |
If Retail Home is configured, it provides a dashboard view of key configured metrics as tiles across multiple applications in the enterprise. RDF CS has the following tile states configured for Retail Home. These metrics are configured on the same dashboard templates. Hence, the regular dashboard segment needs to be built first, in order to see the Retail Home tiles. Retail Home uses a different set of JSON files to get the data from the dashboard segments into these tiles.
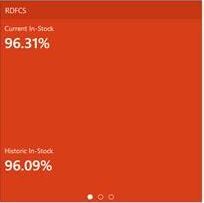
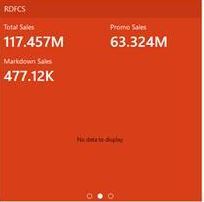
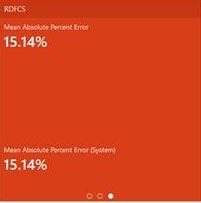
RDF CS has the following three tile states configured:
Current versus Historic In-Stock
Metrics displayed in this tile state:
Current In-Stock
Historic In-Stock
Sales versus Promotions
Metrics displayed in this tile state:
Total Sales
Promo Sales
Markdown Sales
Mean Absolute Percent Error
Metrics displayed in this tile state:
Mean Absolute Percent Error
Mean Absolute Percent Error (System)