| Oracle® Retail Merchandise Financial Planning Cost Cloud Service User Guide Release 15.0 E69494-01 |
|

 Previous |
| Oracle® Retail Merchandise Financial Planning Cost Cloud Service User Guide Release 15.0 E69494-01 |
|
Previous |
Merch Targets and Merch Plan users can both use the Create Merch Plan Targets and Create Merch Plan activity during the in-season to review plans and compare those plans to the season actuals. Merch Targets users review the targets and the plans created by the lower level users and determine how those plans compare to actuals. Merch Plan users can review plans to actuals and also adjust the plans with the Update Department Plans task.
One of the key steps of in-season management is reviewing Open to Buy (OTB). OTB is the amount of money budgeted during the in-season to purchase goods that have not yet been received or ordered. The Merch Plan user can decide in-season how to spend this money to reach strategic targets.
Each role has its own task within the Create Merch Plan Targets and Create Merch Plan activity. The activities of each role are described in this chapter.
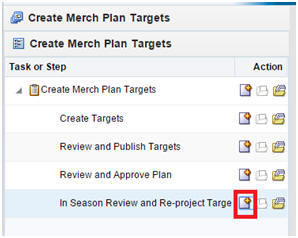
The Merch Plan Targets user can use the In Season Review and Re-project Targets task to review the targets and plans created by the lower level users and determine how those plans compare to actuals. The In Season Review and Re-project Targets has six tabs, two of which are used to re-approve an already submitted plan.
Review and Re-project
Open to Buy
Publish Targets
Projection
Review Plan
Approve View
To build the In Season Review and Re-project Targets workbook, complete the following steps.
Click the Create New Workbook icon in the In Season Review and Re-project Targets task.
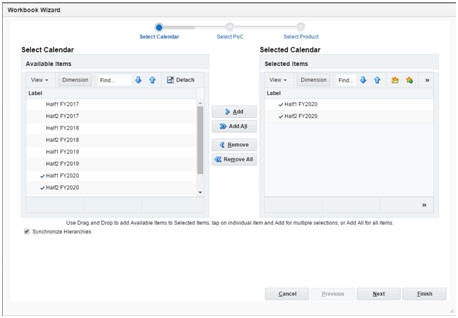
The workbook wizard opens at the Calendar Selection step. Select the halves that you want to plan and move them to the Selected Items box. Click Next.
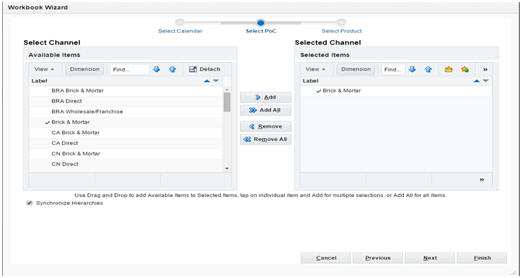
The Location Selection step of the workbook wizard is displayed. Select the channels you want to plan and move them to the Selected Items box. Click Next.
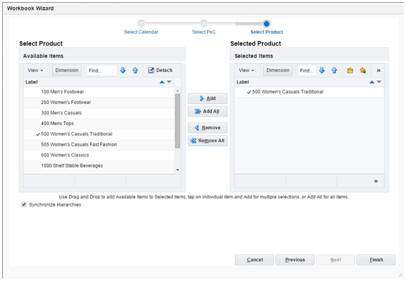
The Product Selection step of the workbook wizard is displayed. Select the product you want to plan and move it to the Selected Items box. Click Finish.
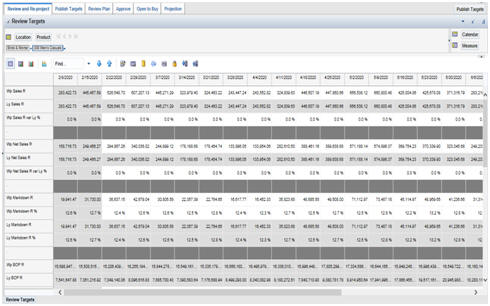
The workbook is built, and the Review and Re-project view is visible.
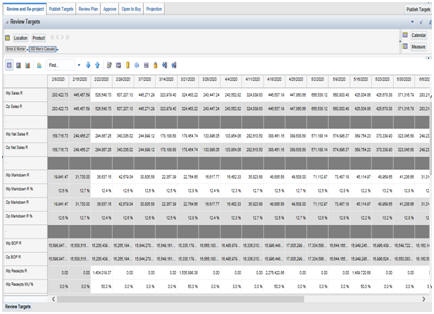
Use the Review and Re-project view to compare your plan to the current plan, the original plan, and last year's actuals. Use the three measure profiles in this view to complete these tasks:
Default
Tgt with Cp
Tgt with Op
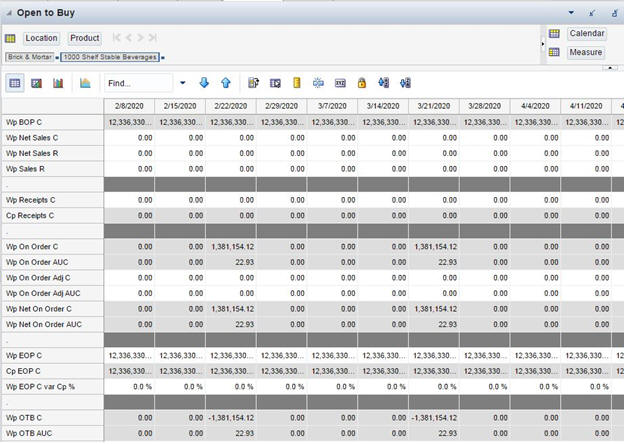
The Open to Buy Tab has one view: Open to Buy. Use the Open to Buy view to understand the variance between the current planned receipts and their markup to the on order and any on order adjustments. This variance is shown in the Wp OTB C and Wp OTB MU% measures. These measures indicate how many additional receipts can be purchased as well as what markup to use in order to purchase these for the current approve receipt retail and markup plan. Users should understand if their planned receipts keep them on the overall Cp EOP inventory plan. To understand the variance between the Cp EOP inventory plan and the Wp EOP inventory plan, users can reference the measure Wp EOP C Var Cp%. Use this view to validate what OTB you have available and then start adjusting your plan. Then, confirm that your updates can be obtained given the OTB constraints that you may have. Use the following best practices to adjust OTB.
To understand the difference between the current approved receipts and the net on order, compare the Cp Receipts C plan to the Wp Net On Order C.
Compare the Cp Receipts MU% plan to the Wp Net On Order MU%. If receipts are booked for non-elapsed periods, you can enter this Wp Receipt C and Wp Receipt MU% data into the Wp On Order Adj C and Wp On Order Adj MU% respectively to capture the Wp OTB measures. For example, this may occur if receipts book daily for the retailer, and OTB is completed on a Tuesday. By using the Wp On Order Adj measures, you can capture all receipts for comparing the Net On Order to the Cp receipt plan.
Use the Review and Re-project tab under In Season Review and Re-project Targets step to adjust the sales and markdown targets for department. The view used in the In Season Review and Re-project Targets step is the Review and Re-project tab view. This view contains several metrics that you can reference when setting your plan. You can use the Ly measures as guidelines for entering data in the corresponding Wp measures.
In this view, you typically complete the following steps to adjust the sales and markdown plan that reflects what you plan to achieve in the period you are planning.
Adjust the desired sales plan by week. You can enter amounts for each week. Or, if you know the aggregate amount for a month, quarter, half, or year, you can enter that amount at that level and then let it spread down to the weeks.
Focus on markdowns by validating the changes you must make.
If necessary, you can validate the unit plan by entering data in the average unit retail (AUR) or unit (U) measures.
After you have adjusted the sales and markdown plan, continue to the next step, "Update Receipts and Inventory Plan".
After you have adjusted the sales plan by setting the sales and markdown targets, adjust the inventory plan so that it can support the sales plan. An inventory plan is created by a value plan and a unit plan, which are both composed of inventory and receipt targets. First, adjust the value plan. After you have adjusted the value plan, review the unit plan. The unit plan is essentially the value plan translated into units, based on the appropriate average unit retail (AUR). Because of this, the unit plan is affected by the changes you made to the value plan. If the value plan has created an unachievable unit plan, adjust both as necessary to meet your goals. The purpose of this step is to ensure that you have a receipt plan and an inventory plan that support the sales that you are projecting.
Use the following best practices to plan the receipts and inventory.
Plan the receipt flow and then evaluate the average inventory and turn.
Use the Gross Margin view to evaluate the gross margin created from your sales plan. Determine whether the planned gross margin meets your gross margin goal. If it does not, gross margin can be updated by editing Wp Net Sales C or directly by updating Wp GM R or Wp GM R%.
Adjust the Wp Stock to Sales ratio C measure accordingly. These adjustments affect the receipts for both the current month and prior month. However, the total plan period receipts do not increase or decrease; they only shift from month to month.
After you have determined that the value and unit plans that you have created are achievable, continue to the "Review and Update Gross Margin Plan" step, where you can review the gross margin plan to see if your sales and inventory plans achieve the gross margin goal you have been given.
Use the Review and Re-project Targets view to review the gross margin plans that were created by the value and unit plans you developed. You should use the Review and Re-project Targets view to determine whether the gross margin plans meet the gross margin goal that you have been given. If the gross margin plans do not meet your goal, make the necessary adjustments to your sales and inventory targets. Continue this process until you are satisfied with the gross margin plans.
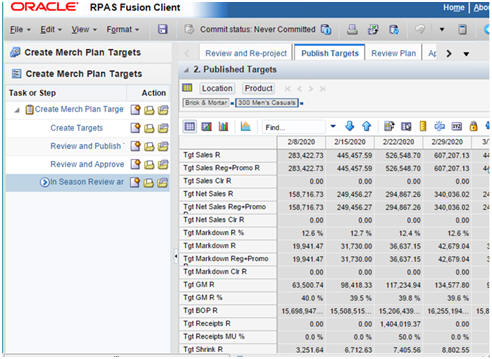
Use the Publish Targets tab under the In Season Review and Re-project step when you are ready to publish the targets you created (publish the updated targets). Publishing a target copies your Merch Target Wp measure information to the Tgt measures in your task, and then it commits those target measures to the database so that Merch Plan users can retrieve those targets.
The Tgt measures are shown in the Published Targets view found in the Publish Targets tab. These measures initially have existing targeted values. After the targets are published in this step, these measures are populated with the updated target information.
To publish the targets, complete the following steps.
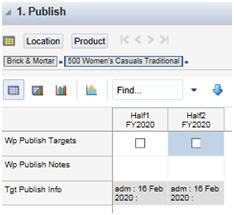
Enable the Wp Publish Targets measure check box to select the halves the that you want to publish.
If necessary, enter relevant information in the Wp Publish Notes measure. This is optional.
Repeat steps 1 and 2 for other locations and products if necessary.
Click Publish Targets. This button is located in the top right corner, as shown in Figure 10-11.
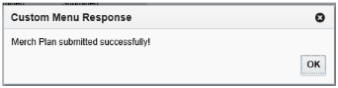
A success message is displayed. Click OK to close it.
The view refreshes and clears the data in Wp Publish Targets and Wp Publish Notes measures. It populates data for the Tgt Publish Info measure as name:date:Notes. The Tgt measures in this view are populated.
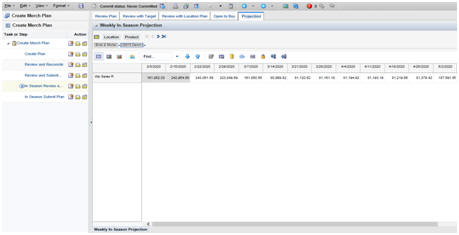
The Projection view contains all the measures contained in the task; however, only the Wp Sales R measure is visible in the default measure profile. Use this task to create a view of task measures that you cannot view at one time in other views.
To see the other measures in this view, complete the following steps:
Click the Measure dimension tile. The All Measures - Measure window is displayed.
Move the measures you want to see in the view from the Hidden Measures box to the Visible Measures box.
When finished, click OK.
After you have published your targets and committed your task, the Merch Plan user can use the targets to re-project the plan. The Merch Plan user can use the In Season Review and Re-project Plan task to review the plan and the targets created by the higher level users and determine how those plans compare to actuals.
To build the In Season Review and Re-project Plan workbook, complete the following steps.
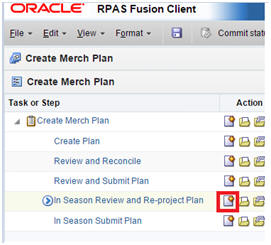
Click the Create New Workbook icon in the In Season Review and Re-project Plan task.
The workbook wizard opens at the Calendar Selection step. Select the halves that you want to plan and move them to the Selected Items box. Click Next.
The Location Selection step of the workbook wizard is displayed. Select the channels you want to plan and move them to the Selected Items box. Click Next.
The Product Selection step of the workbook wizard is displayed. Select the product you want to plan and move it to the Selected Items box. Click Finish.
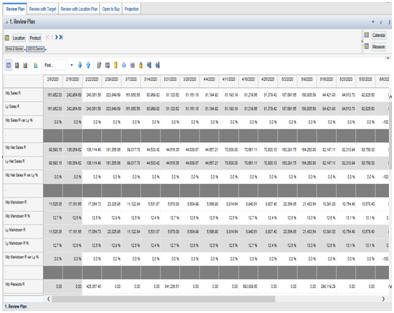
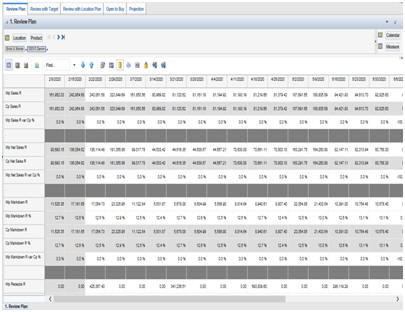
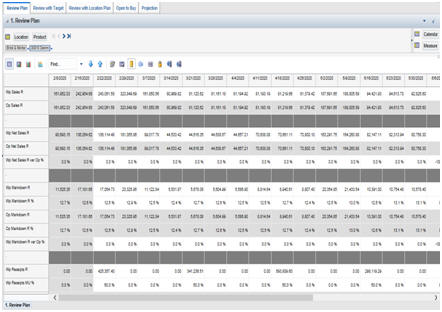
The workbook is built, and the Review Plan view is visible. The In Season Review and Re-project Plan Task has the following tabs:
Review Plan
Review with Targets
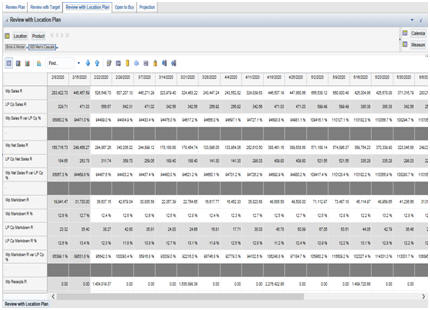
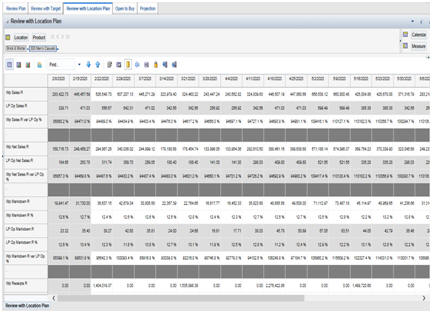
Review with Location Plan
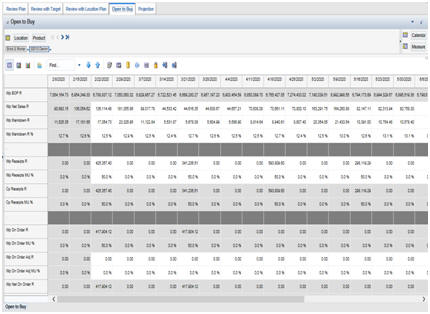
Open to Buy
Projection
Use the Review Plan to compare your plan to the current plan, the original plan, and last year's actuals. Use the three measure profiles in this view to complete these tasks: Wp/Ly, Wp/Cp, and Wp/Op.
The next step for the planner is to review the plan with re-projected targets.
After reviewing the plan, you must review the department targets that the Merch Targets user has created for you. In this way you can understand the goals that your plan should meet.
Use the Review with Target view under In Season Review and Re-project Plan step to adjust the sales and markdown, inventory, and gross margin for subclasses within a department by considering the targets that have been re-projected by the Merch Target role users.
Use the Open to Buy view to review your adjusted plan. The primary in-season task for the Merch Plan user is to review the OTB and adjust receipts if necessary. You can do this only if you have open to buy available. In the Review OTB step, you may have adjusted the OTB. Use this view to confirm that your updates can be obtained, given the OTB constraints you may have.
The Projection view contains all the measures contained in the task; however, only the Wp Sales R measure is visible in the default measure profile. Use this task to create a view of task measures that you cannot view at the same time in other views.
To see the other measures in this view, complete the following steps:
Click the Measure dimension tile. The All Measures - Measure window is displayed.
Move the measures you want to see in the view from the Hidden Measures box to the Visible Measures box.
When finished, click OK.
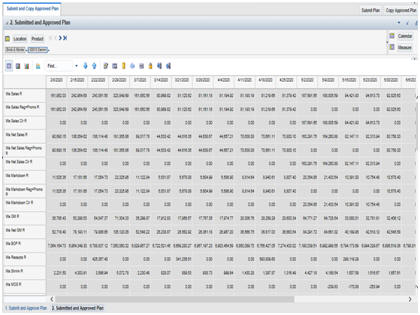
When you are ready to submit your working plan to the Merch Plan user for approval, use the Submit and Copy Approved Plan view in the In Season Submit Plan step. This step has two views: Submit and Copy Approved Plan and Submitted and Approved Plan.
Note that when you select the Op Approve Enabled measure, you can submit a plan for the Op version. This measure is set by an administrator in the Enable OP Approval administration task. The administrator can select or deselect this option at any time. If the administrator deselects it during the in-season, you cannot submit a plan for the Op. The administrator may choose to do this after the planning process has been finalized in order to lock down the Op. If this occurs, you will be unable to submit a plan for the Op and the Merch Targets user will be unable to approve a plan for the Op.
Enable the Wp Submit measure check box for the select the halves the that you want to publish.
Optional: Enter information about the working plan in the Wp Submit Notes measure.
Click the Submit custom menu.
A success message is displayed. Click OK to close it.
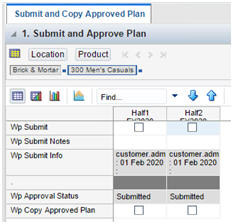
After the Submit custom menu is run, the Wp Submit and Wp Submit Info measures are cleared and the Wp Approval Pending check boxes are checked. The Wa Submit By, Wa Submit Date, and Wa Submit Info measures are populated. In addition, your working plan is copied into a Waiting for Approval (Wa) plan.
After the Merch Targets user approves or rejects the Wa plan, the Merch Plan user can see the approval or rejection information by accessing the Submit and Copy Approved Plan view in the Merch Plan - In Season Submit Plan step.
Once the planner submits the plan, the data is copied from the Wp measures to the Wa measures.
After you have submitted your plan to the Merch Targets user, the Merch Targets user approves or rejects your submitted plan. If the plan rejected, you can adjust it using the steps described in this chapter and submit it again.
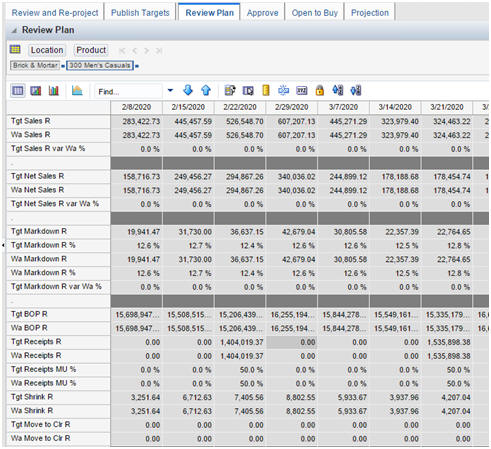
After the Merch Plan user submits a plan, the Merch Targets user can review the details of the plan in the Review Plan view under In Season Review and Re-project Targets step. This step has one view: Review Plan.
To build the In Season Review and Re-project Targets workbook, complete the following steps.
Click the Create New Workbook icon in the In Season Review and Re-project Targets task.
The workbook wizard opens at the Calendar Selection step. Select the halves that you want to plan and move them to the Selected Items box. Click Next.
The Location Selection step of the workbook wizard is displayed. Select the channels you want to plan and move them to the Selected Items box. Click Next.
The Product Selection step of the workbook wizard is displayed. Select the product you want to plan and move it to the Selected Items box. Click Finish.
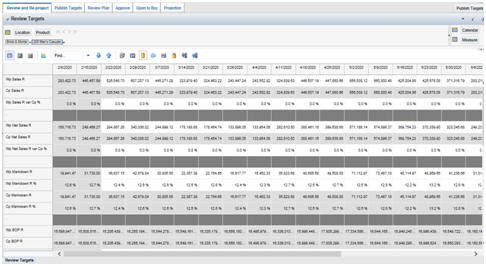
The workbook is built, and the Review and Re-project view is displayed.
Merch Target user can review the details of the plan in the Review Plan view under the In Season Review and Re-project Targets step. This step has one view: Review Plan.
You can use four measure profiles to review the plan: Default and Units.
After you have finished reviewing the Wa plan, continue to the last step of the task, Approve/Reject Plan. The Merch Target user can approve or reject the plan using Approve View.
In the Wp Approval measure, Select the Approved(or) Rejected option from the drop-down list.
Commit the data using the File menu (File > Commit).
After the Merch Targets user approves or rejects the Wa plan, the Merch Plan user can view the approval or rejection information by accessing the Submit and Copy Approved Plan view in the Merch Plan - In Season Submit Plan step.
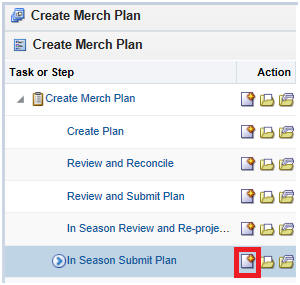
To build the In Season Submit Plan workbook, complete the following steps.
Click the Create New Workbook icon in the In Season Submit Plan task.
The workbook wizard opens at the Calendar Selection step. Select the halves that you want to plan and move them to the Selected Items box. Click Next.
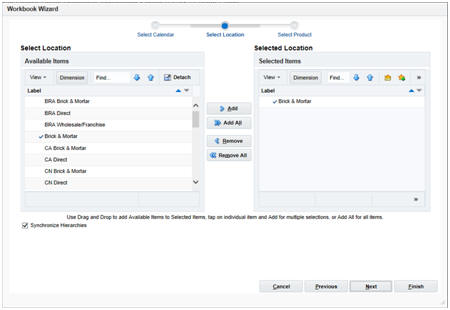
The Location Selection step of the workbook wizard is displayed. Select the channels you want to plan and move them to the Selected Items box. Click Next.
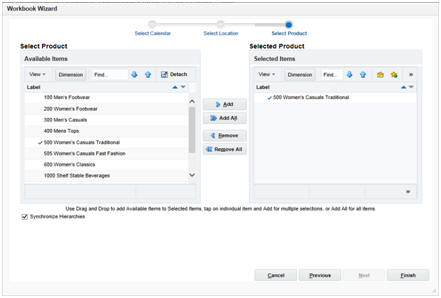
The Product Selection step of the workbook wizard is displayed. Select the product you want to plan and move it to the Selected Items box. Click Finish.
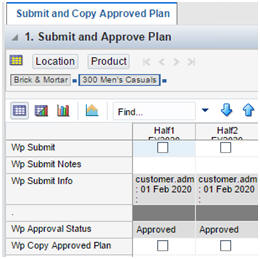
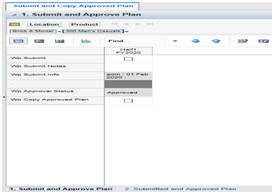
This step has only one view, Submit and Copy Approved Plan View.
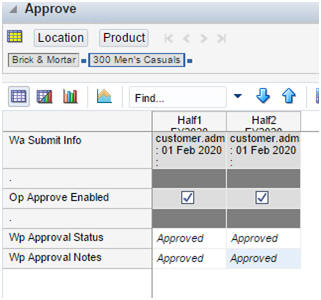
Verify the status of the Wp Approval Status measure.
Enable the Wp Copy Approved Plan check box and run the Copy Approved Plan custom menu to approve the plan.
Once the planner re-approves the plan, the data is copied from the Wa measures to the Cp and Op measures.