| Oracle® Retail Merchandise Financial Planning Cloud Service and Oracle® Retail Merchandise Financial Planning Enterprise Edition Cloud Service Administration Guide Release 19.0 F24870-08 |
|

 Previous |
 Next |
| Oracle® Retail Merchandise Financial Planning Cloud Service and Oracle® Retail Merchandise Financial Planning Enterprise Edition Cloud Service Administration Guide Release 19.0 F24870-08 |
|
Previous |
Next |
This chapter describes the process for managing users and roles. The Administrator can create users and assign the level of access as needed. This chapter describes how to create/modify/delete a user and assign roles to a user.
Your Merchandise Financial Planning Cloud Service is configured with Oracle Cloud Infrastructure Identity and Access Management (OCI IAM) or Oracle Identity Cloud Service (IDCS) for managing users and access.
In order to provide application access to end users, the Cloud Service Administrator needs to create the user's account from OCI IAM or IDCS. For OCI IAM user setup, follow the steps in "OCI IAM User Creation." For IDCS user setup, follow the steps in "IDCS User Creation." The user must also be assigned to a group in OCI IAM or IDCS.
To complete the user provisioning activity, the same user must be added in the Merchandise Financial Planning Cloud Service application and assigned to the same user group.
MFP Cloud Service is built with role-based access. Permissions are associated with roles. All roles, including for authorization and application administration, are described in the Oracle Retail Identity Management for OCI IAM Startup Guide.
The Administrator can assign the roles to the user. Follow the steps in "Managing Users in OCI IAM" or "Managing Users in IDCS."
For detailed information on the tasks related to user and role, see the following sections:
For Enterprise Edition Cloud Service provisions, the customer needs to define required roles as needed for their configuration using OCI IAM or IDCS. For more details about Atomic User Management (AUM), additional roles available, and access to security details, see the Oracle Retail Predictive Application Server and Applications Cloud Edition Security Guide.
This section describes how to maintain users through Oracle Cloud Infrastructure Identity and Access Management (OCI IAM).
Before users can access the Oracle Retail Merchandise Financial Planning Cloud Service applications, it is necessary to provision access to the system for each user and to assign roles to each user to control what functionality will be available to the user. The access provisioning can be done using OCI IAM. After creation of the user in OCI IAM, the Administrator needs to create the same user with the same user group (that is, the role in OCI IAM) in the Oracle Retail Merchandise Financial Planning Cloud Service application.
|
Note: The OCI IAM Application URL and login with the required administrator access are needed to perform the following steps. The welcome email sent by Oracle includes the URL. |
The following steps explain how to define users and assign roles for a new user:
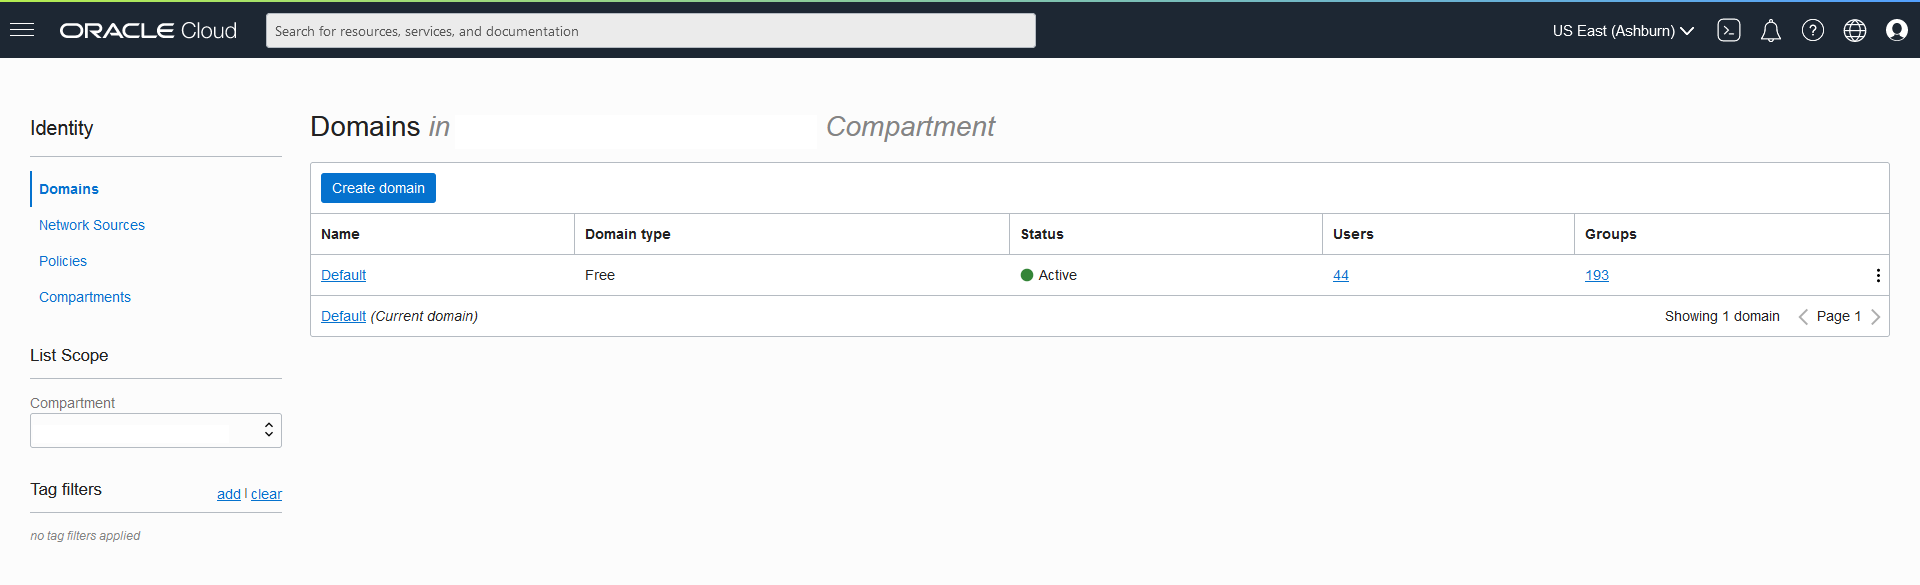
Log in to the OCI IAM application. The Domains view is shown by default.
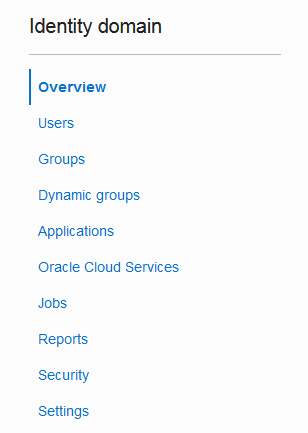
Click the Domain name for which you want to create a user. The Domain Overview page appears.
From the Domains Overview page, click Users.
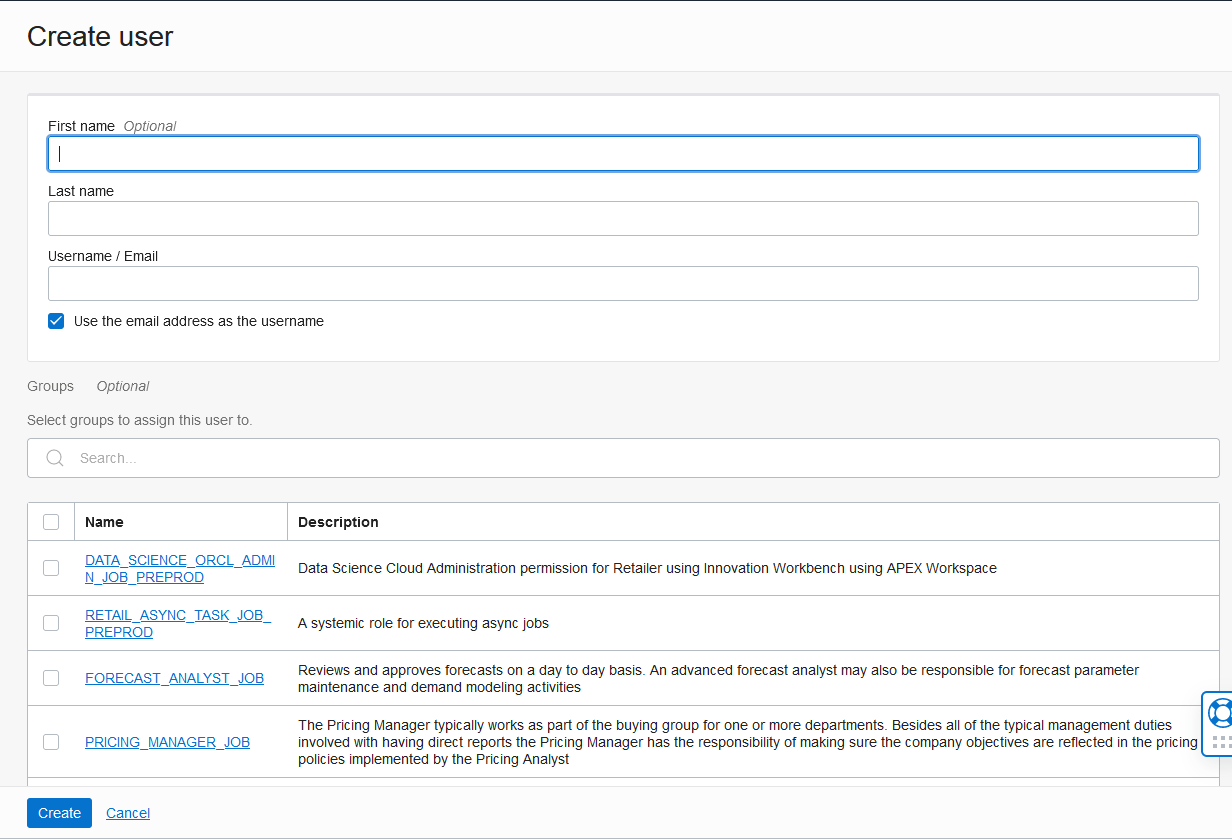
From the Domain Users page, click Create User. The Create User page appears.
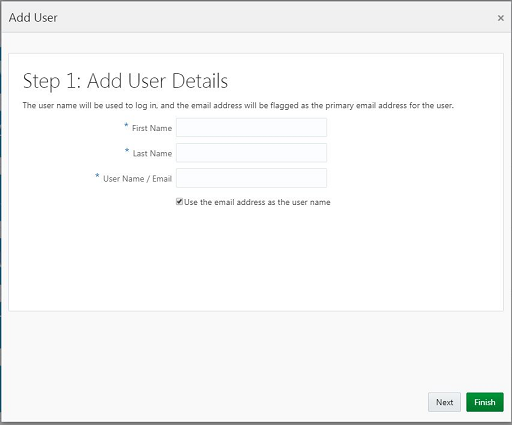
Provide the First Name, Last Name, and unique user name. If the option ”Use the email address as the user name” is checked, the system automatically takes the email address as the user name.
|
Note: Oracle recommends using the email address as the user name. |
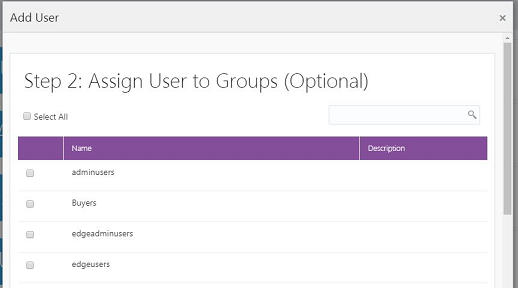
Assign the user to a group. Typically, this will be the group specific to the provisioned service or application. The user can be assigned to more than one user group, but it is recommended to assign one group to one user.
For example, you could assign the user being created to the MFP_BUYERS role.
Click Create to complete the user creation in OCI IAM.
To complete the user setup, the same user must be created in the Merchandise Financial Planning Cloud Service application. To add the user to the Merchandise Financial Planning Cloud Service application, follow the steps in "Adding a User to the MFP CS Application."
User groups provide an intermediate level of security to workbooks that were created and saved by specific users. When new users are assigned to the system, they must be assigned to existing user groups. User groups should consist of individuals with similar job functions or responsibilities. In the Oracle Retail Predictive Planning Suite, the user group corresponds to the user's planning role.
To add a user group:
Under User Administration, click Add User Group. A Workbook Wizard window appears.
In the Workbook Wizard window, enter the relevant information into the following fields:
In the Group Name field, enter a name for the group.
|
Note: Each group name must begin with a letter and contain only alphanumeric characters and underscores. It cannot have spaces. User group names are case sensitive. |
In the Group Label field, enter a descriptive label for the group. This label is displayed when referring to the group throughout RPAS CE.
Click Finish to add the user group to the database.
After users are created in OCI IAM, the Administrator can manage user information, manage user groups assigned to users, delete or revoke user access, and reset a password.
The following steps explain how to manage users in OCI IAM:
Log in to the OCI IAM application. The Domains view is shown by default.
Click the Domain name for which you want to create a user. The Domain Overview page appears.
From the Domains Overview page, click Users.
Click the user that you want to edit.
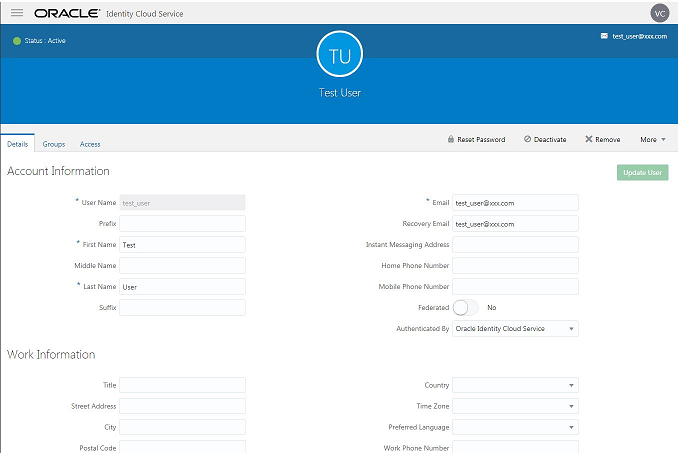
You can update the additional information for the selected user. Once updated, click Update User to confirm the changes.
You can manage the user groups assigned to users in the Groups table.
Assign a New Group
In the Groups table, click Assign user to groups.
From the Assign user to group dialog, select the group or groups to add the user.
Click Assign user.
Remove a Group
In the Groups table, select the group from which you want to remove the user.
Click Remove user from group.
|
Note: The same user also needs to be deleted from the Merchandise Financial Planning Cloud Service application. This will keep OCI IAM and the application synchronized. Complete the user deletion by following the steps for deleting a user in the User Maintenance chapter of the Oracle Retail Predictive Application Server Cloud Edition Administration Guide. |
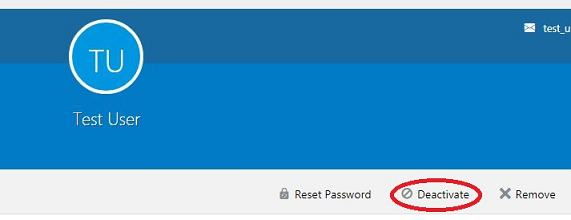
A user can be deactivated by selecting Deactivate from the More Actions menu and then confirming the selection in the confirmation dialog.
A user can be asked to reset their password by selecting Reset Password and then confirming the selection in the confirmation dialog. The associated user will get an email with a link to reset the password.
This section describes how to maintain users through Oracle Identity Cloud Service (IDCS).
Before users can access the Oracle Retail Merchandise Financial Planning Cloud Service applications, it is necessary to provision access to the system for each user and to assign roles to each user to control what functionality will be available to the user. The access provisioning can be done using IDCS. After creation of the user in IDCS, the Administrator needs to create the same user with the same user group (that is, the role in IDCS) in the Oracle Retail Merchandise Financial Planning Cloud Service application.
|
Note: The IDCS Application URL and login with the required administrator access are needed to perform the following steps. The welcome email sent by Oracle includes the URL. |
The following steps explain how to define users and assign roles for a new user:
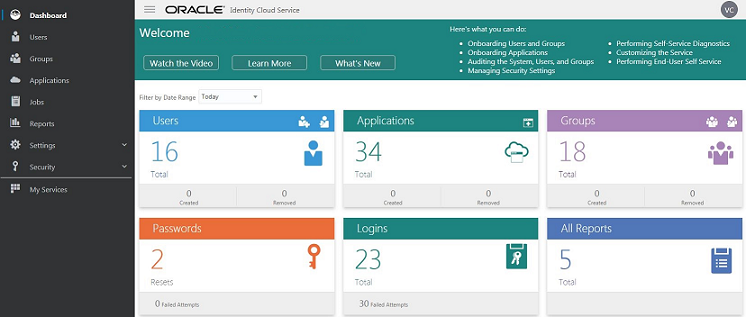
Log in to the IDCS application. The dashboard view is shown by default.
Click the Add a user icon.
Provide the First Name, Last Name, and unique user name. If the option "Use the email address as the user name" is checked, the system automatically takes the email address as the user name.
|
Note: Oracle recommends using the email address as the user name. |
Assign the user to a group. Typically, this will be the group specific to the provisioned service or application. The user can be assigned to more than one user group, but it is recommended to assign one group to one user.
For example, you could assign the user being created to the MFP_BUYERS role.
Click Finish to complete the user creation in IDCS.
To complete the user setup, the same user must be created in the Merchandise Financial Planning Cloud Service application. To add the user to the Merchandise Financial Planning Cloud Service application, follow the steps in "Adding a User to the MFP CS Application."
User groups provide an intermediate level of security to workbooks that were created and saved by specific users. When new users are assigned to the system, they must be assigned to existing user groups. User groups should consist of individuals with similar job functions or responsibilities. In the Oracle Retail Predictive Planning Suite, the user group corresponds to the user's planning role.
To add a user group:
Under User Administration, click Add User Group. A Workbook Wizard window appears.
In the Workbook Wizard window, enter the relevant information into the following fields:
In the Group Name field, enter a name for the group.
|
Note: Each group name must begin with a letter and contain only alphanumeric characters and underscores. It cannot have spaces. User group names are case sensitive. |
In the Group Label field, enter a descriptive label for the group. This label is displayed when referring to the group throughout RPAS CE.
Click Finish to add the user group to the database.
After users are created in IDCS, the Administrator can manage user information, manage user groups assigned to users, delete or revoke user access, and reset a password.
The following steps explain how to manage users in IDCS:
Log in to the IDCS application. The dashboard view is shown by default.
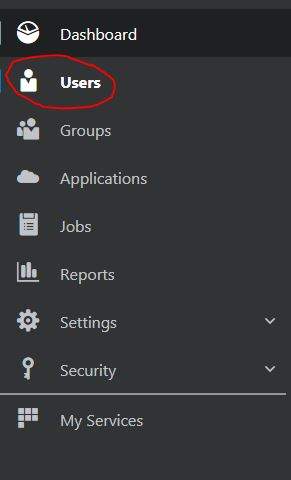
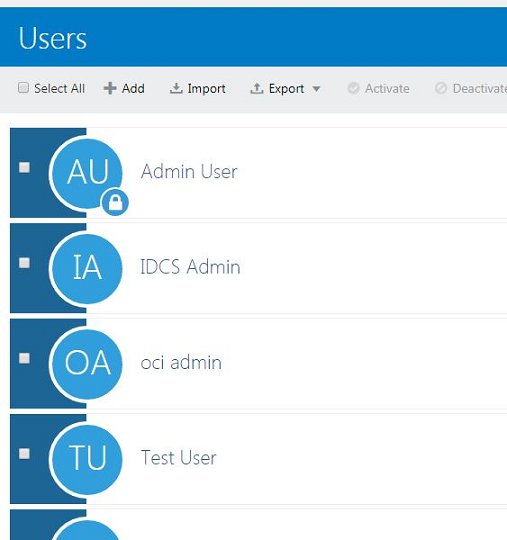
Select Users from the menu. The list of users in the system is displayed.
Click the user that you want to edit.
You can update the additional information for the selected user. Once updated, click Update User to confirm the changes.
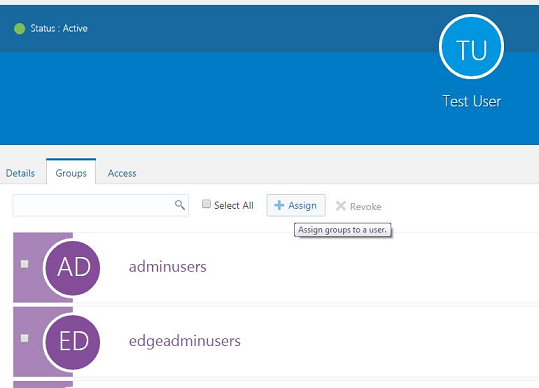
You can manage the user groups assigned to users by selecting the Groups tab in the top menu and selecting the + Assign option to update user groups as shown in the following figure.
A user can be deactivated by selecting Deactivate and then confirming the selection in the confirmation dialog.
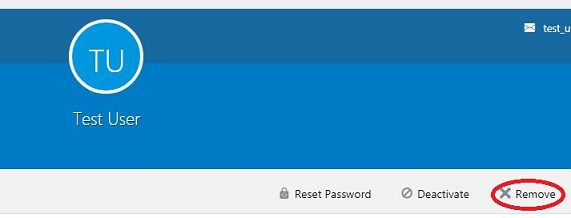
A user can be deleted by selecting Remove and then confirming the selection in the confirmation dialog.
The same user also needs to be deleted from the Merchandise Financial Planning Cloud Service application. This will keep IDCS and the application synchronized. Complete the user deletion by following the steps for deleting a user in the User Maintenance chapter of the Oracle Retail Predictive Application Server Cloud Edition Administration Guide.
A user can be asked to reset their password by selecting Reset Password and then confirming the selection in the confirmation dialog. The associated user will get email with a link to reset the password.
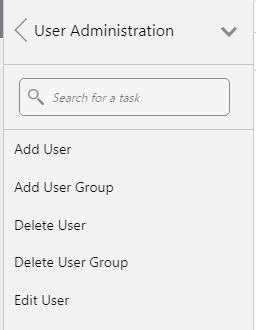
To add a user to the MFP CS application:
Under User Administration, click Add User. A Workbook Wizard window appears.
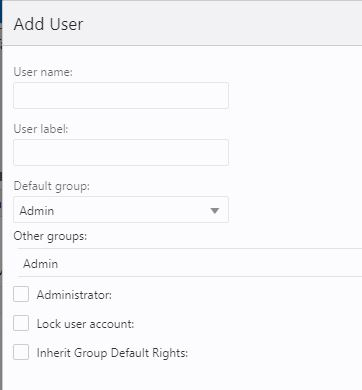
In the Workbook Wizard window, enter the relevant information in the following fields:
User name: Enter the user name that the user uses for logging in. This user name should be the same as the user name created in OCI IAM or IDCS.
User label: Enter a label that describes the user (for example, the user's full name). This identifying label appears in various locations throughout the application.
Default group: Select the user group to which the user belongs. The group selected for the user should be same as the role selected for the same user in OCI IAM or IDCS.
For example, you could assign the user being created to the MFP_BUYERS role.
Other groups: If a user belongs to more than one group, select the additional groups from the list in the Other groups field.
|
Note: Passwords are not used by the RPAS CE Client. The password is defined and managed by your external authentication provider. |
If the user requires Administration status, check the Administrator box. To make the user an Administrator, it is mandatory to check this check box.
|
Note: Administrative users have special privileges and the read-only status may not apply to them.If you are not sure whether a user should be granted this ability, you can modify the Administration status later in the Security Administration workbook. |
|
Note: Granting users Administration status gives them access to all workbook templates, but it does not automatically give them access to all workbooks. |
Select the Lock user account check box to temporarily disable the user's account.
Select the Inherit group default rights check box so that the user can inherit the default rights set for the user group through the Group Workbook Template Default Rights and Group Measure Default Rights worksheets. If the Inherit group default rights option is not selected and the Administrator check box is not selected, then the user is assigned Denied access rights to all templates and measures. If the Inherit group default rights option is not selected but the Administrator check box is selected, then the user is assigned Full Access rights to all templates and Read/Write rights to all measures.
Click Finish to add the new user to the database.
Workbook template and measure access rights can now be assigned to the user. To do this, access the Security Administration workbook. For more information, see the Accessing Security Administration section in the Oracle Retail Predictive Application Server Cloud Edition Administration Guide.
The Administrator can bulk import user and user groups using comma-separated-values (CSV) files. For information on the bulk import of user and user groups from OCI IAM or IDCS, see the documentation at the following links: https://docs.oracle.com/en-us/iaas/Content/Identity/home.htm https://cloud.oracle.com/identity/documentation.