| Oracle® Retail Merchandise Financial Planning Retail Cloud Service User Guide Release 15.0 E69497-01 |
|

 Previous |
 Next |
| Oracle® Retail Merchandise Financial Planning Retail Cloud Service User Guide Release 15.0 E69497-01 |
|
Previous |
Next |
Location Planning is the process in which planners create the location plans at the store level. These plans are then compared to and reconciled against the Merch Plan.
To build the workbook, complete the following steps.
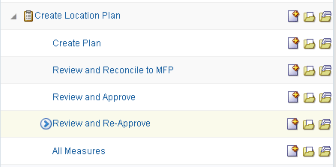
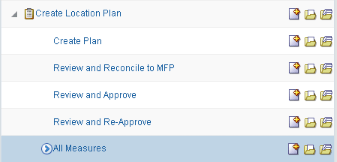
Click the Create New Workbook icon in the Create Location Plan step.
The Product Selection step of the workbook wizard is displayed. Select the department you want to plan and move it to the Selected Items box. Click Next.
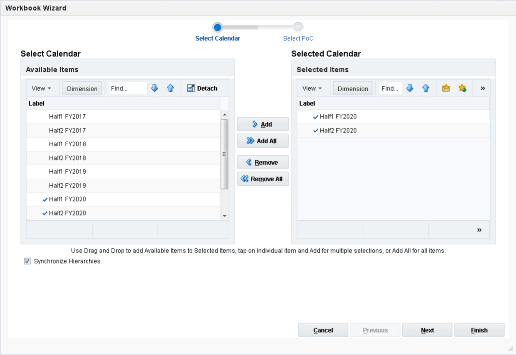
The workbook wizard opens at the Calendar Selection step. Select the halves that you want to plan and move them to the Selected Items box. Click Next.
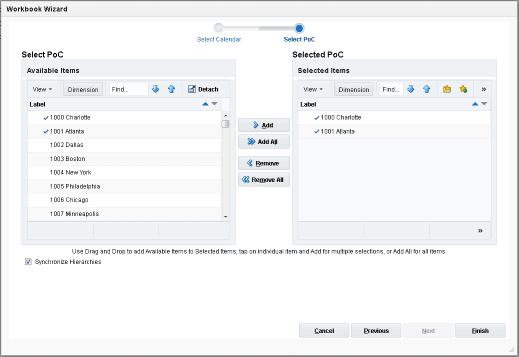
The Location Selection step of the workbook wizard is displayed. Select the channels you want to plan and move them to the Selected Items box. Click Finish.
This section describes location plan creation.
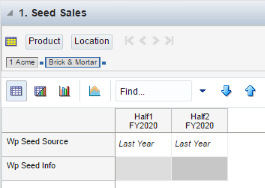
The first action that the location target users perform when creating a new plan is to seed the plan with the Seed Sales view. This view is found under the first tab within the Create Plan step, Seed Sales.
Table 9-1 Top Down Initialize Plan Measures
| Measure | Description |
|---|---|
|
Wp Seed Source |
The seed source used to seed the working plan. Use this option to seed or not seed the working plan. You can seed with Last Year's (Ly) or Forecast (Fcst) data. Alternatively, choose the Blank option if you do not want to seed the working plan. |
|
Wp Seed Info |
Includes a few pertinent facts about the last time that the Seed custom menu was executed: last seed source concatenated with last seeded date and the last user to perform the Seed. If blank, then the given intersection has never been seeded. |
With this view, you can choose to seed your plan with Last Year (Ly), Forecast (Fcst), or Targets (Tgt) data to create a demand curve on which to spread the new plan's initial targets. Or, you can instead choose to not seed the plan, which allows you to create a plan that is not influenced by last year's performance or forecast (plus last year's performance).
In the preceding example, both Half1 and Half2 have been selected to be seeded for the Brick & Mortar channel.
See Table 9-2 for the list of measures that are seeded for different seeding options.
Table 9-2 Seeding Options
| Seeded Measure | Seed With Version |
|---|---|
|
Wp Sales R |
Ly/Fcst/Tgt* |
|
Wp Sales U |
Ly/Fcst/Tgt* |
|
Wp Markdown R % |
Ly/Tgt |
|
Wp Returns R % |
Ly/Tgt |
|
Wp Returns AUR |
Ly/Tgt |
|
Wp Receipts R |
Ly |
|
Wp Receipts U |
Ly |
|
Wp Receipts MU % |
Ly |
|
Wp Receipts MU % |
Ly |
|
Wp Shrink R % |
Ly |
|
Wp Shrink AUR |
Ly |
|
Wp Shrink MU % |
Ly |
|
Wp Transfers In/Out R |
Ly |
|
Wp Transfers In/Out U |
Ly |
|
Wp W/F Owned by Retailer R % |
Ly |
|
Wp W/F Markup R % |
Ly |
|
Wp W/F Markdown R % |
Ly |
|
Note: Tgt* - Only Target measures corresponding Variance to Ly (var Ly) measures will be seeded. |
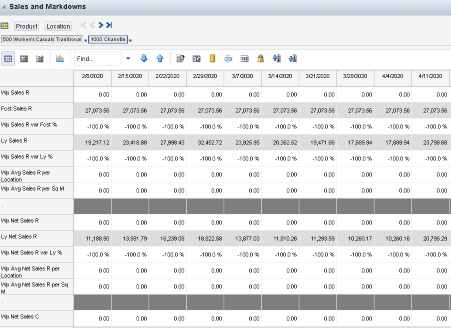
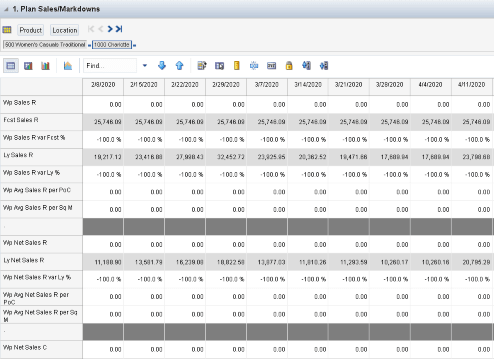
After seeding, a user can verify the seeded sales and markdown data in this view.
You can verify the seeded sales and markdown data in this view. After you have seeded, develop the sales and markdown location plan for those departments. Sales/Markdowns has one default view: Plan Sales and Markdowns.
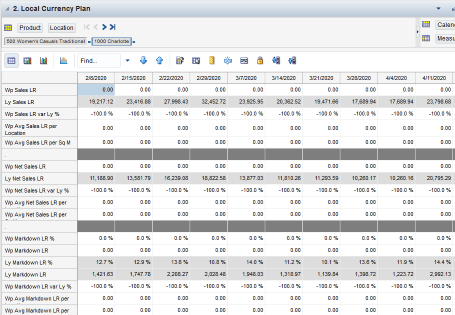
If the Wholesale Franchise or the Local Currency options are provisioned, then there are additional views to support planning sales and markdowns specifically catered to those options.
Local Currency Plan
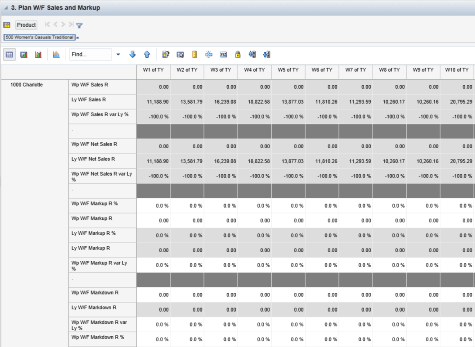
Plan W/F Sales and Markup
The Local Currency step displays your plan using the local currency conversion set up by the administrator.
If the Wholesale Franchise options are provisioned, then this additional view will be available to plan additional wholesale/franchise measures in this view.
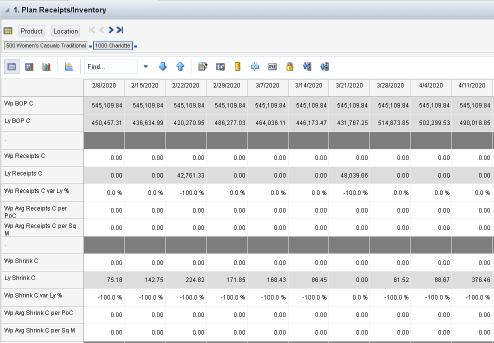
The third tab within the Create Location Plan step, Inventory/Gross Margin, has two default views: Plan/Receipts and Inventory and Gross Margin.
After you have developed the sales and markdown plan, develop a receipts and inventory plan that can support the sales and markdown plan. The purpose of this step is to ensure that you have a receipt and inventory plan that supports the sales that you are projecting. Like the Plan Sales and Markdowns View, the Plan Receipts/Inventory view contains several Ly metrics that you can reference when setting your targets. Additional measures can be used to adjust your inventory targets.
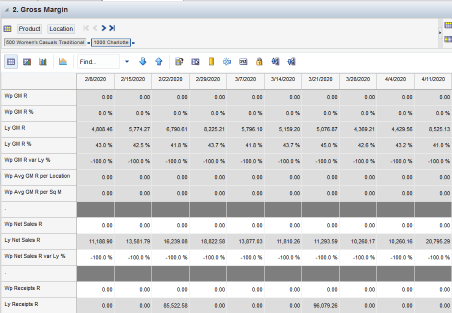
Use the Gross Margin view to evaluate the gross margin created from your sales and markdown plan and receipts and inventory plan. Determine whether the planned gross margin meets your gross margin goal. If it does not, return to the Plan Sales and Markdown Plan and Plan Inventory and Receipt Plan steps to adjust your receipt markups and receipt flow. When you return to the Plan Sales and Markdowns view, adjust the markdown plans, but do not change the sales. Continue this process until you are satisfied with the gross margin.
If the Wholesale Franchise or Local Currency options are provisioned, then there are additional views to support planning sales and markdowns specifically catered to those options:
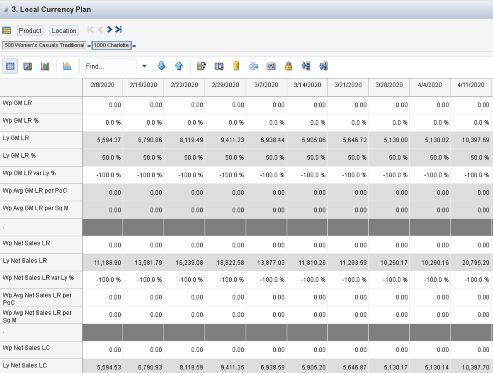
Local Currency Plan
The Local Currency Plan view shows the Gross Margin plan using the local currency conversion set up by the administrator.
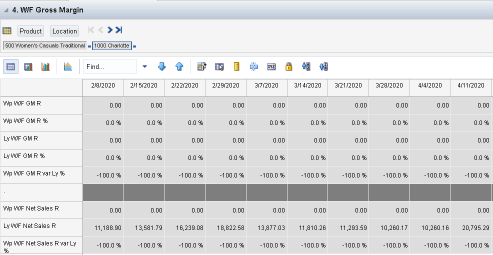
W/F Gross Margin
The W/F Gross Margin view shows planned Wholesale Franchise Gross Margin if this option is provisioned.
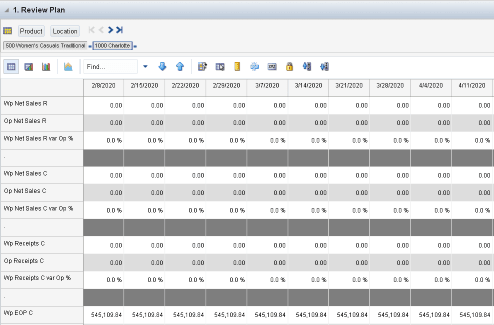
In this step, review and compare your targets to the top down targets to see if you meet the goals created by the top down user. Use the MFP OP and the MFP CP measure profiles to reconcile your location plan to the Merch Plan and Merch Targets.
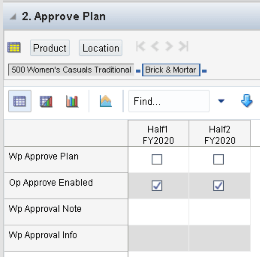
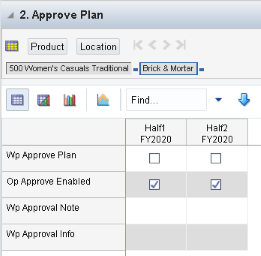
In this step, the location planner can review and approve the created location plan. The Review and Approve step contains two views: Review Plan and Approve Plan.
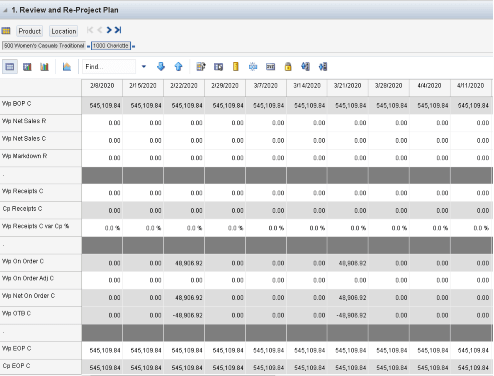
Use this step to review the location plan during in-season for On Order and Open to Buy and to update the plan and reapprove if necessary. The Review and Re-Approve step has two views: Review and Re-Project Plan and Approve Plan.
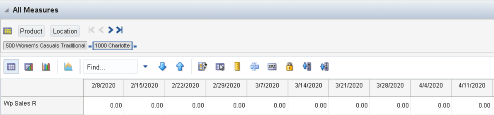
Use this workbook to create a view of workbook measures that you may not be able to view at the same time in other views.