Manually Installing Credit Card Certificates on Workstations
Perform these steps on the POS client workstation running Microsoft Windows 10. Upon completion, the MerchantLink credit card certificate is ready for use on the POS client workstation.
- Open the Run window from the desktop.
- In the Open field, enter
mmc, and then click OK. - From the Console window, click File, and then select Add/Remove Snap-in.
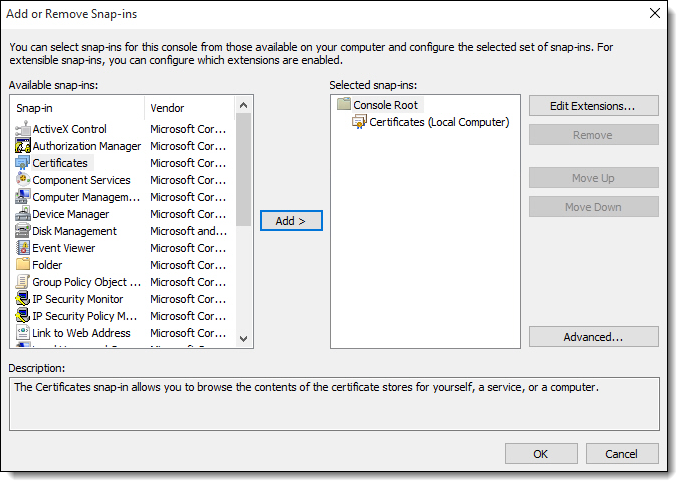
- From the Add or Remove Snap-ins window, select Certificates, and then click the Add button.
- From the Certificates Snap-In dialog, select Computer Account, and then click Next.
- From the Select Computer dialog, select Local Computer, and then click Finish.
- Verify that the Add Snap-ins window shows the Certificates snap-in on the right, and then click OK.
Figure 12-1 Add or Remove Snap-ins Window

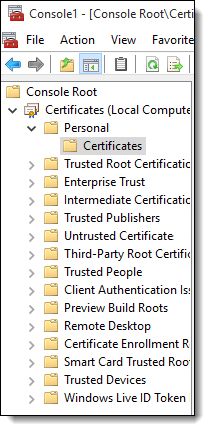
- From the Console window, expand Certificates (Local Computer), and then expand the Personal folder.
Figure 12-2 Console Root Certificates

- Right-click the Certificates folder directly under the Personal folder, select All Tasks, and then click Import....
- From the Certificate Import Wizard dialog, verify that the Store Location is set to Local Machine, and then click Next.
- From the File To Import page, click Browse, navigate to the file location where the certificate resides, and then click Next. MerchantLink sends a certificate in the .P12 format.
If your certificate does not appear in the file location, change the File Type drop-down list to All Files.
- From the Private key protection page, enter the Password provided by MerchantLink that corresponds to the certificate being installed, and then click Next.
Leave the Import Options at the default settings.
- From the Certificate Store page, select Automatically select the certificate store based on the type of certificate, and then click Next.
- From the Console window verify that the certificate is added to the Personal Store.
Refresh the page if the certificate does not appear. The Issued To column shows your company name.
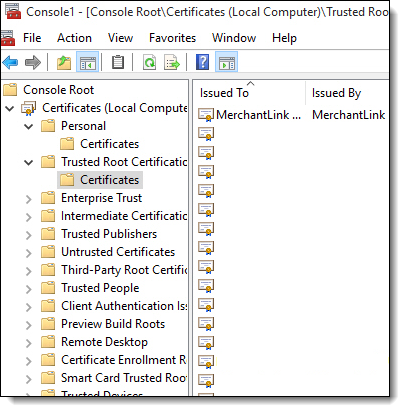
- Expand the Certificates folders to Trusted Root Certification Authorities and then Certificates. This store includes a MerchantLink Certificate Authority certificate.
Figure 12-3 Console Root Trusted Root Certificates

- Close the MMC Console window.
When closing the window, you are prompted to save the Console. If you save the Console window, you can make modifications to certificates without using the Add / Remove Snap-In windows.
- Download the Microsoft WinHttpCertCfg tool from https://www.microsoft.com/en-us/download/details.aspx?id=19801.
The tool may be included in the credit card driver files distributed by MerchantLink. Older releases of this tool were in the .exe format. Newer releases of the tool are in .msi format.
- Open a command prompt window as Administrator.
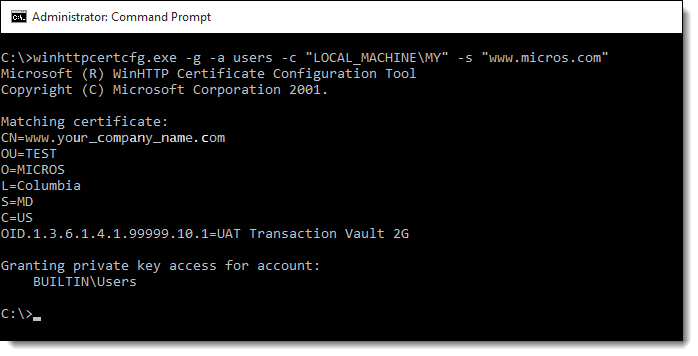
- Navigate to the location where you saved the WinHttpCertCfg tool, and execute one of the following commands:
winhttpcertcfg.exe -g -a users -c "LOCAL_MACHINE\MY" -s "-insert unique customer cert info here-"winhttpcertcfg.msi -g -a users -c "LOCAL_MACHINE\MY" -s "-insert unique customer cert info here-" - Replace the
insert unique customer cert info herewith the customer certificate information found in the Personal certificate store (for example, www.your_company_name.com).Figure 12-4 Command Prompt
