| Oracle® Retail Advanced Inventory Planning Data Management User Guide Release 14.1 |
|

 Previous |
 Next |
| Oracle® Retail Advanced Inventory Planning Data Management User Guide Release 14.1 |
|
Previous |
Next |
This chapter provides information about using Data Management for warehouses.
This section provides information on:
This section provides information on how to:
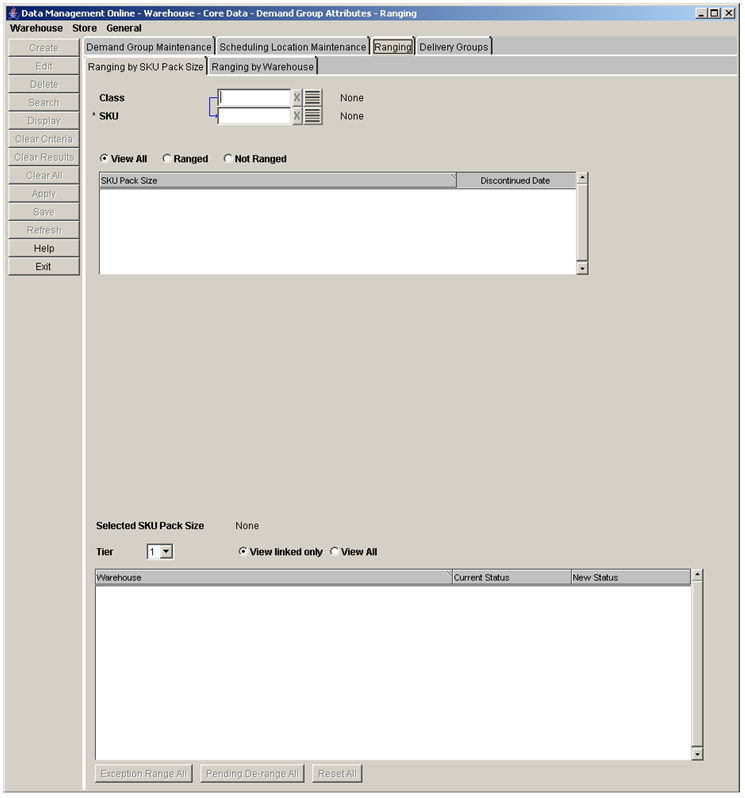
The Ranging window allows you to maintain the ranging status of a SKU-pack-size. Ranging allows you to associate a location and a SKU-pack-size. You can maintain the ranging associations by SKU or by warehouse.
SKU packs that are ranged can exist in multiple statuses:
Profile Ranged: Indicates that the system has automatically ranged the SKU pack at the warehouse when the SKU or warehouse was assigned to the same profile.
Exception Ranged: Indicates that the user has manually ranged the SKU pack at the warehouse rather than having ranged it by assigning the SKU pack to a warehouse profile (Profile Ranged). SKU packs that are Exception Ranged are used throughout the system in exactly the same manner as Profile Ranged SKU packs.
Pending De-ranged: Indicates that the SKU pack is no longer replenished at the warehouse. The SKU pack can be ordered out of the warehouse in order to remove the stock. Once all of the stock at the warehouse is cleared, the status is automatically updated to De-ranged.
De-ranged: The SKU pack is no longer replenished or stocked at the warehouse.
Navigate: Log into Data Management. From the Warehouse menu, select Core Data. On the Ranging primary tab, select the Ranging by SKU Pack-size secondary tab.
Enter criteria to retrieve SKUs:
Class: Enter the class ID, or click the LOV button and select a class.
SKU: Enter the SKU ID, or click the LOV button and select a SKU.
Click Search.
To view all pack-sizes that match the search criteria, select View All.
To view only SKU-pack-sizes that are ranged to at least one warehouse, select Ranged.
To view only SKU-pack-sizes that are not ranged to any warehouse, select Not Ranged.
Select the SKU-pack-size you want to change.
Click Display.
To view only warehouses that the selected SKU pack-size is ranged to, select View Linked Only.
To view all valid warehouses, select View All.
Select a new ranging status for one or more warehouses:
In the New Status column, select a ranging status for each warehouse you want to change.
Click Exception Range All to set all displayed warehouses to Exception Ranged status. This only updates warehouses where the exception ranged status is valid; the status of other warehouses remain unchanged.
Click Pending De-range All to set all displayed warehouses to Pending De-ranged status. This only updates warehouses where the pending de-ranged status is valid; the status of other warehouses remain unchanged.
Click Reset All to reset all displayed warehouses back to their saved status at any time.
Click Save. You are prompted to confirm your decision.
Click OK.
The Ranging window allows you to maintain the ranging status of a SKU-pack-size. Ranging allows you to associate a location and a SKU-pack-size. You can maintain the ranging associations by SKU or by warehouse.
Navigate: Log into Data Management. From the Warehouse menu, select Core Data. On the Ranging primary tab, select the Ranging by Warehouse secondary tab.
Enter criteria to retrieve SKUs:
Warehouse: Enter the warehouse ID, or click the LOV button and select a warehouse.
Class: Enter the class ID, or click the LOV button and select a class.
SKU: Enter the SKU ID, or click the LOV button and select a SKU.
Click Search.
Select the SKU-pack-size you want to change.
Click Display.
To view only warehouses that the selected SKU pack-size is ranged to, select View Linked Only.
To view all valid warehouses, select View All.
Select a new ranging status for one or more SKU pack-sizes:
In the New Status column, select a ranging status for each SKU pack-size you want to change.
Click Exception Range All to set all displayed SKU pack-sizes to Exception Ranged status. This only updates SKU pack-sizes where the exception ranged status is valid; the status of other SKU pack-sizes remains unchanged.
Click Pending De-range All to set all displayed SKU pack-sizes to Pending De-ranged status. This only updates SKU pack-sizes where the pending de-ranged status is valid; the status of other SKU pack-sizes remain unchanged.
Click Reset All to reset all displayed SKU pack-sizes back to their saved status at any time.
Click Save. You are prompted to confirm your decision.
Click OK.
This section provides information on how to:
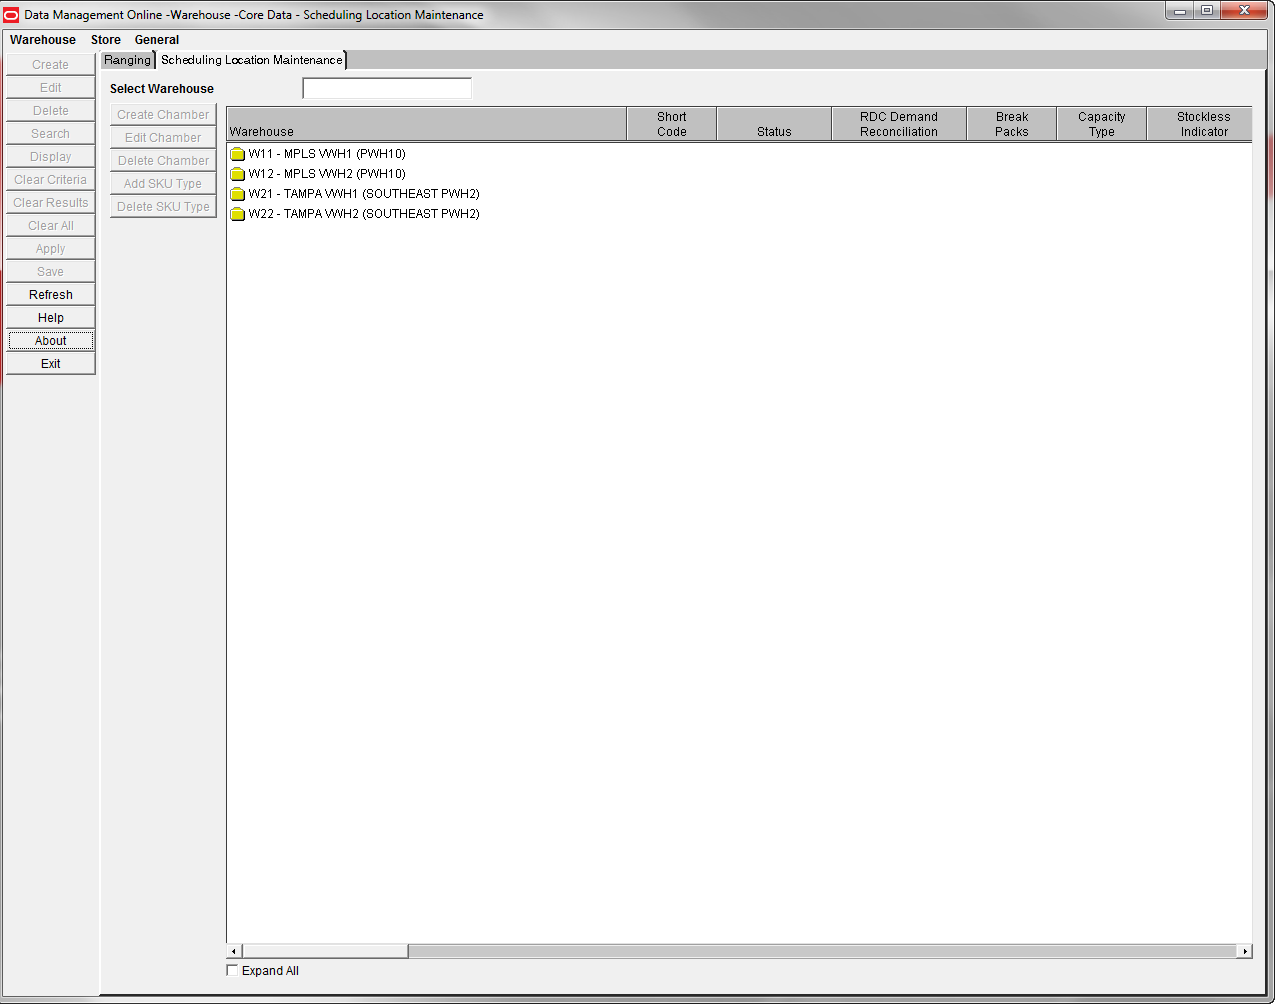
Warehouses are imported from an external merchandising system and assigned chambers in Data Management online. A warehouse is a collection of chambers at a warehouse. Each chamber represents an area of the warehouse. You can define a code and name, status, capacity type, and specific flags for each chamber.
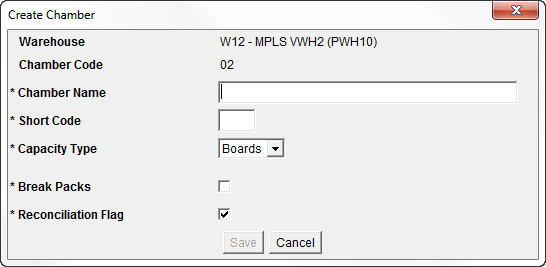
The capacity type allows you to indicate how the items are being stored in each chamber.
Reconciliation Flag: When selected, the Reconciliation Flag indicates that any destinations are reconciled with the quantities available at the chamber. For example, if the store demand is for five cases of SKU pack-size 10, and the warehouse only has SKU pack-size 15, the orders from the warehouse are reconciled against the need so that the store may get some quantity of the required SKU.
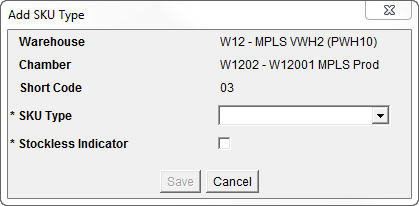
After you define the chamber for a warehouse, you must add SKU types to the chamber. All SKUs with the SKU type are delivered to that chamber. You can associate a SKU type to one chamber of a warehouse at a time. When you add a SKU type to a chamber, any previous association of that SKU type is removed from any other chambers of the same warehouse.
Navigate: Log on to Data Management. From the Warehouse menu, select Core Data. Select the Scheduling Location Maintenance tab.
In the Select Warehouse field, type part or all of the warehouse code.
Press Enter.
The first warehouse code that matches the entry is selected and displayed in the tree.
Navigate: Log on to Data Management. From the Warehouse menu, select Core Data. Select the Scheduling Location Maintenance tab.
|
Note: Chambers must not be created for warehouses with a pending sister warehouse copy. Creating chambers before the copy occurs causes the copy to fail. The supply chain must then be completed manually. |
Select a warehouse to create the chamber by clicking on its name or folder icon in the tree.
Click Create Chamber. The Create Chamber Window opens.
In the Chamber Name field, enter a name for the chamber.
In the Short Code text field, enter a short code for the chamber.
|
Note: Short codes must be unique across all scheduling locations and consists of two alphanumeric characters. |
In the Capacity Type field, select the receiving/storage unit of items in the chamber.
Check the Reconciliation Flag checkbox if store orders should be reconciled for the chamber.
Click Save. You are prompted to confirm your decision.
Click OK.
Navigate: Log on to Data Management. From the Warehouse menu, select Core Data. Select the Scheduling Location Maintenance tab.
Expand the warehouse that contains the chamber you wish to add a SKU type to by double-clicking on the warehouse or checking the Expand All checkbox.
Select the chamber to add a SKU type to by clicking on its name or folder icon.
Click Add SKU Type. The Add SKU Type Window opens.
In the SKU Type field, select the SKU type you want to add to the chamber.
In the Stockless Indicator field:
Select the check box to indicate that SKUs are not stored in the warehouse from day to day.
Clear the check box to indicate that surplus SKUs can be stored in the warehouse from day to day.
Click Save. You are prompted to confirm your decision.
Click OK.
Change the status of the chamber as necessary.
Warehouses are imported from an external merchandising system and then assigned chambers in Data Management online.
In the warehouse structure, warehouses are displayed at the highest level. Beneath the warehouse are the chambers of the warehouse. For each chamber, the short code, status, capacity type, break packs flag, reconciliation flag, and stockless indicator are displayed next to it in the tree. The SKU types supported by each warehouse chamber are displayed with file icons beneath their warehouse chamber folder.
The chamber may exist in one of multiple statuses. A status tells you whether a chamber can be used for replenishment. You may change the status of a chamber forward or backward, one status at a time before saving. You cannot change the status of a chamber from New to warehouse replenishment (WRP) unless the chamber has at least one SKU type associated to it.
| Chamber Status | Description |
|---|---|
| New | The chamber is being created and cannot be used. |
| WRP | The chamber is used to generate replenishment planning numbers for the warehouse, but not for warehouse inbound planning. |
| Release | The chamber is used in the system to generate replenishment planning numbers for the warehouse, uses the numbers for inbound planning at the warehouse and release purchase orders to the merchandising system. |
| Closing Down | The inventory in the chamber is sold and not replenished. |
| Closed | The chamber is no longer used in the system, and has not been deleted. A chamber can be closed only if the chamber has no confirmed or future orders for the entire planning horizon, the chamber's warehouse is not ranged for any SKUs, and there are no actively ranged SKUs on order from a store being sourced from the chamber's warehouse. When a chamber is closed all SKU types are removed from it. |
A chamber must have a closed status before it can be deleted. When you delete a chamber it is removed from any delivery groups or order groups to which it is assigned.
When a chamber is in WRP, Release, or Closing down status, there must be at least one SKU type remaining in order to delete a SKU type.
You can delete the last SKU type from a chamber only if the chamber status is New. You may add a SKU type to any warehouse chamber as long as its status is not Closed. Once you close the chamber any remaining SKU types are automatically removed.
To move a SKU type between chambers, the chamber status you are moving the SKU type from must be New.
Navigate: Log on to Data Management. From the Warehouse menu, select Core Data. Select the Scheduling Location Maintenance tab.
In the Select Warehouse field, enter part or all of the warehouse code that contains the chamber you want to edit.
Press Enter. The first warehouse code that matches the entry is selected.
Navigate: Log on to Data Management. From the Warehouse menu, select Core Data. Select the Scheduling Location Maintenance tab.
Search for a warehouse.
Select the chamber you want to update.
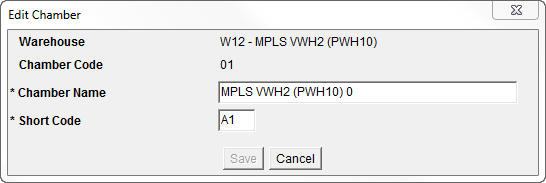
To update the name and the code of the chamber.
Click Edit Chamber. The Edit Chamber Window opens.
Edit the enabled fields as necessary.
Click Save. You are prompted to confirm your decision.
Click OK.
Select a chamber status from the Status option. Chamber status changes are assigned in the following order:
New
WRP
Released
To set the chamber status to Release, you must change and save the status as follows:
| If the Status Displays... | Then from the Status Option, Select... | And Click... |
|---|---|---|
| New | WRP | Save |
| WRP | Release | Save |
| To Indicate that Store Orders... | Then... |
|---|---|
| Are reconciled for the chamber | Select the Reconciliation Flag check box |
| Are not reconciled for the chamber | Clear the Reconciliation Flag check box |
Select a new capacity type from the Capacity Type dropdown for the chamber.
| If... | Then... |
|---|---|
| All surplus SKUs are immediately allocated out of the warehouse | Select the Stockless Indicator option |
| SKUs can be stored in the warehouse from day to day | Clear the Stockless Indicator option |
Click Save. You are prompted to confirm your decision.
Click OK.
Navigate: Log on to Data Management. From the Warehouse menu, select Core Data. Select the Scheduling Location Maintenance tab.
Search for a warehouse.
Select the SKU type to delete by clicking on its name or file icon.
Click Delete SKU Type. You are prompted to confirm your decision.
|
Note: When a chamber is in WRP, Release, or Closing Down status, the Delete SKU Type button is enabled if the chamber contains more than one SKU type. You can delete the last SKU type from a chamber only if the status of the chamber is New. |
Click OK.
Navigate: Log on to Data Management. From the Warehouse menu, select Core Data. Select the Scheduling Location Maintenance tab.
Search for a warehouse.
Delete all SKU types from the chamber.
Select the chamber you want to delete.
Change the status of the chamber to closed.
Click Delete Chamber. You are prompted to confirm your decision.
Click OK.
This section provides information on how to:
The Pack Breaking window allows you to specify which smaller packs are contained within a larger pack as well as the warehouses that are capable of breaking packs.
For each SKU pack size, you may specify whether that pack size can be broken into a smaller pack size of the same SKU and if so, what the smaller pack size is. The choices of which pack sizes a given pack can be broken into are limited to those smaller packs where the larger pack is a multiple of the smaller pack. A pack may only be broken into one other pack. That pack however, may itself be broken. This information is used for breaking packs into smaller quantities to meet demand.
The Pack Breaking window also displays the warehouses that are capable of breaking packs. This information is optional and is used in reconciliation when determining whether or not to break packs to meet store need.
Navigate: Log into Data Management. From the Warehouse menu, select Core Data. and then select the Pack Breaking tab.
Select the SKU Pack Sizes option.
Enter criteria to retrieve SKU pack sizes:
Class: Enter the Class ID, or click the LOV button and select a class.
SKU: Enter the SKU ID, or click the LOV button and select a SKU.
Click Search to populate the SKU Pack Sizes list.
|
Note: All pack sizes of the SKU display at the highest folder level.Any pack size that is currently saved as a breakable pack displays at a lower level. |
Select the SKU pack size you want to break to populate the SKU Pack Size drop-down list.
|
Note: The SKU Pack Size drop-down list.contains all smaller pack sizes where the selected larger pack size is a multiple of the smaller pack |
To adjust the level of the selected pack size (from the SKU Pack Size drop-down list), either:
Click Add to add the selected pack size as a lower level of the higher pack size.
Click Remove to remove the selected pack size from a higher level pack size,
|
Note: The Add button is not available when:
|
Click Save to update any changes made to the SKU Pack Sizes list.
Navigate: Log into Data Management. From the Warehouse menu, select Core Data. and then select the Pack Breaking tab.
See Figure 5-8, "Pack Breaking Tab"
Select the Warehouses option.
Enter criteria to retrieve break packs by warehouse:
Warehouse: Enter a warehouse, or click the LOV button and select a warehouse.
Class: Enter the Class ID, or click the LOV button and select a class. This selection is filtered based on the warehouse selection.
SKU: Enter the SKU ID, or click the LOV button and select a SKU. This selection is filtered based on the warehouse and class selections.
|
Note: At least one Warehouse and a Class must be selected for Search to be available. |
Click Search to populate the Warehouses/SKU/Break Pack grid.
|
Note: Data Management displays each warehouse/SKU combination where the SKU is profile ranged, exception ranged, or pending de-ranged at the warehouse.The Break Packs check box is selected for any warehouse/SKU combination that is currently saved. |
The Break Packs check box is selected for any warehouse/SKU combination that is currently saved. Update the Break Packs check boxes using these buttons:
Check All: Selects all Break Packs check boxes in the grid.
Uncheck All: Clears all Break Packs check boxes in the grid.
Reset All: Sets all Break Packs check boxes in the grid to the value stored in the database.
Click Save to update the changes or click Clear to reset the grid.
This section provides information on:
This section provides information on how to:
The Warehouse Couple Flag window allows you to maintain coupled indicators, which allows you to join store and warehouse orders for selected SKUs. When the store orders are coupled with the warehouse orders, the store order cannot be re-planned once the store placement lead time has been reached.
The placement lead time subtracted from the delivery date results in a date after which the warehouse order may not be able to be re-planned to reflect any new quantity required to fulfill the store's demand. You can update a SKUs coupled flag for a given warehouse-chamber on the effective date through this window.
Navigate: Log into Data Management. From the Warehouse menu, select Warehouse Data. On the Warehouse Product Defaults & Exceptions primary tab, select the Warehouse Coupled Flag secondary tab.
In the Effective Date field, select the date your changes become effective.
Enter additional criteria to retrieve SKUs.
Warehouse Chamber: Enter the warehouse ID, or click the LOV button and select a warehouse.
Class: Enter the class ID, or click the LOV button and select a class.
SKU: Enter the SKU ID, or click the LOV button and select a SKU.
Click Search.
Select the Coupled check box next to a SKU pack-size to indicate that warehouse and supplier orders for the SKU are sent together.
Clear the Coupled check box next to a SKU pack-size to indicate that warehouse and supplier orders for the SKU are not sent together.
Click Check All to set the coupled indicator for all available SKU pack-sizes.
Click Uncheck All to remove the coupled indicator for all available SKU pack-sizes.
Click Reset All to set all coupled indicators to the original values.
Click Save. You are prompted to confirm your decision.
Click OK.
The Pallet and Order Multiples tab allows you define and view pallet multiples and order multiples for an item.
Navigate: Log into Data Management. From the Warehouse menu, select Warehouse Data. On the Warehouse Product Defaults & Exceptions primary tab, select the Pallet and Order Multiples secondary tab.
In the Effective Date field, select the date your changes become effective.
Enter additional criteria to retrieve a delivery group.
Order Source: Enter the supplier ID or warehouse ID, or click the LOV button and select a supplier or warehouse.
Class: Enter the class ID, or click the LOV button and select a class.
SKU-Pack-size: Enter the SKU ID, or click the LOV button and select a SKU pack-size.
Click Search. The Available Locations that are ranged for the Supplier and SKU pack-size are displayed.
Move a location from the available side to the selected side.
Click Display.
Navigate: Log into Data Management. From the Warehouse menu, select Warehouse Data. On the Warehouse Product Defaults & Exceptions primary tab, select the Pallet and Order Multiples secondary tab.
Search for locations.
Select By Delivery Date.
To define a pallet multiple:
Select the Set Pallet Multiple To option.
In the field to the right, enter a new value. This value represents the number of cases (of the pack-size) that constitute a full pallet.
To define an order multiple:
Select the Set Order Multiple To option.
In the field to the right, enter a new value.
Click Save. You are prompted to confirm your decision.
Click OK.
This section provides information on how to:
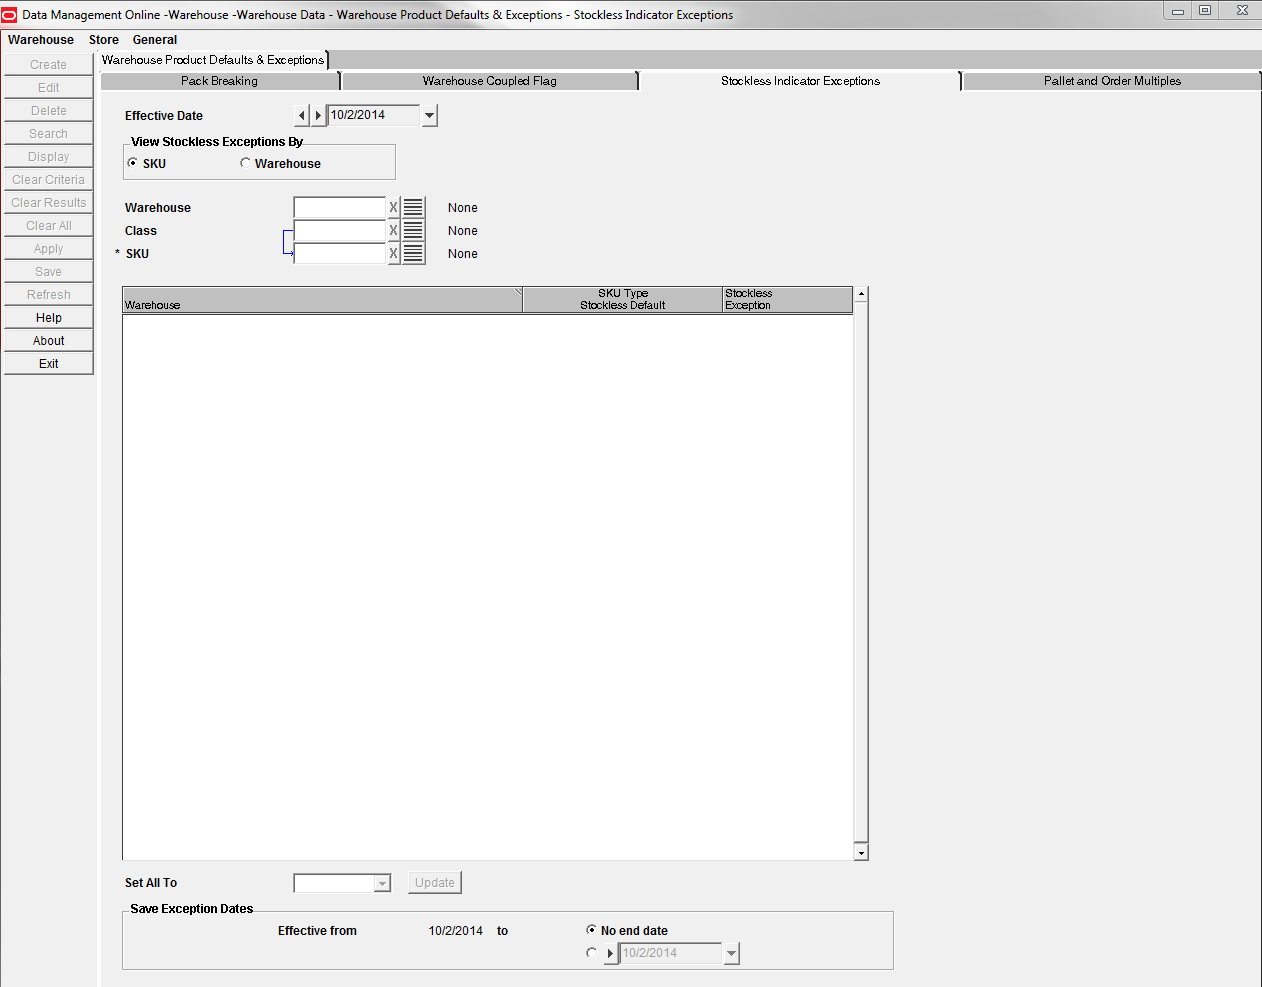
The Stockless Indicator Exceptions tab allows you to set exceptions to the stockless indicators at the warehouse level. The stockless indicator means that the warehouse ships all inventory out of the warehouse at the end of the day. This is typically used for perishable items.
|
Note: Based on the AIP configuration settings for your system, the Warehouse Type drop-down list may not appear on the Stockless Indicator exceptions tab. This field is typically displayed when warehouse types are defined in your system and displays the following options:
|
Navigate: Log into Data Management. From the Warehouse menu, select Warehouse Data. On the Warehouse Product Defaults & Exceptions primary tab, select the Stockless Indicator Exceptions secondary tab.
In the Effective Date field, select the date your changes become effective.
Select the option for how you want to view and maintain exceptions, SKU or Warehouse.
Enter the required criteria.
Warehouse: Warehouse is required when maintaining exceptions by warehouse. Enter the class ID, or click the LOV button and select a class.
Class: Enter the class ID, or click the LOV button and select a class.
SKU: SKU is required when maintaining exceptions by SKU. Enter the SKU ID, or click the LOV button and select a SKU.
Click Search.
Navigate: Log into Data Management. From the Warehouse menu, select Warehouse Data. On the Warehouse Product Defaults & Exceptions primary tab select, the Stockless Indicator Exceptions secondary tab.
Search for stockless exceptions.
To update the status for all displayed SKUs or warehouses:
|
Note: The displayed list depends on the choice made in the View Stockless Exceptions By area. |
In the Set All To field, select the new stockless status you want to apply.
Click Update.
To update a single status, in the Stockless Exception field, select the status of the displayed SKU or warehouse.
No Exception: No exception exists for the SKU/warehouse from the selected effective date onwards.
Stocked: An exception is present for the SKU/warehouse with a value of stocked from the effective date onwards. This exception is used instead of the default warehouse/SKU type value.
Stockless: An exception is present for the SKU/warehouse with a value of stockless from the effective date onwards. This exception is used instead of the default warehouse/SKU type value.
In the To date field, either:
Select the last day the exception is effective.
or
Select No End Date to indicate that the stockless exception never expires.
In the next field, enter the last day an exception is valid.
Click Save. You are prompted to confirm your decision.
Click OK.
This section provides information on:
This section provides information on how to:
Order groups are used to group source SKUs together to enable more efficient maintenance of ordering lead times within the supply chain. Order groups are only used at the chamber level. They are not used for store ordering. By using order groups, you can put all the source SKUs that have the same ordering behavior into one group for maintenance. An order group is assigned to a single order cycle. All source/SKU/chambers assigned to that order group are then assigned the order lead times defined by that order cycle.
Manually created: After you create the order group, you must assign the SKU to complete the order group.
System generated: System generated order groups are created when the batch is run. One of the applicable scheduling locations is assigned to each order group generated. You can add or modify SKUs and order cycle assignments in the same manner as manually generated order groups.
Navigate: Log into Data Management. From the Warehouse menu, select Warehouse Ordering. Select the Order Groups tab.
Click Create. The Create Order Group Window opens.
In the Order Group Code field, enter a unique five-character alphanumeric code for the order group.
In the Order Group Name field, enter a description of the order group.
Select the Automated SKU Assignment checkbox to indicate the system should automatically create SKU assignments for this order group when new SKU-pack-sizes arrive in the AIP system.
|
Note: The automated order group assignments are created for the Automation Source and the Order Group's Automation Scheduling Locations. An assignment is created when a new SKU-pack-size arrives in the AIP system that is valid for the Automation Source and one or more Automation Scheduling Locations. An assignment is not created for any existing source/destination combinations that already exist for the SKU-pack-size's SKU. |
Select the Automated SKU Assignment option. The Automation Source is enabled.
Click the LOV button and select an Automation Source.
In the Default Cycle Code field, select the order cycle associated with the order group.
Enter an order cycle code in the search box and press Enter.
Select the order cycle from the list.
|
Note: Click Display to view the lead times for the order cycle. |
Click Save. You are prompted to confirm your decision.
Click OK.
To complete the order group, you must assign SKUs to the order group.
After you create order groups you may need to maintain them.
Setting the working order group allows you to navigate through the Summary, SKUs, and Automation Scheduling Locations tabs.
| Tab | Description |
|---|---|
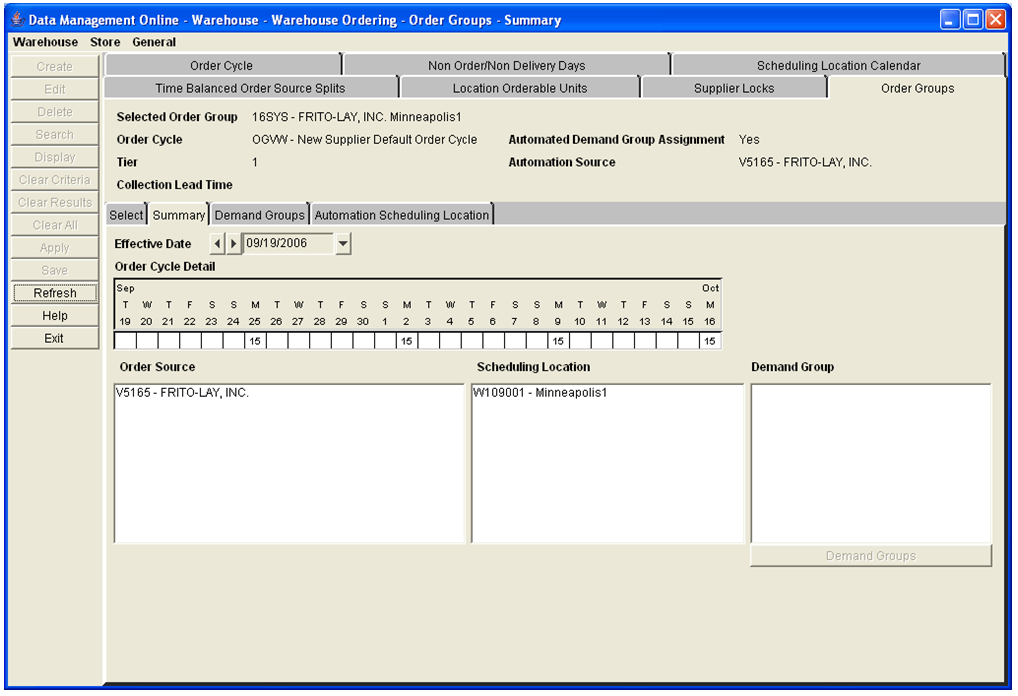
| Summary | The Summary tab allows you to view sources, SKUs, and stocking points for the working order group selected. The effective date defaults to today. The live order cycle is displayed and the lists of sources, and scheduling locations are displayed for today's assignments. |
| SKU | The SKUs tab allows you to edit the order group and create assignments for the working group. |
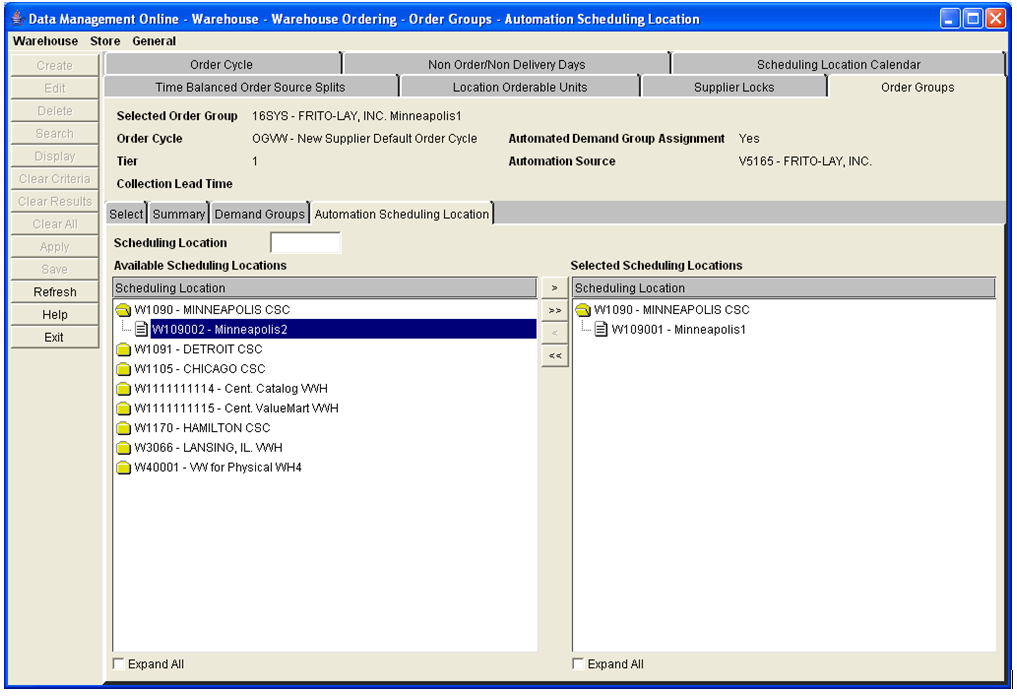
| Automation Scheduling Location | In order for this tab to be enabled, the working order group must display Yes for the Automated SKU Assignment. The Automation Scheduling Location tab allows you to maintain the list of scheduling locations attached to the working order group. Only the scheduling locations linked to the order group are automatically assigned to an Order Group SKU Assignment. Scheduling locations are warehouse chambers that receive merchandise for the working order group. Scheduling locations can be added to or removed from the order group. The available and selected scheduling locations are displayed. |
|
Note: It is possible for a warehouse to contain multiple scheduling locations, and therefore it is possible for a warehouse to be shown on both the available and selected sides if one of the locations has been selected and the other has not. |
You must move all source/SKU/scheduling location assignments to a new order group, before you can delete the order group. The delete is effective immediately and no assignments can exist for the current or future dates.
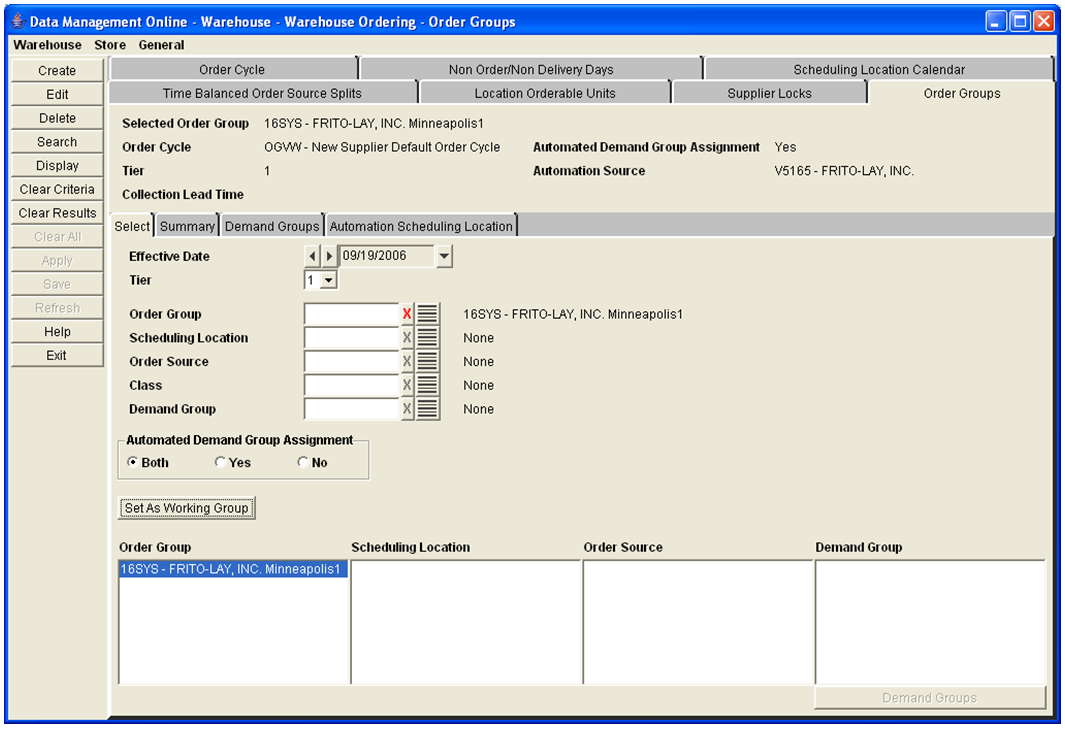
Navigate: Log into Data Management. From the Warehouse menu, select Warehouse Ordering. Select the Order Groups tab.
In the Effective Date field, select the date from when your changes become effective.
Enter additional criteria to retrieve an order group.
| Criteria | Description |
|---|---|
| Order Group | Enter the order group ID or click the LOV button and select an order group. |
| Scheduling Location | Enter the scheduling location ID, or click the LOV button and select a scheduling location. |
| Order Source | Enter the order source ID, or click the LOV button and select an order source. |
| Class | Enter the class ID, or click the LOV button and select a class. |
| SKU | Enter the SKU ID, or click the LOV button and select a SKU. |
| Automation SKU | Select the following option to limit or expand the search results displayed.
|
Click Search.
In the Order Group column, select the order group you want to edit or view.
Click Set As Working Group.
Navigate: Log into Data Management. From the Warehouse menu, select Warehouse Ordering. Select the Order Groups tab.
Set an order group as the working order group.
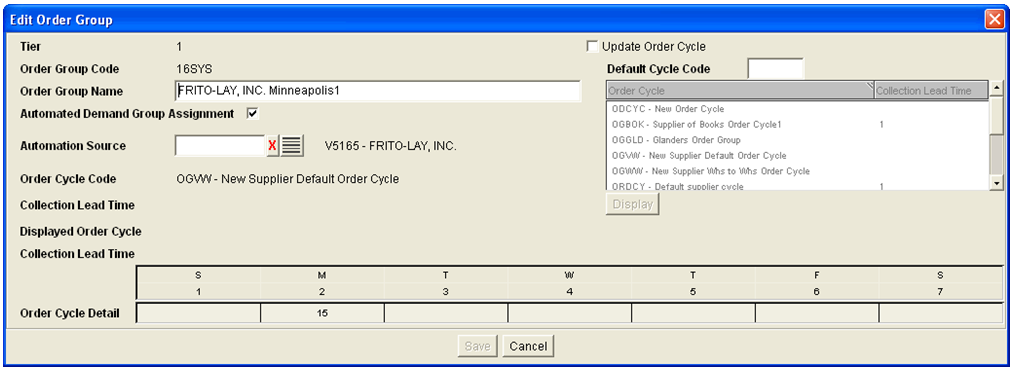
Click Edit. The Edit Order Group Window opens.
In the Order Group Name field, enter the new name.
De-select the Automated SKU assignment option if you want to remove the Automated SKU Assignment, which removes any automation scheduling locations from the order group.
If you want to change an order group to use automated scheduling locations, perform the following:
Select the Automated SKU Assignment option. The Automation Source field is enabled.
Click the LOV button and select an Automation Source.
To enable a new order cycle:
Select the Update Order Cycle check box.
Select a new default order cycle to apply to the order group.
Click Save. You are prompted to confirm your decision.
Click OK.
Navigate: Log into Data Management. From the Warehouse menu, select Warehouse Ordering. Select the Order Groups tab.
Set an order group as the working order group.
Click Delete. You are prompted to confirm your decision.
Click OK.
|
Note: The order group can be deleted only if there are no assignments for today or in the future. Once deleted, the order group is removed from the results block and cleared from the tab. |
Navigate: Log into Data Management. From the Warehouse menu, select Warehouse Ordering. Select the Order Groups tab.
Set an order group as the working order group.
Select the Summary tab.
In the Effective Date field, select the date you want to view a summary for.
Limit the data as necessary:
Select a supplier to limit the list of scheduling locations.
|
Note: Scheduling locations are limited to those that are linked to the working order group through the SKUs. |
Select a scheduling location to limit the suppliers.
|
Note: Suppliers are limited to those that are linked to the selected location to the working order group through the SKUs that are assigned. |
Click SKUs to display a list of SKUs limited by selections in the Supplier and Scheduling Location lists.
Navigate: Log into Data Management. From the Warehouse menu, select Warehouse Ordering. Select the Order Groups tab.
Set an order group as the working order group.
Select the Order Groups tab.
In the Effective Date field, select the date you want to view a summary for.
Enter additional criteria to retrieve a SKUs.
| Criteria | Description |
|---|---|
| Order Group | Enter the order group ID, or click the LOV button and select an order group. This option is available when the Unassigned SKU option is not selected. |
| Scheduling Location | Enter the scheduling location ID, or click the LOV button and select a scheduling location. |
| Order Source | Enter the order source ID, or click the LOV button and select an order source. When using the LOV button, the window displays all suppliers and warehouses, which have at least one chamber that is NOT assigned a status of New or Closed. |
| Class | Enter the class ID, or click the LOV button and select a class. Entering a class filters SKUs based on the specified class. |
| SKU | Enter the SKU ID or click the LOV button and select a SKU. Entering a SKU limits your search to valid order sources and scheduling locations for the specified SKU. |
| Unassigned SKUs | Select the Unassigned SKUs check box to return SKUs that are not assigned to an order group. Clear the checkbox to return SKU that are assigned to an order group on the specified effective date. |
| Automated SKU Assignment | Select the following option to limit or expand the search results displayed:
|
Click Search.
Move the SKUs from the Available SKUs to the Selected SKUs area.
|
Note: SKUs are in subfolders for each supplier. Double-click a supplier folder to view the SKUs. |
Click Save. You are prompted to confirm your decision.
Click OK.
Navigate: Log on to Data Management. From the Warehouse menu, select Warehouse Ordering. Select the Order Groups tab.
Set an order group as the working order group.
Select the Automation Scheduling Location tab.
The tab displays Available Scheduling Locations, which can be added to the order group, and the Selected Scheduling Locations, which are currently assigned to the order group.
|
Note: The Automation Scheduling Location tab is only enabled for Order Groups with Automated SKU Assignment set to Yes. |
Move the appropriate locations to the Selected Scheduling Locations area.
Click Save. You are prompted to confirm your decision.
Click OK.
A supplier lock allows you to create a deal with the supplier contingent on your organization not changing the orders within an agreed period that is longer than the normal lead-time.
Supplier locks are entered as a rolling number of weeks - indicating the period of time inside which the existing orders are locked and cannot be changed by the system replenishment process. The number of weeks is assumed to start the Sunday of the current week (defined Sunday to Saturday). A supplier lock entered using this window remains in place until the you remove it.
Supplier locks are entered at two levels:
| Level | Description |
|---|---|
| Supplier/class level | Locks entered at the supplier/class level are applied to all SKUs in the class. |
| Supplier/SKU level | You can enter a lock at the supplier/SKU level, regardless of whether one exists at the class level. Locks at the supplier/SKU level locks take precedence over those at the class level. |
Navigate: Log into Data Management. From the Warehouse menu, select Warehouse Ordering. Select the Supplier Locks tab.
In the Supplier field, enter the supplier ID you want to create a lock for, or click the LOV button and select a supplier.
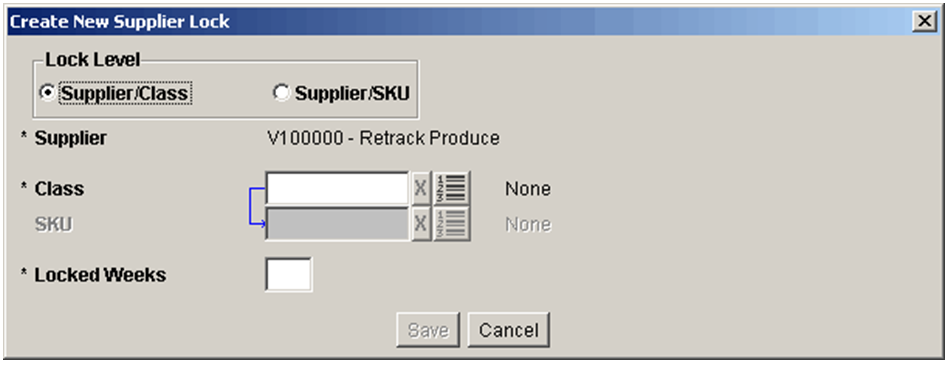
Click Create. The Create New Supplier Lock Window opens.
In the Lock Level area, select the level at which the lock occurs.
In the Class field, enter the class the lock occurs for, or click the LOV button and select a class.
If the lock occurs at the supplier/SKU level, in the SKU field, enter the SKU the lock occurs for, or click the LOV button and select a SKU.
In the Locked Weeks field, enter the number of weeks that the lock is enabled for.
Click Save. You are prompted to confirm your decision.
Click OK.
Navigate: Log into Data Management. From the Warehouse menu, select Warehouse Ordering. Select the Supplier Locks tab.
Enter the criteria to retrieve a supplier lock.
Supplier: Enter the supplier ID, or click the LOV button and select a supplier.
Class: Enter the class ID, or click the LOV button and select a class.
SKU: Enter the SKU ID, or click the LOV button and select a SKU.
Click Search.
To view SKUs in a class with an existing Supplier Lock:
Expand the class folder.
Select the Expand All check box.
Double-click on the Locked Weeks value to enable the value for editing.
Enter the new locked week value.
|
Note: Modified but not saved Lock Weeks are displayed in green. |
Click Save. You are prompted to confirm your decision.
Click OK.
Navigate: Log into Data Management. From the Warehouse menu, select Warehouse Ordering. Select the Supplier Locks tab.
Enter the criteria to retrieve a supplier lock.
Supplier: Enter the supplier ID, or click the LOV button and select a supplier.
Class: Enter the class ID, or click the LOV button and select a class.
SKU: Enter the SKU ID, or click the LOV button and select a SKU.
Click Search.
To view SKUs in a class with an existing Supplier Lock:
Expand the class folder.
Select the Expand All check box.
Select the check box in the Delete Lock column next to the class or SKU.
Click Save. You are prompted to confirm your decision.
Click OK.
The Non Order / Non Delivery Days window allows you to maintain non receipt and non release dates for the entire company. You create a non-order day to indicate that for that particular day, no product is ordered from a source. You create a non-delivery day to indicate that for that particular day, no product is received at the warehouse. Additionally, you can create exceptions by order group for non order dates and non delivery dates.
Navigate: Log into Data Management. From the Warehouse menu, select Warehouse Ordering. Select the Non Order/Non Delivery Days tab.
Select Non-Order Date.
Click the calendar button to select a non-order date.
|
Note: Dates in gray indicate that those dates are eligible to be created as a non-order day. |
Click Create. You are prompted to confirm your decision.
Click OK.
Select the non-order date you want to create exceptions for.
|
Note: Dates selected for non-order are displayed in bold, black text. |
Click Search.
| To... | Then... |
|---|---|
| Indicate that SKU-packs in that order group can be ordered | Select Y from the Exceptions list next to an order group. |
| Indicate that SKU-packs in that order group can be ordered | Select N from the Exceptions list next to an order group. |
| Remove the exceptions for all available order groups | Click Set All to No Exception. |
| Set all the exception indicators to their original value | Click Search. |
Click Save. You are prompted to confirm your decision.
Click OK.
Navigate: Log into Data Management. From the Warehouse menu, select Warehouse Ordering. Select the Non Order/Non Delivery Days tab.
Select Non-Delivery Date.
Click the calendar button to select a non-delivery date.
|
Note: Dates in gray indicate that those dates are eligible to be created as a non-delivery day. |
Click Create. You are prompted to confirm your decision.
Click OK.
Select the date you want to create exceptions for.
|
Note: Dates selected for non-delivery are displayed in bold, black text. |
Click Search.
| To... | Then... |
|---|---|
| Indicate that SKU-packs in that order group can be received | Select Y from the Exceptions list next to an order group. |
| Indicate that SKU-packs in that order group cannot be received | Select N from the Exceptions list next to an order group. |
| Remove the exceptions for all available order groups | Click Set All to No Exception. |
| Set all the exception indicators to their original value | Click Search. |
Click Save. You are prompted to confirm your decision.
Click OK.
The Order Cycle window allows you to define the amount of time a source needs to deliver SKUs to the next location in the supply chain. Order lead times may not be less than zero. A zero lead time represents same day, continuous replenishment. On any given day, an order lead time may be blank, representing no lead time for that day.
The collection lead time may not be less than one day. The collection lead time may be blank, representing no collection lead time for that order cycle. If a collection lead time is present, it must be less than the order lead time for any day in the cycle.
Navigate: Log into Data Management. From the Warehouse menu, select Warehouse Ordering. Select the Order Cycle tab.
Select the order cycle you wish to view from the list of order cycles:
Select the order cycle in the list.
In the Select Order Cycle field, enter the order cycle ID and press Enter.
Click Display.
Navigate: Log into Data Management. From the Warehouse menu, select Warehouse Ordering. Select the Order Cycle tab.
Click Create. The Create Order Cycle Window opens.
In the Order Cycle Code field, enter an ID for the order cycle.
|
Note: Order cycle codes must consist of alphanumeric characters and must be unique. |
In the Order Cycle Name field, enter a name for the order cycle.
In the Order Cycle Length field, select the length of the order cycle.
In the Collection Lead time field, enter a collection lead time.
Enter order lead times:
Double-click a cell in the Order Cycle grid.
Enter the lead time in the cell. You must enter an order lead time for at least one day in the cycle.
Press Enter or click away from the cell.
Click Save. You are prompted to confirm your decision.
Click OK.
The Location Orderable Units tab allows you to assign valid SKU pack-size as the default orderable unit for each supplier/SKU/scheduling location.
Navigate: Log into Data Management. From the Warehouse menu, select Warehouse Ordering. Select the Location Orderable Units tab.
In the Effective Date field, select the date from which your changes become effective.
Enter additional criteria to retrieve a delivery group.
| Criteria | Description |
|---|---|
| Order Source | Enter the supplier ID or warehouse ID, or click the LOV button and select a warehouse. |
| Class | Enter the class ID, or click the LOV button and select a class. |
| SKU | Enter the SKU ID, or click the LOV button and select a SKU. |
Click Search.
Move a scheduling location from the Available Locations area to the Selected Locations area.
Select a single location you wish to view.
Click Display.
In the Set Orderable Units field, select a SKU-pack-size.
|
Note: Pack Change Events cannot be overridden in this window. Stores should be added to the excluded destinations list to manually change a pack size that is part of an Event. |
Click Save. You are prompted to confirm your decision.
Click OK.
The Time Balanced Order Source Splits tab allows you to determine how an order quantity should be requested from multiple sources that supply the product.
SKUs in SKUs can be supplied to a warehouse by another warehouse or a supplier. When multiple sources exist, the order quantity generated is divided across the sources. DM online uses time balanced order source split to determine how orders are divided across sources.
When you enter percentages for each source, the percentages indicate that from the effective date onwards, the entered percentages of volume are received from each source over time. It is considered time balanced because over time, Oracle Retail Warehouse Replenishment Planning attempts to balance the distribution of orders across the sources so that the desired percentages are achieved. On any specific day, the orders do not need to be divided out according to the stated percentages. This allows for the fact that some sources may not be able to deliver on a particular date or day of week.
Navigate: Log into Data Management. From the Warehouse menu, select Warehouse Ordering. Select the Time Balanced Order Source tab.
In the Effective Date field, select the date the split begins.
In the SKU field, enter the SKU ID that the split applies to, or click the LOV button and select a SKU.
Click Search.
Move a Destination Warehouse from the Available Destination Warehouses area to the Selected Destination Warehouse area.
Select the destination you want to view from the Selected Destination Warehouse list.
Click Display.
In the New Split% column, double-click the cell you want to update and enter the source percentages for the Selected Destination Warehouse.
|
Note: For each SKU and destination warehouse, the total from all sources must equal one hundred percent (100%) before you can save. |
Click Save. You are prompted to confirm your decision.
Click OK.
The Time Balanced Order Source Split percentages are achieved over time as a result of maintaining the total historical order quantity for each source, SKU, and warehouse. The Reset Order History button allows you to clear the order history for the SKU at the selected warehouses. The history is cleared for all sources of the SKU and selected warehouses that are assigned a split percentage, regardless of effective date.
Navigate: Log into Data Management. From the Warehouse menu, select Warehouse Ordering. Select the Time Balanced Order Source tab.
In the SKU field, enter the SKU ID of the history to be cleared, or click the LOV button and select a SKU.
Click Search.
Move a Destination Warehouse from the Available Destination Warehouses area to the Selected Destination Warehouse area.
Click Reset Order History. You are notified that the history is cleared regardless of the selected effective date.
|
Note: Once any value is entered into the New Split% column, Reset Order History is unavailable. |
Click OK. You are prompted to confirm your decision to clear the history.
Click OK.
A secondary or alternate source is a source that should be used to provide inventory in the event of a shortage caused by the original source's inability to meet unconstrained demand.
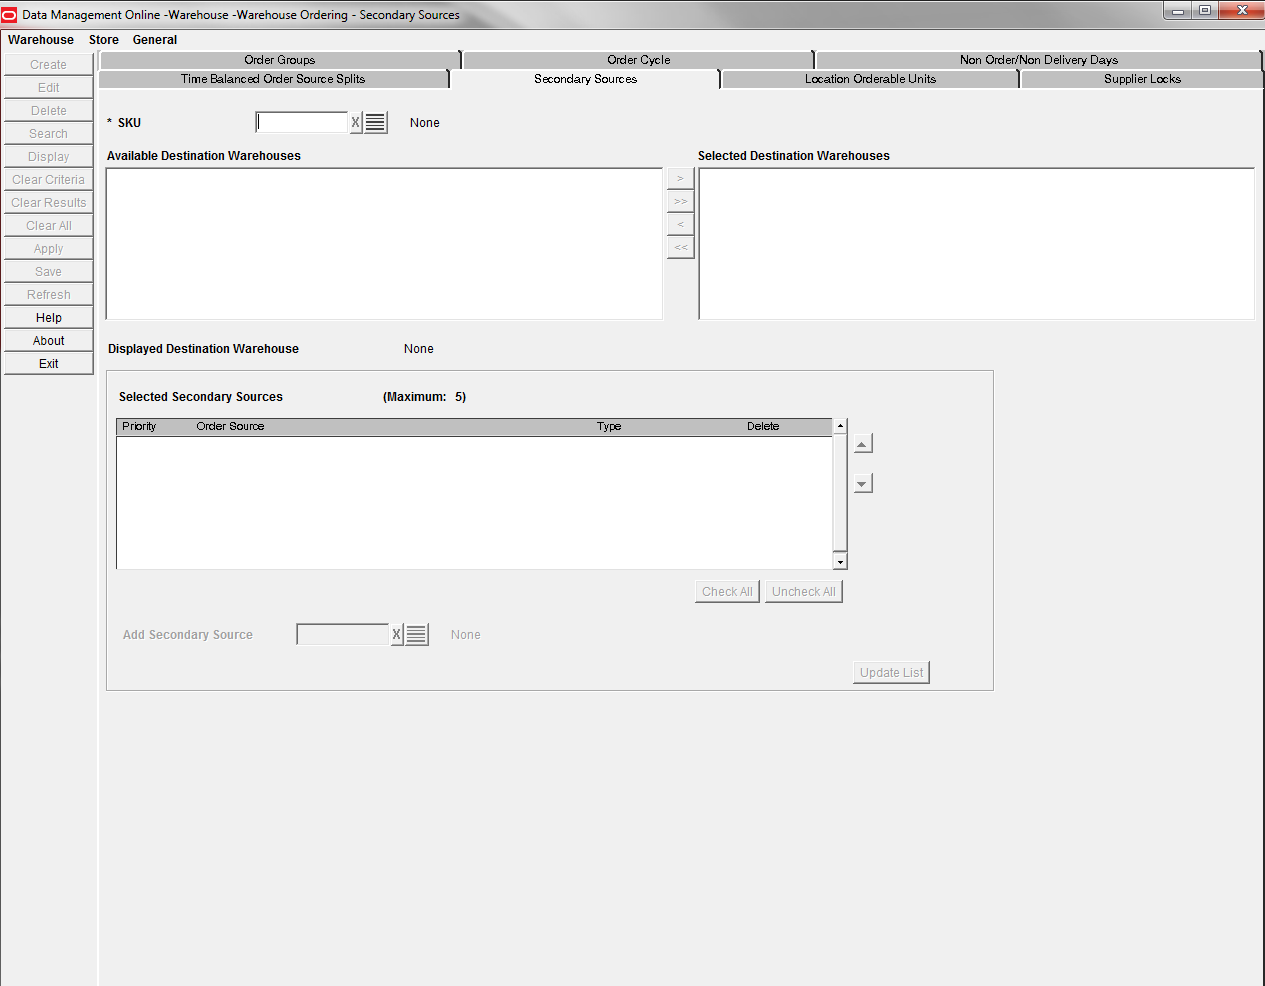
The Secondary Sources tab allows you to maintain a prioritized list of alternate sources by SKU/Destination warehouse. This list is used whenever a shortage is experienced for a SKU-pack within the SKU at the specified location. The sequence in which sources appear on the list reflects the preferred order in which the alternate sources should be used to satisfy shortages.
In DM Online, you can add or delete secondary sources for a SKU/Destination warehouse, or change the priority sequence of existing secondary sources.
Navigate: Log into Data Management. From the Warehouse menu, select Warehouse Ordering. Select the Secondary Sources tab.
In the SKU field, enter the SKU ID to which the secondary source applies, or click the LOV button and select a SKU.
Click Search.
Move the desired destination warehouse from the Available Destination Warehouses area to the Selected Destination Warehouse area.
Select the destination you want to view from the Selected Destination Warehouse list and click Display. If any secondary sources for the selected SKU/Destination exist, they are displayed.
|
Note: If you move a destination warehouse from the Available Destination Warehouses area to the Selected Destination Warehouse area, and the warehouse has been selected as a secondary source, you are given a warning message indicating that the warehouse will be removed from the Selected Secondary Sources list if you choose to continue. |
Navigate: Log into Data Management. From the Warehouse menu, select Warehouse Ordering. Select the Secondary Sources tab.
In the Add Secondary Source field, enter the new secondary source, or click the LOV button and select a secondary source.
Click Update List to add the selected source to the Selected Secondary Sources list.
|
Note: If you add a warehouse to the Selected Secondary Sources list that has also been chosen as a destination warehouse, you are given a warning message indicating that the warehouse will be removed from the Selected Destination Warehouses list if you choose to continue. |
Click Save. A verification window prompts you to confirm your decision.
Click OK.
|
Note: The list of Selected Secondary Sources, visible in the screen at the time of clicking Save, replaces any previously saved list. Therefore, at the time of saving, the Selected Secondary Sources must display the complete list of valid secondary sources for the SKU/Destinations. |
Navigate: Log into Data Management. From the Warehouse menu, select Warehouse Ordering. Select the Secondary Sources tab.
You have the option to select one or more sources to delete for a SKU/Destination location.
To delete a secondary source, enable the Delete checkbox; multiple sources may be selected for deletion.
Click Update List to remove the selected sources from the Selected Secondary Sources list.
Click Save. A verification window prompts you to confirm your decision.
Click OK.
|
Note: Use the Uncheck All checkbox to clear all sources checked for deletion prior to clicking Update List. |
Secondary sources are displayed in a prioritized sequence. You can change the priorities of secondary sources by moving a source up or down in the secondary source list.
Navigate: Log into Data Management. From the Warehouse menu, select Warehouse Ordering. Select the Secondary Sources tab.
To move a secondary source to a higher or lower priority, select the desired source in the Selected Secondary Sources area.
Use the Up or Down buttons to move the source higher or lower in the list.
Click Save. A verification window prompts you to confirm your decision.
Click OK.