![]()
![]()
![]()
![]()
|
|
|
|
|
Note: If you try to install the CRF Submit software on a system that already has the Document Generator software installed, you receive an error message. To continue with the installation, click Ignore.
Note: This must be an account that has local administrator rights.
The Choose Setup Language page appears.
The Welcome page appears.
The Customer Information page appears.
The Choose Destination Location page appears.
The Oracle CRF Submit Setup Dialog page appears.
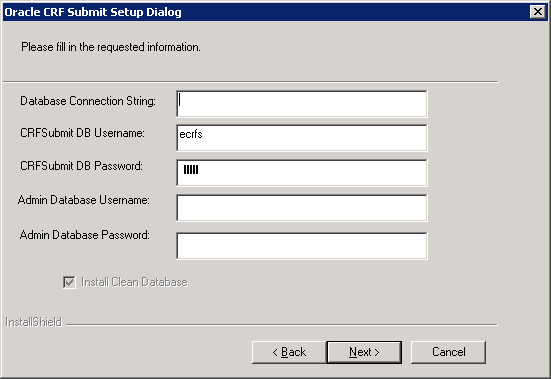
Field |
Description |
|---|---|
Database Connection String |
Oracle connection string used to connect to the CRF Submit server database. If you plan to distribute processing among multiple servers, the connection string should be the same on all servers. |
CRFSubmit DB Username |
Oracle user name used to access the CRF Submit database. If you plan to distribute processing among multiple servers, the DB Username should be the same on all servers. Note: A clean database is automatically created. During a reinstall, the previously installed database is overwritten and you lose any information that was stored there. If you use an existing user, the user is dropped and then recreated. |
CRFSubmit DB Password |
Password used to connect to the Oracle database. If you plan to distribute processing among multiple servers, the password should be the same on all servers. |
Admin Database Username |
Name of the DBA in the Oracle instance. |
Admin Database Password |
Password that goes with the administrator user name. |
The InstallShield Wizard review page appears.
When the installation has completed, the InstallShield Wizard Complete page appears.
Copyright © 2005, 2016 Oracle and/or its affiliates. All rights reserved.