| Oracle® Retail Merchandising System Oracle Retail Merchandising System User Guide 15.0 E65443-01 |
|

 Previous |
 Next |
| Oracle® Retail Merchandising System Oracle Retail Merchandising System User Guide 15.0 E65443-01 |
|
Previous |
Next |
The Item Maintenance information can be accessed through these procedures:
RMS item creation allows you to create simple or complex items. Multifaceted items are created by defining each variation of the item as an Item Level. A diff allows you to distinguish an item by characteristic. For items that do vary, you can use diffs to create up to three levels of an item.
Up to 30 different diff types can be created in RMS. Examples of diff types are color, size, flavor or pattern. By tracking information based on diffs you are able to identify which variety of an item has the best rate of sale, expedite ordering and transferring goods, and generate detailed reports.
Diff ratios are used to designate the quantity of each diff that should be fulfilled as a percentage of the total diff quantity. You are able to view and edit the results of a diff ratio that has been calculated by a batch program, base a store's diff ratios on those for another store, and you edit the quantity for each diff or diff combination. See the following related topics for more information:
To view diffs:
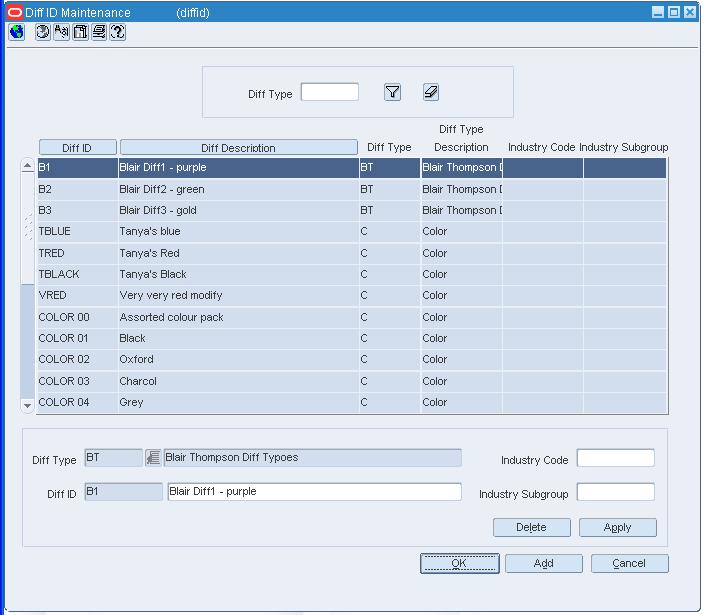
Navigate: From the main menu, select Items > Diffs > Diff IDs > View. The Diff ID Maintenance window appears.
To view a subset of the diffs, in the Filter area select the type of diff in the Diff Type field.
Click the Filter button. The diffs that match the filter criterion appear.
To view all the diffs, click the clear filter button.
Click OK to close the window.
To add a diff:
Navigate: From the main menu, select Items > Diffs > Diff IDs > Edit. The Diff ID Maintenance window appears.
Click Add. The fields in the apply block are cleared.
In the Diff Type field, enter a diff type, or select from the diff type list.
In the Diff ID field, enter a unique ID for the new diff.
In the Diff Description field, enter a diff description.
In the Industry Code field, if the diff is a size, you may enter a valid National Retail Federation (NRF) size code.
In the Industry Subgroup field, if the diff is a color, you may enter a valid National Retail Federation (NRF) color code.
Click Apply. The diff is added to the table.
Click OK to save your changes and close the window.
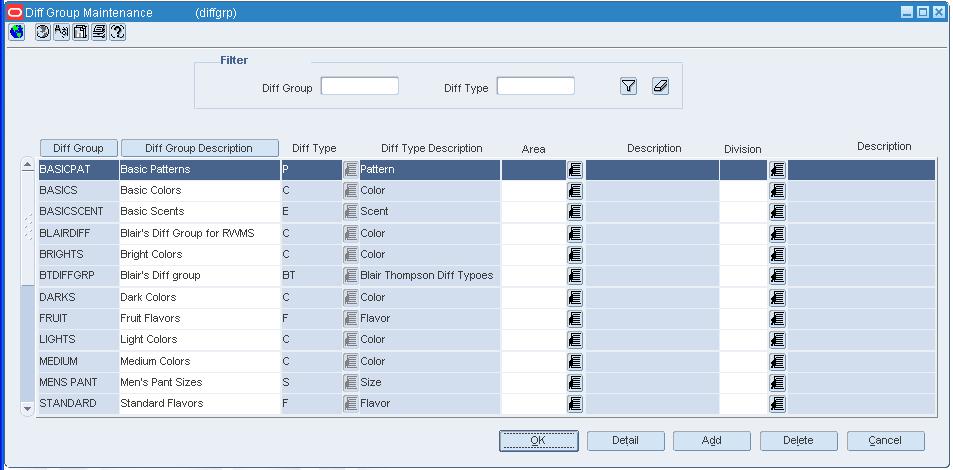
The Diff Group Maintenance window allows you to add, edit, and view diff groups. You can access a detail window in order to add, edit, or view the diffs that are members of the group. Diff groups are used to simplify associating RMS items with multiple diff IDs. To view a subset of the diff groups, you can filter the diff groups by type or code.
When you create a diff group, you can assign diff groups to levels of the merchandise or organization hierarchy. You can only assign the levels of merchandise and organization hierarchy that your user group is associated to. All levels below the hierarchy level assigned are also enabled for the user groups. Users whose security settings allow them access to the same hierarchy levels can use this diff group throughout RMS. If you do not assign a merchandise or organization level all users are able to use this diff group throughout the system.
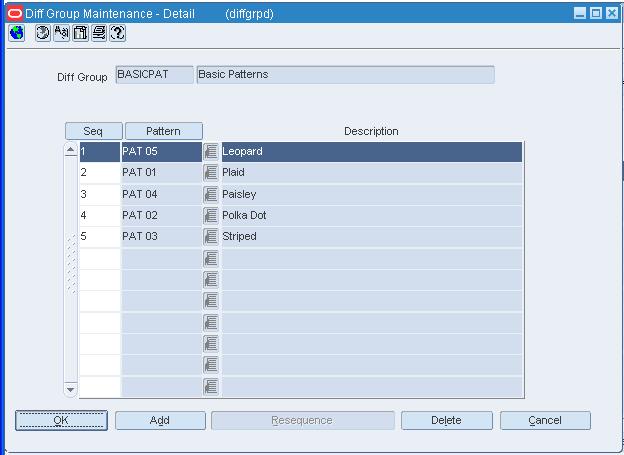
The Diff Group Maintenance-Detail window allows you to add, edit, and view the diffs that are members of a diff group. You can also indicate the order in which the diffs are listed. See the following related topics for more information:
To add a diff group:
From the main menu, select Items > Diffs > Diff Group > Edit. The Diff Group Maintenance window appears.
In the Diff Group field, enter a unique ID for the diff group.
Click Add. The next available line is enabled.
In the Diff Group Description field, enter a description for the diff group.
In the Diff Type field, click the LOV button and select a diff type for the new group.
In the merchandise hierarchy fields, enter the ID of the member of each hierarchy level, or click the LOV button and select a member.
Click Detail. The Diff Group Maintenance - Detail window appears.
|
Note: Click OK in response to the message confirming the addition of the diff group. Click OK when prompted that there are no details for the group. |
Click Add.
In the Seq field, enter a numeric value for each diff ID in the diff group. When the diffs appear on RMS windows, they will be sequenced in the order indicated in the Seq field.
In the Diff ID field, enter the ID of the diff, or click the LOV button and select the diff. The label for the Diff ID field will display the diff type assigned to this group.
Click OK to save your changes and close the window.
To view a diff type:
Navigate: From the Main Menu, select Items > Diffs > Diff Types > View. The Diff Type Maintenance window appears.
Click OK to close the window.
To add a diff type:
From the Main Menu, select Items > Diffs > Diff Types > Edit. The Diff Type Maintenance window appears.
Click Add. A blank row is highlighted.
In the Diff Type field, enter a unique diff type ID.
In the Description field, enter a description for the new diff type.
Click Add to add any additional diff types.
|
Note: You may have up to 30 diff types in RMS. |
Click OK to save your changes and close the window.
To maintain diffs:
Navigate: From the main menu, select Items > Diffs > Diff IDs > Edit. The Diff ID Maintenance window appears.
To edit a diff:
Select a diff.
|
Note: To filter the diffs displayed in the table by diff type, enter a diff type in the filter field. Click the filter button. Only diffs matching the diff type in the filter field appear. |
In the Apply area, you may edit the description, industry code, and industry subgroup.
Click OK to save your changes and close the window.
To delete a diff:
Select a diff from the table, or enter a diff type and click the filter button to view only diffs matching that type.
Select the diff you want to delete.
Click Delete.
|
Note: If the selected diff is currently being used in RMS, it cannot be deleted. |
When prompted to delete the record, click Yes.
Click OK to save your changes and close the window.
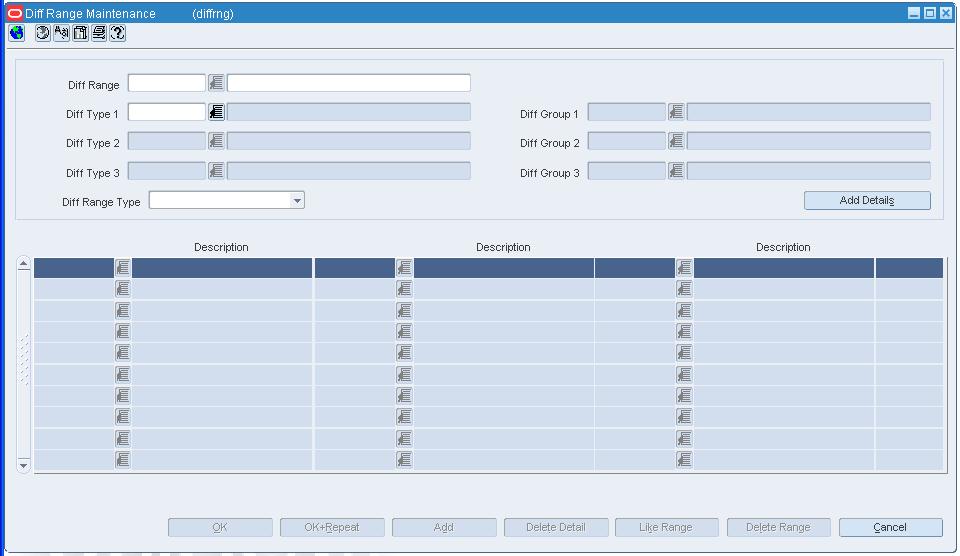
To view a diff range:
Navigate: From the main menu, select Items > Diffs > Diff Range > View. The Diff Range Maintenance window appears.
In the Diff Range field, enter the ID of the diff range, or click the LOV button and select the diff range.
Click OK to close the window.
To copy a diff range:
Navigate: From the main menu, select Items > Diffs > Diff Range > New. The Diff Range Maintenance window appears.
In the Diff Range field, enter the ID and description of the diff range.
Click Like Range. The Like Range Selection window appears.
In the Diff Range field, enter the ID of the diff range to be copied, or click the LOV button and select the diff range.
Click OK to save your changes and close the window. The details of the selected diff range are copied to the Diff Range Maintenance window.
Edit or delete diffs in the table as necessary.
Click OK to save your changes and close the window.
To maintain diff types:
Navigate: From the Main Menu, select Items > Diffs > Diff Types > Edit. The Diff Type Maintenance window appears.
To view diff groups:
Navigate: From the main menu, select Items > Diffs > Diff Group > View. The Diff Group Maintenance window opens.
To view a subset of the diff types:
In the Diff Type field (Filter area), select the type of diff.
Click the Filter button. The diff types that match the filter criteria appear.
To view all the diff types, click the clear filter button.
Click OK to close the window.
To maintain diff groups:
Navigate: From the main menu, select Items > Diffs > Diff Group > Edit. The Diff Group Maintenance window appears.
To edit a diff group:
To filter the data in the table, enter a valid diff group and/or diff type in the field fields.
Edit the descriptions of diff groups as necessary.
To add a diff to a group:
Select a diff group.
Click Detail. The Diff Group Maintenance - Detail window appears.
Click Add. The next available line is enabled.
In the Seq field, enter a number to indicate the order to sort diffs.
In the Diff ID field, enter the ID of the diff, or click the LOV button and select the diff. The label for this field will display the name of the diff type assigned to this diff group.
Click OK to save your changes and close the window.
To delete a diff from a group:
Select a diff.
Click Delete. You are prompted to delete the record.
|
Note: If the diff is currently being used in RMS, you cannot delete it. |
Click Yes.
Click OK to save your changes and close the window.
To change the sort order of a diffs:
Edit the sequence numbers to match the order in which you want to display the diffs.
|
Note: To automatically renumber the diffs from top to bottom, click Resequence. You may want to click Diff ID to sort the diffs by ID first. |
Click Seq. The diffs are sorted by sequence number.
Click OK to save your changes and close the window.
To maintain diff ranges:
Navigate: From the main menu, select Items > Diffs > Diff Range > Edit. The Diff Range Maintenance window appears.
To edit a diff range:
In the Diff Range field, enter a valid diff range ID, or click the LOV button and select a diff range ID.
Edit the ID and description of the diff range as necessary.
If Percent or Ratio were selected in the Diff Range Type field, enter a percent or ratio in the last column of the table, for each diff detail.
Click OK to save your changes and close the window.
To add details to the diff range displayed:
Click Add. The next available line is enabled.
In the Diff ID field, enter a diff ID, or click the LOV button and select the diff. The diff types selected in the header appear as the labels for Diff ID fields in table.
Select additional diff IDs as needed to complete the enabled row.
Click OK to save your changes and close the window.
To delete a diff range:
In the Diff Range field, enter the ID of the diff range, or click the LOV button and select the diff range. The details of the diff range appear.
Click Delete Range. You are prompted to delete the record.
Click Yes. The diff range is deleted and the Diff Range Maintenance window is closed.
To create a diff range:
From the main menu, select Items > Diffs > Diff Range > New. The Diff Range Maintenance window appears.
In the Diff Range field, enter the ID and description of the diff range.
In the Diff Type field, select a type of diff that you want to include in the range.
In the Diff Group field, enter the ID of a group of diffs that you want to include in the range, or click the LOV button and select the diff group.
Repeat steps 2 and 3 for up to 3 total diff type/group combinations.
Click Add Details to enable the first row in the table.
Enter a valid diff ID to include in the diff range, or click the LOV button and select the diff range. The diff types selected in step 2 above appear as the labels for Diff ID fields in table.
Select additional diff IDs as needed to complete the diff range record.
Click Add, and repeat steps 6 and 7 above, to add another diff ID to the range.
If Percent or Ratio were selected in the Diff Range Type field, enter a percent or ratio in the last column of the table, for each diff detail.
Click OK to save your changes and close the window.
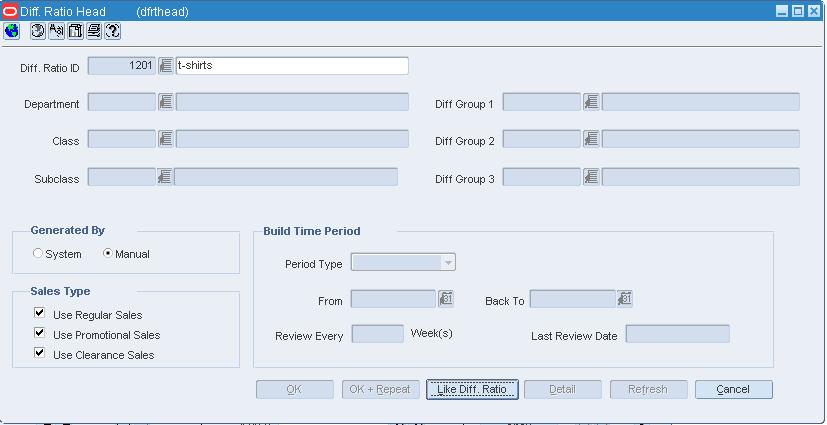
The Diff Ratio Head window allows you to create, edit, or view a diff ratio. The diff ratio is based on the sales history for an item in the department, class, and subclass that you select. You indicate the type of sales (regular, promotional, or clearance) and the time period to include in the calculation of the diff ratio. The diff ratio is calculated by a batch program. See these related topics for more information:
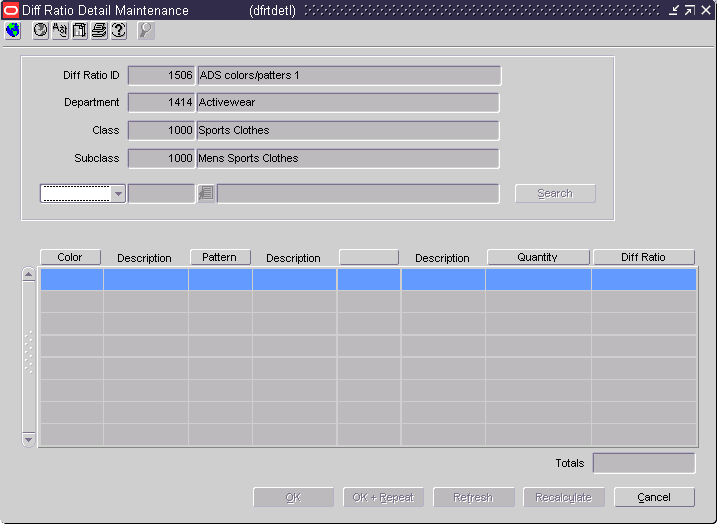
The Diff Ratio Detail Maintenance window allows you to view and edit the results of a diff ratio that has been calculated by a batch program. In Edit mode, if you select a store that is not yet associated with the current diff ratio, you can base the store's ratios on those for another store. After you select a store or all stores, you can edit the quantity for each diff or diff combination. See these related topics for more information:
To view a diff ratio:
From the main menu, select Control > Diff Ratios. The Diff Ratio Find window appears.
Search for and retrieve a diff ratio in Edit mode. The Diff Ratio Head window opens.
Click Detail. The Diff Ratio Detail Maintenance window opens.
To view the records for all stores, select Subclass in the Subclass/Store field.
To view the records for a specific store, select Store in the Subclass/Store field. Then enter the ID of the store, or click the LOV button and select the store.
Click OK to close the window.
To maintain diff ratios:
Navigate: From the main menu, select Control > Diff Ratios. The Diff Ratio Find window appears.
Search for and retrieve a diff ratio in Edit mode. The Diff Ratio Head window opens.
To edit a diff ratio:
Edit the description, sales types, and review number as necessary.
Click Detail. The Diff Ratio Detail Maintenance window appears.
In the Search block, select Subclass to edit the diffs at all stores, or select Store to edit the diffs at a specific store. In the value field, enter the ID of the store, or click the LOV button and select the store.
If you select a store that is not yet associated with the diff ratio, you are prompted to add the store using another store as the template.
Click Yes in response to the prompt. The Store window opens.
In the Store field, enter the ID of the store that you want to copy, or click the LOV button and select the store.
Click OK to close the window. The details are copied to the Diff Ratio Detail Maintenance window.
Edit the quantity of each diff as necessary.
Click Recalculate to update the ratios in the Diff Ratio column.
Click OK to save your changes and close the window.
To create a diff ratio:
Navigate: From the main menu, select Control > Diff Ratios. the Diff Ratio Find window appears.
In the Action field, select New.
Click OK. The Diff Ratio Head window opens.
|
Note: The diff ratio ID is filled in automatically. |
In the Diff Ratio ID field, enter the description of the diff ratio.
Select either the System or Manual option.
If you select System:
Enter the ID of the Department, Class, and Subclass in the appropriate fields, or select from the list.
Enter up to three diff groups to be associated with this ratio, or select from the list.
In the Sales Type area, select the types of sales that you want to include in the size ratio.
In the Build Time Period, select the type of time period. Then enter the dates or the number of weeks in the appropriate fields.
In the Review Every Weeks field, enter how often the size ratio should be recalculated.
If you select Manual:
Click Like Diff Ratio. The Like Diff Ratio window opens.
In the Diff Ratio ID field, enter the ID of the diff ratio that you want to copy, or click the LOV button and select the diff ratio.
Click OK to close the window. The merchandise levels, sales types, diff groups, and time period information are copied to the current sales ratio.
Click Detail. The Diff Ratio Detail Maintenance window opens.
In the Subclass/Store field, select either Store or Subclass. If you select Store, enter the ID of the store, or click the LOV button and select the store. The quantity and ratio for each diff at the store (or all stores if you selected Subclass) appear.
|
Note: If you select a store that is not yet associated with the diff ratio, you are prompted to add the store and copy the settings from another store. |
Edit the quantities as necessary.
Click Recalculate.
Click OK to save your changes and close the windows.
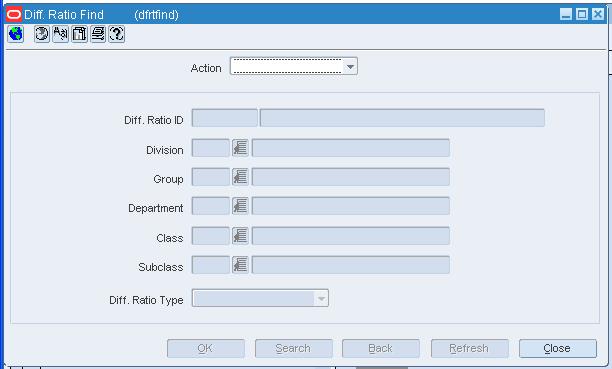
The Diff Ratio Find window allows you to enter criteria in order to search for diff ratios and view the results of the search.
The default view for the Diff Ratio Find window opens when you open the window for the first time. You can also create a custom view. See this related topic for more information:
To search for a diff ratio,
From the main menu, select Control > Diff Ratios. The Diff Ratio Find window appears.
In the Action field, select either Edit or View.
Enter additional criteria as desired to make the search more restrictive.
Click Search. The Diff Ratio Find window displays the diff ratios that match your search criteria.
Select a task:
To perform another search, click Refresh.
To display the diff ratio information, select a record and click OK. The Diff Ratio Head window appears.
Click Close to close the window.
The Like Diff Ratio window allows you to create a diff ratio with the same department, class, subclass, sales types, and time periods as another diff ratio. A diff ratio can be copied if you create a manually-generated diff ratio.
Navigate: From the main menu, select Control > Diff Ratios. The Diff Ratio Find window appears.
In the Action field, select New.
Click OK.
In the Diff Ratio ID field, enter the description of the diff ratio.
Select Manual in the Generated By option box.
To copy the sales types and time period parameters from another diff ratio:
Click Like Diff Ratio. The Like Diff Ratio window opens.
In the Diff Ratio field, enter the ID of the diff ratio to copy, or click the LOV button and select the diff ratio.
Click OK to save your changes and close the window.
Click OK to save your changes and close the window.
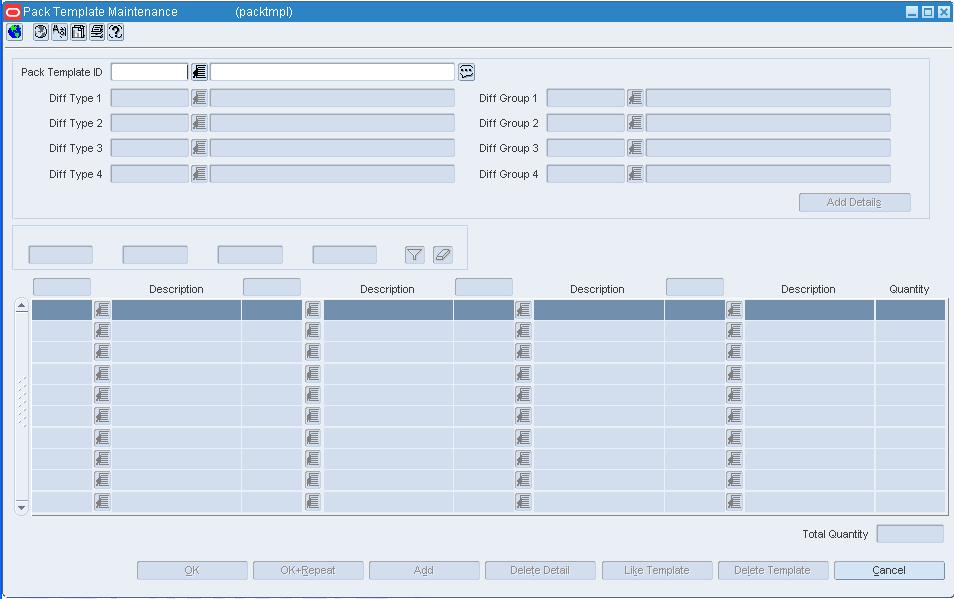
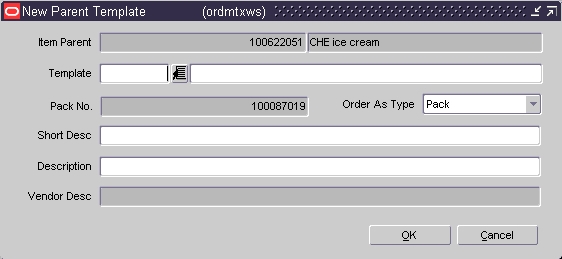
Navigate: From the main menu, select Items > Diffs > Pack Templates > New. The Pack Template Maintenance window appears.
|
Note: A Pack Template ID is automatically generated and displayed. |
In the Pack Template ID field, enter a description for the template.
In each Diff Type field, enter the ID of a diff type you want to assign to this template for up to four diff types, or click the LOV button and select the diff type.
In each Diff Group field, select the diff group you want to assign to this template, for up to four diff groups.
Click Add Details.
For each Diff field, enter a diff ID, or click the LOV button and select a diff for each diff group/type combination. The field label will display the value that you selected in the Diff Type field.
In the Quantity field, enter the quantity to include in the pack.
Click OK to save your changes and close the window.
The Diff ID Maintenance window allows you to add, edit, and view the characteristics that can be associated with an item. In RMS these identifying characteristics are called diffs, or diffs. A diff may be a specific color, size, or any other detail you want to use to track a varied item. Diffs are categorized by diff types. You may have up to 30 diff types. For example, you may want to create a diff type called Color and assign diff values of red, blue, and purple to that diff type.
You can also filter the diffs by type in order to view a subset of the diffs.
The Diff Range Maintenance window allows you to create, edit, and view ranges of diffs. A diff range is a list of diffs that are grouped under one ID. You can then use the diff range to apply multiple diffs to an item with less repetition and effort than applying each diff ID individually.
Navigate: From the main menu, select Items > Items. The Item Search window appears.
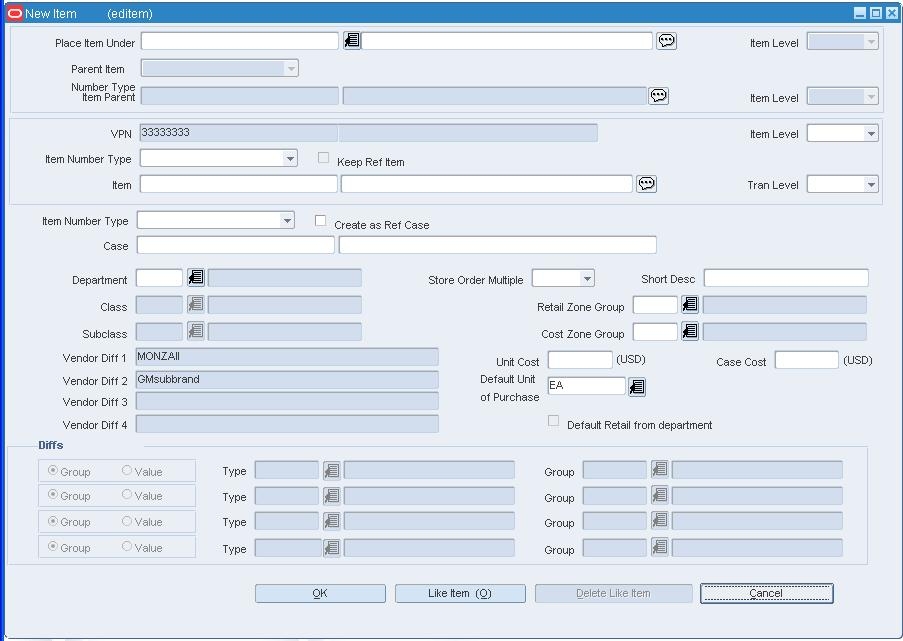
In the Action field, select New Item.
In the Department, Class, and Subclass fields, enter the IDs of the merchandise hierarchy, or click the LOV buttons and select the merchandise hierarchy.
In the Item Type field, select Regular Item.
Select the item type indicators:
Inventory: When Yes is selected, inventory is tracked and held in RMS for an item.
Sellable: When Yes is selected, an item can be sold and is sent to the POS.
Orderable: When Yes is selected, an item can be ordered, set up on replenishment, and can have HTS and expenses set up.
|
Note: The indicators that you select for the Level 1 item will be applied to all items in the item group and cannot be changed. |
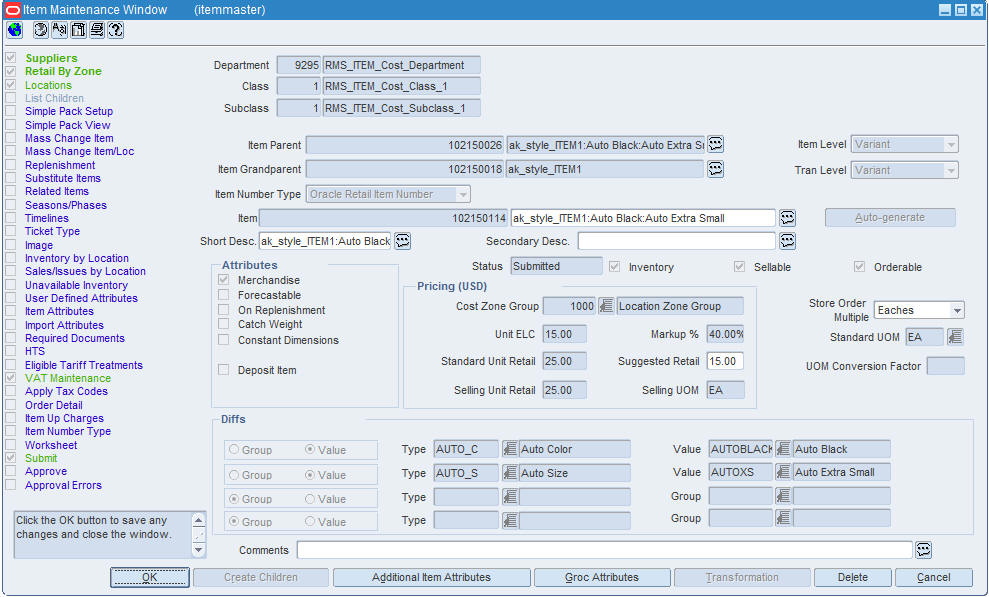
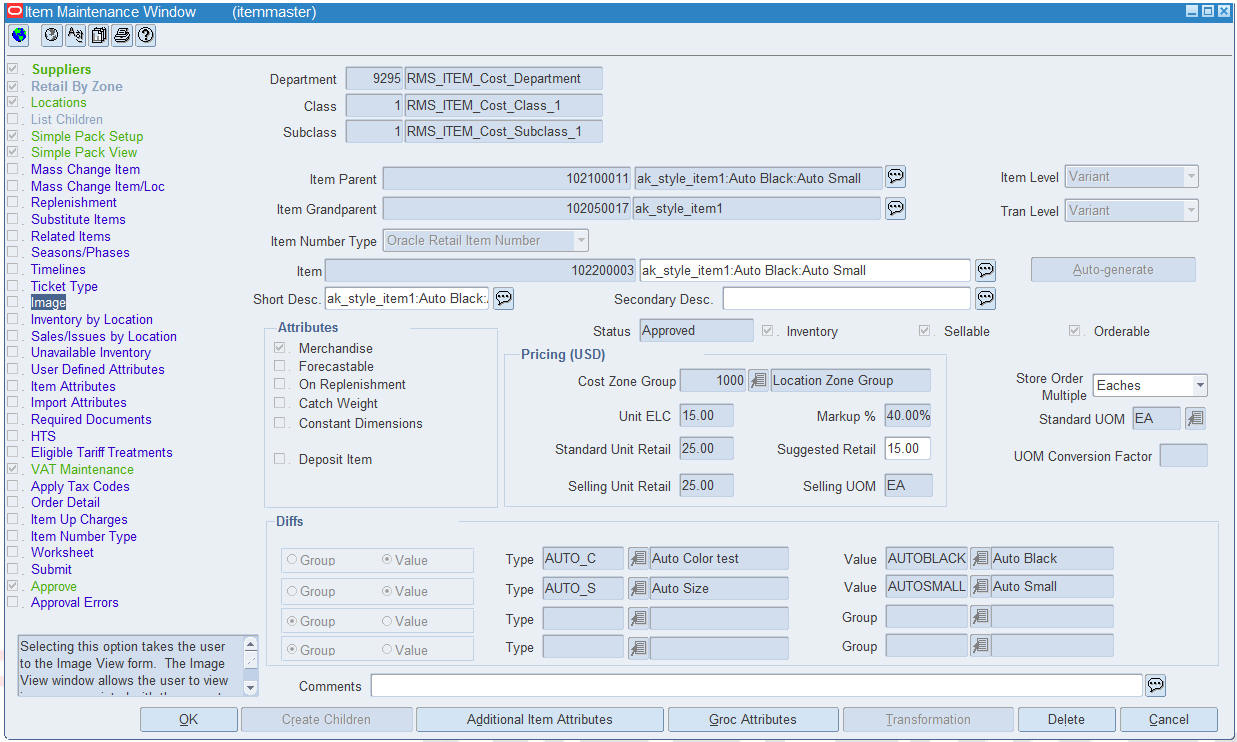
Click OK. The Item Maintenance Window appears.
In the Item Number Type field, select the type of item number that you want to associate with the item.
In the Item field, enter the item number and description of the item.
|
Note: If you select Oracle Retail Item Number or UPC-A in the Item Type field, the item number is automatically added. If you select EAN/UCC-13, you can automatically generate the EAN number by clicking Auto-generate. When Manual is chosen from the Item Number Type field, the description field accepts alphabetic text and does not validate digit, length, or characters. It is a 12-digit number starting with 3 that includes check digit validation. |
In the Tran Level field, select Level 2.
In the Attributes area, select or clear the check boxes as needed.
In the Pricing area, in the Cost Zone Group field, enter the cost zone group ID or click the LOV buttons and select the cost zone group.
Add a supplier for an item.
Edit the retail price of an item.
In the Diffs area, select either the Group or Value option for up to four diffs.
In the Type field, select up to four diff types that you want to assign to this item. The Diff Type values appear as the label for all corresponding diff fields on the Item Children window.
In the Group or Value fields, enter up to four IDs for the diff group or diff, or click the LOV button and select a diff value or diff group.
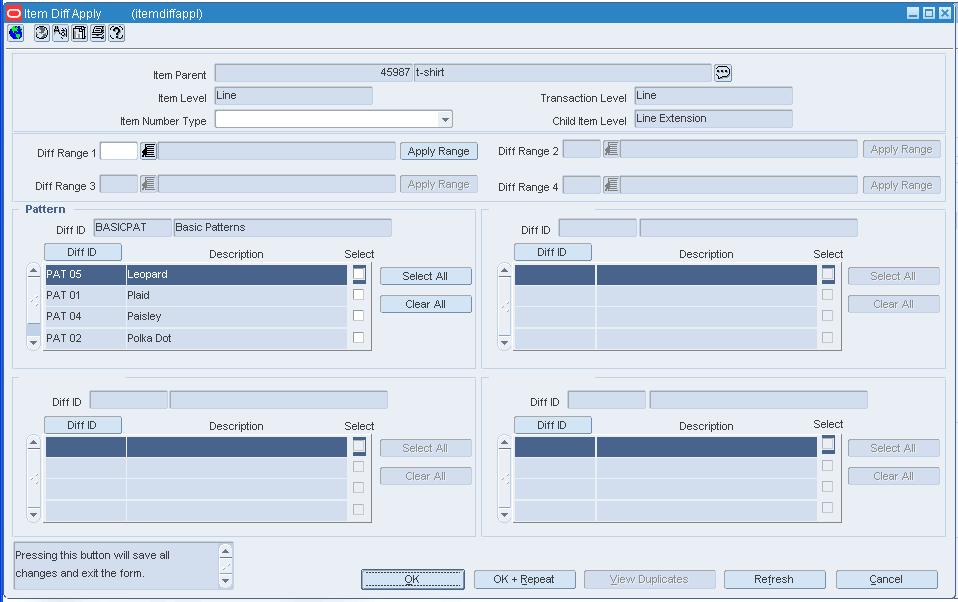
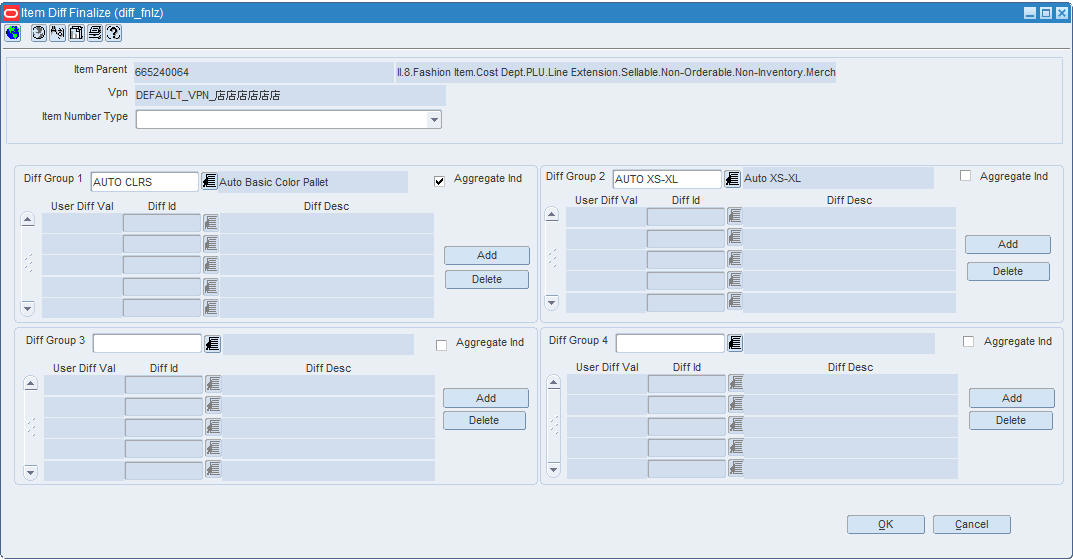
Click Create Children. The Item Diff Apply window appears.
In the Item Number Type field, select the type of item number that you want to associate with the items that are added to the item group at this level.
This section describes the diff combinations.
In any Diff Range field, you can enter an ID of a diff range, or click the LOV button and select the diff range.
Click Apply Range.
|
Note: You can enter a diff range for each diff group that is associated with the item. Each diff range can contain diffs from up to three diff groups. The diff type and diff groups appear in the List of Values (LOV) window. If a diff range is used, you cannot use the associated diff groups while creating the same set of items. |
Click OK. The Diff Combinations window appears.
|
Note: You must select at least one diff from each diff group table. |
Select an item on the table.
In the Item field, edit the item number and description of the item.
Click Apply. Edits are added to the table.
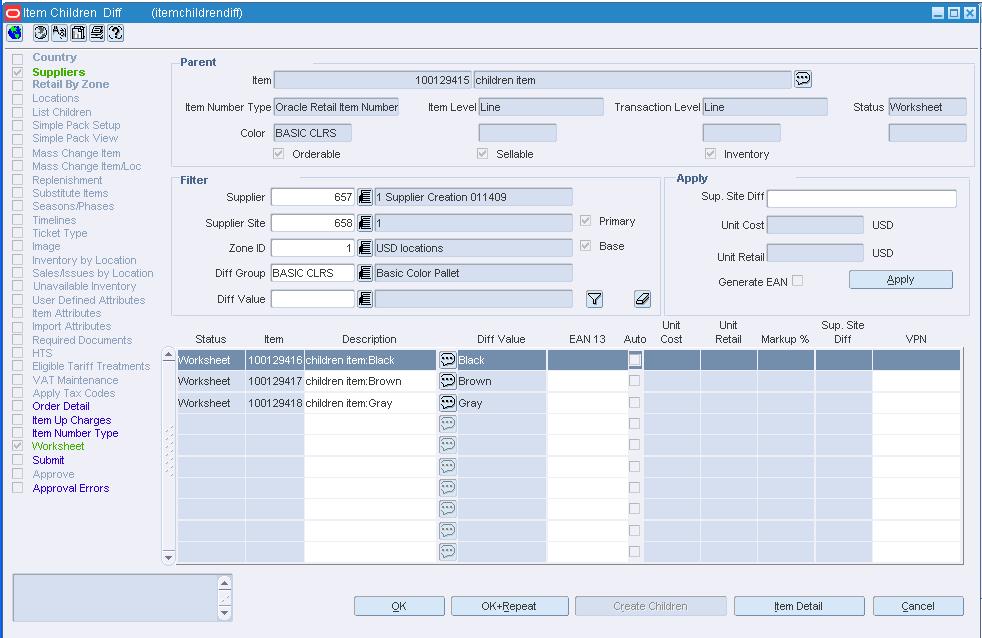
Click OK to create the item children. Click Yes when prompted to approve the creation of item children. The Item Children Diff window appears.
In the Apply area, enter the new values for the criteria you want to update.
Click Apply.
On the table, you can update:
EAN 13: Enter the European Article Number (EAN) for the item.
Auto: The Auto generated numbers for the level two items.
VPN: Enter the Vendor Product Number (VPN) for the item.
|
Note: Before you update the VPN, the records must be filtered by supplier. |
Click OK to save any changes and close the window.
The Diff Type Maintenance window is used to create, edit, or view diff types. These types can be assigned to diffs. RMS allows up to 30 diff types.
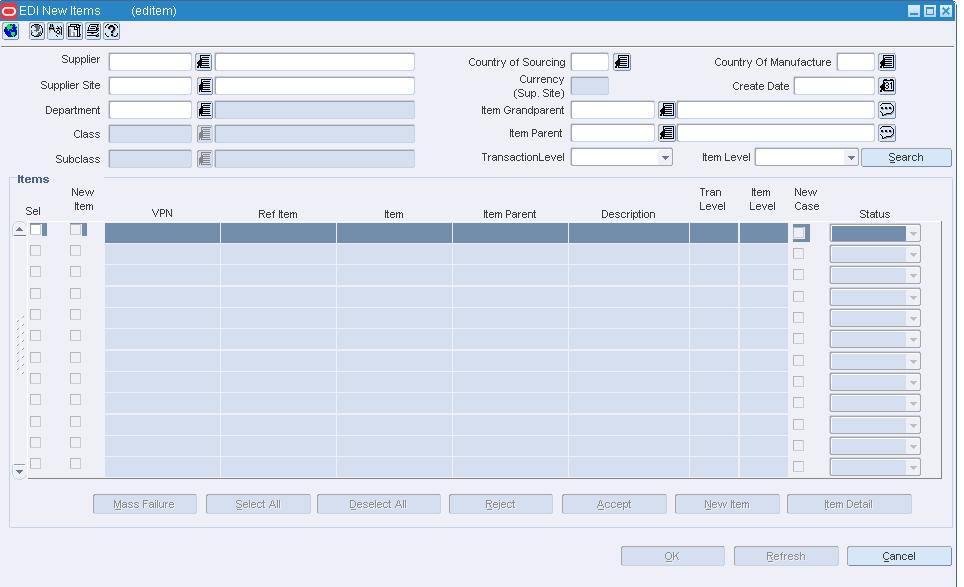
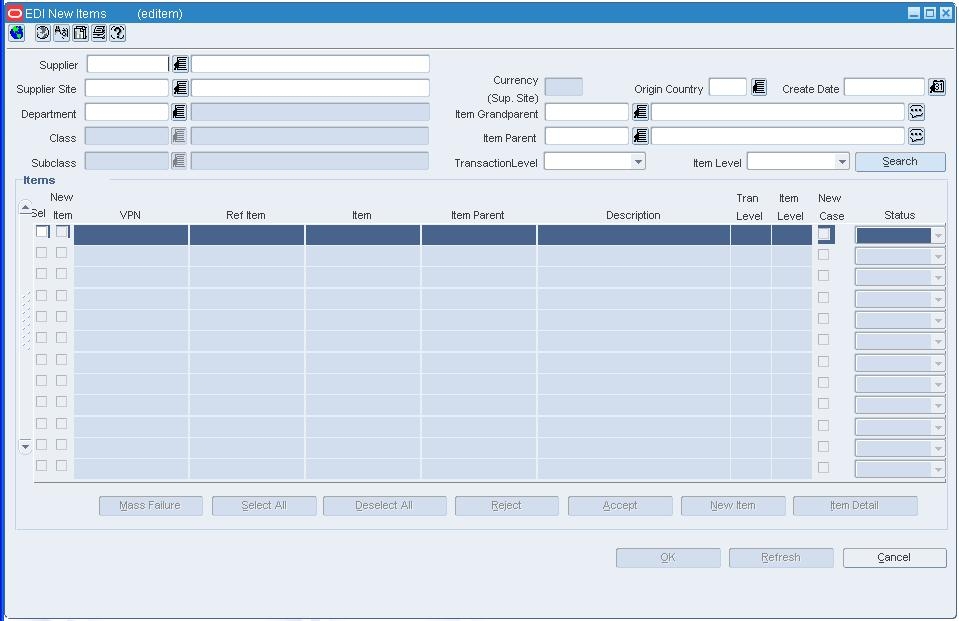
Navigate: If there are any problems with items that are added on the Distribution Diff Apply Window, the Diff Distribution Error Summary Window is automatically displayed.
If the system is set up to automatically create approved items at a subordinate level, you are able to enter item numbers for the new items and you must enter an item number to add the item/diff combination to your order.
If the system is not set up to automatically create approved items at subordinate levels, the selected list of item/diff combinations opens.
To resolve errors, you must make the necessary changes in the appropriate item window. Or, you may choose to accept the distribution with errors and any failed item/diff combinations are deleted from the order.
If there were any problems with items being added on the Distribution Diff Apply Window, the Diff Distribution Error Summary Window opens. Items appear on this window for one of three reasons:
An item is not supplied by the order's supplier.
An item is not in Approved status.
No item exists with the item parent/diff combination.
If the system is set up to automatically create approved children items, you are able to enter item numbers for the new items.
|
Note: You must enter an item number to add a level 1 item/diff or level 2 item/diff combination to your order. |
If the system is not set up to automatically create approved subordinate level items, the selected list of level 1 item/diff or level 2 item /diff combinations opens.
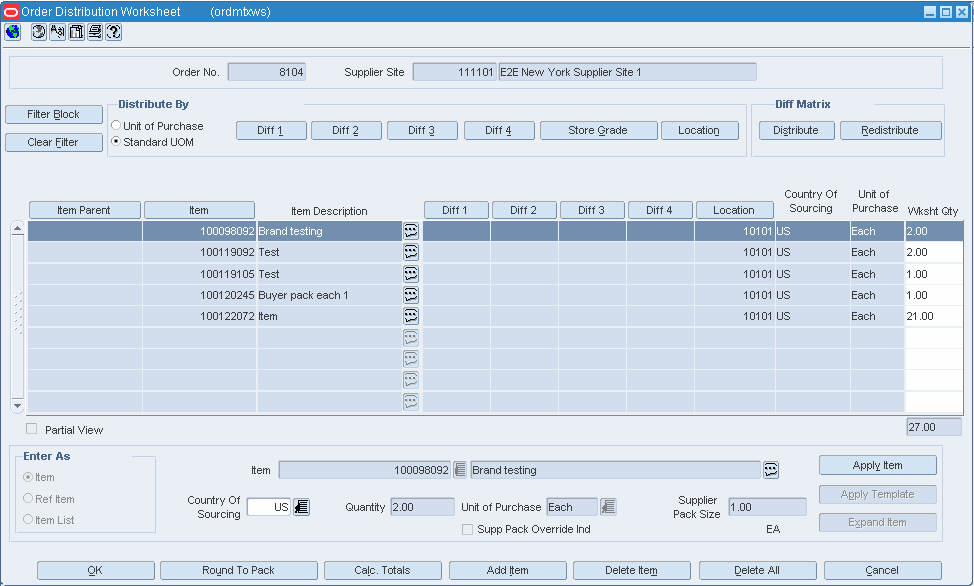
The Distribution Diff Apply window is used to distribute an item by diff groups. You may select from diffs in the associated group or use diff ranges and ratios. Also, use this form to specify the distribution quantity, percentage, or ratio for each selected diff. As part of the process of distributing by diffs, subordinate level items must either be selected or created.
The Like Range Selection window allows you to copy the details from an existing diff range to a new diff range.
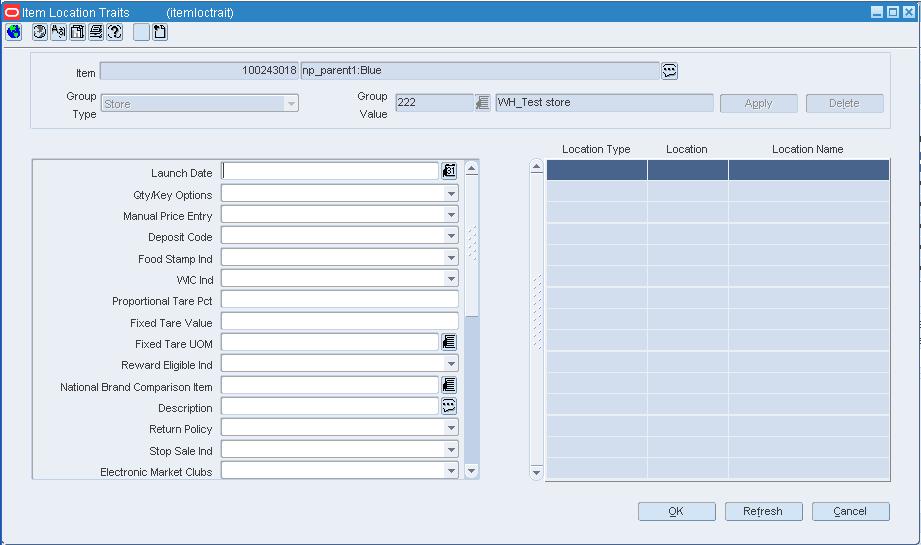
Item location traits are set at the item/location level. Many of the traits are downloaded to the POS. Other traits may be downloaded to a ticketing system. The remaining traits are entered for information only and drive no processing.
To change the item traits for a location,
From the main menu, select Items > Items. The Item Search window is displayed.
Search for and retrieve an item. The Item Maintenance window appears.
Click the Locations option. The Item Location window opens.
Select a location and click the Item/Single Loc Attrib option. The Item Location Traits window appears.
Select or enter the new values for the desired traits.
Click OK to save your changes and close the window.
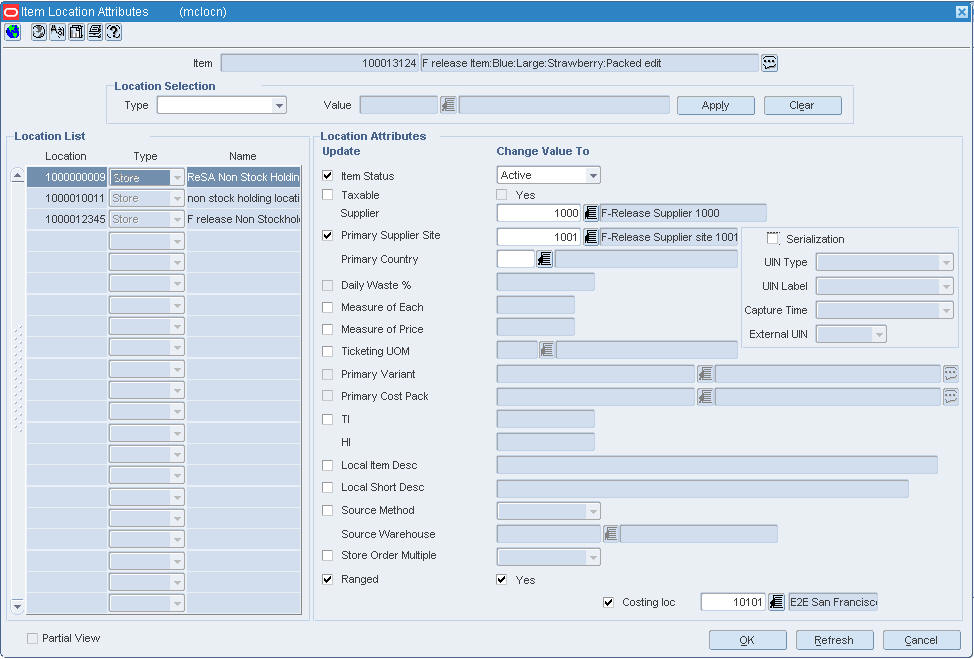
To change an item traits for multiple locations:
From the main menu, select Items > Items. The Item Search window is displayed.
Search for and retrieve an item. The Item Maintenance window appears.
Click the Locations option. The Item Location window appears.
Click the Item/Multi Loc Attrib option. The Item Location Traits window appears.
In the Group Type field, select a grouping mechanism.
In the Group Value field, enter the ID of the group or location, or click the LOV button and select the group or location.
Select the check boxes in the Update column next to the fields that you want to change.
Select or enter the new values in the Change Value To column.
Click OK to save your changes and close the window.
Items can be grouped into a one, two, or three level hierarchy. The naming conventions for the three item levels may vary by organization, but they are referred to here as item levels 1, 2, and 3. All item hierarchies begin at item level 1. After creating a level 1 item, you can create level 2 items for the item. If a third level is desired, you can select a level 2 item and create level 3 items.
There are several different types of items you can create in RMS:
Regular items
Deposit items
Packs
Concession items
Consignment items
Transformable items
This section describes the regular items.
An item group is an item hierarchy in which an item is broken into levels. The entire set of items (level 1 - 3) is an item group. The item is broken down in to factors which allow it to be distinguished from the more generic item.
After you have defined the item structure, you must add a supplier to the item, determine item cost, and assign the item to a location.
A differentiatior (diff) is a characteristic that can be used to make items distinct from one another. You can add levels to an item group if you identify a set of diffs or diff groups. Each unique diff or combination of diffs creates a new level in the item group. If you choose not to use diffs, you can manually create item levels.
Once you have selected the diffs, you can create all of the items for that item level, through RMS.
A deposit item is an item that has a portion which is returnable by the customer after it has been sold to the customer. A deposit is taken from the customer for the returnable portion. A deposit item is broken into the components of the item, and each item is track separately in RMS.
Deposit Contents Item: The item that is sold to the customer.
Deposit Container Item: The item for which the deposit is taken. The deposit container item holds the deposit contents item.
Deposit Crate Item: The item which holds the container and contents items.
Deposit Returned Item: The item that is returned to the retailer by the customer and for which the deposit is returned to the customer.
Deposit items can be maintained as a complex pack or a single item. Maintaining the deposit items as a complex pack ensures the appropriate components are grouped together and facilitates ordering. If you maintain the deposit items individually, you must associate the item with the appropriate container item.
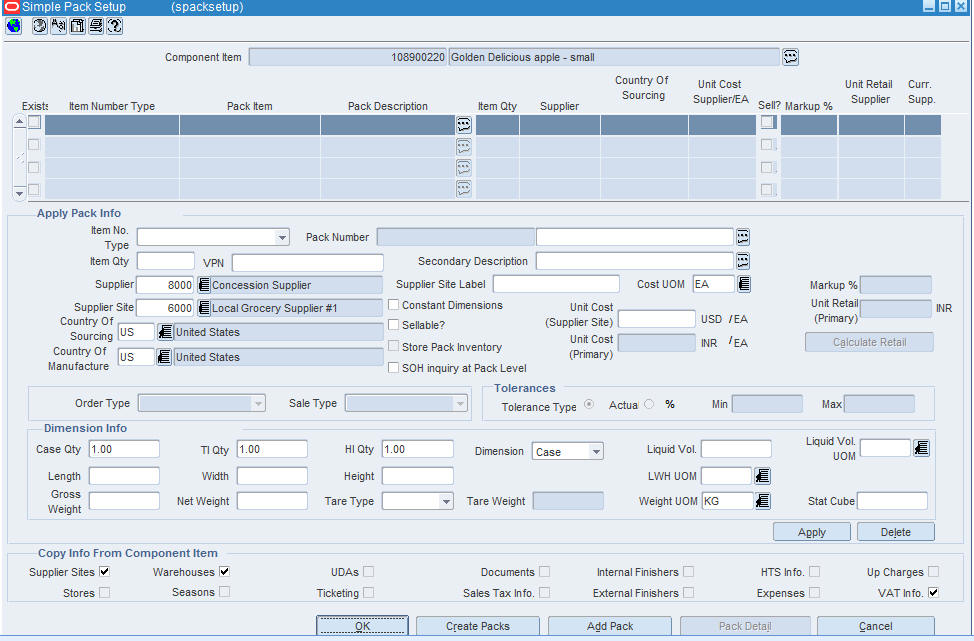
A pack is way of tracking multiple items under one item number. The Pack Item Overview contains additional information on simple and complex packs.
This section describes the concession and consignment items.
A consignment item is a marketing arrangement where physical control of merchandise, but not the title of ownership is transferred from one business, the consignor (the supplier) to another, the consignee, (the retailer). The title to the goods remains with the consignor until the goods are sold. Upon sale of the goods, the consignor bills the consignee through an invoice.
A concession item is similar to a consignment item in that the retailer does not own the inventory being sold. Concession items differ from consignment in that the ownership is not transferred when the items are sold. A retailer rents floor space to a supplier on which the supplier sells their goods. A record of concession sales is recorded and the retailer then bills the supplier using their chosen method.
A transformable item is an item that can be ordered as one item and the broken into smaller items. The smaller items can them be resold in the store. There are two types of transformable items:
Transformed Orderable: The item is ordered from the supplier in one form, but changed by the retail and sold to the customer in a different form.
Transformed Sellable: The item that is sold to the customer. A transformed sellable item is from the supplier in a different form than it is sold.
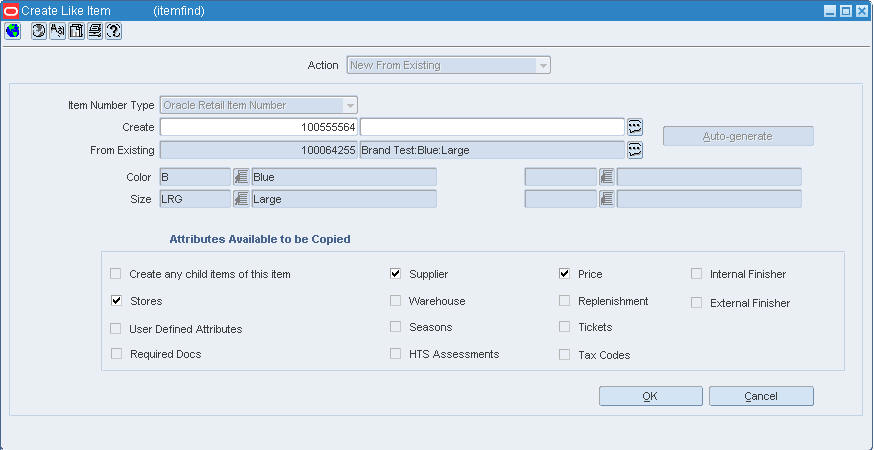
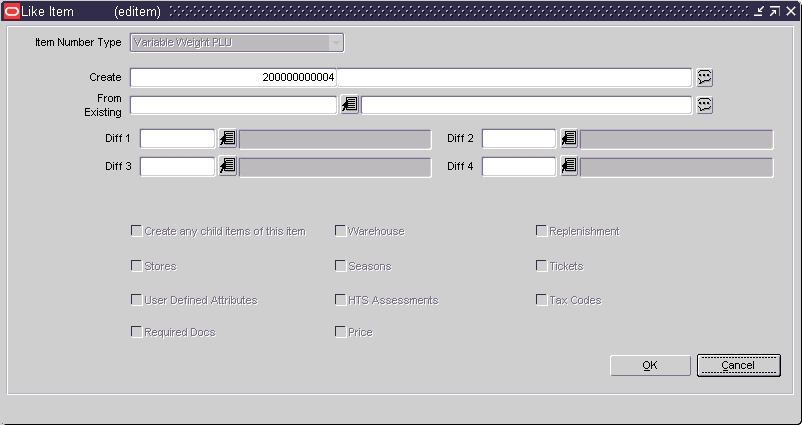
The Create Like Item window allows you to copy the details from an existing item to a new item. If the existing item is at item level 1, you are creating an new level 1 item. If the existing item is at item level 2 or 3, the item you create is a member of the same item group.
To maintain an item,
From the main menu, select Items > Items. The Item Search window appears.
Search for and retrieve an item in Edit mode. The Item Maintenance window appears.
|
Note: You may not be able to make certain changes if the item is Approved. |
Edit the enabled fields as needed.
To edit the details for the item, click the appropriate options on the Options list.
Click OK to save your changes and close the window.
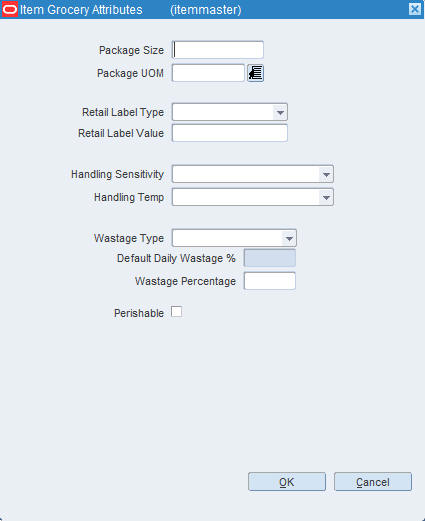
On the Item Maintenance Window, select Groc Attributes. The Item Grocery Attributes window appears.
|
Note: The remaining deposit items are view only from the Item Grocery Attributes window. |
In the Deposit Item Area, update the container Item field, and Price Per UOM Calculation Type field, as necessary.
Click OK to save your changes and close the window.
On the Item Maintenance window, click Transformation. The Transformation Maintenance window appears.
Update the enabled fields as necessary.
|
Note: The Total Yield% field and the Production Loss field must total 100% before you can save any changes and close the window. |
Click OK to save your changes and close the window.
Navigate: From the main menu, select Items > Items. The Item Search Window appears.
Search for and retrieve an item in New From Existing mode. The Create Like Item window appears.
If the existing item is at item level 1, select the type of number that you want to assign to the new item in the Item Number Type field.
In the Create field, enter the item number and description of the item.
In the Item Number Type field, if the item number type is Oracle Retail Item Number or UPC-A, the item number is automatically filled in. If the item number type is Variable Weight UPC, you must select an item number type. It is a 12-digit number starting with 3 that includes check digit validation.
Enter the description.
|
Note: When Manual is chosen from the Item Number Type field, the description field accepts alphabetic text and does not validate digit, length, or characters. |
If the item you are copying from is associated with diffs, you can select diffs for the like item you are creating. Enter the diff IDs in the enabled fields, or click the LOV button and select the diffs.
To copy details from the selected item to the new item, select or clear the enabled check boxes as necessary.
Click OK to save your changes and close the window. The Item Maintenance window appears.
Edit the details of the item as necessary.
Click OK to save your changes and close the window.
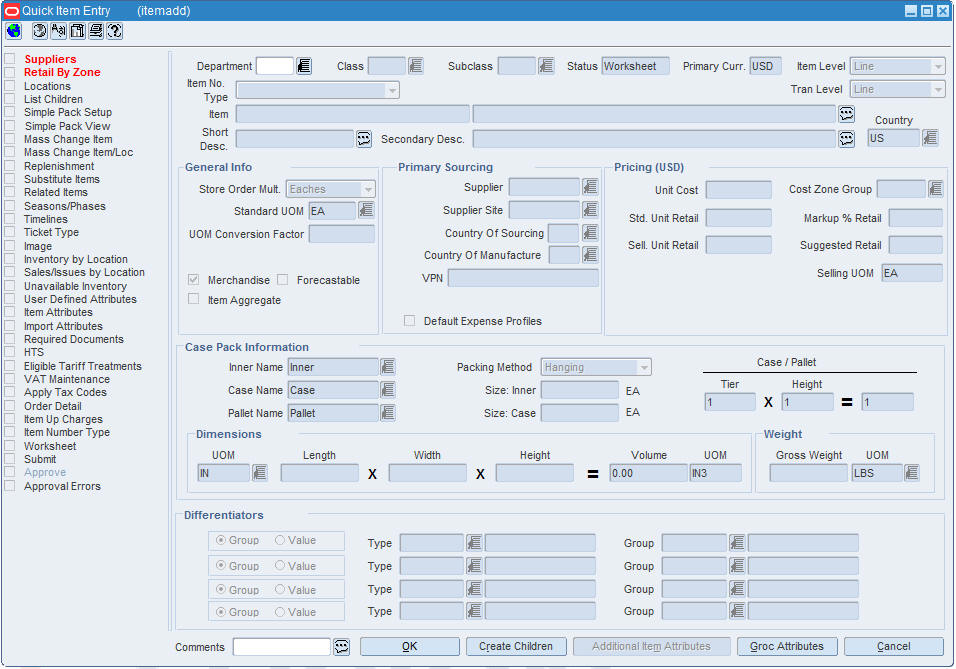
The Quick Item Entry window allows you to quickly create items in approved status. The required item information is contained on one window. If you wish to add details to an item you are creating, you may do so by selecting an option from the options list.
Look at the Options list to verify that all necessary information has been added for the current item. The options are color-coded to indicate whether they are required by the system, required by your organization, or made available/unavailable.
Red, bold: The option is required by the system. The Suppliers and Retail by Zone options are required by the system.
Green, bold: The option required by the system has been edited.
Red: The option is required by the department, class, or subclass.
Green: The option, required or not, has been edited.
Blue: The option is not required but can be edited if the user so chooses.
Black: The option is not available to the user.
The check box next to each option provides another visual cue. A selected check box indicates that the option has been edited. You can click the required or available options in order to perform a task related to the current item. The appropriate message or window opens.
Navigate: From the main menu, select Items > Quick Item Entry. The Quick Item Entry window appears.
In the Department, Class, and Subclass fields, enter the IDs of the merchandise hierarchy, or click the LOV buttons and select the merchandise hierarchy.
In the Item Type field, select the type of item number that you want to associate with the item.
In the Tran Level field, select the item level at which transactions will be tracked for this item group.
In the Item field, enter the item number and description of the item.
|
Note: If you select Oracle Retail Item Number or UPC-A in the Item Type field, the item number is automatically added. It is a 12-digit number starting with 3 that includes check digit validation. |
You can edit the abbreviated description in the Short Desc field.
In the General Information area:
In the Store Order Mult, Standard UOM, and UOM Conversion Factor fields, select how stores will order the item and how that compares with the standard unit of measure.
The AIP Case Type determines which case sizes to extract against an item in the AIP interface and it is used only if AIP is integrated. Select either Formal or Informal from the AIP Case Type list.
Select or clear the check boxes as needed.
In the Primary Sourcing area:
In the Supplier field, at the bottom of the window, enter the ID of the supplier, or click the LOV button and select the supplier for this item.
In the Supplier Site field, enter the supplier site or click the LOV button.
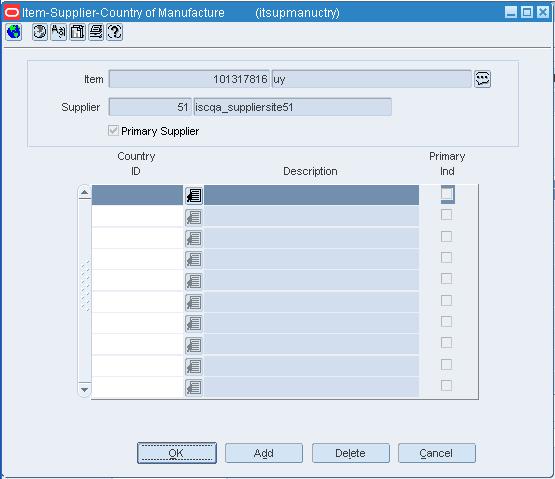
In the Country of Sourcing field, enter the code for the country, or click the LOV button and select the country.
In the Country of Manufacture field, enter the country of manufacture, or click the LOV button.
The Primary Case Size indicates the primary case size for the item supplier when an orderable item is configured for informal case types. It is used only if AIP is interfaced.
Enter additional information as necessary.
In the Pricing (USD) area:
In the Cost Zone field, enter the cost zone ID the item is associated with, or click the LOV button and select the cost zone.
In the Unit Cost field, enter the cost of one item.
Enter additional information as necessary.
In the Case Pack area, enter inner size and the case size.
In the Differentiators area:
In the Diffs area, select either the Group or Value option for up to four diffs.
In the Type field, select up to four diff types that you want to assign to this item. The Diff Type values appear as the label for all corresponding diff fields on the Item Children window.
In the Group or Value fields, enter up to four IDs for the diff group or diff, or click the LOV button and select a diff value or diff group.
Click OK to save any changes and close the window.
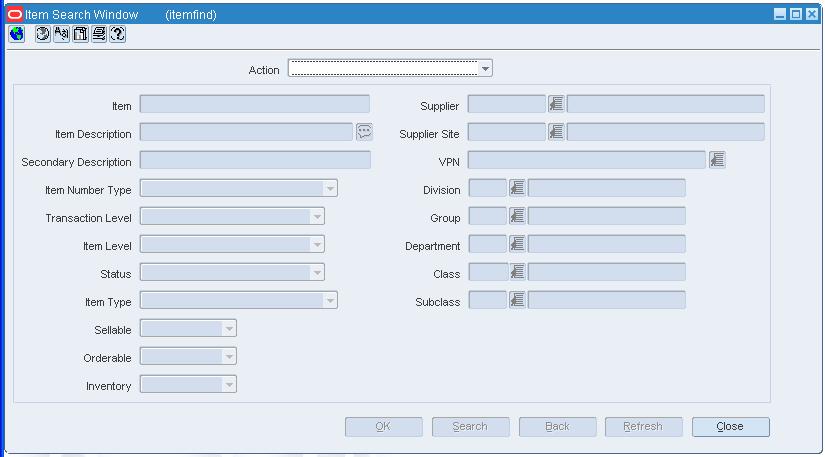
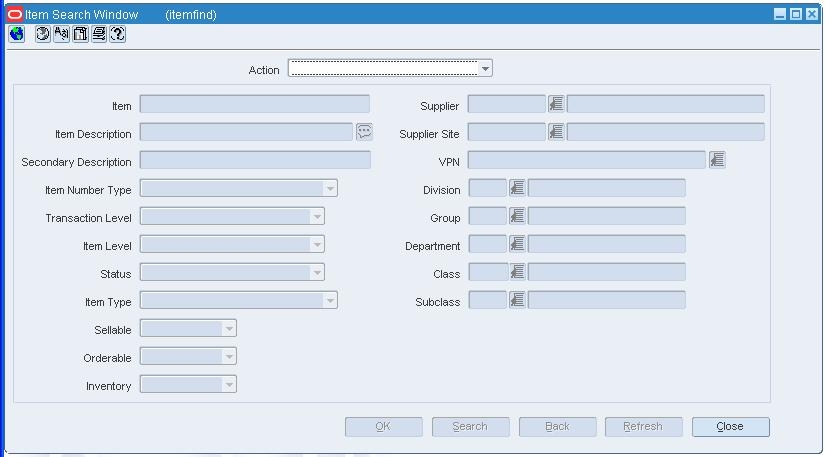
The Item Search window allows you to enter criteria in order to search for items and view the results of the search.
When you are creating an item, you are required to enter information on the Item Search window to associate the item to the merchandise hierarchy and to correctly identify the item type. After you select the item type the item type indicator are enabled. The item type indicators allow you to identify the following required information about an item:
Inventory: When Yes is selected, inventory is track and held in RMS for an item.
Sellable: When Yes is selected, an item can be sold and is sent to the POS.
Orderable: When Yes is selected, an item can be ordered, set up on replenishment, and can have HTS and expenses set up.
For some item types you are allowed to select all three item indicators as appropriate for your item, other item types, the indicators default to required values for some or all of the indicators.
The default view for the Item Search window appears when you open the window for the first time. You can also create a custom view.
The Update Record Status window allows you to indicate which item children to submit or approve in an item hierarchy. You can submit or approve the selected item with or without its item children, or you can submit or approve all the item children in the Item Children window with or without their own children.
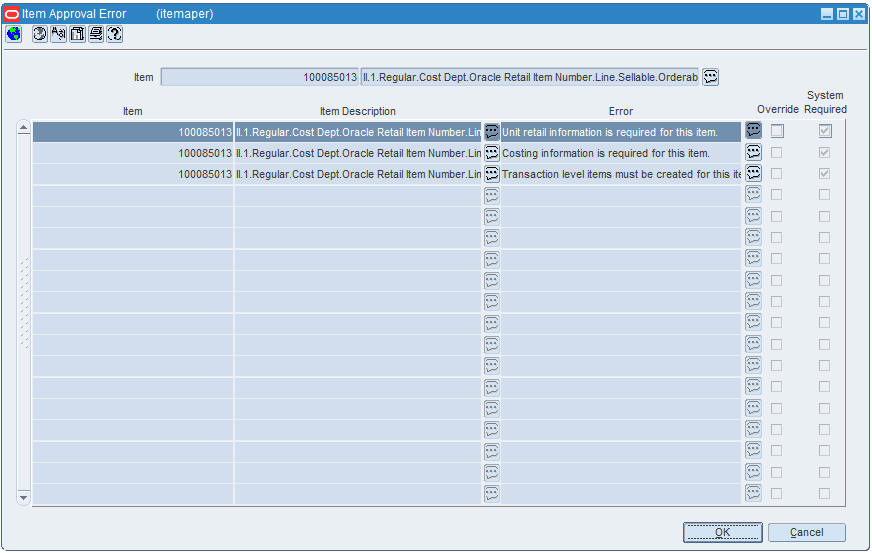
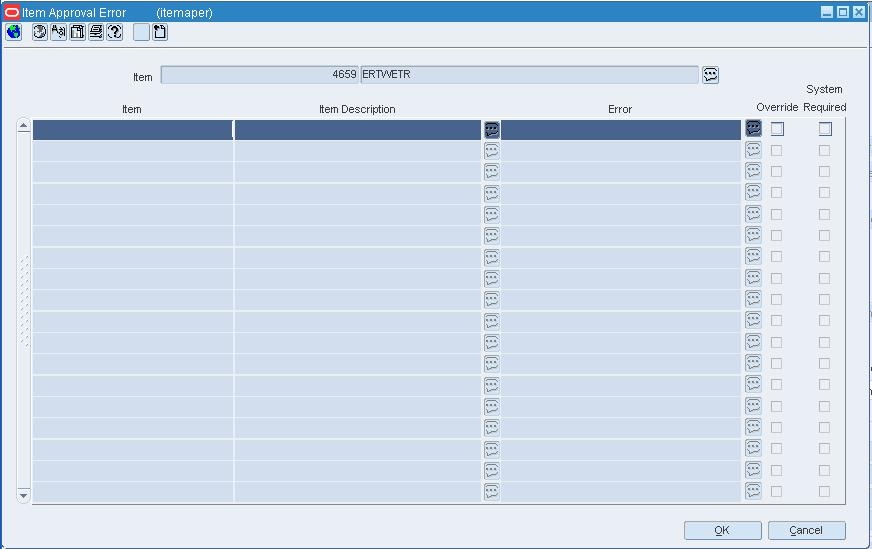
You cannot submit or approve a child until its parent is submitted or approved. Only an error free item may be submitted or approved. If during the submittal or approval process errors are detected, you are prompted. To view the errors, you can select the Approval Errors option from the Option list of the Item Children window. The errors appear in the Item Approval Error window. At that time, you can choose to override errors not required by the system, or fix all the errors and resubmit or approve the items.
The Item Attributes window allows you to record and edit information specific to a selected item. The Item Attribute window is a customizable window. Therefore, the fields that appear in this window are specific to your organization.
See "Record Attributes for an Item” in the Foundation Data chapter
The Update Record Status window allows you to indicate which item children to submit or approve in an item hierarchy. You can submit or approve the selected item with or without its item children, or you can submit or approve all the item children in the Item Children window with or without their own children.
You cannot submit or approve a child until its parent is submitted or approved. Only an error free item may be submitted or approved. If during the submittal or approval process errors are detected, you are prompted. To view the errors, you can select the Approval Errors option from the Option list of the Item Children window. The errors appear in the Item Approval Error window. At that time, you can choose to override errors not required by the system, or fix all the errors and resubmit or approve the items.
The Item Retail Price by Zone window allows you to view and edit the regular retail price for an item in Worksheet or Submitted status. After the item is approved, you can no longer edit retail prices in this window.
To display monetary amounts in the primary currency of the company, the local currency of the store, or the Euro currency, select the appropriate option from the Options > Currency menu. Monetary amounts can be edited when the supplier currency opens.
See "Edit the Retail Price of an Item" in the Purchasing chapter
The Item Expense Maintenance window allows you to view importing and exporting expenses associated with an item. Expenses are tracked at two levels: country and zone. Country-level expenses track the costs of importing merchandise from the country of sourcing, through the lading port, to the discharge port. Zone-level expenses track the costs of sending merchandise from the discharge port to the final destination.
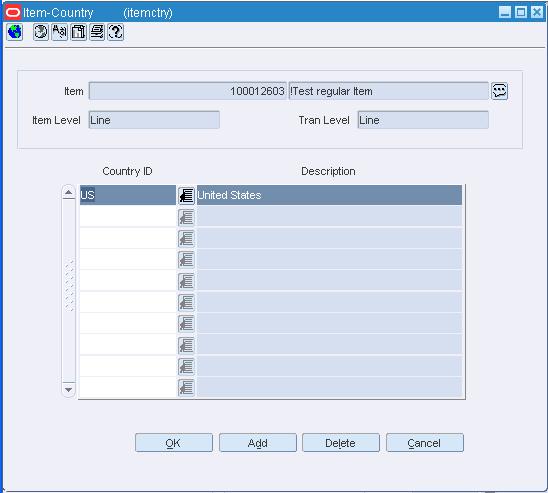
The Item Country window displays the country associated with an item.
To view the country associated with an item,
From the main menu, select Items > Items. The Item Search window is displayed.
Search for and retrieve a item in the Edit Item mode. The Item Maintenance window appears.
Select the Country option. The Item-Country window appears.
Select the country you want to delete.
Click Delete.
When prompted to delete the country record, click Yes.
Click OK to save your changes and close the window.
To maintain fiscal attributes of an item country,
From the main menu, select Items > Items. The Item Search window is displayed.
Search for and retrieve a item in the Edit Item mode. The Item Maintenance window appears.
Select the Country option. The Item-Country window appears.
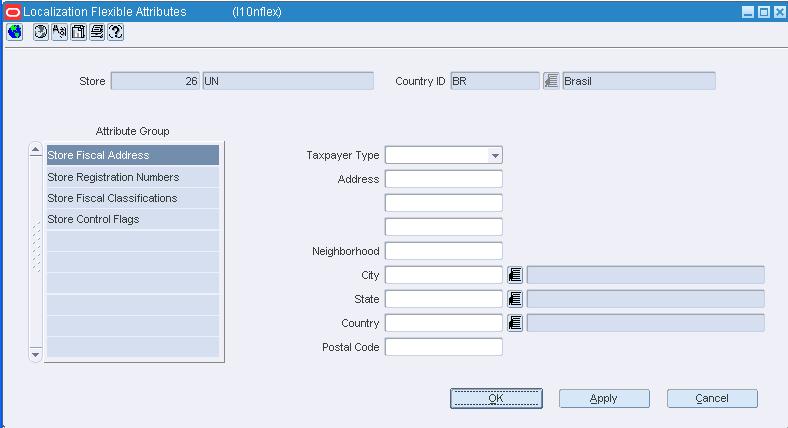
Select Fiscal Attributes from the Options menu. The Localization Flexible Attributes - Item Country window appears.
Make changes as necessary.
Click Apply to save the changes made to that attribute group.
Make necessary changes to other attribute groups, if necessary.
Click OK to save your changes and close the window.
|
Note: The Fiscal Attributes will be enabled only when the Default_tax_type in Localization_unit_options is GTAX and Localization_ind = Y. |
To view item expense details at the country level,
From the main menu, select Items > Items. The Item Search window appears.
Search for and retrieve an item in Edit mode. The Item Maintenance window appears.
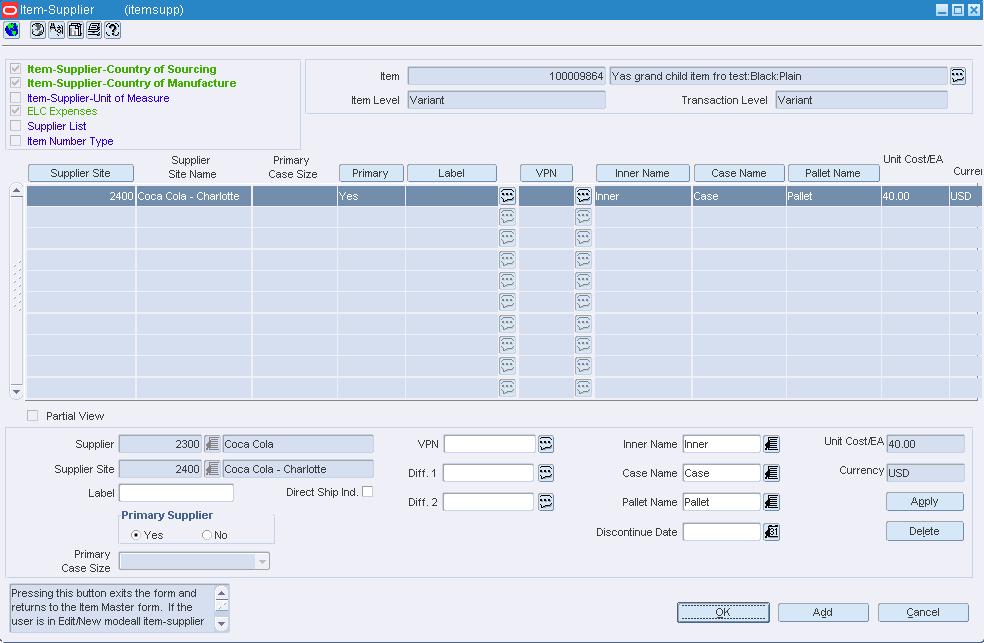
From the Options menu, select Suppliers. The Item-Supplier window is displayed.
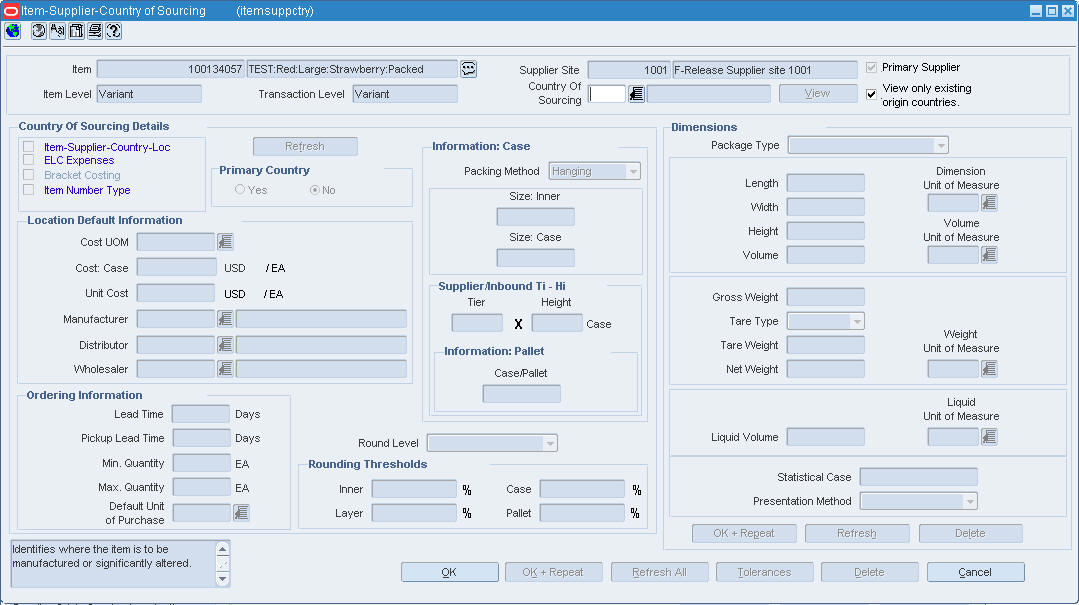
From the Options menu, select Item-Supplier-Country of Sourcing. The Item-Supplier-Country of Sourcing window appears.
Enter the code for the Country source, or click the LOV button and select the country.
Click View.
In the options list, click ELC Expenses. The Item Expense Maintenance window appears.
To view the nomination flags, from the View menu, select Nomination flag.
To add additional lading ports, click Add.
To add charges associated with a port, select the port and click Add Details.
Click OK to close the window.
To view item expense details at the zone level,
From the main menu, select Items > Items. The Item Search window appears.
Search for and retrieve an item in Edit mode. The Item Maintenance window appears.
From the Options menu, select Suppliers. The Item-Supplier window appears.
From the Options menu, select ELC Expenses. The Item Expense Maintenance window appears.
To view nomination flags, select View > Nomination flag.
To add additional discharge ports, click Add.
To add charges associated with a port:
Select the port.
Click Add Details.
Click OK to close the window.
The Item Orders window allows you to view a list of the outstanding orders for a selected item, item parent, or pack item. You can also access the details of the purchase orders.
See "View Outstanding Orders for an Item" in the Purchasing chapter
The Item Grocery Attributes window allows you to maintain details for grocery industry items.
If the item is a deposit content item, you can associate the appropriate container item to the contents item. If the item is a deposit container item, you can view all the contents items associated with the container item.
See "Record Grocery Attributes for an Item" in the Foundation Data chapter
See "View an Item" in the Purchasing chapter
The Item HTS Maintenance window allows you to maintain the HTS classifications that are associated with an item.
See "Approve an HTS Classification for an Item" in the Purchasing chapter
See "Edit an HTS Classification for an Item" in the Purchasing chapter
See "View HTS Classifications for an Item" in the Purchasing chapter
The Item Eligible Tariff Treatment window allows you to maintain which tariffs are associated with an item.
See "Add a Tariff Treatment at the Item Level" in the Purchasing chapter
See "Delete a Tariff Treatment at the Item Level" in the Purchasing chapter
See "View Tariff Treatments at the Item Level" in the Purchasing chapter
The Item Number Find window allows you to search for an item at the transaction level by reference item or vendor product number (VPN). This functionality is available from the Options menu whenever the cursor is in an empty Item or VPN field on a window. After you find a reference item and close the window, the item number and description of the transaction level item are filled in automatically on the window that you are returned to.
The Item Import Attributes window allows you to record and edit import information for a selected item.
See "Record Attributes for an Item" in the Foundation Data chapter
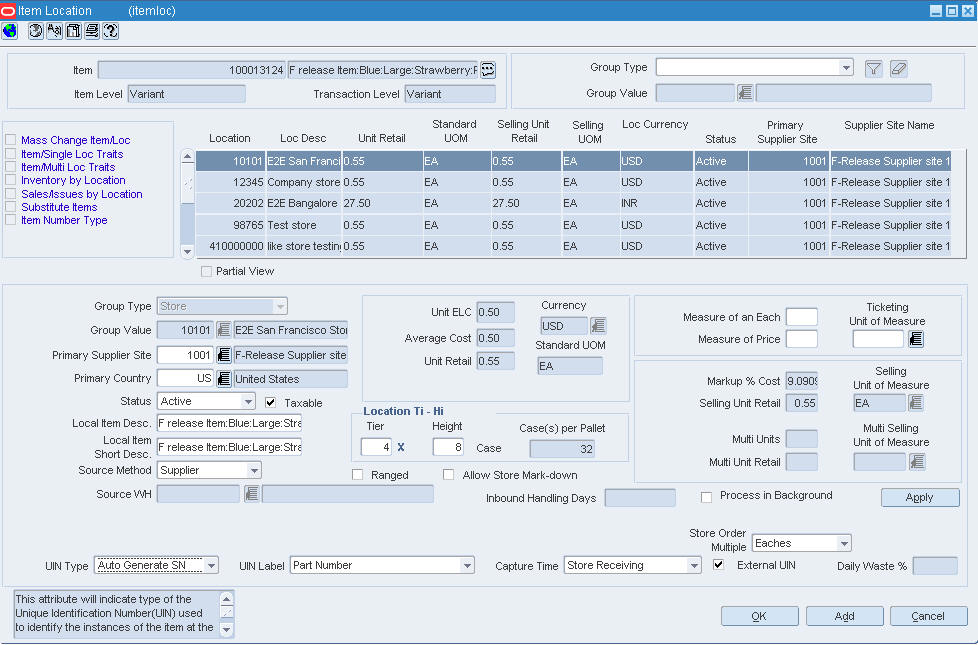
The Item Location window allows you to view and maintain the locations at which an item is stocked. You can maintain the locations for items at or above the transaction level. If the item is above the transaction level, you can select an option to automatically apply changes to child items down to the transaction level. In a multi-channel environment, items are associated with warehouses at the virtual warehouse level.
Additional information that you can add at the item location level allows you to define information that is different at the location that it is for the item, including:
An item's active status for a particular location
Costing information, for the pack and the unit
Ti - Hi information for the location
Units of measure and the appropriate measure
Allows you to indicate the type of the Unique Identification Number (UIN) used to identify the instances of the item at the location
Additional attributes, including wastage and inbound handling days
For transformed sellable items, you cannot apply supplier/country sourcing, cost, or store order multiple information. For transformed orderable items, you cannot apply price, markup, multi-unit, or selling unit information.
The default view for the window appears when you open the window for the first time. You can also view the table with the Primary Currency view or you can create a custom view.
See "View Locations Associated with an Item" in the Foundation Data chapter
The Item Location Traits window allows you to change the traits for an item at one or multiple locations.
You can choose from several grouping mechanisms in order to select the affected locations. The grouping mechanisms may include: All Locations, All Stores, All Warehouses, Store, Store Class, District, Region, Location Trait, Default Warehouse, Warehouse, Location List, Promotional Zone, and Transfer Zone.
The Item Location Inventory Window allows you to view inventory details for an item at one or multiple stockholding locations. All details appear at the transaction level for the selected item. If you search for an item that is above the transaction level, the details are summarized at the transaction level.
To view packs:
Enter the component item number in the Item field.
Select Warehouse from the Group Type drop-down list.
Enter the warehouse associated to the simple pack item in the Group Value field.
Click Search.
Select the View menu and then select Pack. The New column Pack Comp On Order displays.
To display additional inventory details, select the appropriate option from the View menu. Using the predefined views, you can view quantities by the unit (default), the supplier pack (case), or component unit (pack).
To display monetary amounts in the primary currency of the company or the local currency of the location, select the appropriate option from the Options > Currency menu.
See "Search for Inventory by Item and Location" in the "Inventory Control" chapter.
The Item Number List window allows you to view the item hierarchy for a selected item. You can also view the vendor product numbers that are associated with the item. This functionality is available from the Options menu whenever the cursor is in an Item or VPN field with a value on any window.
Navigate: This search tool is accessible from the Options menu whenever the cursor is placed in an empty Item or VPN field.
Place the cursor in an Item or VPN field that has a value on a window.
From the Options list, select Item Number Type. The Item Number List window appears with the item hierarchy and vendor product numbers for the selected item.
Click OK to close the window.
Item Up Charges are incurred when transferring from an RMS Store or Warehouse to a different RMS Store or Warehouse.
|
Note: This window will only be available if the RMS 'Estimated Landed Costs' indicator is set to 'Yes'. |
Each Up Charge has:
A Calculation Basis of either 'Value' or 'Specific.'
A Cost Basis of either 'Weighted Average Cost' (when using Average Cost Method) or 'Unit Cost' (when using Standard Cost Method).
A Component Rate of:
Monetary if Calculation Basis = 'Specific.'
Percentage if Calculation Basis = 'Value.'
A Component Currency.
An Up Charge Group, which is used to group Up Charge Components together to show a total sum on the Transfer Up Charge window.
More information can be found in these related topics:
See "Add an Up Charge to an Item" in the Cost Management chapter
See "Add an Up Charge to Items on an Item List" in the Cost Management chapter
See "Maintain Up Charges for an Item" in the Foundation Data chapter
See "View Item Up Charge Components" in the Foundation Data chapter
This window is accessed from the Item Cost Details window to view the various components that make up the total upcharge amount applied in the Item Cost component dialogue.
See "Add an Up Charge to an Item" in the Cost Management chapter
See "Add an Up Charge to Items on an Item List" in the Cost Management chapter
See "Maintain Up Charges for an Item" in the Foundation Data chapter
See "View Item Up Charge Components" in the Foundation Data chapter
The Additional Item Attributes window allows you to maintain Customer Order details for an item.
Navigate: From the main menu, select Items > Items. The Item Search Window appears.
Search for and retrieve an item in Edit mode. The Item Maintenance Window appears.
Click Additional Item Attribute. The Additional Item Attribute window appears.
View the items and click OK to close the window.
The Item Approval Error window allows you to view the reasons why an item cannot yet be submitted or approved. If the item being approved has subordinate level items, checks are done for the for all items at or above the transaction level. If the details are not required by the system, you can override the error in order to submit or approve the item.
A system option determines whether the subordinate level item of an approved item should be automatically approved. If the system option is set to Yes, all items are automatically approved after they are created. If the system option is set to No, the subordinate level items of approved items remain in Worksheet status until you manually change the status.
Suppliers and retail pricing by zone must be set up for items at the transaction level before an item can be submitted and approved. For example, if you create a level 1 item and set the transaction level at item level 2, you must create the level 2 item before the level 1 item can be approved.
Navigate: From the main menu, select Items > Items. The Item Search window appears.
Search for and retrieve an item in Edit mode. Restrict the search to items in Worksheet status. The Item Maintenance window appears.
Select the Suppliers option on the Options list. The Item Supplier window appears.
Select a supplier.
Edit the enabled fields in the Apply area as necessary.
Select a Primary Supplier option, if applicable.
|
Note: When you select a Primary Supplier option, a prompt cautions you about changing the primary supplier. Click Yes or No to continue. |
Select the Apply Additions, Updates, and Deletions check box if you want to apply the edits to the lower level items down to the transaction level.
Click Apply. The details are updated for the selected supplier.
To edit any other details for the supplier, click the appropriate option on the Options list.
Click OK to save your changes and close the window.
Select a supplier.
Click Delete.
When prompted to delete the record, click Yes.
|
Note: The primary supplier cannot be deleted. If you delete a supplier from a pack item, the supplier will not be deleted from any component item. |
Click OK to save your changes and close the window.
Navigate: From the main menu, select Items > Items. The Item Search window appears.
Search for and retrieve an item in Edit mode. The Item Maintenance window appears.
Click the Suppliers option on the Options list. The Item Supplier window appears.
Select a supplier.
Click the Item Supplier Country of Sourcing from the Options list. The Item Supplier Country of Sourcing window appears.
In the Country of Sourcing field, enter the ID of the country, or click the LOV button and select the country.
Click View. The details for the sourcing country appear.
Click the Item Supplier Country Loc option on the Options list. The locations associated with the current item, supplier, and sourcing country appear in the Item Supplier Country Locations window.
Select a location.
Select the Edit Cost or Edit check boxes next to each detail to be edited.
Click Apply. The details are updated on the table.
Click OK to save your changes and close the window.
In the Location Type field of the Apply area, select a grouping mechanism.
In the Value field, enter the ID of the group, or click the LOV button and select the group.
Select the Edit Cost or Edit check boxes next to each detail to be edited.
Click Apply. The details are updated on the table.
To update the same details for items at a lower level of the same item group down to the transaction level, select the Update Item/Supplier/Country Location Information check box.
Click OK to save your changes and close the window.
Navigate: This search tool is accessible from the Options menu whenever the cursor is placed in an empty Item or VPN field.
|
Note: You can use this procedure to search for a transaction level item. |
Place the cursor in an empty Item or VPN field on a window.
From the Options menu, select Item Number Type. The Item Number Find window appears.
To search by reference item, enter the item number of the reference item, or click the LOV button and select the item.
To search by VPN, enter the vendor product number, or click the LOV button and select the VPN.
The item numbers and descriptions of the item at and above the transaction level appear.
Click OK to save your changes and close the window.
Navigate: From the main menu, select Items > Items. The Item Search Window appears.
In the Action field, select New Item.
In the Item Type field, select Regular Item.
Select the item type indicators:
Inventory: When Yes is selected, inventory is tracked and held in RMS for an item.
Sellable: When Yes is selected, an item can be sold and is sent to the POS.
Orderable: When Yes is selected, an item can be ordered, set up on replenishment, and can have HTS and expenses set up.
|
Note: The indicators that you select for the Level 1 item will be applied to all items in the item group and cannot be changed. |
In the Department, Class, and Subclass fields, enter the IDs of the merchandise hierarchy, or click the LOV buttons and select the merchandise hierarchy.
Click OK. The Item Maintenance Window appears.
In the Item Number Type field, select the type of item number that you want to associate with the item.
In the Item field, enter the item number and description of the item.
|
Note: If you select Oracle Retail Item Number or UPC-A in the Item Type field, the item number is automatically added. If you select EAN/UCC-13, you can automatically generate the EAN number by clicking Auto-generate. When Manual is chosen from the Item Number Type field, the description field accepts alphabetic text and does not validate digit, length, or characters. It is a 12-digit number starting with 3 that includes check digit validation. |
In the Tran Level field, select Level 1.
In the Attributes area, select or clear the check boxes as needed.
In the Cost Zone Group field, enter the cost zone group ID or click the LOV buttons and select the cost zone group.
Add a supplier for an item.
Add an sourcing country for a supplier of an item.
Edit the retail price of an item.
Click OK to save any changes and close the window.
Navigate: From the main menu, select Items > Items. The Item Search window appears.
In the Action field, select New Item.
In the Department, Class, and Subclass fields, enter the IDs of the merchandise hierarchy, or click the LOV buttons and select the merchandise hierarchy.
In the Item Type field, select Regular Item.
Select the item type indicators:
Inventory: When Yes is selected, inventory is tracked and held in RMS for an item.
Sellable: When Yes is selected, an item can be sold and is sent to the POS.
Orderable: When Yes is selected, an item can be ordered, set up on replenishment, and can have HTS and expenses set up.
|
Note: The indicators that you select for the Level 1 item will be applied to all items in the item group and cannot be changed. |
Click OK. The Item Maintenance Window appears.
In the Item Number Type field, select the type of item number that you want to associate with the item.
In the Item field, enter the item number and description of the item.
|
Note: If you select Oracle Retail Item Number or UPC-A in the Item Type field, the item number is automatically added. If you select EAN/UCC-13, you can automatically generate the EAN number by clicking Auto-generate. When Manual is chosen from the Item Number Type field, the description field accepts alphabetic text and does not validate digit, length, or characters. It is a 12-digit number starting with 3 that includes check digit validation. |
In the Tran Level field, select Level 2.
In the Attributes area, select or clear the check boxes as needed.
In the Pricing area, in the Cost Zone Group field, enter the cost zone group ID or click the LOV buttons and select the cost zone group.
Add a supplier for an item.
Add an sourcing country for a supplier of an item.
Edit the retail price of an item.
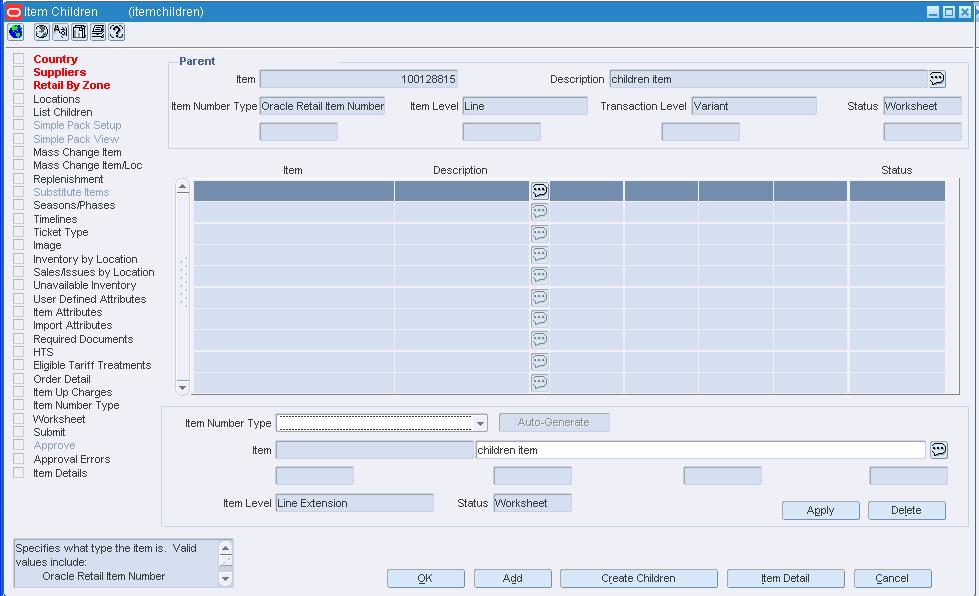
Click Create Children. The Item Children Window appears.
In the Item Number Type field, select the type of item number for the item.
|
Note: If you select Oracle Retail Item Number or UPC-A in the Item Type field, the item number is automatically added. If you select EAN/UCC-13, you can automatically generate the EAN number by clicking Auto-generate. When Manual is chosen from the Item Number Type field, the description field accepts alphabetic text and does not validate digit, length, or characters. It is a 12-digit number starting with 3 that includes check digit validation. |
In the Item fields, edit the item number and description as needed.
On the Item Children window, click Apply. The item is added to the table.
|
Note: When you click Apply, the supplier, country of sourcing, and retail price information is defaulted to the Level 2 item. |
Click OK to save your changes and close the window.
Create a two level item with diffs or create a two level item without diffs. The Item Children Diff window appears.
Select the level 2 item from which to create the level 3 item.
Click Create Children. The Item Children window appears.
In the Item Number Type field, select the type of item number that you want to associate with the item.
In the Item field, enter or edit the item number and description of the item.
|
Note: If you select Oracle Retail Item Number or UPC-A in the Item Type field, the item number is automatically added. If you select EAN/UCC-13, you can automatically generate the EAN number by clicking Auto-generate. When Manual is chosen from the Item Number Type field, the description field accepts alphabetic text and does not validate digit, length, or characters. It is a 12-digit number starting with 3 that includes check digit validation. |
Click Apply. Your changes are added to the table.
Click Add to continue adding level three items, or click OK to save any changes and close the window.
The Price and Margin History window is used to view the transactions for an item, the locations, pricing, and margins.
Navigate: From the main menu, select Items > Price Point History. The Price and Margin History window appears.
Select an Item or Parent Item, or a Location.
Click Search. The list box populates with items matching the criteria.
Select an option from the View menu to create custom views of the results.
Click OK to close the window.
Navigate: From the main menu, select Items > Items. The Item Search window appears.
In the Action field, select New Item.
In the Department, Class, and Subclass fields, enter the IDs of the merchandise hierarchy, or click the LOV buttons and select the merchandise hierarchy.
In the Item Type field, select the type of transformable item you are creating:
Transformed Orderable: The item is ordered from the supplier in one form, but changed by the retailer and sold to the customer in a different form.
Transformed Sellable: The item that is sold to the customer. A transformed sellable item is ordered from the supplier in a different form than it is sold.
Create the one level item, two level item or three level item.
|
Note: If you are creating a transformed orderable item, you will not be able to select the Retail by Zone option from the options list. If you are creating a transformed sellable item, you will not be able to select the Supplier option from the options list. |
Click Transformation. The Transformation Maintenance window appears.
|
Note: This is available only for transformed orderable items. |
In the Item Transformation Description field, enter the description of the transformation.
In the Production Loss field, enter the percentage of the orderable item which is wasted in producing the sellable items.
In the Detail Item field, enter the ID of the sellable item that is created from the orderable item, or click the LOV button and select an item.
In the Yield % field, enter percentage of the orderable item used to create the sellable item.
Click Apply.
|
Note: The Total Yield % field must equal 100% for the orderable item. The Total Yield % field is calculated by adding the Yield % and the Production Loss % field. |
Define the yield details for any sellable items that are associated with multiple orderable items.
Click OK to save any changes and close the window.
Navigate: From the main menu, select Items > Items. The Item Search window appears.
In the Action field, select New Item.
In the Department, Class, and Subclass fields, enter the IDs of the merchandise hierarchy, or click the LOV buttons and select the merchandise hierarchy.
In the Item Type field, select the type of deposit item you are creating:
Deposit Contents Item: The item that is sold to the customer.
Deposit Container Item: The item for which the deposit is taken. The deposit container item holds the deposit contents item.
Deposit Crate Item: The item which holds the container and contents items.
Deposit Returned Item: The item that is returned to the retailer by the customer and for which the deposit is returned to the customer.
Create the one level item, two level item, or three level item.
|
Note: Only Deposit Contents items must be associated to the container items. If the item is another Deposit type, click OK to save any changes and close the window. |
Click Groc Attributes. The Item Grocery Attributes window appears.
In the Deposit Item area:
In the Container Item field, enter the ID of the container item, or click the LOV button and select the container item.
|
Note: Only Deposit Contents items must be associated to the container items. The container item must already exist to associate it to the contents item. |
In the Price Per UOM Calculation Type field, select how the price for one unit of the item is calculated.
Inclusive of Deposit Amount: At the point of sale, the price/UOM is calculated as the price per UOM of the item plus the retail price of the returnable item.
Exclusive of Deposit Amount: At the point of sale, the price/UOM is calculated as the price per UOM of the item.
Click OK to save any changes and close the window.
Click OK to save any changes and close the window.
Navigate: From the main menu, select Items > Items. The Item Search window appears.
In the Action field, select New Item.
In the Department, Class, and Subclass fields, enter the IDs of the merchandise hierarchy, or click the LOV buttons and select the merchandise hierarchy.
In the Item Type field, select Concession or Consignment.
Click OK. The Item Maintenance Window appears.
Create the one level item or two level item.
Navigate: From the main menu, select Items > Items. The Item Search Window appears.
Search for and retrieve an item in Edit mode. Restrict the search to items in Worksheet status. The Item Maintenance Window appears.
Click the Suppliers option on the Options list. The Item Supplier window appears.
Select a supplier.
Click the Item Supplier Country of Sourcing option on the Options list. The Item Supplier Country of Sourcing window appears.
In the Country of Sourcing field, enter the code for the country, or click the LOV button and select the country.
Click View. The details of the sourcing country appear.
Edit the Primary Country option, Location Default, Ordering, Case, and Dimension information as necessary.
To edit dimensions for multiple types of packaging, click OK + Repeat in that area to enter the dimensions of another package.
To edit any other details for the sourcing country, click the appropriate option on the Options list.
To apply the edits to the item children down to the transaction level, select the Apply Additions and Deletions check box.
Click OK to save any changes and close the window.
|
Note: If you made the current country the primary country, a prompt cautions you about changing the primary country. Click Yes or No to continue. |
Click Delete. You are prompted to delete the record.
|
Note: The primary sourcing country cannot be deleted. |
Click Yes.
If available, select the Apply Additions and Deletions check box to delete the sourcing country for other items in the item group, to the transaction level.
Click OK to save any changes and close the window.
Navigate: From the main menu, select Items > Items. The Item Search Window appears.
Search for and retrieve an item in Edit mode. Restrict the search to items in Submitted status. The Item Maintenance Window appears.
Click the Worksheet option on the Options list.
A prompt lets you know whether the change in status was successful.
Click OK to dismiss the message. The subordinate level items are also returned to Worksheet status.
Click OK to save your changes and close the window.
The Items Not Added to TPG window allows you to view the items that are not included in a tax product group type of item list. The items are excluded because they are already associated with another tax product group type of item list. An item can belong to only one such list.
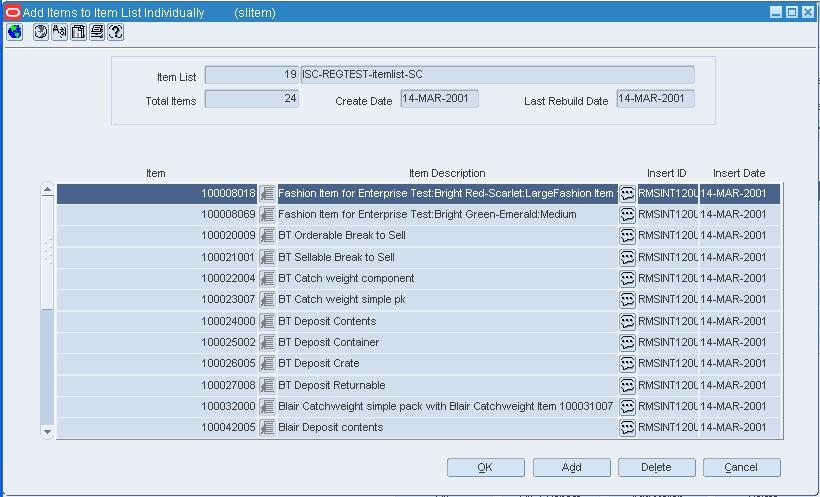
Navigate: From the main menu, select Items > Item List. The Item List Search window appears.
Search for and retrieve a tax product group item list in View mode. Restrict the search by selecting Yes in the Tax Product Group field. The Item List Header window appears.
From the Options menu, select View Excluded Items. The Items Not Added to TPG window appears.
Click OK to close the window.
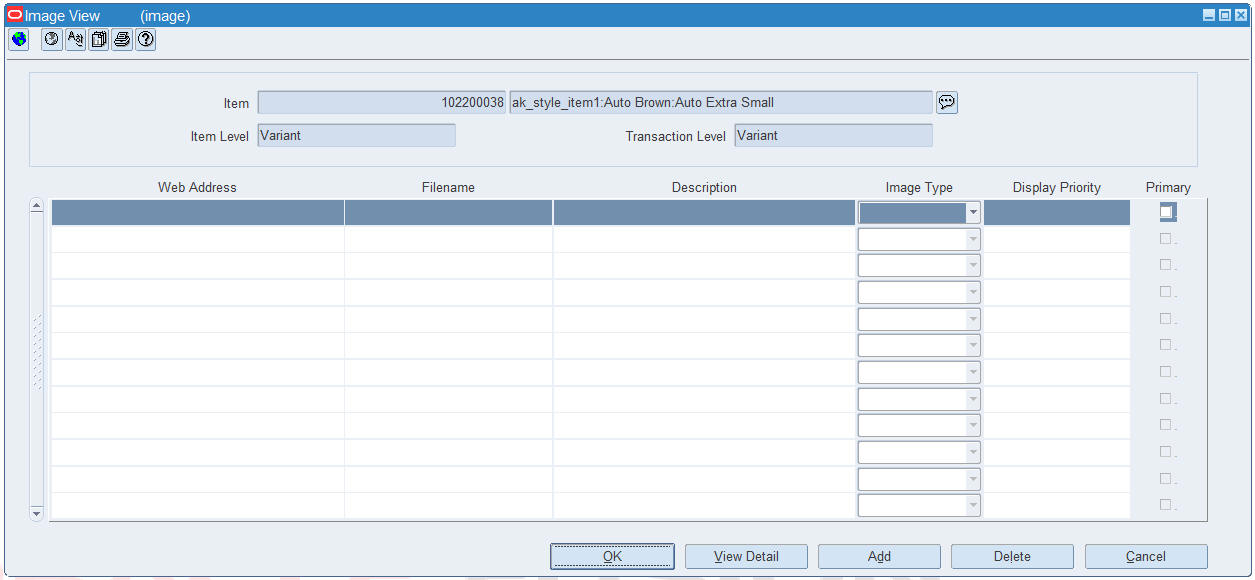
The Image View window allows you to add, delete, and view one or more images for an item. The location for an image must be a URL address. You can maintain images for items at the following levels:
| When the item level is: | And the transaction level is: |
|---|---|
| Level 1 | Level 1, 2, or 3 |
| Level 2 | Level 2 or 3 |
| Level 3 | Level 3 |
Navigate: From the main menu, select Items > Items. The Item Search Window appears.
Search for and retrieve an item in View mode. The Item Maintenance Window appears.
Click the Image option on the Options list. The Image View window appears.
Select an Item.
Click View Detail. The image opens in a browser window.
Close the browser window.
Click OK to close the window.
Navigate: From the main menu, select Items > Items. The Item Search Window appears.
Search for and retrieve an item in Edit mode. The Item Maintenance Window appears.
Click the Image option on the Options list. The Image View window appears.
|
Note: If this is the first image being added for the item, enter the following information in the table without clicking Add. |
Click Add. The next available line is enabled.
In the Web Address field, enter the URL address for the image.
In the Filename field, enter the filename and extension.
In the Description field, enter a brief description of the image.
Select the image type from the following Image Type list:
Thumbnail
High
Medium
Low
The Display Priority field indicates the priority of usage of each image file defined.
Selecting the Primary check box indicates the image to be primary.
Click OK to save your changes and close the window.
Navigate: From the main menu, select Items > Items. The Item Search window appears.
Search for and retrieve an item in Edit mode. The Item Maintenance Window appears.
Select the Locations option from the Options list. The Item Location window appears.
Click Add. The fields are cleared in the Apply area.
In the Group Type field of the Apply area, select a grouping mechanism.
In the Group Value field, enter the ID of the specific group, or click the LOV button and select the group.
|
Note: The Costing Location field is mandatory for Franchise Store. The Costing Location field is available only for Franchise Store. |
Indicate type of the Unique Identification Number (UIN) used to identify the instances of the item at the location.
Enter or edit the enabled fields.
Click Apply. The locations are added to the table.
|
Note: If the Partial View checkbox is selected, some records may not be displayed in the form due to user's limited visibility. Totals should always reflect the correct overall total taking into account the records outside the user's visibility. |
The Ranged check box determines if the location is ranged intentionally for replenishment/selling or incidentally ranged by the RMS transaction when item is not ranged to a specific location on the transaction.
The Process In Background check box determines if the ranging of items to the selected locations happens immediately or the ranging is submitted in the background. This must be checked if the list of locations ranged is big so that you do not have to wait for the ranging to complete. Submitting the ranging to background disables this form and the Item Maintenance screen goes into View mode. You can check Asynchronous job log form for status of the ranging happening in background.
Select the UIN Type from the list. This number is used to identify the instances of the item at the location.
Select the UIN Label from the list. This number will be displayed in SIM.
Select the Capture Time, either Sale or Store Receiving from the list. This is captured for an item during the transaction process. If you select the option as Store Receiving, the External UIN check box is enabled.
To add the locations to the subordinate items of the current item, down to the transaction level, select the Apply Additions and Modifications check box.
Click OK to save any changes and return to the Item Maintenance window or click Cancel to return to the Item Maintenance window without saving changes.
Navigate: From the main menu, select Items > Items. The Item Search window appears.
Search for and retrieve an item in Edit mode. The Item Maintenance window appears.
Click the Image option on the Options list. The Image View window appears.
Select an image.
Click Delete. You are prompted to delete the record.
Click Yes.
Click OK to save your changes and close the window.
Navigate: From the main menu, select Items > Items. The Item Search window appears.
Search for and retrieve an item in Edit mode. The Item Maintenance window appears.
Click Additional Item Attributes. The Additional Item Attributes window appears.
Select an Item Service Level from the list.
Select the Product Classification from the list.
Enter the Brand or select from the list.
Select Gift Wrap Ind, if this item is available with gift wrap.
Select Ship Alone Ind, if this item is shipped alone, and not grouped for shipment.
Click OK to save your changes and close the window.
|
Note: If maintaining at parent item level the user has the option of defaulting the values to the child item level. If defaulted the values can be overwritten at the child item level. |
Navigate: From the Main menu, select Finance > Average Cost Adjustment. The Average Cost Adjustment window appears.
Enter an item number, or enter a partial item description and click the LOV button to select an item.
For Location Type, select Store or Warehouse.
In the Store/Warehouse field, click the LOV button to select a store or warehouse.
In the New Average Cost field, enter the new value.
Click OK to save your changes and close the window.
Navigate: From the main menu, select Items > Items. The Item Search window appears.
Search for and retrieve an item in Edit mode. The Item Maintenance window appears.
Click the Locations option on the Options list. The Item Location window appears.
Select a location.
In the Apply area, edit the enabled fields.
On the Item Location window, click Apply. The details are updated for the selected location.
To update the same details for the child items of the current item down to the transaction level, select the Apply Additions and Modifications check box.
Click OK to save your changes and close the window.
Navigate: From the main menu, select Items > Item List. The Item List Search window appears.
From the Action menu, select Use.
Click Search.
Select an item list to use in building the shopping list.
Click OK. The Item List Header window appears.
From the Options menu, select Create Competitive Shop List. The Competitive Shop Request window appears.
|
Note: RMS automatically creates a competitive shopping list made up of all items on the item list. |
In the Competitor field, enter the competitor, or click the LOV button and select the appropriate competitor.
In the Competitor Store field, enter the competitor store, or click the LOV button and select the appropriate competitor store.
In the Shopper ID field, enter the shopper who will be performing the competitive shopping, or click the LOV button and select the shopper.
In the Shop Date field, enter the date when the competitive shopping will be performed, or click the calendar button and select the date.
Click Add Location to add another competitor's store to the competitive shopping request.
Click OK to save your changes and close the window.
Create a transformable orderable item.
On the Transformation Maintenance window, click Yield Detail. The Transformation Yield Maintenance window appears.
In the Yield % field, indicate the percentage of the sellable item that is allocated to each orderable item.
|
Note: The Total Yield field, must equal 100%. |
Click OK to save any changes and close the window.
Navigate: From the main menu, select Items > Items. The Item Search window is displayed.
Search for and retrieve a item in the Edit Item mode. The Item Maintenance window appears.
Select the Required Documents option. The Required Documents window appears.
Select the document you want to delete.
Click Delete.
When prompted to delete the document record, click Yes.
Click OK to save your changes and close the window.
The Unavailable Inventory window allows you to view stock on hand that is not available for sale. You can restrict the view to one or all locations and one or all status types.
Navigate: From the main menu, select Items > Items. The Item Search window appears.
Search for and retrieve an item in Edit or View mode. The Item Maintenance window appears.
From the Options list, select the Unavailable Inventory option. The Unavailable Inventory window appears.
In the Location Type field, select the type of location that you want to view.
In the Location field, enter the ID of the location, or click the LOV button and select the location.
|
Note: The Location field is enabled when you select either Store or Warehouse in the Location Type field. |
Select the status of the item as necessary.
Click Search. The locations that match the search criteria appear.
Click OK to close the window.
Navigate: From the main menu, select Items > Items. The Item Search Window appears.
Search for and retrieve an item in Edit mode. The Item Maintenance Window appears.
|
Note: You can also access the Item Location Attributes window from the Item Location window. On the Item Maintenance window, click the Locations option. On the Item Location window, click the Mass Change Item/Loc window. |
Click the Mass Change Item/Loc option. The Item Location Attributes window appears. The Item Number and the Item Description will already be selected.
To apply the location to the Location List to the grid, from the Location Selection area:
Select the location type from the Type list.
In the Value field, enter the ID of the group, or select from the list.
Click Apply to add the selected options to the Location List table or click Clear. if you want to clear the selected option and reenter.
|
Note: To view the results in a partial view, select the Partial View checkbox. |
Table 4-1 describes the field and description of the Location Attributes Update and Change Value To columns.
Table 4-1 Location Attributes Update and Change to Value To Fields and Description
| Fields | Description |
|---|---|
|
Item Status |
Select the check box and select the item status from the list. |
|
Taxable Supplier |
Select the check box if the item is taxable. |
|
Primary Supplier Site and Primary Country |
Select the Primary Supplier Site check box and enter the Primary Supplier Site and Primary Country or select from the list. |
|
Daily Waste % |
If the item is a perishable item then, enter the percentage of wastage. |
|
Measure of Each |
Enter the measurement of each. |
|
Measure of Price |
Enter the measurement price. |
|
Ticketing UOM |
Enter the ticketing unit of measurement or select from the list. |
|
Primary Variant |
If the item has a primary variant then, enter the primary variant or select from the list. |
|
Primary Cost Pack |
If the primary variant is select, make sure to enter the Primary Cost Pack or select from the list. (send out an email to medini) |
|
TI and HI |
Enter the number of cases for TI and enter the number of tiers stacked on a pallet for the HI. |
|
Local Item Desc |
Enter the description for the item. |
|
Local Short Desc |
Enter the short description for the item. |
|
Source Method and Source Warehouse |
Enter the source method either the Supplier or the Warehouse. If you select the warehouse then enter the warehouse source name or select from the list. |
|
Store Order Multiple |
Select the Store Order Multiple from the list. |
|
Ranged |
Select the item if it is Ranged. |
|
Inbound Handling Days |
If the Location Selection type is Warehouse, then enter the Inhouse handling days for the item. |
|
Serialization |
If the item has the serial number, select Serialization check box. |
|
UIN Type |
Select the UIN type from the list. |
|
UIN Label |
Select the UIN label from the list. |
|
Capture Time |
Select the capture time from the list. |
|
Costing loc |
Enter the Costing location or select from the list. |
|
External UIN |
If the item has external UIN, select Yes. |
Click OK to save your changes and exit from the window.
Navigate: From the main menu, select Items > Items. The Item Search window is displayed.
Search for and retrieve an item in View mode. The Item Maintenance window appears.
From the options list, select Replenishment. The Replenishment Attribute Maintenance window appears.
In the Group Type field, select the type of grouping mechanism or location.
In the Value field, enter the ID of the group or location, or click the LOV button and select a group or location.
Click View Master. The Master Replenishment Attributes window appears.
Click OK to close the window.
Navigate: From the main menu, select Items > Replenishment. The Replenishment Attribute Maintenance window appears.
To limit the replenishment items that appear, enter criteria in the View Criteria fields.
Click Search. The replenishment items appear on the table.
Click OK to close the window.
Navigate: From the main menu, select Items > Replenishment > Replenishment Attribute History. The Replenishment Attribute History window appears.
To limit the replenishment items that appear, enter criteria in the View Criteria fields.
Click Search. The replenishment items appear on the table.
Click OK to close the window.
Navigate: From the main menu, select Items > Replenishment > Edit. The Replenishment Attribute Maintenance window appears.
or
From the main menu, select Items > Items. The Item Search window appears.
Search for and retrieve an item in Edit mode. The Item Maintenance window appears.
On the Options list, select the Replenishment option. The Replenishment Attribute Maintenance window appears.
or
From the main menu, select Items > Item List. The Item List Search window appears.
Search for and retrieve an item list in Use mode. The Item List Header window appears.
From the Options menu, select Create Mass Item Change > Replenishment. The Replenishment Attribute Maintenance window appears.
In the Group Type field, select the type of grouping mechanism or location.
Enter the Store or select from the list. This allows all stockholding stores in the Store field. All attributes available for company stores is available for a Franchise store as well.
In the Replenishment Attribute Maintenance Action field, select Update.
In the Schedule Active Date area, click Calendar button to select the date. The item's replenishment attributes become active on the future date.
In the Master Administration area, select Update Master option to update the master replenishment attributes with the new attributes.
To update the replenishment attributes with the attributes recorded on item master, select the Update From Master check box.
|
Note: If you select both check boxes, the master replenishment attributes will be restored, then apply any attribute changes made, and finally update the master with this result. Updates occur during the next batch process. |
Edit the enabled fields as necessary.
To deactivate replenishment attributes for an item:
In the Replenishment Attribute Maintenance Action field, select Deactivate.
When prompted to clear the replenishment attribute fields, click Yes.
Click OK to exit.
To avoid a situation where a Franchise store or a Company store requests for the same inventory at the same time, a priority group is created. With the help of this priority group, the system will allocate the inventory based on the priority set to a particular store.
Add a Priority Group for a Company Store or a Franchise Store
Navigate: From the main menu, select Items > Replenishment > Priority Group Maintenance > Edit. The Priority Group Maintenance window appears.
Enter the description of the Company or Franchise store in the Priority Group Description field.
Set the priority of the Company or Franchise store in Priority field.
|
Note: The number entered in this field should be unique for each priority group that defines the priority of the group. |
Click OK to save the changes and close the window.
Click Delete to delete the selected location from the list.
Navigate: From the main menu, select Items > Replenishment > Priority Group Maintenance > Edit. The Priority Group Maintenance window appears. Select a priority group from the list and click Locations.
Select the Location Type from the list.
Enter the Location or select from the list.
Click Apply to add the Location to the priority group or click Clear to re-enter the details again.
Click OK to save the changes and close the window.
Click Add to add more locations to the priority group.
To delete the priority location, select the priority location and click Delete.
Navigate: From the main menu, select Items > Replenishment > Supplier Distribution. The Supplier Distribution window appears.
In the Item field, select an item or click the LOV button and select an item.
In the Location Type field, select a type from the list menu.
In the Location field, select a location or click the LOV button to select a location.
Click Search. The results display in the table.
In the Percent field, enter a percentage.
Click OK to save your changes and close the window.
Navigate: From the main menu, select Control > Setup > Unit of Measure. The Unit of Measure window appears.
Click OK to close the window.
Navigate: From the main menu, select Items > Items. The Item Search window appears.
Search for and retrieve an item in View mode. The Item Maintenance window appears.
Click the Suppliers option. The Item Supplier window appears.Select a supplier.
Click the Item Supplier Unit of Measure option. The units of measure appear in the Item Supplier Unit of Measure window.
Click OK to close the window.
Navigate: From the main menu, select Items > Items. The Item Search window appears.
Search for and retrieve an item in Edit mode. The Item Maintenance window appears.
Click the Supplier option. The Item Supplier window appears.
Select a supplier.
Click the Item Supplier Unit of Measure option. The Item Supplier Unit of Measure window appears.
Select a unit of measure (UOM).
In the value field, enter the factor used to convert the supplier UOM to the standard UOM.
If the item belongs to an item group that has items at a lower level, you are prompted to overwrite the UOM details for the 'child' level items.
Click Yes to apply the edits to the current item's subordinate items.
Click No to apply the edits to the current item only.
Click OK to save any changes and close the window.
Select a unit of measure (UOM).
Click Delete.
When prompted to delete the record, click Yes.
Click OK to save your changes and close the window.
If the item belongs to an item group that has items at a lower level, you are prompted to overwrite the UOM details for the 'child' level items.
Click Yes to apply the edits to the current item's subordinate items.
Click No to apply the edits to the current item only.
The Item VAT Rate - Mass Change window allows you to edit a VAT code for multiple items by item list.
The VAT code for pack items cannot be changed using this window.
If the new VAT region and active date for any item on the item list conflict with any existing VAT regions and active dates, you are prompted to override the existing VAT regions and active dates.
The Zone Locations window allows you to view the locations that exist in a selected zone.
See "Edit the Retail Price of an Item" in the Purchasing chapter
The Add Items to Item List by Group window allows you to add the criteria by which items are added to an item list.
See "Add Items to an Item List" in Foundation Data chapter
The Add Items to Item List Individually window allows you to add items one by one to an item list.
See "Add Items to an Item List" in the Foundation Data chapter
Navigate: From the main menu, select Items > Item List. The Item List Search window appears.
Search for and retrieve an item list in Edit mode. The Item List Header window appears.
Edit the description and comments as necessary.
|
Note: Item lists that were created with user security will only be visible to the user who created them. |
From the Options menu, select Select Items. The Add Items to Item List Individually window appears.
Click Add.
On the next available line enter the item number in the Item field, or enter a partial item number and click the LOV button to select the item from a list.
|
Note: Only items that are in the departments associated with the item list will be added to the list. |
Click OK to save your changes and close the window.
From the Options menu, select Select Items. The Add Items to Item List Individually window appears.
Select an item and click Delete.
When prompted to delete the record, click Yes.
Click OK to save your changes and close the window.
From the Options menu, select Select By Group. The Add Items to Item List by Group window appears.
Select or enter the criteria in the Criteria fields.
Click Add. The items that match the criteria are added to the item list.
|
Note: Only items that are in the departments associated with the item list will be added to the list. |
Click OK to save your changes and close the window.
From the Options menu, select View Criteria. The Item List Criteria window appears.
Select or enter the criteria in the Criteria fields.
Click Delete. When prompted to delete the record, click Yes. The items that match the criteria are deleted from the item list.
Click OK to save your changes and close the window.
Navigate: From the main menu, select Items > Scheduled Item Maintenance > Edit. The Scheduled Item Maintenance window appears.
In the Item/Location Link ID field, enter a link ID or click the LOV button and select a link.
Click Show Detail to view the detail of this link in the Detail Information table.
Make any changes.
Click OK to save your changes and close the window.
Navigate: From the main menu, select Items > Item List. The Item List Search window appears.
Search for and retrieve an item list in Use mode. The Item List Header window appears.
From the Options menu, select Create Mass Item Change > Location. The Item Location Attributes window appears.
To select the locations for which you want to change the attributes:
In the Type field, select a grouping mechanism.
In the Value field, enter the ID of the group, or click the LOV button and select the group.
Click Apply. The locations in the selected group are added to the Location List table.
|
Note: To view the results in a partial view, select the Partial View checkbox. |
To delete locations from the list:
In the Type field, select a grouping mechanism.
In the Value field, enter the ID of the group, or click the LOV button and select the group.
Click Delete.
Select the check boxes in the Update column next to the attributes that you want to change.
Select or enter the new values in the Change Value To column.
Click OK to save your changes and close the window.
This window allows users to select substitute items for an item on a franchise order.
Use this procedure to substitute an item on a Franchise order.
Navigate: From the main menu, select Franchise> Franchise Orders and Returns. The Franchise Orders and Returns Search window appears. Search for and retrieve a Franchise Order in Edit mode. Restrict the search to orders in Input status.
Select a Franchise Order and click OK. The Franchise Order window appears.
In the Item field, enter the item number of the item to be substituted, or click the LOV button and select the item.
Enter appropriate information in the item area.
Click Substitute. The Substitute Item Maintenance window appears.
Select the item to substitute.
Click Apply. The Substitute Item Maintenance window closes.
Click OK to save your changes and close the window.
Navigate: From the main menu, select Items > Items. The Item Search window appears.
Search for and retrieve an item on replenishment in Edit mode. The Item Maintenance window is displayed.
Click the Substitute Items option. The Substitute Item Maintenance window appears.
In the Location Table, select the location to be edited.
In the Substitute Item Table, select the item to be edited.
|
Note: To view items the main item is a substitute item for, from the Options menu, select Main Item View. The Main Item View window appears. |
In the Apply Block area, edit the enabled fields as necessary. Click Update All.
To update the location information only, click Update Location.
To update the substitute item information only, click Update Sub. Item.
To view the details for the substitute item, click Sub. Item Detail.
The Substitute Items Maintenance window is used to replace or phase out a main item with a substitute item and to maintain the substitute item information. Substitute Items are associated at the Item/Location level.
You can indicate whether the main item or the substitute item is primarily used to fill the recommended order quantities. In the warehouse, you can also select multiple substitute items for the main item and enter the order in which they are picked as substitute for the main item.
See "Add a Substitute Item for an Item on Replenishment" in the Replenishment chapter.
The Related Items Maintenance window is used to associate an item with one or more other items and maintain the information. Related items relationships are used outside of RMS primarily to support customer ordering.
Navigate: From the main menu, select Items > Items. The Item Search Window appears.
Search for and retrieve an item in Edit mode, the item must be on the worksheet level. The Item Maintenance window is displayed.
Click the Related Items option. The Related Items Maintenance window appears.
Table 4-2 Related Items Maintenance fields and description
| Field | Description |
|---|---|
|
Item |
In this block, enter the following details for searching the related items:
|
|
Item Relationship Details |
In this block, enter the following details to add the related items of an item:
|
|
Related Items |
In this block you can add or delete the related items. Add Item: Click Add Item button to add an item to the relationship type. When you click Add Item button, the fields in the Apply Block are displayed. Delete Item: Click Delete Item to delete any of the related items from the grid. |
|
Apply Block |
In this block you can add new item and add or apply to the Related Item grid.
|
Click OK to add the related items to the primary item.
A pack item is used to buy, sell, and track multiple items under one item number. The types of pack items are:
A simple pack is always orderable. You can make the pack sellable. A simple pack is an orderable vendor pack with multiples of one the same component item.
A complex pack can be both orderable and sellable, but they can also be orderable or sellable.
A buyer pack is a grouping mechanism used by the retailer in order to order multiple items as a single line item on a purchase order. Buyer packs can be ordered and received as component items or as a pack.
A vendor pack is a grouping mechanism used by the vendor in order to sell multiple component items as packs to the retailer. Vendor packs can only be ordered and received as a pack.
A sellable pack is a grouping mechanism used to sell multiples of different items as one item.
Break Packs into Component Items
Search for Pack Items by Component Item
See "View a Pack Item" in the Purchasing chapter
See "View Simple Pack Details for a Component Item" in the Purchasing chapter
See "View the Components of a Sellable Pack" in the Purchasing chapter
The Simple Pack Setup window allows you to create and view simple packs that contain the selected component item. A simple pack is a sellable and/or orderable vendor pack with multiples of only one item number as the component item.
When creating a simple pack for a component item, you must provide the following information:
Type of number, pack number, and pack description
Number of units of the component item that make up the pack
Primary supplier and country of sourcing for the pack
Unit cost of the pack
Number of packs in a case, cases on a tier, and tiers on a pallet
Base retail price of the pack if it is sellable as a pack
In addition, you can define the dimensions, weights, and volumes of cases and pallets. After defining the attributes of the pack, you can choose to copy other details from the component item. The details may include suppliers, stores, warehouses, seasons, user defined attributes, ticketing, required documents, sales taxes, HTS numbers, and expenses.
See "View Simple Pack Details for a Component Item" in the Purchasing chapter
Navigate: From the main menu, select Items > Items. The Item Search window appears.
In the Action field, select New Item.
In the Item Type field, select Simple Pack.
Select the item type indicators:
Sellable: When Yes is selected, an item can be sold and is sent to the POS.
Orderable: This field defaults to Yes. Simple packs can be ordered, set up on replenishment, and can have HTS and expenses set up.
Inventory: This field defaults to Yes. Simple packs always have inventory tracked and held in RMS.
In the Department, Class, and Subclass fields, enter the IDs of the merchandise hierarchy, or click the LOV buttons and select the merchandise hierarchy.
Click OK. The Item Maintenance window appears.
In the Item Number Type field, select the type of item number that you want to associate with the item.
In the Item field, enter the item number and description of the item.
|
Note: If you select Oracle Retail Item Number or UPC-A in the Item Type field, the item number is automatically added. When Manual is chosen from the Item Number Type field, the description field accepts alphabetic text and does not validate digit, length, or characters. It is a 12-digit number starting with 3 that includes check digit validation. |
You can edit the abbreviated description in the Short Desc field.
In the Attributes area, select or clear the check boxes as needed.
In the Pricing area, in the Cost Zone Group field, enter the cost zone group ID or click the LOV button and select the cost zone group.
Add a supplier for an item.
Add an country of sourcing for a supplier of an item.
On the Item Maintenance window, click Pack Details. The Pack Item Detail Maintenance window appears.
In the Item field, enter the ID of the item you want to add, or click LOV button and select the item you want to add.
In the Quantity field, enter the number of component items in the pack.
Click Apply. The information is added to the table.
Navigate: From the main menu, select Items > Items. The Item Search window appears.
Search for the item that will be the component of the simple pack. Retrieve the item in Edit mode. The Item Maintenance window appears.
On the Options list, click the Simple Pack Setup option. The Simple Pack Setup window appears.
|
Note: Supplier, Supplier Site, Country Of Sourcing, Country of Manufacture, Cost UOM, Case Qty, TI Qty, HI Qty, Dimension, and Weight UOM are defaulted from the component to the pack. |
In the Apply Pack Information area:
In the Item No. Type field, select the type of item number that you want to associate with the pack item.
In the Pack Number field, enter the pack number and description of the pack item.
|
Note: If you select Oracle Retail Item Number or UPC-A in the Item Type field, the item number is automatically added. It is a 12-digit number starting with 3 that includes check digit validation. |
In the Item Qty field, specify the number of component items of the pack.
In the VPN field, specify the vendor product number.
In the Supplier field, add a supplier for an item.
In the Supplier Site field, enter the supplier site, or select the LOV button and select a site.
In the Country of Sourcing field, enter the code for the country, or click the LOV button and select the country.
In the Country of Manufacture field, enter the ID for the country, or click the LOV button and select the country.
In the Secondary Description field, specify the alternate name of the item.
The Supplier Site Label field is defined to describe the label or brand for the item supplied by the supplier.
In the Cost UOM field, select the unit of measure.
The Markup % field displays the percentage the price marked up, based on the supplier's cost.
In the Constant Dimensions field, select the check box if the pack dimensions are fixed.
If you select the Sellable field, the item can be sold and sent to the POS.
The Store Pack Inventory indicates whether inventory will be tracked at the pack level in SIM for stores.
The SOH Inquiry at Pack Level is used by SIM to determine how to reflect SOH for pack items in the store.
In the Unit Cost (Supplier Site) field, enter the cost of the item in the indicated currency.
The Unit Cost (Primary) field is displayed by default.
The Unit Retail (Primary) field is displayed by default.
If you click the Calculate Retail button based on the retail zone group defined, the Markup % and the Unit Retail (Primary) fields are populated.
Enter additional information as necessary.
|
Note: The Catch Weight and Tolerance areas are enabled only if you select Catch Weight in the Attributes area of the Item Maintenance window. |
The Order Type field gets enabled only for Catch Weight pack.
The Sale Type field gets enabled only for Catch Weight pack.
In the Tolerances section, the following fields are available:
Tolerance Type: This is the unit of the tolerances for catch weight simple packs. The valid values are A (actual) and % (percentage).
Min: This is the minimum tolerance value for the Catch Weight simple pack.
Max: This is the maximum tolerance value for the Catch Weight simple pack.
In the Dimension Information area, enter the necessary information about the simple pack.
In the Copy Info from Component Item area, select which details you want to copy from the component item to the simple pack.
Click Apply. The simple pack is added to the table.
Click Create Packs. The Exists check box is automatically selected and the selected component details are copied to the simple pack.
|
Note: When you click Create Packs, component details are copied to the new simple packs. If simple packs already exist, their details are not updated. |
Click OK to save your changes and close the window.
Navigate: From the main menu, select Items > Items. The Item Search window appears.
In the Action field, select New Item.
In the Item Type field, select Complex Pack.
Select the item type indicators:
Sellable: When Yes is selected, an item can be sold and is sent to the POS.
Orderable: When Yes is selected, an item can be ordered, set up on replenishment, and can have HTS and expenses set up.
Inventory: This field defaults to Yes. Complex packs always have inventory tracked and held in RMS.
In the Department, Class, and Subclass fields, enter the IDs of the merchandise hierarchy, or click the LOV buttons and select the merchandise hierarchy.
Click OK. The Item Maintenance window appears.
In the Item Number Type field, select the type of item number that you want to associate with the item.
In the Item field, enter the item number and description of the item.
|
Note: If you select Oracle Retail Item Number or UPC-A in the Item Type field, the item number is automatically added. When Manual is chosen from the Item Number Type field, the description field accepts alphabetic text and does not validate digit, length, or characters. It is a 12-digit number starting with 3 that includes check digit validation. |
You can edit the abbreviated description in the Short Desc field.
In the Attributes area, select or clear the check boxes as needed.
In the Pricing area, in the Cost Zone Group field, enter the cost zone group ID or click the LOV buttons and select the cost zone group.
Add a supplier for an item.
Add an country of sourcing for a supplier of an item.
On the Item Maintenance window, in the Pack area, if the pack will contain inner containers, select the Contains Inners check box.
In the Pack Type field, select:
Buyer Pack: if you are create an orderable pack that is used by a retailer to order multiple items on a single line item on a purchase order.
Vendor Pack: if you are create an orderable pack that is used by a vendor to sell multiple items on a single line item on a purchase order.
If you created a buyer pack, in the Order As field, select pack or eaches to indicate how the item should be ordered.
Click Pack Details. The Pack Item Detail Maintenance window appears.
In Item field, enter the item number of the component item, or click the LOV button and select the item.
In the Quantity field, enter how many units of the component item belong in the pack.
Click Apply. The component item is added to the table.
To add additional items, click Add Item.
When you have finished adding the components of the pack, click OK to close the Pack Item Detail Maintenance window and save your changes. The Item Maintenance window appears.
Navigate: From the main menu, select Items > Items. The Item Search window appears.
Search for and retrieve a pack item in Edit mode. To restrict the search to pack items, select the Pack Item check box The Item Maintenance window appears.
You may choose to edit any enabled fields.
Click Pack Details to edit the component items. The Pack Item Detail Maintenance window appears.
Select a component item.
In the Quantity field, edit the number of units that belong in the pack.
Click Apply.
Click OK to save your changes and close the window.
On the Pack Item Detail Maintenance window, click Add Item. The fields in the Item Selection area are cleared.
In the Item field, enter the item number of the component item, or click the LOV button and select the item.
Click Apply.
Click OK to save your changes and close the window.
|
Note: You cannot add a component item to a simple pack, because a simple pack is multiples of one component item. |
Navigate: From the main menu, select Items > Diffs > Pack Templates > Edit. The Pack Template Maintenance window appears.
In the Pack Template ID field, enter the ID of the pack template, or click the LOV button and select the template.
Edit the template description and quantities as necessary.
Click OK to save your changes and close the window.
Navigate: From the main menu, select Items > Items. The Item Search window appears.
Search for and retrieve a pack item in Edit mode. To restrict the search to pack items, select the Pack Item check box. The Item Maintenance window appears.
Click Delete. You are prompted to delete the record.
Click Yes.
|
Note: The record will be deleted in the next scheduled batch process. |
Click OK to save your changes and close the window.
Navigate: From the main menu, select Items > Items. The Item Search window appears.
In the Action field, select Edit Item, View Item, New From Existing, or New Cost Change.
Enter additional criteria as desired to make the search more restrictive.
Click Search. The Item Search window displays the items that match the search criteria.
Select a task:
To perform another search, click Refresh.
To display the item information, select a record and click OK. Based on what appears in the Action field, the Item Maintenance window, Create Like Item window, or Cost Change by Supplier window appears.
Click Close to exit.
Navigate: From the main menu, select Items > Item Pack Query. The Item Pack Query window appears.
In the Item field, enter the item number of a component item, or click the LOV button and select the item. The pack items that contain the component item appear.
View results.
Click Refresh to clear the fields for another search.
Click OK to save your changes and close the window.
The Item Pack Query window allows you to search for and view all the pack items that contain a specified component item.
The Pack Item Detail Maintenance window allows you to add, edit, and view the component items of a pack item. A complex pack may be composed of multiple units of multiple items. A simple pack may be composed of multiple units of one item.
There are some restrictions depending on the how you define the purpose of the pack:
Orderable pack: You cannot add, delete, or edit the component items if the pack is already on order or stocked at any location.
Sellable pack: You cannot add, delete, or edit the component items after the pack item is priced.
More information can be found in these related topics:
See "View a Pack Item" in the Purchasing chapter
The Main Item View window allows you to view all items and location combinations that the main item is replacing as a substitute item.
See "Add a Substitute Item for an Item on Replenishment" in the Replenishment chapter
The Sellable Pack Build window allows you to view how many sellable packs can be built from the component items at a specific store.
See "View the Components of a Sellable Pack" in the Purchasing chapter
The Item Packing Window allows you to send instructions to the finisher to tell them how items and packs should be shipped to the final location.
The Results area will display all the packs that can be created and any items component items that are unpacked. The following packaging combinations may occur:
The Break Pack Build window allows you to break orderable packs down to their component items or inner pack levels. The inventory of packs and component items is adjusted accordingly. The number of packs is decremented and the number of inner packs or items is incremented. Pack items are inventoried at the warehouse level.
Navigate: From the main menu, select Inventory > Pack Items > Break Pack. The Break Pack Build window appears.
In the Pack No field, enter the number of the pack item, or click the LOV button and select the pack.
In the Warehouse field, enter the ID of the warehouse, or click the LOV button and select the warehouse.
In the Qty to Break field, enter the number of packs that you want to break down to the component level. This number must be less than the number displayed in the Stock on Hand: Before field.
Click Apply. The number of packs is decremented. The number of component items is incremented.
Click OK to save your changes and close the window.
The Pack Template Maintenance window allows you to create, edit, and view a pack template. You can use the a pack template to order diffs that are frequently ordered as a 'set', rather than ordering individual items. When creating a pack item, you must specify a quantity for each combination.
See "View a Pack Template" in the Purchasing chapter
Navigate: From the main menu, select Ordering > Orders. The Order Search window appears.
Search for and retrieve a purchase order in Edit mode. Restrict the search to purchase orders in Worksheet status. The PO Header Maintenance window appears.
Click Items. The PO Item Maintenance window appears.
Click Add to Order. The Order Distribution Worksheet window appears.
Click Add Item. The Apply area is enabled.
Enter Item parent ID or name or select from the list.
The country of source ID is displayed when you select the item.
Enter the quantity or select from the list.
Enter the unit of purchase or select from the list.
Enter the supplier pack size.
Click Apply Template. The New Parent Template window appears.
In the Template field, enter the ID of the item parent template, or click the LOV button and select the template.
In the Order As Type field, select either Pack or Eaches.
In the Short Description field, enter the short description for the pack.
In the Description field, you can edit the long description of the pack.
Click OK to exit the New Parent Template window.
Click Apply Item to add the item parent or Expand Item to add the components of the item parent to the table.
Filter and distribute the items as necessary.
Click OK to save your changes and close the window.
Navigate: From the main menu, select Items > Diffs > Pack Templates > New. The Pack Template Maintenance window appears.
|
Note: A Pack Template ID is automatically generated and displayed. |
In the Pack Template ID field, enter a description for the template.
Click Like Template. The Like Pack Template window appears.
In the Pack Template ID field, enter the ID of the template to copy, or click the LOV button and select the template.
Click OK to exit the Like Pack Template window. The assortment of diffs are copied to the Pack Template Maintenance window.
Edit the values in the Quantity field, where necessary.
Click OK to save your changes and close the window.
The Like Pack Template window allows you to create a diff pack template with the same assortment of diffs as another template.
The Diff Combinations window allows you to view the item children that are created after you select the desired diffs in the Item Diff Apply window. You can enter the item number (if it was not generated automatically) and description for each item child and delete any undesired item children. When you click OK to exit this window, the Item Children window appears. From there, you can edit the attributes of each item child.
The Item Children window allows you to create a subset of items from an item that is already entered into RMS. In RMS, all of the item levels for a given item are called an item group. The term child or children refers to the second or third levels of any 2-level or 3-level item group. In this window, you can:
Edit level 2 or level 3 items that were created without diffs
Edit the description of items at level 2 or level 3 of an item group.
Use the Options list to edit details for a selected level 2 or level 3 item.
More information can be found in these related topics:
Use the Item Diff Apply window to create items with diffs. You can apply diffs individually, by diff range, or by diff group. When two types of diff values are combined, a level 2 or level 3 item is created for each possible combination of the two types. The new items appear in the Diff Combinations window. If you create duplicate items, you can view the details of the duplicate item in the Duplicate Diff Combinations window.
Navigate: From the main menu, select Items > Items. The Item Search window appears.
Search for and retrieve an item in Edit mode. Restrict the search to items in Worksheet status. The Item Maintenance window appears.
Enter information in the diff fields.
Click Create Children. The Item Diff Apply window appears.
Enter data in the required fields.
Click OK to create the possible combinations of item children. The Diff Combinations window opens.
Edit the item number and description of an item child.
Click OK to create the item children.
If duplicate item children exist, the Duplicate Diff Combination window opens.
Click OK to close the window.
The Item Children Diff window allows you to create a subset of items from an item that is already entered into RMS. In RMS, all of the item levels for a given item are called an item group. The term child or children refers to the second or third levels of any 2-level or 3-level item group. In this window, you can:
Edit level 2 or level 3 items that were created with diffs
Edit the description of items at level 2 or level 3 of an item group.
Use the Options list to edit details for a selected level 2 or level 3 item.
More information can be found in these related topics:
The Duplicate Diff Combinations window allows you to view which diffs are duplicated for an item parent. You are prompted to view the duplicate item children at the time you create them.
The Item Maintenance window allows you to manage multiple types of items and their attributes. Items can be tracked at 3 levels. The naming conventions for the three item levels may vary by organization. You must indicate at which item level you want to track transactions. After creating a level 1 item, you can create level 2 item. On some RMS windows, the level 2 item is referred to as a 'child' item. You can also select a level 2 item and create level 3 items, referred to as grandchildren.
Look at the Options list to verify that all necessary information has been added for the current item. The options are color-coded to indicate whether they are required by the system, required by your organization, or made available/unavailable.
Red, bold: The option is required by the system. The Suppliers and Retail by Zone options are required by the system.
Green, bold: The option required by the system has been edited.
Red: The option is required by the department, class, or subclass.
Green: The option, required or not, has been edited.
Blue: The option is not required but can be edited if the user so chooses.
Black: The option is not available to the user.
The check box next to each option provides another visual cue. A selected check box indicates that the option has been edited. You can click the required or available options in order to perform a task related to the current item. The appropriate message or window opens.
Create a Two Level Item with Diffs
Create a Two Level Item without Diffs
See "View an Item" in the Foundation Data chapter
Electronic data interchange (EDI) provides a standardized method for retailers and suppliers to transmit business documents electronically. EDI translation programs convert outgoing and incoming files to the appropriate flat file or EDI format.
The following EDI transaction sets can be processed by RMS:
832 - Price/sales catalogue: New and updated item/cost information received from the supplier.
838 - Trading partner profile: Store and warehouse addresses are sent to the supplier. Addresses are received from the supplier.
846 - Inventory Inquiry/Advice: Supplier availability details are received from the supplier.
850 - Purchase order: Purchase orders and contracts are sent to the supplier.
852 - Product activity data: Store sales and inventory information is sent to the supplier.
855 - Purchase order acknowledgement: Purchase order acknowledgements and changes are received from the supplier.
856 - Ship notice/manifest: Advance shipping notices (ASN) are received from the supplier.
860 - Purchase order change request - buyer initiated: Modified purchase orders are sent to the supplier.
879 - Price information: Cost changes pertaining to items are received from the supplier.
888 - Item maintenance: New and updated item details are received from the supplier.
To begin using EDI functionality, some preliminary setup is required. You must indicate which EDI transactions are supported by a supplier. If the supplier requests product activity data, you can indicate whether the data should be transmitted on a daily or a weekly basis.
You should also indicate the variance allowed for cost changes by monetary amount and by percentage. Cost changes received from the supplier that are within the tolerated range are automatically approved by the system after you accept the changes. In vendor managed inventory (VMI) situations, you can indicate whether orders received from the supplier are automatically approved or remain in Worksheet status.
As you create and revise purchase orders and contracts, you can indicate whether to transmit approved transactions. If you have access to Oracle Retail Invoice Matching, you can also indicate whether to transmit approved debit memos, credit memos, and credit note requests.
When item details and cost changes are received from suppliers, you must review and accept them before the item catalog can be updated and a cost change event can be created. Rejected items and cost changes are held in the system for a predefined number of days.
The system administrator may set the following system variables for EDI transactions:
Request an EDI-compliant catalog of store and warehouse addresses be transmitted to suppliers.
Indicate whether supplier-provided costs may be overridden by the application of deals, brackets, and allowances to unit costs on purchase orders.
Set the retention period, in days, for 1) revisions/versions of completed and cancelled purchase orders, 2) rejected items, and 3) rejected cost changes. When the records exceed the retention periods, they are automatically purged by regularly scheduled batch programs.
Set the number of days that product activity data must be held on a temporary table before the report is transmitted to suppliers.
The New Item window allows you to enter additional details before a new item or case can be added to the system. Cases are processed as simple packs. The preliminary information is received from the supplier through an electronic data interchange (EDI) transmission.
Several fields are filled in automatically if you select an item at a higher item level than the new item. You can also choose to copy additional details from an existing item to the new item.
The Item Detail window allows you to view measurement, unit cost, lead time, and minimum/maximum order details for an item that is received through an electronic data interchange (EDI) transmission.
The EDI New Items window allows you to accept or reject new items or changes made to existing items. The information is received from a supplier through electronic data interchange (EDI) transmissions.
From this window, you can access the:
Item Detail window: View dimensions, volume, and weight at the each, case, and pallet level. Also, view unit of measure (UOM) conversion details, unit cost, lead time, and minimum and maximum order quantities.
New Item window: Edit the details of a new item, or copy details from an existing item to the new item (Like Items window).
After you change the status of the item to Accepted, you can edit the seasons/phases and user defined attributes for the item. Select the appropriate option from the Options > Items menu.
To view additional details in the EDI New Items window, select the appropriate option from the View menu.
The default view for the EDI Items window opens when you open the window for the first time. You can also view the table with the Parent view or you can create a custom view. Additional fields can be viewed when you create a custom view.
The Mass Update Failures window allows you to view the reason for and status of items that failed to update through Electronic Data Interchange (EDI).
The Like Item window allows you to copy the details from an existing item to a new item. If the existing item that you choose is a level 1 item, a new item hierarchy is created for the new item. If the existing item is a level 2 or level 3 item, the new item is associated with the same item group as the existing item.
Navigate: From the main menu, select Items > EDI New Items. The EDI New Items window opens.
Select an item with New Item column selected
Click New Item. The New Item window opens.
In the Place Item Under field, enter the item number of the item parent or item grandparent under which you want to place the new item, or click the LOV button and select the item.
In the Item Level field, select the level at which the item parent or item grandparent resides in the item hierarchy.
In the Parent Item Number Type field, select the item number type for the new level two item.
|
Note: If a level 3 item is placed under a level 1 item and the transaction level is at level 2, you must identify the level 2 item above the new item. If the level 1 item has no existing subordinate (level 2) items, you must select the appropriate type of item number for the level 2 item. |
In the Item Parent type field, enter or edit the item number of the item parent under which you want to place the new item, or click the LOV button and select the item.
|
Note: For Level 3 items only. |
In the Item Number Type field, select the item number for the new item.
Select the Keep Ref Item to indicate that reference number received from the supplier should be saved.
In the Item field, enter or edit the item number and item description.
In the Item Level field, select the level of the item in the item group.
In the Tran Level field, select the transaction level for the item.
|
Note: If you select an item with subordinate items, the transaction level is automatically filled in. |
To create a simple case pack for the item for the EDI item:
Select the Item Number Type for the pack item.
Enter or edit the item ID and description.
Select Create as Ref Case to indicate that the case is a reference item for the case.
In the Department field, enter the ID of the department for the new item, or click the LOV button and select the department.
In the Class field, enter the ID of the class for the new item, or click the LOV button and select the class. You must select a department before you can select a class.
In the Subclass field, enter the ID of the subclass for the new item, or click the LOV button and select the subclass. You must select a department and class before you can select a subclass.
In the Cost Zone Group field, enter the ID of the cost zone group the item belongs to or click the LOV button and select the cost zone group.
In the Unit Cost field, enter the cost of one unit of the item.
In the Default Unit of Purchase field, enter the measure that is used when ordering the item, or click the LOV button and select a default unit of purchase.
In the Short Desc field, enter a short description of the item.
In the Store Order Multiple field, select how the store orders the item from the warehouse.
Add diff information for the item as necessary.
On the New Item window, click Like Item. The Like Item window opens.
In the From Existing field, enter the item number of the item to be copied, or click the LOV button and select the item.
To copy details from the selected item to the new item, select the enabled check boxes as necessary.
Click OK to save your changes and close the window.
Click OK to save your changes and close the window.
The EDI Cost by Location window allows you to review unit costs and bracket cost details received through EDI at the item/supplier/country of sourcing/location level.
Navigate: From the main menu, select Items > EDI New Items. The EDI New Items window opens.
Enter or select the criteria you want to search by.
|
Note: Supplier is a required field. |
Click Search. The items that match the specified criteria appear.
Click Mass Failures. The Mass Update Failures window opens.
Click OK to close the window.
Navigate: From the main menu, select Control > Supplier > Maintenance. The Supplier Search window opens.
Search for and retrieve a supplier site. The Supplier Maintenance window opens.
|
Note: If the Financials module is installed, select Control > Supplier > Maintenance from the main menu. |
From the Options menu, select EDI. The Supplier EDI Information window opens.
In the EDI Transactions fields, select the activities that the supplier can process through EDI.
In the Sales field, select how often product activity data must be generated for the supplier.
In the Amount and Percent fields, enter a currency amount and a percentage to indicate by how much a cost change can vary from the current cost and still be automatically approved.
Click OK to save your changes and close the window.
The New EDI Cost Changes window allows you to accept or reject cost changes that are received from a supplier through electronic data interchange (EDI). Cost changes that are within the variance set for the supplier are automatically approved after you accept them.
You can access the EDI Cost by Location window in order to review unit costs and bracket cost details at the item/supplier/country of sourcing/location level for a selected item.
You can access the Item Maintenance window in order to view additional details about a selected item.
To view the monetary amounts in the primary currency of the company or the local currency of the supplier, select the appropriate option from the Options > Currency menu.
Navigate: From the main menu, select Items > EDI New Items. The EDI New Items window opens.
Enter or select the criteria you want to search by.
|
Note: Supplier is a required field. |
Click Search. The items that match the specified criteria appear.
In the Status field next to each item, select the appropriate status.
Accepted: The item change was reviewed and accepted.
Rejected: The item change was reviewed and rejected. Rejected item changes are purged from the system after a predefined number of days.
Not Reviewed: The item change has not yet been reviewed. The change cannot take effect and it cannot be purged from the system.
Failed: The item was not received.
Select an item.
From the Options menu, select either Seasons/Phases or User Defined Attributes.
Edit the details in the Item/Season Matrix window or Item UDA List window as necessary.
Click OK to save your changes and close the window.
Select an item with New Item column selected
Click New Item. The New Item window opens.
Enter details in any enabled fields.
To copy details from an existing item:
On the New Item window, click Like Item. The Like Item window opens.
In the From Existing field, enter the item number of the item to be copied, or click the LOV button and select the item.
To copy details from the selected item to the new item, select the enabled check boxes as necessary.
Click OK to save your changes and close the window.
Click OK to save your changes and close the window.
Navigate: From the main menu, select Items > Seasons/Phases > View. The Season and Phase Maintenance window opens.
Select the season for which you want to view the phases. The phases for the selected season appear in the Phases area.
Click OK to exit.
Navigate: From the main menu, select Items > Item List. The Item List Search window opens.
Search for and retrieve a item in Edit mode. The Item Maintenance window opens.
Click the Seasons/Phases option. The Item/Season Matrix window opens.
Click OK to close the window.
The Item/Season Matrix window allows you to add and delete seasons and phases from items. When you add a season to an item, you select a season and then select a phase within the season.
You can use the seasons and phases of an item to track the sales of the item through reports. You can add or overwrite season/phase records for items in a group if the passed item is above the item's group transaction level.
The Season and Phase Maintenance Window allows you to create and maintain seasons and phases. A season is a specific selling period during the year, and a phase is a smaller time period within a season. A season requires at least one phase. If you do not add at least one phase to a season, a phase with the same name and dates as the season is automatically created for the season.
Seasons and phases have two functions:
Reporting and tracking
Replenishment
You can add seasons and phases to items and pack items. You can then create custom reports to track the movement of items with specific seasons and phases.
Seasons and phases are also used for forecasted items with a replenishment method of Time Supply - Seasonal and Dynamic - Seasonal. The items are on replenishment during the dates of the selected season and phase. The seasons and phases associated with the item for reporting and tracking purposes have no impact on the seasons and phases used in replenishing the item.
When you create a season and phase, you can assign the season to levels of the merchandise or organization hierarchy. You can only assign the levels of merchandise and organization hierarchy that your user group is associated to. All levels below the hierarchy level assigned are also enabled for the user groups. Users whose security settings allow them access to the same hierarchy levels can use this season throughout RMS. If you do not assign a merchandise or organization level all users are able to use this season throughout the system.
Add a Season and Phase to an Item
Add a Season and Phase to an Item List
Edit a Season and Phase for an Item
Navigate: From the main menu, select Items > Seasons/Phases > Edit. The Season and Phase Maintenance window opens.
Click Add Season.
In the Season field, enter a description of the season. A season ID is filled in automatically.
In the Start Date field, enter the date on which the season begins, or click the calendar button and select the date.
In the End Date field, enter the date on which the season ends, or click the calendar button and select the date.
In the merchandise hierarchy fields, enter the ID of the member of each hierarchy level, or click the LOV button and select a member.
Click OK to save your changes and close the window.
Click Add Phase.
In the Phase field, enter a description of the phase. A phase ID is filled in automatically.
In the Start Date field, enter the date on which the phase begins, or click the calendar button and select the date.
In the End Date field, enter the date on which the phase ends, or click the calendar button and select the date.
Click OK to save your changes and close the window.
Navigate: From the main menu, select Items > Items. The Item Search window opens.
Search for and retrieve an item in Edit mode. The Item Maintenance window opens.
From the Options list, select Seasons/Phases. The Item/Season Matrix window opens.
Click Add.
On the next available line, enter the ID of a season in the Season field, or click the LOV button and select a season.
In the Phase field, enter the ID of a seasonal phase, or click the LOV button and select a phase.
Click OK to save your changes and close the window.
Navigate: From the main menu, select Items > Item List. The Item List Search window opens.
Search for and retrieve an item list in Use mode. The Item List Header window opens.
From the Options menu, select Create Mass Item Change > Seasons/Phases. The Item Season - Mass Change window opens.
Click Add.
To add a season and phase to an item:
In the Action Type field, select Add.
In the New Season field, enter the ID of the season, or click the LOV button and select the season.
In the New Phase field, enter the ID of the phase, or click the LOV button and select the phase.
Click OK to save your changes and close the window.
Navigate: From the main menu, select Items > Seasons/Phases > Edit. The Season and Phase Maintenance window opens.
Select a season.
Edit the Season, Start Date, and End Date fields as necessary.
To edit a phase, select the season related to the phase. Related phases appear in the Phase table.
Edit the Phase, Start Date, and End Date fields as necessary.
Click OK to save your changes and close the window.
Select the season that you want to delete.
Click Delete Season.
When prompted to delete the season, click Yes. The season and the phases associated with the season are deleted.
Click OK to save your changes and close the window.
Select the season related to the phase you want to delete. Related phases appear in the Phase table.
Select the phase that you want to delete.
Click Delete Phase.
When prompted to delete the phase, click Yes.
|
Note: A season requires one phase. You cannot delete a phase if it is the only phase for a season. |
Click OK to save your changes and close the window.
Navigate: From the main menu, select Items > Item List. The Item List Search window opens.
Search for and retrieve an item list in Use mode. The Item List Header window opens.
From the Options menu, select Create Mass Item Change > Seasons/Phases. The Item Season - Mass Change window opens.
In the Action Type field, select Change.
In the New Season field, enter the ID of the season, or click the LOV button and select the season.
In the New Phase field, enter the ID of the phase, or click the LOV button and select the phase.
In the Existing Season field, enter the ID of the season that you want to replace, or click the LOV button and select the season.
In the Existing Phase field, enter the ID of the phase that you want to replace, or click the LOV button and select the phase.
Click OK to save your changes and close the window.
In the Action Type field, select Delete.
In the Existing Season field, enter the ID of the season, or click the LOV button and select a season.
In the Existing Field, enter the ID of the phase, or click the LOV button and select the phase.
Click OK to save your changes and close the window.
Navigate: From the main menu, select Items > Item. The Item Search window opens.
Search for and retrieve a item in Edit mode. The Item Maintenance window opens.
Click the Seasons/Phases option. The Item/Season Matrix window opens.
Select the season and phase you want to edit.
Edit the fields as appropriate.
To delete a phase:
On the table, select the season and phase you want to delete.
Click Delete.
When prompted to delete the season and phase, click Yes.
Click OK to close the window.
The Item Season - Mass Change window allows you to change the seasons and phases for all of the items on an item list. You can add seasons and phases, delete seasons and phases, and replace existing seasons and phases with new seasons and phases.
The Item Ticket Detail window allows you to associate ticket types with a single item or multiple items. You can choose under what circumstances tickets should be printed automatically. For example, tickets should be printed automatically when a purchase order is approved, when an item is received at a location, or when a permanent price change takes effect. If you need more than the default number of tickets, you can enter the percentage of extra tickets to be printed.
When you add ticket types to items on an item list, any existing ticket types for those items are deleted and replaced with the new ticket types.
See "Edit Ticket Types for Multiple Items" in the User Tools chapter
Navigate: From the main menu, select Items > Request Tickets. The Request Manual Ticketing window opens.
Navigate: From the main menu, select Items > Request Tickets. The Request Manual Ticketing window opens.
Select a record and edit the quantity or sourcing country as necessary.
|
Note: You can edit the quantity in the table or in the Apply area. You can edit the country of sourcing in the Apply area only. |
Navigate: From the main menu, select Items > Ticket Type > View. The Ticket Types window opens.
To view the attributes of a ticket type:
Select the ticket type and click Detail. The attributes appear in the Ticket Items window.
Click OK to exit the Ticket Items window.
Click OK to close the window.
Navigate: From the main menu, select Items > Items. The Item Search window opens.
Search for and retrieve an item in View mode. The Item Maintenance window opens.
Click the Ticket Type option on the Options list. The Item Ticket Detail window opens.
To view ticket types for a subordinate item:
Click the List Children option on the Options list. The Item Children window opens.
Select an item.
Click the Ticket Type option on the Options list.
Click OK to close the window.
Navigate: From the main menu, select Items > Ticket Type > Edit. The Ticket Types window opens.
The UDA window allows you to add, edit, or view the user defined attributes (UDA) that can be associated with items. The types of UDAs are date, free form text, and list of values. You can associate the UDAs with items or assign the UDAs as the default for items in a specific department, class, or subclass.
When you create a user defined attribute, you can assign the UDA to levels of the merchandise or organization hierarchy. You can only assign the levels of merchandise and organization hierarchy that your user group is associated to. All levels below the hierarchy level assigned are also enabled for the user groups. Users whose security settings allow them access to the same hierarchy levels can use this UDA throughout RMS. If you do not assign a merchandise or organization level all users are able to use this UDA throughout the system.
See "Add a User Defined Attribute" in the Foundation Data chapter
See "View User Defined Attributes" in the Foundation Data chapter
Navigate: From the main menu, select Items > User Defined Attributes > Edit. The UDA window opens.
Edit the UDA Description and UDA Values fields as necessary.
The Item UDA List window allows you to add, edit, and view the user defined attributes (UDA) that are associated with an item.
See "Add a User Defined Attribute" in the Foundation Data chapter
Edit User Defined Attributes by Item
See "View User Defined Attributes" in the Foundation Data chapter
Navigate: From the main menu, select Items > Items. The Item Search window opens.
Search for and retrieve an item in Edit mode. The Item Maintenance window opens.
Click the Suppliers option on the Options list. The Item Supplier window opens.
Select a supplier.
Click the Item Supplier Unit of Measure option on the Item-Supplier window's Options list. The Item Supplier Unit of Measure window opens.
Click Add. The next available line becomes enabled.
|
Note: If this is the first Unit of Measure being added for the item, enter the following information in the table without clicking Add. |
In the UOM field, enter the abbreviation for the unit of measure (UOM), or click the LOV button and select the UOM.
In the Value field, enter the number of units that would make the current UOM equivalent to the standard UOM.
Click OK to save your changes and close the window.
If you prompted to overwrite the UOM details for the 'children' (subordinate level items), click Yes to apply edits to items below the current item level or click No to apply edits to the current item level only.
Click OK when prompted that the UOM has been applied.
Click OK when prompted that the applied records have been saved.
The UDA - Free Form Default window allows you to edit the default text for a free form text type of user defined attribute (UDA). If you create an item that has default UDAs defined at the department, class, or subclass level, you are prompted to open this window.
The User Defined Attribute/Item Default List allows you to add, delete and view the user defined attributes that are associated with a department, class, or subclass. You can indicate that the UDA is required for all items that are created for the selected department, class, or subclass. For a list of values type of UDA, you can select which value is the default value.
See "Add a user Defined Attribute to a Merchandise Level" in the Foundation Data chapter
Delete a User Defined Attribute from a Merchandise Level
See "View User Defined Attributes by Merchandise Level" in Foundation Data chapter
Navigate: From the main menu, select Action> Merchandise Hierarchy. The Merchandise Hierarchy Main Form window opens.
Select Department on the tree structure. The departments appear on the table.
Select a department and click Edit. The Department Maintenance window opens.
From the Options menu, select User Defined Attributes. The User Defined Attribute/Item Default List window opens.
Select a UDA and click Delete.
When prompted to delete the record, click Yes.
Click OK to exit the User Defined Attribute/Item List window.
Select Class on the tree structure.
In the Department field, enter the ID of the department, or click the LOV button and select the department.
Click Edit. The Class Maintenance window opens.
Select a class.
From the Options menu, select User Defined Attributes. The User Defined Attribute/Item Default List window opens.
Select a UDA and click Delete.
When prompted to delete the record, click Yes.
Click OK to exit the User Defined Attribute/Item List window.
Select Subclass on the tree structure.
In the Department field, enter the ID of the department, or click the LOV button and select the department.
In the Class field, enter the ID of the class, or click the LOV button and select the class.
Click Edit. The Subclass Maintenance window opens.
Select a subclass.
From the Options menu, select User Defined Attributes. The User Defined Attribute/Item Default List window opens.
Select a UDA and click Delete.
When prompted to delete the record, click Yes.
Click OK to save your changes and close the window.
The UDA Default Matrix window allows you to add, delete, and view the departments, classes, or subclasses that are associated with a user defined attribute (UDA). You can indicate that a UDA is required for all items that are created for the selected departments, classes, or subclasses. For a list of values type of UDA, you can select which value is the default value.
See "Add a User Defined Attribute to a Merchandise Level" in the Foundation Data chapter
Delete a User Defined Attribute from a Merchandise Level
See "View User Defined Attributes by Merchandise Level" in Foundation Data chapter
The UDA - List of Values Default window allows you to edit the default value of a list of values type of user defined attribute (UDA). If you create an item that has default UDAs defined at the department, class, or subclass level, you are prompted to open this window.
The Item UDA Matrix window allows you to add, edit, and view the items that are associated with a user defined attribute (UDA). You can edit the default date, text, or value of the user defined attribute for each item.
See "Add an Item to a User Defined Attribute" in the Foundation Data chapter
See "Delete an Item from a User Defined Attribute" in the Foundation Data chapter
Edit an Item by User Defined Attribute
See "View Items by User Defined Attribute" in the Foundation Data chapter
The UDA - Date Default window allows you to edit the default date for a date type of user defined attribute (UDA). If you create an item that has default UDAs defined at the department, class, or subclass level, you are prompted to open this window.
The Item UDA - Mass Change window allows you to edit the user defined attributes that are associated with the items on an item list.
You can run a Mass Item Change Rejection report in order to view the results of a mass change. The items that could not be edited and the reasons for rejection are listed on the report.
Navigate: From the main menu, select Items > Items. The Item Search window opens.
Create a new item in a department, class or subclass that defines UDAs at the merchandise hierarchy level.
Click User Defined Attributes option. The UDA - List of Values Default, UDA - Date Default, or UDA - Free Form Default window opens, depending on the type of UDA defined in the merchandise hierarchy level.
In the UDA - List of Values Default window, enter the ID of the value in the UDA Value field, or click the LOV button and select the value.
In the UDA - Date Default window, enter the date in the UDA Date field, or click the calendar button and select the date.
In the UDA - Free Form Default window, enter the text in the UDA text field, or click the comments button and enter the text.
Click OK to exit each window. After any or all of the windows appear, the Item UDA List window opens.
Click OK to save your changes and close the window.
Navigate: From the main menu, select Items > User Defined Attributes > Edit. The UDA window opens.
Select a user defined attribute.
From the Options menu, select Item. The Item UDA Matrix window opens.
Edit the Date, Comments, or UDA Value fields as necessary.
|
Note: The field that opens depends on the type of user defined attribute. |
Click OK to save your changes and close the window.
Navigate: From the main menu, select Items > Items. The Item Search window opens.
Search for and retrieve an item in Edit mode. The Item Maintenance window opens.
Click the User Defined Attributes option. The Item UDA List window opens.
Edit the UDA Value, UDA Date, and UDA Text fields as necessary.
Click OK to save your changes and close the window.
The Item Induction window allows you to submit an Upload or Download request that will enable downloading, importing, and updating an item data.
Navigate: From the RMS Start Menu, select Items. From the Contents of Items on the right panel, select Item Induction. The Item Induction window appears.
To upload the spreadsheet, do the following:
Select the Upload option in the Action field. The following fields are enabled:
Source: You can either choose Spreadsheet or Staging Tables from the list.
Destination: You can either choose RMS Tables or Staging Tables from the list.
Template Type: You can choose to add your own template types in the Template Type field.
Template: This field is enabled if you choose one of the following template types: Master Data, Supplier Data, Pack Data, Cost Change. You can either specify the template, or select the template from the list of values.
Source File: If the source is Spreadsheet, the Source File field and the Browse button are enabled that allows selection of a spreadsheet file or upload.
Process Name: You can enter a process name for easy traceability and retrieval.
Figure 4-126 Item Induction (iteminduct) Window - Upload Option if the Data Source is Staging Tables
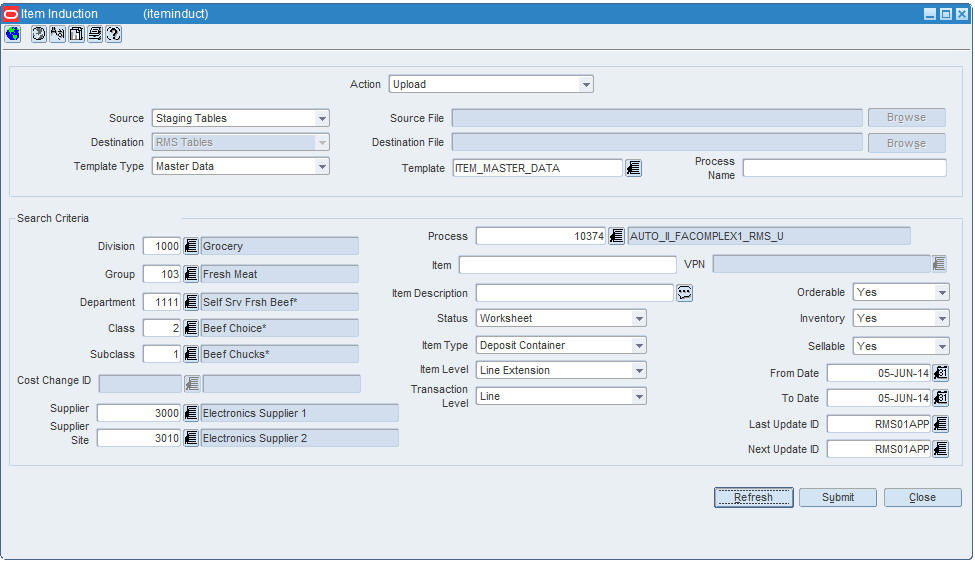
|
Note: The Search Criteria block is enabled to identify a subset of data to be uploaded. |
In the Search Criteria block, enter the following details:
Division: You can either specify the division, or select the division from the list of values configured in RMS or staging tables based on the Source selected.
Group: You can either specify the group, or select the group from the list of values configured in RMS or staging tables based on the Source selected.
Department: You can either specify the department, or select the department from the list of values configured in RMS or staging tables based on the Source selected.
Class: You can either specify the class, or select the class from the list of values configured in RMS or staging tables based on the Source selected. You need to select the department before selecting a class.
Subclass: You can either specify the subclass, or select the subclass from the list of values configured in RMS or staging tables based on the Source selected. You need to select the subclass before selecting a class.
Supplier: You can either specify the supplier, or select the supplier from the list of values configured in RMS or staging tables based on the Source selected.
Supplier Site: You can either specify the supplier site, or select the supplier site from the list of values configured in RMS or staging tables based on the Source selected.
Process: You can either specify the process ID, or select the process ID from the list of values configured in RMS or staging tables based on the Source selected.
Item: You can either specify the item or the system allows you to select from the set of all items records filtered by the supplier and product hierarchy.
Item Description: Specify the description of the item.
Status: You can choose one of the following status from the list: Worksheet, Submitted, Approved, Delete Pending.
Item Type: You can choose one of the following item type from the list: Regular Item, Simple Pack, Complex Pack, Deposit Contents, Deposit Container, Deposit Crate, Deposit Returned Item, Consignment/concession, Transformed Orderable, Transformed Sellable.
Item Level: You can choose Line or Line Extension from the item level list.
Transaction Level: You can choose one of the following transaction level from the list: Line, Line Extension, Variant.
VPN: This field is enabled when you choose Diff Finalization option in the Action field.
Orderable: You can choose to include or exclude orderable items from the list.
Inventory: You can choose to include or exclude inventory items from the list.
Sellable: You can choose to include or exclude sellable items from the list.
From Date: In the From Date field, specify the start date from which you want to retrieve process request, or click the calendar button and select the date.
To Date: In the To Date field, specify the end date till which you want to retrieve process request, or click the calendar button and select the date.
Last Update ID: This field indicates the User ID of the user who last updated the process record.
Next Update ID: This field indicates the User ID of the user who has to make subsequent updates to the process record.
To download the spreadsheet, do the following:
Select the Download option in the Action field. The following fields are enabled:
Source: You can either choose RMS or Staging Tables from the list.
Template Type: You can choose to add your own template types in the Template Type field.
Destination File: Specify the download file path and file name by clicking the Browse button.
Template: This field is enabled if you choose one of the following template types: Master Data, Supplier Data, Pack Data, Cost Change. You can either specify the template, or select the template from the list of values.
Process Name: You can enter a process name for easy traceability and retrievals.
|
Note: The Search Criteria block is enabled to filter the items to be downloaded. |
To download blank templates, do the following:
Select the Download Blank Template option in the Action field. The following fields are enabled:
Template Type: You can choose to add your own template types in the Template Type field.
Destination File: Specify the download file path and file name by clicking the Browse button.
Template: This field is enabled if you choose one of the following template types: Master Data, Supplier Data, Pack Data, Cost Change. You can either specify the template, or select the template from the list of values.
Process Name: You can enter a process name for easy traceability and retrievals.
In the Search Criteria block, enter the search criteria in the available fields. You must enter at least one item search criteria.
|
Note: The Search Criteria block is enabled:
|
Click Refresh to clear the fields.
Click Close to exit.
Click Submit to submit an Upload or Download request for processing. The Item Induction - Process Tracker window appears.
The Item Induction Process Tracker window is accessible by clicking the Submit button in the Item Induction window, or by navigating as follows: From the RMS Start Menu, select Items. From the Contents of Items on the right panel, select Item Induction Process Tracker. The Item Induction Process Tracker window appears.
The Item Induction Process Tracker window allows you to track various upload or download requests. It captures and stores the ID of the user who submitted the process request for processing. It also helps in easy tracking and for audit purposes.
The Search Criteria block allows you to search and filter various process IDs.
The Status field displays the status corresponding to each of the query results.
You can view requests in any of the following status from the Status list:
New
In Queue
Processing
Processed Successfully
Processed with Errors
The filter results are displayed in the Search Results multi-row block. Upload/Download request can also be filtered by User, Process ID, File Name, Template Type, Source, Destination using the search criteria.
The following action buttons are selectively enabled based on the row selected in the Search Results multi-row block:
The Upload to RMS button is enabled only if the status is Processed and the Destination is Staging Tables.
The View Issues button allows access to the Item Induction - Issues View window. This button is enabled for selection only if the status is Processed with Errors.
The Download Staged button is enabled only if the status is either in Processed with Errors status, or Processed Status, and the Destination is Staging tables.
The Delete button is enabled only if the status is either Processed, or Processed with Errors.
The Close button allows you to exit the Item Induction Process Tracker window without saving changes.
The item Induction Issues View window offers a view of the error location and error details logged during validation and processing of any upload or download request.
By default, the Item Induction Issues View window displays all errors logged against the selected process ID. You can filter the errors by clicking the Filter button.
You can view the Item Approval Error window by navigating as follows: In the Item Induction - Issues View window, select the Item Detail button, the Item Maintenance window appears. From the Options list, select Approval Errors. The Item Approval Error window appears.
Once a request is submitted for processing through the UI, a process ID is assigned and added into a processing queue if the processing is not synchronous. Certain requests that involve smaller data sets are processed synchronously. The status of various requests are tracked through their respective process IDs through the Item Induction Process Tracker window. If there are other requests being processed, then the newly submitted request are assigned a status In Queue until it is picked up for processing. Once the request is picked up the status of the request is updated to Processing. Once the processing is completed, then the process status for those requests is updated to Processed Successfully, if no processing errors are noted.
If there are any errors in uploading the spreadsheet data, then the status of the process is set to Processed with Errors. You can either download a copy of the data from the staging area or use the original file that was uploaded to make data corrections. Once the errors are corrected the file can be re-uploaded as a fresh upload request. You can either delete the processes that are in Processed with Errors status or they will be purged by the purge batch after a set retention days. During deletion of any process, the data linked to the process in staging tables are also deleted. In cases where the items are uploaded to RMS, but has failed one or more approval linked validations the error can be fixed by accessing the item in RMS through the Item Detail button on the Item - Induction Issues View window.
The process IDs that were uploaded to the staging tables successfully (Processed Successfully status) can be further uploaded to RMS through the Upload to RMS button on the Item Induction Process Tracker window. A process that is submitted for upload into RMS from the Item Induction Process Tracker window is subject to the queuing and processing in a manner similar to a fresh request, except that the status changes are updated against the existing process ID. The data linked to any of the process IDs in the staging area can be downloaded for data enrichment through the Download Staged button on the Item Induction Process Tracker window.
The Item Induction Process through spreadsheet integration offers RMS users increased flexibility to import and update item data. It extends the process of Item Induction to allow for creation of child items using differentiators (diffs). The solution allows the user flexibility to expand parent item data by adding, deleting, or remapping diffs. The entire process of child item creation is automated thereby simplifying the item creation process.
In the Action field of the Item Induction window, select Diff Finalization option from the list.
The following fields are dimmed if you select Diff Finalization option:
Source
Destination
Template Type
Source File
Destination File
Template
Process Name
In the Search Criteria block, the following fields are enabled if you select Diff Finalization option:
Item: This field represents a item for which Diff finalization is desired.
VPN: The LOV allows selection of VPN from the set of all Item records filtered by the supplier and product hierarchy.
Item Description: Specify the description of the item.
Status: You can choose one of the following status from the list: Worksheet, Submitted, Approved, Delete Pending.
Item Type: You can choose one of the following item type from the list: Regular Item, Simple Pack, Complex Pack, Deposit Contents, Deposit Container, Deposit Crate, Deposit Returned Item, Consignment/concession, Transformed Orderable, Transformed Sellable.
Item Level: You can choose Line or Line Extension from the item level list.
Transaction Level: You can choose one of the following transaction level from the list: Line, Line Extension, Variant.
Orderable: You can choose to include or exclude orderable items from the list.
Inventory: You can choose to include or exclude inventory items from the list.
Sellable: You can choose to include or exclude sellable items from the list.
|
Note: An item is mandatory to proceed with Diff finalization. |
Click Refresh to clear the data present in the header/filter criteria blocks.
Click Submit for Submission of an Upload or Download Request for Processing. The Item Diff Finalize window appears. See Item Diff Finalization Window section for more details.
Click Close to exit.
Once you submit a request for Item Diff finalization, the Item Diff Finalize window appears.
The Item Parent field populates the Item number selected in the filter block of the Item Induction window if it represents a Level 1 parent item. If the Item number selected in the filter block of the Item induction screen corresponds to a transaction level item, then the parent item corresponding to the item will be displayed in the Item Parent field.
The VPN field displays the VPN number of the parent item if available.
The Item Number Type field allows you to select a valid item number type from the LOV. Only automated number types are supported for selection through the Item Diff Finalize window.
There are four diff groups and each diff group will look for a different Diff Group ID. You need to manually select the value from the existing set of diff groups present in RMS using the diff values as a basis for the selection. Specifying a diff group field value is mandatory to proceed with diff ID selection.
For a given Diff Group, the User Diff Value field will be populated with all Diff value variations available in the staging area for the parent item selected.
The Aggregate Ind check box can be selected for three of the four diff groups specified. If any of the diff groups has the aggregate checkbox set, then the aggregate indicator flag should be set for the parent item during finalization.
The Diff ID and Diff Description are populated by the system, if the DIFF_VALUE populated in the result row exactly matches the description of any Diff ID present in RMS under the corresponding diff group. The user can also remap a Diff value to a different Diff ID.
Click Add to add a new row and Diff ID through the UI.
To delete the Diff ID, select the Diff ID and click Delete. The Diff Value (if present) as well as Diff ID information will be deleted from the UI and from the staging area when saved.
Click OK to finalize the diff matrix.
Click Cancel to close the window.
Navigate: From the main menu, select Items > Items. The Item Search window is displayed.
Search for and retrieve an item in Edit mode. Restrict the search to items in Worksheet status. The Item Maintenance window opens.
On the Item Maintenance window, click the Suppliers option. The Item-Supplier window opens.
Click the Item Supplier Country of Sourcing option. The Item Supplier Country of Sourcing window opens.
Enter the Country of Sourcing. Click the Bracket Costing option, if it is available. Otherwise, click the Item-Supplier-Country-Loc option. The Item Supplier Country Location window opens.
Click Brackets. The Item Supplier Country Location Bracket window opens.
In the Unit Cost field, enter the new unit cost. The Case Cost is automatically calculated.
or
In the Case Cost field, enter the new case cost. The Unit Cost is automatically calculated.
Click OK to save your changes and close the window.
When an item is added to the system, it must go through a series of checks before it is accessible in the system. Depending on your user role, you may not be able to move the item to the next status. An item may be in any of the following statuses:
| Status | Definition |
|---|---|
| Worksheet | The item has been started, but not completed. |
| Submitted | The item has been completed and is pending review. |
| Approved | The item has been reviewed and has been approved. |
| Rejected | The item has been submitted, reviewed, and has been rejected. |
| Deleted | The item has been marked for deletion. It will be deleted by a regularly scheduled batch program. |
Navigate: From the main menu, select Items > Items. The Item Search window opens.
Search for and retrieve an item in Edit mode. Restrict the search to items in Worksheet status. The Item Maintenance window opens.
Click the Submit option on the Options list.
If necessary, respond to the following messages:
If you are prompted approve item children, click Yes or No to indicate approval of subordinate level items.
If any errors are detected by the system, a prompt opens. Click Yes to acknowledge the message.
Click the Approval Errors option on the Options list of the Item Maintenance window. The errors appear in the Item Approval Error window.
If an option is not required by the system and you want to override the error message, select the Override check box.
If an option is required by the system, make a note of the error and click OK to exit.
Resolve the errors and reapprove the item.
Navigate: From the main menu, select Items > Items. The Item Search window opens.
Search for and retrieve an item in Edit mode. Restrict the search to items in Worksheet status. The Item Maintenance window opens.
Click the List Children option on the Options list. The Item Children window opens.
Select a subordinate level item (child item) in the items table.
Click Submit on the Options list. The Update Record Status window opens.
Select one of the following options:
|
Note: Not all options may be available. |
Submit the child item at the line item level only.
Submit the line item and all children of that item.
Submit all items.
Submit all items and all their children.
Click OK. If the item or items could not be submitted, a message prompts you to view the approval errors window.
Click OK.
Click Approval Errors on the Options list. The Item Approval Error window opens. The reason for the error appears in the error field.
If allowed, you may select the Override option for each error. Or, click OK and correct the error before attempting to resubmit the child item.
Navigate: From the main menu, select Items > Items. The Item Search window opens.
Search for and retrieve an item in Edit mode. Restrict the search to items in Submitted status. The Item Maintenance window opens.
Click Approve from the Options list.
If you are prompted approve item children, click Yes or No to indicate approval of subordinate items.
If any errors are detected by the system, a prompt opens.
Click Yes to acknowledge the message.
Click Approval Errors from the Options list of the Item Maintenance window. The errors appear in the Item Approval Error window.
If an option is not required by the system and you want to override the error message, select the Override check box.
If an option is required by the system, make a note of the error and click OK to exit.
Resolve any errors and reapprove the item.
Navigate: From the main menu, select Items > Items. The Item Search window opens.
Search for and retrieve an item in Edit mode. Restrict the search to items in Worksheet status. The Item Maintenance window opens.
Click List Children from the Options list. The Item Children window opens.
Select a level 2 or level 3 item in the items table.
Click Approve option from the Options list. The Update Record Status window opens.
Select one of the following options:
|
Note: Not all options may be available. |
Approve the child item at the line item level only.
Approve the line item and all children of that item.
Approve all items.
Approve all items and all their children.
Click OK to save your changes and close the window.
If the item or items could not be approved, a message will prompt you to view the approval errors window.
Click OK.
Click Approval Errors from the Options list. The Item Approval Error window opens. The reason for each error will be displayed in the error field.
If allowed, you may select the Override option for each error. Or, click OK and correct each error before attempting to approve the subordinate item.
Item reclassification allows you to move an item or item list from one department/class/subclass to another. You can reclassify an item or a list of items.
You determine which item or item list is to be reclassified, under which department, class, subclass, and the effective date. A batch process reclassifies those items whose effective date is the next day.
When items are moved from one department, class, and subclass combination to another, several other modules can be affected.
Sales history: A reclassification event does not rebuild sales history automatically. A reclassification does not affect previously recorded sales history. RMS maintains three levels of rolled up sales history: department, class, and subclass. Optional batch programs are available that can be used to rebuild the rolled up sales history.
Stock ledger: Stock ledger transactions are written to move the inventory amount associated with an item from the old department, class, and subclass to the new. Existing stock ledger transactions are not updated to reflect the hierarchy change.
Open to buy: Open to buy (OTB) records are updated for all orders that are approved, but have not yet been received.
Forecasts: If the reclassified item is forecastable and the new hierarchy values move the item to a new forecast domain, then an indicator is reset for the item at the item/store level. This change indicates to the program responsible for extracting sales history that the next time sales history is extracted from RMS for that item and store combination, all sales history should be extracted. Normally, only the sales history that occurred since the last data export is extracted.
The following edit checks are performed as you set up a reclassification event. The event cannot be created if:
The item exists in another reclassification event.
The item is in a consignment department, but the new department is not a consignment department. Likewise, if the item is in a department that is not a consignment department, but the new department is a consignment department.
One or more items on the reclassification event exist on approved partially received orders.
Other edit checks that can cause a reclassification event to fail also occur during the batch processing of the event. A reclassification cannot occur if:
The item is on a Unit and Value stock count. The items to be counted have already been determined based on the department, class, and subclass specified when the stock count was created. The stock count is scheduled after the effective date of the reclassification event.
The item is forecastable, but the new hierarchy values with which the item is associated do not have an associated forecast domain.
The new department, class, and subclass contain a required user defined attribute that must be entered at the item level.
The new department, class, and subclass contain a user defined attribute that defaults at the item level, but the item does not have this UDA defined.
More information can be found in these related topics:
Create a Reclassification Event for an Item
Create a Reclassification Event for an Item List
Delete a Reclassification Event
Delete an Item from a Reclassification Event
Navigate: From the main menu, select Items > Reclassification > Reclassify One Item. The Reclassify Item window opens.
In the Item field, enter the ID of the item to be reclassified, or click the LOV button and select the item.
In the Reclassification Description field, enter a description of the reclassification event.
In the Effective Date field, enter the date on which the reclassification must occur, or click the calendar button and select the date.
In the Department, Class, and Subclass fields, enter the IDs of the Department, Class, and Subclass under which you want the item to be classified, or click the LOV buttons and select them.
Click OK to save your changes and close the window.
|
Note: A batch process reclassifies the items on the night before the effective date that you selected. Therefore, the earliest that you can schedule an effective date is for the next day. |
Navigate: From the main menu, select Items > Item List. The Item List Search window opens.
Search for and retrieve an item list in Use mode. The Item List Header window opens.
From the Options menu, select Create Mass Item Change > Reclassification. The Reclassify Item window opens.
In the Reclassification Description field, enter a description of the reclassification event.
In the Effective Date field, enter the date on which the reclassification must occur, or click the calendar button and select the date.
In the Department, Class, and Subclass fields, enter the IDs of the Department, Class, and Subclass under which you want the items to be classified, or click the LOV buttons and select them.
Click OK to save your changes and close the window.
|
Note: A batch process reclassifies the items on the night before the effective date that you selected. Therefore, the earliest that you can schedule an effective date is for the next day. |
Navigate: From the main menu select Action > Pending Merchandise Hierarchy. The Pending Merchandise Hierarchy Search window opens.
In the Action field, select either Edit or View.
Enter additional criteria as desired to make the search more restrictive.
Click Search.
Select a task:
To perform another search, click Refresh.
To display the supplier information, select a record and click OK. The Pending Merchandise Hierarchy Search window opens.
Click Close to close the window.
Navigate: From the main menu select Action > Pending Merchandise Hierarchy. The Pending Merchandise Hierarchy Search window opens.
Search for and retrieve a merchandise change in Edit mode.
Edit the enabled fields as necessary.
|
Note: Fields are enabled based on the merchandise level selected. |
Click OK to save any changes and close the window.
The Reclassify Item window allows you to create a reclassification event. You also identify the item or list of items to be reclassified. Items are not reclassified online. A regularly scheduled batch program processes reclassification events on the evening before their effective date.
Navigate: From the main menu, select Items > Reclassification > View/Maintain. The Reclassification View window opens.
Select a reclassification event.
Click Detail. The Reclassification View/Maintain - Detail window opens. The affected items appear.
Click OK to save your changes and close the window.
Navigate: From the main menu, select Items > Reclassification > View/Maintain. The Reclassification View window opens.
Select a reclassification event to view the items affected.
Click Detail. The Reclassification View/Maintain - Detail window opens with the affected items.
Click OK to close the windows.
Navigate: From the main menu, select Items > Reclassification > View/Maintain. The Reclassification View window opens.
Select the reclassification event that you want to delete.
Click Delete. You are prompted to delete the record.
Click Yes.
Click OK to save your changes and close the window.
Navigate: From the main menu, select Items > Reclassification > View/Maintain. The Reclassification View window opens.
Select the reclassification event that contains the item you want to delete.
Click Detail. The Reclassification View/Maintain - Detail window opens with the items that are to be reclassified.
Select the item that you want to delete.
Click Delete. You are prompted to delete the record.
Click Yes.
Click OK to save your changes and close the window.
The Item-Supplier-Country of Manufacture allows the user to indicate the primary and secondary countries for suppliers of certain items.
Navigate: From the main menu, select Items > Items. The Item Search window opens.
Enter a New Item.
Click OK. The Item Maintenance window opens.
Enter appropriate information.
Select Suppliers. The Item Supplier window opens.
Enter the appropriate information.
Select Item-Supplier-Country of Manufacture. The Item-Supplier-Country of Manufacture window opens.
In the Country ID field select the ID, or select the LOV button and select the ID.
Select the Primary Ind checkbox if this is the primary country of manufacture.
Click Add.
Click OK to save your changes and close the window.
Navigate: From the main menu, select Items > Items. The Item Search window opens.
Select View.
Enter criteria for an item.
Click OK. The Item Maintenance window opens.
Select Suppliers. The Item Supplier window opens.
Select Item-Supplier-Country of Manufacture. The Item-Supplier-Country of Manufacture window opens.
Enter appropriate changes in the fields.
Click OK to save your changes and close the window.
The Item Supplier window allows you to add, edit, and view the suppliers for the current item. By default, the first supplier is marked as the primary supplier for the item. After you add additional suppliers, you can redefine the primary supplier.
To view the monetary amounts in the primary currency of the company or the local currency of the supplier, select the appropriate option from the Currency menu.
To view additional information in the table, select the Custom option from the View menu. The Customize toolbar opens. Select or clear the check boxes next to the fields that you want to show or hide.
See "Add a Supplier for an Item" in the Foundation Data chapter
See "View Suppliers for an Item" in the Foundation Data chapter
The Item Supplier Country Location window allows you to maintain the supplier hierarchy and the unit and case costs at the item/supplier/sourcing country/location level. This window can be accessed only after one or multiple locations have been associated with the current item.
To view monetary amounts in the primary currency of the company, the local currency of the supplier, or the local currency of the location, select the appropriate option on the Currency menu.
In a multi-channel environment, items are associated with warehouses at the virtual warehouse level. Unit costs, manufacturers, distributors, and wholesalers are the same for all virtual warehouses within a physical warehouse.
The Item Supplier Country Bracket window allows you to maintain the brackets for this item-supplier-country-location combination. You can edit unit and case bracket costs for Worksheet items.
When you modify a country-level bracket, costs default down to all location brackets. When you modify items that are above the transaction level, you can default costs down to children for all brackets.
If a default bracket cost is changed, the cost is modified at the item-supplier-country-location level.
In a multi-channel environment, any bracket costs modified for virtual warehouses will update all other virtuals attached to the item.
The Item Supplier Country of Sourcing window allows users add, edit, and view the sourcing countries that are associated with an item and supplier combination. Users can enter the cost negotiated with the supplier, based on what users can see cost exclusive of all taxes, cost inclusive of all taxes, and the taxes applicable for that supplier. Users can maintain location default, ordering, case, and packaging information.
To view monetary amounts in the primary currency of the company or the local currency of the supplier, select the appropriate option on the Currency menu.
The Item/Supplier/Country of Sourcing List window allows you to view the supplier and sourcing country relationships for an item. You can restrict the list to display only primary sourcing countries or all sourcing countries for each supplier.
See "Add an Country of Sourcing for a Supplier of an Item" in the Foundation Data chapter
The Item Supplier Unit of Measure window allows you to add, delete, and view miscellaneous units of measure (UOM) for an item and supplier combination. You must enter a factor that can be used to convert the unit of measure to the standard unit of measure. You have the option of overwriting the unit of measure for all subordinate level items that are supplied by the supplier of the selected item.
Navigate: From the main menu, select Items > Items. The Item Search window opens. Search for and retrieve an item in View mode. The Item Maintenance window opens.Click the Suppliers option on the Options list. The Item Supplier window opens.
Click Supplier List from the Options list. The Item Supplier Country Sourcing List window opens.
To view only the primary sourcing country for each supplier, select the Primary Countries option.
Click Close to close the window.
Navigate: From the main menu, select Items > Items. The Item Search window opens.Search for and retrieve an item in View mode. The Item Maintenance window opens.Click Suppliers from the Options list. The Item Supplier window opens.Select a supplier.
Click Item Supplier Country of Sourcing from the Options list. The Item Supplier Country of Sourcing window opens.
In the Country of Sourcing field, enter the code for the country, or click the LOV button and select the country.
Click View. The details of the sourcing country appear.
To view any other details for the sourcing country, click the appropriate option from the Options list.
Click OK to close the window.