| Oracle® Retail Merchandising Cloud Services Administration Guide Release 16.0 E85584-01 |
|

 Previous |
| Oracle® Retail Merchandising Cloud Services Administration Guide Release 16.0 E85584-01 |
|
Previous |
This chapter describes the processes for maintaining users and roles as well as batch processes. For information regarding standard end user activities like creating and viewing reports, please see the Oracle Retail Merchandising Cloud Services User Guide.
It is considered to be a best practice to have all Oracle Retail Merchandising Cloud Services support requests submitted through a single point of contact for that customer environment; the client designated administrator is usually designated to perform this role.
The link to use when submitting Service Requests (SR) is:
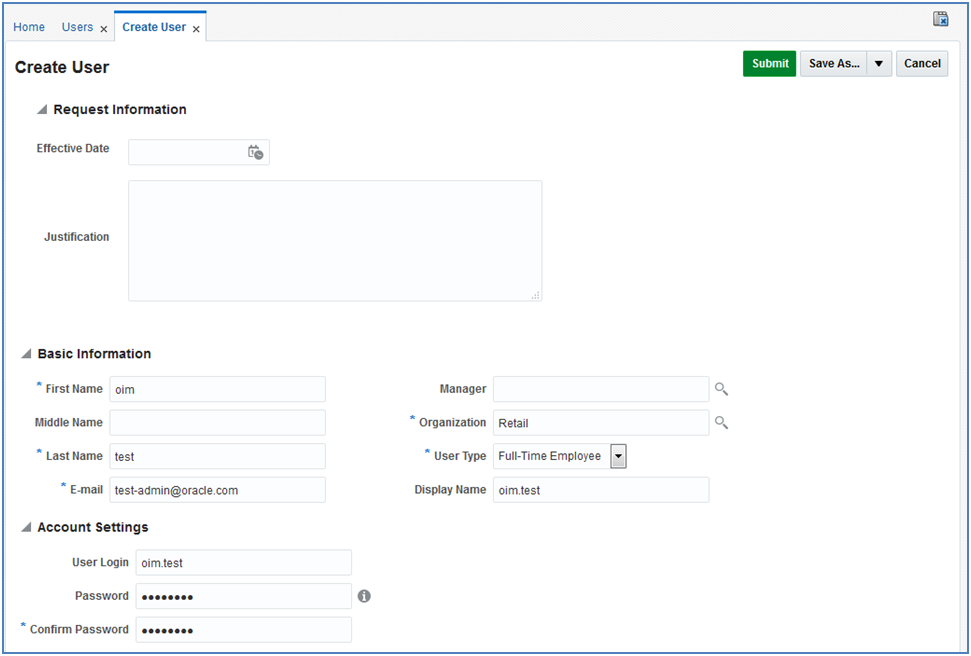
Before users can access the Oracle Retail Merchandising Cloud Services applications it is necessary to provision each user access to the system, and assign roles to each user to control what functionality will be available to them. The access provisioning is done using Oracle Identity Management (OIM). The following steps explain how to define users, assign roles and revoke access for users when needed. The OIM Application URL and the login with the required administrator access would be needed to execute the below steps:
Log into the OIM application.
Under Administration, click Users.
Under Actions, click Create.
The Create User screen opens.
Under Basic Information, enter the following:
First Name
Last Name
For Organization, enter Retail
For User Type, enter Full time employee
For E-mail, enter the e-mail address of the employee
Under Account Settings, enter the following:
User Login: <firstname>.<lastname>
Password, enter a password
Confirm Password, reenter the password
Click Submit.
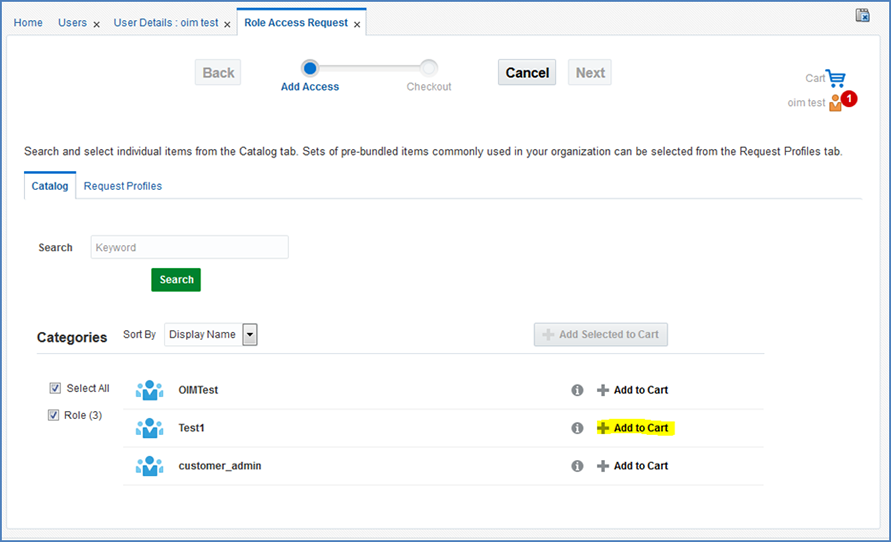
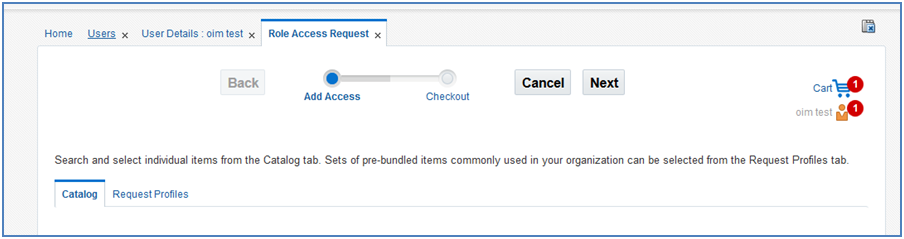
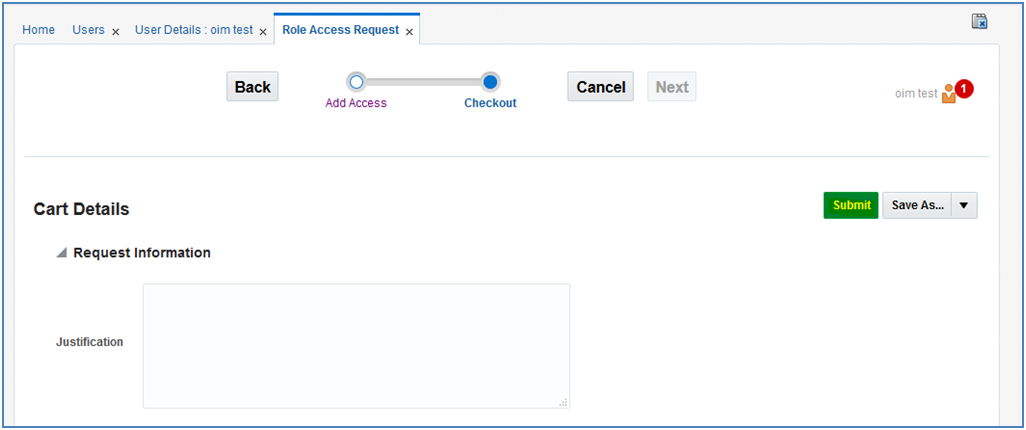
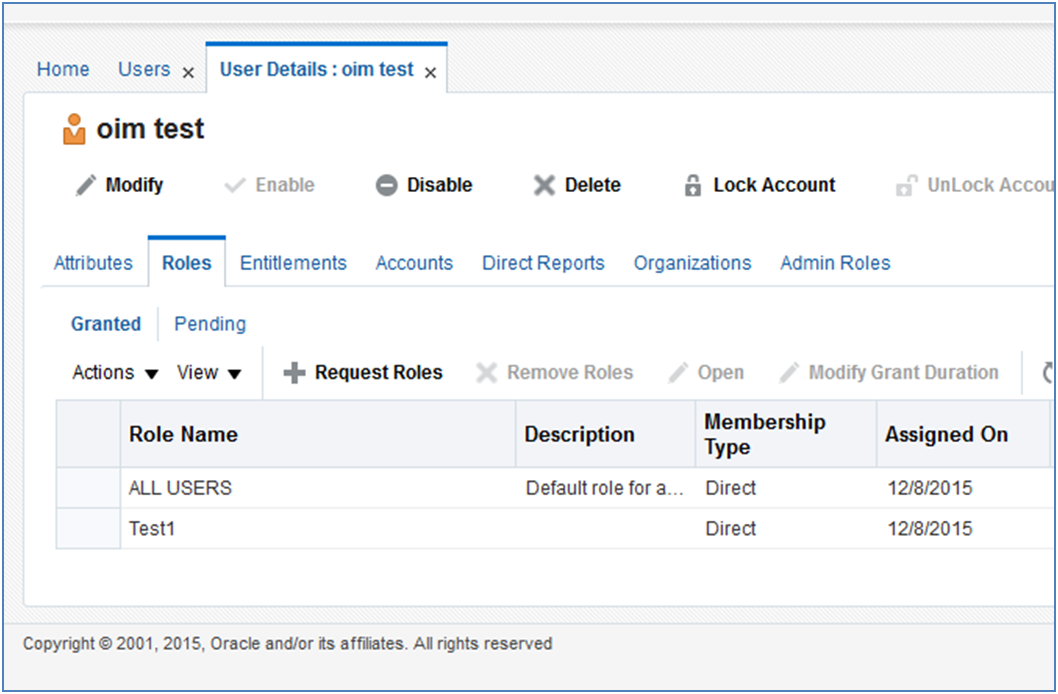
To assign members to a role, complete the following:
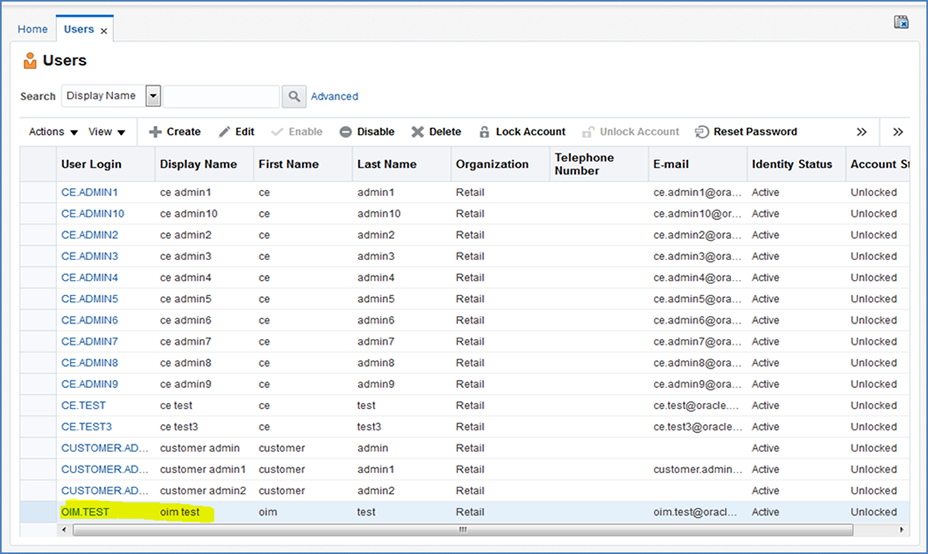
Log into the OIM application.
Click Users.
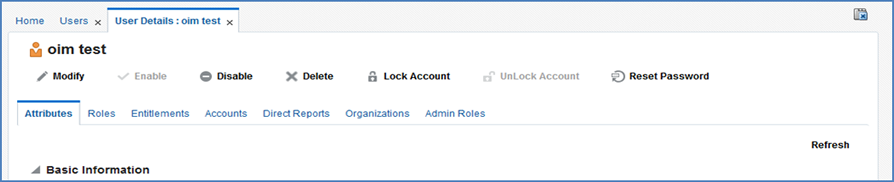
Click the oim.test user.
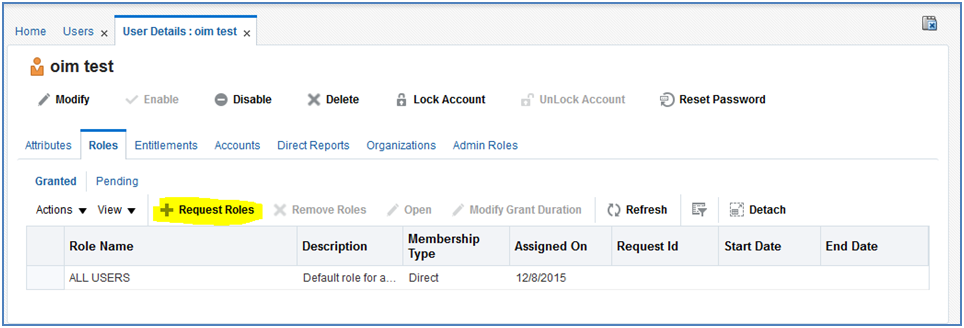
Click the Roles tab.
Click the Request Roles button.
Click the Add to Cart button next to the role you want to assign.
Click Next.
Click Submit.
The role is now assigned to the User.
Retail Merchandising Cloud Services is built with role-based access. Permissions are associated with roles. Assign these roles to the user following the steps in the section, "Assigning Members to a Role" as per your requirement.
The following roles are available for RMS and ReSA:
Table 1-1 Retail Merchandising Cloud Services Default Enterprise Roles
| Application Module | Default Enterprise Roles | Corresponding Application Roles |
|---|---|---|
|
ORMS |
Application Administrator |
RMS Application Administrator |
|
ORMS |
Data Steward |
RMS Data Steward |
|
ORMS |
Buyer |
Buyer |
|
ORMS |
Inventory Analyst |
Inventory Analyst |
|
ORMS |
Inventory Manager |
Inventory Manager |
|
ORMS |
Corporate Inventory Control Analyst |
Corporate Inventory Control Analyst |
|
ORMS |
Inventory Control Manager |
Inventory Control Manager |
|
ORMS |
Sourcing Analyst |
Sourcing Analyst |
|
ORMS |
Finance Analyst |
Finance Analyst |
|
ORMS |
Supply Chain Analyst |
Supply Chain Analyst |
|
ORMS |
Finance Manager |
Finance Manager |
|
ORESA |
Sales Audit Analyst |
Sales Audit Analyst |
|
ORESA |
Sales Audit Manager |
Sales Audit Manager |
|
ORESA |
Application Administrator |
RESA Application Administrator |
|
ORESA |
Finance Manager |
Finance Manager |
|
ReIM |
Accounts Payable Specialist |
Accounts Payable Specialist |
|
ReIM |
Finance Manager |
Finance Manager |
|
ReIM |
Buyer |
Buyer |
|
ReIM |
Corporate Inventory Control Analyst |
Corporate Inventory Control Analyst |
|
ReIM |
ReIM Application Administrator |
ReIM Application Administrator |
|
ReIM |
Finance Analyst |
Finance Analyst |
|
ReIM |
Accounts Payable Manager |
Accounts Payable Manager |
|
ReIM |
Data Steward |
Data Steward |
|
Allocation |
Allocation Application Administrator |
Allocation Application Administrator |
|
Allocation |
Allocation Manager |
Allocation Manager |
|
Allocation |
Allocator |
Allocator |
|
Allocation |
Buyer |
Buyer |
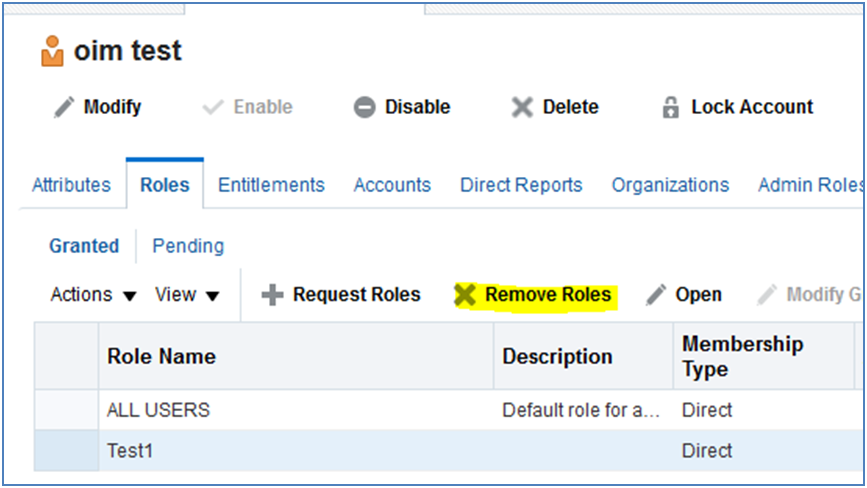
To revoke the membership of a member in a role:
Log into the OIM application.
Click Users.
Click the oim.test user.
Click the Roles tab.
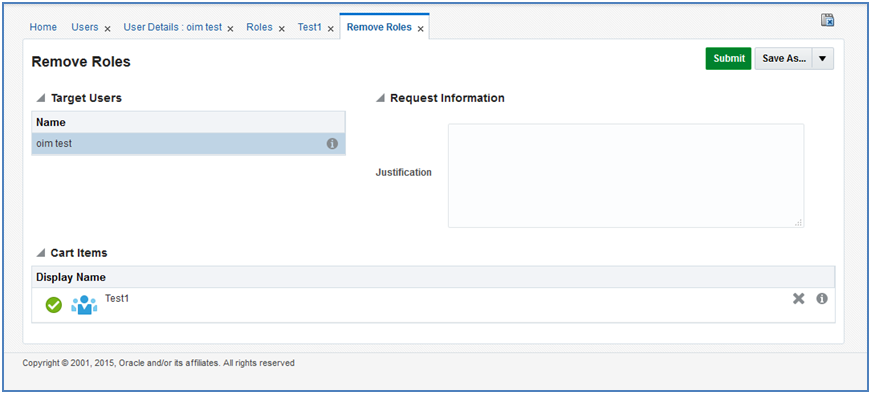
Select the Role you want to revoke and click the Remove Role button.
In the Remove Roles screen, click Submit.
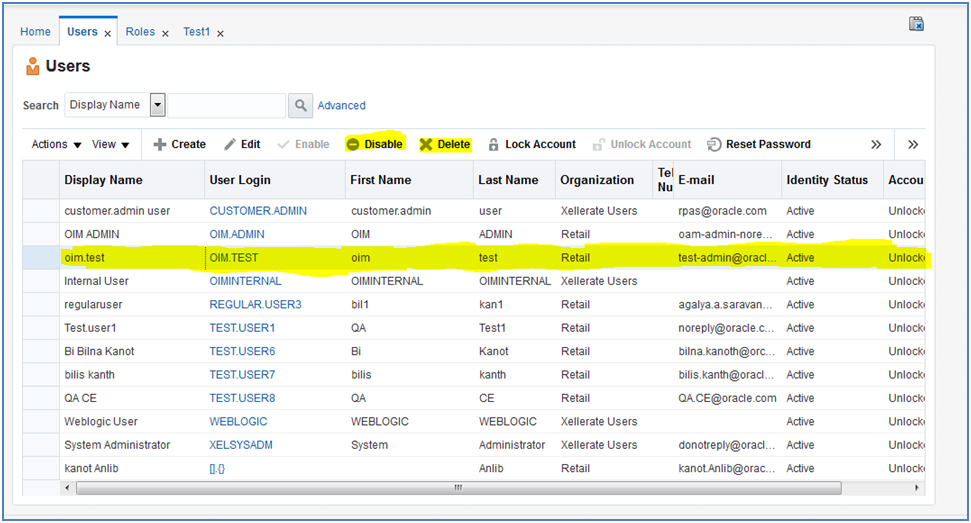
To delete or disable a user
Log into the OIM application.
Under Administration, click Users.
Select the user and click Disable or Delete as necessary.
You can also Lock or Unlock a particular user from the same screen if needed.
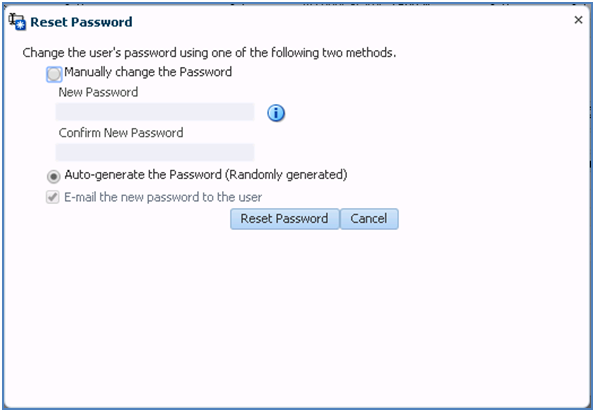
To reset the password of a user:
Log into the OIM application.
Under Administration, click Users.
Click the Search tab and then select on the User you want to reset the password.
Click Reset Password.
In the Reset Password screen, make sure Auto-generate the Password is selected and then click Reset Password. (The system auto-generates the password and e-mails it to the user.)
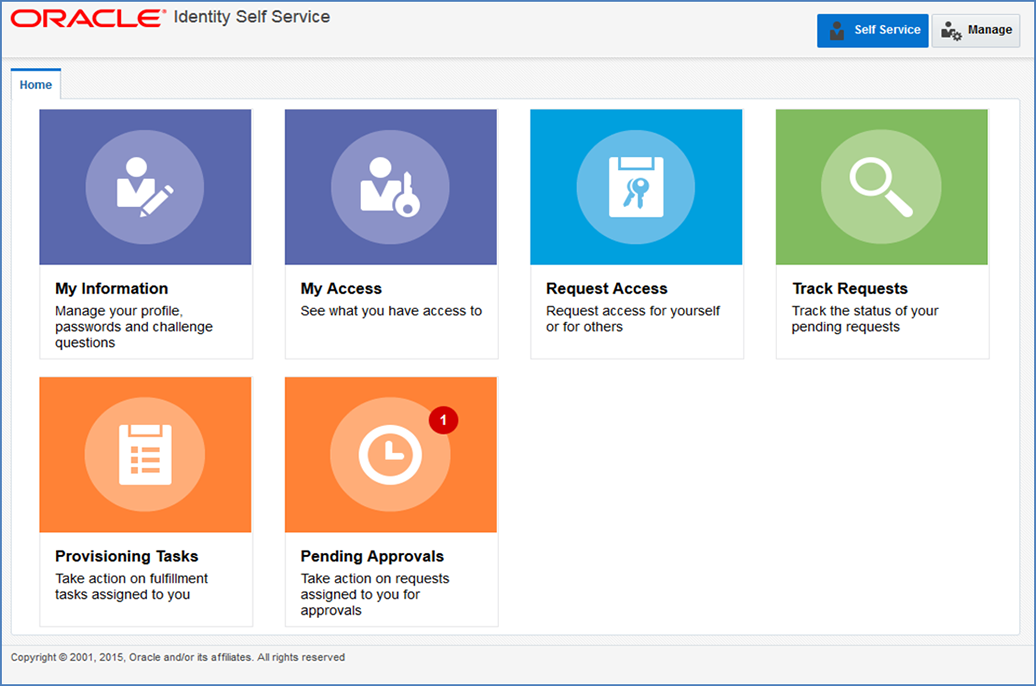
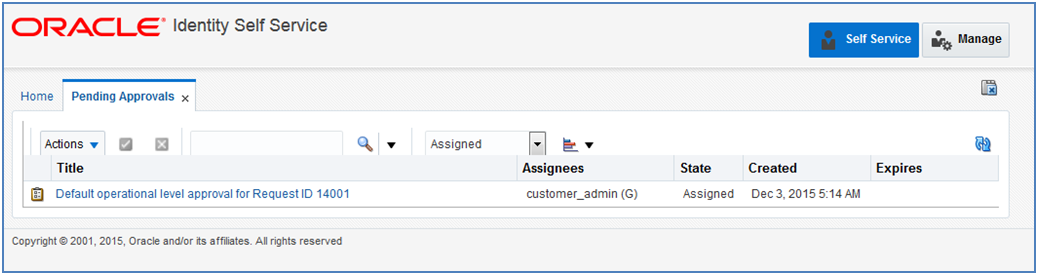
The users can also request for the Roles or revoke those that are available for him to access the RIS Service. Follow these steps to approve the request from the User.
Login into OIM Application.
Click Pending Approvals.
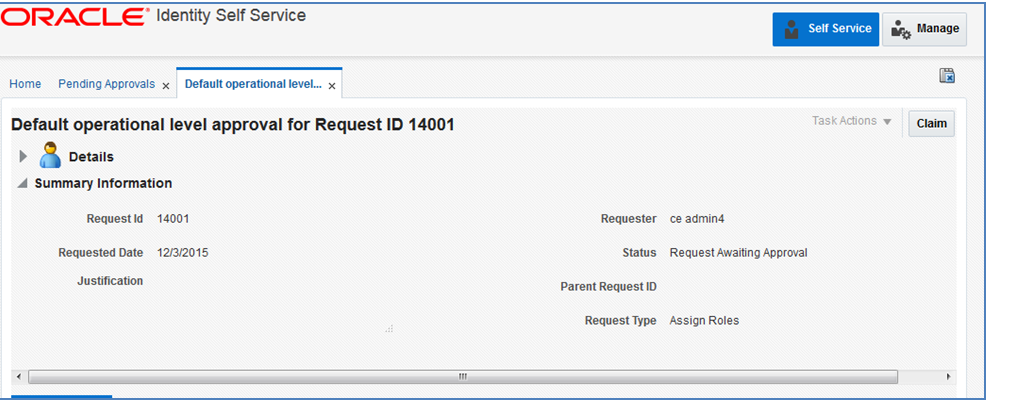
Click on the Action that is assigned to you.
Click the Claim button.
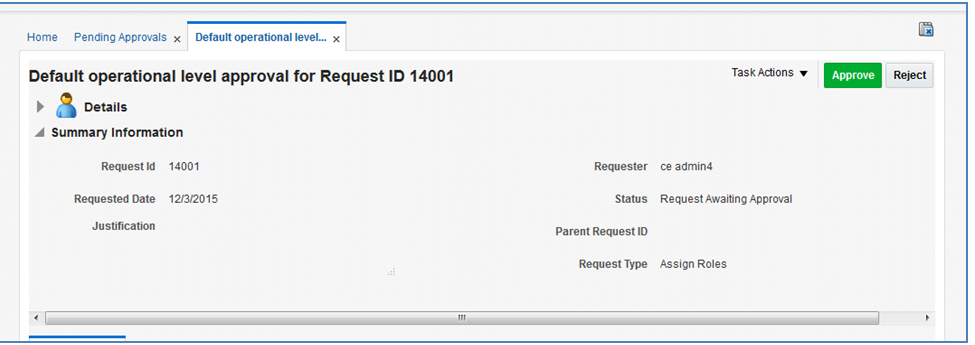
Click Approve or Reject.
The request is complete.
Users can also request for the multiple Roles or revoke them if they are available for him to access the RIS Service. Follow these steps to approve the request from the User.
Login into OIM Application.
Click Pending Approvals.
Click on the Action that is assigned to you.
Click the Claim button.
Click Approve or Reject.
Once done, if approved, the request is split into multiple requests, one for each role for each user. Approve all of them by following steps 3-5.
Once all the requests are approved, all the roles are assigned to users.
|
Note: The customer administrator can request multiple roles for multiple users. Once this request is made, the customer administrator is required to approve the request using the Approve Requests from User for Multiple Roles process. |
If you have batch of users that have to be created, the Oracle team can bulk load the users into the OIM Application. When users are bulk loaded their initial password will be set to the current password of a template user. The new users are required to change their password on their first login.
To request the creation of accounts by bulk loading, perform the following steps.
Create a CSV file listing all of the users to create (see the example in step 3).
Create or identify a user whose password will be used as the initial password for all created users.
Open an SR with Oracle support and provide the CSV file and user from steps 1 and 2.
##################
 filename.csv
###################
##########################################
USR_LOGIN,USR_FIRST_NAME,USR_LAST_NAME,USR_EMAIL,ORG_NAME
ce.admin1,ce,admin1,ce.admin1@oracle.com,Retail
ce.admin2,ce,admin2,ce.admin2@oracle.com,Retail
ce.admin3,ce,admin3,ce.admin3@oracle.com,Retail
ce.admin4,ce,admin4,ce.admin4@oracle.com,Retail
ce.admin5,ce,admin5,ce.admin5@oracle.com,Retail
ce.admin6,ce,admin6,ce.admin6@oracle.com,Retail
ce.admin7,ce,admin7,ce.admin7@oracle.com,Retail
ce.admin8,ce,admin8,ce.admin8@oracle.com,Retail
ce.admin9,ce,admin9,ce.admin9@oracle.com,Retail
ce.admin10,ce,admin10,ce.admin10@oracle.com,Retail
##########################################
If you have quite a few users that have roles to be assigned to, the Oracle team can bulk update the role membership into the OIM Application.
To update the membership of the by bulk update, perform the following steps.
Create CSV file with the user role mapping. Please note that the user name must be in upper case format (see the example in step 3).
Open an SR with Oracle support and provide the CSV file and user from step 1.
##################
 role.csv
###################
##########################################
UGP_NAME,USR_LOGIN
Role1,CE.ADMIN1
Role2,CE.ADMIN1
Role1,CE.ADMIN2
Role3,CE.ADMIN3
Role4,CE.ADMIN4
Role5,CE.ADMIN5
Role6,CE.ADMIN6
Role7,CE.ADMIN7
Role8,CE.ADMIN8
Role2,CE.ADMIN8
Role2,CE.ADMIN9
##########################################
|
Note: If you want more than one role attached to a particular user, add one more row with the role that you want the user to have and the user name. Refer to the CE.ADMIN1 in above table for example. |
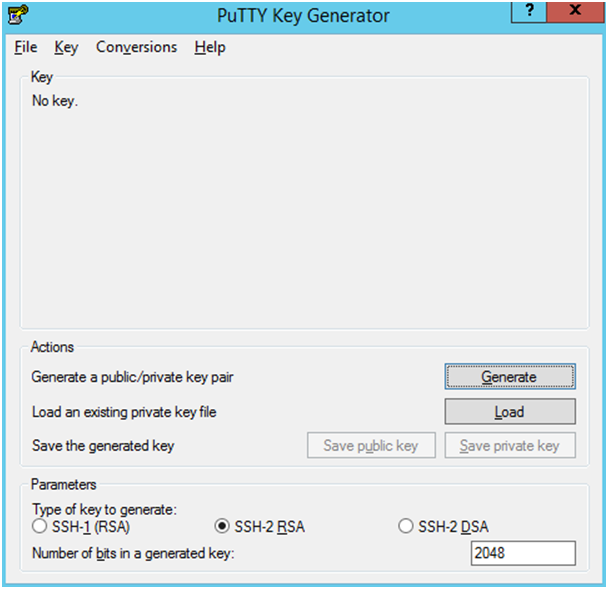
The following is the file upload process. The Private/Public Keys must be generated and the public Key must be associated with your SFTP Account for the file uploads. The Adding Authorized Keys section describes the step-by-step method to generate the Keys (2048 bit RSA Keys).
Use this process to generate a 2048 bit RSA key and add the same to the SFTP server. With Windows, use the WinSCP tool or with Linux, use ssh-keygen.
Launch WinSCP and select Tools -> Run PuttyGen.
Select SSH-2 RSA for the type of key to generate and enter 2048 for the number of bits in a generated key field and click Generate.
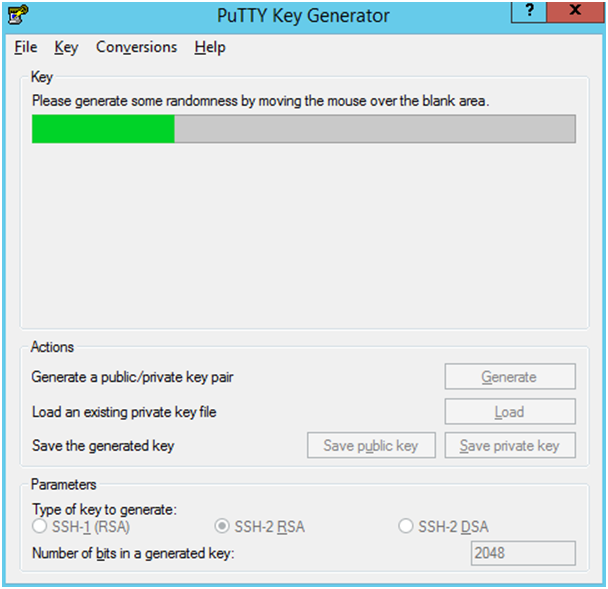
Move the mouse over the blank space in the window until the key is generated.
Once the key is generated, click Save public key to save the public key to a file.
Click Save private key to save the Private key to a file. Confirm to save it with or without a passphrase.
Open an SR with Oracle Support, to associate the Public half of the Key with your SFTP account (attach the Key with the SR).
These upload steps use the private key generated in section, Adding Authorized Keys.
Launch WinSCP and connect to <SFTP Server> using port 22.
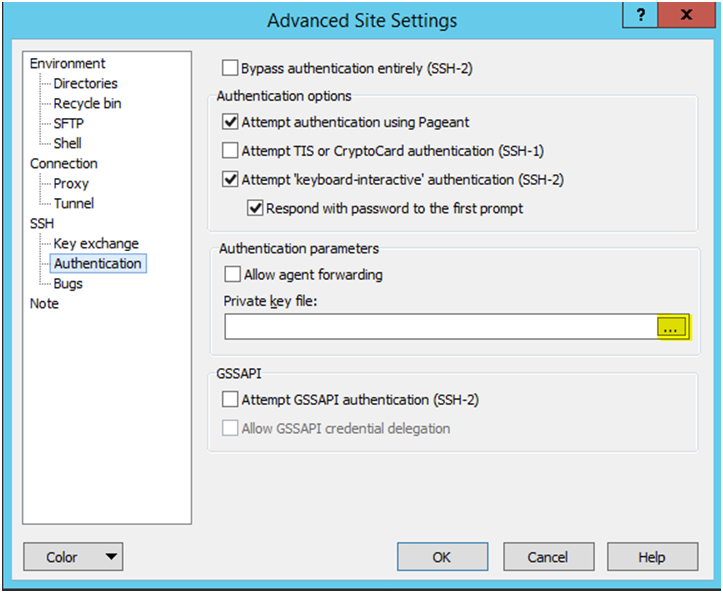
Enter the username and then click Advanced.
Click Authentication.
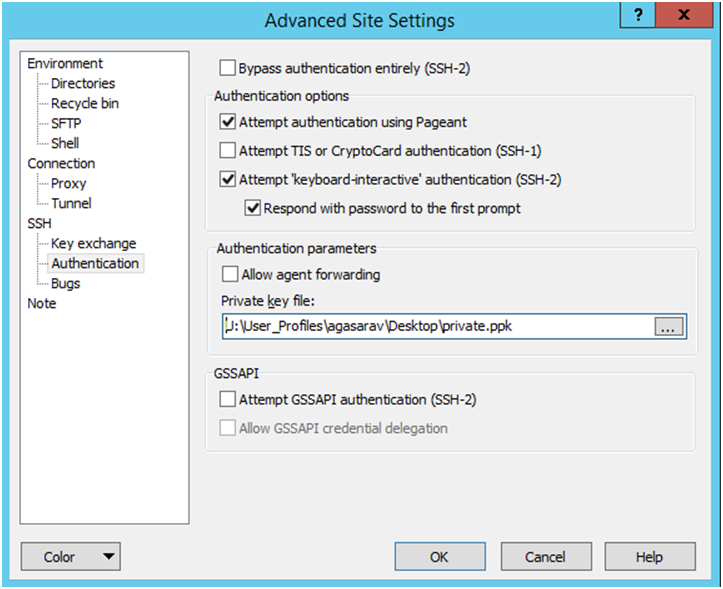
In the Private Key File field, click Browse and select the private key created in the section, Adding Authorized Keys.
After loading the private key file, click OK.
Click Login. The window does not prompt for a password and logs into the SFTP server. Provide a passphrase if one has been set up.
Login to the WinSCP by Following the Steps – Login to WinSCP section.
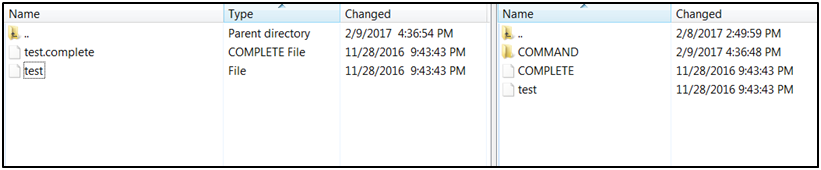
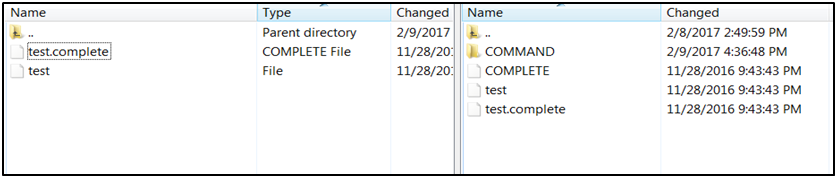
Transfer the file to be copied (e.g., test) to /<SFTP User>.
Transfer an empty file <filename>.complete (eg: test.complete) to the directory /<SFTP User>.
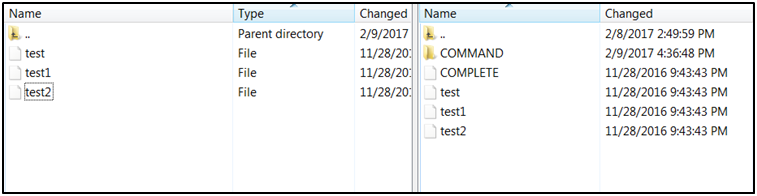
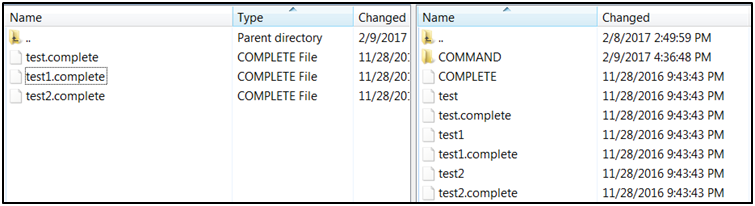
If multiple files have to be transferred, copy all the files to /<SFTP_user>.
Transfer all the corresponding <filename>.complete files to the /<SFTP_user> directory for the transfer to complete.
Login to the WinSCP by following the Steps – Login to WinSCP section. The following is the download file process.
Change the directory to /<SFTP User>/EXPORT.
Download all data files.