| Oracle® Retail Merchandising Suite Administration Guide Release 19.3.000 F45073-03 |
|

 Previous |
 Next |
| Oracle® Retail Merchandising Suite Administration Guide Release 19.3.000 F45073-03 |
|
Previous |
Next |
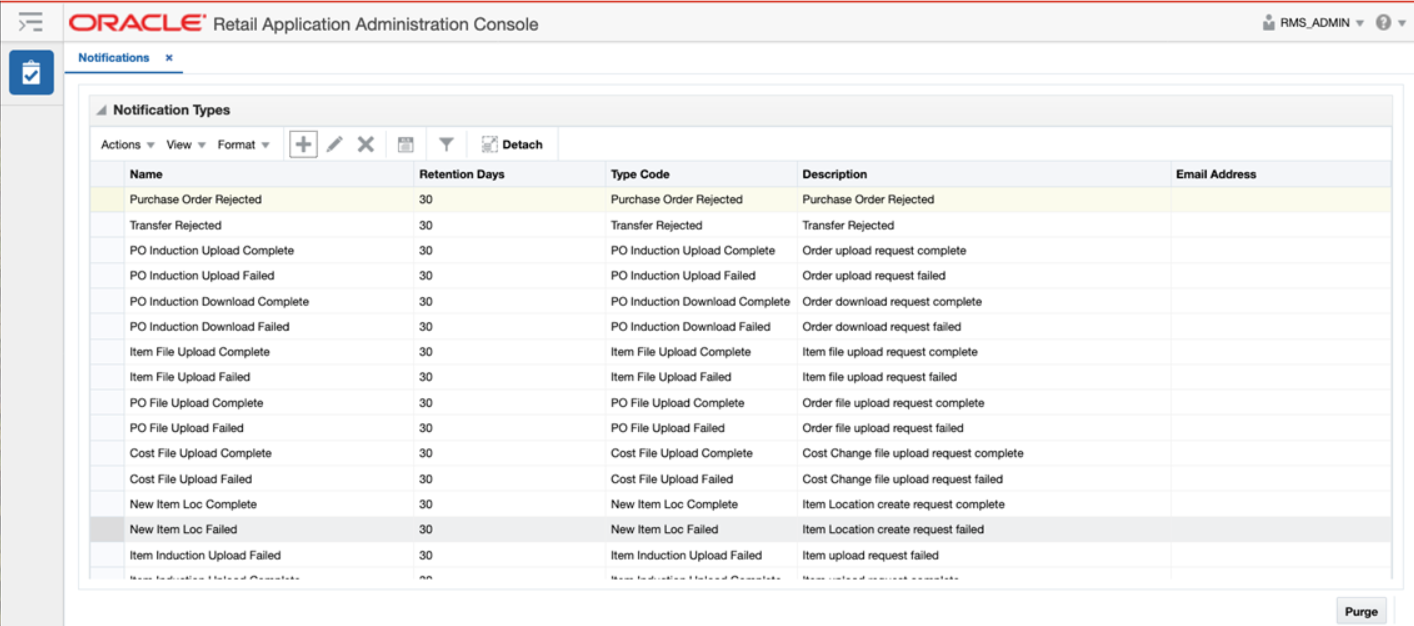
From the Settings menu, you can access the Notifications option. Selecting this option will open the Notifications page in the Retail Application Administrator Console. This page will display two tables.
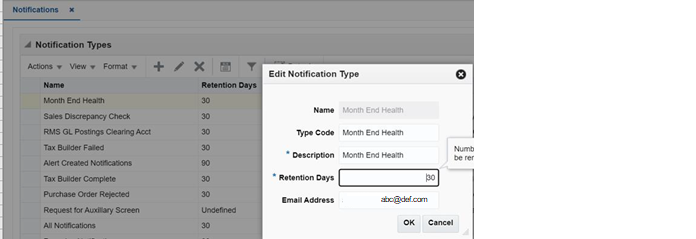
The top table shows the notification types that are configured in the solution, along with the number of days that the notifications will be retained when they occur for a user. Existing notifications can be edited to change the type code and description, along with the retention days. Retention days must be a number greater than zero, or it can be set to -1 to keep the notification indefinitely, unless deleted by a user. However, this is not recommended.
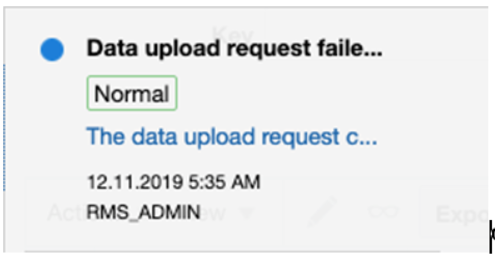
The description is displayed in the notification displayed to the user:
You can also add one or more email addresses to have a message sent when the action occurs to trigger a notification.
Deleting a notification type removes the notification type and all the notification type's associated roles and groups. Any past notifications are also removed from user's queues.
The second table in the screen is used to create groups for the notification type selected in the top table. Click the Create iconic button ( ![]() ) to create a new group. Then, associate roles or another group with the group by selecting the Add Job Role iconic button (
) to create a new group. Then, associate roles or another group with the group by selecting the Add Job Role iconic button ( ![]() ) or the Add Notification Groups iconic button (
) or the Add Notification Groups iconic button ( ![]() ). This will allow the notification to be delivered to all users assigned to the roles configured for the group. If no group is assigned, then the notification is delivered to the user who initiated the action the created the notification.
). This will allow the notification to be delivered to all users assigned to the roles configured for the group. If no group is assigned, then the notification is delivered to the user who initiated the action the created the notification.
|
Note: New notifications can be added in on premise implementation of Merchandising solutions only. Adding new notifications also would require customization if you want the action to be triggered from an action within the application. |
The Alerts framework provides a mechanism to monitor business processes and alert users of any errors, changes, or stalled transactions. These alerts can be routed via email to different users to prompt the user to resolve potential issues. The email alert will include a result ID (wherever applicable), that can be used to download and view data associated with the alert as an aid to taking corrective action.
You need to perform below steps to setup and receive alerts for Critical Business validations.
Open Notification Screen in ORAAC application and setup a contact mailing group for the intended alert notification.
Enable and Schedule Adhoc/Cyclic Jobs through POM to run any specific alert (depending on the business requirement) at a specific time of the day or multiple times a day at specific intervals. The typical usage pattern for these batch jobs is indicated below
USAGE="
USAGE: $script Name <connect string> <entity name>
<connect string> Username/password@db. Use "'$UP'" if using Oracle Wallet.
<Param Ind> (Optional) Indicator to identify the next parameter - Valid values -I or -N
<Param Value> (Optional) Intra Day Run identifier (Valid Values Y or N) or Notification Type"
The relevant batch jobs for the alerts are listed in the table below.
Table 5-1
| SL NO | POM JOB NAME & DESCRIPTION | EXPLANATION | USE CASE |
|---|---|---|---|
|
1 |
BATCH_EMAIL_ALERT_ADHOC_JOB This job sends automatic email alerts for business validations. It can be scheduled to run any specific alert |
Default parameter is #Sys-Opt.dbwallet Users can modify the parameters to run specific alerts by passing the mapped Notification Type. Refer Use case column for examples. |
Case1 - Run All Alerts Parameters - #SysOpt.dbwallet Case2 - Run a particular notification/alert which is not an Intraday alert Parameters - #SysOpt.dbwallet -N <Notification_type_code> |
|
2 |
BATCH_EMAIL_ALERT_CYLCE_JOB This job sends automatic email alerts for business validations. It can be scheduled to run only intraday alerts. |
Default parameter - #Sys-Opt.dbwallet -I Y Users can pass additional parameter to run specific intraday alert by passing the mapped Notification Type -N <notification type code> Note-It will only process Alerts whose alert timeline is set to A in custom_alert_control. Refer V_ALERT_INFO to view details in APEX. User must schedule the time for the cycles they want to run (every 2 hrs., every 1 hr. etc.) in POM application. |
Case 1 - Process only intraday alerts Parameters - #SysOpt.dbwallet -I <Y> Case 2 - Process specific intraday alert Parameters - #SysOpt.dbwallet -I <Y> -N <Notification_type_code> |
|
3 |
BATCH_EMAIL_ALERT _JOB This job sends automatic email alerts for business validations. It will process all alerts that satisfy the alert criteria setup in custom_alert_period table. Refer V_ALERT_INFO view to know the setup in APEX. |
Parameters are fixed and cannot be modified. |
The ORAAC Notification screen or V_ALERT_INFO view in APEX can be used to retrieve the notification type code that can be passed as parameter to the jobs to run a specific alert. Additional alert related schedule setup data can also be viewed using the V_ALERT_INFO view in APEX.
|
Note: One Alert job will run-in background every day, which will scan all the Alerts setup in the system and trigger them based on the preconfigured setup in custom_alert_period table.Month End Checks would run and send Alerts continuously for 5 days before actual Month End, unless all the necessary data discrepancies are resolved. |
Assign the required privilege to Business Users, so that they can access the Download Alert Data screen and download the data linked to an alert wherever applicable. If the user has one or more of the following privileges, the Download Alert Data link under the Application Administration folder in Merchandising will be displayed.
Duty: RMS_ ALERT_DATA_MONTH_END_INQUIRY_DUTY
Privilege: VIEW_MONTH_END_HEALTH_CHECK_ALERT_DATA_PRIV
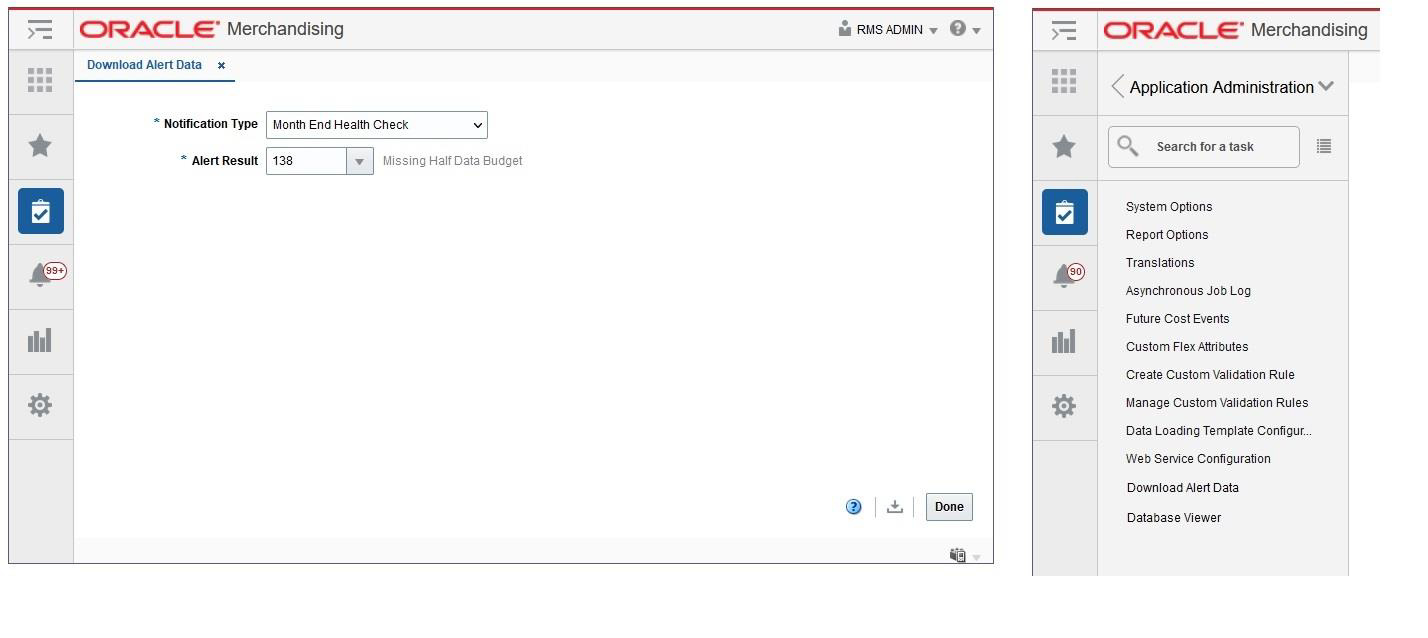
Users with required privileges can access The Download Alert Data screen via the Download Alert Data task under Application Administration task hierarchy as shown below.
The list of Notification types visible to the user on the Download Alert Data screen will depend on the privileges assigned to the user (Refer step 3). Users will be able to download the alert data by keying in the result ID contained in the email alert. The result id would be included in the email for all alerts for which there is linked data
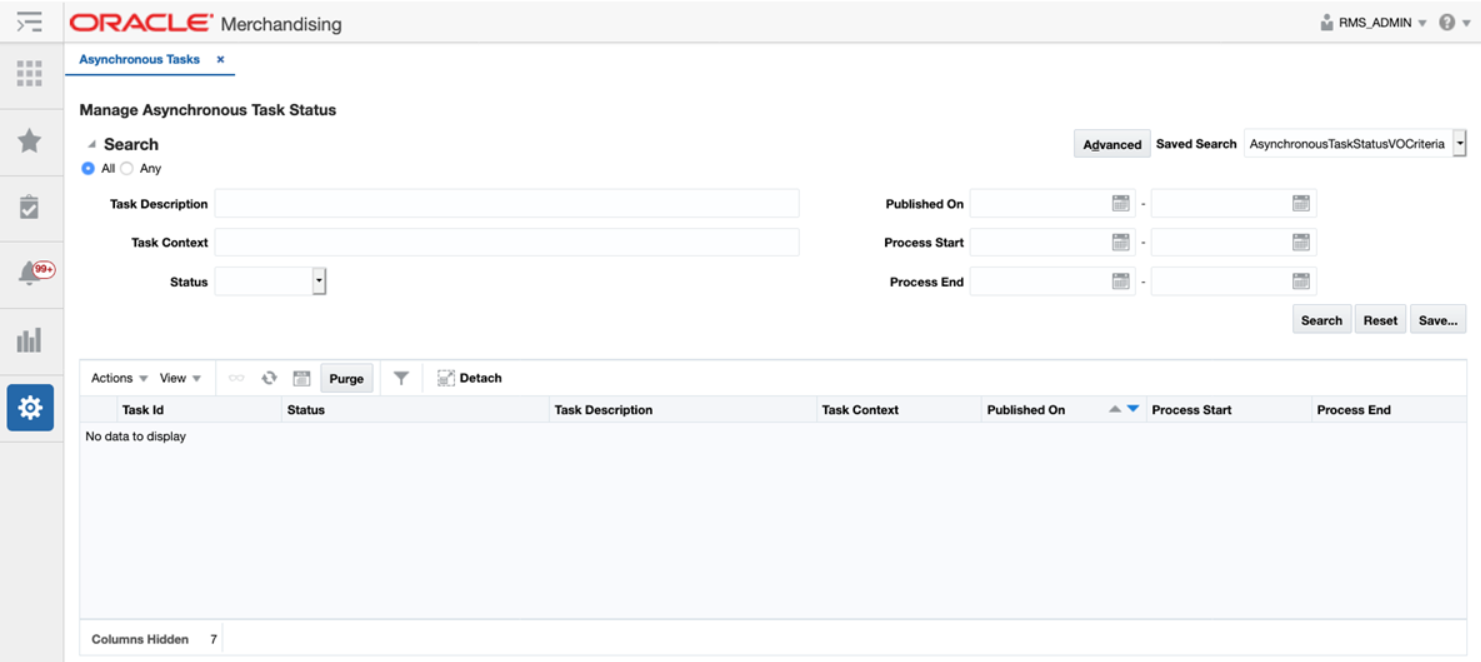
Asynchronous tasks are background processes launched by users of the Merchandising solutions. For example, you may use this to troubleshoot an asynchronous task that you failed to receive a notification for. The information in this screen should be included in any SRs logged in helping resolve asynchronous issues. Note: this is not used for Merchandising or Sales Audit.
Administrators can view the latest status of asynchronous tasks through the Manage Asynchronous Task Status page, which is accessed from the Settings menu by selecting Asynchronous Tasks. To view tasks, enter search criteria and click Search. Click the View option in the Actions menu, or the View iconic button, to view more details on the task. Click the Refresh option in the Actions menu, or the Refresh iconic button, to refresh the data with the latest tasks. You can also purge asynchronous tasks present in the system, if desired. Otherwise, the tasks will be purged as configured in Application Properties.
The Application Properties screen allows administrators to search for and modify configuration properties by deployment. There are There are several functions in the Merchandising cloud services that use these properties:
Enabling Attachments in Merchandising and Invoice Matching
Enabling Drill to Finance functions in Merchandising and Sales Audit
Enabling Slack integration in Merchandising
To enable the attachments feature in Merchandising and Invoice Matching, you will need to do the following:
Select Settings > Application Properties
In the search criteria, enter RMS or ReIM as the Deploy Name, depending on which solution you are configuring, and type Attachments in the Key Name field. Then click Search.
This should return one row, similar to what is shown below.
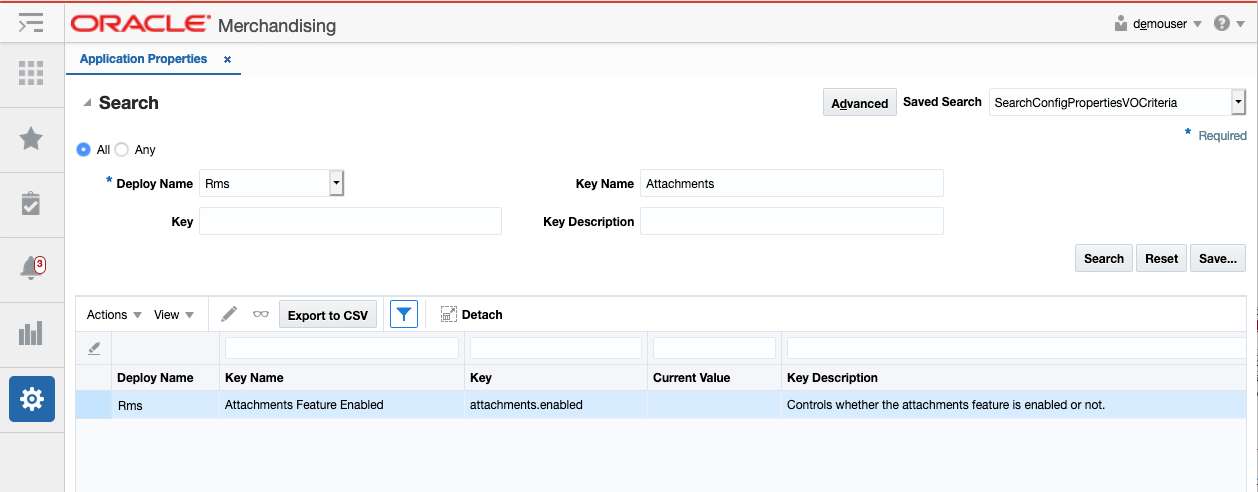
Click on the Edit iconic button or select Edit from the Actions menu. This should display a popup that looks like the below image. To enable attachments, change the Current Value to true.
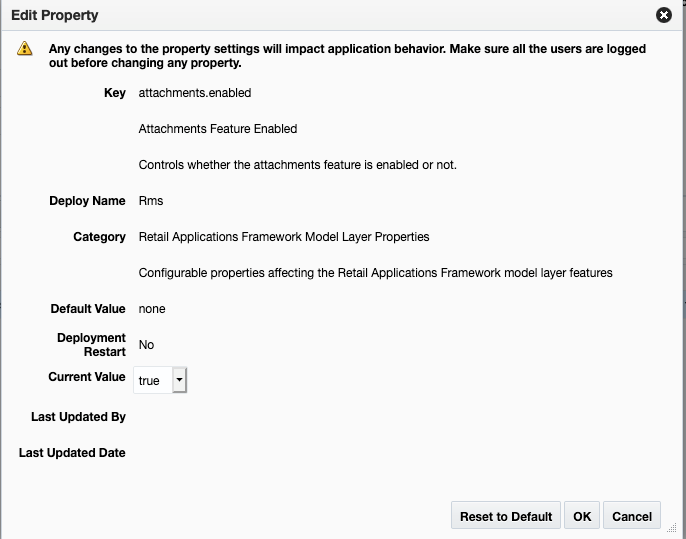
Then click OK to save your changes.
Validate that the Attachments pane is visible in one of the screens that supports this function:
Merchandising: Item, Item Supplier, Item Supplier Sourcing Country, Item Location, Order Header, and Order Details.
Invoice Matching: Document Maintenance
To later disable this feature, follow similar steps, but set the Current Value to false instead.
There are reports and buttons available in the Transaction Data and Fixed Deal Transaction Data screens in Merchandising, as well as in the General Ledger screen in Sales Audit, that allow users to view General Ledger details and also to drill forward into the General Ledger to view the details of how these financial transactions were posted. By default, access to these buttons and reports is disabled in both Merchandising and Sales Audit, since they are only applicable if integrating with PeopleSoft Financials. For more details on these reports and how to access once enabled, see the BI Publisher Reports section of the Merchandising Reports Guide and the Sales Audit Reports Guide. To enable the buttons and reports, log into either Merchandising or Sales Audit and follow these steps:
Select Settings > Application Properties.
In the search criteria, enter RMS (or RESA) as the Deploy Name and type "Drill" in the Key field. Then click Search.
This should return one row, similar to what is shown below.
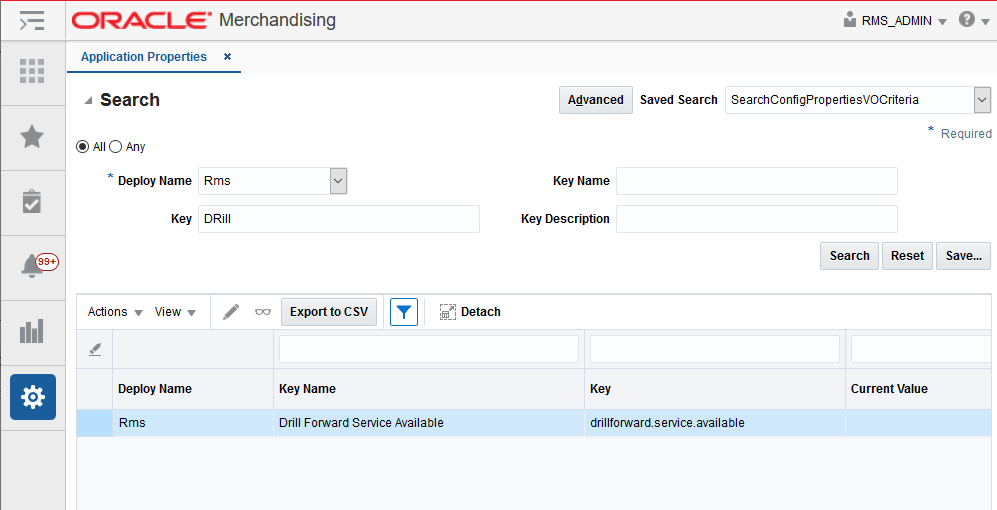
Click on the Edit iconic button or select Edit from the Actions menu and change the Current Value to true.
Then click OK to save your changes.
|
Note: There may be a delay in this taking effect once the change has been made. |
In the Item and Purchase Orders workflows in Merchandising, you can configure on a feature called Conversations, which allows you to integrate the collaboration tool Slack with Merchandising. When this is enabled, it will allow users of these workflows to collaborate while creating or updating items or managing purchase orders. This feature works by creating a channel in Slack when you initiate a conversation for a particular item or PO. In this way, you can reply or monitor the details both through the Merchandising application, as well as in your Slack instance. The instructions for doing this are below.
First, create a Slack App that will be integrated with Merchandising. These are the basic steps for creating an app in Slack calling out the specifics needed to integrate with Merchandising, but please consult the Slack documentation for specifics.
Log into the appropriate Slack Workspace and Select Create New App.
Provide a name for your app - this will be displayed to the user when they authenticate in Merchandising.
You will be brought to the Basic Information page. In the navigation bar, under Features, select the OAuth & Permissions link.
Add a Redirect URL. This should have a format that matches the hostname for your Merchandising environment and ends with oauth/_callback, something like https://xxx-yyy-mfcs-mas.oracleindustry.com/Rms/oauth/_callback.
Scroll down to the Scopes section on the OAuth & Permissions page. Select the Permission Scopes dropdown and select the following scopes then click Save Changes:
chat:write:user
groups:history
groups:read
groups:write
users:read
Install the Slack App in the Workspace by scrolling back to the top of the OAuth & Permissions link and clicking the Install App to Workspace button.
Next, the details of what was configured above will need to be configured in the app server. This needs to be done by the Oracle Cloud Operations team, so will require an SR. In the SR, you will need to include some of the information you set up when you created the app in step 1, including:
Slack Workspace URL
Redirect URL
Client-id and Client-Secrets - these can be found in your new Slack App under the Basic Information link under Settings in the section titled App Credentials. Merchandising will use these to authenticate itself to Slack.
Once that step is complete, you will need to configure the related application parameters, following these steps:
Select Settings > Applications Properties.
In the search criteria, enter RMS as the Deploy Name and type "Conversation" in the Key field. Then click Search.
You should see several items listed in the results table. For each of the Key Names listed below, highlight the appropriate row and click on the Edit iconic button to make the updates noted:
Collaboration Conversations Enabled - set current value to true
Collaboration Conversation Login Scheme - set current value to oauth
Collaboration Conversation Provider - set current value to slack
Slack URL - set current value to https://slack.com.
Slack App Redirect URL - set the current value to that described above in the pre-requisites.
Slack Workspace - set the current value to that described above in the pre-requisites.
These changes will take place immediately after all steps are completed.