2. Maintaining Customer Information Files
In the ‘Customer Maintenance’ screen, you maintain various personal and business details of the customers of your bank.
The CIF details are maintained at the branch level by the sign-on branch. These details can be accessed by all branches and therefore a duplicate customer record for a customer in two different branches need not be maintained.
This chapter includes the following sections:
- Section 2.1, "Customer Maintenance"
- Section 2.2, "Customer Category Maintenance"
- Section 2.3, "Customer Group Maintenance"
- Section 2.4, "Customer Segment Maintenance"
- Section 2.5, "Capturing Customer Prefixes"
- Section 2.5, "Capturing Customer Prefixes"
- Section 2.6, "Storing Authorized Variations of Customer’s Name"
- Section 2.7, "Quick Customer Addition"
- Section 2.8, "Employer Maintenance"
- Section 2.9, "Tax Waiver Maintenance"
- Section 2.10, "Maintaining Risk Category for Customers"
- Section 2.11, "Maintaining Customer Ownership"
- Section 2.12, "Viewing Customer Net Worth Report"
- Section 2.13, "Customer Relationship Maintenance"
- Section 2.14, "Float Days Maintenance"
- Section 2.15, "Account Address Location Maintenance"
- Section 2.16, "KYC Maintenance"
- Section 2.17, "Alphabet Equivalent Maintenance"
- Section 2.18, "Creating a Message Advice Format"
- Section 2.19, "Customer Closure Data from Channels"
- Section 2.20, "Searching for Customers"
2.1 Customer Maintenance
This section contains the following topics:
- Section 2.1.1, "Invoking Customer Maintenance Screen"
- Section 2.1.2, "Personal Tab"
- Section 2.1.3, "Corporate Tab"
- Section 2.1.4, "Additional Tab"
- Section 2.1.5, "Director Tab"
- Section 2.1.6, "Auxiliary Tab"
- Section 2.1.7, "Checklist Tab"
- Section 2.1.8, "MFI Details Tab"
- Section 2.1.9, "Fields Button"
- Section 2.1.10, "Other Basic Customer Information"
- Section 2.1.11, "Cards Button"
- Section 2.1.12, "OFAC Check Button"
- Section 2.1.13, "KYC Details Button"
- Section 2.1.14, "Joint Venture Button"
- Section 2.1.15, "NSF Blacklist Status Button"
- Section 2.1.16, "Documents Button"
- Section 2.1.17, "Banking Channels Button"
- Section 2.1.18, "Account Details Button"
- Section 2.1.19, "MT920 Button"
- Section 2.1.20, "Group Button"
- Section 2.1.21, "Linked Entities Button"
- Section 2.1.22, "Viewing Customer Information"
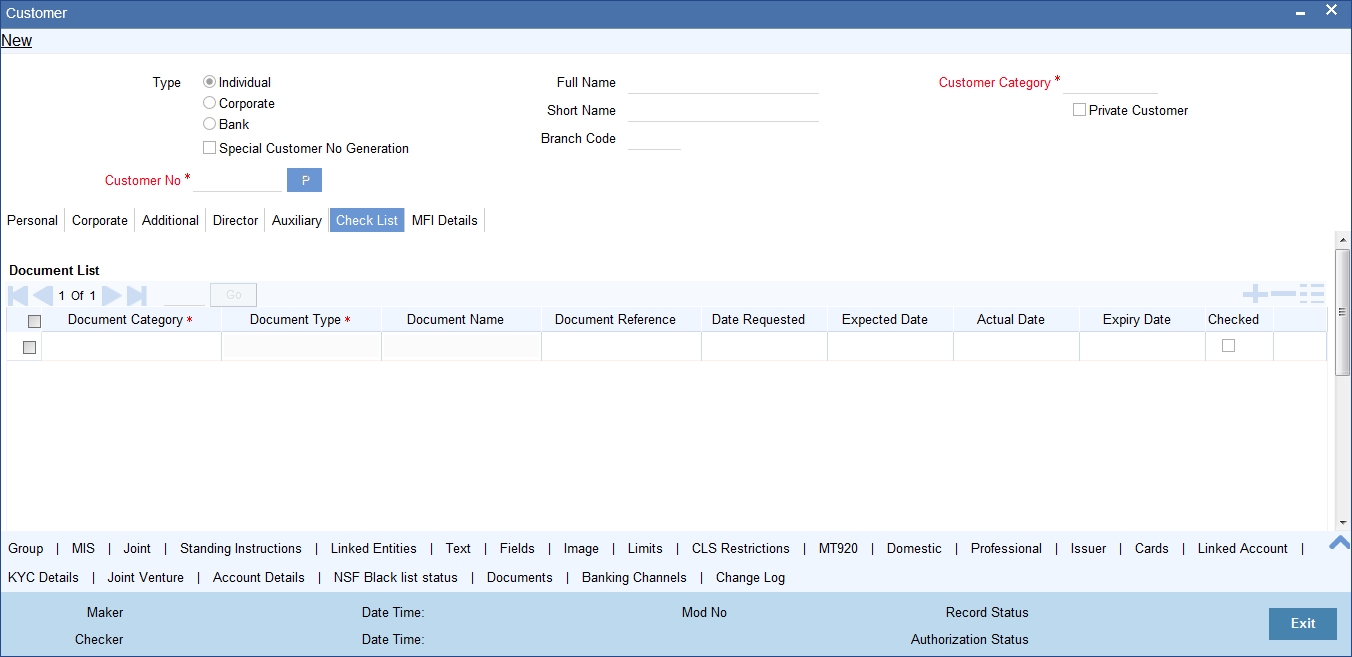
2.1.1 Invoking Customer Maintenance Screen
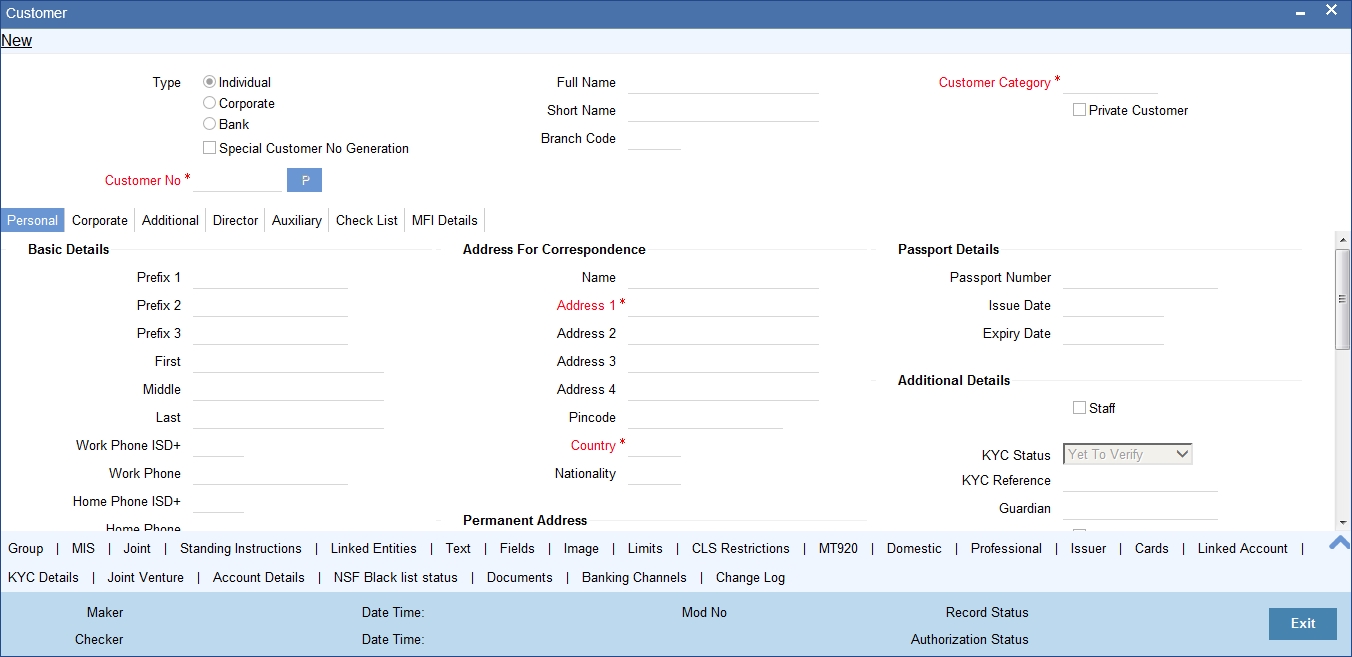
You can invoke the ‘Customer Maintenance’ screen by typing ‘STDCIF’ in the field at the top right corner of the Application tool bar and clicking the adjoining arrow button.
You need to specify the following basic details of the customer:
Type
Indicate the Type of customer that your are maintaining. You can select one of the following options:
- Individual
- Corporate
- Bank
To recall, if a customer record is created from an external Siebel CRM application after a successful upload into Oracle FLEXCUBE, the ‘CRM Customer’ flag gets checked after the upload. You can however, uncheck the same when you unlock such a record and make changes. When you unlock such a record, system throws up an override stating that the customer is a CRM customer and asks whether you want to continue modifying the record. If you confirm the same, Oracle FLEXCUBE allows you to make changes. If you choose to ignore, the original record is saved.
Special Customer No Generation
Check this box to generate a special customer number in the ‘Customer Number’ field.
Note
- If the customer creation is manual, you should enter the desired customer number complying with the mask having the special number in the ‘Customer Number’ field. On click of ‘Populate’ button, the system validates whether the special number entered is an unused and a valid number.
- This field is disabled after generating customer number in the ‘Customer Number’ field.
- For normal customers, if the customer number generation is manual, you cannot use the special numbers maintained for customer number generation. If the customer number generation is automatic, the system skips the special numbers maintained for the branch.
- You cannot generate Special Customer Number from ‘Quick Customer Creation’ screen. A customer created using ‘Quick Customer Creation’ screen is treated as normal customer.
You can maintain branch wise CIF and CASA range for specific customers. A range can also be maintained for special number generation. For more information, refer to the section ‘Special Range/Number Maintenance’ in the chapter 'Customer Accounts' in CASA User Manual.
Customer No
Specify a customer code for the customer. Thee customer code is assigned to identify a customer. It is also referred to as the customer CIF Number. This code should be unique across branches. It can be 9-characters long.
For example, Assign a code using a maximum of 9 characters, alphanumeric. For example, assume your customer is DOW Corporation, US. You can assign him a code, which could either, be a number representing the customer’s serial number or an alphabetic code like DowCorp or an alphanumeric code like Dow1000US or DowUS1000 / 1000DowUS, if he is the 1000th customer to approach your bank.
Full Name
Specify the complete name of the customer in this field.
Short Name
Specify the customer’s unique abbreviated name or a short name. It helps in conducting a quick alpha-search or generating queries regarding the customer. This is an optional field.
While processing a transaction which involves customer identification, this uniquely abbreviated short name of the customer will be available in the option list for selection of the customer.
Branch Code
Specify the code of the corresponding branch.
Customer Category
Select the category under which a particular customer has to be categorized.Each customer that you maintain can be categorized under any one of the categories that you have maintained in the Customer Category Maintenance screen.
Note
You need to capture the basic details for each customer, regardless of the type of customer you are maintaining.
Private Customer
Check this box to indicate that the customer type is private.
The Customer Maintenance screen has the following tabs:
Tab |
Remarks |
Personal |
You maintain the attributes for individual customers |
Corporate |
You maintain the attributes for all corporate customers |
Additional |
Additional tab contains additional information of the individual, corporate and bank customers. |
Director |
Director tab consists of the director’s basic information. |
Auxiliary |
Auxiliary tab contains the information about the auxiliary department. |
Check List |
Check List tab provides the information about documents and its remarks, if any. |
To define the basic details of the customer click on the tab titled ‘Main’. The details that you can specify for a customer depend on the type of customer whose details you are capturing.
If a particular field is disabled, it means that the field is not relevant to the type of customer that you are creating.
Note
The system performs the action level access rights validation only on ‘Save’ operation.
2.1.2 Personal Tab
If your customer, for whom you have defined parameters in the ‘CIF-basic’ screen, is an ‘individual, you also have to maintain the personal details in order to determine the credit line. You can maintain these details in the ‘Personal’ tab of the ‘CIF Maintenance’ screen.
In the ‘Personal’ tab, you can maintain generic personal details of a customer. In addition, you can also maintain the domestic and professional details of the ‘individual’ type customer. You can do this by invoking the relevant screens by clicking on the respective buttons.
The information that you capture in these screens forms more a part of a credit line questionnaire. Whenever you are deciding on a credit limit for an individual customer, you can use these details for verification.
You have to maintain the following parameters for every individual type of customer:
Prefix 1, 2 and 3
Specify the title prefixed to the name of the customer whose code is input against Customer Code in the Main section. The title could be Mr. /Mrs./ Ms./ Dr. /Prof. etc.
The academic titles (like Prof., Dr., etc) of the customer along with the salutations (like Consulate, Senator, Chancellor, etc.). You can either select the prefixes from the option list key-in a prefix of your choice.
First Name
Specify the First name of the customer.
Middle Name
Specify the Middle name of the customer.
Last Name
Specify the Last name of the customer.
Work Phone ISD+
Specify a valid international dialling code for the work telephone number of the customer. The adjoining option list displays all valid ISD codes maintained in the system. Select the appropriate one.
Work Phone
Specify the work telephone number of the customer.
Home Phone ISD+
Specify a valid international dialling code for the home telephone number of the customer. The adjoining option list displays all valid ISD codes maintained in the system. Select the appropriate one.
Home Phone
Specify the home telephone number of the customer.
Mobile ISD Code+
Specify the international dialling code for the mobile number of the customer. The adjoining option list displays valid ISD codes maintained in the system. Select the appropriate one.
Mobile Number
Specify the mobile number of the customer.
Fax ISD Code +
Specify the international dialling code for the fax number of the customer. The adjoining option list displays valid ISD codes maintained in the system. Select the appropriate one.
Fax Number
Specify the Fax number of the customer.
Email Id
Specify the email address of the customer.
Gender
Select the gender of the customer. The following options are available for selection:
- Male
- Female
- Other
- Prefer Not to Disclose
Communication Mode
Indicate the mode of communication to be used to intimate the customer about the beneficiary account credit. You can select one of the following options:
- Mobile
- Email ID
The above field is enabled only for the product that uses the NEFT clearing network, i.e., Network Qualifier of the Clearing network should be NEFT.
National ID
Specify the national identification number or national social security number of the customer.
Birth Place
Specify the birth place of the customer.
Birth Country
Specify the birth country of the customer.
Date of Birth
Specify the date of birth of the customer.
Mother’s maiden name
Specify the maiden name of the customer’s mother.
Language
Specify the language in which your customer wants the statements and advices to be generated while sending periodic updates. Alternatively, you can also choose the language from the adjoining option list. English is defaulted as the language of correspondence; you have the option to change the default. The list displays all the language codes maintained in the SMS module. You can select the appropriate.
Address for Correspondence
‘Address for Correspondence’ contains the physical address of the customer. You need to specify the following address details:
Name
Specify the name of the customer. The customer will be addressed by this name in all correspondences sent from the bank. These characters should conform to SWIFT standards.
Note
The number of characters that you can specify in this field is determined by the preference that you have specified in the Bank Parameters screen. However, in the advices and statements that are sent to the customer only the first 35 characters of the name will be displayed.
Address 1–4
Specify the mailing address of the customer in the four rows that are provided. In each line, you can enter a maximum of 35 alphanumeric characters. All characters should conform to SWIFT standards.
Pincode
Specify pincode of the address specified.
Country
Specify the country as given in the address of correspondence of the customer. Alternatively, you can also choose the country from the adjoining option list. The list displays all the country codes maintained in the Country Codes screen. You can select the appropriate.
Nationality
Specify the nationality of the customer. The list of country codes maintained in the Country Codes Maintenance screen are available in the option-list positioned next to this field. You can select the appropriate.
Permanent Address
‘Permanent Address’ contains the permanent address of the customer. You need to specify the following information:
Same as Correspondence Address
Select the check box if the ‘Address For Correspondence’ is same as “Permanent Address’. If the permanent is same as the address for correspondence, you need not provide the details of the permanent address. If not, you need to specify the permanent address.
Address 1–4
Specify the permanent address of the customer. Four lines have been provided for this purpose. You can capture a maximum of 35 characters, alphanumeric in each line. Only characters specified in SWIFT standards are permissible.
Pincode
Specify pincode of the address specified.
Country
Along with the permanent address, specify the country of permanent residence of the customer.
Resident Status
Choose the resident status of the customer. This indicates whether the customer is a recognized resident of the country in which the particular branch of your bank operates or not. Choose one of the following options:
- Resident
- Non Resident
Permanent US Resident Status
Check this box to indicate that the customer of some other nationality has a Us resident permit.
Visited US in last 3 years?
Check this box to indicate that the customer has visited US in the last three years.
MFI Info
MFI Customer
Check this box to indicate that the user is a Microfinance user. By default, the system leaves this box unchecked to indicate that all users would be normal users. This box should be checked for Individual Customers and not for Corporate Customers or other Banks.
The MFI Details tab is enabled only when this box is checked.
Passport Details
You need to specify the passport details of this customer, which include the passport number, the date on which the passport was issued, and the date on which the passport is due to expire.
Passport Number
Specify the passport number of the customer.
Issue Date
Specify the passport issue date. The following validations are applicable to passport issue date:
- This date should not be later than the passport expiry date
- This should not be the same as the passport issue date
- This should not be the same as the current system date
- This should not be later than the current system date
If any of the above conditions is not met, the system will display a configurable override message. The system will validate the issue date against the system date and passport expiry date when you create or modify a record.
Expiry Date
Specify the passport expiry date. The following validations are applicable to the passport expiry date:
- This date should not be the same as the current system date
- This date should not be later than the current system date
If the above conditions are not met, the system will display a configurable override message. The system will validate the passport expiry date against the system date when you create or modify a record.
Additional Details
Additional Details contains the details to Know Your Customer (KYC). KYC refers to Know Your Customer. KYC details for customers are maintained using KYC Details screen. The system generates a KYC Reference Number during this maintenance. You need to specify the following KYC information:
Staff
Check this box whenever a customer record is created for a staff. By default this box is left unchecked.
KYC Status
Select the KYC status of the customer.
KYC Reference
Specify the KYC Reference Number. The option list displays all valid KYC reference numbers generated. Choose the appropriate one. The system will link the KYC details of the selected reference number to the customer CIF.
Guardian
Specify the customer’s guardian’s name.
Minor
Check this box to indicate that the customer is minor.
Submit Age Proof
Indicate the age proof submission status of the minor to major from the drop-down list. The available options are:
- Not required
- Pending
- Verified
Note
- Any out flow or debit transaction is posted on a particular customer’s account/s and the ‘Submit Age Proof’ chosen is ‘Pending’, then the system displays an error message as “Necessary documents are not submitted for Major.”
- Once the documents are submitted, the user has to manually set ‘Submit Age Proof’ as ‘Verified’.
After the field ‘Submit Age Proof’ is changed to ‘Verified’, then all the accounts created for the customer would be allowed for withdrawals.
Preferred Date of Contact
Specify the preferred date for contacting the customer. You can also select the date from the adjoining calendar icon.
The system does not allow Back dated values.
Preferred Time of Contact
Select the preferred time for contacting the customer on the preferred date of contact, from the adjoining drop-down list. This list displays the following time slots in 24hrs format:
- Any time
- 1 hour combination of timings starting from 12am – 1am to 23pm – 12am.
Power of Attorney
Note
If the FATCA is enabled at the bank and the check box 'Power of Attorney' is checked here, then it is mandatory to specify the Power of Attorney information.
Power of Attorney
Check this box to indicate that the customer account is to be operated by the power of attorney holder.
Holder Name
The person who has been given the power of attorney.
Nationality
Specify the nationality of the power of attorney holder.
Address
Specify the address of the power of attorney holder.
Country
Specify the country of the power of attorney holder.
Telephone ISD Code +
Specify the international dialling code for the telephone number of the power of attorney holder. The adjoining option list displays valid ISD codes maintained in the system. Select the appropriate one.
Telephone Number
Specify the telephone number of the power of attorney holder.
2.1.3 Corporate Tab
Click the ‘Corporate Details’ tab from the ‘Customer Maintenance’ screen to define the details of a Corporate or a Bank type of customer. The tab is enabled only for a corporate or a bank customer. You need to specify the following details:
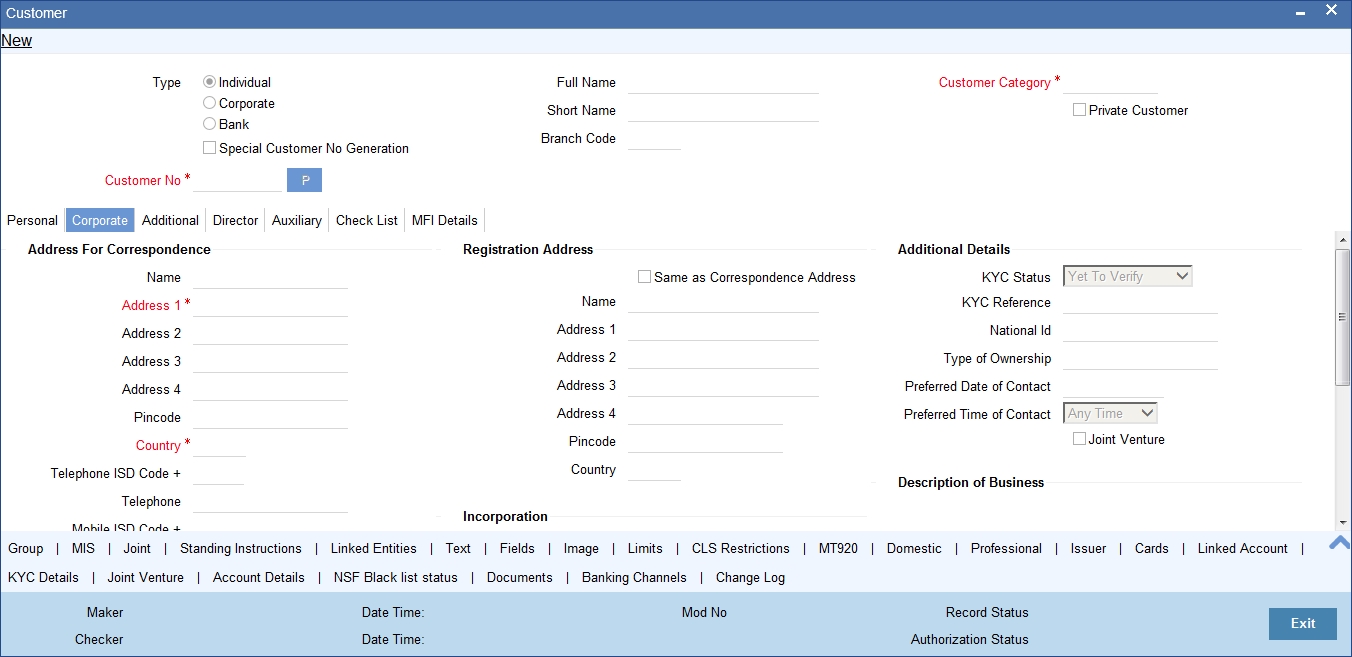
In this screen, you can maintain generic personal details of a corporate or a bank customer. In addition, you can also maintain the corporation and registration details of the ‘Corporate’ or ‘Bank’ type customers. You can do this by invoking the relevant screens by clicking on the respective buttons.
The information that you capture in these screens forms more a part of a credit line questionnaire. Whenever you are deciding on a credit limit for an individual customer, you can use these details for verification.
You have to maintain the following parameters for every individual type of customer:
Address for Correspondence
In this section, you can maintain the address for correspondence.
Name
In the lines that are provided you can enter the name of the customer. The customer will be addressed by this name in all correspondence sent from the bank. These characters should conform to SWIFT standards.
Note
The number of characters that you can enter in this field is determined by the preference that you specified in the Bank Parameters screen. However, in the advices and statements that are sent to the customer only the first 35 characters of the name will be displayed.
Address 1–4
You can specify the mailing address of the customer in the four rows that are provided. In each line, you can enter a maximum of 35 alphanumeric characters. All characters should conform to SWIFT standards.
Pincode
Specify pincode of the address specified.
Country
This is the country as given in the address of correspondence of this customer. Click on the option list positioned next to this field, a list of countries maintained in the Country Codes screen is displayed. You can select the appropriate.
Nationality
Specify the nationality of the customer. The list of country codes maintained in the Country Codes Maintenance screen are available in the option-list positioned next to this field. You can select the appropriate.
Telephone ISD Code
Specify a valid international dialling code for the telephone number of the customer. The adjoining option list displays valid ISD codes maintained in the system. Select the appropriate one.
Telephone
Specify the telephone number of the customer.
Mobile ISD Code +
Specify the international dialling code for the mobile number of the customer. The adjoining option list displays valid ISD codes maintained in the system. Select the appropriate one.
Mobile Number
Specify the mobile number of the customer.
Fax ISD Code +
Specify the international dialling code for the fax number of the customer. The adjoining option list displays valid ISD codes maintained in the system. Select the appropriate one.
Fax
Specify the fax number of the customer.
Email Id
Specify the email address of the customer.
Language
As part of maintaining customer accounts and transacting on behalf of your customer, you will need to send periodic updates to your customers in the form of advices, statement of accounts and so on.
You have to indicate the language in which your customer wants the statements and advices to be generated. English is defaulted as the language of correspondence; you have the option to change the default. The list positioned next to the language field contains all the language codes maintained in the SMS module. You can select the appropriate.
Communication Mode
Indicate the mode of the communication to the customer to intimate about the beneficiary account credit. You can select one of the following options:
- Mobile
- Email ID
The above field is enabled only for the product that uses the NEFT clearing network, i.e., Network Qualifier of the Clearing network should be NEFT.
Registration Address
‘Registration Address’ contains the registration address of the customer. You need to specify the following information:
Same as Correspondence Address
Select the check box if the ‘Address For Correspondence’ is same as “Permanent Address’. If the permanent is same as the address for correspondence, you need not provide the details of the permanent address. If not, you need to specify the permanent address.
Address 1–4
Specify the registration address of the customer. Four lines have been provided for this purpose. You can capture a maximum of 35 characters, alphanumeric in each line. Only characters specified in SWIFT standards are permissible.
Pincode
Specify pincode of the address specified.
Country
Along with the permanent address, specify the country of permanent residence of the customer.
Incorporation
‘Incorporation’ consists of the corporate details of the corresponding organization. You need to specify the following details:
Date
Specify the date on which the customer’s company was registered as an organization.
Capital
Specify the initial investment in the company.
Net Worth
Specify the net worth of the company.
Country
Specify the Country of registration of the office of the corporate.
Currency of Amounts
Specify the Currency in which you specify the particular customer’s various financial details like the Net worth of the customer organization, the total Paid Up capital etc.
Additional Details
Additional Details contains the details to Know Your Customer (KYC). KYC refers to Know Your Customer. KYC details for customers are maintained using KYC Details screen. The system generates a KYC Reference Number during this maintenance. You need to specify the following KYC information:
KYC Status
Select the KYC status of the customer.
KYC Reference
Specify the KYC Reference Number. The option list displays all valid KYC reference numbers generated. Choose the appropriate one. The system will link the KYC details of the selected reference number to the customer CIF.
National ID
Specify the corporate National Identification Number of this customer., in other words the registration number of your customer organization.
Type of Ownership
Specify the ownership type of the customer business. The adjoining option list displays a list of ownership types maintained in the system. Select the appropriate one.
Preferred Date of Contact
Specify the preferred date for contacting the customer. You can also select the date from the adjoining calendar icon.
Preferred Time of Contact
Select the preferred time for contacting the customer on the preferred date of contact, from the adjoining drop-down list. This list displays the following time slots in 24hrs format:
- Any time
- 1 hour combination of timings starting from 12am – 1am to 23pm – 12am
Joint Venture
Select the check box if you have a joint venture.
Description of Business
Specify the additional details of the business, if any.
2.1.4 Additional Tab
‘Additional tab contains additional information of the individual, corporate and bank customers.

You need to specify the following details:
Domicile Address
Domicile Address contains the address of domicile of the customer. You need to specify the following details:
Address 1–4
Specify the address of domicile of the customer. Four lines have been provided for this. Each line can have a maximum of 35 characters, alphanumeric. Only characters specified as per SWIFT standards are permissible.
Pincode
Specify pincode of the address specified.
Country
Specify the country of domicile of the customer. A list of all country codes maintained in the ‘Country Codes Maintenance’ screen is available in the option list. You can select the appropriate code.
Misc Details
‘Misc Details’ contains the miscellaneous details of the customer. In this tab, you need to specify the following information:
Swift Code
You can choose to associate a SWIFT Code with the customer whose CIF details you are maintaining. This code will be used to send all SWIFT related messages to the customer. This is pertinent while creating CIF record for banks as customers.
Credit Rating
Specify valid credit rating for a Customer number from the option list. You can modify the credit rating of a customer.
Credit rating basically indicates the credit worthiness of the customers linked to a particular credit line. It is used primarily for information only. The Limits Services Module also uses it in generation of reports.
Charge Group
Specify the charge group of the customer from the option list provided. Only the Group codes maintained with type Charge will appear for selection.
Clearing Group
Categorize the customer for levying charges at a customer group level.
Tax Group
You need to specify the tax group of the customer from the option list provided. Only the Group Codes maintained with type Tax will appear for selection.
Exposure
Select the country of exposure of the customer from the adjoining option list. It is maintained for Central Liability tracking. For instance, for Toyota in the USA, the country of exposure is Japan.
Exposure Category
Specify the exposure category under which exposure due to loans issued to the CIF and the accounts of the CIF will be tracked.
Note
The exposure category is derived by the End of Day batch program and displayed, if the applicable logic has been maintained for the specified customer-provisioning group, in the Exposure Type Category Linkage maintenance. If no logic has been maintained for the group, you can specify the applicable exposure category
Customer classification
Specify the customer classification.
External Ref No
To recall, if a customer record is created from an external Siebel CRM application after a successful upload into Oracle FLEXCUBE, the external reference number is defaulted in the ‘External Ref No’ field. You can amend the same when you unlock a record and make changes.
Location
Specify the relevant location code. This pertains to a particular area in a country. It cannot be more than 15 characters.
Status
Status contains the customer’s account information.
Note
When the customer status is modified to "Frozen", "Deceased" or "Whereabouts Unknown" from the customer screen (STDCIF), the system will check if there is an active amount block on any of the customer accounts. If there is an amount block system will display a configurable override message: "There are some active amount block on the customer accounts”.
You need to specify the following information:
Frozen
Check this box if the account needs to be frozen. A customer’s account is frozen when an order is passed by law, the customer has deceased, or the customer’s whereabouts are unknown.
Deceased
Check this box if the customer has deceased.
Whereabouts Unknown
Check this box if the whereabouts of the customer are unknown.
Eligible for AR-AP Tracking
Check this box if the Customer is eligible for AR-AP Tracking.
CRM Customer
Check this box if the customer is a CRM customer.
Mailers Required
Check this box if you require mailers for the customer.
CLS Participant
Customers of your bank can settle their FX deals via the CLS (Continuous Linked Settlements) Bank to reduce the risks associated with such transactions. To allow the customers to do CLS trades, you have to mark the customer as a ‘CLS Participant’. However, you have to ensure that the branch at which the customer operates is also qualified to process CLS deals i.e. the branch should also be marked as a CLS Participant before allowing the same for the customer.
Further, you can also capture currency restrictions for your customers by maintaining a list of allowed or disallowed currencies for CLS trading. Click the ‘CLS Restrictions’ button to maintain this list. Note that currency restrictions will be allowed only for customers who are CLS participants.
Refer the ‘Continuous Linked Settlements’ chapter of the Foreign Exchange User Manual for details on maintaining currency restrictions and other maintenances required for processing CLS deals in Oracle FLEXCUBE.
Issuer Customer
If the customer, for whom you are maintaining the CIF, is an issuer of securities, then check this box.
Treasury Customer
Check this box if the customer is a Treasury Customer.
Investment Customer
Check this box if you wish to classify the customer as an investment customer. This selection indicates that the customer can have unit holder relationship with the FCIS system. When a CIF ID is created or modified in the system, then a notification is sent to the external channel with the CIF details.
Joint Customer
Check this box if the customer is a Joint Customer.
MT920
Check this option to indicate that the customer is eligible to request for MT920 messages.
MT920 - Account Update Request - A request for an up-to-date statement from the bank where the referenced Account is held. The request may be for an Intra Day Update (MT942) or an End of Day Update (MT940) and is subject to the service agreed with that bank.
Relationship Pricing
Select this checkbox to indicate that the customer is eligible for relationship pricing. This checkbox will be unselected by default.
For more details on relationship pricing, refer Relationship Pricing user manual.
Withholding Tax Applicable
Check this box to apply withholding tax for the customer during the payment and rollover operations of a loan.
ELCM Customer
Check this box to replicate the customer details to ELCM system. By default, system checks this box whenever the new customer is created. You can uncheck this box if required so that customer data will not get replicated to ELCM system.
Note
Once you select the option ‘ELCM customer’, system will not allow you to unselect it.
ELCM Customer Number
You need to specify the ELCM customer number if the option ‘Generate Customer Number’ is not selected in ‘ELCM Parameter Maintenance’ screen. If the option ‘Generate Customer Number’ is selected in ‘ELCM Parameter Maintenance’ screen, then the system will replicate the customer number from ELCM system.
For each customer you will be allowed to mark one or more statuses. For example, if the customer has deceased then the customer account will be declared frozen. Therefore, for the particular customer both the statuses ‘Deceased’ and ‘Frozen’ will be applicable.
If none of the statuses is marked, it suggests that this customer’s status is normal.
CIF Status
If status processing for your branch is being done at Group/CIF level (as specified in the Branch Parameters), the current status assigned to all loans issued to the CIF as well as all overdraft accounts belonging to the CIF, is displayed in the CIF Status field in the Customer Maintenance screen. This status is the worst status of all loans contracts and overdraft accounts for a Group/CIF and is displayed both at the account as well as the loan level for all the accounts and loans a customer has in the current branch. The update applies only to the accounts and loans in the current branch not across branches.
Segment Details
Identifier
Each customer is required to provide certain identification details to your bank for establishing the customer’s identity. For instance, the passport number or ration card of the customer may serve as the criteria to establish the customer’s identity. In Oracle FLEXCUBE, this is known as Unique Identifier Name.
Name
Enter the identifier name in not more than 20 characters.
Value
You have to capture the serial number or any number of significance that is to be associated with the document, which can help in identifying the document. You can use a maximum of 30 alphanumeric characters, to capture the identifier value.
Relationship Manager
Every customer in Oracle FLEXCUBE can be designated to a relationship manager. You need to specify the following details of the relationship manager:
RM Id
Specify the user ID of the relationship manager of this customer. The option list displays all valid user IDs with their roles defined as relationship manager. Choose the appropriate one.
Relationship managers are responsible for helping the customers designated to them in need.
RM Name
Based on the RM ID, the system displays the name of the relationship manager.
Combined Statement Plan
Auto Generated Statement Plan
Check this box to automatically generate the combined statement plan.
Frequency
Select the frequency at which the combined statement should be generated from the adjoining drop-down list. The options available are:
- Annual
- Semi Annual
- Quarterly
- Monthly
- Fortnightly
- Weekly
- Daily
Statement Day
Select the day on which combined statement should be generated from the adjoining drop-down list. If value for Statement Day is not selected, then the system defaults the values based on the frequency cycle selected. The statement gets generated on the month end of the defaulted values.
The maker and checker ID of the combined statement plan generated from the customer account screen should be ‘System’.
Modifications done on the frequency cycle and statement day in the combined statement screen will not be reflected in the combined statement plan of the customer maintenance screen.
Virtual Account
Allow Virtual Account
Check this box to indicate whether the virtual account facility needs to be provided to the customer. If this box is not checked, then it will not be possible to open a virtual account for that particular customer.
Virtual Customer ID
Specify the unique Virtual Customer ID for the customer. This field is enabled if ‘Allow Virtual Account’ is checked. The customer number across branches and the Virtual Customer ID cannot be the same.
2.1.5 Director Tab
Director tab consists of the director’s basic information.
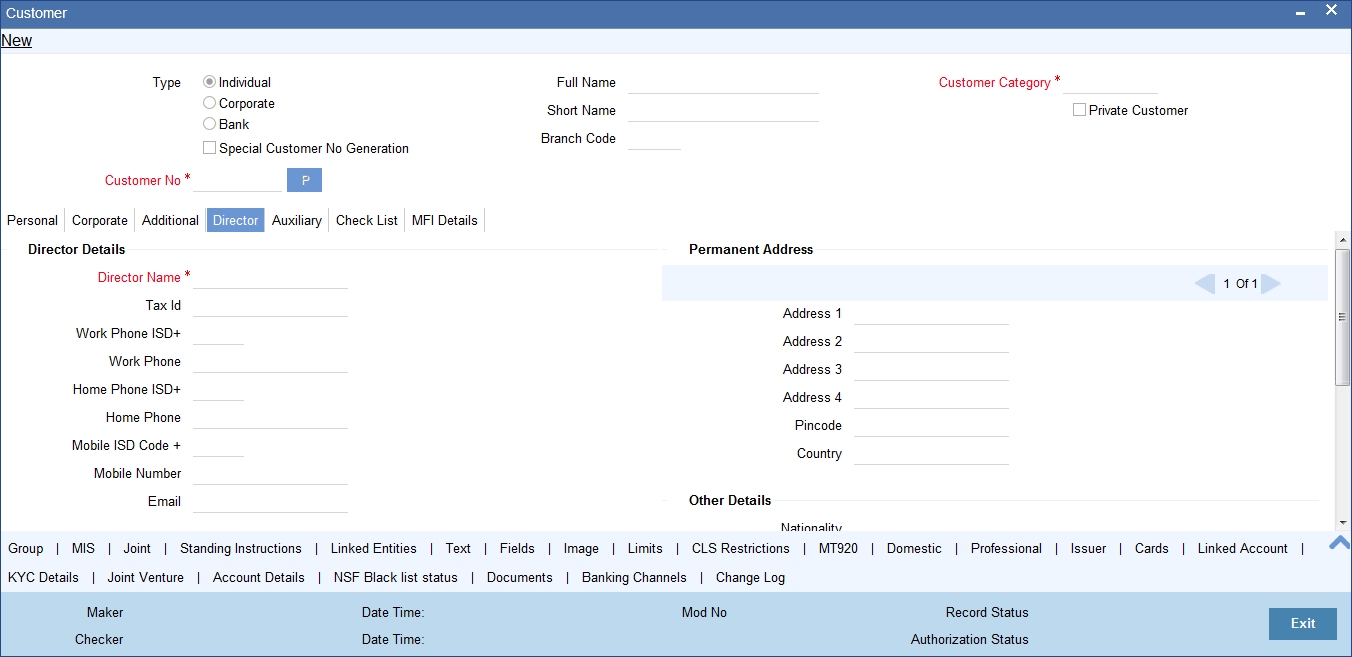
You need to specify the following information:
Director Details
Director Details consists of the details of the corresponding branch’s director. You need to specify the following information:
Director Name
Specify the corresponding director’s name.
Tax Id
Specify the Tax Id of the corresponding director.
Work Phone ISD+
Specify a valid international dialling code for the work telephone number of the director. The adjoining option list displays valid ISD codes maintained in the system. Select the appropriate one.
Work Phone
Specify the work telephone number of the director.
Home Phone ISD+
Specify a valid international dialling code for the home telephone number of the director. The adjoining option list displays valid ISD codes maintained in the system. Select the appropriate one.
Home Phone
Specify the home telephone number of the director.
Mobile ISD Code+
Specify the international dialling code for the mobile number of the director. The adjoining option list displays valid ISD codes maintained in the system. Select the appropriate one.
Mobile Number
Specify the mobile number of the corresponding director.
Email id
Specify a valid email address of the corresponding director.
Mailing Address
‘Mailing Address’ contains the mailing address of the corresponding director. You need to specify the following information:
Address 1–4
Specify the mailing address of the director. Four lines have been provided for this purpose. You can capture a maximum of 35 characters, alphanumeric in each line.
Pincode
Specify pincode of the mailing address specified.
Country
Specify the country of the Mailing Address of the corresponding director.
Permanent Address
‘Permanent Address’ contains the permanent address of the corresponding director. You need to specify the following information:
Address 1–3
Specify the permanent address of the director. Three lines have been provided for this purpose. You can capture a maximum of 35 characters, alphanumeric in each line. Only characters specified in SWIFT standards are permissible.
Pincode
Specify pincode of the permanent address specified.
Country
Specify the country of the permanent Address of the corresponding director.
Other Details
Nationality
Specify the nationality of the corresponding director.
Permanent US Resident Status
Check this box to indicate that the corresponding director is a permanent US resident.
Shareholding %
Specify the shareholding percentage of the director in the company.
2.1.6 Auxiliary Tab
Click the Auxiliary tab to provide the auxiliary details pertaining to the customer.
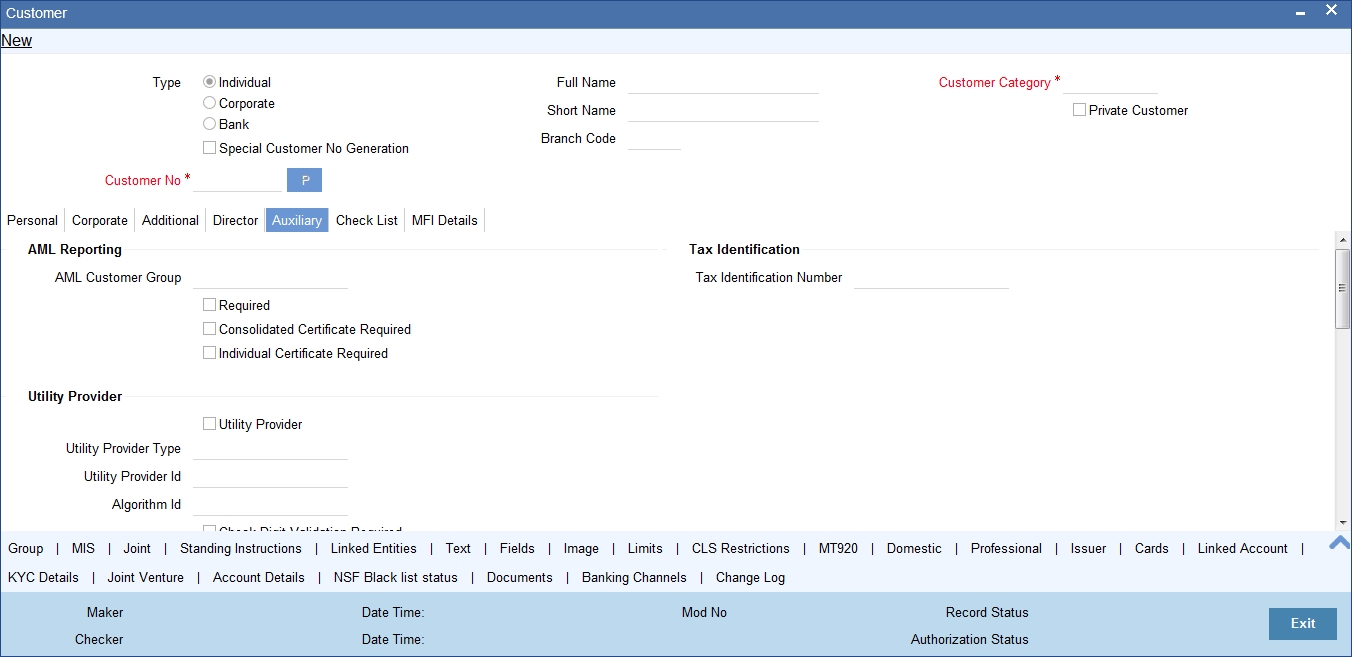
You need to specify the following details:
AML Reporting
As a CIF level parameter, you can specify whether AML Reporting is required for the customer. You can check the box positioned next to this field to indicate that AML reporting should be done for the customer whose details you are maintaining.
AML Customer Group
Specify the AML customer group. Click on the option list positioned next to this field, a list of AML customer group screen is displayed. You can select the appropriate.
Required
Check this box to indicate that AML Reporting is required. Acode assigned to the customer whose details you are maintaining is defaulted to the Customer Group field since the system recognizes each customer code as a customer group. You can choose to either categorize the customer under the same group or choose another customer group.
Note
If you leave the box unchecked, the system will suppress the generation of AML reports for the customer.
Consolidated Certificate Required
Check this box to indicate whether a consolidated tax certificate is required for all transactions done for a given tax cycle. This option would work in conjunction with a similar option in the Tax Category screen and the Tax Details screen accessed from the Branch Parameters Detail screen.
Generating Consolidated Tax Certificate
Depending on the frequency maintained at the branch level, the system will generate the Consolidated Tax Certificate for a customer, provided the consolidated tax certificate generation is required at the customer level and the option is maintained at the Tax Category level. The Tax Certificate will be in a pre-shipped advice format and printed on a Year to Date basis
Maintaining Elements for Advice Generation
The following elements will be available for advice generation for consolidated tax certificates.
Element Name |
Description |
Data Type |
CUSTOMERNO |
The customer number for which the tax summary certificate is printed |
Alphanumeric |
CUSTOMERNAME |
The customer name |
Alphanumeric |
FROMDATE |
The from date for which the certificate is generated |
Date |
TODATE |
The to date for which the certificate is generated |
Date |
TXNNUMBER |
The contract reference number |
Alphanumeric 16 characters |
CALCDATE |
The tax calculation date |
Date |
TAXCCY |
The tax currency |
Alphanumeric 3 characters |
TAXAMTINTAXCCY |
The tax amount in tax currency |
Number |
INTERESTAMT |
The interest amount (basis amount on which the tax has been calculated |
Number |
Individual Certificate Required
Check this box to indicate whether an individual tax certificate is required for each transaction. An individual tax certificate is a certificate (advice) which is generated for each individual event (in a transaction) resulting in computation/deduction of tax from the customer’s account. The advice is linked to the product and is generated at the time of authorization of the contract/event.
Generating Individual Tax Certificate
For contracts that have tax defined on interest liquidation, an individual tax certificate will be generated by the system, provided the tax certificate is linked as an advice for the event and the individual transaction tax certificate is required to be generated for the customer.
For income other than through interest on customer accounts, the advice format for the tax certificate can be maintained depending on the requirement. This advice format can be linked to the products.
For income through interest on customer accounts, the advice format for the tax certificate is pre-shipped. The format of the advice can be modified except for the name of the advice format which is pre-shipped.
Maintaining Tags for Advice Generation
The following tags will be available for advice generation for individual transaction.
Tag Name |
Description |
Data Type |
TXNNUMBER |
The contract reference number |
Alphanumeric 16 characters |
CALCDATE |
The tax calculation date |
Date |
COMPCCY |
The interest component currency |
Alphanumeric 3 characters |
TAXCCY |
The tax currency |
Alphanumeric 3 characters |
TAXAMTINTAXCCY |
The tax amount in tax currency |
Number |
INTERESTAMT |
The interest amount (basis amount on which the tax has been calculated) |
Number |
Utility Provider
Utility Providers are the recipients of the bill payment. Typical entities involved in a bill payment transaction are the consumer, your bank and the institutions (utility providers).
Utility Provider
Check this box if the customer whose details you are maintaining happens to be a Utility Provider
Utility Provider Id
Assign a unique ID to identify the utility provider.
Check Digit Validation Required
Check this box to indicate whether the check digit validation should be performed for the consumer number that is captured while making bill payment for the utility provider.
Algorithm ID
If the check digit validation should be performed you must also identify the Algorithm ID, which is used to perform the check digit validation on the consumer number.
Utility Provider Type
Indicate the type of utility provider. The option list adjoining ‘Utility Provider Type’ displays all valid utility provider types maintained in the system. You can select the appropriate one.
Head Office
Account Number
The Head Office Account Number is the customer’s account number with the Head Office of your bank. You need to capture this value only if the Customer Type is a ‘Bank’. It is used only for reference purposes.
Debtor Category
Specify the category of the Debtor from the adjoining option list.
Risk Profile
Specify the risk profile from the adjoining option list.
FT Accounting As of
For funds transfer contracts involving certain customers, you may need to generate messages on the booking date of the contract, while the actual accounting may be deferred to the debit value date.
This facility could be required in respect of future dated funds transfers involving specific customers for which the requisite messages need to be sent on booking the contract itself, whereas posting of accounting entries must be deferred to the debit value date.
You can indicate whether such a facility of allowing message generation before accounting is available for the customer, in the FT Accounting As Of field. You have the following options for accounting for FT contracts:
- Accounting as of message date (accounting entries will be posted on the date of message generation)
- Debit Value Date (accounting entries will be posted on the debit value date)
Additional Fields Labels
You can specify the additional details, if any.
Tax Identification
Tax Identification Number
Specify the tax identification number.
2.1.7 Checklist Tab
Click the ‘Checklist’ tab from the ‘Customer Maintenance’ screen to capture the details of document types that are to be maintained. Checklist is an optional tab based on the workflow of the bank. In this tab, you need to provide the following information:
Specify the following details:
Document List
Document Category
Specify the category of the document.
Document Type
Specify the document type. The adjoining option list displays all the document types that are maintained in the system. You can select the appropriate one.
Document Name
Specify the name of the document. For example, Address Proof, Identity Proof etc. This is an optional field.
Document Reference
Specify the reference number for the document. For example, if the document submitted is a passport, then you can maintain the passport number here. This is an optional field.
Date Requested
Specify the date on which the document was requested.
Expected Date
Specify the date by which the document has to be submitted.
Note
If you do not specify the expected submission date, then on save, the system calculates and defaults the expected date in this field. The system calculates this date based on the requested date + the verification time limit (in days) maintained in 'Customer Type-Wise FATCA Parameters' screen.
Actual Date
Specify the date on which the document was actually submitted.
Expiry Date
Specify the date till which the document is valid.
Note
If you do not specify the expiry date, then it will be considered to be valid till perpetuity.
Remarks
Specify the additional information, if required.
Checked
Check this box to indicate that the received documents are acknowledged.
Remarks
Specify the additional information, if required.
Note
For an investment customer, at least one record needs to be mandatorily maintained.
Oracle FLEXCUBE facilitates linkage of required documents automatically during due diligence. When a customer is classified for ‘PENDING CLASSIFICATION’ in the Maintaining Customer Type-wise FATCA Parameters (STDFATCA) screen, the system automatically populates the check list for FATCA due diligence.
For more information on automatic population of check list for due diligence, refer to the section ‘Automatic Population of Check List for Due Diligence’ in this User Manual.
2.1.8 MFI Details Tab
As part of maintaining financial details of customers, you can maintain micro-finance details of individual customers like the customer’s insurance number, poverty status, education level, whether blacklisted or not. This tab is enabled only if MFI Customer field is checked in the Personal tab.
Click the ‘MFI Details’ tab from the CIF Maintenance screen to maintain these details.

In this screen, you can capture the following details for each individual type of customer:
MFI Info
Insurance Number
Specify the insurance number of the individual customer.
Customer Type
Indicate the type of customer that you are maintaining. You can select one of the following options:
- Group
- Center
- Individual
Group Code
The system displays the group code assigned to the customer.
Meeting Code
The system displays the meeting code maintained for the corresponding Group Code.
Account Officer
Specify a valid account officer assigned to the customer. The adjoining option list displays all valid account officers maintained in the system. You can select the appropriate one.
Note that this is an optional field. If no Account Officer is specified, the system picks up the same from the next microfinance level (Group or Center).
Blacklisted
Check this box to indicate that the customer is blacklisted. By default the system leaves it unchecked to indicate that the customer is not blacklisted.
Number of Times Blacklisted
The system displays how many times the customer has been blacklisted, if any.
Customer Info
Physically Challenged
Check this box to indicate that the customer has some physical limitations.
Poverty Status
Specify a valid financial status of the customer. The adjoining option list displays all valid poverty statuses maintained in the system. You can select the appropriate one.
Literacy of Client
Specify a valid literacy level of the client. The adjoining option list displays all valid literacy levels maintained in the system. You can select the appropriate one.
Business Activity
Specify a valid nature of work that the customer does for a living. The adjoining option list displays all valid business activities maintained in the system. You can select the appropriate one.
Business Description
The system displays a relevant description of the business corresponding to the selected Business Activity.
Training Code
The system displays the assigned training code of the customer.
Trained On
The system displays the date on which the customer is trained.
2.1.8.1 Identification Details Button
You can maintain what documents are received from the customer as part of collecting identification details using the ‘Identification Details’ screen. Click on ‘Identification Details’ button. The ‘Identification Details’ screen will be displayed.

You can capture the following details here:
- Sl No: The system displays the serial number.
- Document Type: The type of document made available by the customer for identification.
- Details
Click on ‘Details’ button. The ‘Document Type Details’ screen will be displayed.

You can specify the following details here:
Document Type
The system displays the document type based on the information you specified in ‘Customer Identification Details’ screen.
Name As Per Document
Specify the name of the customer as mentioned on the document.
Series
Specify the series of the document.
Doc Id
Specify the document ID number.
Date of Issue
Specify the date on which the document was issued to the customer.
Date of Expiry
Specify the date on which the validity of the document expires.
Issuing Authority
Specify the name of the person or agency that issued the document.
Place of Issue
Specify the place in which the document was issued.
2.1.8.2 Checklist Button
You can maintain a list of what documents have been checked using the ‘Checklist Details’ screen. Click on ‘Checklist’ button. The ‘Checklist Details’ screen will be displayed.

This screen contains a list of documents maintained using the ‘MFI Action Checklist Maintenance’ screen. If you have checked a particular document appearing under ‘Description’, check the corresponding box under ‘Checked’ to indicate that the document has been checked.
2.1.8.3 Domestic Button
As part of maintaining personal details of the customer, you can capture Domestic details about the customer like the customer’s educational status, marital status, number of dependants, etc. Click on ‘Domestic’ button. The Customer - Domestic Details screen will be displayed.

In this screen, you can capture the following details for each individual type of customer:
- The Marital status of the customer: A customer could be married, single, re-married, divorced, separated, widowed etc. You have to indicate the appropriate
- The name and employment status of the customer’s spouse
- The educational status of a customer (Under Graduate, Graduate, Post Graduate and Non-student). If the customer has received no formal education, select Non-student
- The family members (children and others) who are dependent on the customer financially. You can indicate any number between 0 and 99
- The type of accommodation this customer is availing of. The types could be classified into - own accommodation, company provided and others. Others include all types other than self-owned and company provided. You can select the appropriate option.
2.1.8.4 Professional Button
After having captured the Domestic details of the individual customer you can capture the professional details about the customer.
These details include the customer’s employment status, employer details or the annual expenses that the customer incurs and so on. Click on ‘Professional’ button. The Customer – Professional Details screen will be displayed.

You can capture the following professional details of the individual type of customer through this screen:
Employment Details
- The employment status of the customer (full time permanent, full time temporary, part-time, self-employed, retired pensioned, retired non-pensioned, unemployed.)
- The number of years the customer has been in his/her current job
- The age at which the customer is due to retire from his/her current job or business
- The designation this customer held in his/her previous job or employment
- The name of the previous employer of this customer
- The designation held by this customer in his present job
- The name, address, country, telephone, telex, fax and E-mail address of the customer’s current employer. The name, address and country of the employer should conform to SWIFT standards
Note
The ‘Current Employer’ field is used by the system to map the user to his current employer. Click the adjoining option list to display all the authorised and open employer codes maintained in the system.
Income Details
- The annual returns that your customer earns through salary and other sources of employment if any. If your customer earns revenue through other source apart from a monthly, salary you have to capture the customer’s combined income from all other sources.
- The annual expenses that your customer incurs from sources other than the annual salary
- The currency in which the customer’s financial details like, annual salary, annual rent expenses, annual loan repayment, etc is expressed
Expenditure Pattern
- The customer’s annual expenditure on rent, premium on insurance
- The customer’s current annual expenditure incurred on re-payment of loans availed
- The customer’s current annual expenditure incurred on payment of expenses other than rent, insurance premium or loans
- The number of credit cards the customer has subscribed to
- The value in terms of money, of this customer’s house (in case he owns one)
The Other Details Include
- The name of your customer’s previous employer and the designation that the customer held in the previous job.
- The customer’s current designation and the full name of the customer’s employer
- The complete mailing address of your customer’s employer
- The telephone, telex, fax numbers and E-mail address of your customer’s current employer or business partner
After having captured all the relevant details, you can save the record. You will be returned to the Personal Details section of the CIF Maintenance screen.
2.1.9 Fields Button
In order to know your customer better, you may need to capture certain additional information specific to a customer. This is in addition to the regular information that you would capture in the Customer Maintenance screen. To capture more details of the customer, you can define a set of UDFs and associate them with the function id ‘STDCIF’ (for Customer Maintenance screen). After you associate the UDFs, they will appear in the Customer Maintenance screen. You can then capture the values for these UDFs.
The UDFs that are displayed in the Customer Maintenance screen depend on your selections in the ‘UDF in Base Table’ screen. A maximum of five UDFs can be made to appear in Customer Maintenance screen.
Refer the manual on ‘User Defined Fields’ for details on defining a user-defined field and associating the UDF with the function id ‘STDCIF’.
The values that you enter for the UDFs will be validated against the rules maintained for them. If the entries fail the validations, the system will display a suitable message to inform you that the entries made do not adhere to the rules maintained.
The UDFs will be displayed in the Customer Maintenance Summary screen as well. You will also be allowed to perform queries based on these fields.
2.1.9.1 Special Customer Grouping UDF
While maintaining the customer information, you can place a customer under a special customer group for different rating purposes. Through the Special_Status user defined field (UDF) you can link the customer to a group and specify the rating for the group.
Whenever a contract is booked for such a customer, the system will display an alert message specifying the status of the customer thereby you can apply the new rates specified for such customers.
The steps involved for including the SPECIAL_STATUS UDF in customer maintenance are as follows:
- Create a new user defined field SPECIAL_STATUS
- Link it to the Function ID STDCIF
- Specify the value of the user defined field at the time of creating a customer
The special status is also displayed in the information retrieval screen when you do a query for such a customer. You can do the query using the ‘Customer Summary Query’ screen.
You can invoke this screen by typing ‘ACDCBIR’ in the field at the top right corner of the Application tool bar and clicking the adjoining arrow button.

Note
After having captured all the required details save the CIF record. It becomes valid only after a user other than you authorizes it.
Check the ‘Linked Customer’ check box and provide the Customer Number and click ‘Query’ button to view all linked customers in Linked Customer Details. Select a customer from the details and click ‘Fetch’ button to perform a query operation on the selected customer. The displayed values are based on the query parameters provided.
2.1.10 Other Basic Customer Information
You will notice the following buttons in the Customer Maintenance screen:
Tab |
Description |
Group |
Through this screen you can associate the customer code with a group |
MIS |
Through this you can define the MIS details of a customer (for future use) |
Joint |
Through this you can capture details of joint customers. |
Standing Instructions |
Through this screen, you can view the details of all standing instructions associated with respective the customer code. |
Linked Entities |
Through this screen, you can link different customers to the specific customer whose details you are capturing and specify the relation shared by the two customers. For details about linked entities, refer to the section Maintaining Customer Accounts under the heading ‘Relationships for Customer’ in this user manual. |
Text |
Through this screen, you can store free format text, scanned images etc about the customer whose details you are capturing. You can store this information either as text documents or as plain text. |
Fields |
Through this you can capture user defined fields. |
Image |
Through this screen, you can capture the photograph of the customer whose details you are maintaining. You will be allowed to access this screen, only if you have the requisite access rights i.e., you may have rights to access the CIF screen but not view the photograph of the customer. |
Limits |
Through this button you can view/modify/add (define) the liability details of a customer, provided you have been assigned the necessary rights. This button appears enabled only if ‘Track Limits’ check box is checked in the Additional tab of Customer Maintenance (STDCIF) screen. |
CLS Restriction |
In case of a CLS participant, you can capture CLS currency restrictions. |
MT920 |
Through this screen, you can specify MT920 preferences. |
Domestic |
Through this screen, you can capture domestic details of the customer. |
Professional |
Through this screen, you can capture professional details of the customer. |
Issuer |
In case of an issuer customer, you can capture issuer details. |
Cards |
Through this screen, you can view cards details of the customer. |
Linked Account |
This button invokes the Linked Account screen where you can view the details of linked accounts. |
KYC Details |
This button invokes the KYC Details screen where you can view the KYC details of the customer. |
Joint Venture |
Through this screen, you can maintain the joint venture details. |
Account Details |
This button invokes ‘The Account Details’ screen where you can maintain the account details. |
NSF Black list status |
You can view the NSF rejection details and customer blacklisted details in this screen. |
Documents |
This button invokes the Document upload screen where you can capture the customer related documents in central content management repository. |
Change Log |
This button invokes the Change Log screen where you can capture the audit history details for the operations performed on that customer and the account. |
2.1.11 Cards Button
Click ‘Cards’ button to view details about debit cards issued to a customer.

Here, you can view the following details.
Branch Code
The branch code is displayed from the main ‘Customer Information Maintenance’ screen.
Customer No
The customer identification code (CIF) is displayed from the main ‘Customer Information Maintenance’ screen.
Account No
The system displays the account number against which you have maintained debit card details.
Authorisation Status
Indicate the authorisation status of the debit card by selecting one of the following values:
- Authorised
- Unauthorised
Record Status
Indicate the record status of the debit card by selecting one of the following values:
- Open
- Closed
Branch Code
The system displays the branch code where the debit card has been issued.
Request Reference Number
The system displays the request reference number of the card issuance record.
Card Number
The system displays the debit card number of the card holder.
Multiple cards can be issued to a customer.
2.1.12 OFAC Check Button
OFAC check enables the application to call an external web service to perform black list check for customer and customer accounts and give warnings appropriately while transacting with black listed customers. You can also capture your remarks before overriding the black list warning.
Click ‘OFAC Check’ button in ‘Customer Account Creation’ screen to view the OFAC check response in the ‘External System Detail’ screen On clicking ‘OFAC Check’ button, system will build the request XML and call the web service. The ‘External System details’ screen displays the response is received from the external system; and you will be also allowed to enter your remarks in this screen. The response received will also be sent to Oracle FLEXCUBE Database layer for any further interpretations of the same.
This button can be made visible while carrying out the actual customization. Request building response interpretation in the database layer needs to be done as part of customization to enable this.

Here, you can view /capture the following details:
External System Response
The response from the external system regarding the black listed customer is displayed here.
User Remarks
Specify your remarks regarding the black listed customer here.
2.1.13 KYC Details Button
KYC refers to know your customer. You can view the KYC details maintained for a customer on ‘KYC Maintenance’ screen. Click ‘KYC Details’ button to invoke the screen
Alternatively, you can invoke this screen by typing 'STDKYCMN' in the field at the top right corner of the Application tool bar and clicking the adjoining arrow button.

The system displays the following details:
- KYC reference number
- Full name of the customer
- Type of customer
- Risk level of the customer
2.1.13.1 Retail Customer Tab
You can view the KYC profile details for retail customers on ‘KYC Retail Profile’ screen. Click ‘Retail Customer’ tab in the ‘KYC Maintenance’ screen.

The system displays the following details of the retail customer:
Beneficial Owner Information
- Whether the beneficial owner is declared as a resident
- Whether the beneficial owner is declared as politically exposed person
- Remarks on the politically exposed person
- Local address of the beneficial owner
- Country code of the beneficial owner
- Home country address of the beneficial owner
- Home country of the beneficial owner
- Whether the beneficial owner has a valid US residence status
- Whether the beneficial owner has visited US in the last three years
- Nationality of the beneficial owner
- Place of birth of the beneficial owner
- Birth country of the beneficial owner. It is mandatory to maintain birth country if the FATCA is enabled for the bank.
- Birth date of the beneficial owner
- International dialling code for the office telephone number
- Telephone number of the beneficial owner’s office
- International dialling code for the residential telephone number
- Residential telephone number of the beneficial owner
- International dialling code for the mobile number
- Mobile phone number of the beneficial owner
- International dialling code for the fax number
- Fax number of the beneficial owner
Note
If the FATCA is enabled for the bank, and any of the Office number, Residential telephone number, Mobile number or Fax number is maintained, then it is mandatory to maintain the corresponding ISD code as well.
- Purpose of opening the account
- Other details
- Type of account
- Whether power of attorney is given to beneficial owner
- Passport number of beneficial owner
- Expiry date of the passport
- Visa number of the beneficial owner
- Expiry date of visa
- Currency in which KYC amount is maintained
Power of Attorney
- Whether the customer account is to be operated by the power of attorney holder
- The person who has been given the power of attorney
- Nationality of the power of attorney holder
- Address of the power of attorney holder
- Country of the power of attorney holder
- International dialling code for the telephone number
- Telephone number of the power of attorney holder
Note
If the FATCA is enabled at the bank and the check box 'Power of Attorney' is checked here, then it is mandatory to specify the Power of Attorney information.
Beneficially Owned Company Details
- Name of the company
- Location of the company
- Percentage of the holding
- Annual income of the company
- Line of business of the company
Source of Income
- Whether salary is a source of income
- Whether rental is a source of income
- Whether investment is a source of income
- Whether business concern is a source of income
- Whether professional business is a source of income
2.1.13.2 Corporate Customer Tab
‘KYC Corporate Profile’ screen gives an account of the KYC profile details for corporate customers. Click ‘Corporate Customer’ tab in the ‘KYC Maintenance’ screen. The system displays ‘KYC Corporate Profile’ screen.
The screen is as shown below:

The system displays the following details:
Customer and Sponsors Information
- Name of the group
- Country of Parents Company
- Type of the company
- Other details
- Currency in which KYC amount is maintained
Reason of Account
- Reason for opening an account
- Other details
Specifying Nature of Business
- Nature of business
- Name and details of the product traded in the business
- Main source of funds
- Borrowing account group
- Annual turnover of the company
Details of Key Person
- Unique identification for the KYC
- Name of the key person
- Relation ship of the key person with the corporate customer
- Nationality of the key person
- Position or title of the key person
- Relationship of the key person with the corporate customer
- Nationality of the key person
- Address of the key person
- Country of the key person
- International dialling code of the key person
- Telephone number of the key person
- Tax identification number of the key person
- Percentage of share for the key person
Specifying Company Details
- Details of the company branches
- Number of person employed in the company
- Mode of salary in the company
- Other details
Specifying Details of Suppliers
- Name of the supplier
- Country of the supplier
- Mode of settlement
Specifying Details of Clients
- Name of the client
- Name of the country of the client
- Mode of payment
Specifying Transaction Types
- Type of transaction
- Count of the transaction
- Total amount of the transaction
- Maximum single amount for the transaction
- Purpose of the transaction
- Country of the transaction
- Purpose of fund transfer within a country
- Audit date
- Whether account should be solicited
- Date on which the account is solicited
- Details of the introducer
- Date of compliance clearance
- Date of business approval
- Trade licence number
- Next date of KYC review
Specifying Comments
- KYC comment about the corporate customer
- Comments on the corporate customer by the sales and service officers
- Name and comments of the approvers on the corporate customers
2.1.13.3 Corporate or Audit HO Details Tab
Click ‘Corporate or Audit HO Details’ tab in the ‘KYC Corporate Profile’ screen.

The system displays the following details:
- Number of the corporate customer
- Name of the corporate customer
- Whether STR should be raised
- Date of STR using adjoining calendar
- Reference number of the STR
- Whether the CB should be responded
- Date of the CB Response
- Details of the activity
- Reason for the activity
- Dairy note
2.1.13.4 Corporate Customer Tab
‘KYC Financial Profile’ screen displays KYC profile details for financial customer. Click ‘Corporate Customer’ tab in the ‘KYC Maintenance’ screen.

The system displays the following details:
- Address of the bank
- Country of the financial customer
- Currency of the KYC amounts
Transaction Products
- Name of the transaction product
- Rating of the product
- Number of monthly transactions
- Monthly amount
Management Details
- Name of the manager
- Designation
Share Holders Details
- Name of the share holder
- Holding of the share holder
- Address of the share holder
- City of the share holder
- Country of the share holder
2.1.13.5 Fields Button
‘User Defined Fields’ screen displays the all UDFs defined using KYC Maintenance screen. You can invoke this screen by clicking ‘Fields’ button in the ‘KYC Maintenance’ screen.

The system displays the following details:
- Name of the user defined field
- Value of the user defined field
2.1.14 Joint Venture Button
You can maintain the joint venture details for a customer on ‘Joint Venture Details’ screen. Click ‘Joint Venture’ button to invoke the screen.
The screen is as shown below:

Party ID
Specify the party ID.
Party Name
The system displays the party name.
Ratio
Specify the ratio between the participants on share.
2.1.15 NSF Blacklist Status Button
Click Blacklist Status to invoke this screen. Blacklist status of the customer is displayed in this screen.

Internal Bank – NSF Details
NSF Level
The system displays the NSF level of the customer. (SP1, SP2, SP3 or SP3A)
Effective Date
The system displays the effective date on which the NSF level is set based on the Expiry period NSF (month) defined at STDNSMNT-NSF level maintenance.
Expiry Date
The system displays the expiry date of the NSF Level based on the Expiry period NSF (month) defined at STDNSMNT-NSF level maintenance.
IB Blacklisted Status
The system displays the active blacklist status of the customer. This is displayed only when Customer cheque is rejected in Internal Bank and is black listed through inward clearing due to NSF (Non Sufficient Fund).
Description
Description for the active blacklist status is defaulted here.
Effective Date
The system displays the effective date on which the Customer is Internal Bank black listed due to NSF based on the Expiry period NSF(month) defined at STDNSMNT-NSF level maintenance.
Expiry Date
The system displays the expiry date from which the Customer is internal Bank black listed due to NSF based on the Expiry period NSF(month) defined at STDNSMNT-NSF level maintenance.
Central Bank – NSF Details
CB Blacklisted Status
The system defaults the blacklisted status of customer which has been shared by Central bank.
Description
Description for the blacklist status is defaulted here.
Effective Date
The system displays the effective date on which Central bank has sent the File and processed for the marking CB black listed for Customer.
Expiry Date
The system displays the expiry date of the NSF CB status which is available in CB File.
Web Branch NSF Details
Counter Cheque Status
The system displays the active blacklist status of the customer whose cheque is rejected over the counter.
Description
Description for the blacklist status is defaulted here.
Effective Date
The system displays the effective date on which cheque is rejected over the counter and processed for marking Web branch blacklisted for Customer.
Expiry Date
The system displays the expiry date from which the Customer is black listed over the counter due to NSF, based on the Expiry period NSF(month) defined at STDNSMNT-NSF level maintenance.
2.1.15.1 NSF Enquiry
You can view the current NSF level, customer blacklist status and cheque details rejected due to NSF in NSF Enquiry screen. You can invoke the screen by typing ‘STDNSFQY ‘in the field at the top right corner of the Application tool bar and clicking the adjoining arrow button.

Branch Code
Select the branch code from the adjoining option list.
Customer No
Select the customer number from the adjoining option list.
Click on query button to view the list of blacklisted customers for the selected branch code.
Customer No
The system defaults the customer number of the blacklisted customer.
Customer Name
The system displays the name of the blacklisted customer.
NSF Level
The system displays the NSF blacklist status of the customer.
2.1.15.2 NSF Details
You can view interbank blacklisted status in the NSF details screen. Click on NSF Details in the NSF Blacklisted Status screen to invoke this screen.

Customer No
Customer No is defaulted here based on the details queried in the NSF Enquiry Screen.
Name
The name of the customer is displayed here based on the details queried in the NSF Enquiry screen.
NSF IB Detail
Customer No
The system defaults the customer number.
NSF Level
The system defaults the NSF level while processing the cheque.
Effective date
Effective date of the NSF level is displayed here.
Expiry Date
The system displays the expiry date of the NSF level.
Account No
The system displays the Account number of the returned cheque.
CG Ref No
The system displays the CG Reference Number of the cheque returned due to NSF.
Cheque No
The cheque number of the returned cheque is defaulted here.
Cheque Amount
The system displays the cheque amount of the returned cheque.
Cheque Date
The value date of the cheque is displayed here.
Transaction Date
The transaction date is displayed here.
Branch Code
The system defaults the branch code.
2.1.15.3 Central Bank Blacklist Status
You can view the current central bank blacklist status in the ‘Central Bank Blacklist Status’ screen. You can invoke this screen by typing ‘STDNCBQY’ in the field at the top right corner of the Application tool bar and clicking the adjoining arrow button.

National Blacklist Reference Number
Select the National Blacklist Reference Number from the adjoining option list.
Blacklisted Customer details
Customer Name
The name of the blacklisted customer is displayed here.
Customer Type
The system displays the customer type.
Account No
The system displays the account number of the blacklisted customer.
Account type
The system displays the type of the account which is marked as blacklisted.
Tax Identification Number
The system displays the tax id of the blacklisted customer.
Identity Number
Unique identification number of the blacklisted customer is displayed here.
Date of Birth
The system defaults date of birth of the blacklisted customer.
Blacklist Effective Date
The system displays the blacklist effective date.
Blacklist Expiry Date
The system displays the expiry date for the blacklist status
Remarks
The system displays the remarks sent from the central bank.
Other Bank Details
Bank Ref No
The system displays the blacklisted customer’s bank reference number.
Bank Code
The bank code in which the customer is marked as blacklisted
Bank Name
The system displays the name of the bank of blacklisted customer.
Address
The address of the blacklisted customer is displayed here.
Our Bank Customer Details
Customer Name
The system displays the name of the central bank blacklisted customer.
Customer Number
The system displays the customer number maintained in the current bank.
Customer Type
Customer type of the blacklisted customer is defaulted here.
Date of Birth
The system displays the date of birth of the blacklisted customer maintained in the current bank.
Unique ID
The system defaults the unique id of the blacklisted customer maintained in the current bank.
2.1.15.4 Viewing Central Bank Blacklist Status
You can view the blacklisted status of the customer in the ‘Central Bank Blacklist Status’ screen. You can invoke this screen by typing ‘STSNCBQY’ in the field at the top right corner of the Application tool bar and clicking on the adjoining arrow button.

In the above screen, you can base your queries on any or all of the following parameters and fetch records:
- Customer Name
- Date of Birth
- Tax Identification Number
Select any or all of the above parameters for a query and click ‘Search’ button. The records meeting the selected criteria are displayed.
The system displays the following details pertaining to the fetched records:
- Customer Name
- Date of Birth
- Tax Identification Number
- Bank Ref No
- Bank Code
- Bank Name
- National Blacklist Ref No
- Customer Type
- Identity Number
- Address 1
- Blacklist Expiry Date
- Account No
- Account Type
- Customer No
- Blacklist Effective Date
- Customer Type
- Customer Name
- Unique ID Value
- Date of Birth
- Upload Sequence Number
- Remarks
Note
- If a new current account is created for an already blacklisted customer then the system displays an error message as “Customer has been marked as blacklisted customer. New account cannot be created for the customer.”
- If a new customer is created for a customer who is already blacklisted by the central bank then the system displays an error message as “Customer is blacklisted by the central bank. Customer can not be created for this new customer.”
2.1.15.5 Batch Processing for NSF Blacklisted Customers
An Intra-day batch STNSFCB is configured to update the NSF Central bank blacklisted customers. The unique id is used to identify the customer. If no match is found then the customer name and date of birth together is used as key to identify the customer.This batch is triggered through intra-day batch start BABIDBAT.
The customer blacklist status is updated based on the internal and central bank blacklist status.
Customer |
Remarks |
0 - Internal Blacklist |
Customer is blacklisted in Internal bank |
1 - Extended data |
Customer is blacklisted in Internal bank and Central bank |
2 - Central bank blacklisted customer |
Customer is blacklisted only in central back |
3 – Customer Blacklisted |
Customer is black listed over the counter |
Processing EOD Batch
When a cheque is returned due to NSF then the expiry date is computed for the customer based on the NSF maintenance. As part of EOD the system performs below task:
- Identify all the NSF returned cheque for the validation period.
- Execute the NSF formula for each cheque one by one in the order of effective date of the cheque and arrive the new NSF level of the customer.
- Compute the new expiry date for the customer from the 1st returned cheque date. This is calculated by adding the first returned cheque date and expiration period.
- Execute the action components which are associated with the newly arrived NSF level for that customer.
PEOTI Batch
- In PEOTI, batch system looks only for NSF level expiry date but not the IB details final expiry date.
- System generates advice messages (warning letters) based on the new NSF Level change (NSF blacklist status, Central bank blacklist status changes).
PBOD Batch
On Processing CASABAT batch in BOD, system performs the following process:-
- Identifies the entire Customer whose final expiry date falls on this date (In PBOD batch system IB details final expiry date).
- System process with unmarking of Black list Customer, unmarking of Black list Account, granting chequebook facility for the respective customer account.
Note
STNSFCB batch is used only for marking Central bank Blacklisted status (Not for Internal (0) and Over the counter black listed (3).
2.1.16 Documents Button
You can capture the customer related documents in central content management repository through the ‘Document Upload’ screen. Click ‘Documents’ button to invoke this screen.

Here, you need to specify the following details:
Document Category
Specify the category of the document to be uploaded.
Document Type
Specify the type of document that is to be uploaded.
Document Reference
The system generates and displays a unique identifier for the document.
Remarks
Specify the additional information, if any.
Upload
Click ‘Upload’ button to open the ‘Document Upload’ sub-screen. The ‘Document Upload’ sub-screen is displayed below:

In the ‘Document Upload’ sub-screen, specify the corresponding document path and click the ‘Submit’ button. Once the document is uploaded through the upload button, the system displays the document reference number.
View
Click ‘View’ to view the document uploaded.
2.1.16.1 Limits Button
You can maintain liability details as a part of auto customer creation process in the ‘Customer Liability Details’ screen. Click ‘Limits’ button to invoke this screen.

Liability ID
The system displays the liability Id.The Id selected in the main screen gets defaulted here.
Liability Name
Specify Liability Name. System defaults the name if existing liability id is selected.
Liability Branch
Select the branch associated with the liability. By default, system displays the current branch from the existing liability.
Liability Currency
Select liability currency from the adjoining option list. For existing liability, system defaults the applicable currency and for new liability, system defaults the local branch currency.
Overall Limit
Specify the overall limit in Liability currency, for the liability. This will be defaulted if existing liability is chosen
Revision Date
Specify the revision date for the liability from the adjoining calender.
Liability Category
Select the category of the liability.The adjoining option list displays all available categories.You can select the appropriate one.
User Defined Status
Select the status of the liability from the adjoining option list.
Liability Clean Risk Limit
The system displays the liability clean risk limit here
Secondary Clean Risk Limit
The system displays the secondary clean risk limit here
Secondary PSTL Risk Limit
The system displays the secondary PSTL risk limit here
Unadvised
Check this box if the liability is unadvised.
Netting Required
Check this box to indicate that all facility amounts linked to this liability should be consolidated.
Remarks
You can specify remarks, if any.
Note
The system displays all the liability details if you have selected an existing liability.You cannot modify the displayed details.
2.1.16.2 Score Button
You can maintain score details in the ‘Liability Score’ screen. Click ‘Score’ button to invoke this screen.
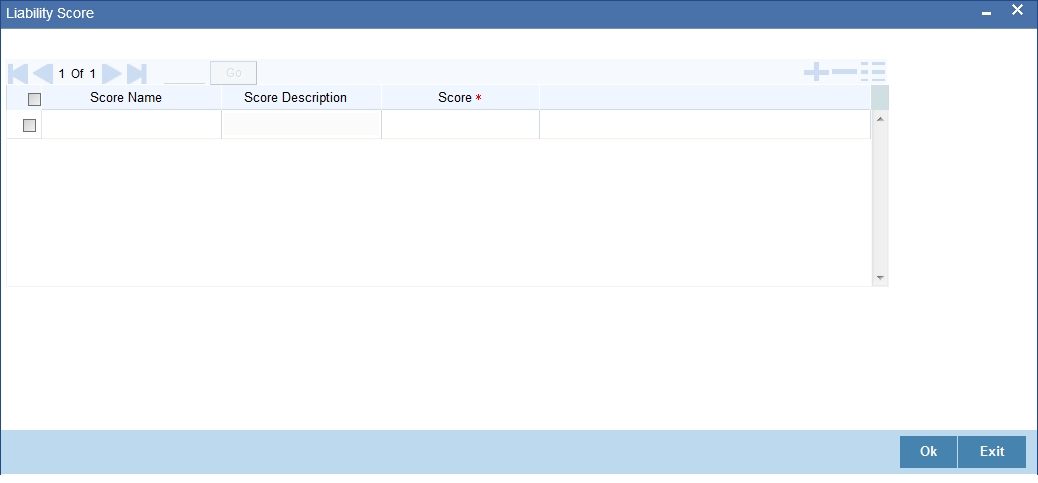
Specify the following details:
Score Name
Select the score name. The adjoining option list displays the all the score names maintained in the system. You can select the appropriate one.
Score description
System displays the description for the selected score name.
Score
Specify score value for the selected score name
Note
For an existing Liability system displays the score details when the liability is selected.
2.1.16.3 Rating Button
You can maintain credit rating details in the ‘Credit Rating’ screen. Click ‘Rating’ button to invoke this screen.
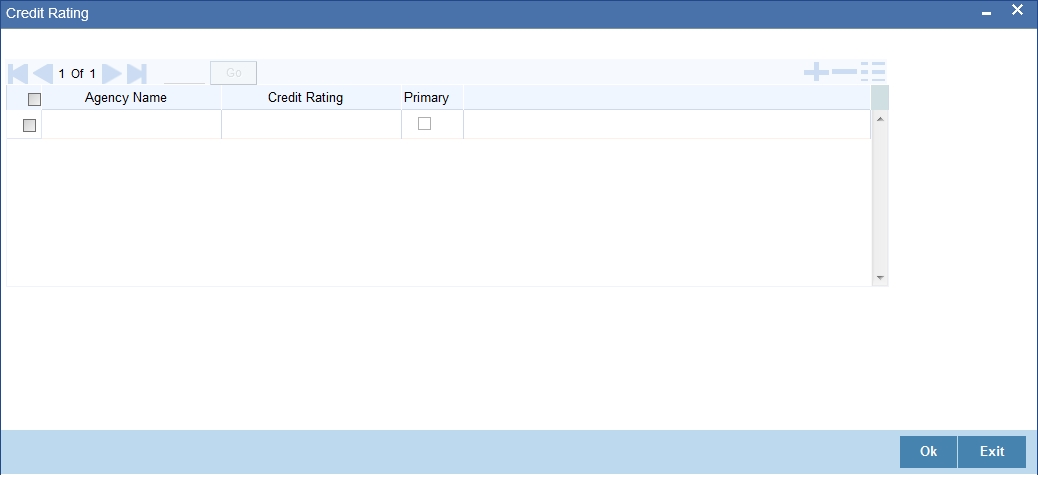
Agency Name
Select the credit agency name. The adjoining list displays the name of all Credit agencies maintained in the system. You can select the appropriate one.
Credit Rating
Select the credit rating. The adjoining list displays all the Credit Ratings maintained in the system. You can select the appropriate one.
Primary
Check this box for primary rating.
Note
For an existing Liability system displays the credit rating details when the liability is selected.
2.1.16.4 Linkage Details Button
You can maintain Customer Exposure details in the ‘liability linkage Details’ screen. Click ‘Linkage Details’ button to invoke this screen.

Exposure Code
Select the exposure code from the available option list.
Exposure Description
System displays the description of exposure based on the exposure code selected.
Exposure Type
System displays the type of exposure based on the exposure code selected.
Note
- When an account is created without maintaining liability and later the liability is created and linked to the customer, the "Limits tracking" option at the customer level is automatically selected by the system.
- Liability can be modified once the customer record is authorized.
2.1.17 Banking Channels Button
You can capture the information of channels like Internet Banking, Interactive Voice Response, Mobile, ATM, and Credit Card at customer level. These channel details can be maintained in ‘Static Type Maintenance’ (CODTYPES) screen. Click ‘Banking Channels’ button to specify the details relating to channels.

Specify the following details:
Banking Channels
Specify the banking channels code. Alternatively, you can select the list of channels from the option list. The list displays the channels maintained in the system.
Banking Channel Name
The system displays the name of the banking channel.
Remarks
Specify remarks for the banking channel subscription.
Note
- While populating the channels to the Customer Account screen, the system populates only the channels which are allowed in primary CIF and Account Class. The system defaults the remarks maintained at customer level to the account. You can modify it.
- You can delete the channels which need not be allowed at the customer account level, but you cannot add the channels which are disallowed at the customer or account class level. The system will display only those channels which are available in both CIF and account class levels.
- You can add channels which are mapped at both CIF and Account Class levels. You cannot delete a channel at CIF/Account Class level, which is already mapped to accounts (authorized or unauthorized) belonging to the CIF/Account Class. The system checks only for active accounts. You can delete the channels from customer/account class level only if the account is closed. During reopen of the account, the system validates whether the account is modified after reopening.
- When an account is created automatically from Customer Creation screen, the channels maintained at both Customer and Account Class is defaulted to the account. If no maintenance is performed at CIF/account class levels for channels, the system does not populate any channels at account.
- When account class transfer happens during batch, the system deletes the existing channels attached to the account and repopulates from the new Account Class and Customer.
During authorization of the account, the system does not repopulate the channel details. While authorizing primary party change, the system defaults the existing channels which are attached to the account and repopulates from the new Customer and Account Class. You can modify the channel information from the main screen for Customer Account Creation.
During save, the system defaults the channel details from Customer and Account Class of the account. You can modify the details in the Account Creation screen (STDCUSAC).
2.1.18 Account Details Button
Click on the Account Details button to invoke the Customer Account screen to specify the customer’s account details.

You can maintain the following parameters here:
Auto Cheque Book Request
Check this box if you want the system to create a request for the cheque book automatically, for the account during account creation.
When you check this box, the system allows you to capture cheque book request details in the Cheque Book Request screen, as part of account creation.
Auto Debit Card Request
Check this box, if you want the system to create a request for the debit card automatically, for the account during account creation.
When you check this box, the system allows you to capture debit card request details in the Debit Card Request Details screen, as part of account creation.
Account Facilities
The system displays the values of following account facilities based on the maintenance in account class screen.
- Cheque Book
- Passbook
- ATM
- Direct Banking
- Alternate Account Number
Note
By availing direct banking facility you can only view the minimum balance of the account. The system does not allow you to perform any other transactions with this facility.
2.1.18.1 Cheque Book Request Button
Click on the ‘Cheque Book Request’ button in the ‘Account Details’ screen to invoke the ‘Cheque Book Request’ screen.

You will be able to invoke this screen, only if you have checked the ‘Auto Cheque Book Request’ check box in the ‘Account Details’ screen.
Branch
The branch detail gets defaulted from the account branch.
Account
The system displays the account number.
First Check Number
Specify the number of the first cheque leaf of the cheque book.
Check Leaves
Specify the number of cheque leaves in the cheque book.
Cheque Book Type
Specify the cheque book type. The adjoining option list displays the cheque types maintained in the system. You can choose the appropriate one.
Order Date
The order date gets defaulted as the current date. However you can change the same.
Order Details
Specify the order details.
Language Code
Specify the code of the language. The adjoining option list displays all valid language codes maintained in the system. You can choose the appropriate one.
Request Status
The value of this will be defaulted to ‘Requested’ status.
Click on ‘Ok’ to save the cheque book request details.
2.1.18.2 Debit Card Request Button
Click on the ‘Card Request’ button in the ‘Account Details’ screen to invoke the ‘Debit Card Request Details’ screen.

You will be able to invoke this screen, only if you have checked the ‘Auto Debit Card Request’ check box in the ‘Account Details’ screen.
Branch Code
The branch detail gets defaulted from the account branch.
Request Reference Number
The reference number of the request is auto generated and populated, when you click on the ‘Default’ button.
Customer No
The customer number of the account gets defaulted.
Account No
The account number gets defaulted from account details.
Card Products
Specify the card products. The adjoining option list displays the card products maintained in the system. You can select the appropriate ones.
Card Bin
Specify the card bin. The adjoining option list displays the card bins maintained for the specified card product. You can choose the appropriate one.
Name on Card
Specify the customer name that is to be printed on card.
Card Number
Specify the debit card number to be requested. The adjoining option list displays the valid debit card numbers maintained in the system. You can choose the appropriate one.
Card Application Date
The card application date would be defaulted as the current date of the branch. However you can change the same.
Primary Card
The primary card check box remains checked by default.
Card Status
The status of the card will be defaulted to ‘Requested’
Click on ‘Ok’ to save the Debit card request details.
2.1.19 MT920 Button
The SWIFT message MT920 is a transaction message requesting latest information available for the particular account. The request will be to transmit account customer statement message (MT940) or Balance report (MT941) or Interim statement (MT942) or a customer summary statement (MT950).
Check the MT920 checkbox only if the customer is eligible for requesting MT920 swift messages for transaction details. In the Customer Maintenance screen, you can indicate if a customer is eligible for requesting MT920 messages. To do this, you need to click MT920 button in the ‘Customer Information Maintenance’ screen and invoke the ‘MT920’ screen.
The screen is shown below:

Here you can enter the following details:
BIC Code
Enter or select valid BIC from the option list. This BIC Code information provided by you is crucial.
Account Number
Once you specify the BIC code, you can enter the relevant Account Number adjacent to it. Click ‘Ok’ to save the details entered here.
2.1.20 Group Button
While maintaining details of a customer account, you can associate it with a customer group. A customer can be associated with several customer groups. Click ‘Group’ button from the ‘Customer Maintenance’ screen to associate the account with a customer group.
The screen is shown below:

2.1.20.1 Specifying Group Details
To associate a customer account with a group, select Group ID from the option list. The option list will contain a list of all the customer groups that you maintained in the ‘Customer Group Maintenance’ screen. To add a group to the list, click Add icon and select a Group ID from the option list. To remove a group from the list, highlight the Group ID and click Delete icon.
For each group that you associate with a customer, you can specify the relationship that the customer shares with the group.
2.1.20.2 Specifying Shareholding Details
You can maintain percentages of shareholding of your individual customers in a corporate entity, which is also your customer. When maintaining customer details of the corporate entity, you can capture names and shareholding percentages of your individual customers who hold shares in the corporate entity.
When you query in Oracle FLEXCUBE, for limits utilizations for any such individual customer, your exposure to the corporate entities is also displayed.
For example, silas Marner and Keith Butler are individual customers and they have contracts and accounts with your bank. Parivallal Express Limited, Gem Granites Limited and Assorted Chemicals Limited are your corporate customers.
Silas Marner has a shareholding in Parivallal Express Limited and Gem Granites Limited. Keith Butler has a shareholding in Gem Granites Limited and Assorted Chemicals Limited.
While querying limits for Silas Marner, your exposure to Parivallal Express Limited and Gem Granites Limited is displayed along with your exposure to Silas Marner.
You can choose to drill down any of the exposures to see the specific line details and contracts. However, if you query for exposure to Parivallal Express Limited or Gem Granites Limited your exposure to Silas Marner is not displayed.
Click ‘Ok’ button to save the details that you specified. Click the windows Close icon to exit the screen without saving the entries that you made.
2.1.21 Linked Entities Button
A customer of your bank can have relationships with any other customer of your bank. Also, a customer of your bank could be a joint account holder with another customer of your bank. You can capture these details when you set up the CIF or customer account.
For linking a customer account, you need to specify details of the relationship for the account. Click the ‘Linked Entities’ button in the ‘Customer Maintenance’ (CIF) screen. The ‘Linked Entities’ screen is displayed.

You must specify a customer code, provide a description, and ID for the relationship.
Customer
Select the customer code from the option list. You can link any number of customers to the primary holder (the customer for whom you are capturing the CIF details) through this screen by establishing a relationship between the two customers.
Description
In this field, the system displays the name of customer that you have selected in the previous field. You cannot change this description.
Relationship
You have to choose a relationship code to establish a relationship between the customer being selected and the customer (primary holder) you are maintaining.
By default, the system will select the customer of the account as the Primary Holder. This is a pre-shipped relationship and you will not be allowed to change the relationship.
Include Relationship
When you specify the relationship of the customer you can also choose to default the same preference to the customer account maintenance for the specified customer by checking the ‘Include Relationship’ box.
Also, specifying this option at the customer maintenance level will inherit all the properties of the customer relationship to the counterparty of the loan/deposit during the contract input.
2.1.22 Viewing Customer Information
You can view the customer details maintained in the ‘Customer Maintenance’ screen using the ‘Customer Summary’ screen. You can invoke this screen by typing ‘STSCIF’ in the field at the top right corner of the Application tool bar and clicking on the adjoining arrow button.

In the above screen, you can base your queries on any or all of the following parameters and fetch records:
- Authorization Status
- Customer No.
- Name
- Customer Category
- Nationality
- Record Status
- Type
- Short Name
- Country
- Branch Code
Select any or all of the above parameters for a query and click ‘Search’ button. The records meeting the selected criteria are displayed.
Note
You can query or modify the customer details whose accounts are permitted to you for the query/modification in the ‘Group Code Restriction’ screen.
If you are allowed to query customer information, then system displays the following details pertaining to the fetched records:
- Authorization Status
- Record Status
- Customer No.
- Type
- Name
- Short Name
- Customer Category
- Country
- Nationality
- Branch Code
- Language
- Address
- Frozen
- Deceased
- Exposure
- Location
- SSN
- Whereabouts Unknown
- Account Number
- Full Name
- SWIFT Code
- Staff
- Date of Birth
- Mother’s Maiden Name
- Incorporation Date
- Tax Identification Number
2.2 Customer Category Maintenance
This section contains the following topics:
- Section 2.2.1, "Defining Customer Category"
- Section 2.2.2, "Invoking Customer Category Screen"
- Section 2.2.3, "Creating Customer Categories"
2.2.1 Defining Customer Category
You may wish to classify the customers of your bank into certain broad categories/groups. For instance, all financial institutions who are your bank’s customer can be classified into a single common group head called Financial Institutions. Similarly, you can have a category called banks, individuals, etc.
The classification of customers into categories can be used for retrieving financial information by customer category; for generating reports on queries; and restricting access of a customer to a product in the front - end modules, for instance, Funds Transfer, Data Entry, etc. You may also retrieve financial information by customer category.
The categories are maintained in the ‘Customer Categories’ screen and are maintained at the bank level by your Head Office. The customers are allocated different categories maintained in this screen in the ‘Customer Information Maintenance’ screen.
2.2.2 Invoking Customer Category Screen
To invoke the ‘Customer Categories Details’ screen, type ‘STDCSCAG’ in the field at the top right corner of the Application tool bar and click the adjoining arrow button.
The screen is shown below:

In this screen, you maintain the following:
- Name of the customer category
- Description of the category
- Customer log
2.2.3 Creating Customer Categories
To create customer categories the following parameters need to be maintained:
Customer Category
In this category, you can classify customers of your bank.
When you are creating a product − be it in a loan, a deposit, a placement, a swap foreign exchange deal, or a funds transfer, you may want to restrict access to the product to a set of customers.
For this, the customers are classified into broad categories, the code of which is input against this field. A category consists of a group of like customers. For instance, if you create a category called, Financial Institutions - all financial institutions who are customers of your bank will come under this category. Likewise, all customers of your bank belong to some category.
It should be noted that at the product level, specifications made for a customer overrides the specifications made for the category. For example, if all financial institutions are allowed access to a particular product; you have the option of restricting the access of one or a few individual financial institutions to his product.
Input the customer category you want to create using not more than 10 characters, alphanumeric. The category code should be unique. For Example, for Financial Institutions category, you can input the code as FinIn.
Description
This is the description of the customer category input above. Enter the description of the customer category input above in not more than 35 character, alphanumeric. Taking the above example, you can enter financial institutions
Maintain Customer Log
Check this box to indicate that customer information has to be tracked.
After you have made the inputs, click the Save icon to save your record. A record is not used until a user other than you authorizes it.
To authorize, click ‘Authorize’ button in the toolbar. If any modifications were made, the old and the new values will be displayed. After which an alert box will indicate that the change will be authorized. You will be prompted to conform. To confirm, click ‘OK’ button. The change will be authorized. Your User ID, the date and time at which the authorization was made will be displayed in the Auth ID and date and time fields at the bottom of the screen. The status of the record will be updated to ‘Authorized’. If you do not want to authorize the change then click Exit icon, you will be returned to the screen from where you invoked the authorization function. Remember that you cannot authorize an event that you have input. Only another user who has the requisite rights can authorize the event.
To exit, click Exit icon. You will return to the Application Browser.
2.3 Customer Group Maintenance
This section contains the following topics:
2.3.1 Maintaining Customer Groups
You can maintain customer groups for any of the following reasons:
- Tracking Exposure for loans as well as outstanding overdrafts in accounts of customers involving the group; in which case, it would comprise of either Corporate or Retail customers.
- Defining Group specific rules – in which case it would either be a Clearing or a Charge Group. Clearing Groups are built in order to derive the Value Date of outward clearing check transactions. Charge Groups are created in order to levy specific charges on customers belonging to the group.
You can set up such groups through the ‘Group Code Maintenance’ screen. Invoke this screen by typing ‘STDGRPCD’ in the field at the top right corner of the Application tool bar and clicking the adjoining arrow button.
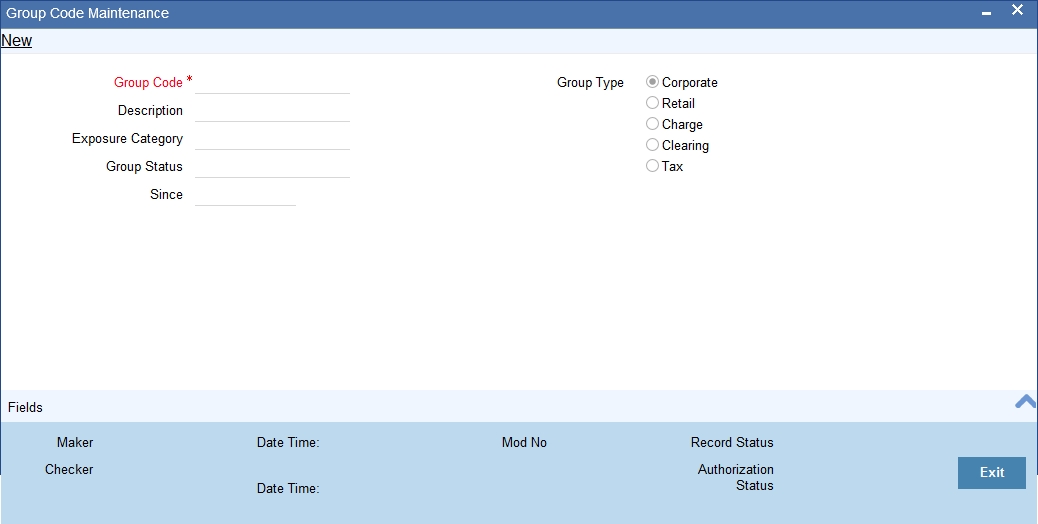
Group Type
You could use this section to indicate whether the customer group you are defining is:
- Corporate
- Retail
- Charge
- Clearing
- Tax
You can select the appropriate option.
Creating Customer Groups for Tracking Exposure
You may wish to track exposure due to loans issued to a group of customers as a whole, and assign the status of all loans issued to the group as the status of the loan with the worst status, among those issued to the group.
You may similarly wish to include the exposure due to outstanding overdraft in respect of a group of customer accounts as a whole, and assign the status of all customer accounts belonging to the group as the status of the customer account with the worst status among the accounts and loans belonging to the group.
When you set up a group for tracking exposure due to loans and customer accounts, you will need to specify the applicable exposure category.
The exposure category for a group is either derived from the logic maintained in the Exposure Type Category Linkage maintenance for the group type, or explicitly specified. If it is derived, it is displayed in this screen, by the End of Day batch program. The type of the group indicates the type of customers that belong to the group – retail or corporate. If no logic has been maintained in the Exposure Type Category Linkage for the group type, you can indicate the applicable exposure category for the group.
Group Status
All loans and overdraft accounts issued to customers in the group will be assigned the same status, which will be the status of the loan / overdraft account with the worst status among those issued to customers in the group. The Group/CIF and the loan contracts and overdraft accounts are all updated with this worst status if they have been marked for automatic status processing .The individual status for the accounts and loan contracts (apart from assigning the worst status) is also captured and displayed. In the ‘Group Code Maintenance’ screen and the ‘CIF Maintenance’ screen, the status for the group is displayed, as well as the date since which the status came into effect.
For details about loan status processing and provisioning, consult the Loans user manual.
Customer Group
When you maintain CIF details for customers, in the ‘Customer Information Maintenance’ screen, you can specify the customer group to which the customer belongs, for:
- Provisioning and status processing (Group Code). You must specify a group code defined for a group type that is the same as the customer type, for instance, if the customer is a retail customer, you must specify a group defined for retail customers
- Classifying the customer as a Clearing customer
- Categorizing the customer for levying charges at a customer group level
- Classifying the customer as a taxpayer. If you select this option, the Exposure Category field will be disabled
To track your credit exposure to a group of customers you should:
- Create Customer Groups and assign credit limits to it
- Associate a customer with a group
2.3.2 Maintaining Limits for Customer Group
You can maintain Customer Groups and set up credit limits in the ‘Customer Group Maintenance’ screen. You can invoke this screen by typing ‘STDGRPMT’ in the field at the top right corner of the Application tool bar and clicking the adjoining arrow button.

Group ID
You can assign a unique identification code to each customer group that you create. You can also enter the detailed name of the group. In the subsequent fields you can set up credit limits for the group.
While setting up a customer, you can indicate the group to which the customer is associated.
Note
It is important to note that in Oracle FLEXCUBE a customer group is different from a customer category. You create customer groups only to set up group limits and report credit utilization by the customers that belong to the group.
Limit Amount and Limit Currency
The limit amount indicates the maximum amount that customers under a group can utilize. You can indicate the currency in which the limit amount is expressed.
The outstanding of all customers associated with a group is aggregated to arrive at the credit utilization of the group. This includes issuer risk arising out of securities issued by your customers and held by the bank.
2.4 Customer Segment Maintenance
This section contains the following topics:
- Section 2.4.1, "Maintaining Customer Segment"
- Section 2.4.2, "Viewing Customer Segment Summary Screen"
- Section 2.4.3, "Associating Segment Code to Customer"
- Section 2.4.4, "Viewing Customer Segment Association Summary Screen"
Oracle FLEXCUBE calculates the relationship tag value or net worth range. The Relationship Manager (RM) categorizes the customers under segments based on the customer’s net worth range or relationship tag value. The RM either will take a decision on association of segment and status; or can amend the segment and status.
2.4.1 Maintaining Customer Segment
You can maintain the segment code details in the ‘Customer Segment Maintenance’ screen. You can invoke this screen by typing ‘STDSEGMT’ in the field at the top right corner of the Application tool bar and clicking on the adjoining arrow button.

You need to specify the following information:
Segment Code
Specify the segment code.
Segment Description
Specify a short description on segment code.
Segment Currency
Specify the currency of the corresponding segment amounts.
Note
If the customer has multiple accounts in different currencies, then the relationship tag value or net worth range is calculated in accordance with the bank local currency.
Minimum Segment Amount
Specify the minimum segment amount.
Maximum Segment Amount
Specify the maximum segment amount
2.4.2 Viewing Customer Segment Summary Screen
You can view the segment code details in the ‘Customer Segment Summary’ screen. You can invoke this screen by typing ‘STSSEGMT’ in the field at the top right corner of the Application tool bar and clicking on the adjoining arrow button.

In the above screen, you can base your queries on any or all of the following parameters and fetch records:
- Authorization Status
- Record Status
- Segment Code
- Minimum Segment Amount
- Maximum Segment Amount
- Segment Currency
Select any or all of the above parameters for a query and click ‘Search’ button. The records meeting the selected criteria are displayed.
System displays the following details pertaining to the fetched records:
- Authorization Status
- Record Status
- Segment Code
- Minimum Segment Amount
- Maximum Segment Amount
- Segment Currency
2.4.3 Associating Segment Code to Customer
Customers can be associated to segment code by mapping customers in ‘Customer Segment Association’ screen. You can invoke this screen by typing ‘STDSEGAS’ in the field at the top right corner of the Application tool bar and clicking on the adjoining arrow button.
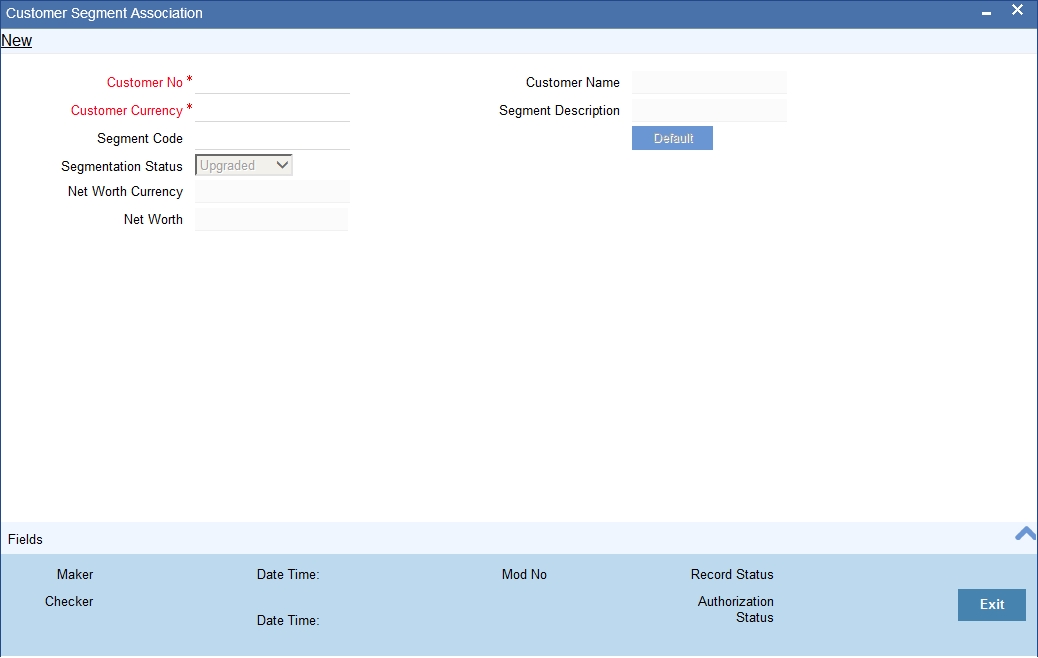
The ‘Customer Segment Association’ screen provides the following fields:
Customer No
Specify the Customer Number..You can select the customer number from the adjoining option list. The customer CIF Number should be unique across all branches.
Note
The option list doesn’t include the customer numbers which are created under the BROKER and BANK customer category,
For example, assign a code using a maximum of 9 characters, alphanumeric. For example, assume your customer is DOW Corporation, US. You can assign him a code, which could either, be a number representing the customer’s serial number or an alphabetic code like DowCorp or an alphanumeric code like Dow1000US or DowUS1000 / 1000DowUS, if he is the 1000th customer to approach your bank
Customer Currency
Specify the customer currency. The system will use this as the default currency of the customer in the transactions.
Segment Code
Specify the segment code. While amending the segment code, if the customer’s relationship tag value or net worth range doesn’t match with the minimum and maximum net worth amounts maintained at the segment code level; then system will display the override message: as “Segment Code Specified doesn’t match with the Min and Max Range maintained at segment level.”
Segmentation Status
Select the segment status of the account from the following options:
- Upgraded-Select this option if you are associating the segment code to a customer for the first time .It is available only for the first time association.
- Downgraded- Select this option if net worth range or relationship tag value is less than the minimum amount of segment code attached to the customer.
- Re-upgraded-Select this option if networth of the customer is more than the maximum amount specified.
Customer Name
The system displays the customer’s name.
Segment Description
The system displays the segment’s description.
Click the ‘Default’ button to view the value of currency of the corresponding Net Worth.
Net Worth Currency
The system displays the currency of the segment’s net worth.
Net Worth
The system displays the net worth value of the customer considering the available balance of the accounts.
2.4.4 Viewing Customer Segment Association Summary Screen
You can view the details of the customer’s segment association in the ‘Customer Segment Association Summary’ screen. You can invoke this screen by typing ‘STSSEGAS’ in the field at the top right corner of the Application tool bar and clicking on the adjoining arrow button.

In the above screen, you can base your queries on any or all of the following parameters and fetch records:
- Authorization Status
- Record Status
- Customer No
- Segment Code
- Segmentation Status
- Net Worth
- Net Worth Currency
Select any or all of the above parameters for a query and click ‘Search’ button. The records meeting the selected criteria are displayed.
System displays the following details pertaining to the fetched records:
- Authorization Status
- Record Status
- Customer No
- Segment Code
- Segmentation Status
- Net Worth
- Net Worth Currency
2.5 Capturing Customer Prefixes
While maintaining the CIF details, of an Individual customer you can capture the academic titles (like Prof., Dr., etc) of the customer along with the salutations (like Consulate, Senator, Chancellor, etc.)
Therefore, you must maintain the list of possible options for each of these academic titles and salutations referred to as ‘prefixes’ through the ‘Customer Prefix Maintenance’ screen.
You can invoke this screen by typing ‘’STDCUPRT’ in the field at the top right corner of the Application tool bar and clicking the adjoining arrow button.
The screen is as shown below:

The following details need to be captured:
- Branch code - This is the code of the branch for which the list of prefixes will be made available. The description associated with the branch is displayed in the adjacent field
- Prefix1 - This is the first prefix to appear in the Customer Name
- Prefix2 - This is the second prefix to appear in the Customer Name
- Prefix3 - This is the third prefix to appear in the Customer Name
While specifying the prefix in the customer in the CIF screen, a list of all the values maintained in this screen is displayed. You will also be allowed to key-in a prefix of your choice.
These details will be printed along with the receiver name in all messages sent to the customer. If the global tags for prefixes have been maintained in the advice, the System substitutes the tags with the respective prefixes maintained in the customer personal details of the receiver.
Note
This feature is applicable only for individual customers where the media type is Mail.
2.6 Storing Authorized Variations of Customer’s Name
In Oracle FLEXCUBE, you can indicate whether incoming Funds Transfers, Payments and Collections should be processed only after the customer’s Account Number and Name correspond to the authorized variations of the customer’s name. If you have enabled this as a preference in the ‘FT Product Preference’, and ‘PC Product Category’ screens, you will need to maintain the authorized customer name variations through the ‘Customer Name Detail’ screen.
Invoke this screen by typing ‘ ‘STDCIFNT’ in the field at the top right corner of the Application tool bar and clicking the adjoining arrow button.

In this screen, you have to capture valid customer names, which have to be associated with Customer Numbers maintained in Oracle FLEXCUBE.
Because of this maintenance, each time an incoming FT or PC contact is processed, the System validates the account number and name involved in the transaction with the authorized customer name. If the validation is successful, the customer name is added to the existing list and the contract is marked as authorized.
If the validation fails the contract is marked as unauthorized. Even during manual authorization of such contracts, an override is displayed asking whether the customer name needs to be added to the existing list. It will be added to the existing list on confirming the override.
2.7 Quick Customer Addition
This section contains the following topics:
- Section 2.7.1, "Invoking Quick Customer Addition Screen"
- Section 2.7.2, "Personal Tab"
- Section 2.7.3, "Corporate Tab"
- Section 2.7.4, "Check List Tab"
- Section 2.7.5, "Account Details Button"
- Section 2.7.6, "MIS Button"
- Section 2.7.7, "Fields Button"
- Section 2.7.8, "Change Log Button"
- Section 2.7.9, "Viewing Quick Customer Addition Summary"
2.7.1 Invoking Quick Customer Addition Screen
In the ‘Quick Customer Addition’ screen, you can create, delete and authorize customer accounts. This screen facilitates creating a new customer account only with basic details. Additional details are added and amended in the ‘Customer Maintenance’ screen.
You can invoke the ‘Quick Customer Addition’ screen by typing ‘STDCIFAD’ in the field at the top right corner of the Application tool bar and clicking the adjoining arrow button.
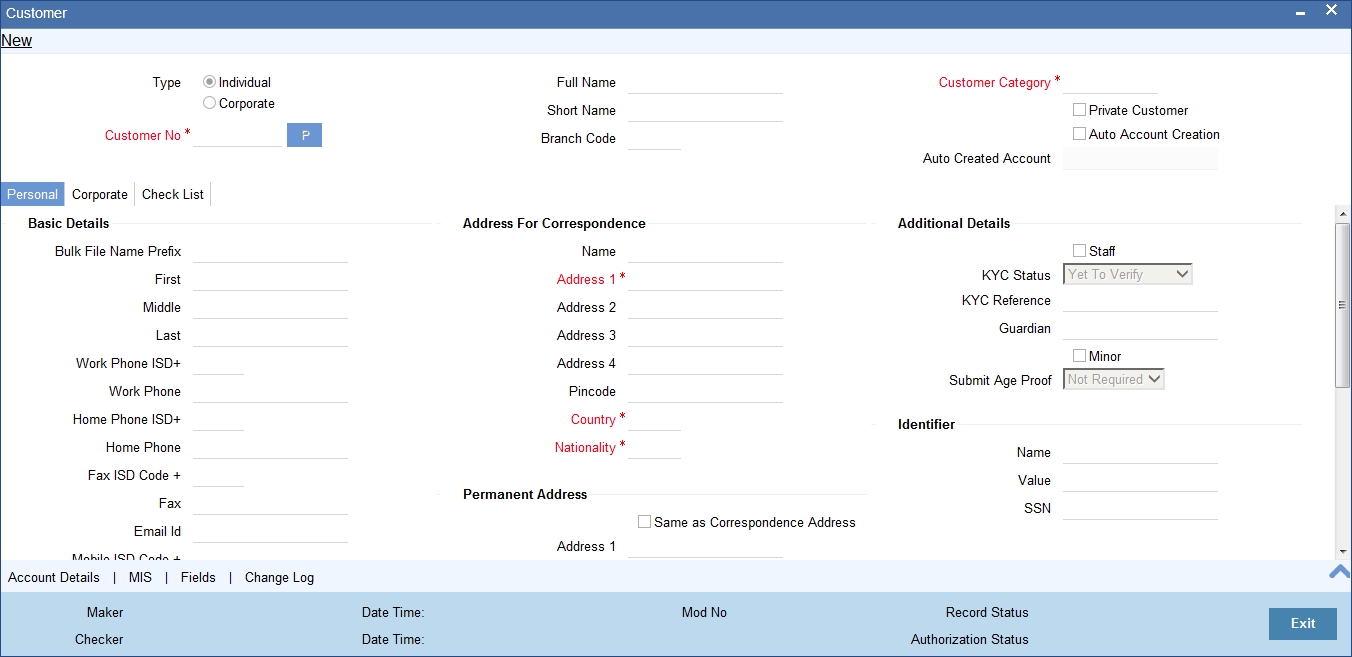
Note
The system does not allow to add ‘Bank’ type customers through ‘Quick Customer Addition’ screen.
You need to specify the following details:
Type
Select the customer type from the following options:
- Individual
- Corporate
Special Customer No Generation
Check this box to generate a special customer number in the ‘Customer Number’ field.
Note
- If the customer creation is manual/automatic, you should enter the desired customer number complying with the mask having the special number in the ‘Customer Number’ field. On click of ‘Populate’ button, the system validates whether the special number entered is an unused and a valid number.
- This field is disabled after generating customer number in the ‘Customer Number’ field.
- For normal customers, if the customer number generation is manual, you cannot use the special numbers maintained for customer number generation. If the customer number generation is automatic, the system skips the special numbers maintained for the branch.
- You cannot generate Special Customer Number from ‘Quick Customer Creation’ screen. A customer created using ‘Quick Customer Creation’ screen is treated as normal customer.
You can maintain branch wise CIF and CASA range for specific customers. A range can also be maintained for special number generation. For more information, refer to the section ‘Special Range/Number Maintenance’ in the chapter 'Customer Accounts' in CASA User Manual.
Customer No
Specify the customer number. The option list displays valid customer numbers. Choose the appropriate one.
Note
In bank parameters, if the ‘Auto CIF Generate’ check box is selected, the system generates and displays CIF. Else, you need to specify the CIF as per the CIF mask.
Full Name
Specify the complete name of the customer.
Short Name
Specify the customer’s unique abbreviated name or a short name.It helps in conducting a quick alpha-search or generating queries regarding the customer. This is an optional field.
While processing a transaction which involves customer identification, this uniquely abbreviated short name of the customer will be available in the option list for selection of the customer.
Branch Code
The system displays the local branch code.
Customer Category
Specify the customer category. The option list displays the values maintained in Customer Categories Maintenance. Choose the appropriate one.
Refer to section 2.2.6 for more information on Customer Category.
Private Customer
Check the box if the customer is a private customer.
Auto Account Creation
Check the box if an account has to be created simultaneously with the customer creation.
Auto Created Account
The system displays the customer account number that is created using 'Add Account' facility.
2.7.2 Personal Tab
Personal tab is accessible only when the customer type is selected as ‘Individual’. In this tab, you need to provide the following information:
Basic Details
Prefix
Specify the prefix of the customer.
First
Specify the first name of the customer. If ‘Investment Customer’ is selected in the ‘Additional Tab’ and if the type of customer selected is ‘Individual’, then this field will be a mandatory field.
Middle
Specify the middle name of the customer.
Last
Specify the last name of the customer.
Work Phone
Specify the work telephone number of the customer for correspondence.
Home Phone
Specify the home telephone number of the customer for correspondence.
Fax
Specify the fax number of the customer for correspondence.
Email Id
Specify the email address of the customer for correspondence.
Mobile Number
Specify the mobile number of the customer for correspondence.
Communication Mode
Select the mode of communication for the customer. The options available in communication mode are:
- Mobile
Gender
Select the gender of the customer. The following options are available for selection:
- Male
- Female
- Other
- Prefer Not to Disclose
National Id
Specify the corporate National Identification Number of this customer, This is the registration number of your customer organization.
Date of Birth
Specify the date of birth of the customer.
Resident Status
Select the residential status of the customer. The options available are:
- Resident
- Non Resident
Language
The system displays ‘English’. You can modify it, if required.
Address For Correspondence
Specify the address of the customer. You need to provide the following address details:
Name
Specify the name of the customer..
Note
The number of characters that you can enter in this field is determined by the preference that you specified in the Bank Parameters screen. However, in the advices and statements that are sent to the customer only the first 35 characters of the name will be displayed.
Address 1–4
Specify the mailing address of the customer. In each line, all characters should conform to SWIFT standards.
Pincode
Specify pincode of the address specified.
Country
Select the country of the customer from the adjoining option list.
Nationality
Select the nationality of the customer from the adjoining option list
Permanent Address
‘Permanent Address’ contains the permanent address of the customer. You need to specify the following information:
Same as Correspondence Address
Check the box if the ‘Address For Correspondence’ is same as “Permanent Address’. If the permanent address is not same as the address for correspondence, you need to provide the details of the permanent address.
Address 1–4
Specify the permanent address of the customer.
Pincode
Specify pincode of the permanent address specified.
Country
Specify the country of permanent residence of the customer.
Additional Details
Staff
Check this box whenever a customer record is created for a staff. By default this box is left unchecked.
KYC Status
Select the Know Your Customer (KYC) status of the customer.
KYC Reference
The system displays the reference number. The KYC reference number will be generated and displayed while saving this screen.
Guardian
Specify the name of the legal guardian of the customer if the customer is a minor. You can capture the name of the legal guardian, not exceeding 35 characters, alphanumeric. The characters should conform to SWIFT standards.
Minor
Check the box if the customer wants to nominee a minor.
Submit Age Proof
Select the age proof submission status of the minor to major from the following options:
- Not required
- Pending
- Verified
Note
- Any out flow or debit transaction is posted on a particular customer’s account/s and the ‘Submit Age Proof’ chosen is ‘Pending’, then the system displays an error message as “Necessary documents are not submitted for Major”.
- Once the documents are submitted, the user has to manually set ‘Submit Age Proof’ as ‘Verified’.
After the field ‘Submit Age Proof’ is changed to ‘Verified’, then all the accounts created for the customer would be allowed for withdrawals.
Identifier
Name
Enter the identifier name in not more than 20 characters.
Value
Specify the value of the identifier. You have to capture the serial number or any number of significance that is to be associated with the document, which helps in identifying the document.
SSN
Specify the SSN available in the identifier.
2.7.3 Corporate Tab
Corporate tab is accessible only when the customer type is selected as ‘Corporate’. In this tab, you need to provide the following information:

Address For Correspondence
‘Address for Correspondence’ contains the physical address of the customer. You need to specify the following address details:
Name
Specify the name of the customer. The customer will be addressed by this name in all correspondence sent from the bank. These characters should conform to SWIFT standards.
Note
The number of characters that you can enter in this field is determined by the preference that you specified in the Bank Parameters screen. However, in the advices and statements that are sent to the customer only the first 35 characters of the name will be displayed.
Address 1–4
Specify the mailing address of the customer.
Pincode
Specify pincode of the mailing address specified.
Country
Specify the country as given in the address of correspondence of the customer. You can select the appropriate country from the adjoining option list.
Nationality
Specify the nationality of the customer. You can select the appropriate nationality from the adjoining option list..
Telephone
Specify the telephone number of the customer.
Fax
Specify the fax number of the customer for correspondence.
Email Id
Specify the email address of the customer for correspondence.
Mobile Number
Specify the mobile number of the customer.
Language
Specify the language for customer communication.
Communication Mode
Choose the mode of communication for the customer. The options available in communication mode are:
- Mobile
Registration Address
Same as Correspondence Address
Check box if the registration address is same as the correspondence address.
Name
Specify the customer’s complete name.
Address 1–4
Specify the registration address of the customer.
Pincode
Specify pincode of the mailing address specified.
County
Specify the country’s name as per the registration address.
Incorporation
You need to specify the details about the company.
Date
Specify the date on which the company was started.
Currency of Amounts
Specify the Currency in which you specify the particular customer’s various financial details.
Capital
Specify the initial investment in the company.
Net Worth
Specify the net worth of the company.
Country
Specify the Country of registration of the office of the corporate.
Description of Business
Specify the nature of the business and the business activities carried out by the customer organization.
Additional Details
KYC Status
Select the Know Your Customer (KYC) status of the customer.
KYC Reference
The system displays the reference number. The KYC reference number will be generated and displayed while saving this screen.
National Id
Specify the corporate National Identification Number of this customer, This is the registration number of the customer organization.
Joint Venture
Select the check box if you have a joint venture.
Joint Venture Details
Party ID
Specify the party ID of your joint venture.
Party Name
The system displays the party name.
Ratio
Specify the ratio between the participants on share.
Identifier
Name
Enter the identifier name..
Value
Specify the identifier value.You have to capture the serial number or any number of significance that is to be associated with the document, which helps in identifying the document.
2.7.4 Check List Tab
Checklist is an optional tab based on the workflow of the bank. In this tab, you need to provide the following information:

Document List
Document Type
Specify the document type. The option list displays the document types that are maintained in the system. You can select the appropriate one. If ‘Investment Customer’ has been selected in the ‘Additional Tab’ then at least one record needs to be provided mandatorily.
Checked
Check this box to indicate that the received documents are acknowledged.
Remarks
Remarks
Specify the remarks about the workflow of the bank, if any.
2.7.5 Account Details Button
You can capture the details to open a customer’s account quickly using the ‘Quick Customer Account Opening’ screen. To invoke this screen, click ‘Add Account’ button in the ‘Customer Accounts Maintenance’ screen.

Note
After specifying the basic details, you can create a new account in addition to creating a customer.
You need to specify the following details:
Location
Each customer code should be associated with a location code. The location is indicative of the place of residence of your customer.
The option list positioned next to this field contains a list of all the location codes maintained in the Location Details maintenance screen. You can select the appropriate code to identify the place of residence of your customer.
Given below is an illustration of how a location code is associated with the CIF record of a customer. For example, you would like to maintain the CIF details of your customer Silas Marner. Although Silas Marner is Irish, he is a resident of London and lives in the northern part of London. Your entries in the respective fields of the CIF Maintenance screen should be as follows:
Fields in Oracle FLEXCUBE |
Your entry |
Customer Code |
SILAS01 |
Nationality |
IRS (Ireland) |
Location Code |
NL1 (North London) |
Options
Spend Analysis
The system displays the status of spend analysis from the ‘Account Class Maintenance’ screen.
For more details on the ‘Quick Customer Account Opening’ screen, refer to the section, ‘Quick Account Opening’ in the chapter, ‘Customer Accounts’ of the Oracle FLEXCUBE, ‘Current and Savings Account’ User Manual.
2.7.6 MIS Button
You can capture Management Information System details for the account, using the ‘Management Information System’ screen. To invoke this screen, click ‘MIS’ button in the ‘Customer Accounts Maintenance’ screen.
For more details on the ‘Management Information System’ screen, refer to the section ’3.2.19’ in the chapter, ‘Maintaining Customer Accounts’ of the Oracle FLEXCUBE, ‘Current and Savings Account’ User Manual.
2.7.7 Fields Button
You can capture User Defined Fields for the account, using the ‘User Defined Fields’ screen. To invoke this screen, click ‘Fields’ button in the ‘Customer Accounts Maintenance’ screen.
For more details on the ‘User Defined Fields’ screen, refer to the section ’3.2.26’ in the chapter, ‘Maintaining Customer Accounts’ of the Oracle FLEXCUBE, ‘Current and Savings Account’ User Manual.
2.7.8 Change Log Button
You can capture the audit history details for the operations performed on that customer and the account using the ‘Change Log’ screen. To invoke this screen, click ‘Change Log’ button in the ‘Customer Accounts Maintenance’ screen.
For more details on the ‘Change Log’ screen, refer to the section ’3.2.34.1’ in the chapter, ‘Maintaining Customer Accounts’ of the Oracle FLEXCUBE, ‘Current and Savings Account’ User Manual.
2.7.9 Viewing Quick Customer Addition Summary
You can view the details of the quick customer addition in the ‘Quick Customer Addition Summary’ screen. You can invoke this screen by typing ‘STSCIFAD’ in the field at the top right corner of the Application tool bar and clicking on the adjoining arrow button.

You can search for the records based on either one or more of the following search parameters:
- Authorization Status
- Record Status
- Customer No
- Type
- Name
- Short Name
- Customer Category
- Country
- Nationality
- Branch Code
Once you have specified the search parameters, click ‘Search’ button. The system will display the following information:
- Authorization Status
- Record Status
- Customer No
- Type
- Name
- Short Name
- Customer Category
- Country
- Nationality
- Branch Code
- Address
- Full Name
- SSN
2.8 Employer Maintenance
In Oracle FLEXCUBE, you can maintain details regarding the employer of a customer. You can maintain the employer details in the ‘Employer Maintenance’ screen. You can invoke this screen by typing ‘SMDEMPMT’ in the field at the top right corner of the Application tool bar and clicking the adjoining arrow button.
The screen is as shown below:

You can maintain the following details here:
Employer Code
Specify a unique code for the employer. The employer code can be an alphanumeric character with a maximum length of nine characters.
Employer Description
Enter a small description for the employer code entered.
2.9 Tax Waiver Maintenance
This section contains the following topics:
- Section 2.9.1, "Maintaining Waiver for Customer Tax Group"
- Section 2.9.2, "Maintaining Tax Allowance Limit for Customers "
2.9.1 Maintaining Waiver for Customer Tax Group
You can maintain waiver related information for Customer Tax Group – Tax Category combination. Invoke this screen by typing ‘STDTAXWV’ in the field at the top right corner of the Application tool bar and clicking the adjoining arrow button.
The screen is as shown below:

Customer Group
You need to specify the Customer Group for which you wish to maintain Tax waiver. Select a customer group from the option list provided.
Customer Number
All customers who have been maintained under the selected customer tax group will appear for selection. If the maintenance is applicable to all customers, select ‘All’ as customer number. If no maintenance is done, then there will be no tax waiver at the customer level.
Tax Category
You need to specify a tax category for which you wish to main tax waiver
Tax Currency
You need to specify the currency in which the tax waiver should be defined. Select ‘All,’ if you wish to define tax waiver for all currencies
Product Or Account Class
You need to specify the Product/Account Class for which the tax waiver is being defined. All account classes and all LD/MM products will be available for selection. You may also select ‘ALL’ in which case the tax waiver would be applicable to all products and account classes.
From Date and To Date
You need to specify the date from which the particular waiver rule is applicable. The To Date is the date up to which the waiver rule is effective.
The To Date should be greater than or equal to the From Date. The To Date field can also be left blank which would indicate that the maintenance is open-ended.
Waiver %
Specify the tax waiver in terms of percentage, which should be made applicable for the period defined. The value you enter should be > 0 and < = 100.
2.9.1.1 Pick-up Order for Waiver Rule
The following table gives the waiver rule pick up order:
Customer Group |
Customer No |
Tax Category |
Currency |
Product/Account Class |
Specific |
Specific |
Specific |
Specific |
Specific |
Specific |
Specific |
Specific |
Specific |
ALL |
Specific |
Specific |
Specific |
ALL |
Specific |
Specific |
Specific |
Specific |
ALL |
ALL |
Specific |
ALL |
Specific |
Specific |
Specific |
Specific |
ALL |
Specific |
Specific |
ALL |
Specific |
ALL |
Specific |
ALL |
Specific |
Specific |
ALL |
Specific |
ALL |
ALL |
Thus for a specific customer in the group, the rule is relaxed for the product first and then for the currency. If no rule is available for selection, then the same process will be repeated where customer number is ‘ALL’ for the customer group.
2.9.2 Maintaining Tax Allowance Limit for Customers
You can maintain tax-free allowance limit at the Customer level. Invoke this screen by typing ‘STDCULMT’ in the field at the top right corner of the Application tool bar and clicking the adjoining arrow button.
The screen is as shown below:

You need to specify the tax group of the customer for whom you wish to define tax-free allowance limit. Select from the option list provided.
Customer Number
You need to specify the customer number for which you wish to define tax free allowance limit. Only customers belonging to the selected tax group will be available for selection. You may also select the ‘All’ option. This is indicative of all customers for the selected Tax Group.
Tax Category
You need to specify the tax category for which you wish to define tax free allowance limit. Select from the option list provided.
From and To Date
You need to specify the date from which the tax-free allowance limit is effective, as well as the date up to which this limit is applicable. The To Date should be greater than or equal to the From Date. The To Date field can also be left blank which would indicate that the maintenance is open-ended.
Limit Currency
You need to specify the currency in which the free allowance limit is being defined
Limit Amount
You need to specify the maximum waiver for the taxable amount (Basis Amount) for the customer for each tax cycle if the End Date overlaps tax cycles or for a particular tax cycle if the period falls within a specific tax cycle.
Remarks
You can specify any remarks you think necessary for the tax limit you have defined. This will be in free format text.
2.9.2.1 Deriving Tax Free Allowance Limit
The following table will be used to derive the tax-free allowance limit:
Customer Tax Group |
Tax Category |
Customer No |
Specific |
Specific |
Specific |
Specific |
Specific |
ALL |
2.10 Maintaining Risk Category for Customers
In order to support risk-weighted risk tracking, you will have to maintain risk details for Customers.
You can maintain different Risk Categories for Customers in the ‘Risk Category Maintenance’ screen. You can invoke this screen by typing ‘STDRSKMT in the field at the top right corner of the Application tool bar and clicking the adjoining arrow button.

Specify the following details in this screen:
- Risk Category – Define the type of Risk Category in this field
- Description – Provide a brief description of the Risk Category being maintained
The types of Risk Categories defined in this screen will be available for Liability maintenance of customers and Risk percent maintenance, only upon authorization of the details maintained.
Note
Risk Category is not a mandatory input during Customer Maintenance. Risk Category is applicable to the Customer and not to the Customer’s Liability ID.
2.11 Maintaining Customer Ownership
You can maintain different types of customer ownerships in ‘Customer Ownership Maintenance’ screen. You can invoke this screen by typing ‘STDOWMNT’ in the field at the top right corner of the Application tool bar and clicking the adjoining arrow button.

You can maintain the following details:
Customer Ownership
Specify the type of customer ownership you need to maintain.
Description
Specify the description for the customer ownership type specified.
Customer Ownership maintenance is a day 0 maintenance. You can amend the ownership record only when the created record is not used in any of the customer record. Also, The created records cannot be closed.
2.12 Viewing Customer Net Worth Report
To generate the report of the customer’s net worth, type ‘STRCUSEG’ in the field at the top right corner of the Application tool bar and clicking on the adjoining arrow button.

The system displays the following details:
- Customer Number
- Customer Name
- Local Branch
- RM Id
- Net Worth
2.13 Customer Relationship Maintenance
This section contains the following topics:
- Section 2.13.1, "Maintaining Types of Relationships"
- Section 2.13.2, "Maintaining Relationships between Customers"
The credit facility granted to any customer is tracked against the Liability Number of the customer. You can also track the liability of a customer (child) against a different customer (parent). Thus, the liability number emphasizes only one kind of relationship, that of the parent with the child.
However, a customer of your bank can have relationships with other customers of your bank i.e. there is a possibility of one to many relationships between customers.
Oracle FLEXCUBE allows you to define different types of relationships that can exist between two customers. For eg: Business, Husband, Wife, and Partners etc. You can link two customers by specifying the relationship that exists between them. The advantage being that, when you generate the exposure report for a customer, it will display the total exposure of the bank to every customer linked to the liability in question as well as the exposure of every customer who is related to any customer within the liability. The example given at the end of this section will further illustrate this concept.
2.13.1 Maintaining Types of Relationships
You can maintain the different types of relationships that can exist between customers of your bank in the ‘Relation Maintenance’ screen. You can invoke this screen by typing ‘STDRELMN
’ in the field at the top right corner of the Application tool bar and clicking the adjoining arrow button.

Specify the following details in this screen:
- Relation – Define the type of relationship in this field. You can use a maximum of 20 alphanumeric characters to define a relationship
- Description – Provide a brief description of the relationship being maintained. This will further help you in identifying the relationship
The types of relationships defined in this screen will become available for linking two customers, only upon authorization of the details maintained
2.13.2 Maintaining Relationships between Customers
The ‘Customer Linkage Maintenance’ screen is used to maintain relationships between customers. In this screen, you can link two customers and specify the relationship that exists between them. You can invoke this screen by typing ‘STDCULMN’ in the field at the top right corner of the Application tool bar and clicking the adjoining arrow button.
The screen is as shown below:
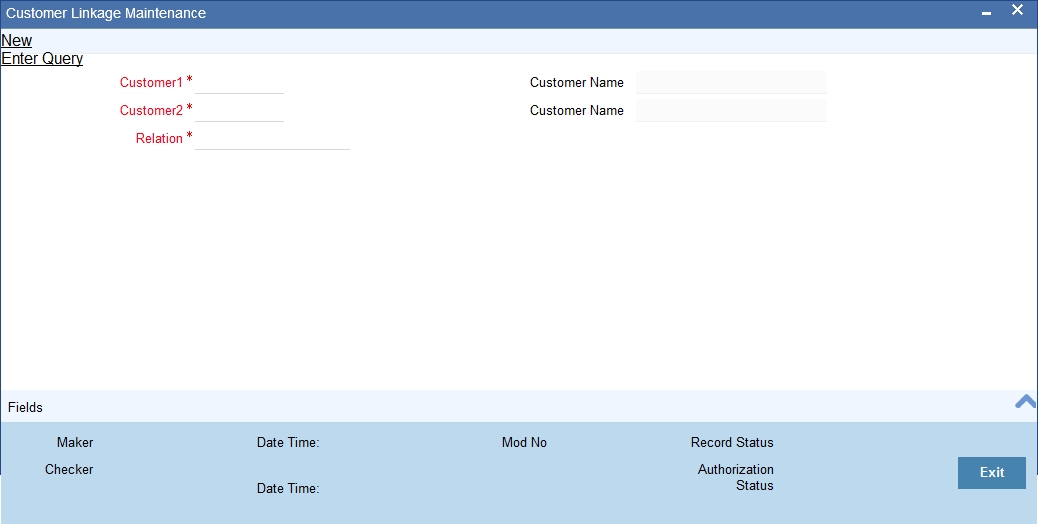
Customer 1 and 2
You can select the names of the customers between whom a relationship is to be established. All authorized customers of your bank will be available in the option-lists provided.
Relation
Specify the type of relationship that exists between the selected customers (1 & 2). All authorized relation types maintained through the ‘Relation Maintenance’ screen will be available in the option list provided. You can select the appropriate name from this list.
This linkage of customers will be used for taking exposure report for the customer. If you maintain a linkage between Customer1 and Customer2, the system will automatically establish a linkage of Customer2 with Customer1. After you maintain a linkage between two customers, you are not allowed to change the customers involved in the linkage. However, you can alter the relationship that exists between them. Only one type of relationship can exist between any two customers. The following example will illustrate the manner in which you can maintain relationship details between customers and the need for the same.
2.14 Float Days Maintenance
The section contains following topics:
- Section 2.14.1, "Maintaining Float Days for Outward Clearing Customer Transactions"
- Section 2.14.2, "Extending Float Days for Outward Clearing Transaction"
- Section 2.14.3, "Extending Float Days of a Specific Outward Clearing Transaction"
- Section 2.14.4, "Float Extension Batch Process"
2.14.1 Maintaining Float Days for Outward Clearing Customer Transactions
Float days applicable for arriving at the Credit Value Date for outward clearing customer transactions are defined through the ‘Float Days Detailed’ screen.
Invoke this screen by typing ‘’STDFLTMT’ in the field at the top right corner of the Application tool bar and clicking the adjoining arrow button.
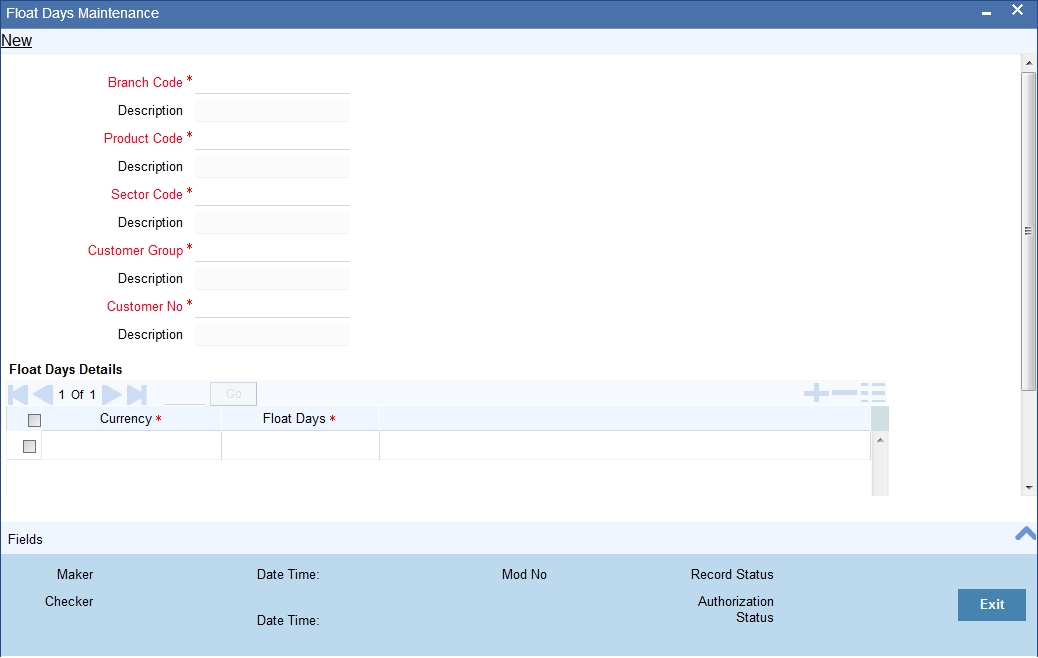
You can define the float days for transactions involving a specific Clearing Bank, Branch, Product, Sector and Currency combination for:
- All customer groups and all customers within the groups
- A specific customer group and all customers within the group
- A specific customer group and a specific customer within the group
The System resolves the float days in the following order:
Branch Code |
Product Code |
Sector Code |
Currency |
Customer Group |
Customer Number |
Specific |
Specific |
Specific |
Specific |
Specific |
Specific |
Specific |
Specific |
Specific |
Specific |
Specific |
ALL |
Specific |
Specific |
Specific |
Specific |
ALL |
ALL |
Note
The float days will be considered as Working Days or Calendar Days depending on your specification in the ‘ARC Maintenance’ screen.
2.14.2 Extending Float Days for Outward Clearing Transaction
Oracle FLEXCUBE supports the extension of float days for outward clearing transactions. The value date of the outward clearing transaction is extended based on
- Sector Code
- Bank Code
- Branch Code
Invoke the Float Extension Maintenance Screen by typing ‘CGDBFLEX’ in the field at the top right corner of the application tool bar and clicking the adjoining arrow button.

Branch Code
Alphanumeric; Mandatory
The system displays the branch code.
Clearing Type
Alphanumeric; Mandatory
Select the clearing type from the adjoining option list.
Reference Number
Alphanumeric; Mandatory
The system displays the unique reference number of the float extension maintenance.
Float Extension
Numeric; Mandatory
Specify the number of days by which the float days is extended for clearing the instrument.
Sector Code
Alphanumeric; Mandatory
Select the sector code from the adjoining option list.
Status
Alphanumeric; Optional
The system displays the status whether the maintenance is executed or not.
Bank Code
Alphanumeric; Mandatory
Select the bank code from the adjoining option list.
Transaction Date
Date Format; Mandatory
The system displays the transaction date as current date.
Clearing Branch Code
Alphanumeric; Mandatory
Select the specific branch code or ALL from the adjoining option list.
You can maintain a New record for Float Extension. You can also View, Unlock, Authorize, Delete, Close and Open the same.
2.14.3 Extending Float Days of a Specific Outward Clearing Transaction
Float days are extended for a specific cheque, demand draft, bankers cheque and also for a group of transactions like all outward clearing transactions of a specific sector or bank sector. Invoke the ‘Float extension of a Outward Clearing’ by typing ‘CGDCFLEX’ in the field at the top right corner of the Application tool bar and clicking the adjoining arrow button.

You can query the outward clearing transactions based on the following criteria:
- Account Number
- Clearing Type
- Routing Number
- Instrument Number
- Instrument Type
Branch Code
The system displays the branch code.
Instrument Number
Specify the instrument number for which float extension is done.
Reference Number
The system displays the unique reference number of the float extension maintenance.
Routing Number
Select the Routing Number from the adjoining option list.
Account Number
Select the Account Number from the adjoining option list.
Float Extension
Specify the number of days by which the float days is extended for clearing the instrument. The system defaults the extension day as 1.
Clearing Type
Select the Clearing Type from the adjoining option list.
New Value Date
The system displays the value date calculated based on the float extension days.
Instrument Type
Select the Instrument Type from the drop-down list.
Value Date
The system displays the current customer value date of the transaction.
FLEXCUBE Reference
Reference Number of the transaction is displayed here.
Click ‘Populate’ to view the current customer value date and the new customer value date based on the float extension days and clearing house holiday maintenance.
You can Save, Query, Authorize and Delete Float Extension of an Outward Clearing.
During Authorization, the float extension for the given instrument triggers:
- The value date of the transaction to the new value date.
- Reversal of accounting entries for the transaction.
- Post accounting entries for the transaction with new value date.
- The available date of the fund to the new value date.
2.14.4 Float Extension Batch Process
CGBFLEXT batch can be configured as an intra day batch to trigger the float extension of the cheque transaction based on the float extension maintenance (CGDBFLEX). The batch process of float extension takes place as follows:
- The value date of the transaction is updated to the new value date.
- The reversal of the accounting entries is passed for the transaction.
- Accounting entries are posted with new value date.
- If the transaction date is maintained as the date of the day and the status is UNPROCESSED, it will be executed by the batch excluding the previous days maintenance.
- The batch updates all the outstanding outward clearing transactions.
- If multiple maintenances are maintained, then the batch executes them in order. This is extracted by the maker time stamp.
For Example:
- Extend 2 days for all bank & branch in sector 600
- Extend 3 days for SBI bank, 000 branch in 600 sector.
In the above scenario, based on the first maintenance system will extend all transactions sent to all bank, branches in 600 by 2 days. Then all transactions sent to 000 branch of SBI in 600 sector will be extended by 3 days. Thus, the transactions sent to 000 branch of SBI in 600 sector will get extended by 5 days. Hence you need to take necessary caution on maintaining the bulk float extension.
The following example briefs about the float extension of a cheque transaction.
2.15 Account Address Location Maintenance
In Oracle FLEXCUBE, you have a provision wherein you can maintain location codes. You do this through the ‘Account Address Location Maintenance’ screen. Invoke this screen by typing ‘STDACCLO in the field at the top right corner of the Application tool bar and clicking the adjoining arrow button.

Location
The relevant location code. This pertains to a particular area in a country. It cannot be more than 15 characters
Description
A short description to the location code
Default
If the location code is to be maintained as a default location code, the same could be specified here by checking against this option. Only one location can be marked as a default location.
The following points are noteworthy:
- Once you save the above maintenance, Oracle FLEXCUBE checks for duplicate location codes. To recall, existing location codes are maintained through the ‘Location Codes Maintenance’ screen. If a match is found, system throws up an error.
- This maintenance is applicable only for account level address maintenances and not for address maintenances done at the customer level
2.16 KYC Maintenance
This section contains the following topics:
- Section 2.16.1, "Maintaining KYC Type"
- Section 2.16.2, "Maintaining Customer KYC Details"
- Section 2.16.3, "Corporate Customer Tab"
- Section 2.16.4, "Corporate or Audit HO Details Tab"
- Section 2.16.5, "Financial Customer Button "
- Section 2.16.6, "Fields Button"
2.16.1 Maintaining KYC Type
Oracle FLEXCUBE maintains KYC details for all customers. For Individuals / Salaried employees, the KYC is fairly simple and straight forward. However, for Small and Medium Enterprises (SME) and corporate customers or Banks, the KYC for the company and its Directors should be done. The KYC for any share holder having the percentage of stock equal to or more than the defined percentage should be done. These share holders may not be the banks customers. The System maintains KYC for NON-CIF customers also.
Oracle FLEXCUBE tracks all the sources of funds/income of any person/company/banks undergoing KYC. The system also tracks approximate number of transactions they are expected to perform in their accounts.
You can specify the details of KYC type in the ‘KYC Type Maintenance’ screen. You can also invoke this screen by typing ‘STDKYCTP’ in the field at the top right corner of the Application tool bar and clicking the adjoining arrow button.

Here you can specify the following details:
KYC Type
Specify the type of KYC that should be maintained.
KYC Type Description
Specify the description that should be maintained for the specified KYC type.
Specifying KYC Value Details
You can specify the following KYC value details:
KYC Type Value
Specify the value of the KYC type.
KYC Type Value Description
Specify the description for the KYC type value.
The table below illustrates the KYC types and the possible values for each KYC types.
KYC Type |
Possible Values |
KYC_DECLARED |
Ownership Shareholding |
KYC_SRC_INCOME |
Salary Rental Investment Business Concerns Professional Business Overseas Property Others |
KYC_TYP_COMP |
Sole Proprietor Partnership LLC PSC PJSC Free Zone Enterprise Government Entity Charity Orgn FZ Co. Offshore Company FZ LLC Others |
KYC_PURPOSE |
Commercial Individual |
KYC_DET_PURPOSE_COMM |
Commercial Banking Trade Services Private Banking Investments Loans Retail Banking Null (Provide Details) |
KYC_DET_PURPOSE_IND |
Salary Transfer Savings Investment Loan Repayment Transactional |
KYC_SAL_TYPE |
Cash Direct Deposit Company Cheque TT/SWIFT/CB Null (Provide Details) |
KYC_SETTL_PAY |
Cash Cheque Wire Transfer LC/Documentary Collection |
KYC_TXN_DET |
Monthly Withdrawals Deposits Remittances By Cash Remittances BY Cheque Local Remittance (Inward) Local Remittance (Outward) Foreign Remittance (Inward) Foreign Remittance (Outward) For Salaried Individuals, this is required only for Risk level 2 & 3 customers |
KYC_TYPE_ACC |
Sole/Joint |
KYC_OCCUPATION |
Own Business Employed |
KYC_FI_STATUS |
Ho Branch Central Office Subsidiary Rep Office Others |
KYC_FI_TYPE |
Commercial Bank Investment Bank Offshore Bank Leasing Company Exchange Company Others |
KYC_AREA_OF_BUSINESS |
Retail Corporate Investment Transfers Islamic Banking Trade Treasury Others |
KYC_OWNERSHIP |
Government Private Owned Public Held Partly Owned By Gov and part by private or public Investors/Partly Traded in Stock Exchange Shares Traded In Stock Exchange & Partly Held By Private And Public Investors Others |
KYC_PRODUCTS |
Incoming Transfer – MT103 Incoming Transfer – MT202 Outgoing Transfer – MT103 Outgoing Tranfer – MT202 Clearing and Collections (Cheques and Drafts) LC Advising LC Reimbursements LC Confirmation LG Advising Bill Discounting Bankers Acceptances Risk Participation (Funded and Non-funded) per annum |
KYC_BANK_STRUCTURE |
Board of Directors Executive Committees |
KYC RATING |
Satisfactory Unsatisfactory Fair |
KYC SHARE HOLDER TYPE |
Legal Entity Individual |
2.16.2 Maintaining Customer KYC Details
You can maintain the KYC details of the customer in the ‘KYC Details’ screen. You can invoke this screen by typing ‘STDKYCMN’ in the field at the top right corner of the Application tool bar and clicking the adjoining arrow button.

Here you can specify the following details:
KYC Reference Number
The system displays the reference number. The KYC reference number will be generated and displayed while saving this screen.
Full Name of Customer
Specify the full name of the customer.
KYC Customer Type
Specify the type of KYC customer from the adjoining drop-down list. The list displays the following values:
- Retail Customer
- Corporate Customer
- Financial Customer
Risk Level
Select the risk level from the drop-down list. The list displays the following values:
- Level1
- Level2
- Level3
Retail Customer Tab
You can specify the KYC profile details for retail customer in the ‘KYC Retail Profile’ screen. Click ‘Retail Customer’ tab to invoke this screen.
You can capture the following details on this screen:
Beneficial Owner Information
You can specify the following details pertaining to the beneficial owner:
Resident
Check this box to indicate that the beneficial owner is a resident. If you do not check this option, the system will not consider the owner as a resident.
Politically Exposed Person
Check this box to indicate that the beneficial owner is a politically exposed person.
PEP Remarks
Specify the remarks about the declaration of the beneficial owner as politically exposed person.
Local Address
Specify the local address of the beneficial owner.
Home Country Address
Specify the home country address of the beneficial owner.
Home Country
Specify the home country of the beneficial owner
Permanent US Resident Status
Check this box to indicate that the beneficial owner has a valid US residence status.
Visited US in last 3 years?
Check this box to indicate that the beneficial owner has visited US in the last three years.
Nationality
Specify the nationality of the beneficial owner.
Birth Place
Specify the place of birth of the beneficial owner.
Birth Country
Specify the birth country of the beneficial owner.
Birth Date
Specify the birth date of the beneficial owner.
Office ISD Code +
Specify the international dialling code for the office telephone number.
Office Tel Number
Specify the telephone number of the beneficial owner’s office.
Residence ISD Code +
Specify the international dialling code for the home telephone number.
Residence Tel No
Specify the residential telephone number of the beneficial owner.
Mobile ISD Code +
Specify the international dialling code for the mobile number.
Mobile Tel Number
Specify the mobile telephone number of the beneficial owner.
Fax ISD Code +
Specify the international dialling code for the fax number.
Fax
Specify the Fax number of the beneficial owner.
Purpose of Account Opening
Specify the purpose of opening the account.
Others
If you wish to provide any additional information about the beneficial owner, use this field.
Account Type
Specify the type of the account.
Power of Attorney
Check this box to indicate that the beneficial owner holds a power of attorney.
Passport Number
Specify the passport number of beneficial owner.
Passport Expiry Date
Specify the expiry date of the passport.
Visa Number
Specify the visa number of the beneficial owner.
Visa Expiry Date
Specify the expiry date of visa.
KYC Amounts Ccy
Specify the currency in which KYC amount is maintained.
Power of Attorney
Note
If the FATCA is enabled at the bank and the check box 'Power of Attorney' is checked here, then it is mandatory to specify the Power of Attorney information.
Power of Attorney
Check this box to indicate that the customer account is to be operated by the power of attorney holder.
Holder Name
Specify the person who gave the power of attorney.
Nationality
Specify the nationality of the power of attorney holder.
Address
Specify the address of the power of attorney holder.
Country
Specify the country of the power of attorney holder.
Telephone ISD Code +
Specify the international dialling code for the telephone number.
Telephone Number
Specify the telephone number of the power of attorney holder.
Beneficially Owned Company Details
You can specify the details of the beneficially owned company in the following fields:
Company Name
Specify the name of the company.
Location
Specify the location of the company.
% Holding
Specify the percentage of holding.
Annual Income
Specify the annual income of the company.
Line of Business
Specify the line of business of the company.
Source of Income
You can specify various sources of income in the following fields:
Salary
Check this box to indicate that salary is a source of income.
Rental
Check this box to indicate that rent is a source of income.
Investment
Check this box to indicate that investment is a source of income.
Business concern
Check this box to indicate that the business concern is a source of income.
Professional Business
Check this box to indicate that the professional business is a source of income.
2.16.3 Corporate Customer Tab
You can specify the KYC profile details for corporate customer in the ‘KYC Corporate Profile’ screen. You can invoke this screen by clicking ‘Corporate Customer’ tab in the ‘KYC Maintenance’ screen.

Here you can specify the following details:
Customer and Sponsors Information
You can specify the information of customers and sponsors in the following fields:
Groups Name
Specify the name of the group.
Parent Company’s Country of Inc
Specify the country of Parents Company. The adjoining option list displays all valid countries maintained in the system.
Type of Company
Specify the type of the company. The adjoining option list displays all valid company types maintained in the system. You can choose the appropriate one.
Others
If you wish to provide additional information on customer and sponsors, use this field.
KYC Amounts Ccy
Specify the currency in which KYC amount is maintained.
Reason of Account
You can specify the reasons for opening the account in the following fields:
Purpose of Account Opening
Specify the reason for opening an account. The adjoining option list maintains all valid reasons maintained in the system. You can choose the appropriate one.
Others
If you wish to provide additional information and reasons, use this field.
Nature of Business
You can specify the nature of business in the following fields:
Nature of Business
Specify the nature of business. The adjoining option list displays all valid businesses maintained in the system. You can choose the appropriate one.
Product Traded
Specify the name and details of the product traded during the course of the business.
Main Source of Funds
Specify the main source of funds.
Borrowing Account Group
Specify the borrowing account group.
Annual Turnover
Specify the annual turnover of the company.
Details of Key Person
You can specify the details of the key person in the following fields:
KYC ID
Specify a unique identification for the KYC details of the key person.
Name
Specify the name of the key person.
Position or Title
Specify the position or title of the key person.
Relationship
Specify the relationship between the key person and the corporate customer. The adjoining option list displays all valid relationships maintained in the system. You can choose the appropriate one.
Nationality
Specify the nationality of the key person. The adjoining option list displays all valid nationalities maintained in the system. You can choose the appropriate one.
Address
Specify the address of the key person.
Country
Specify the country of the key person
ISD Code
Specify the international dialling code for the telephone number.
Telephone Number
Specify the telephone number of the key person.
Tax Id Number
Specify the tax identification number of the key person.
Share Percentage
Specify the percentage of share for the key person.
Company Details
You can specify the details of the company in the following fields:
Details of Company Branches
Specify the details of the company branches.
Number of Person Employed
Specify the number of person employed in the company.
Mode for Salary
Specify the mode of salary payment in the company. The adjoining option list displays all valid modes maintained in the system. You can choose the appropriate one.
Others
If you wish to provide additional information on the company, use this field.
Details of Suppliers
You can specify the details of suppliers in the following fields:
Supplier Name
Specify the name of the supplier.
Country
Specify the country to which the supplier belongs.
Settlement Mode
Specify the mode of settlement. The adjoining option list displays all valid modes maintained in the system. You can choose the appropriate one.
Details of Clients
You can specify the client’s details in the following fields:
Client Name
Specify the name of the client.
Country
Specify the name of the country of the client.
Payment Mode
Specify the mode of payment. The adjoining option list displays all valid modes maintained in the system. You can choose the appropriate one.
Transaction Types
You can specify the details of the transaction types in the following fields:
Transaction Type
Specify the type of transaction.
Count
Specify the count of the transaction.
Total Amount
Specify the total amount of the transaction.
Max Single Amount
Specify the maximum single amount allowed for the transaction.
Purpose
Specify the purpose of the transaction,
Country
Specify the country in which the transaction takes place.
Fund Transfer Purpose within Country
Specify the purpose of funds transfer within the country.
Audit Date
Specify the audit date. Use the date button to choose a date from the calendar.
Account Solicited
Check this box to indicate that the account should be solicited.
Account Solicited Date
Specify the date on which the account should be solicited using adjoining calendar button.
Introducer Details
Specify the details of the introducer.
Compliance Clearance
Specify the date of compliance clearance using adjoining calendar.
Business Approval
Specify the date of business approval using adjoining calendar.
Trade Licence No
Specify the trade licence number. The adjoining option list displays all valid licence numbers maintained in the system. You can choose the appropriate one.
KYC Next Review Date
Specify the next date of KYC review.
Comments
KYC
Specify the comments on the KYC details of the corporate customer.
Sales and Service Officer
Specify the comments of sales and service officer on the corporate customer.
Approvers
Specify the name and comments of the approvers of the corporate customers.
2.16.4 Corporate or Audit HO Details Tab
Click ‘Corporate or Audit HO Details’ tab in the ‘KYC Corporate Profile’ screen.

Here you can specify the following details:
CID Number
Specify the CID number of the corporate customer.
Name
Specify the name of the corporate customer.
STR Raised
Check this box to indicate that the STR should be raised.
STR Date
Specify the date of STR using adjoining calendar button.
STR Reference Number
Specify the reference number of the STR.
CB Response
Check this box to indicate that the CB should be responded.
CB Response Date
Specify the date of CB Response using the adjoining calendar button.
Activity
Specify the details of the activity.
Activity Reason
Specify the reason for the activity.
Dairy Note
Specify the dairy note.
2.16.5 Financial Customer Button
You can specify the KYC details of financial customers using the ‘KYC Financial Profile’ screen. You can invoke this screen by clicking ‘Financial Customer’ button in the ‘KYC Maintenance’ screen.
The screen is as shown below:

Here you can specify the following details:
Bank Address
Specify the address of the bank.
Country
Specify the country of the financial customer.
KYC Amounts CCY
Specify the currency of the KYC amounts.
Specifying Transaction Products
Specify the following details:
Transaction Products
Specify the name of the transaction product.
Rating
Specify the rating of the product.
Monthly No of Transactions
Specify the number of monthly transactions.
Monthly Amount
Specify the monthly amount.
Specifying Management Details
Specify the following details:
Name
Specify the name of the manager.
Designation
Specify the designation of the manager.
Specifying Share Holders Details
Specify the following details:
Name
Specify the name of the share holder.
Holding
Specify the holdings of the share holder.
Address
Specify the address of the share holder.
City
Specify the city of the share holder.
Country
Specify the country of the share holder.
2.16.6 Fields Button
You can create user defined fields using the ‘User Defined Fields’ screen. To invoke this screen, click ‘Fields’ tab in the ‘KYC Maintenance’ screen.
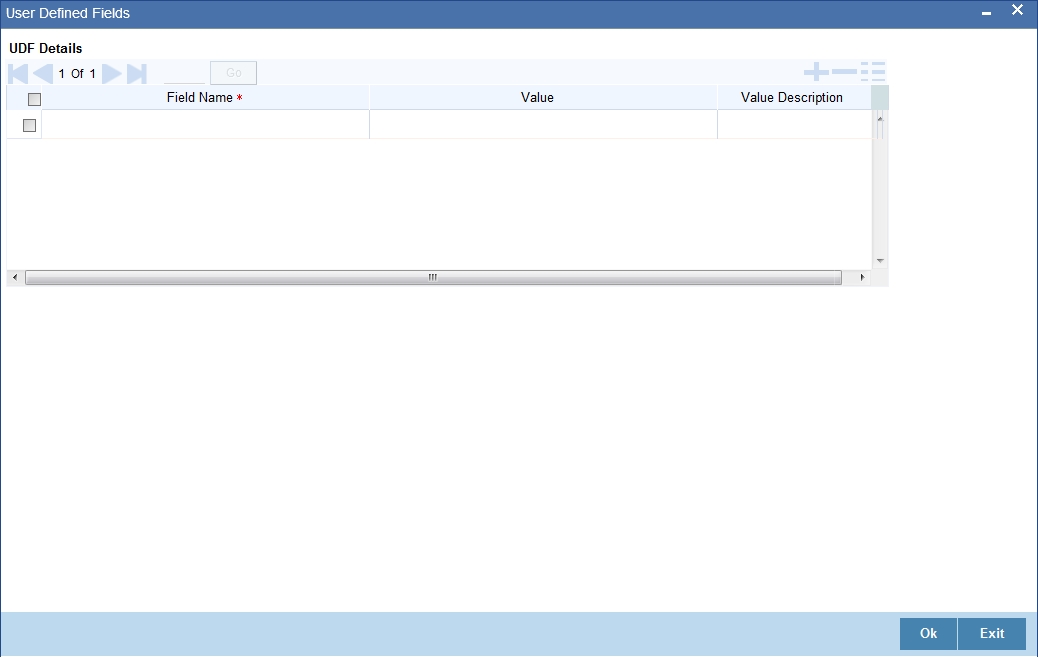
Here you can specify the following details:
Field Name
Specify the name of the field.
Value
Specify the value of the field.
2.17 Alphabet Equivalent Maintenance
This section contains the following topics:
- Section 2.17.1, "Maintaining Alphabet Equivalents"
- Section 2.17.2, "Viewing Alphabet Equivalent Summary"
2.17.1 Maintaining Alphabet Equivalents
You can maintain alternative letters for a given alphabet or a combination of alphabets using ‘Alphabet Equivalent Mapping Maintenance’ screen. During a customer name search, the system will search for the equivalent or matching names based on this maintenance.
To invoke this screen, type ‘STDALPMT’ in the field at the top right corner of the Application Toolbar and click the adjoining arrow button.

Specify the following details:
Alphabet
Specify the alphabet or a combination of alphabets for which you wish to maintain an equivalent alphabet or combination. You can have a combination that is a maximum of three characters long.
Alphabet Equivalent
Specify the equivalent alphabet or combination for the selected alphabet. You can have a combination that is a maximum of 3 characters long.
For example, if you select the alphabet ‘U’ and maintain ‘OE’ as its equivalent, then, during a customer query, the system will search for all names that match the given name and its equivalent spelling alternatives. In the above case, if the name contains the alphabet ‘U’, the system will replace it with ‘OE’ and display the results that match both instances. Similarly, if the given name contains the string ‘OE’, the system will replace it with ‘U’ and display the results for both the instances.
The system will search for the alphabet equivalents during a customer name query from of the following screens:
- STSACSTA - Customer Accounts Summary
- STSKYCMN – Customer KYC Summary
- STSCUSSH – Customer Search
- STSCIF – Customer Information Summary
- Customer – Branch Screen
Example
Suppose that you have maintained the following equivalent.
- Alphabet – U
- Alphabet Equivalent - OE
Further, when you perform a search for the name ‘Sukarni’, the system will display the results for the following names:
- Sukarni
- Soekarni
- SUKARNI
- SOEKARNI
2.17.2 Viewing Alphabet Equivalent Summary
You can view a summary of alphabet equivalents maintained in the system using ‘Alphabet Equivalent Summary’ screen. To invoke the screen, type ‘STSALPMT’ in the field at the top right corner of the application toolbar and click the adjoining arrow button.

In the above screen, you can base your queries on any or all of the following parameters and fetch records:
- Authorization Status
- Record Status
- Alphabet Equivalent
- Alphabet
Select any or all of the above parameters for a query and click ‘Search’ button. The records meeting the selected criteria are displayed.
System displays the following details pertaining to the fetched records:
- Authorization Status
- Record Status
- Alphabet Equivalent
- Alphabet
2.18 Creating a Message Advice Format
You need to create a message advice format through the ‘Advice Format Maintenance’ screen with the format named ‘CUS_MIMJADV’. A batch function ‘CASABAT’ will perform status change from Minor to Major during EOD.
During EOD, batch (CASABAT) which would check for the current age of each minor customer, if the customer’s current age is on or above the minor age limit maintained at branch parameters then you to do the following mentioned settings:
- The option ‘Minor’ at customer personal details will be unchecked in customer maintenance screen.
- The select ‘Submit Age Proof’ as ‘Pending’ in customer maintenance screen.
Note
- In case of holiday the Minor to Major conversion would be done after the holiday.
- The Debit would be still allowed for the system initiated transactions (During EOD/BOD) even though the documents have not been submitted.
Customer Advice Generation:
During EOD, batch (CASABAT) will generate the advice for the customers who are going to attain the Major status based on the number of days mentioned at Branch Parameters level for advice generation.
The customer will receive an advice in the following sample format:
#RH
< Customer Minor Major Advice>
-----------------------------------
Date : _BRANCHDATE_
Bank Name : _BANK-NAME_
Branch Address : _BRANCH-ADDR_
Customer Name : _CUST-NAME1_
Customer ID : _CUSTOMER_
You are attaining the Major status on _DATE_ .Hence please submit the necessary documents on or before _DATE_.
#EH
#B
#SC
AUTHORIZED SIGNATORY.
#EC
#EB
2.19 Customer Closure Data from Channels
This screen displays the data store provided by the external channels. You can invoke the screen by typing ‘STSCUSCL’ in the field at the top right corner of the application toolbar and click the adjoining arrow button.

Specify the following details in this screen:
Authorization Status
Select the authorization status from the drop down list. The options available in the drop down list are as follows:
- Authorized
- Unauthorized
- Rejected
Record Status
Select the record status from the drop down list. The options available are as follows:
- Open
- Closed
Entity Type
Select the type of entity for which the record is created from the drop down list. The entity types can be Customer. Account as so on.
Entity ID
Select a valid entity ID of the entity type selected, from the adjoining option list. For example: if the entity type is selected is Customer, then valid customer ids will be listed in this field
Source Code
Select the source code from which the data has been created. The source code can be FCIS, FCPB, and so on. The source code maintained in the ‘External System Maintenance (GWDEXSYS)’ screen, is displayed here.
Closure Allowed
Select ‘Yes’ or ‘No’ from the drop down list to indicate whether closure of the entity ID is allowed or not.
On specifying details in these fields, the following columns are populated in this screen:
- Entity Type
- Entity ID
- Source Code
- Closure Allowed
- Processing Date
The Entity Type, Entity ID, Source Code, Closure Allowed, and Processing Date values are received from external channels through the FCUBSCustomerservice messaging service.
For more information on this service, refer to the chapter ‘Annexure- List of Messages’ in the Gateway Services Module.
Multiple web service requests are made by these external channel to the FCUBS system. At EOD, the external system sent a reconciliation file with the list of records created during that particular day using web service. The FCUBS system validates these records and if any record is missing, then the system will create a new record.
Note
If a record is created for an entity id by a source code and there is a modification to the same record from the same source code, then the existing record is overwritten with the new modified data.
If the ‘Investment Customer’ flag is checked in the ‘Customer Maintenance (STDCIF)’ screen, then the following validations are performed by the system on closure of an entity ID:
- If no record is available for that particular entity ID in the STSCUSCL screen, then the system displays an error message which states ‘Customer Can be Closed Only When Closure Allowed Flag is received as Yes’.
- If a record for that particular entity ID is available in the STSCUSCL screen, however if the ‘Closure Allowed’ field in this screen is updated as ‘No’, then an error message is displayed which states ‘Customer Cannot be Closed When Closure Allowed Flag is No’.
Therefore, records will be closed only if a record is available for the particular entity ID in the STSCUSCL screen and the ‘Closure Allowed’ field is updated as ‘Yes’.
2.20 Searching for Customers
You can search the details of individual or corporate CRM customer or prospect customer in the ‘Customer Party Summer’ screen. To invoke this screen, type ‘STSCUSSH’ in the field at the top right corner of the Application tool bar and clicking the adjoining arrow button.

You can search for records based on any one or all of the following criteria:
- Customer No
- First Name
- Last Name
- Customer Type
- Telephone
- Corporate Name
- Country
- SSN
- Fax
- Customer Category
- Short Name
- Unique Name
- Unique Value
Note
- Using this screen, you can search the details of individual/corporate CRM customers or prospects only.
- It is mandatory to specify the Customer Type as a search criteria.
Click ‘Search’ button. The system identifies all records satisfying the specified criteria and displays the following details for each one of them:
- Customer No
- First Name
- Last Name
- Address Line 1
- Address Line 2
- Address Line 3
- Telephone
- SSN
- Fax
- Customer Category
- Short Name
- Unique Name
- Unique Value
2.21 Pin Code Maintenance
This section contains the following topics:
2.21.1 Viewing Pin Code Details
You can invoke the ‘Pin Code Maintenance’ screen by typing ‘STDPINCD’ in the field at the top right corner of the Application tool bar and clicking the adjoining arrow button.

You need to specify the following basic details of the customer:
Pincode
Specify the pincode.
City
Specify the city in which the customer resides.
State
Specify the state in which the customer resides.
Country
Specify the country in which the customer resides.