7. Processing FGL Entries
Oracle FLEXCUBE General Ledgers (FGL) eases the process of posting entries by capturing the entries, transaction details and the customer MIS details separately, yet maintaining a linkage. FGL also identifies the entries posted from a deal in an external system. Additionally, FGL reduces the quantity of data to be exchanged while uploading files.
For every contract, you may often have to post accounting entries at various stages. However, the transaction and MIS information of the contract may remain the same at those stages. FGL helps you capture the transaction and MIS data initially and use the same information whenever similar entries are posted. You may even capture transaction and MIS information along with each entry in Oracle FLEXCUBE.
In this chapter, you will find more information on processing of various transactions in Oracle FLEXCUBE general ledgers.
This chapter contains the following sections:
- Section 7.1, "Transaction Details Maintenance"
- Section 7.2, "Customer MIS Details"
- Section 7.3, "Uploading Entries "
7.1 Transaction Details Maintenance
This section contains the following topics:
- Section 7.1.1, "Maintaining Transaction Details"
- Section 7.1.2, "Maintaining Transaction Details as Name-Value Pairs"
- Section 7.1.3, "Transaction MIS Details Tab"
7.1.1 Maintaining Transaction Details
You can maintain details pertaining to transaction attributes for FGL using ‘Transaction Details – Detailed’ screen.
You can invoke the ‘Transaction Details – Detailed’ screen by typing ‘EGDTXNAT’ in the field at the top right corner of the Application tool bar and clicking the adjoining arrow button.
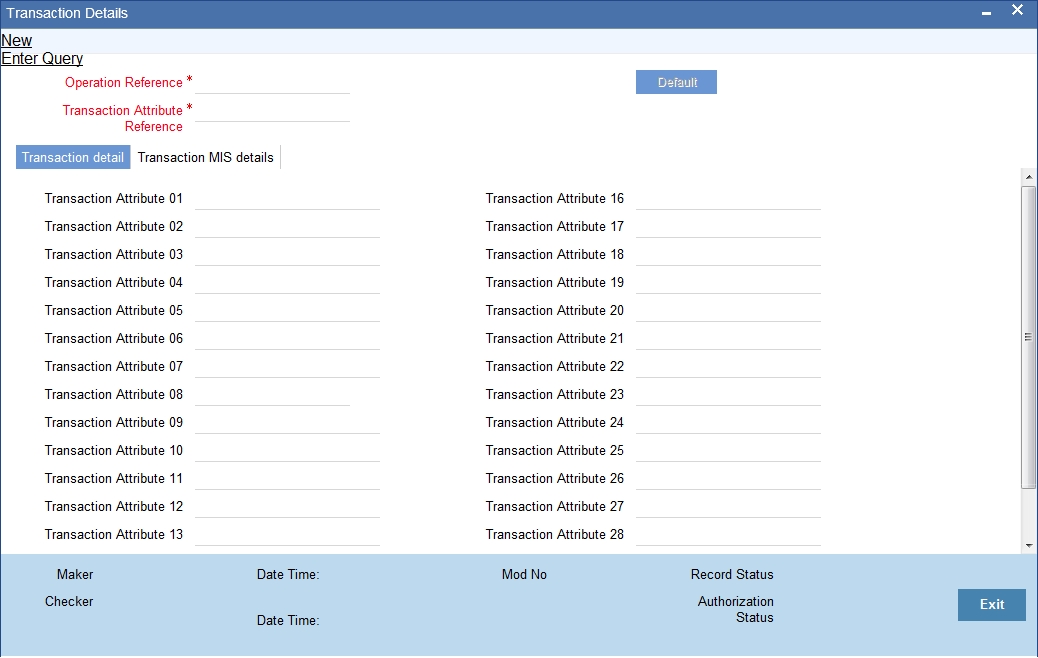
On this screen, you need to capture the following details:
Operation Reference
The system displays the operation reference number.
Transaction Attribute Reference
Specify the transaction attribute reference. You can use this reference while posting entries to pass on transaction data. The system uses this reference number for all entries of the same nature, so that you need not send the transaction data along with every entry.
However, Oracle FLEXCUBE adjusts the system account balances only if the transaction data is sent separately with a transaction attribute reference.
This screen consists of two tabs:
- Transaction Details: This section captures details of transaction attributes. You can define a maximum of 30 attributes on this screen.
- Transaction MIS Details: This section captures the details of transaction MIS. You can define a maximum of 20 attributes.
7.1.2 Maintaining Transaction Details as Name-Value Pairs
You can even capture these details as name-value pairs. You can invoke the ‘Transactions Details – Detailed’ screen by typing ‘EGDTXNDT’ in the field at the top right corner of the Application tool bar and clicking the adjoining arrow button.
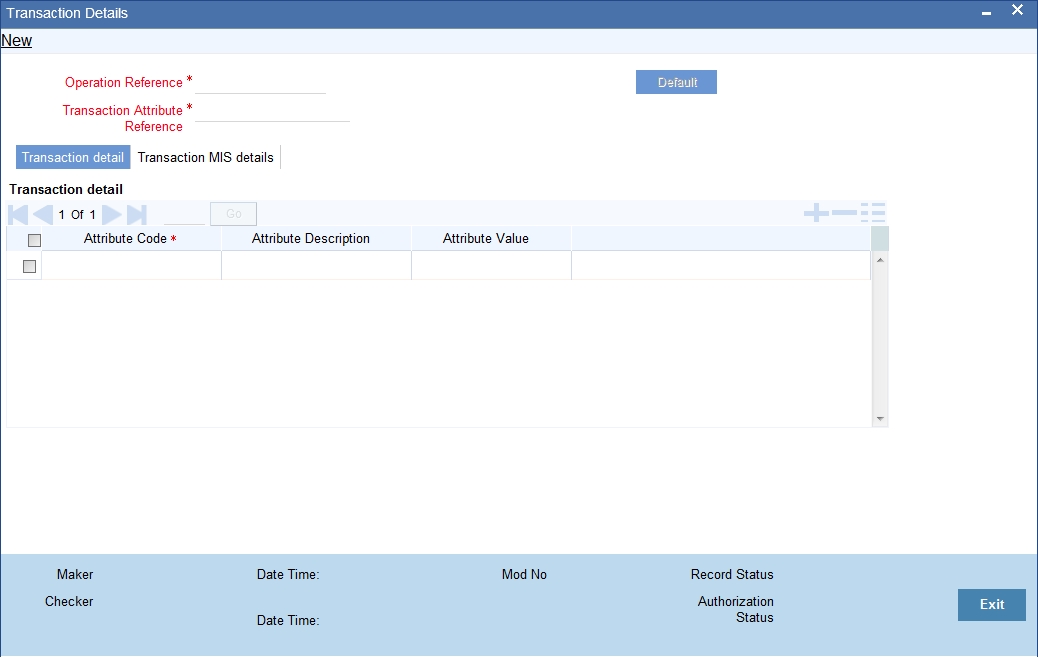
Under the tab ‘Transaction Details’, you can add more information on transaction attributes. You can add more attributes to the list using add icon
Here, you need to specify the following details:
Attribute Code
Specify the attribute code.
Attribute Description
Based on the attribute code, the system displays the description.
Attribute Value
Specify a value for the selected attribute code. FGL generates system account number based on this value. For instance, in case of Attribute PRODUCT, attribute value will be LD. However, you need to define the same based on the parameters set in 'SDE Class Definition' screen.
7.1.3 Transaction MIS Details Tab
Similarly, you can capture the transaction MIS details on this screen. To enter the details, click ‘Transactions MIS Details’ button on ‘Transaction Details – Detailed’ screen.
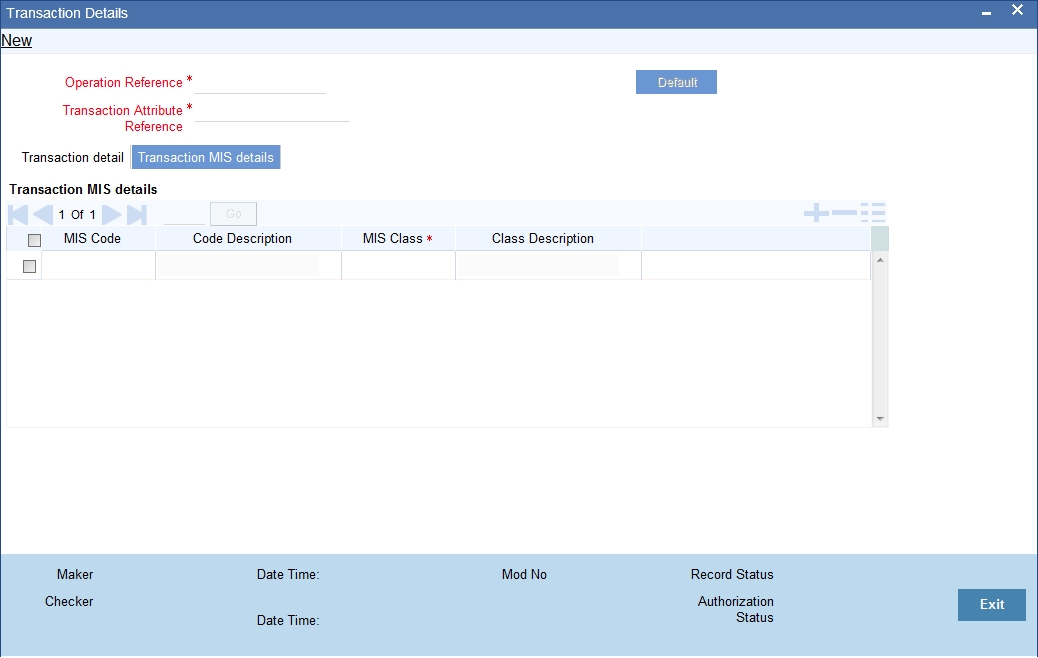
You need to capture the following details pertaining to transaction MIS.
MIS Class and Description
Specify the MIS class for the transaction. Based on the class code selected, the system displays the description.
MIS Code and description
Specify the MIS code that you wish to add to this operation. Based on the MIS code selected, the system displays the description.
You may add more rows to the list using add icon
7.2 Customer MIS Details
This section contains the following topics:
- Section 7.2.1, "Maintaining Customer MIS Details"
- Section 7.2.2, "Maintaining MIS Details as Name-Value Pairs"
7.2.1 Maintaining Customer MIS Details
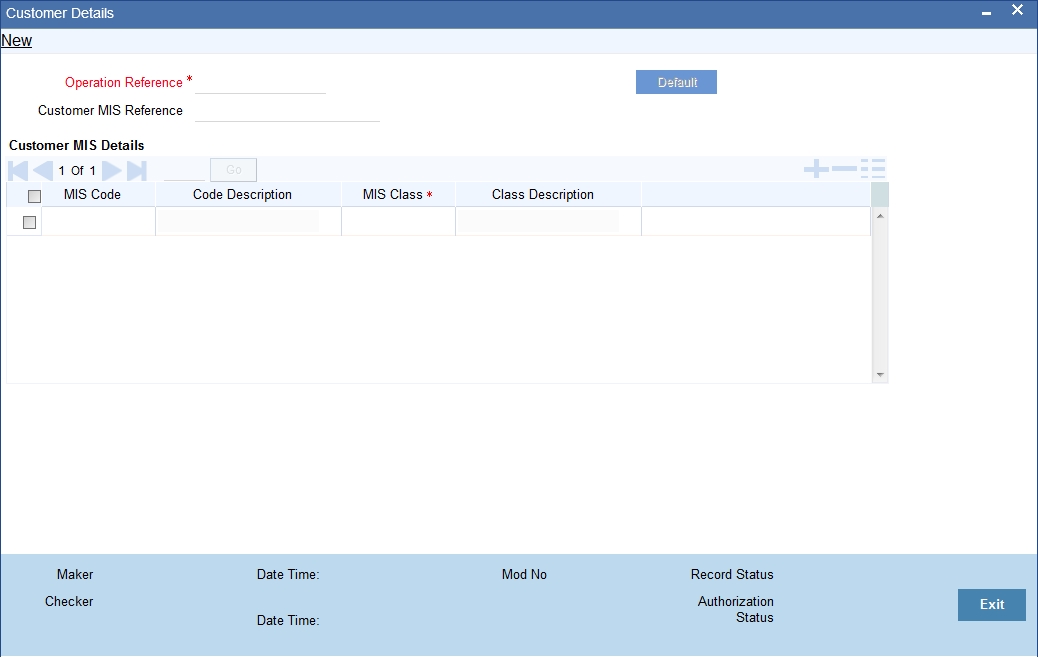
You can capture customer MIS details using ‘Customer Details – Detailed’ screen.You can invoke the ‘Customer Details – Detailed’ screen by typing ‘EGDCMSAT’ in the field at the top right corner of the Application tool bar and clicking the adjoining arrow button.
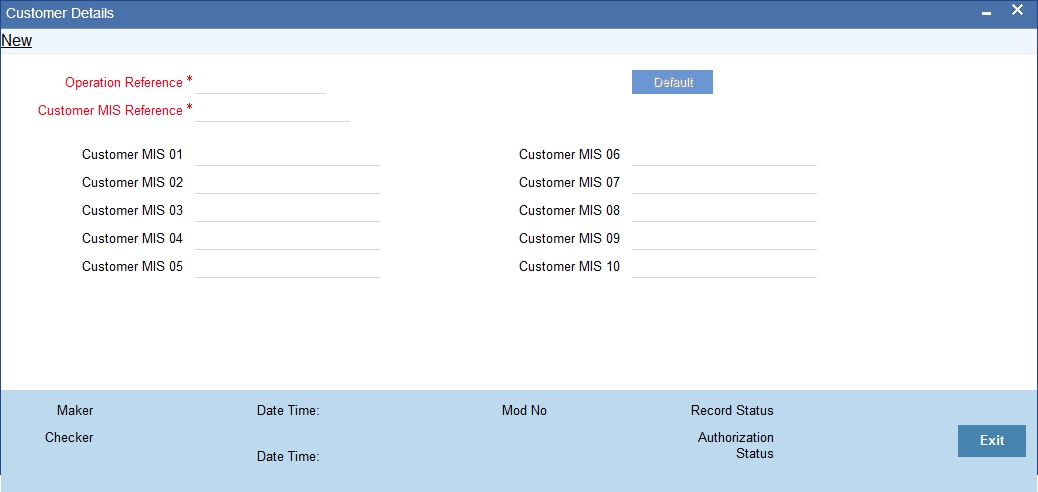
Here, you need to capture the following details:
Operation Reference
The system displays the operation reference number.
Customer MIS Reference
Specify the customer MIS reference number. The system will use this reference number while posting entries for FGL.
You can maintain a maximum of 10 MIS codes corresponding to 10 MIS classes. However, if you wish to modify the data sent, you will have to provide all existing information along with the modifications. If the MIS information undergoes any change, the system automatically adjusts the system account and MIS balance.
7.2.2 Maintaining MIS Details as Name-Value Pairs
You can even capture the customer MIS information as name value pairs. You can invoke the ‘Customer Details – Detailed’ screen by typing ‘EGDCMSDT’ in the field at the top right corner of the Application tool bar and clicking the adjoining arrow button.
You can enter the following details:
MIS Class and Description
Specify the MIS class for the transaction. Based on the class code selected, the system displays the description.
MIS Code and Description
Specify the MIS code that you wish to add to this operation. Based on the MIS code selected, the system displays the description.
You may add more rows to the list using add icon
7.3 Uploading Entries
This section contains the following topics:
7.3.1 Upload Details
Oracle FLEXCUBE general ledger receives entries uploaded in specific formats. It can receive entries from external systems through Entry Upload Request of Web Services. FGL will process such entries.
You can send the entries directly to the system accounts. However, an external system can post such entries only to manually created system accounts.
FGL can receive all attributes along with each entry. Separate records with unique reference number may also be sent. Such records can be linked with respective entries.
You can upload the following details:
| Field Name | Data Type | Maximum Length | Mandatory | ||||
|---|---|---|---|---|---|---|---|
| Serial Number | NUMBER | Y | |||||
| GAAP Code | VARCHAR2 | 2 | N | ||||
| Account or GL(A/G) | VARCHAR2 | 1 | Y | ||||
| Account Branch | VARCHAR2 | 3 | Y | ||||
| Account Currency | VARCHAR2 | 3 | Y | ||||
| Account Number | VARCHAR2 | 50 | Y | ||||
| Debit GL | VARCHAR2 | 9 | N | ||||
| Credit GL | VARCHAR2 | 9 | N | ||||
| Current Balance in case of Customer Accounts | NUMBER | N | |||||
| System Account Number | VARCHAR2 | 50 | N | ||||
| Debit / Credit | VARCHAR2 | 1 | Y | ||||
| Transaction Code | VARCHAR2 | 3 | Y | ||||
| Amount in Posting Currency | NUMBER | Y (for foreign currency only) | |||||
| Exchange Rate | NUMBER | Y (for foreign currency only) | |||||
| Amount in Local Currency | NUMBER | Y | |||||
| Posting Date | DATE | 7 | Y | ||||
| Offset Entry serial No | NUMBER | N | |||||
| Amount Code | VARCHAR2 | 50 | N | ||||
| Related Reference Number | VARCHAR2 | 255 | N | ||||
| Related Account | VARCHAR2 | 255 | N | ||||
| Transaction Attribute Reference Number | VARCHAR2 | 50 | N | ||||
| Customer MIS Reference | VARCHAR2 | 50 | N |
7.3.2 Posting Journal Entries
You can use FGL to post entries into the general ledgers using ‘Journal Entries Detailed’ screen. You can invoke the ‘Journal Entries Detailed’ screen by typing ‘EGDJRENT’ in the field at the top right corner of the Application tool bar and clicking the adjoining arrow button.
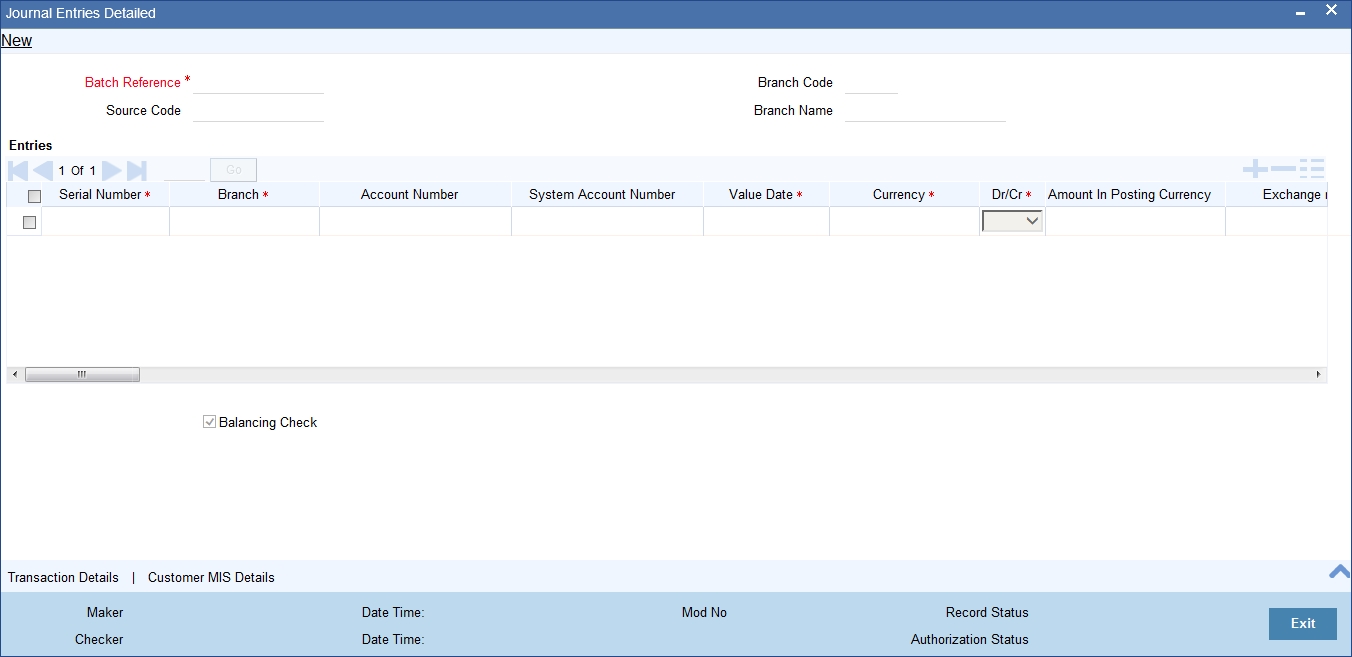
On this screen, you need to capture the following details:
Batch Reference
As you select ‘New’ from the action menu, the system generates a batch reference number.
Source Code
If the entry is posted through front end, system displays the source code as ‘Oracle FLEXCUBE’. Otherwise, it displays the source code of the external source.
Branch Code
The system displays the branch code of the current branch.
Branch Name
Based on the branch code specified, the system displays the branch name.
Based on the preferences set, the system processes the entries in the following order:
- Resolve inter branch entries
- Prepare position entries
- Run balancing check based on source preferences
- Run a check for currency and value date balancing based on source preferences
- Explode GAAP entries
- Update the system account, GL and MIS balances
7.3.2.1 Exploding GAAP Entries
External systems may send entries to FGL for specific GAAPs as well as for all the GAAPs. The following example illustrates how FGL handles GAAP entries:
Consider the following entries passed by an external system:
| GAAP | DR/CR | Account Branch | Account | Currency | Posting Date | Amount | |||||||
|---|---|---|---|---|---|---|---|---|---|---|---|---|---|
| AL | D | BR1 | GL1 | USD | 1-Jan-08 | 10,000 | |||||||
| G1 | C | BR1 | GL3 | USD | 1-Jan-08 | 10,000 | |||||||
| G2 | C | BR1 | GL4 | USD | 1-Jan-08 | 10,000 |
In the above table, GAAP indication has been set to ‘AL’. Hence, the system resolves all applicable GAAP indicators for the combination of the branch BR1 and the general ledger GL1.
Now, assume that
Applicable GAAPs for BR1 are G1, G2 and G3
Applicable GAAPs for GL1 are G1, G2 and G4
In such case, the system resolves the applicable GAAPs as G1 and G2 as these are common for both BR1 and GL1.
Further, system prepares the GAAP wise entries as follows:
| GAAP | DR/CR | Account Branch | Account | Currency | Posting Date | Amount | |||||||
|---|---|---|---|---|---|---|---|---|---|---|---|---|---|
| G1 | D | BR1 | GL1 | USD | 1-Jan-08 | 10,000 | |||||||
| G2 | D | BR1 | GL1 | USD | 1-Jan-08 | 10,000 | |||||||
| G1 | C | BR1 | GL3 | USD | 1-Jan-08 | 10,000 | |||||||
| G2 | C | BR1 | GL4 | USD | 1-Jan-08 | 10,000 |
7.3.2.2 Inter Branch Accounting
FGL passes inter-branch entries based on source level preferences. If external system preferences are configured in such a manner to generate inter branch entries, the system resolves the inter branch accounting setup and passes extra pairs of entries.
Consider the following entries passed by the external system:
| DR/CR | Account Branch | Account | Currency | Posting Date | Amount | ||||||
|---|---|---|---|---|---|---|---|---|---|---|---|
| D | BR1 | GL1 | USD | 1-Jan-08 | 10,000 | ||||||
| C | BR2 | GL2 | USD | 1-Jan-08 | 10,000 |
Oracle FLEXCUBE general ledger will resolve the inter branch maintenance and pass extra pairs of entries to balance the books at each branch. Now, suppose that the inter branch scheme is ‘DIRECT’, the system will pass the following entries:
In the books of BR1:
| DR/CR | Account Branch | Account | Currency | Posting Date | Amount | ||||||
|---|---|---|---|---|---|---|---|---|---|---|---|
| D | BR1 | GL1 | USD | 1-Jan-08 | 10,000 | ||||||
| C | BR1 | Due to BR2 | USD | 1-Jan-08 | 10,000 |
In the books of BR2:
| DR/CR | Account Branch | Account | Currency | Posting Date | Amount | ||||||
|---|---|---|---|---|---|---|---|---|---|---|---|
| D | BR2 | Due From BR1 | USD | 1-Jan-08 | 10,000 | ||||||
| C | BR2 | GL2 | USD | 1-Jan-08 | 10,000 |
If the inter branch accounting scheme is ‘THRURO’ or ‘THRUHO’, the system routes the inter branch entries through Regional Office or Head Office respectively. On such circumstances, the number of system generated entries will be more.
7.3.2.3 Position Accounting
In Oracle FLEXCUBE, you may track the currency positions by passing position entries. Position GLs are linked to FGLs using ‘Chart of Accounts’ screen. Each general ledger can have multiple sets of position and position equivalent GLs for different currencies. If you have not linked a position GL, the system uses the position GLs maintained on the ‘Currency Maintenance’ screen.
Suppose that the local currency for branch BR1 is USD.
The external system passes the following entries:
| DR/CR | Account Branch | Account | Currency | Posting Date | Amount | ||||||
|---|---|---|---|---|---|---|---|---|---|---|---|
| D | BR1 | GL1 | GBP | 1-Jan-08 | 10,000 | ||||||
| C | BR2 | GL2 | USD | 1-Jan-08 | 8,000 |
Suppose that the inter branch scheme is ‘DIRECT’. The system will post the entries as follows:
In the books of BR1:
| DR/CR | Account Branch | Account | Currency | Posting Date | Amount | ||||||
|---|---|---|---|---|---|---|---|---|---|---|---|
| D | BR1 | GL1 | GBP | 1-Jan-08 | 10,000 | ||||||
| C | BR1 | Position GL | GBP | 1-Jan-08 | 10,000 | ||||||
| D | BR1 | Position Equivalent GL | USD | 1-Jan-08 | 8,000 | ||||||
| C | BR1 | GL2 | USD | 1-Jan-08 | 8,000 |
7.3.2.4 Debit-Credit Balancing Check
You may perform a debit-credit balancing check when data is received from an external system. By default the option is enabled in FGL. However, you can modify it. The system verifies the debit-credit balances and displays an error message if it finds a mismatch.
For each GAAP, FGL ensures the balancing of batches by branch.
7.3.2.5 Posting Date-wise Balancing Check
For data received from external systems, you can configure Oracle FLEXCUBE to check the balances by posting date. However, you need to set the configurations in the external system. Further to completion of the check, the system displays an error, in case of errors, and a warning in case of successful configuration.