3. Maintenance
The LC module requires the setting up of certain basic information before it becomes fully operational. The information that needs to be maintained are discussed in the subsequent sections. This chapters contains the following details:
- Section 3.1, "Document Details"
- Section 3.2, "Clause Details"
- Section 3.3, "Goods Details"
- Section 3.4, "Import License Details"
- Section 3.5, "Free Format Text Codes Details"
- Section 3.6, "Insurance Company Details"
- Section 3.7, "Trade License Details"
- Section 3.8, "Exchange Rates for Bills Details"
- Section 3.9, "INCO Terms Details"
- Section 3.10, "Open Insurance Policy Details"
- Section 3.11, "Blacklisting LCs"
- Section 3.12, "Maintaining Branch Parameters for Letter of Credit"
3.1 Document Details
This section contains the following topics:
- Section 3.1.1, "Maintaining Document Details"
- Section 3.1.2, "Specifying UDF Values"
- Section 3.1.3, "Operations on Document Maintenance Record"
3.1.1 Maintaining Document Details
There are certain standard documents that are required under a documentary LC. As these documents are standard and common in most countries, their details need not be specified every time you need to use it for an LC. Instead, you can maintain its details in the Document Maintenance screen and attach it to the LC you process.
The advantage of maintaining document details is that at the time of creating a product or at the time of entering the details of an LC, you only need to specify the code assigned to the document. All the details maintained for the document will be automatically picked up. This helps reduce repetitive work, as you do not need to enter the contents of the document each time you use it.
To invoke the ‘Bills and Collections Document Codes Maintenance’ screen, type ‘BCDDOCCD’ in the field at the top right corner of the Application tool bar and click the adjoining arrow button.
If you are maintaining details of a new document click new icon from the tool bar. The ‘Bills and Collection Document Code Maintenance’ screen is displayed without any details.
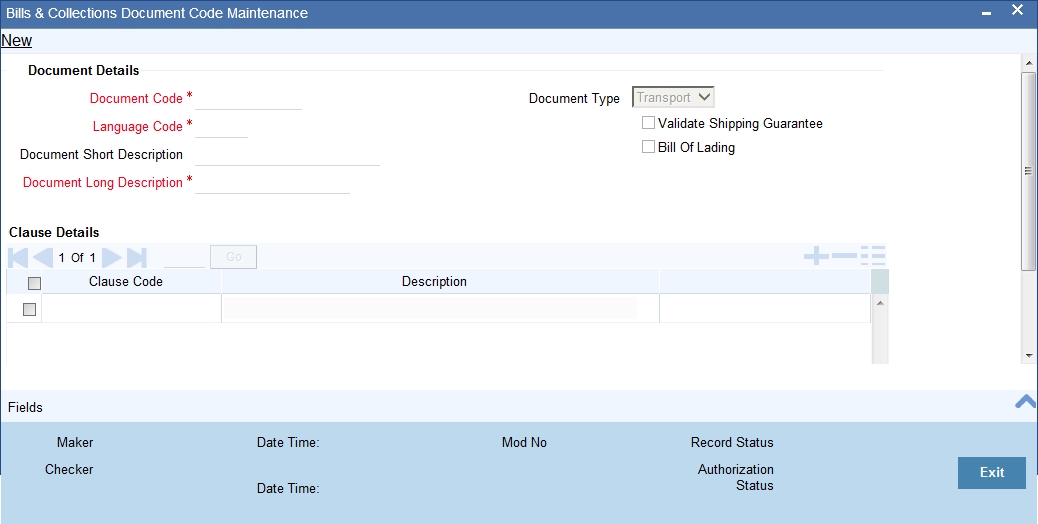
Here you can specify the following details.
Document Code
In Oracle FLEXCUBE, each document maintained is identified by a twelve-character code, called a Document Code. You can follow your own convention for devising this code. However, one of the characters of the code should necessarily be a letter of the English alphabet.
The code assigned to should be unique as it is used to identify the document. While creating a product or at the time of entering the details of an LC, you only need to specify the code assigned to the document. The document details will be automatically picked up and defaulted.
Language Code
The language used in the document which you bank receives from the customer.
Document Type
Select the type of document you bank received from the customer from the drop-down list. Following are the options available in the drop-down list:
- Transport
- Insurance
- Invoice
- Others
Document Short Description
The documents for an LC are at times large and hence difficult to identify. Therefore, you can specify a short description or a title that will enable you to identify the document quickly.
The short description that you specify is for information purposes only and will not be printed on any customer correspondence.
Document Long Description
After you specify a code to identify the document, you can proceed to maintain the content of the document. The content that you enter is printed on the applicable advices generated for an LC. A document can contain a maximum of two thousand characters.
Once the document code is stored, the description of a document can be edited only through the ‘Document Codes Maintenance’ screen (the screen we are discussing). However, you can also view the contents of a document code when you are linking it to a product or LC.
Validate Shipping Guarantee
Check this option to indicate that a shipping guarantee should be validated.
Bill of Lading
Check this option to indicate the bill of lading.
Clause Details
Specify the following details.
Clause Code
Specify the clause code that should be linked to the document.
Description
A brief description of the chosen clause code is displayed here.
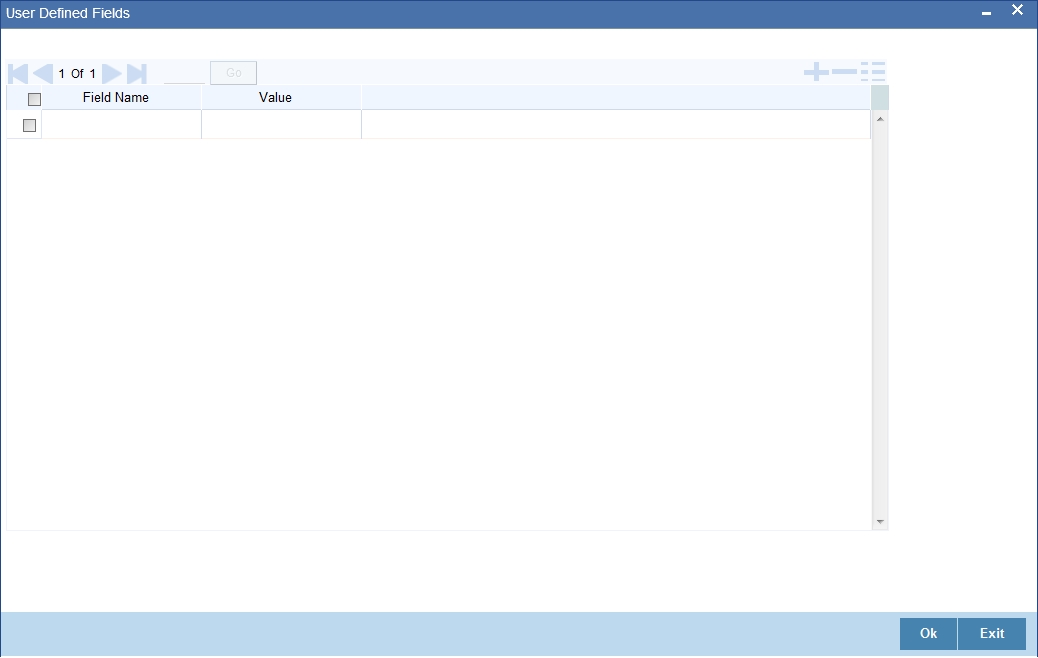
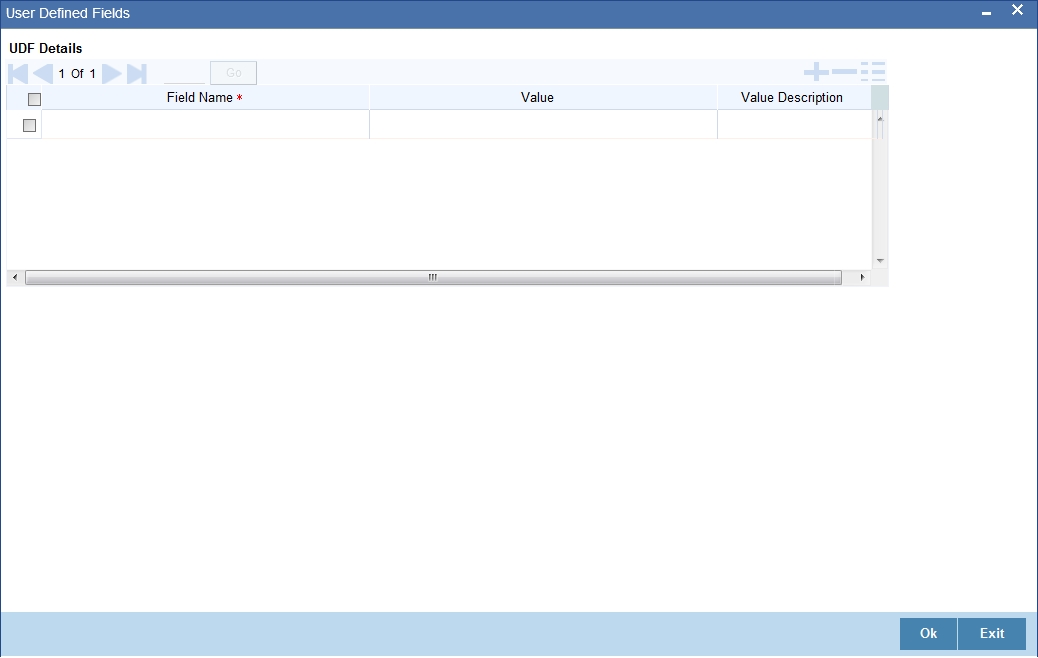
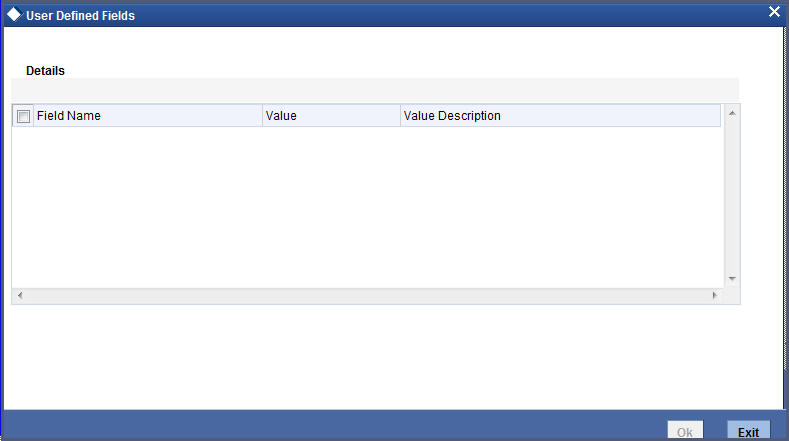
3.1.2 Specifying UDF Values
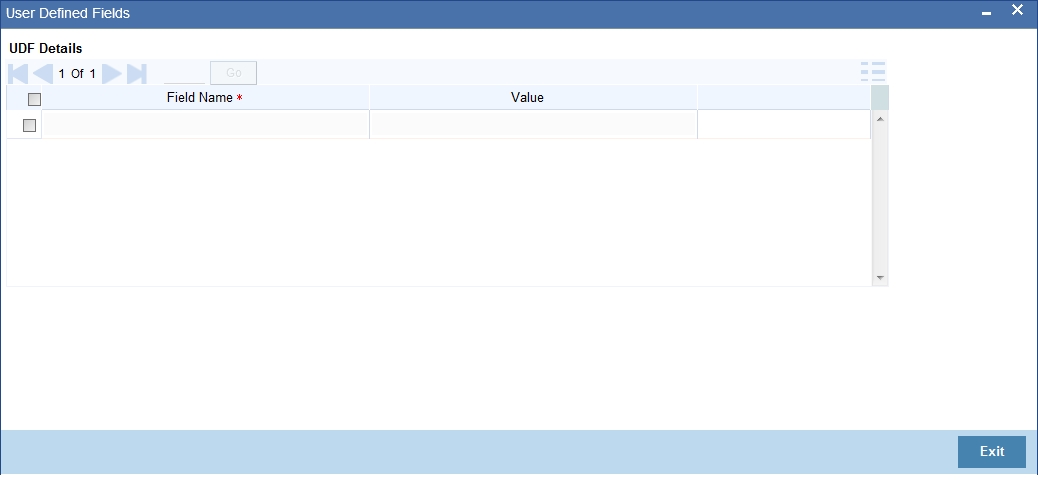
You can specify values for all the User Defined fields (UDFs) created and attached to the ‘Bills & Collections Document Codes Maintenance’ screen.
You can view the list of UDFs associated to this screen by clicking ‘Fields’ button.

You can enter the value for the UDFs listed here in the ‘Value’ column.
For more details on how to create user Defined fields, refer chapter ‘Creating custom fields in Oracle FLEXCUBE’ in the User Defined Fields User Manual under Modularity.
3.1.3 Operations on Document Maintenance Record
On an existing Document Maintenance record, you can perform the following operations (if any icon is disabled in the application toolbar, it means that the function is not allowed for the record):
- Amend the details of a document
- Authorize a document
- Copy the details of a document on to a new one
- Close the document
- Reopen the document
- Print the details of a document
- Delete the details of a document
Please refer to the manual on Common Procedures for details of these operations.
3.2 Clause Details
This section contains the following topics:
- Section 3.2.1, "Maintaining Clause Details"
- Section 3.2.2, "Specifying UDF Values"
- Section 3.2.3, "Operations on a Clause Maintenance Record"
3.2.1 Maintaining Clause Details
A clause is a statement that accompanies a document required under an LC. Instead of specifying the details of a clause every time, you can maintain a list of the standard clauses, which can accompany the documents, required for an LC, in the Clause Maintenance screen.
The advantage of maintaining clause details is that at the time of creating a product or at the time of entering an LC, you only need to specify the code assigned to the clause. All the details maintained for the clause will be automatically picked up.
You can invoke the ‘Letters of Credit Clause Code Maintenance’ screen by typing ‘LCDCLAMA’ in the field at the top right corner of the Application tool bar and clicking on the adjoining arrow button. If you are maintaining a new clause, click new icon from the tool bar. The ‘Letters of Credit Clause Code Maintenance’ screen is displayed without any details.
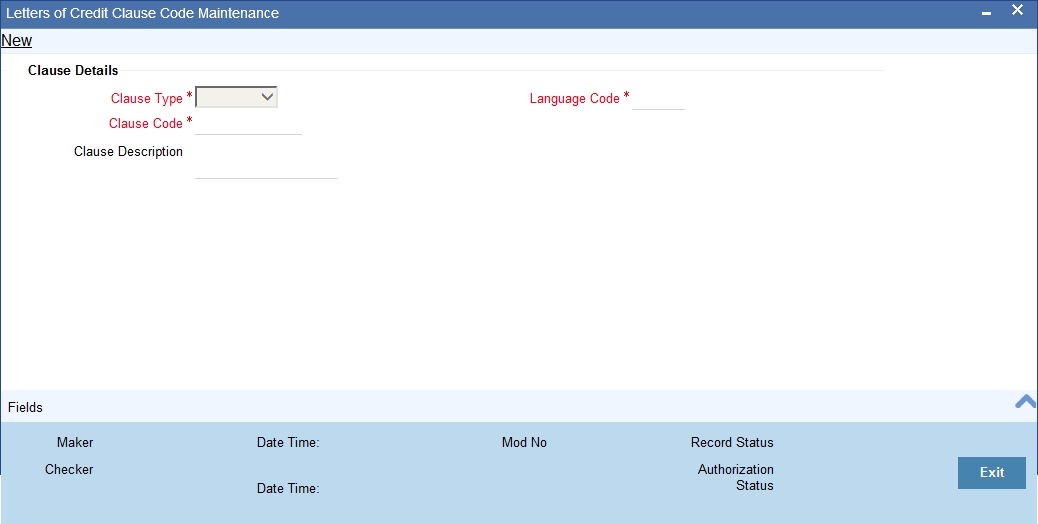
Specify the following details.
Clause Type
A clause that you maintain will accompany a document that is sent for an LC. Therefore, the type of clauses that you can maintain is determined by the type of document that it accompanies. The nature of the clauses that you define can fall within the following categories:
- Transport
- Insurance
- Invoice
- Others
Clause Code
Each clause that you maintain is identified by a twelve-character code called a Clause code. You can follow your own convention for devising the code. However, at least one of the characters of the clause code should be a letter of the English alphabet.
This code should be unique as it is used to identify the clause. While creating a product or at the time of entering the details of an LC where you need to specify the clauses that should accompany a document, you only need to specify the code assigned to the clause. The clause details will be automatically picked up and defaulted.
Clause Description
After you have specified a code for the clause, you can proceed to maintain a detailed description of the clause.
The description carries the contents of the clause, which will be printed on the customer correspondence that accompany an LC. The clause description can contain a maximum of two thousand characters.
After you have made the mandatory entries, you should save the record.
Language Code
The language used in the document which you bank receives from the customer.
3.2.2 Specifying UDF Values
You can specify values for all the User Defined fields (UDFs) created and attached to the ‘Letters of Credit Clause Code Maintenance’ screen. You can view the list of UDFs associated to this screen by clicking ‘Fields’ button.
You can enter the value for the UDFs listed here in the ‘Value’ column.
For more details on how to create user Defined fields, refer chapter ‘Creating custom fields in Oracle FLEXCUBE’ in the User Defined Fields User Manual under Modularity.
3.2.3 Operations on a Clause Maintenance Record
On an existing Clause Maintenance record, you can perform the following operations (if any icon is disabled in the application toolbar, it means that the function is not allowed for the record):
- Amend the details of the record
- Authorize the record
- Copy the details of a Clause, on to a new record
- Close the record
- Reopen the closed record
- Print the details of a record
- Delete the record
Please refer to the manual on Common Procedures for details of these operations.
3.3 Goods Details
This section contains the following topics:
- Section 3.3.1, "Maintaining Goods Details"
- Section 3.3.2, "Specifying UDF Values"
- Section 3.3.3, "Operations on Goods Maintenance Record"
3.3.1 Maintaining Goods Details
An LC is an instrument used for trade payments, it therefore involves merchandise. There are certain standard goods or commodities, the trading of which is done, with LC cover. Instead of specifying the details of merchandise each time they are traded under an LC, you can maintain the details of the standard goods in the ‘Bills and Collections Commodity Code Maintenance’ screen.
The advantage of maintaining goods details is that at the time of entering the details of an LC, you only need to specify the code assigned to the goods. The description maintained for the goods code will be automatically picked up. Typically, the statutory body controlling international and domestic trade in a country assigns these codes.
To maintain details of the standard goods transacted under LCs, you need to invoke the ‘Bills and Collections Commodity Code Maintenance’ screen. You can invoke this screen by typing ‘BCDCOMCD’ in the field at the top right corner of the Application tool bar and clicking on the adjoining arrow button. If you are maintaining details for the goods or commodity for the first time, click new icon from the tool bar.
The ‘Bills and Collections Commodity Code Maintenance’ screen is displayed without any details.
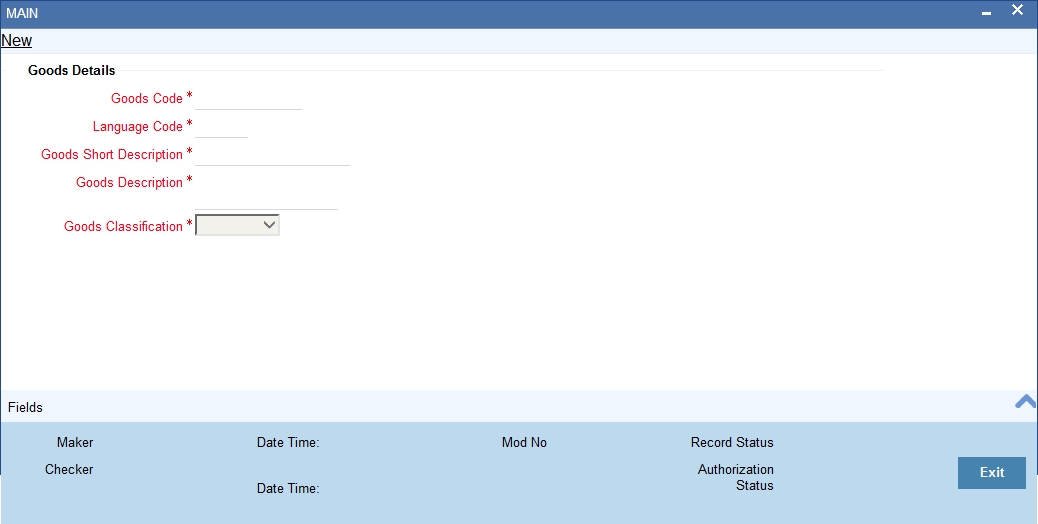
Specify the following details.
Goods Code
In Oracle FLEXCUBE goods are identified by a twelve-character code called the goods code. You can follow your own convention for devising the code. However, at least one of the characters of the goods code should be a letter of the English alphabet.
The code that you assign to a commodity should be unique as it is used identify the goods. While processing an LC where you need to specify the goods transacted, you need to only specify the code assigned to the goods. The goods description will automatically be picked up and defaulted.
Language Code
The language used in the document which you bank receives from the customer.
Goods Short Description
Give a brief description of the goods.
Goods Description
After assigning a code to the goods, you can proceed to maintain a detailed description of the goods. The goods description can contain a maximum of six thousand five hundred characters.While specifying the details of the goods transacted under an LC, you can edit the description that is defaulted, to suit the requirements of the LC you are processing. Specifications such as the quality and quantity of the merchandise can also be entered.
Goods Classification
Select the type of the goods from the adjoining drop-down list. the options are:
- General
- Licensed
- Prohibited
Goods classification is mandatory.
3.3.2 Specifying UDF Values
You can specify values for all the User Defined fields (UDFs) created and attached to the ‘Bills and Collections Commodity Code Maintenance’ screen. You can view the list of UDFs associated to this screen by clicking ‘Fields’ button.
You can enter the value for the UDFs listed here in the ‘Value’ column.
For more details on how to create user Defined fields, refer chapter ‘Creating custom fields in Oracle FLEXCUBE’ in the User Defined Fields User Manual under Modularity.
3.3.3 Operations on Goods Maintenance Record
On an existing Goods Maintenance record, you can perform of the following operations (if any icon is disabled in the application toolbar, it means that the function is not allowed for the record):
- Amend the details of a record
- Authorize a record
- Copy the details of a commodity, on to a new record
- Close a record
- Reopen a closed record
- Print the details of a record
- Delete a record
Please refer to the manual on Common Procedures for details of these operations.
3.4 Import License Details
This section contains the following topics:
- Section 3.4.1, "Maintaining Import License"
- Section 3.4.2, "Viewing Import License Maintenance Details"
- Section 3.4.3, "Operations on Import License Utilization"
3.4.1 Maintaining Import License
You can capture single or multiple import license issued to a customer through Import License Maintenance screen. You can invoke this screen by typing ‘LCDIMLIC’ in the field at the top right corner of the Application tool bar and clicking on the adjoining arrow button.
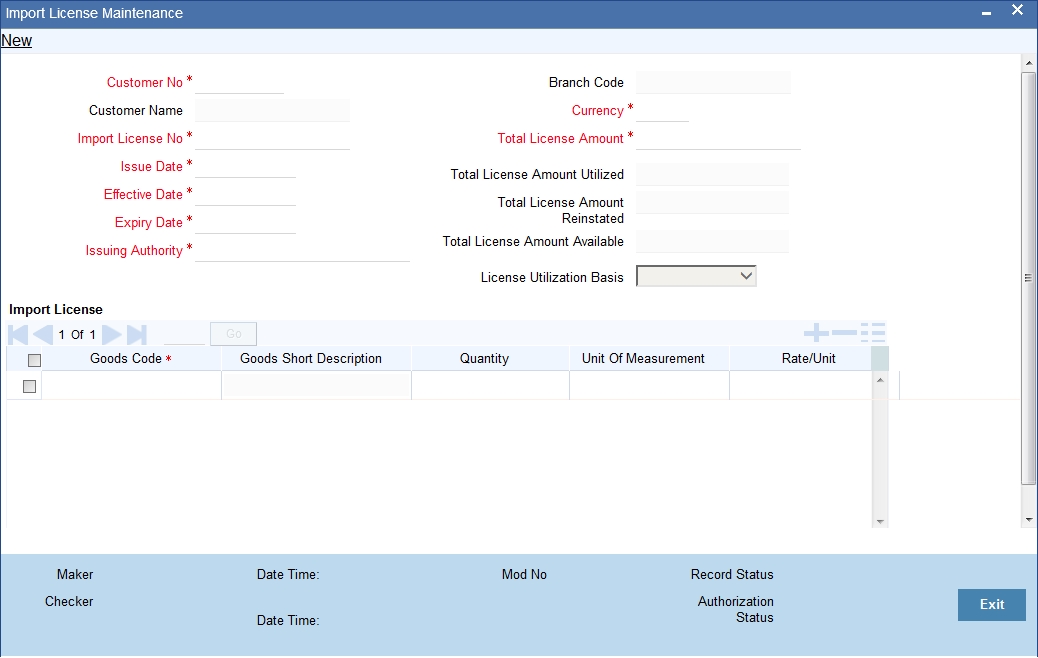
You can specify the following in this screen:
Customer No
Select the customer number for which import licenses are to be maintained from the adjoining option list.
Customer Name
The system displays the name of the customer when the customer number is selected.
Import License No
Specify the reference number of the import license.
Issue Date
Specify the issue date of the import license. Issue date cannot be a future date and greater than expiry date.
Effective Date
The system defaults the effective date. However you can modify it. Effective date cannot be lesser than issue date and greater than expiry date.
Expiry Date
Specify the expiry date of the import license. The expiry date should be greater than issue date and effective date.
Issuing Authority
Specify the issuing authority of the import license.
Branch Code
The system displays the branch code.
Currency
Select the currency of license amount from the adjoining option list.
Total License Amount
Specify the total amount for which the import license is issued.
Total License Amount Utilized
The system displays the sum total of licensed amount utilized for all goods code.
Total License Amount Reinstated
The system displays the sum total of license amount reinstated for all goods code.
Total License Amount Available
The system displays the sum total of available license amount of all goods.
License Utilization Basis
Select the license utilization basis from the adjoining drop-down list. The options are:
- Quantity
- License Amount
Import License
You can capture multiple goods code, quantity or amount details here.
Goods Code
Select the goods code from the adjoining option list.
Goods Short Description
The system displays the goods short description maintained in the ‘Bills and Collections Commodity Code Maintenance’ screen.
Quantity
Specify the quantity of the goods.
Quantity is mandatory if the license utilization basis is opted as quantity.
Unit of Measurement
Specify the unit of measurement relevant to quantity.
Rate/Unit
Specify the rate or unit amount.
Rate/Unit can be captured if the license utilization basis is quantity.
License Amount
License Amount can be captured if the license utilization basis is amount.
Quantity Utilized
The system displays the sum total of the quantity utilized for the goods code in Import BC and LC contract and Import License Utilization screen.
License Amount Utilized
The system displays the sum total of license amount utilized for the goods code in BC and LC contract and Import License Utilization screen.
If the license utilization basis is ‘Quantity’ and ‘Rate / Unit’ is available, then the system updates license amount utilized as (Quantity Utilized * Rate / Unit).
Quantity Reinstated
The system displays the sum total of quantity reinstated for the goods code in BC and LC contract and Import License Utilization screen.
License Amount Reinstated
The system displays the sum total of license amount reinstated for the goods code in BC and LC contract and Import License Utilization screen.
If the license utilization basis is ‘Quantity’ and ‘Rate / Unit’ is available, then the system updates license amount reinstated as (Quantity Reinstated * Rate / Unit).
Available Quantity
The system displays the available quantity for the goods code.
If the license utilization basis is ‘Quantity’, then the available quantity for the goods code will be derived by the system as Quantity - Quantity Utilized + Quantity Reinstated.
Available License Amount
The system displays the available license amount for the goods code.
If the license utilization basis is ‘Amount’, then the system displays the available license amount for the goods code as License Amount - License Amount Utilized + License Amount Reinstated.
If the license utilization basis is ‘Quantity’ and ‘Rate / Unit’ is available, then the system updates available license amount as (Available Quantity * Rate / Unit).
3.4.2 Viewing Import License Maintenance Details
You can view the import license details maintained in the ‘Import License Maintenance’ screen using the ‘Import License Maintenance Summary’ screen.You can invoke this screen by typing ‘LCSIMLIC’ in the field at the top right corner of the Application tool bar and clicking on the adjoining arrow button.
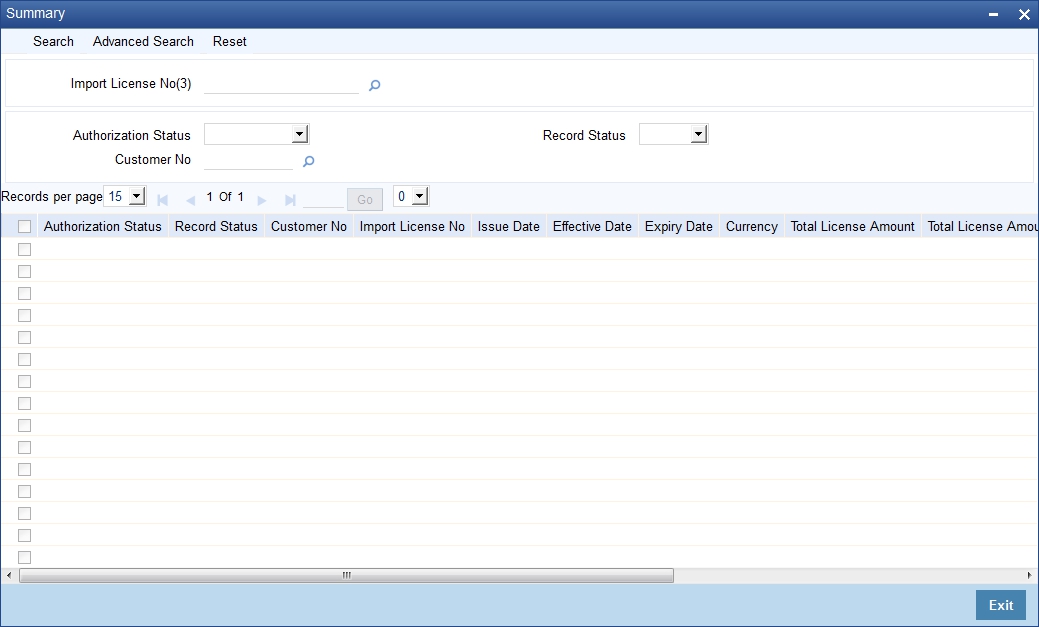
In the above screen, you can base your queries on any or all of the following parameters and fetch records:
- Customer No
- Authorization Status
- Import License No
- Record Status
Select any or all of the above parameters for a query and click ‘Search’ button. The records meeting the selected criteria are displayed.
If you are allowed to query import license details, then system displays the following details pertaining to the fetched records:
- Authorization Status
- Record Status
- Customer No
- Import License No
- Issue Date
- Effective Date
- Expiry Date
- Currency
- Total License Amount
- Total License Amount Utilized
- Total License Amount Reinstated
- Total License Amount Available
3.4.3 Operations on Import License Utilization
On an Import License record, you can perform of the following operations (if any icon is disabled in the application toolbar, it means that the function is not allowed for the record):
- Amend the details of a record
- Authorize a record
- Copy the details of a commodity, on to a new record
- Close a record
- Print the details of a record
- Delete a record
Please refer to the manual on Common Procedures for details of these operations.
3.5 Free Format Text Codes Details
This section contains the following topics:
- Section 3.5.1, "Maintaining Free Format Text Codes"
- Section 3.5.2, "Specifying UDF Values"
- Section 3.5.3, "Operations on FFT Maintenance Record"
3.5.1 Maintaining Free Format Text Codes
Free Format Text (FFT) may be a set of instructions or statements that are applicable to the LCs that you process. There are certain standard statements that should appear in the correspondence and messages, sent to the parties involved in an LC. Instead of specifying the details of an FFT each time you need to use it, you can maintain them in the ‘Bills and Collections Free Format Code Maintenance’ screen. The advantage of maintaining FFT details is that at the time of creating a product or while entering the details of an LC, you only need to specify the code assigned to the FFT. All the details maintained for the FFT code will be automatically picked up. This reduces your effort, as you do not need to enter the description of an FFT each time you use it. You can invoke this screen by typing ‘BCDFFTCD’ in the field at the top right corner of the Application tool bar and clicking on the adjoining arrow button. If you are maintaining the details for the FFT for the first time, click new icon in the tool bar.
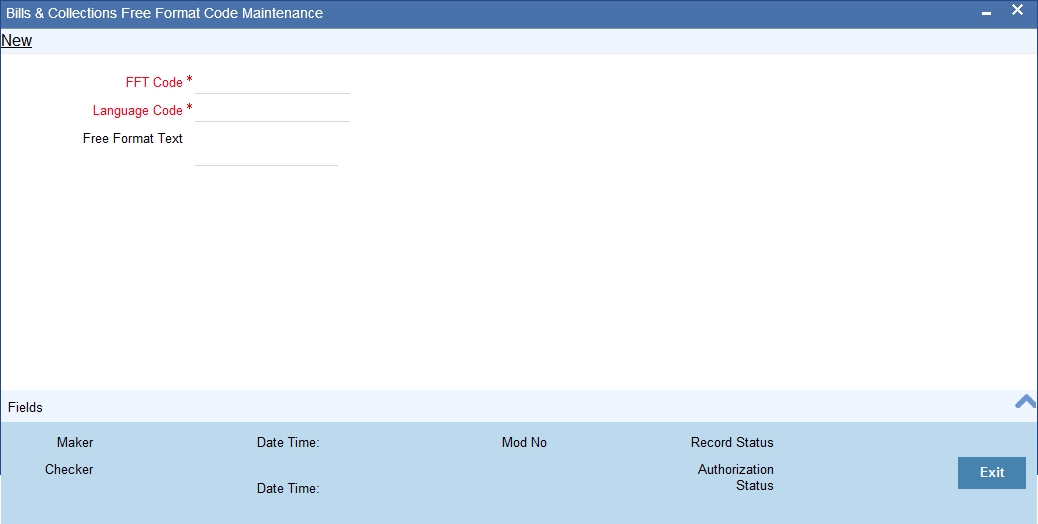
Specify the following details:
Text Code
In Oracle FLEXCUBE, each FFT that you maintain is identified by a twelve character code called an FFT Code. You can follow your own conventions for devising the code. However, at least one of the characters of the goods code should be a letter of the English alphabet.
The code that you specify should be unique since it identifies the FFT. While creating a product, or at the time of entering the details of an LC you only need to specify the code assigned to the FFT. The FFT details will be automatically picked up and defaulted.
Language Code
The language used in the document which you bank receives from the customer.
Free Format Text
After assigning a code to identify an FFT, you can proceed to maintain the description of the FFT. The description that you specify can contain text up to two thousand characters.
3.5.2 Specifying UDF Values
You can specify values for all the User Defined fields (UDFs) created and attached to the ‘Bills and Collections Free Format Code Maintenance’ screen. You can view the list of UDFs associated to this screen by clicking ‘Fields’ button.
You can enter the value for the UDFs listed here in the ‘Value’ column.
For more details on how to create user Defined fields, refer chapter ‘Creating custom fields in Oracle FLEXCUBE’ in the User Defined Fields User Manual under Modularity.
3.5.3 Operations on FFT Maintenance Record
On an existing FFT Maintenance record, you can perform the following operations (if any icon is disabled in the application toolbar, it means that the function is not allowed for the record):
- Amend the details of the record
- Authorize the record
- Copy the details of an FFT on to a new record
- Close the record
- Reopen the closed record
- Print the details of a record
- Delete the record
Refer to the manual on Common Procedures for details of these operations.
3.6 Insurance Company Details
This section contains the following details:
- Section 3.6.1, "Maintaining Insurance Company Details"
- Section 3.6.2, "Specifying Company Details"
- Section 3.6.3, "Specifying Account Details"
- Section 3.6.4, "Specifying UDF Values"
- Section 3.6.5, "Operations on Company Maintenance Record"
3.6.1 Maintaining Insurance Company Details
An LC, as an instrument of international trade involves the shipment of large merchandise over long distances. To cover the loss or damage of the goods during transition, most merchandise traded under an LC is covered with an insurance policy. You can maintain the details of different Insurance Companies in Oracle FLEXCUBE.
At the time of capturing the details of an LC contract in the system, you can associate the appropriate Insurance Company Code with the contract. Upon selection of the code, all the details maintained for the selected code will be automatically picked up by the system. Subsequently, on receipt of the insurance policy from the company, the insurance policy number can also be captured in the relevant contract.
You can maintain the details of an insurance company through the ‘Bills and Collections Insurance Company Maintenance’ screen. You can invoke this screen by typing ‘BCDINSCO’ in the field at the top right corner of the Application tool bar and clicking on the adjoining arrow button.

In this screen, you can maintain the following details of Insurance Companies:
3.6.2 Specifying Company Details
Insurance Company Code
Specify a unique code for each insurance company being defined in the system. The insurance company will be identified by this code throughout the system. This is mandatory information and if not provided, you will not be allowed to save the details of the company.
You can use a maximum of 9 alphanumeric characters to create the company code.
Insurance Company Name
After specifying a unique code for the company, you can also specify the full name of the insurance company.
Address 1 to 4
Specify the mailing address of the insurance company being defined. You can maintain a maximum of four lines of address. Each line of address can accommodate a maximum of 105 alphanumeric characters.
Telephone Number
Capture the telephone number of the insurance company.
Fax Number
Capture the fax number of the insurance company.
Note
The insurance company will be available for association with LC contracts only after you authorize the company details.
3.6.3 Specifying Account Details
Customer
Specify the customer name.
Account
Specify the account details.
3.6.4 Specifying UDF Values
You can specify values for all the User Defined fields (UDFs) created and attached to the ‘Bills and Collections Insurance Company Maintenance’ screen.
You can view the list of UDFs associated to this screen by clicking ‘Fields’ button.
You can enter the value for the UDFs listed here in the ‘Value’ column.
For more details on how to create user Defined fields, refer chapter ‘Creating custom fields in Oracle FLEXCUBE’ in the User Defined Fields User Manual under Modularity.
3.6.5 Operations on Company Maintenance Record
On an existing Company Maintenance record, you can perform the following operations (if any icon is disabled in the application toolbar, it means that the function is not allowed for the record):
- Amend the details of the record
- Authorize the record
- Copy the details of a record on to a new record
- Close the record
- Reopen the closed record
- Print the details of a record
- Delete the record
Refer to the manual on Common Procedures for details of these operations.
3.7 Trade License Details
This section contains the following details:
- Section 3.7.1, "Maintaining Trade License Details"
- Section 3.7.2, "Operations on Licence Expiry Date Record"
- Section 3.7.3, "Viewing Trade License Details"
3.7.1 Maintaining Trade License Details
Oracle FLEXCUBE allows you to maintain the TradeLicense Expiry Date of all the customers of your bank. You can maintain only one License Expiry Date for a customer. On selection of the CIF ID of the customer at the time of processing an LC contract, the Trade License Expiry Date maintained for the selected CIF ID is also displayed in the LC Contract screen. The system will not do any validations based on the expiry date. It is used only for information purpose.
You can capture trade license expiry date through the ‘Trade License Details’ screen. You can invoke this screen by typing ‘STDEXPDT’ in the field at the top right corner of the Application tool bar and clicking on the adjoining arrow button.
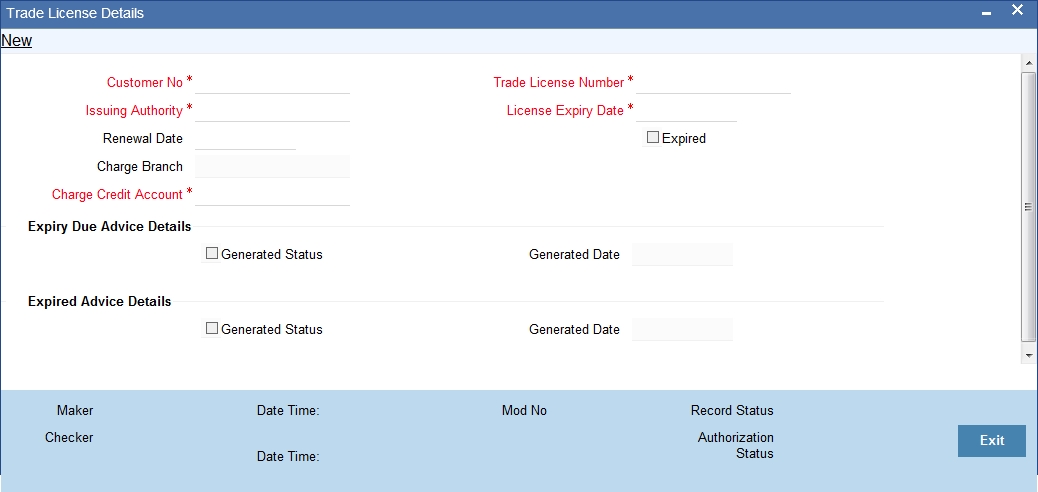
Specify the following details.
Customer No
Every customer of your bank is identified by a unique CIF ID. All authorized and active corporate CIF IDs are displayed in the option-list. You can select the appropriate CIF ID from the list.
Issuing Authority
Specify the government authority which issued the trade license to the customer.
Renewal Date
Specify the date on which the trade was renewed.
Charge Account
Specify a valid account to be used to collect the charges for trade license expiry. The adjoining option list displays all open and authorized accounts belonging to the customer. You can select the appropriate one.
Charge Branch
The system displays the Branch Code where the Charge Account is held.
Trade License No.
Specify the trade license number. This must be unique for each customer.
License Expiry Date
Specify the Trade License Expiry Date for the customer. The expiry date maintained here is validated during the following operations:
- Upon saving customer information
- Upon saving customer account
- Upon saving limits facilities
- Upon saving FT contract , LC contract, and BC contract
- Upon saving LC availment
- Upon saving BC liquidation
- Upon saving CL account, disbursement, payment and amendment
Note
Days before the license is due to expire, a notification is generated and sent to the customer. The number of days before which this notification needs to be generated is maintained at the Bank Parameters Preferences level.
Expired
The system marks the trade license of the customer as expired during EOD if the system date happens to be greater than or equal to trade license expiry date.
Expiry Due Advice Details
During EOD, advices are generated for customers whose trade license is impending expiry.
Generated Status
The success or failure of message generation through the above process is indicated by the true and false status of the field ‘Generated Status’.
Generated Date
The system displays the date on which the message was generated, if any.
Expired Advice Details
During EOD, advices are generated for customers whose trade license has expired.
Generated Status
The success or failure of message generation through the above process is indicated by ‘True’ or ‘False’ status of this field.
Generated Date
The success or failure of message generation through the above process is indicated by the true and false status of the field ‘Generated Status’.
3.7.2 Operations on Licence Expiry Date Record
On an existing Licence Expiry Date Maintenance record, you can perform the following operations (if any icon is disabled in the application toolbar, it means that the function is not allowed for the record):
- Amend the details of the record
- Authorize the record
- Copy the details of a record on to a new record
- Close the record
- Reopen the closed record
- Print the details of a record
- Delete the record
Refer to the manual on Common Procedures for details of these operations.
3.7.3 Viewing Trade License Details
You can view the trade license details maintained in the 'Trade License Details' screen using the 'Trade License Summary' screen.You can invoke this screen by typing 'STSEXPDT' in the field at the top right corner of the Application tool bar and clicking on the adjoining arrow button.
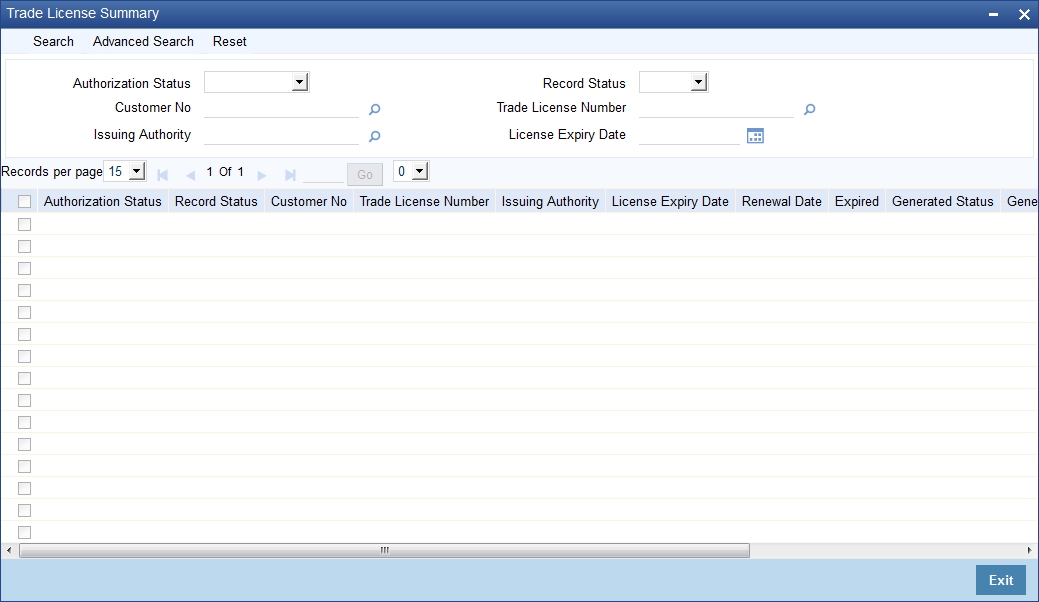
In the above screen, you can base your queries on any or all of the following parameters and fetch records:
- Authorization Status
- Record Status
- Customer No
- Trade License Number
- Issuing Authority
- License Expiry Date
Select any or all of the above parameters for a query and click 'Search' button. The records meeting the selected criteria are displayed.
If you are allowed to query trade license details, then system displays the following details pertaining to the fetched records:
- Authorization Status
- Record Status
- Customer No
- Trade License Number
- Issuing Authority
- License Expiry Date
- Renewal Date
- Expired
- Generated Status
- Charge Branch
- Charge Credit Account
3.8 Exchange Rates for Bills Details
This section contains the following details:
- Section 3.8.1, "Maintaining Exchange Rates for Bills"
- Section 3.8.2, "Specifying Exchange Rate Maintenance"
- Section 3.8.3, "Specifying UDF Values"
- Section 3.8.4, "Operations on Exchange Rate Type Maintenance Record"
3.8.1 Maintaining Exchange Rates for Bills
Oracle FLEXCUBE allows you to apply different exchange rates based on the amount involved in the transaction. The cut-off amount slabs are maintained in the local currency of your bank. If the transaction currency is not the local currency, the system will first convert the transaction amount into the local currency equivalent using the Standard Mid Rate. This is necessary as the cut-off amount slabs are maintained in the local currency. The system will then validate the converted amount against the different amount slabs to determine the appropriate rate type. This is the rate type that will be used for the actual conversion of the transaction currency into the local currency equivalent.
You can capture the exchange rate types for different amount slabs through the ‘Bills and Collections Exchange Rate Type Maintenance’ screen.
You can invoke this screen by typing ‘BCDAMTEX’ in the field at the top right corner of the Application tool bar and clicking on the adjoining arrow button.
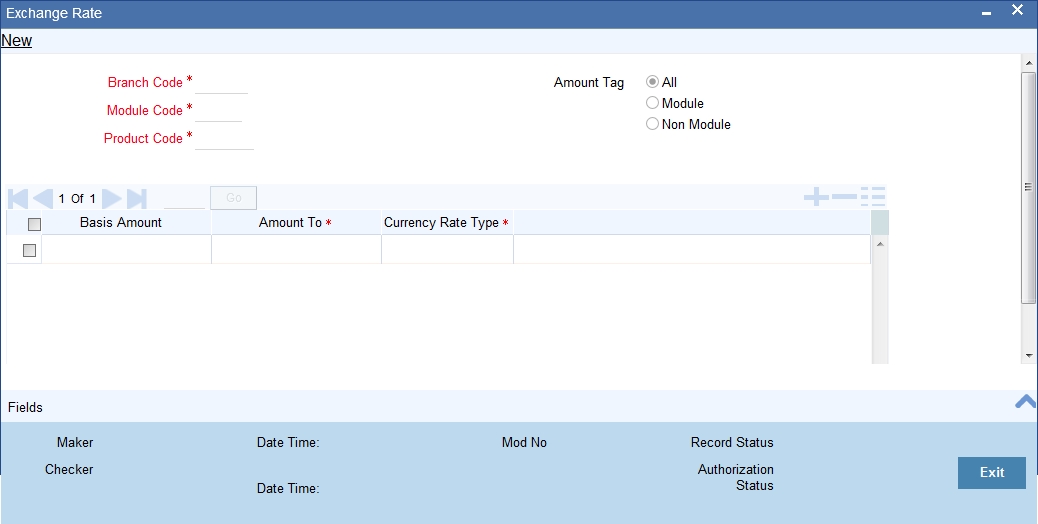
In this screen, you can specify the amount slabs for a branch, module and product combination.
Branch Code
Each branch of your bank is identified by a unique code. All authorized and active branch codes are available in the option-list. You can select the appropriate branch code from the list.
Module Code
Like wise, all the modules (like Loans & Deposits, Letters of Credit, Bills & Collections, Funds Transfer etc) available in your bank are also displayed in an option-list. All active and authorized records are available for selection. You can select the appropriate module code from the list.
Product Code
The various products/services offered by your bank are also available in an option-list. Select the product code from the list. Alternatively, you can also maintain the cut-off amounts that will be applicable for all the branches, modules, and products of your bank. You can make the following selections to do this:
- Branch Code – ALL (all branches)
- Module Code – AL (all modules)
- Product Code – ZALL (all products)
Amount Tag
Amount tags identify the various components (eg Bill Amount, Loan Principal, LC Amount etc.) involved in a contract. You can maintain the cut-off amount slabs for:
- All: The maintenance will be applicable to all the amount tags available in the system (Module tags and Non-module tags).
- Module: The amount tags that are specific to a particular module are known as Module Tags. For eg the amount tag PRINCIPAL is specific to the Loans module, BILL_AMOUNT is defined for the Bills module and so on.
- Non-Module: The amount tags that are internally created by the system are referred to as Non-Module tags. The system will automatically create the amount tags for the Interest, Tax, Charge, and Commission components that you define for a product.
3.8.2 Specifying Exchange Rate Maintenance
Basis Amount
Specify the floor basis amount. The upper limit of the previous amount slab gets defaulted as the Floor Basis Amount.
Amount To
Specify the ceiling limit of the slab.
Click add icon to capture each subsequent amount slab.
Currency Rate Type
You can associate a different exchange rate type with each cut-off amount slab that you have maintained. All authorized and active rate types defined in your system are available in the option-list. Select the appropriate rate type for each amount slab.
3.8.3 Specifying UDF Values
You can specify values for all the User Defined fields (UDFs) created and attached to the ‘Bills and Collections Exchange Rate Type Maintenance’ screen. You can view the list of UDFs associated to this screen by clicking ‘Fields’ button.
You can enter the value for the UDFs listed here in the ‘Value’ column.
For more details on how to create user Defined fields, refer chapter ‘Creating custom fields in Oracle FLEXCUBE’ in the User Defined Fields User Manual under Modularity.
3.8.4 Operations on Exchange Rate Type Maintenance Record
On an existing Exchange Rate Type Maintenance record, you can perform the following operations (if any icon is disabled in the application toolbar, it means that the function is not allowed for the record):
- Amend the details of the record
- Authorize the record
- Copy the details of a record on to a new record
- Close the record
- Reopen the closed record
- Print the details of a record
- Delete the record
Refer to the manual on Common Procedures for details of these operations.
3.9 INCO Terms Details
This section contains the following details:
- Section 3.9.1, "Maintaining INCO Terms"
- Section 3.9.2, "Specifying INCO Term Document Details"
- Section 3.9.3, "Specifying Document Details"
- Section 3.9.4, "Operations on INCO Term Maintenance Record "
3.9.1 Maintaining INCO Terms
INCOTERMS or International Commercial Terms indicate who will bear the freight, insurance and ancillary charges i.e. charges relating to an import or export consignment other than the cost of the goods/service. Additionally, they also determine which party will make arrangements to clear the goods from a port or airport. There are 13 INCO terms given by the ICC (full form required).
Each INCO term is a three-letter code stating the responsibility of the seller i.e. the beneficiary in an LC. For instance ‘EXW’ states that the responsibility of the seller is limited to keeping the goods at his factory ready for export and it is the buyer’s responsibility to pick it up and arrange for onward freight and insurance. Under ‘FOB’ the seller is responsible for securing export clearance and placing the goods on board a ship in his country. From that point on i.e. the cost relating to the freight, transit insurance and clearing the goods for import are the buyer’s responsibility. ‘CIF’ states that the seller is responsible for the freight/transport charges and insurance upto the point of destination. ‘DDP’ indicates that the seller has to take complete responsibility to arrange and pay for transport, insurance and export/import clearances. An INCO term is also specific to the mode of transport used. The terms ‘FAS’, ‘FOB’, ‘CFR’ and ‘CIF’ should only be used when the shipment mode is sea.
You can associate documents and clauses to INCO terms as part of a one-time maintenance for your bank. You can do this through the ‘INCO Term Document Maintenance’ screen. You can invoke this screen by typing ‘BCDINCOD’ in the field at the top right corner of the Application tool bar and clicking on the adjoining arrow button.
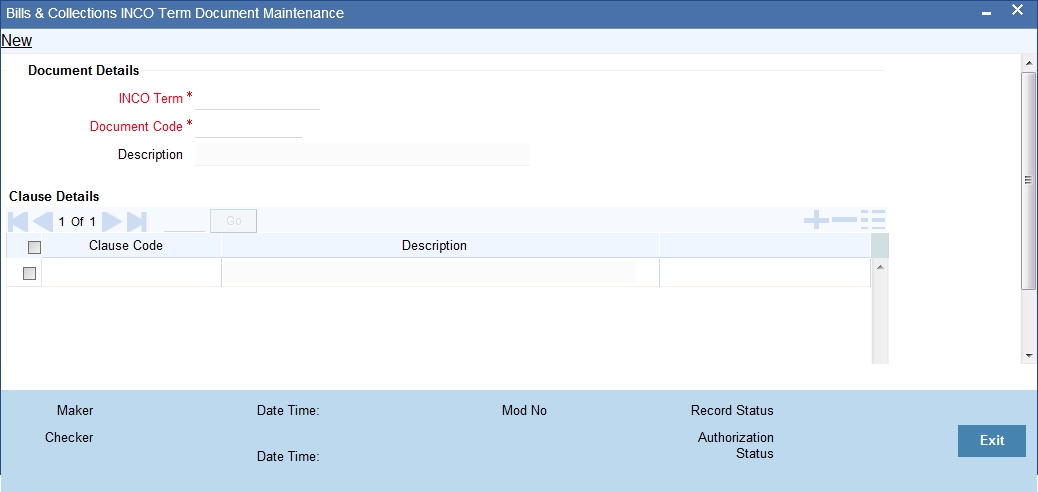
Here, you need to specify the following:
3.9.2 Specifying INCO Term Document Details
INCO Term
The following are the INCO terms for which you can maintain documents and clauses:
- EXW - EX Works
- FCA - Free Carrier
- FAS - Free Alongside Ship
- FOB - Free On-Board
- CFR - Cost and Freight
- CIF - Cost Insurance Freight
- CPT - Carriage Paid to
- CIP - Cost Insurance Paid
- DAF - Delivered at Frontier
- DES - Deliver Ex Ship
- DEQ - Delivered Ex Quay
- DDU - Delivered Duty Unpaid
- DDP - Delivered Duty Paid
Document Code
You need to associate a valid document to an INCO term. All valid document codes maintained (through the ‘Bills and Collections Document Master Maintenance’ screen) in your current branch are made available here for selection. You can associate any number of valid documents to an INCO term.
Description
A brief description of the chosen document is displayed here.
3.9.3 Specifying Document Details
Clause Code
To each document associated with an ‘INCO Term’, you need to associate a clause. The adjoining option list displays all clause codes maintained in through the ‘Clause Maintenance’ screen. You can choose the appropriate one.
To each document associated with an ‘INCO Term’, you can associate any number of clauses.
Description
A brief description of the chosen clause is displayed here.
3.9.4 Operations on INCO Term Maintenance Record
On an existing INCO term maintenance record, you can perform any one of the following operations (if any icon is disabled in the application toolbar, it means that the function is not allowed for the record):
- Create a record
- Unlock and amend the details of the record
- Delete the record
During the ‘amend’ operation, you can amend the clause code only.
Refer to the chapter on common procedures for details on each of these operations.
3.10 Open Insurance Policy Details
This section contains the following details:
- Section 3.10.1, "Maintaining Open Insurance Policy Details"
- Section 3.10.2, "Specifying Open Policy Details "
- Section 3.10.3, "Operations on an Open Policy Record"
3.10.1 Maintaining Open Insurance Policy Details
A trader can enter into an open insurance policy with an insurance company to insure all goods in transit falling within that agreement for an indefinite period, until the agreement is cancelled by either party. You can capture details of such insurance policies using the ‘Open Policy Maintenance’ screen.
You can invoke this screen by typing ‘LCDOPNPL’ in the field at the top right corner of the Application tool bar and clicking on the adjoining arrow button.
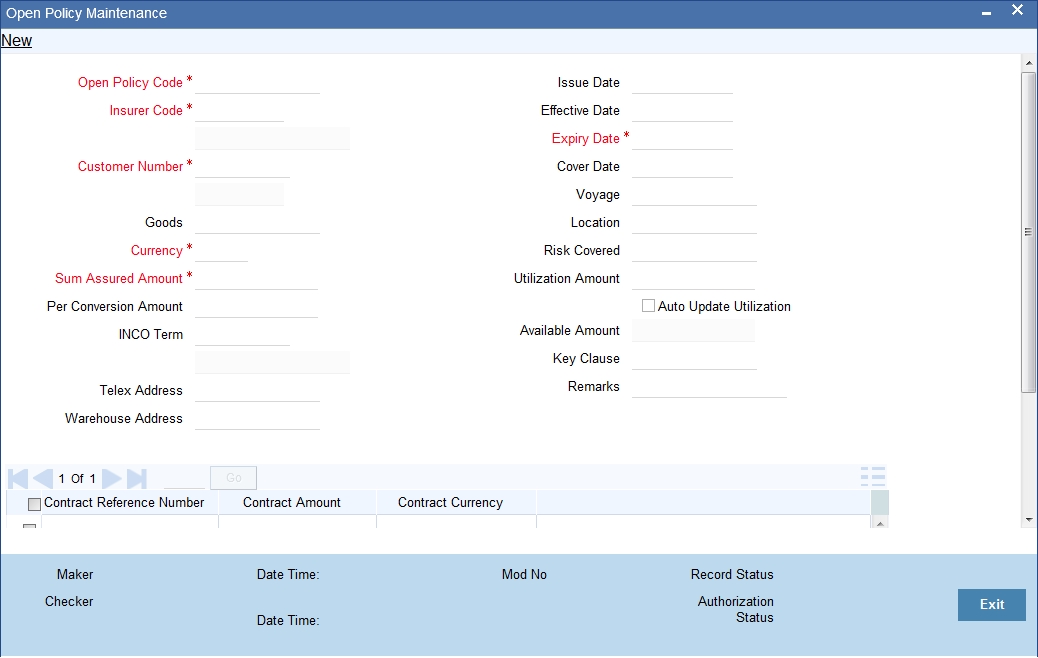
Here you can capture the following details:
Open Policy Code
Specify a unique alphanumeric code to identify the policy. You can specify a maximum of 105 characters.
Insurer Code
Specify the insurer who has issued the policy. The adjoining option list displays all insurance companies maintained using the ‘Bills & Collections Insurance Company Maintenance’ screen. You can select the appropriate one.
CIF ID
Specify the customer identification number (CIF) for whom the policy is issued. The adjoining option list displays all CIF maintained using the ‘Customer Information Maintenance’ screen. You can select the appropriate one.
Short Name
The system displays the short name.
Goods
Specify the goods to be linked to the open policy.
Currency
Specify the currency in which the total sum assured and the amount per conveyance should be maintained. The adjoining option lists displays all currency codes maintained in the system. You can select the appropriate one.
Sum Assured Amount
Specify the total amount assured for the policy.
Per Conversion Amount
Specify the limit to be set for every transaction under the policy.
INCO Term
Specify the INCO term that should be linked to the policy. The adjoining option list displays the following values:
- EXW - EX Works
- FCA - Free Carrier
- FAS - Free Alongside Ship
- FOB - Free On-Board
- CFR - Cost and Freight
- CIF - Cost Insurance Freight
- CPT - Carriage Paid to
- CIP - Cost Insurance Paid
- DAF - Delivered at Frontier
- DES - Deliver Ex Ship
- DEQ - Delivered Ex Quay
- DDU - Delivered Duty Unpaid
- DDP - Delivered Duty Paid
You can choose the appropriate one.
Telex Address
Specify the telex number of the customer.
Warehouse Address
Specify the warehouse address of the customer.
Issue Date
The system displays the application date here. However you can change it.
Effective Date
Specify the date on which the policy becomes effective.
Expiry Date
Specify the date on which the policy expires. Note that this date has to be greater than the effective date.
Cover Date
Specify the cover date for the policy. This date should not exceed the expiry date.
Voyage
Specify details of the shipment that can be undertaken under this policy.
Location
Specify details of the location to which goods can be shipped under this policy.
Risk Covered
Specify details of the risk coverage for goods under this policy.
Utilized Amount
If you have checked the option ‘Update utilization Automatically’ the system will display the amount that has been utilized out of the total insured sum. If an LC contract is linked, the utilization amount will show the LC contract amount. In case of a BC contract being linked subsequently, the amount will be re-instated accordingly. If that option is not checked, then you need to enter the utilized amount.
If the linked LC contract is reversed or deleted, the utilization will be reduced to the extent of LC amount.
Auto Update Utilization
Check this option to indicate that the system should automatically update utilization amount based on the transactions undertaken under the policy.
Available Amount
The system displays the amount available for further utilization. This amount is arrived at by subtracting the utilized amount from the total sum assured.
Key Clauses
Specify the clauses that you wish to link to the policy.
Remarks
Specify remarks pertaining to the policy.
3.10.2 Specifying Open Policy Details
While querying on records, you can view the following details:
Contract Reference Number
The reference number of the linked LC contract is displayed here.
Contract Currency
The system displays the contract currency of the linked LC contract..
Contract Amount
The system displays the contract amount of the linked LC contract.
While creating a new policy or amending an existing one, you cannot modify the fields under the ‘Contract Linkage’ section. You can modify the following fields while amending a record:
- Expiry Date
- Voyage
- Location
- Risk Covered
- Per Conveyance Amount
- Key Clauses
- Remarks
- Cover Date
- Utilization Amount (If the option ‘Update utilization Automatically’ is not checked)
- Update utilization automatically
- Telex Address
- Warehouse Address
3.10.3 Operations on an Open Policy Record
You can perform the following operations on this record:
- New
- Unlock
- Close
- Copy
3.11 Blacklisting LCs
You can black list LCs and collection bills based on a set of criteria that you can define. You can define criteria for black listing LCs and bills in the ‘Black Listed Transaction Input’ screen. You can invoke this screen by typing ‘TFDBKLST’ in the field at the top right corner of the Application tool bar and clicking on the adjoining arrow button.
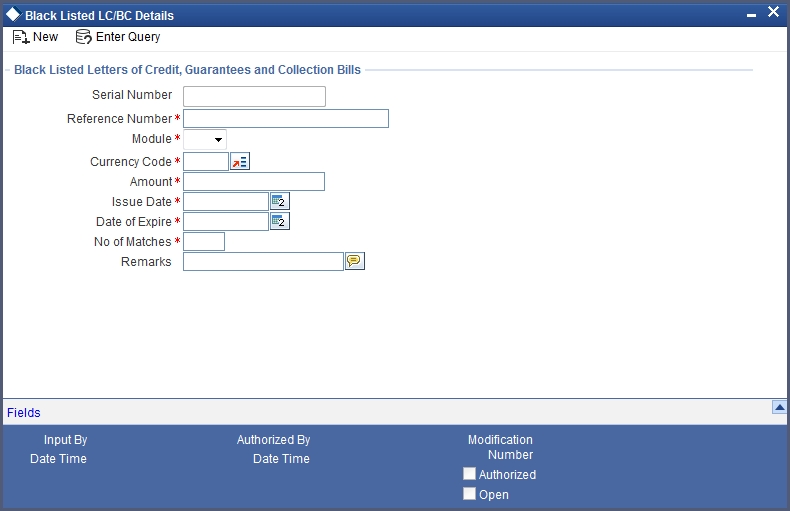
You can set up the following criteria for blacklisting LCs and Bills:
- The module to which the contract belongs
- The reference number of the party (For LCs, specify the reference of the Issuer. For Bills, enter the reference of the Remitting bank).
- The Currency Code of the contract
- The Contract Amount
- The Issue Date and
- The Expiry Date
Number of Matches
Now that you have set up the criteria for black listing contracts, you need to indicate the number of the above criteria that should be used to black list LCs and Bills.
For example you indicate 2 in the field Number of Matches. All LCs/Bills that match at least two of the blacklisting criteria that you specified will be displayed for blacklisting.
After you indicate the blacklisting criteria, click save icon to save the record. A message with the Reference Number of the LCs/Bills that matches the blacklisting criteria that you specified is displayed. You can choose to blacklist the contract or ignore the message.
If you enter a new LC/Bill that matches the blacklisting criteria, you will be prompted for an override. Similarly, if you attempt to amend the details of a blacklisted LC/Bill, you will be prompted with an override.
3.12 Maintaining Branch Parameters for Letter of Credit
You can maintain letter of credit details specific to a branch using the ‘Letters of Credit Branch Parameters’ screen. These parameters can be maintained for each branch of your bank. You can invoke this screen by typing ‘LCDBRPRM’ in the field at the top right corner of the Application tool bar and clicking on the adjoining arrow button.
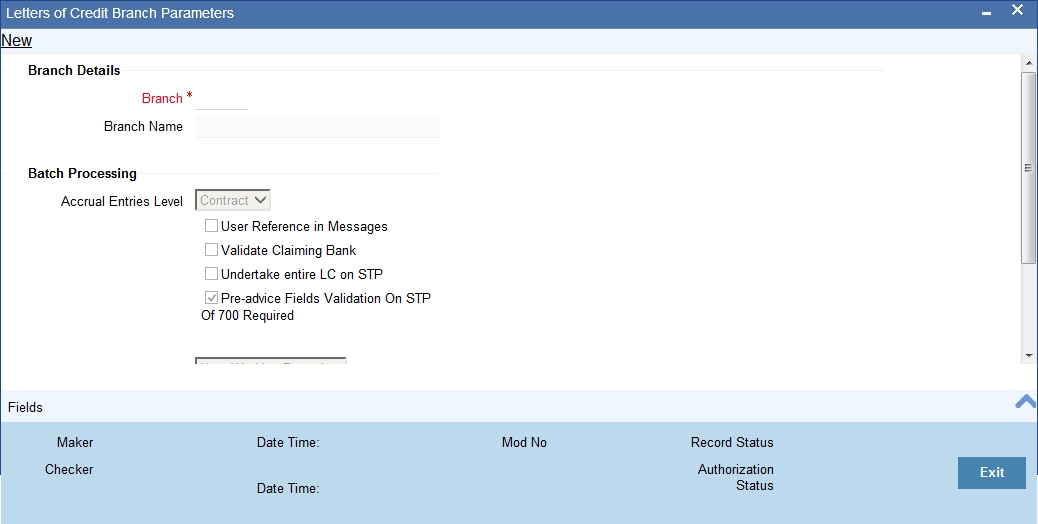
The following details can be captured here:
Branch Details
Branch Code
Specify the branch code for which you need to maintain specific parameters. Alternatively, you can select the branch code from the adjoining option list also. All branch codes maintained in the system will be available in the list of values for selection.
Branch Name
The branch name is defaulted based on the branch code selected.
Batch Processing
Accrual Entries Level
Select the option to indicate the level at which accrual has to be done and entries have to be passed, from the drop-down list. The options available are:
- Product
- Contract
Process Till Next Working Day - 1
Select the day on which automatic events, such as; accrual, liquidation etc., falling due on a holiday should be processed, from the adjoining drop-down list. This list displays the following options:
- Next Working Day - 1 – Select this option if you want the batch process to process all the automatic events, which are due on the holiday, as part of the EOD on the last working day before the holiday.
- System Date –Select this option if you want the batch process to process the automatic events, which are due on the holiday, as part of BOD on the first working day after the holiday. On the last working day before the holiday, batch process processes only the events scheduled for that day.
For example the current branch date is 20 March 1998. On 21 March 1998, which is a holiday, the following automatic events fall due:
- The automatic closure of an LC
- Automatic reinstatement of the LC amount
- Automatic accrual of commission and charges
Next working Day - 1
If you specify that the processing should be done on the last working day - 1, the above events will be processed on March 20, as part of the batch process run at End of Day.
System Date
If you specify that the processing should be done only up to the system date, then the events scheduled for 21 March 1998, will be processed as part of the Batch Process run as part of Beginning of Day on 22 March 1998.
User Reference Number in Messages
Check this box to include User Reference Number in messages.
If you check this box then system will display the User Reference Number in the ‘User Ref No’ column of the account statement for the LC contract.
Note
For the user reference to be picked up in the account statement, the new tag ‘Userrefno’ is included in the account statement format.
Validate Claiming Bank
Check this box to validate claiming bank.
If you check this box, you can check if the sender of the MT742 is same as the party recorded against the CLB (Claiming Bank) party for the linked LC.
When a MT740 message is received, the system will insert a record with CLB party type as part of the Import LC Contract only if,
- 41A tag contains a BIC or
- 41D tag contains a value other than ‘ANY BANK’ (the value is the Customer Name/Customer Address), the CIF ID will be resolved based on these values. If no CIF is resolved, then the Walk-in Customer ID will be inserted as CLB party.
The system will create the Bill Contract, if the CLB party is not recorded as part of the linked Import LC (assuming that it is for ‘ANY BANK’). If CLB party is present for the linked Import LC and if the sender of MT742 is not same as the CLB party, then the system will display an override message and will put the BC contract on HOLD.
When a MT742 message is processed manually in Incoming Browser, the system will perform the above validation. If the validation fails, then the system will display an override message.
Undertake Entire LC on STP
Check this box to default the entire LC amount as undertaken while processing an incoming MT740.
If you do not check this option, the entire LC maximum amount will be defaulted as non-undertaken amount while creating the Import LC contract on receiving MT740. In that case, the default undertaken amount will be taken as zero.
Pre-advice Fields Validation On STP Of 700 Required
Check this box if you require validation of Pre-advice fields mentioned in STP 700 Swift Message. The check box is checked by default; however, you can modify, if needed.
Discrepancy Notice Period
Specify a period within which the discrepancy details should be added to the bills processed under LCs. This period will be calculated from the date of presentation of the bills (which is typically the booking date of the bill) to the issuing bank/confirming bank.
The system will display an override if the discrepancies are added to the bills (in the Bills Contract Details screen) after the discrepancy notice period.
Allow Partial Closure
Check this box to indicate that the LC should be partially closed during LC batch.
If this option is checked, system will do the following as part of the Closure Batch:
- If the entire LC amount is utilized, then the LC will be closed as existing.
- If the LC is partially utilized, then an event, PCLS (Partial Closure of LC) will take place. The Limits, Outstanding Liability and the Cash Collateral for the unutilized amount will be released.
For example assume that an LC of USD 1000 is created. A Bill of USD 700 is created in initial stage by linking the above LC. On the expiry date of LC, as part of Closure batch (if this option is checked at the branch level), system will release the Limits, OS liability and Cash collateral for USD 300 by retaining USD 700 assuming that the Bill to which the LC is linked will be availed at the later stage.
Partial Closure Days after Expiry
Specify the number of days required for the partial closure of the LC after its expiry date. You specify the partial closure days only if the option ‘Allow Partial Closure’ is checked.
The system allows manual partial closure during the partial closure days, until the LC is closed.
The system verifies the date arrived at after adding the number of partial closure days to the expiry date. If this date is later than the closure date of the LC contract, the system closes it on the actual closure date itself.
The above rule applies to export LC contracts as well.