8. Operations
This chapter explains the various operations that can be performed on a lease account; the most prominent being payments and amendments, funding, status change, simulation of payments, rollover etc.
This chapter contains the following sections:
- Section 8.1, "Leasing Payments Details"
- Section 8.2, "Saving and Authorising Leasing Payments"
- Section 8.3, "Viewing Leasing Payments"
- Section 8.4, "Leasing Amendments Details"
- Section 8.5, "Maintaining Manual Status Change"
- Section 8.6, "Viewing Manual Status Change"
8.1 Leasing Payments Details
This section contains the following topics:
- Section 8.1.1, "Maintaining Leasing Payments"
- Section 8.1.2, "Partial Payment"
- Section 8.1.3, "Payments Simulation"
8.1.1 Maintaining Leasing Payments
The ‘Lease Payment’ screen allows you to make payments towards a lease. Payment can be against any or all or a combination of the components due. Prepayments will attract a pre-payment penalty to be charged. The payment computed by the system can be overridden by the amount negotiated by the customer and a subsidy is captured as amount waived. The amount accepted is either waived or capitalized. Depending on the mode selected, additional payment details such as clearing house details, settlement products to be used if the settlement is through another product of Oracle FLEXCUBE, etc are captured.
- If the outstanding balance of all the components is zero except the Residual amount then the status of the lease is marked as ‘Residue’
- On liquidation of residual amount, status is set to Liquidated.
- There is no penalty on Residual amount if it is not liquidated.
You can invoke the ‘Leasing Payment’ screen by typing ‘LEDPMNT’ in the field at the top right corner of the Application tool bar and clicking on the adjoining arrow button.
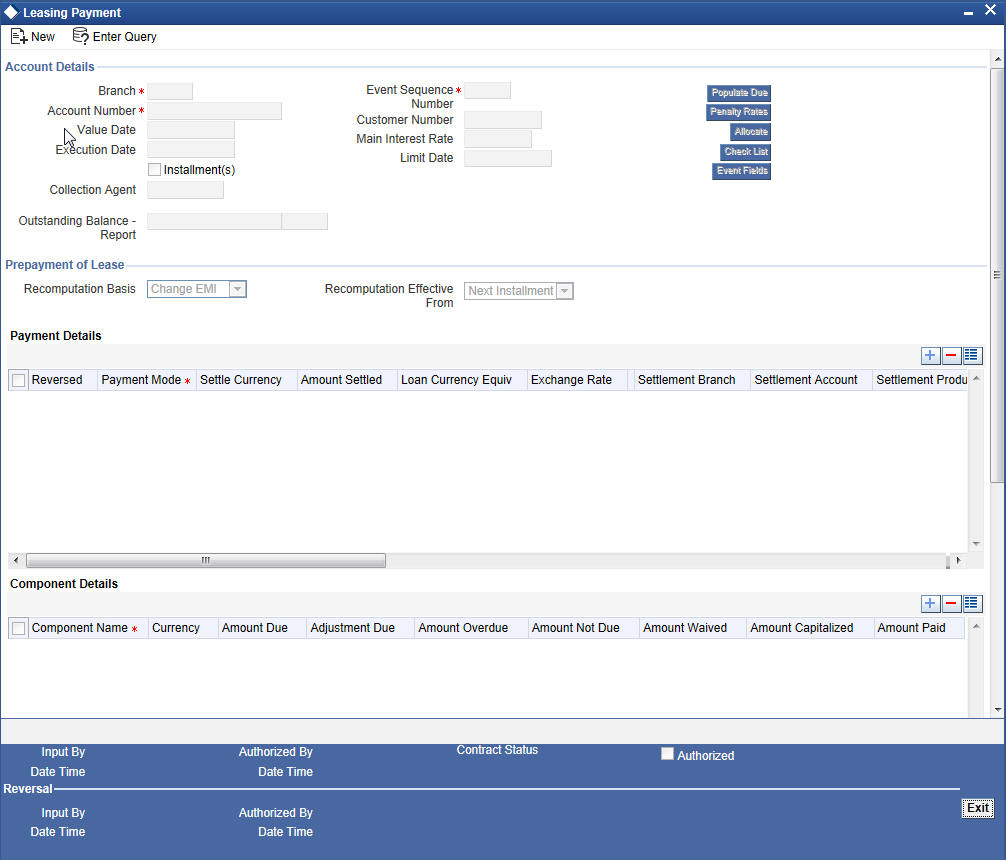
You can specify the following details in the Lease Payment screen:
Account Details
The following details are captured here:
Branch
Select the branch code of the account towards which the payment is made from the option list.
Account Number
Select the customer’s account number from the option list.
Event Sequence Number
The system displays the event sequence number of the payment in the account’s life history.
Value date
Specify the date on which the payment affects the account balance in this field.
Note
The value date can be a Back Valued, Current or Future Date.
Execution Date
This is the application date on which the payment is entered into the system. If the Execution date is in the future, the payment is tanked and released on the Future Value date of the payment; else, it is applied immediately as of the value date of the payment.
Note
By default it is the current system date, but can be modified.
Collection Agent
The collection agent assigned to the lease gets defaulted here during liquidation.
Note
The collection agent assigned through the Assignment screen is still valid and the collection agent assigned here is effective only for this particular liquidation. After Authorization the details of the liquidation is passed into Collections module routines for the calculation of Collection Agent Fee.
Customer No
The system displays the Customer No of the account in this field.
Main Int. Rate
The rate value for the rate code maintained against the main interest UDE chosen is displayed here.
Limit Date
Select the limit date from the available schedules that can be included as amount from the option list.
Note
This option is allowed only if the installment option is selected.
Installment(s)
If you select this option then the amount due includes schedules till limit date. If not then the amount due is the same as on the value date.
Interest Payback Applicable
Check this box if interest payback is applicable for a prepayment.
Amount Financed
Specify the total lease amount. On saving the transaction after entering all the required details in the system, the system validates the value of the transaction amount against the following:
- Product transaction limit
- User Input limit
If the transaction currency and the limit currency are different, then the system converts the amount financed to limit currency and checks if the same is in excess of the product transaction limit and user input limit. If this holds true, the system indicates the same with below override/error messages:
- Number of levels required for authorizing the transaction
- Transaction amount is in excess of the input limit of the user
Prepayment of Amortized Lease
The following details are captured here:
Recomputation Basis
Select the recomputation basis from the drop-down list. Following are the options available in the drop-down list:
- Change EMI
- Reduce Tenor
Recomputation Effective From
You can start the prepayment on the next installment.
Payment Details
The following details are captured here:
Reversed
This option indicates that the settlement is reversed.
Note
This option is disabled in the new payment mode.
Payment Mode
Specify the mode of leasing payment by clicking the adjoining option list. A list of payment modes is displayed. Click on a value to select it.
The payment modes are CASA, Cash/Teller, Instrument, External Account, Electronic Pay Order, Internal Cheque, Clearing, Debit Card, and Credit Card.
Settlement Currency
Select the currency used for the specific payment mode by clicking the adjoining option list. A list of currencies is displayed. Click on a value to select it.
Amount Settled
Specify the amount paid through the specified mode of payment in terms of the settlement currency in this field.
Note
The amount should be a valid amount and should not exceed the total amounts due; else it is treated as a prepayment.
Lease Currency Equivalent
The system displays the amount settled in terms of the local currency in this field.
Exchange Rate
Specify the exchange rate to be used between the lease currency and settlement currency in this field.
Note
The exchange rate is defaulted but can be overridden. The final value should be within the exchange rate variances maintained in the account preference.
Set Component
Each settlement is apportioned against a component due based on the Liquidation order. The order in which the settlements are picked is ordinal as entered in the screen. Click ‘Set Component’ button to view/change the component settlement details in the ‘Component Details’ screen.
Settlement Branch
Select the settlement branch from the option list.
Settlement Account
Select the settlement account from the option list.
Settlement Product
Specify the settlement product
Instrument number
Specify the instrument number.
Card No
Specify the card number.
External Account Number
Specify the external account number
External Account Name
Specify the external account name.
Clearing Bank
Select the clearing bank details from the option list.
Clearing Branch
Specify the clearing branch details.
Upload Source
Select the upload source details from the option list.
Sector Code
Select the sector code details from the option list.
Routing Number
Specify the routing number.
Settlement Reference Number
Specify the settlement reference number.
Component Details
The following details are captured here:
Component Name
The system displays the component name in this field.
Currency
The system displays the currency of the component based on lease currency and the account in this field. If the component is based on a flat amount UDE then the UDE currency is displayed.
Amount due
The system displays the amount due for the component in this field. It is generated based on the account and component.
Adjustment Due
Adjustment due happens when there is a revaluation or when there is rate revision, according to increase or decrease of rates.
Amount overdue
Here, the system displays the amount overdue for the component. It is generated based on the account and component.
Amount not due
For the principal amount, Amount not due is the rest of principal that is due after the value date. Hence any payment towards this constitutes a prepayment. This value is system generated based on account and component.
Amount Paid
The system displays the actual amount paid against the component dues in this field.
Note
When payments are allocated across dues, payment details are defaulted from the liquidation order. But these details can be modified as per your preferences.
Amount Waived
Enter the amount waived by the bank after negotiations with the customer in this field.
Amount Capitalized
Enter the amount capitalized in this field.
Settlement Details
Depending upon the mode of payment the following settlement details are captured:
For ‘CASA’:
- Settlement Branch
- Settlement Account
For ‘Credit Card’ and ‘Debit Card’
- Card No.
For ‘Clearing’
- Upload Source
- Instrument Number
- Clearing Product
- End Point
- Routing Number
- Clearing Bank
- Clearing Branch
- Sector Code
For ‘External Account’
- Upload Source
- PC Category
- Clearing Bank
- Clearing Branch
- External Account Name
- External Account Number
For ‘Electronic Pay Order’
- Upload Source
- PC Category
- Clearing Bank
- Clearing Branch
- External Account Name
- External Account Number
For ‘Internal Check’
- Instrument Number
- Settlement Branch
- Settlement Account
For ‘Instrument’
- Instrument Number
- Settlement Branch
- Settlement Account
For ‘Cash/Teller’
- Upload Source
- Settlement Product
On saving a manual payment towards a lease component (s), the online liquidation against each such component follows the order of liquidation as specified through the ‘Component Liquidation Order’ screen.
8.1.2 Partial Payment
Partial payment is required to parameterize partial liquidation during auto liquidation process.
In the ‘Product’ screen you can indicate whether partial liquidation is allowed during auto liquidation of the lease or not. This preference set at the product level gets defaulted at the account creation level also. But this option is allowed only if ‘Verify Funds’ option is selected. Auto Liquidation will check this option before carrying out partial liquidation viz. before liquidating to the extent of availability during Verify Funds check.
If selected, the function proceeds with liquidation, else it is marked as unpaid.
Refer the section titled ‘Specifying Product Preferences’ in the ‘Defining Product Categories and Products’ chapter of this User Manual for more details.
8.1.3 Payments Simulation
Lease payment simulation calculation function is used to arrive at an agreement with the client. The ‘Leasing Payment Simulation’ screen displays the effect of making payments across components across schedules. You can invoke this screen by typing ‘LEDSIMPT’ in the field at the top right corner of the Application tool bar and clicking on the adjoining arrow button. The results are used to arrive at a negotiated amount that can be used to settle outstanding loss.
For more details on the field explanation refer section ‘Leasing Payment’ in this chapter.
You can change specific UDE values to simulate the effect of changing prepayment penalty rates.
Payments can be saved from the simulator. Once the payment simulation is saved, if you enter simulation account number in the payments screen and click on the ‘Populate Due’ button then the system displays all the details entered in the payment simulation screen.
Note
Only users with rights to input payments are allowed to save payments from the simulator.
Click ‘Simulate’ button to view the account details after the current payment. An account screen is launched to view the updated account after the payment. You can also print an advice from the simulation screen.
8.2 Saving and Authorising Leasing Payments
You have to save a leasing payment after entering all the required details in the system. Click Save icon on the application Toolbar to save an account. The system updates this as an unauthorised contract. To authorize an account, click ‘Authorize’ icon on the Application toolbar.
Note
You cannot authorise a payment from the ‘Leasing Payments’ screen in the following cases:
- the contract has multilevel of authorization pending, the same will be done using the ‘Multilevel Authorization Detailed’ screen
- the level of authorization is greater than or equal to ‘N’
- •the ‘Nth’ or the final level of the users authorisation limit is less than the difference between amount financed and sum of the limits of all the users involved in authorizing a transaction, this case holds good when the ‘Cumulative’ field is checked in the ‘Product Transaction Limits Maintenance’ screen
- the transaction amount is greater than the authoriser’s authorisation limit if the ‘Cumulative’ field is unchecked in the ‘Product Transaction Limits Maintenance’ screen
8.3 Viewing Leasing Payments
You can view details of leasing payments in the ‘Leasing Lease Payments Summary’ screen. You can invoke this screen by typing ‘LESPMNT’ in the field at the top right corner of the Application tool bar and clicking the adjoining arrow button.
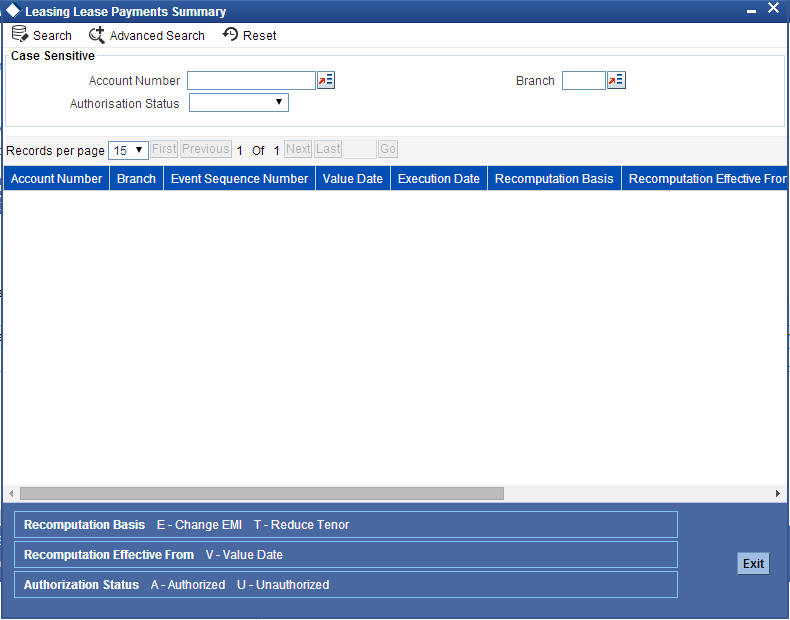
You can query on records based on any or all of the following criteria:
- Account Number
- Authorize Status
- Branch
Click ‘Search’ button. The system identifies all records satisfying the specified criteria and displays the following details for each one of them:
- Account Number
- Authorize Status
- Branch
8.4 Leasing Amendments Details
This section contains the following topics:
- Section 8.4.1, "Leasing Amendments"
- Section 8.4.2, "Amendments Tab"
- Section 8.4.3, "Account Details Tab"
- Section 8.4.4, "Default Tab"
- Section 8.4.5, "Components Tab"
- Section 8.4.6, "Charges Tab"
- Section 8.4.7, "Saving and Authorizing Leasing Amendments"
- Section 8.4.8, "VAMI Simulation"
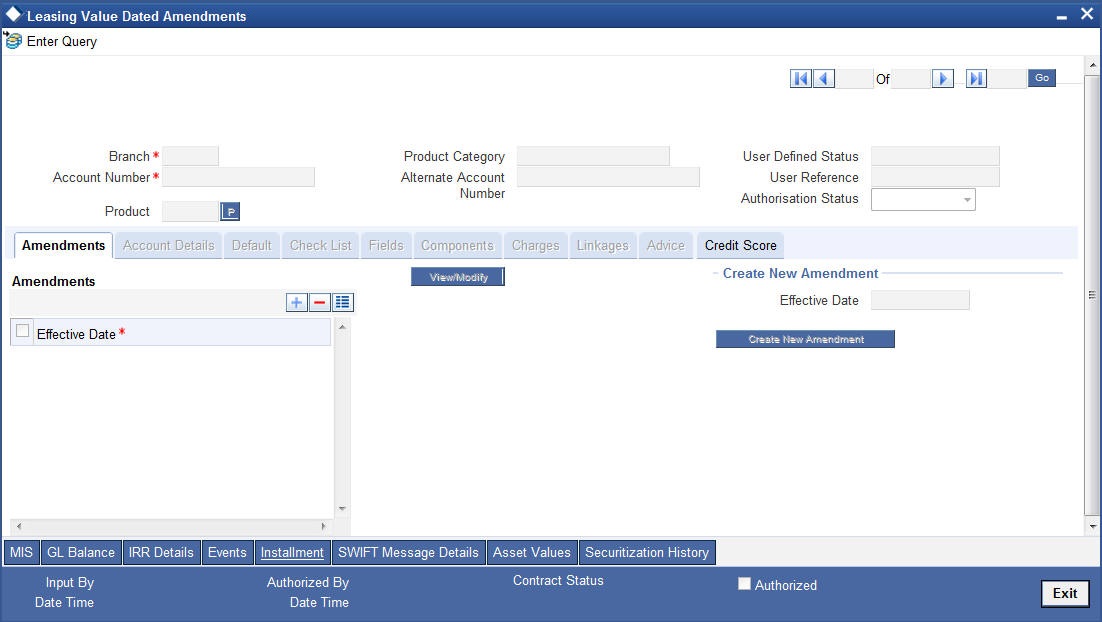
8.4.1 Leasing Amendments
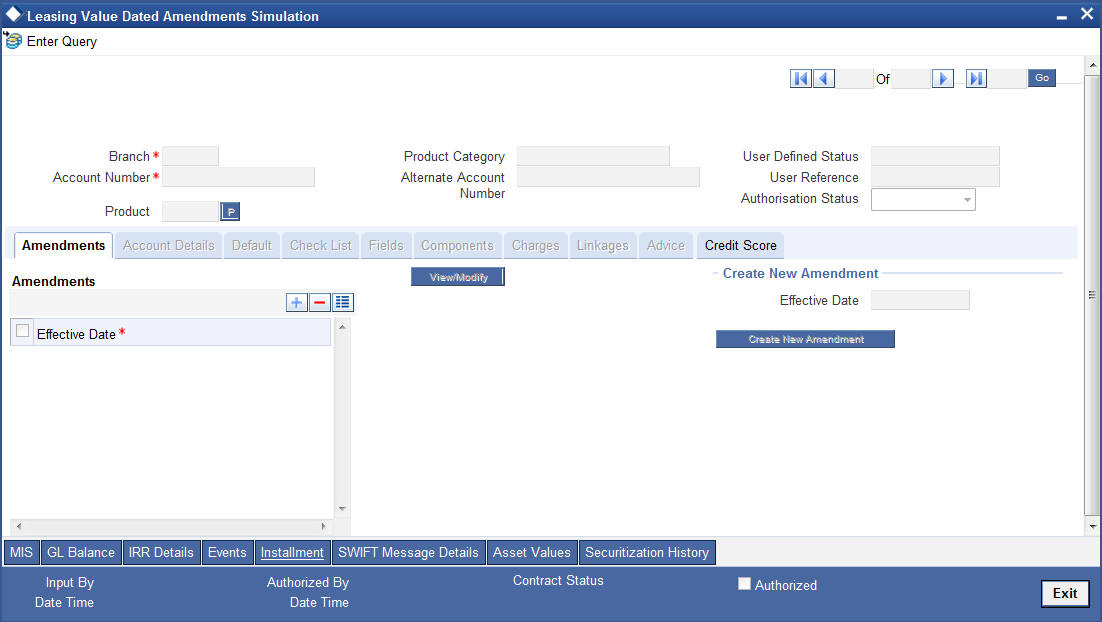
Oracle FLEXCUBE supports value dated amendments for leasing module. You can invoke this screen by typing ‘LEDVDAMD’ in the field at the top right corner of the Application tool bar and clicking on the adjoining arrow button.
Booking an amendment is called VAMB and Initiating is called VAMI. These are considered as events in the life cycle of the Lease.
Value Dated Amendments supports the following functions:
- Modification of currency between UF and CLP. The UF conversion on any date uses the effective date UF rate.
- When the above change in interest rate is completed, the accrual is recomputed. The difference in accruals is accounted for in the current period on the booking date of the change.
- The amendment date of value dated amendments should be one of the schedule dates.
- Recomputation of EMI will be effective from the next schedule after the amendment date.
If these changes are required to be effective on a particular date, not maintained previously, a fresh set of rates for that day is required to be maintained.
You can pick any active account from the Value Dated Amendments screen and apply the amendments for that account. You can also view or modify the amendments that are not yet applied for that account.
If the amendments result in a status change for the account, the system will update the current status for the account in the ‘Derived Status’ field. During end-of-day batch processing, it will update the ‘User Defined Status’ for the account with the worst status available for all accounts and leases for this CIF and post the required accounting entries for the change.
For more details on the field explanation refer section ‘Specifying Account Details’ in ‘Account Creation’ chapter.
8.4.2 Amendments Tab
The following detail is displayed here:
Effective Date
The effective date of the various amendments done to the leasing account is displayed here.
8.4.2.1 Viewing and Modifying Existing Amendments
In order to view or modify existing amendments, query for the required account number.
Select the corresponding effective dates of the amendment and click the ‘View/Modify’ button. The Account Details tab is displayed where you can view/modify the existing amendments.
8.4.3 Account Details Tab
Specify the account number for which the amendment needs to be done and then ‘Unlock’ the record. In the New Amendment frame specify the Effective Date. Click the ‘Create New Amendment’ button in order to make new amendments to lease. The Account Details tab is displayed where you can create the new amendment.
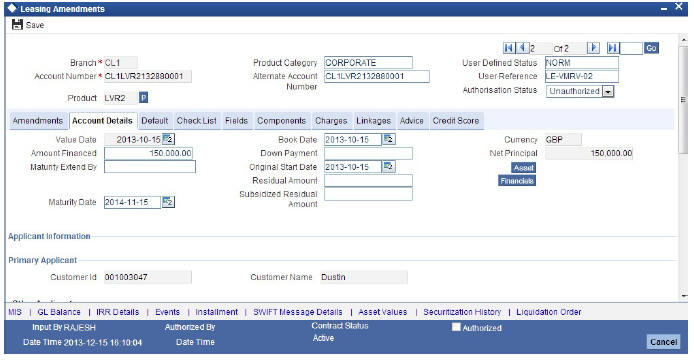
The following information is captured:
Effective Date
This is the date as of which the changed values should be applicable. You can add a new effective date, when you make some amendment to the account. Click add button to enter the effective date.
Once you have entered the new effective date, click ‘P’ button. The system will default the latest UDE values maintained for the account. However, you may delete or modify the default UDE values.
Note
If you click the ‘P’ button after making some changes to the UDE values, the system will ignore your changes and default the UDE values from the product again.
Maturity Extend By
Specify a number in the field. On clicking ‘Edit’ followed by ‘Explode Schedules’ button in the Components tab, the system multiplies the number with the ‘Tenor Unit’ maintained in LE Product (Days, Months or Years) and extends the maturity and payment schedules by the resulting unit.
Main Int Rate
The rate value for the rate code maintained against the main interest UDE chosen is displayed here.
Amount Waived
Specify the amount which can be provided as the discount to the customer. This will be waived from the charge computed. This amount can not be greater than the charge amount.
Click view icon to view a list of lending rate codes and their values in the ascending order of rate value.
For more details on the field explanation refer section ‘Specifying Account Details’ in ‘Account Creation’ chapter.
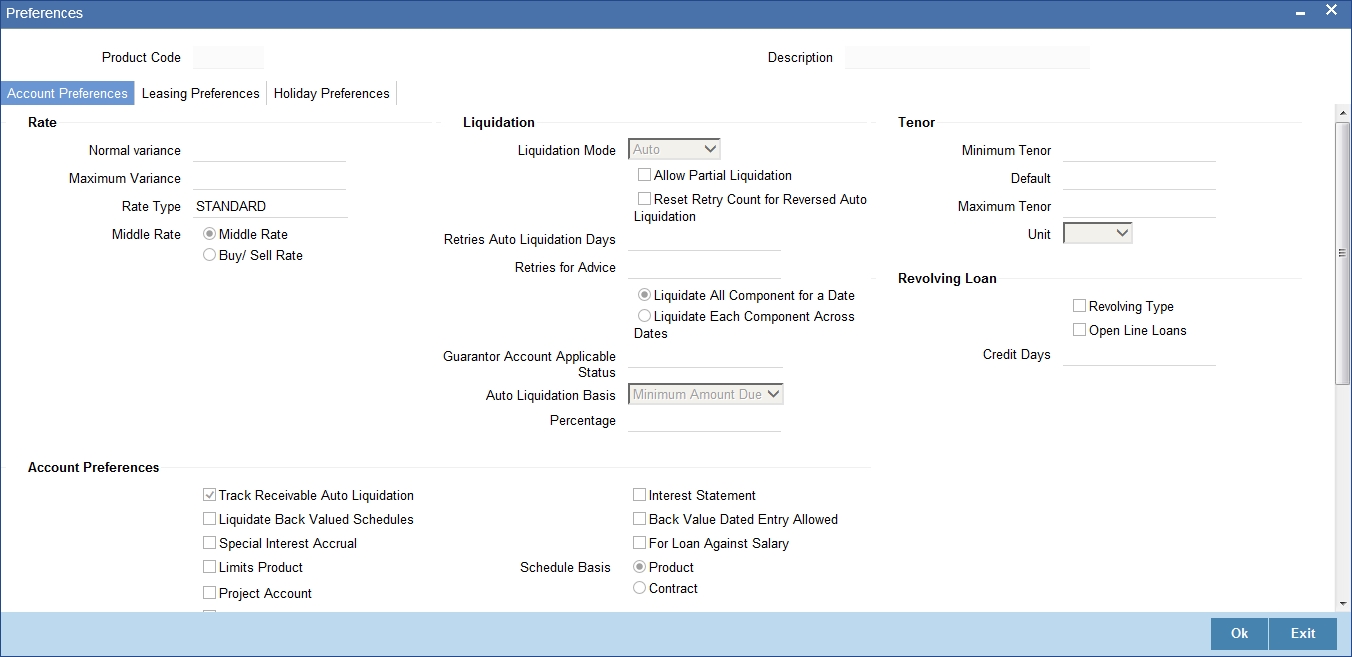
8.4.4 Default Tab
Defaults maintained for the account are displayed here:

You can modify the following details:
Liquidation Mode
Specify the mode of liquidation from the drop-down list. The following options are available for selection:
- Auto
- Manual
- Component
Retries Advice Days
Number of retries for an advice is defaulted here from the product maintenance level; however, you can modify if needed. The value should be less than the value maintained for ‘Retries Auto Liquidation Days’.
Loan Settlement Notice
You can maintain the following loan settlement notice details here:
Loan Settlement Request
Check this option to indicate the request for loan settlement has been received. If you check this box, it is mandatory to specify the notice date and the expected loan closure date.
Notice Date
Specify the date on which the notice of loan settlement was received. By default, the system displays the current application date. However, you can modify this.
You can use the date button to choose an appropriate date from the calendar.
Expected Closure Date
Specify the expected date of loan closure. This date must be later than the notice date specified above. This must also be earlier than the original loan closure date.
You can specify the expected closure date only if the option ‘Loan Settlement Request’ is checked. In other cases, this date cannot be captured.
8.4.5 Components Tab
Components maintained for the account are displayed here.

You can modify the following details:
Liquidation Mode
The system defaults the mode of liquidation from the product level. However you can modify the same to indicate the mode of liquidation of the component from the drop-down list. The following options are available for selection:
- Auto
- Manual
Note
This is applicable only if ‘Liquidation mode’ is selected as ‘Component’ at the account preference level.
8.4.6 Charges Tab
In order to calculate the charges that we would like to levy on an account, we have to specify the basis on which we would like to apply charges.
The Charges tab is displayed where you can view/modify the charges to be levied on the account.
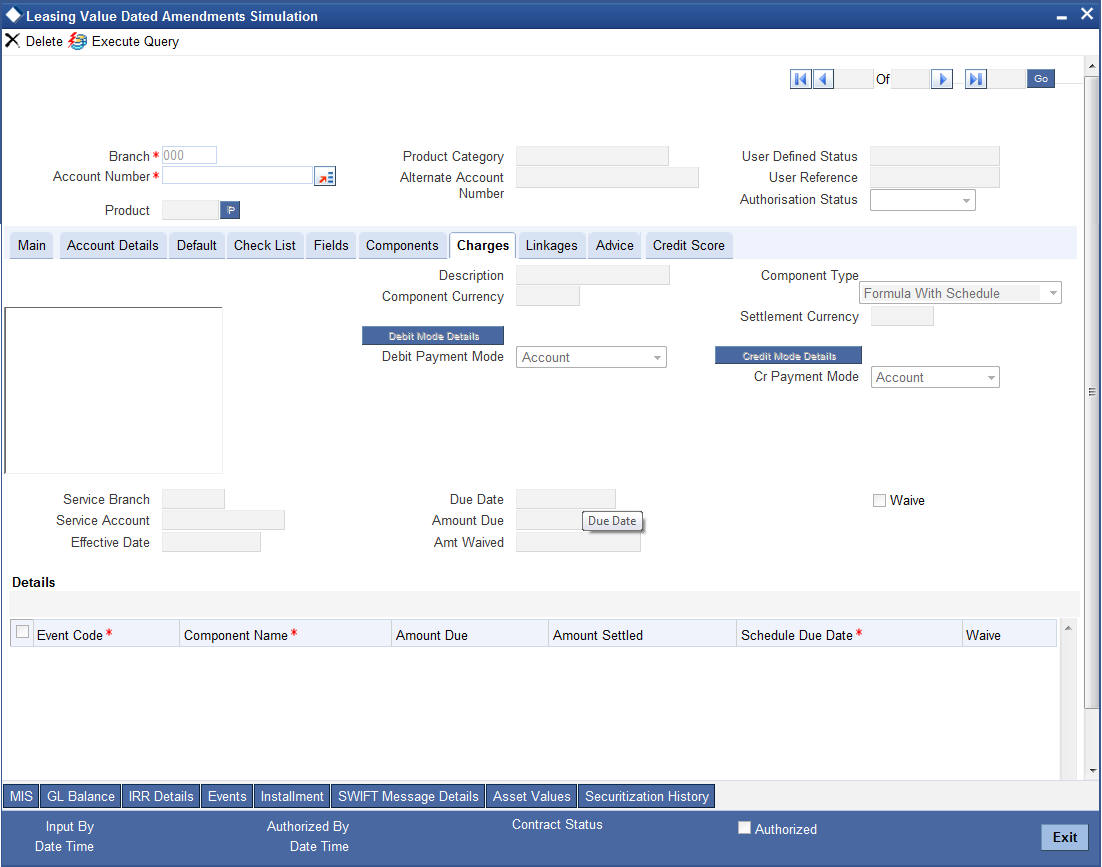
You can capture the following details in this screen:
Amt. Waived:
The amount displayed here is the amount that needs to be waived as the discount offered to the customer.
For more details on the field explanation refer section ‘Specifying Account Details’ in ‘Account Creation’ chapter.
8.4.7 Saving and Authorizing Leasing Amendments
After entering the amended details, click ‘Save’ icon to save the leasing details. On saving the transaction after entering all the required details in the system, the system validates the value of the transaction amount against the following:
- Product transaction limit
- User Input limit
If the transaction currency and the limit currency are different, then the system converts the amount financed to limit currency and checks if the same is in excess of the product transaction limit and user input limit. If this holds true, the system indicates the same with below override/error messages:
- Number of levels required for authorizing the transaction
- Transaction amount is in excess of the input limit of the user
To authorize an account, click ‘Authorize’ icon on the Application toolbar.
Note
You cannot authorise a contract from the ‘Leasing Amendments’ screen in the following cases:
- the contract has multilevel of authorization pending, the same will be done using the ‘Multilevel Authorization Detailed’ screen
- the level of authorization is greater than or equal to ‘N’
- the ‘Nth’ or the final level of the users authorisation limit is less than the difference between amount financed and sum of the limits of all the users involved in authorizing a transaction, this case holds good when the ‘Cumulative’ field is checked in the ‘Product Transaction Limits Maintenance’ screen
- the transaction amount is greater than the authoriser’s authorisation limit if the ‘Cumulative’ field is unchecked in the ‘Product Transaction Limits Maintenance’ screen
8.4.8 VAMI Simulation
Value Dated Amendment simulation calculation function is used to get the details of the VAMI charge before applying the same. You can invoke this screen by typing ‘LEDSIMVD’ in the field at the top right corner of the Application tool bar and clicking on the adjoining arrow button.
The Value Dated Amendment Simulation screen is similar to ‘Amendments’ screen.
For more details on the field explanation refer section ‘Specifying Account Details’ in ‘Account Creation’ chapter. Also refer ‘‘Leasing Amendments’ section in this chapter.
8.4.8.1 Maturity Date Change
The Amendment of the lease account maturity date, effective on a certain date can be performed through this function. Future schedules are affected based on the effective date. This assists in providing schedules as per the customer’s choice. Hence, even if an extension is sought, the interest increase in the installment can be postponed till a certain period to facilitate customer’s liquidity situation.
8.4.8.2 Version Creation
Version numbers are created for a lease account during any one of the following three instances:
- When amendments made to the Account parameters – Principal, Rate and Tenor
- Rollover of the lease product
8.5 Maintaining Manual Status Change
The status change can also be triggered manually. The status change can also be done with a value date which can even be in the past.
You can invoke the ‘Manual Installment Status Change’ screen by typing ‘LEDMSTCH’ in the field at the top right corner of the Application tool bar and clicking on the adjoining arrow button.
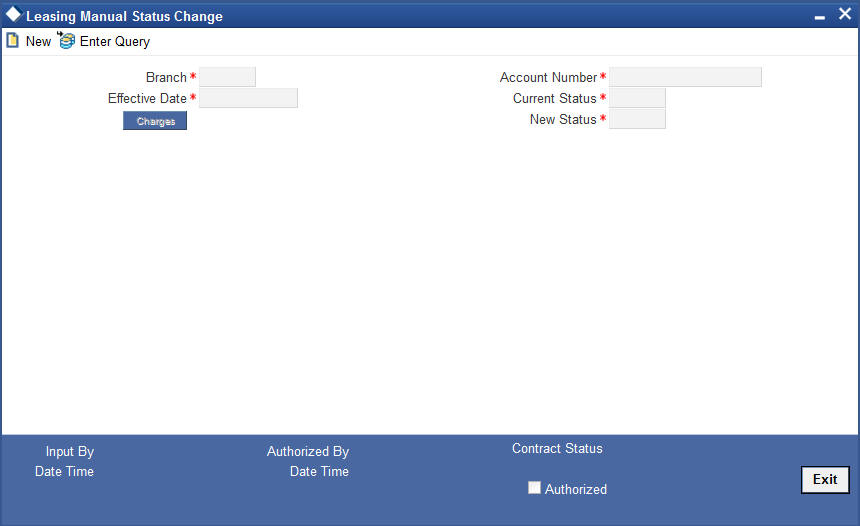
The following details are captured here:
Branch
Enter the branch code of the account for which the status will be manually changed in this field.
Account Number
Select the account number of the account which needs a status change in this field by clicking the adjoining option list. A list of values is displayed. Double click on a value to select it.
Current Status
The system displays the current status of the Account in this field.
New Status
Select the new status of the account by clicking the adjoining option list. A list of values appears. Double click on a value to select it.
The valid values are active, dormant, closed and so on.
Note
This is a mandatory input.
Effective Date
Enter the date of the new status for the account comes into effect in this field. This is a mandatory input.
Note
When a change in status is done manually for an account, the system will post the required accounting entries for the change immediately.
8.6 Viewing Manual Status Change
You can view the details of manual status change details in the ‘Leasing Manual Status Change Summary’ screen. You can invoke this screen by typing ‘LESMSTCH’ in the field at the top right corner of the Application tool bar and clicking the adjoining arrow button.
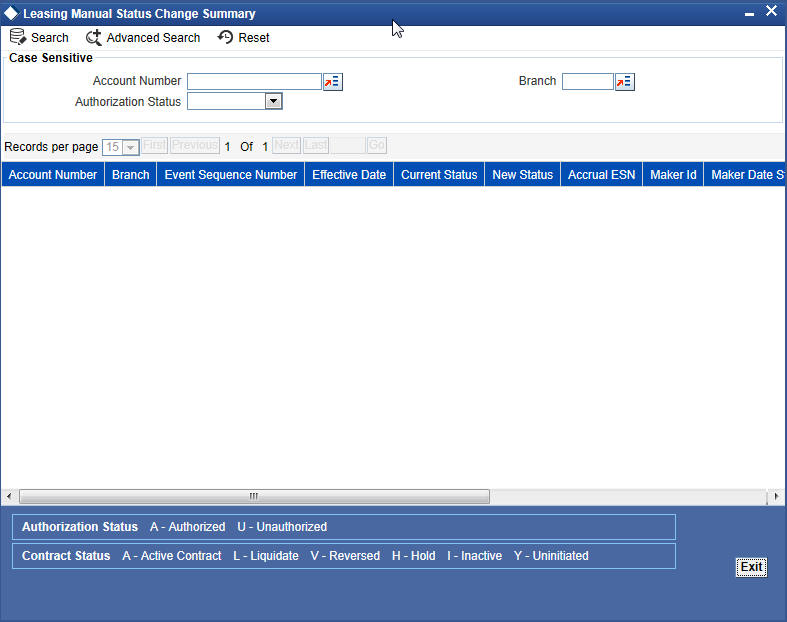
You can query on records based on any or all of the following criteria:
- Account Number
- Branch
- Authorization Status
Click ‘Search’ button. The system identifies all records satisfying the specified criteria and displays the following details for each one of them:
- Account Number
- Branch
- Authorization Status