11. Making Query
When you are in the Outgoing or Incoming Message Browser, all the messages that were transmitted from and received at your branch are displayed. This may amount to hundreds of messages. To avoid wading through this mass of data, you can make a query to obtain information that is relevant to you at a particular time.
For example, you may want to obtain information on the messages that were sent to just two customers, on a specific date. Or you may want to see all outgoing messages across modules, sent during a specific period. The Advanced Search function makes this possible for you.
This chapter contains the following section:
11.1 Advanced Search
This section contains the following topics:
- Section 11.1.1, "Invoking Advanced Search Screen"
- Section 11.1.2, "Making Query based on more than one criterion"
- Section 11.1.3, "Selecting Same Criterion to Apply One or More Conditions"
- Section 11.1.4, "Ordering Details of Query"
- Section 11.1.5, "Using Wildcards to make Query"
11.1.1 Invoking Advanced Search Screen
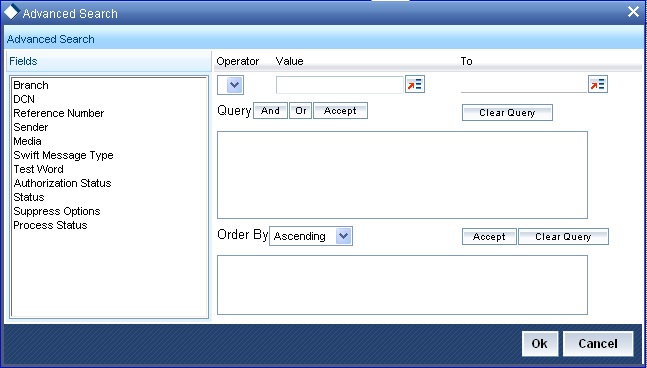
To make an advanced search, click ‘Advanced Search’ button either from the Outgoing or Incoming Browser as the case may be. The ‘Advanced Summary’ screen is displayed.
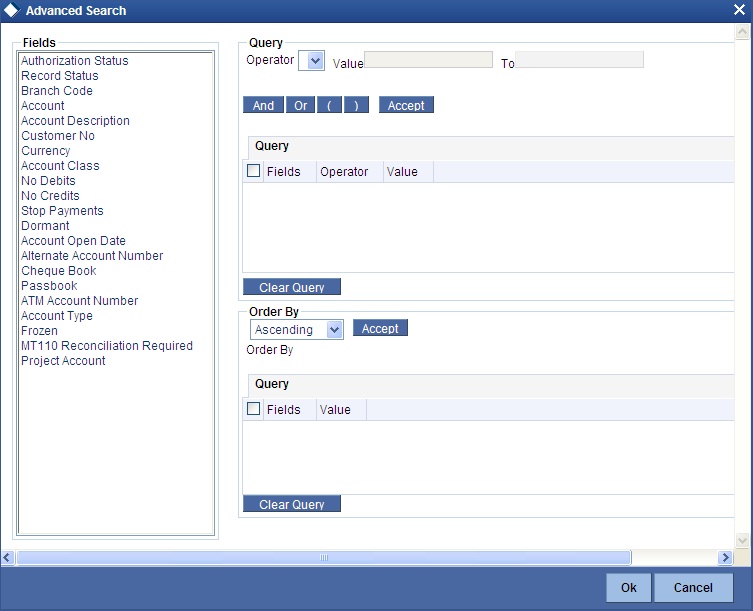
The Query screen, will display all the fields that appear in the messaging module. These fields form the criteria based on which you can make a query.
If you do not wish to carry the query through, click ‘Clear Query’ button. The query screen is cleared and you can proceed to make a new query.
11.1.2 Making Query based on more than one criterion
Suppose you want to obtain information based on more than one criterion. For example, you may want to view the details of all the guarantees generated for the Letters of Credit module from your branch located at London.
Procedure
The procedure to make such a query involves the following steps:
Action |
Button |
Accept |
The Accept button |
And |
The And button |
Step 1
Select ‘Module’ under ‘Fields’, and then from the Operator drop-down list choose Equal To and LC under Value. Then click the Accept button.
Step 2
Click the ‘And’ button. Repeat step one with the criteria value, as Message type, select Guarantee under value clicking accept and add buttons in the sequence described for the first criterion.
Step 3
Click the ‘And’ button. Repeat step one with the criteria value, as Branch select London under Value clicking accept and add buttons in the sequence described for the first criterion.
Step 4
The query that you have made will be displayed in the Query screen. Check it for correctness and click ‘Ok’ button.
The Outgoing Message Browser will display details of all the Guarantees generated for the LC module from your branch at London.
11.1.3 Selecting Same Criterion to Apply One or More Conditions
Now, you may want to make a query to see the debit advices (in the Letters of Credit module) that were generated from the London branch involving three different customers (Wendy Klien, Silas Reed and Keturah Smith).
This involves specifying a customer code one by one all of which come under the same criterion module -- LC (listed out under Fields) and indicating a message type for which you want details. This is where the ‘Or’ button on the query screen comes into play. You can choose to use the keyboard to key in the query or you can follow the following procedure to make a query.
Procedure
Step 1
Select Module under Fields, and then from the Operator drop-down list choose Equal To and LC under Value. Then click the ‘Accept’ button.
Step 2
Click the And button. Repeat step one with criteria Field as “Branch”, Operator being “Equal To” and “London” under Value. Click the ‘Accept’ and ‘Add’ buttons in the sequence described in Step 1.
Step 3
Click the And button. Repeat step one for Field with the criteria value, as Message Type. Then select Debit message under Value clicking the ‘Accept’ and ‘Add’ buttons in the sequence described for the first criterion.
Step 4
To cull out details of the debit advices involving these three customers, click the And button. Repeat Step 1 with the ‘Field’ as ‘Name’. Select say Ms. Keturah Smith under Value. Then click the accept button.
To select another customer, click the Or button and then click Name in the Fields list, specify the Operator as Equal To and pick out the customer name Mr. Silas Reed from the Value option list then click the Accept button.
Repeat the process for the third customer, Ms. Wendy Klien.
Step 5
The query that you have made is displayed on the Query screen.
MODULE = LC AND BRANCH = LONDON AND MSG_TYPE = DR_ADV AND NAME = SILAS REED OR NAME = KETURAH SMITH OR NAME = WENDY KLIEN
Check it for correctness and click ‘Ok’ button to see the query through. The Outgoing Message Browser will display details of all the debit advices generated for the LC module from your branch at London to the three customers that you specified.
11.1.4 Ordering Details of Query
Oracle FLEXCUBE also provides you the option to order the information that you have made a query on. You can further specify that the ordered information should be arranged in ascending or descending order.
Suppose you have made a query to obtain details of the debit messages that were generated by the Data Entry module of Oracle FLEXCUBE, and you wish to order the information in the ascending order of the customer to whom the message was sent.
Make the query following the procedure detailed under the head making a Query after you have specified the entire criterion for the query, select the required ordering option from the Order By drop-down list. The list contains the following options:
- Ascending
- Descending
Click the option of your choice, say, Descending.
Click the ‘Accept’ button and click ‘Ok’. The details of the query that you have made will be displayed on the Outgoing Browser ordered on the basis of the customer to whom the message was sent. The details will further be sorted in the alphabetic order.
If you decide to cancel the ordering you have specified, click ’Clear Query’. The screen clears and you can specify a new order.
11.1.5 Using Wildcards to make Query
You need not always specify the criteria for a query. You can use wild cards such as:at oa
Wild Card |
Description |
Implication |
_ |
Underscore |
To match a single character |
% |
Percent |
To match any string of multiple characters |
Using %
For instance, if you have to check the messages relating to one particular Loans product LD01, you can query for records with Reference Number like ‘%LD01%’ since all the contract reference numbers with that product will invariably contain that string.
Once you click the Accept button and make a query, the ‘Outgoing Message Browser’ screen displays all the Free Format Texts.
When you are searching for strings of specific length which vary in only one character – for instance, all branches like 001, 002, 003 – can be represented as 00_. Searching for 00_ will fetch all the messages for all these three branches.