5. Processing OTC Option Instruments
This section of the manual tells you how to enter details of an interest rate option (IRO), currency option (CO) or swaption transaction in Oracle FLEXCUBE. This includes the definition of schedules and performing other functions in the lifecycle of a contract, like re-assignment, amendment and reversal.
Let us briefly look at the workflow of the OTC Options module.
First of all you need to maintain the basic module-specific information that is necessary for the successful functioning of the module. This is over and above the static data, maintained as part of core services that are used by several modules in Oracle FLEXCUBE. This information includes the maintenance of:
- Branch Parameters, which govern the processing of OTC option transactions at a particular branch of your bank
- Contract Fair Value details, for revaluation of options
- Limit tracking details, for tracking counterparty exposure due to purchased options
The next step in the process is the creation of OTC option products. Products help you group together or categorize contracts, which share broad similarities. You have to associate a product type with each of the products that you create. The product inherits all the attributes of the type. While defining the product, you associate charge and tax classes with it, specify branch and customer restrictions, maintain MIS details and specify preferences for the product.
Under each product that you define, you can enter specific contracts (transactions). By default, a contract inherits the attributes of the product to which it is associated. This means that you do not have to define the attributes that default from the product every time you enter a contract involving the product. However, you can change some of the attributes to suit the contract you are defining.
This chapter contains the following sections:
- Section 5.1, "OTC Option Contract"
- Section 5.2, "Specifying Other Details for OTC Option Contract"
- Section 5.3, "Manual Knock-In Knock-Out "
- Section 5.4, "Terminating Option Contracts"
- Section 5.5, "Uploading Options Contracts"
- Section 5.6, "Exercising Option"
5.1 OTC Option Contract
This section contains the following topics:
- Section 5.1.1, "Entering Details of OTC Option Contract"
- Section 5.1.2, "Format of Options Contract Input Screen"
- Section 5.1.3, "Specifying Common Details (Main Tab)"
- Section 5.1.4, "Specifying Details Specific to Currency Option"
- Section 5.1.5, "Settlement Method for Currency Options"
- Section 5.1.7, "Settlement Method for IROs"
5.1.1 Entering Details of OTC Option Contract
You can invoke the ‘Options Contract Input’ screen by typing ‘OTDTRONL’ in the field at the top right corner of the Application tool bar and clicking the adjoining arrow button. To enter the details of a new contract, click new icon in the Application tool bar.
If you are calling a contract that has already been created, choose the ‘Contract Input Summary’ option. The details of all the contracts that you entered earlier will be displayed in a tabular form. From the ‘Summary’ screen, you can open an existing deal by double clicking it.
You can copy the details of an existing option contract to a new one that you are creating. You may make necessary changes before saving the new contract.
You can invoke the ‘Options Contract input’ screen by typing ‘OTDTRONL’ in the field at the top right corner of the Application tool bar and clicking the adjoining arrow button.
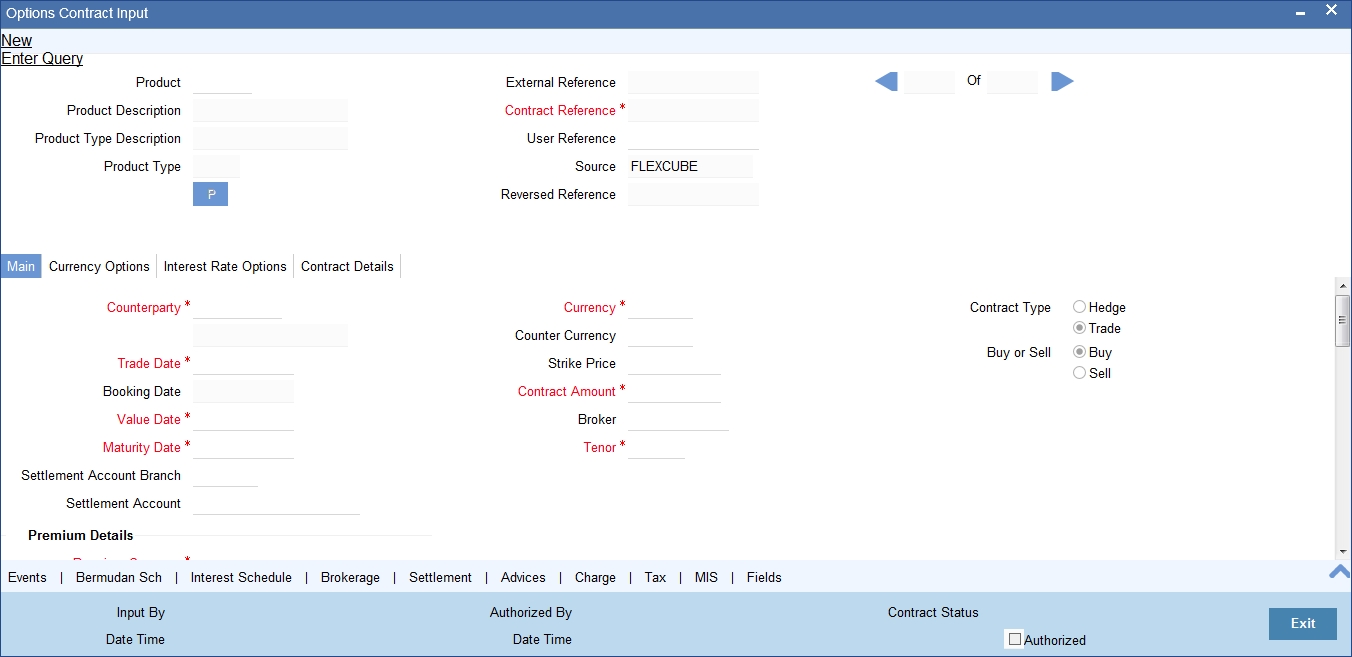
5.1.2 Format of Options Contract Input Screen
Apart from a common header for capturing details of the product under which the contract is initiated and reference numbers for the contract, the ‘Contract Input’ screen has four tabs:
- Main – for capturing details common to all OTC options.
- Interest Rate Options / Currency Options– based on the product type (IRO / CO), any one of these tabs is displayed. Here you can capture details specific to either interest rate options or currency options.
- Contract Details – provides details of deferred inception gain, revaluation, deferred termination gain and deferred time value.
Besides the existing fields in the ‘Options Contract Input’ screen, you will also notice a vertical array of icons. Clicking on an icon launches a screen that captures details specific to an attribute – settlement message details, for example.
These buttons are briefly described below:
| Button | Description | ||
|---|---|---|---|
| Bermudan Sch | Click this icon to open the ‘Bermudan Schedule’ screen. | ||
| Brokerage | Click this icon to indicate brokerage details applicable to the contract. | ||
| Advices | Click on this button to enter advices. You can view suppress and prioritize the advices that are to be generated. | ||
| Events | Click this icon to view details of the events and accounting entries that the contract involves. The screen also displays the overrides that were encountered for the contract. | ||
| User Defined Fields | Click this icon to invoke the ‘User Defined Fields’ screen. You can indicate the user-defined fields for which information needs to be captured. | ||
| Charge | This button invokes the Charge service of Oracle FLEXCUBE. On invoking this function you will be presented with a screen where the charge rate, amount, and the waive charge parameters can be specified. | ||
| MIS | Click on this button to enter the transaction MIS details. | ||
| Settlement | Click this icon to invoke the ‘Settlement’ screens. Based on the details that you enter in the ‘Settlement’ screens, the contract will be settled. | ||
| Tax | This icon invokes the Tax services. | ||
| Interest Schedule | Click this icon to open the ‘Interest Schedules’ screen. |
5.1.2.1 Specifying Product Code, Reference Numbers and Other Details
Initially, you need to define the product details on this screen. As you enter a valid product code, the system will copy the preferences defined at the product level onto the contract.
Product
Select an options product code from the list of options products that you have maintained or enter a valid product code.
For physically settled swaption deals, the OT product should have a DV swap product linked to it.
Product Description
Based on this product code, the system will default the Product Description that you have defined at the product level. However, you cannot modify it.
Type
The system displays the product type. The product type can be:
- IRO – Interest Rate Option
- CO – Currency Option
However, you cannot modify it.
Contract Reference Number
The system generates the 16-character contract reference number based on the branch code, the product code, the Julian date and a running sequence of four digits. You cannot change this.
External Reference Number
You can also enter an external reference number, which may be the reference number that your counterparty has given– this will help in reconciling deal confirmations and other correspondence.
Source Code
From the option list, choose the code of the source from which you want the system to upload the contract.
User Reference Number
The user reference number takes on the same value as the contract reference number. However, you can change this to suit any numbering standard that you might be following.
Reversed Reference Number
The system displays the reference number of the contract that is being reversed and rebooked during a financial amendment.
5.1.3 Specifying Common Details (Main Tab)
First, you have to specify the basic details of the contract you are entering.
Customer
From the list of values against the field, select the CIF Number of the counterparty to the deal. The name of the counterparty is automatically displayed.
Settlement Account
Select the default settlement account branch and the default settlement account from the respective options lists next to these fields. This account of the counterparty is debited or credited for all payments that you receive from or pay to the counterparty.
Trade Date
The system defaults the current date as the trade date. This is the date on which the deal is agreed with the counterparty. Trade date cannot be amended once authorized.
The system will display error messages under the following conditions:
- Trade date is greater than current system date
- Trade date is holiday as per the deal currency
- Trade date is blank
- Trade date is later than the value date
- Trade date is earlier than the product start date.
Booking Date, Value Date and Maturity Date
The booking date is the date when the option contract is entered into the system. This is defaulted to the system date and cannot be changed.
For an IRO, the value date is the first date of the interest period. For a CO, it is the date from which the option takes effect. This can be earlier than the booking date, provided that the first exercise date for an IRO is always later than or same as the booking date. The value date for an option contract has to be earlier than its maturity date.
The maturity date, for both IROs and COs, is the date on which the contract expires. It is mandatory to enter the maturity date. However, if you specify the tenor, the maturity date will be computed accordingly and displayed. The reverse is also true. If expiration style is ‘European’ in an MT306, then maturity date (field 30a) will be updated with option F.
Contract Currency
Select the currency of the option contract from the option list next to the field. For IROs, your choice of the contract currency is subject to the currency restrictions that you have maintained as part of product definition.
Counter Currency
The counter currency applies only to COs, where this is the other currency of the pair that makes up the contract. Your choice of counter currency is restricted by currency pair restrictions that you have maintained at the product level.
Note
While generating MT305 message, the system restricts the following currency codes in Contract and Counter currencies:
| ISO 4217 Currency Code | Currency | ||
|---|---|---|---|
| XAU | Gold (one troy ounce) | ||
| XAG | Silver (one troy ounce) | ||
| XPD | Palladium (one troy ounce) | ||
| XPT | Platinum (one troy ounce) |
Strike Price
Indicate the price at which a CO will be exercised, depending on the option style. This applies for all styles of COs, except for No Touch options. This does not apply for IROs.
Contract Amount
The contract amount is the size of the option deal. For COs, this should adhere to the minimum and maximum deal size that you have specified as part of product preferences.
Broker
Specify a broker for the contract, by selecting from the option list next to the field, only if you have allowed brokerage while maintaining product preferences. Brokerage can be paid in advance – that is, on the booking of the contract itself – or in arrears – that is, on termination, final exercise or expiry, as the case may be.
Tenor
The tenor of the contract is the number of days between the value date and the maturity date. The tenor and the maturity date of the contract are inter-related and if you specify one, the value for the other is computed.
Contract Type
This indicates whether the option contract is a hedge or a trade (speculative) type of contract and whether you are buying or selling (writing) the option. These specifications default from the product under which you are initiating the contract. You can modify them here.
Note
An option that you are buying can be either a hedge or a trade type deal, but a written option can only be a trade deal.
Buy or Sell
Indicate the type of contract. According to the nature of the contract, choose ‘Buy’ or ‘Sell’ from the drop down menu.
5.1.3.1 Specifying Premium Details
The option premium is the price or fee that you pay for buying an option or receive for writing an option. You have to mention the amount of the premium and the currency in which the premium is denominated. Alternatively, you can enter a premium percentage, whereby the system computes the premium amount as a percentage of the contract amount.
You also need to mention the date on which the premium is due to be paid. This can be any date between the booking date and the value date, both inclusive.
Note
Irrespective of the date on which premium is collected; the premium amount has to be entered at the time of entering the contract.
While generating MT305 message, the system restricts the following currency codes in Premium currency:
| ISO 4217 Currency Code | Currency | ||
|---|---|---|---|
| XAU | Gold (one troy ounce) | ||
| XAG | Silver (one troy ounce) | ||
| XPD | Palladium (one troy ounce) | ||
| XPT | Platinum (one troy ounce) |
5.1.3.2 Specifying Inception Details
The Inception Fair Value is the market value of the option contract at inception. This is denominated in the premium currency. It is possible that you have bought or sold an option at a price higher or lower than its fair value. You will have to ascertain the fair value of the contract from external sources and enter the same.
The option contract’s Intrinsic Value at inception is the possible pay-off from the option if it were to be exercised at inception itself. For a swaption, this value is zero. A non-swaption IRO can have a positive intrinsic value at inception that does not exceed the option premium. For no touch currency options, intrinsic value at inception is the fixed amount that you enter at inception of the contract. For binary, digital, and fixed payment plain vanilla options, there is a positive inception intrinsic value only if the option is in-the-money at inception. In such a case, the inception intrinsic value is the fixed amount payable on exercise of the option. The inception intrinsic value is displayed in the premium currency.
The option contract’s time value at inception is the difference between its premium and inception intrinsic value. Therefore, for a swaption or a CO, this will be the same as the option premium itself. For an IRO, it can take any positive value, including zero. The inception time value is expressed in the premium currency.
Intrinsic Value
Intrinsic value is the value that any given option would have if it were exercised today. Basically, the intrinsic value is the amount by which the strike price of an option is in the money. It is the portion of an option's price that is not lost due to the passage of time. The following equations can be used to calculate the intrinsic value of a call or put option:
Call Option Intrinsic Value = Underlying Stock's Current Price – Call Strike Price
Put Option Intrinsic Value = Put Strike Price – Underlying Stock's Current Price
Time Value
The time value of options is the amount by which the price of any option exceeds the intrinsic value. It is directly related to how much time an option has until it expires as well as the volatility of the stock. The formula for calculating the time value of an option is:
Time Value = Option Price – Intrinsic Value
5.1.3.3 Specifying Expiration Style
The expiration style can be American, European or Bermudan. This specification defaults from the preferences you have maintained for the product and cannot be changed at the contract level. The expiration style for IROs (except swaptions) can only be European and, therefore, this field is not enabled for such options.
Refer to the Products section of this manual for an explanation and applicability of the various option expiration styles.
For COs with American expiration style, you also need to enter the earliest date before maturity when the option can be exercised. This can be the value date itself, or any date after that.
5.1.3.4 Specifying Schedules for Options with Bermudan Expiration Style
Bermudan style swaptions or plain vanilla COs can be exercised on certain pre-specified dates during the life of the option. If the expiration style for the contract that you are entering is Bermudan, you have to specify the dates on which it can be exercised.
Click on the ‘Bermudan Sch’ button to invoke the ‘Bermudan Schedule’ definition screen. This button is enabled only if you have mentioned the expiration style as Bermudan:
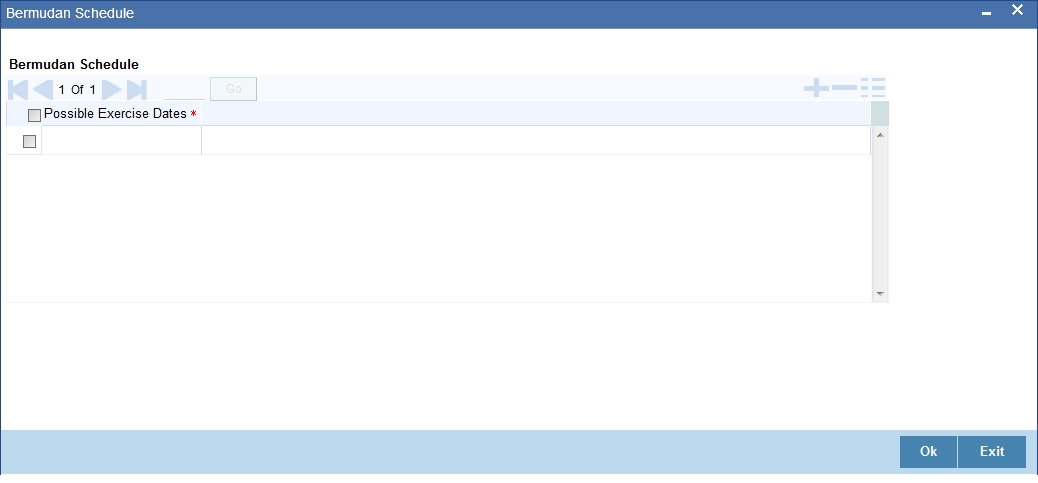
In this screen, you can enter the allowed exercise dates for the option. All exercise dates should lie between the value date and the maturity date. The same date cannot be entered twice and the date for a record should be later than that for the previous record.
Note
An option with Bermudan schedule will be exercised automatically on maturity only if it is in the money and the maturity date has been included as a possible exercise date.
5.1.3.5 Specifying Treatment of Maturity Date Falling on Holiday
The holiday treatment that you specify in the Main tab of the ‘Options Contract Input’ screen applies only to the maturity or the expiry date of the contract. The holiday treatment for IRO schedules has to be specified in the Interest Rate Options tab.
All holiday treatment specifications default to the contract from the preferences that you have maintained at the product level. You can change them for a contract.
Refer to the Products section of this manual for details of holiday treatment specifications.
5.1.3.6 Specifying Limit Tracking Details
You may wish to track counterparty exposure due to an option contract against limits set up for that counterparty. This applies only to purchased option contracts, not written ones.
If you have maintained a Master Agreement and wish the exposure tracking for the contract to be guided by that agreement, you can select the relevant master agreement code (MA Code). If the master agreement stipulates limit tracking, then that feature is defaulted to the contract. Even if you have not selected an MA code, you can choose limit tracking to apply to this contract.
If you opt for limit tracking, the Fair Value Limit tracking field will be enabled. You can specify if fair value limit tracking is required for the particular contract. If you chose this option then you should also specify a fair value line code against which exposure is to be tracked. Once again, this defaults from the master agreement if an MA code is selected and the master agreement stipulates limit tracking; otherwise, you can choose from the list of values next to the field.
Refer to the Derivatives user manual for details on maintaining master agreements.
For details on limit and line maintenance, refer to the Central Liabilities user manual.
If you have opted for limit tracking, you also need to specify the current value of the option contract, which is the marked-to-market (MTM) value of the contract at inception. You can also indicate the impact of movements in interest rates and foreign exchange rates on the exposure.
5.1.3.7 Specifying Notional & Risk Weighted Limits Tracking Details
Specify whether notional and risk weighted limit tracking is required for the contract.
The fields Fair Value Limit Tracking, Notional Limits Tracking and Risk Weighted Limits Tracking will be enabled only if Limit Tracking option is enabled. If the contract is governed by a Master agreement then if any of the three fields (Fair Value Limit Tracking, Notional Limits Tracking and Risk Weighted Limits Tracking) are checked in the Master Agreement, the Limit Tracking Required option will be checked at contract level.
The fields Notional Limits Tracking, Notional Line Code, Risk Weighted Limits Tracking and Risk Weighted Line Code are defaulted from the Master agreement maintenance if the contract comes under the preview of a Master agreement.
The Notional Line Code and Risk Weighted Line Code are mandatory if the Notional Limits Tracking and Risk Weighted Limits Tracking options are enabled, respectively.
For the line code, all valid lines for the counterparty and the product will be displayed in the option list.
On saving the contract, all the three lines selected will be validated for any restrictions based on product and currency. Oracle FLEXCUBE will also ensure that all line codes selected are distinct from each other.
Risk % and Risk Weighted amount will be calculated and shown on the screen as soon as the Risk Weighted Limits Tracking option is selected. These fields will be recalculated if the value date or the maturity date is amended.
Risk Weighted Amount will be calculated as follows:
Risk percent will be computed by comparing the tenor (Maturity date – Value date) of the contract with the tenor slabs in risk percent maintenance. Risk category used for comparison will be the risk category defined in customer maintenance for the counterparty of the derivatives and options contract. Product used for comparison will be the product for the contract. If there is no risk maintenance for the particular category and product, product will be replaced by ‘ALL’ and risk percent for contract tenor, customer category and product ‘ALL’ will be arrived at. Module used for find out the risk percent will be ‘DV’ for derivatives.
Various combinations possible for find out risk percentage in order of preference are:
OT + Customer Category + Product
OT + Customer Category + ALL
An error message will be raised if Risk Weighted Limit Tracking is checked and risk percentage cannot be arrived at.
Risk percent, once arrived at, will be stored at the contract level and will be used to compute the risk weighted amount for limit tracking. Any future amendment of risk percentage in risk percentage maintenance will not affect the risk weighted amount of the contract and it will remain the same throughout the life cycle of the contract.
Limits Utilization for the Notional Amount and the Risk Weighted amount will be done against the in contract currency for all types of options.
5.1.4 Specifying Details Specific to Currency Option
For entering contract details specifically pertaining to currency option contracts, migrate to the Currency Options tab of the ‘Options Contract Input’ screen.
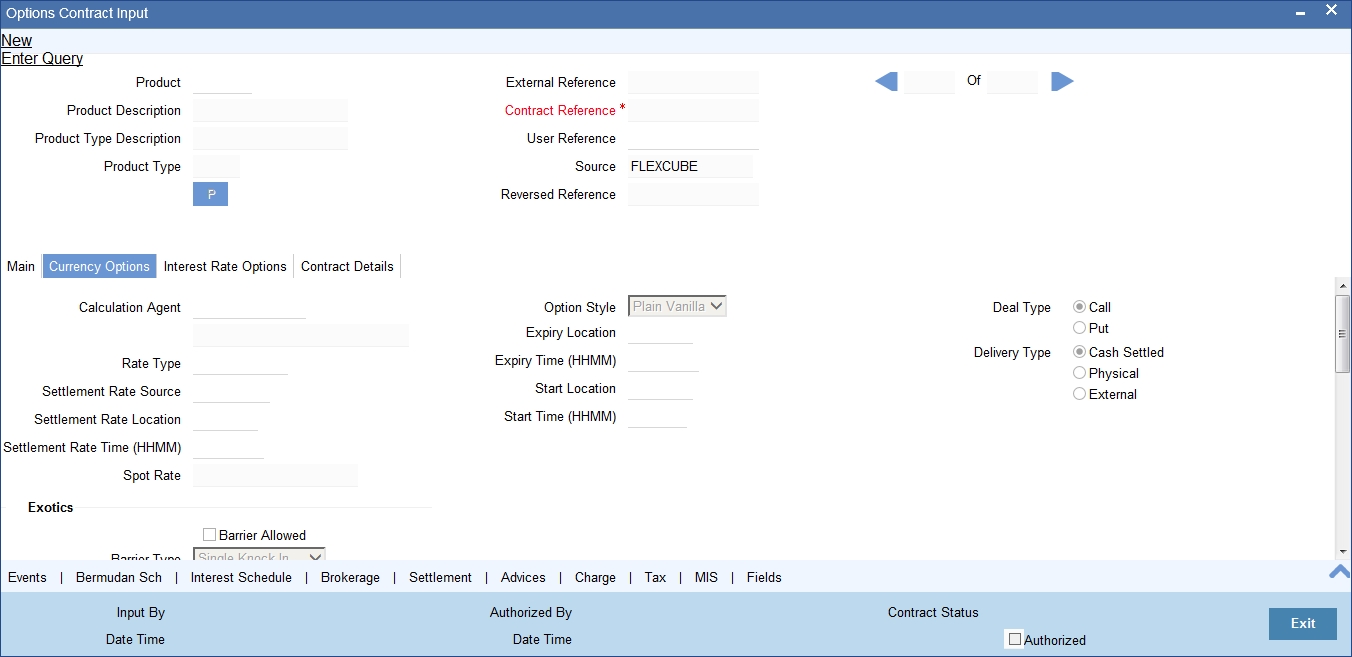
You can maintain the following details in this screen:
Calculation Agent
This does not apply to a plain vanilla CO without barriers and marked for physical settlement.
For plain vanilla options which are cash settled or which have barriers (knock-in or knock-out type options), as also for binary, digital and no touch options, the Calculation Agent refers to the party who provides the rates to determine whether the exchange rate level(s) specified in the contract have been reached or not. You have to mention the BIC of the calculation agent.
Refer to the Products section of this manual for explanation on different styles of currency options.
Rate Type
Choose the rate type of the reference to be picked up. The option list displays all valid rate types maintained in the system.
Settlement Rate Source
Specify the source of the settlement rate, i.e. Reuters, Telerate, etc.
Settlement Rate Location
Specify the location of the settlement rate. Alternatively, you can select the location from the option list. The list displays the values maintained in the system.
Settlement Rate Time (HHMM)
Specify the settlement rate time in HHMM format.
Spot Rate
This is the spot foreign exchange rate between the currency and the counter currency of the contract at the time of contract inception. This is picked up and displayed from the exchange rates that you maintain as part of core maintenances.
Start Location
This code/ID indicates the financial institution where the option starts.
Start Time
Enter a valid time in HHMM format. This indicates the time when the option becomes valid.
Expiry Location
This is the Code/ID of the Financial Institution where the option expires.
Expiry Time
This is the time at which the option expires. Enter a valid time in the HHMM format.
Option Style
Select the option style. It can be any one of the following:
- Plain Vanilla
- Binary
- Digital
- No Touch
Note
If you choose ‘Plain Vanilla’, the system will resolve the type of contract and generate MT305 confirmation SWIFT message during BOOK event. In case of other currency option styles, the system will generate MT306 confirmation SWIFT message.
Refer to the Products section of this manual for explanation on different styles of currency options.
Deal Type and Delivery Type
These indicate whether the currency option is a call or a put and whether it is cash settled (resulting in a net cash settlement on exercise), physical (resulting in a foreign exchange deal on exercise) or whether the contract is uploaded (external). The option ‘External’ will be disabled for contracts that are being created in Oracle FLEXCUBE. It will be selected only in case of uploaded contracts. You can select ‘External’ only for uploaded contracts.
These values are defaulted from the product under which the contract is initiated. You can modify them at the contract level.
Deleting a currency option contract having a ‘Physical’ delivery type results in the corresponding FX contract getting deleted.
5.1.4.1 Indicating Exotics Details
Here, you can capture the following details:
Barrier Allowed
Barrier(s) are allowed by default for non-plain vanilla style options. For plain vanilla COs, you can opt to have barrier(s).
Barrier Type
If you allow barrier(s), then you must select one of the following barrier types to apply to the contract:
- Single Knock Out (SKOT)
- Double Knock Out (DKOT)
- Single Knock In (SKIN)
- Double Knock In (DKIN)
For no touch options, the barrier type can be either SKOT or DKOT.
Barrier and Lower Barrier
If you allow barrier(s), you must also indicate the barrier price – the pre-determined exchange rate at which the contract will be knocked in or knocked out. For DKIN and DKOT options, this represents the upper barrier and has to be more than the strike price. For SKIN and SKOT options, there is only a single barrier price, which can be less or more than the strike price.
For DKIN and DKOT options, you need to indicate the lower barrier – this has to be lower than the strike price.
Barrier Window Start Date and End Date
For barrier options, you also have to specify the barrier window period – the period within which a system batch process compares the barrier and lower barrier (if applicable) with the spot exchange rate to check whether a CO contract should be knocked in or knocked out. The barrier window is specified by entering a start and an end date (both dates are included in the window). By default, the start date is the contract value date and the end date is the contract maturity date.
5.1.4.2 Specifying Rebate Details
Barrier options may carry rebates, payable to the purchaser if the option is knocked out or not knocked in during its lifetime. If you have allowed rebate at the product level, that specification defaults to the contract – you can change it for specific contracts. If rebate is allowed, you have to enter the rebate amount to be paid / received and the currency in which it is denominated. For SKOT and DKOT options, you also need to indicate whether the rebate is payable / receivable at Hit (when the option gets knocked out) or at contract maturity.
For more details on barrier options, refer to the Products section of this user manual.
5.1.4.3 Fixed Payments on Exercise of Options
Usually, the settlement amount for plain vanilla options is based on the difference between the strike price and the spot exchange rate on the day of exercise. However, you may have entered into a plain vanilla options contract, whose terms stipulate that a fixed amount will change hands on exercise (this makes it very similar to a binary option). In such a case, you will first need to allow fixed payments and then indicate the amount of the fixed payment and the currency in which it is denominated.
For binary and digital options, fixed payments are natural – for either of these, indicate the amount of the fixed payment and the currency in which it is denominated.
While generating MT306 message, the system restricts the following currency codes in fixed amount currency:
| ISO 4217 Currency Code | Currency | ||
|---|---|---|---|
| XAU | Gold (one troy ounce) | ||
| XAG | Silver (one troy ounce) | ||
| XPD | Palladium (one troy ounce) | ||
| XPT | Platinum (one troy ounce) |
5.1.4.4 Specifying Other Details for Currency Option
From the list of values against the field, select the financial institution where the CO will expire. Also indicate the time of expiry in HHMM format. These are mandatory. Select the clearing code where the CO will start. Also, indicate the start time in HHMM format. This start time and start location which you specify here will be populated in the field 29 J of MT 306.
You can also indicate the rate type (Standard / Cash / TT, etc.) of the reference rate that will be picked up for settlement, knocking in or knocking out of a contract.
Physical Delivery
If a currency option is marked for physical delivery while maintaining product preferences, then a foreign exchange deal is automatically generated by the system on exercise of the contract. The contract reference number of the uploaded foreign exchange contract is displayed on this screen.
Note
- For External Type currency options, FX contract must be uploaded with Option Contract Reference Number.
- You cannot upload more than one foreign exchange contract for same swaption contract; if you are doing this, the system will throw an error:
- FX reference number will be displayed after uploading the FX contract.
Dual Currency Deposits
The Linked TD account number is displayed in the ‘TD Reference No’.
The following operations are not allowed for Option contracts created out of TD account:
- Amendment of Option Contracts
- Reversal of Option Contracts
- Manual Knock-in/Knock-out is not allowed for the Contracts created out of TD account
- Termination of Option Contract is not allowed for the Contracts created out of TD account
- Contracts created out of TD account are not allowed for exercising the contract.
For more details on Dual Currency Deposit, refer section ‘Capturing Details for Dual Currency Deposit’ in the chapter ‘Maintaining Customer Accounts’ in Core Entities User Manual.
5.1.5 Settlement Method for Currency Options
The following table summarizes how currency options with different option and expiration styles are settled:
| Option Style | Expiration Style | Exercise Method | Settlement on | ||||||||||||
|---|---|---|---|---|---|---|---|---|---|---|---|---|---|---|---|
| Plain Vanilla | American, Bermudan or European | Manual or Auto | For American expiration style: | If manually exercised -- Any day between earliest exercise date and Contract maturity date (both included), if manually exercised. | For auto exercise -- On maturity, if the option is in-the-money. | For Bermudan expiration style: | If manually exercised -- On pre defined exercise dates or on contract maturity date. | For auto exercise -- On maturity, if the option is in the money. | For European expiration style: | Only on Contract maturity date. | In all these cases, payment can be a fixed amount if such is opted for. | ||||
| Binary | American or European | Manual or Auto | For American expiration style: | If manually exercised -- Any day between earliest exercise date and Contract maturity date (both included), if manually exercised. | For auto exercise -- On maturity, if the option is in-the-money. | For European expiration style: | Only on Contract maturity date. | Settlement payment is always a fixed amount. | |||||||
| Digital | European only | Manual or Auto | Only on Contract maturity date. | Settlement payment is always a fixed amount. | |||||||||||
| No Touch | European only | Auto only | Only on Contract maturity date. | Settlement payment is always a fixed amount. |
5.1.6 Specifying Details Specific to Interest Rate Option
For entering contract details specifically pertaining to interest rate option contracts, migrate to the ‘Interest Rate Options’ tab of the ‘Options Contract Input’ screen.
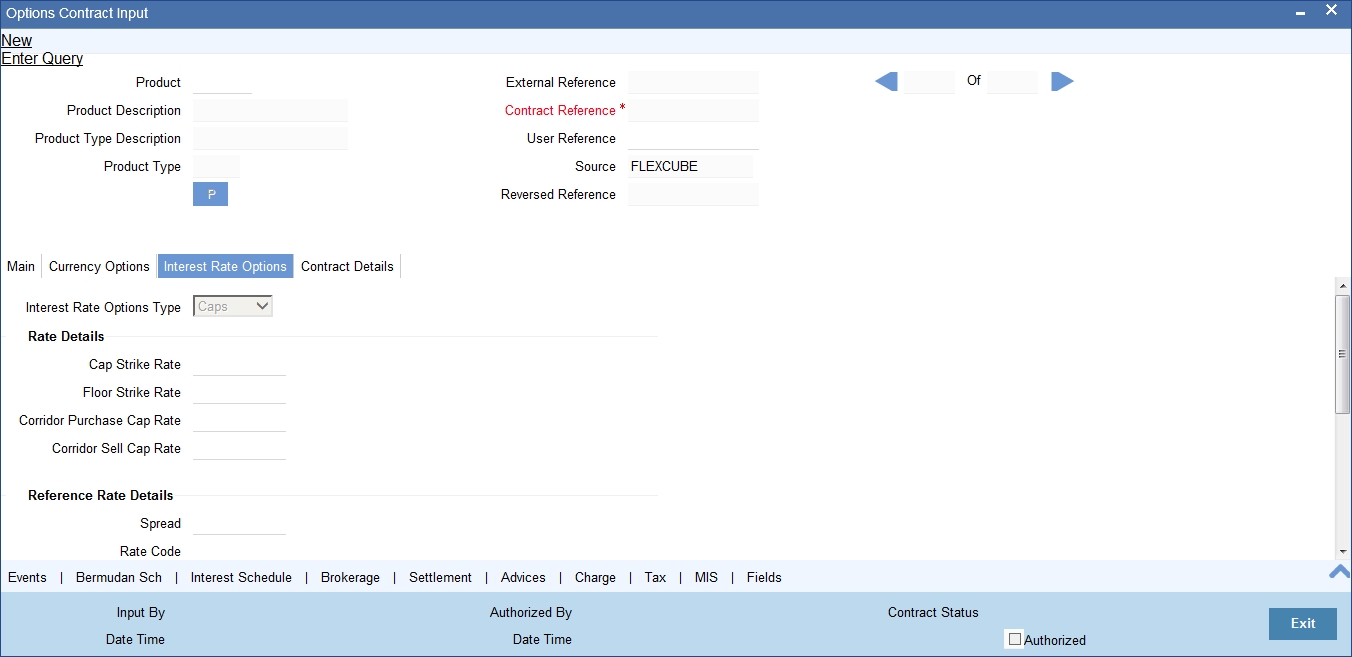
Interest Rate Option Type
Select the IRO type from the adjoining drop-down list. The list displays the following values:
- Cap
- Floor
- Collar
- Corridor
- Swaption
The type is defaulted to the contract from the product under which it is initiated and cannot be changed at the contract level.
The payment method can be Advance or Arrears, indicating whether settlement takes place at the beginning or end of each schedule. This is also defaulted from the product and cannot be changed at the contract level.
5.1.6.1 Specifying Rate Details
For the IRO contract that you are defining, you have to enter the following rates (whichever applicable):
Cap Strike Rate
For a cap, you have to enter the strike rate. For a collar, which is a combination of a purchased cap and a written floor, you must enter the cap buy rate.
Floor Strike Rate
Enter the strike rate for a floor or the floor strike rate for a collar.
Corridor Purchase and Sell Cap Rates
For a corridor, which is a combination of a purchased cap and a written cap, enter the strike rates for the two caps. The written cap should have a higher strike rate than the purchased one.
5.1.6.2 Specifying Reference Rate Details
Here, you can capture the following details:
Spread
You have to indicate the spread, in percentage, that is to be applied over the reference rate. A positive spread cannot exceed and a negative spread cannot be less than the maximum spread defined at the product level.
Rate Code, Rate Source and Rate Tenor Code
For all IROs (except swaptions), the settlement amount is computed by comparing the reference rate with the strike rate. Therefore, you need to specify the reference rate code – LIBOR, etc. – for non-swaption IROs, based on which the reference rate will be picked up. You also need to specify the source of the reference rate – Reuters, Telerate, etc.—and the tenor code for the reference rate – e.g., 3-month LIBOR, 6-month LIBOR, etc.
5.1.6.3 Specifying Swaption Details
For a swaption, you must specify whether settlement will be in the form of an exchange of money (cash settled swaptions), whether it will require the counterparties to enter into an interest rate swap deal (physically settled swaptions) or whether the contract is uploaded (external swaption). For IRO and Swaption style, you can select the delivery type as external only In the event of a physically settled swaption, you must enter a future dated interest rate swap.
You must specify the swaption value date and swaption maturity date in the corresponding fields. The swaption value date should be the same as the maturity date of the options contract.
This swap is initialized when the swaption is exercised, with the following details getting automatically populated:
- Counterparty
- Booking Date
The contract reference number of the interest rate swap generated by the manual exercise of a physically settled swaption is displayed on the ‘Options Contract Input’ screen.
If you are reversing a swaption contract manually or through an upload, the corresponding DV contract also gets reversed. This holds good for both the ‘Physical’ and the ‘External’ swaption styles.
You need to manually create a DV contract and choose the corresponding options contract as the swaption reference. For physically settled swaption options contracts, you can book IRO without a swaption reference number. An underlying DV contract need not be created in this case.
The system allows reversal of a swaption contract only after reversing the IRS contract linked to it.
During manual exercise of an OT contract, the system will initiate the corresponding DV contract. The system will trigger DOPT event as part of this process.
5.1.6.4 Specifying Schedules for Settlement and Rate Reset for IROs
For caps, collars, floors and corridors, you need to define the settlement and rate revision schedules that the tenor of the IRO is split into. Click on the ‘Interest Schedule’ button on the screen to visit the ‘Interest Details’ sub-screen. If the screen for settlement schedules is not visited, the schedules will be defaulted according to the parameters defined as part of product preferences.
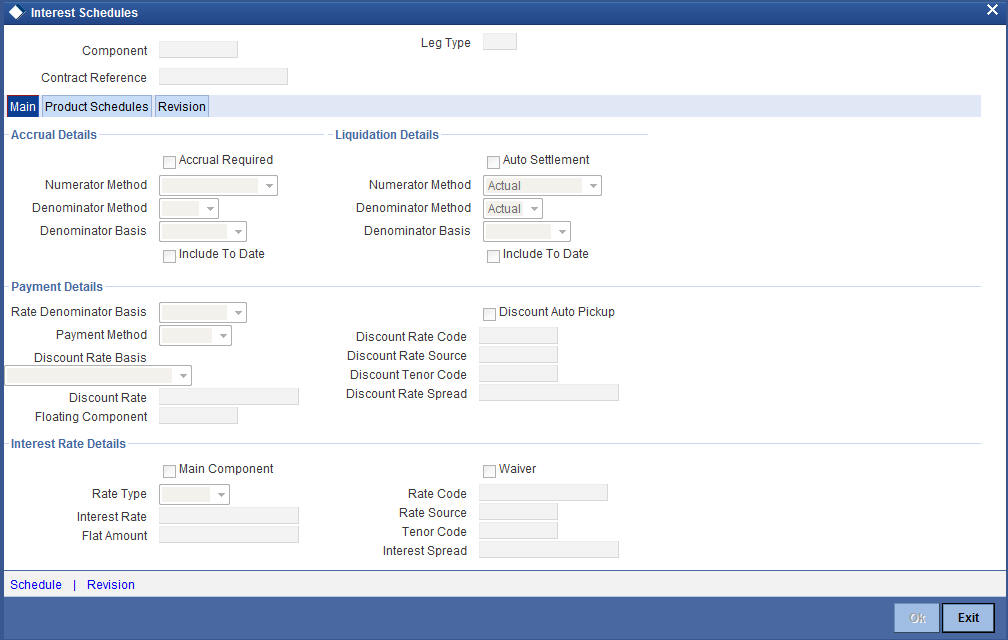
In the Main tab of this screen, you need to specify the following details:
Liquidation Details
Select the numerator method, which is used to arrive at the number of days in the liquidation cycle from the adjoining drop-down list. This list displays the following values:
- 30 – Euro
- 30 – US
- 30 – ISDA
- 30 – PSA
- Actual
- Actual – Japanese
Also specify the denominator method, which derives the number of days in the year/period. This can be – 360, 365, Actual. You can choose the denominator basis to be per annum or per period.
These specifications determine how interest is going to be calculated for each liquidation cycle.
Payment Details
You need to specify the following payment details:
- Rate Denominator Basis - You need to indicate the basis on which
rate denominator has to be computed. The options available are:
- Per Annum
- Per Period
- Payment Method – This specifies when the settlement will the
happen if an option is in the money. It can be:
- Arrears - Settlement happens at the end of the liquidation period; OR
- Advance - Settlement happens at the beginning of the liquidation period.
- Discount Rate Basis – If you have chosen payment method as
Advance, then you must specify the rate basis that is used to discount
advance payments. It can be:
- Direct input
- Other floating component
- Contract floating component
- Discount Rate – This is the rate to discount any advance settlement. If you have specified the discount rate basis as Direct Input, then you must enter a discount rate.
- Discount Auto Pickup - Check this box to indicate whether the discount rate should be automatically picked up by the system from the ‘Floating Rates’ screen. If you check this, the system will perform this based on the other parameters you have specified such as the discount rate source, rate code, tenor code and the rate spread.
- Discount Rate source – If you have specified the discount rate basis as Other Floating Component, then you have to mention a discount rate source.
- Discount Rate code – If you have specified the discount rate basis as Other Floating Component, then you must mention the floating rate code that will be used to discount any advance payouts – e.g., LIBOR, EURIBOR, etc.
- Discount Tenor Code – If you have specified the discount rate basis as Other Floating Component, then you must mention the discount tenor code – e.g., 3-month LIBOR, 6-month LIBOR, etc.
- Discount Rate Spread – This is the spread to be applied to the discount rate code for obtaining the discount rate for advance payments – e.g., LIBOR + 1%.
Interest Rate Details
Here, you need to specify the following details:
- Main Component
- Rate Type
- Interest Rate
- Flat Amount
- Waiver
- Rate Code – Select the rate code to be used, from the option list. On this basis, the system will pick up the reference rate.
- Rate Source - Specify the source of the reference rate - Reuters, Telerate, etc.
- Tenor Code
- Interest Spread
In the payment schedule tab, the following information is displayed:
- Holiday treatment – this is defaulted from specifications maintained as part of product preferences
- Schedule details – this is also defaulted from product preferences
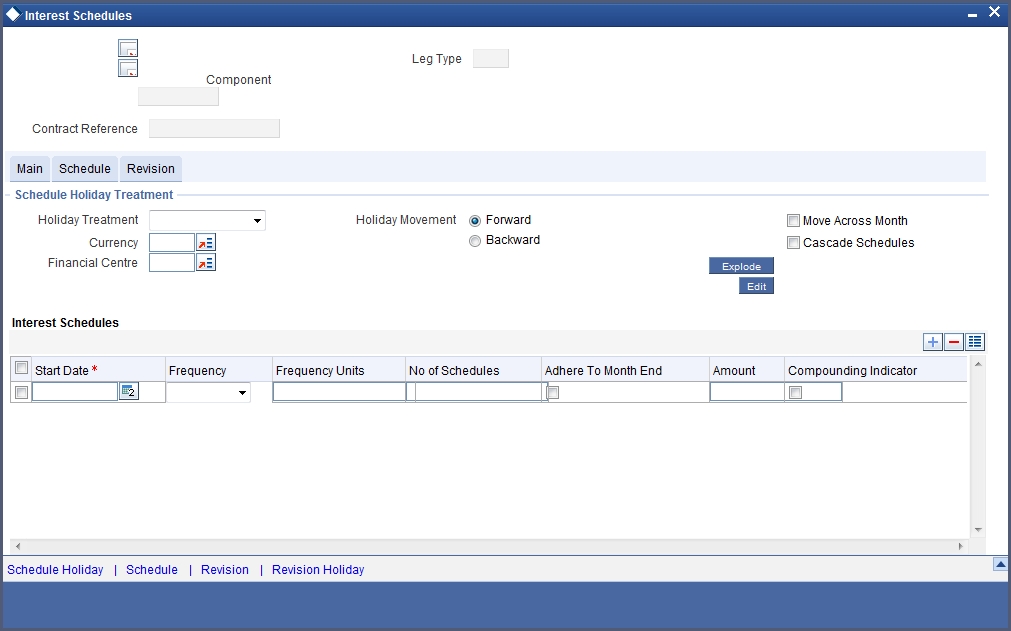
All the schedules will have the same payment method – advance or arrears. The computation start and end dates coincide with the period start and end dates respectively.
You can view the modified exploded interest and the rate revision schedule split on this screen. Click ‘Explode’ button on the Interest Schedules screen. The system re-picks the interest and rate revision schedules. This happens only if the schedule details for settlement and rate revision are updated.
Use ‘Edit’ button to modify the details before you explode the schedules.
Once the details are updated, you can view the modified details on ‘Schedule’ and ‘Revision’ sub screens.
Click ‘Schedule’ button to view the ‘Interest Split’ screen.
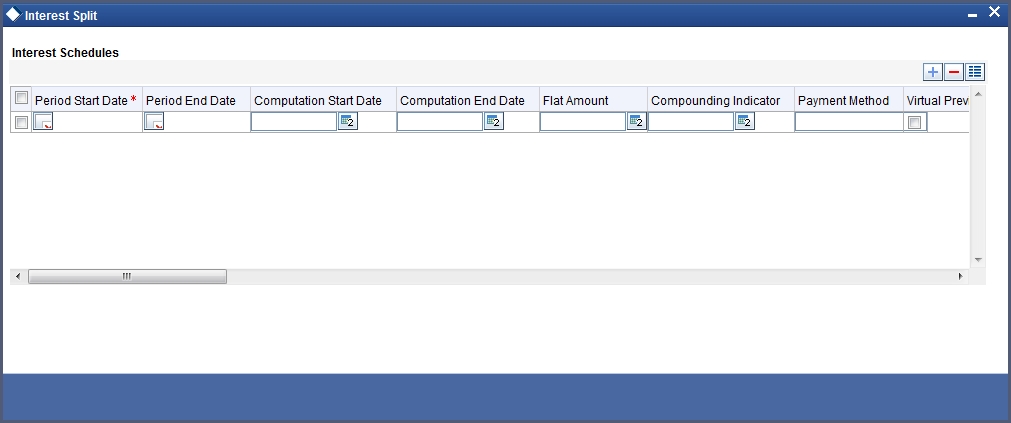
Similarly, you can view the ‘Revision Split’ screen by clicking ‘Revision’ button.
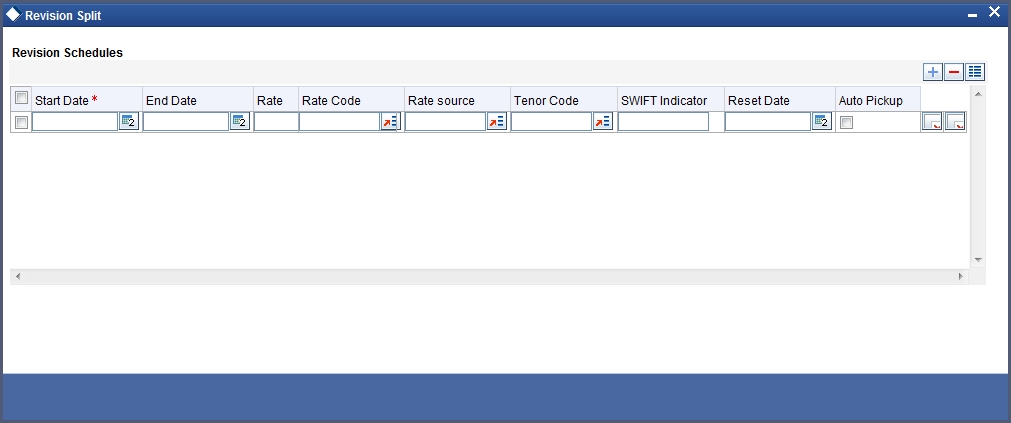
The Revision tab is used for the payment of settlement amount at maturity.
In this tab, you need to specify:
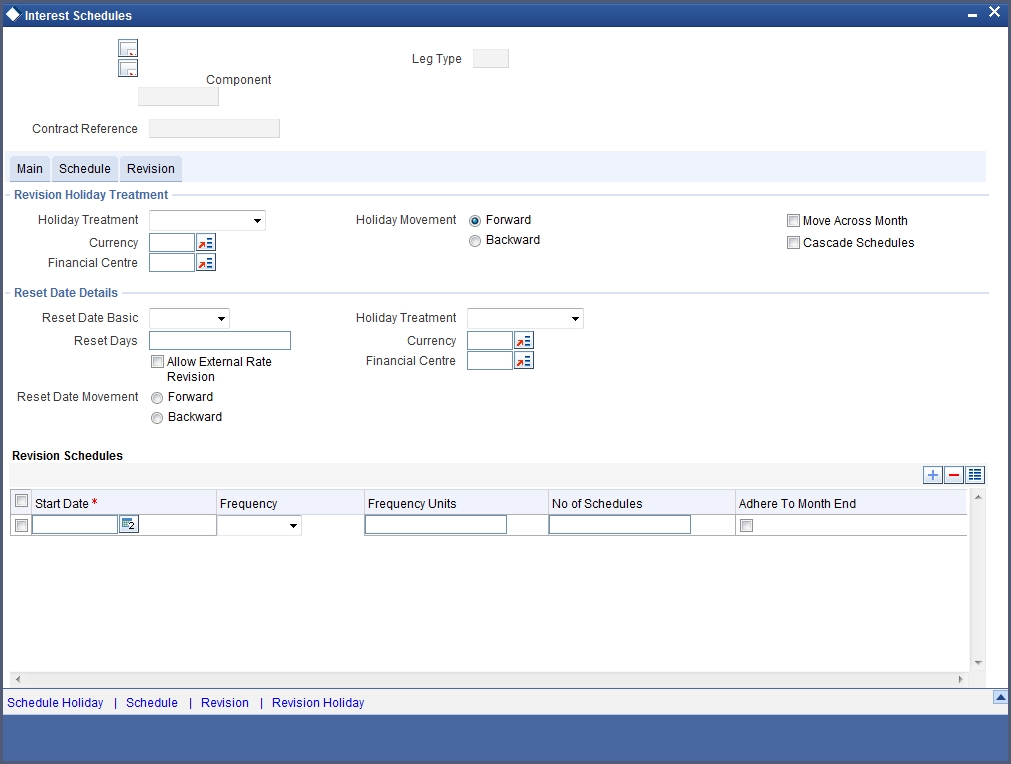
5.1.6.5 Revision Holiday Treatment
Here, you can capture the following details:
Holiday Treatment
In Oracle FLEXCUBE, a schedule date falling due on a holiday can be treated in any of the following ways:
- Ignore the holiday - In which case the holiday will be ignored and the schedule date will be retained on that day.
- Choose to follow the Local holiday - The holiday will be treated as per your specifications in the ‘Branch Holiday Maintenance’ screen.
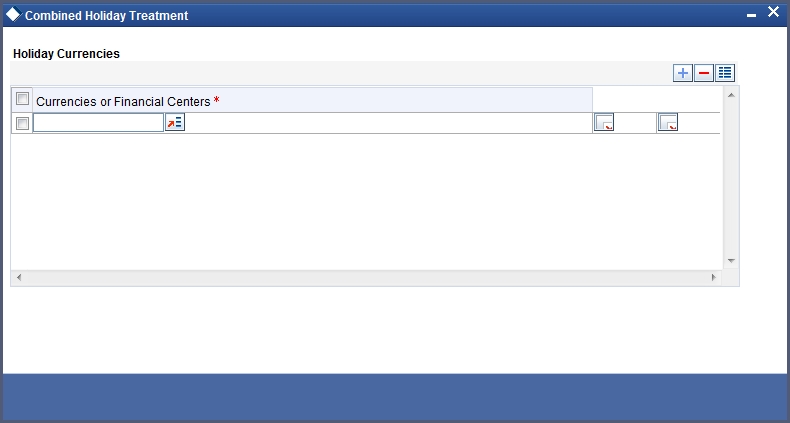
- Choose to follow the Currency holiday - The movement of schedules will be based on the holiday calendars maintained for all the currencies that you have specified for the contract in Holiday Currency field.
- Indicate that the holiday treatment should be governed by the Financial Center – In such a case, the movement of schedules will be based on the holidays maintained for the financial institutions involved in the contract in Financial Center field.
Holiday Currency and Financial Centre
If you choose to follow either the currency holiday or the holiday calendar maintained for the financial center, you need to specify the currencies/financial institutions that are involved in the contract. In the event, a schedule date of a component falls due on a holiday, the system computes the next schedule date based on the combination of holiday calendars maintained for all the currencies/financial institutions that you have specified for the contract (whether principal, interest or revision). Therefore, in effect, the next schedule date for a component will be a working day in all the calendars involved in the contract.
Holiday Movement
Occasionally the preferred holiday treatment, the branch holiday, the currency holiday or the holiday governed by the financial center may, in turn, fall on a holiday. In such a situation you have to indicate the movement of the schedule date. Whether it is to be moved forward to the next working day or whether it should be moved backward to the previous working day.
Moving Across Months
If you have chosen to move a principal schedule falling due on a holiday either forward or backward, such that it falls due on a working day, and it crosses over into another month, the schedule date will be moved into the next month only if you so indicate. If not, the schedule date will be kept in the same month.
Cascade Schedules
The question of cascading schedules arises only if:
- You have specified that a schedule falling due on a holiday has to be moved forward or backward; and,
- The schedule has been defined with a definite frequency.
If you have indicated that schedules should be cascaded, the schedule date for the next payable schedule will depend on how the schedule date was moved for a holiday. The following example illustrates how this concept of cascading schedules functions:
For example, a monthly schedule has been defined with backward movement and a schedule date falling due on April 30 was moved to April 29, April 30 being a holiday.
The schedule date for May depends on whether you have chosen to cascade schedules. If you have, the schedule date for May will be set as May 29, as the frequency has been specified as monthly. For the subsequent schedules also, May 29 will be considered as the last schedule date.
If you have not specified that schedules have to be cascaded, the date originally specified will be the date for drawing up the schedules. Even if the April month end schedule has been moved to April 29, the next schedule will remain on May 30.
5.1.6.6 Reset Rate Details
Specifications for reset rate basis reset rate movement and reset days default from the preferences you maintain at the product level.
You have to indicate the holiday treatment for reset dates. This requires specifications similar to the holiday treatment for maturity dates.
Refer to the Products section in this manual for details on specifying holiday treatment for option maturity dates.
On pressing the ‘Schedule Explode’ button, the exploded revision schedule is displayed:
For non-swaption IROs, settlement amount is calculated and stored during rate reset. Actual settlement happens on the schedule start date or schedule maturity date, depending on the payment method that you have selected.
5.1.6.7 External Rate Revision
For IROs of the types ‘Cap’, ‘Collar’, ‘Floor’ and ‘Corridor’ you can specify whether the rate revision should be based on rates uploaded from an external system or not. If you check the option ‘Allow External Rate Revision’, the system will revise rates as per the uploaded rates. If the box is unchecked, the system will perform rate revision based on the maintenance in Oracle FLEXCUBE.
This value gets defaulted from the linked product. However, you can change it.
5.1.7 Settlement Method for IROs
The following table summarizes how interest rate options with different expiration styles are settled:
| IRO Type | Expiration Style | Exercise Method | Settlement on | |||||||||
|---|---|---|---|---|---|---|---|---|---|---|---|---|
| Caps | European only | Auto only | Schedule maturity | |||||||||
| Floors | European only | Auto only | Schedule maturity | |||||||||
| Collars | European only | Auto only | Schedule maturity | |||||||||
| Corridors | European only | Auto only | Schedule maturity | |||||||||
| Swaptions | American, Bermudan or European | Manual only | For American expiration style: | Any day between the earliest exercise date and contract maturity date (both included). | For Bermudan expiration style: | On pre defined exercise dates or on contract maturity date. | For European expiration style: | Only on contract maturity date. |
5.2 Specifying Other Details for OTC Option Contract
This section contains the following topics:
- Section 5.2.1, "Processing Brokerage on Contract"
- Section 5.2.2, "Specifying Advices for Contract"
- Section 5.2.3, "Viewing Event Details"
- Section 5.2.4, "Selecting User Defined Fields"
- Section 5.2.5, "Levying Charges for Transaction"
- Section 5.2.6, "Maintaining Settlement Instruction Details"
- Section 5.2.7, "Levying Tax on Contract"
5.2.1 Processing Brokerage on Contract
When capturing the details of a contract that involves brokerage, you will have to specify the brokerage details applicable to the contract. To recall, you have already specified the name of the broker through whom the contract was brokered in the ‘Options Contract Input’ screen. The details specified for the broker, including the brokerage rule linked to the broker, is defaulted. However, you can change some details, like whether brokerage should be booked in advance or in arrears or whether it should be waived altogether.
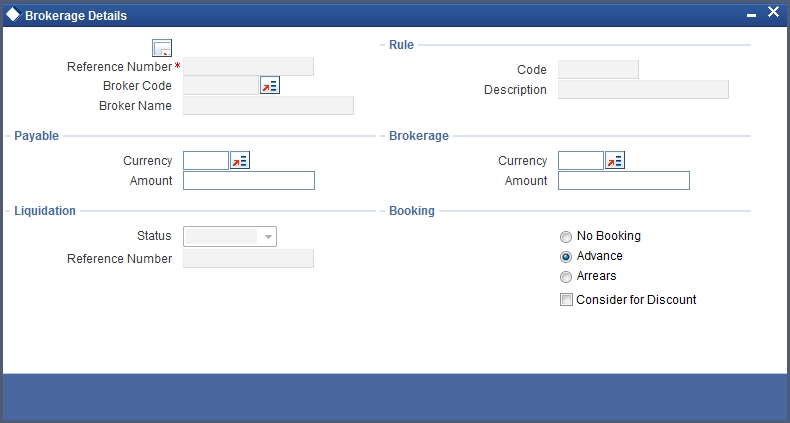
Click ‘Brokerage’ button to define the brokerage details that are applicable to the contract leg you are processing. You will be allowed to enter details of a broker only if brokerage was allowed for the product to which the contract is associated.
5.2.1.1 Features of Contract Brokerage Details Screen
Here, you can capture the following details:
Reference Number
This is the reference number the contract.
Broker Code and Name
The code assigned to the broker through whom the deal was brokered is displayed along with the broker’s name.
Payable Currency and Brokerage Currency
If the brokerage payable currency is the same as the brokerage paid currency, then the same amounts (brokerage paid and brokerage payable) are displayed against the currencies. You have the option to change these currencies.
Payable Amount and Brokerage Amount
You cannot enter the brokerage payable amount. However, the brokerage paid amount can be changed.
The following brokerage details are displayed:
- The brokerage liquidation status. If it has been liquidated, the liquidation reference number is also displayed.
- The rule code and description that has been linked to the broker.
Indicating when brokerage should be booked
Indicate preferences as to when the brokerage applicable to the contract should be linked. The options available are:
- No Booking
- Advance
- Arrears
The preference specified for the broker will be displayed. You can change it in this screen, say from advance to arrears or vice-versa.
You have a third option. That is of waiving brokerage. If you opt for no booking, no accounting entries will be passed for brokerage for this deal.
Note
If you invoke the ‘Brokerage Details’ screen for operations like delete, change, authorize, liquidate and detailed view, this screen will only display brokerage details. You can change brokerage details for a deal only if you have clicked the Modify option from the Actions Menu.
5.2.2 Specifying Advices for Contract
From the ‘Contract Input’ details screen, click ‘Advices’ button. The events ‘Advices’ screen is displayed. To recall, the advices that can be generated for the events that occur during the life-cycle of a contract are defined for the product to which the contract is associated and are generated after the product is authorized.
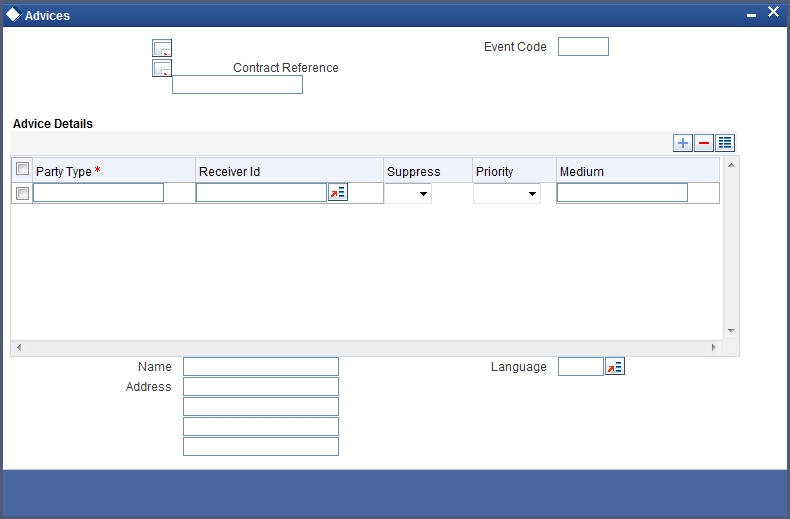
The details of the advices applicable for an event are displayed in the ‘Advices’ screen. The party type to whom a specific advice should be sent is picked up automatically based on the type of contract you are entering and the parties involved in the contract.
The address of the party, who is the recipient of the message, will be picked up by default, based on the media and address maintenance for the party. You can change either of them.
For a payment message by SWIFT, you also have the option to change the priority of the message.
Suppressing the generation of an advice
By default, all the advices defined for a product will be generated for contracts involving it. If any of the advices are not applicable to contract you are processing, you can suppress its generation.
Indicating the generation priority
For a payment message by SWIFT, you also have the option to change the priority with which the message should be generated. By default, the priority of all advices is marked as Normal. You have the option to prioritize a payment message to one of the following options:
- Normal
- Medium
- High
Indicating the medium of generation
The medium through which an advice is transmitted and the corresponding address will be picked up based on the address and media maintained for the customer who is the recipient of the message.
You can, however, change either of these while processing the contract. Typically, if changed, both of them will be changed.
Refer to Annexure A to this manual for a list of event-wise advices for the OTC Options module.
5.2.3 Viewing Event Details
Click ‘Events’ button from the ‘Options Contract Input’ screen, to view details of events involved in the transaction.
The details of events that have already taken place for the transaction leg will be displayed, along with the date on which the event took place.
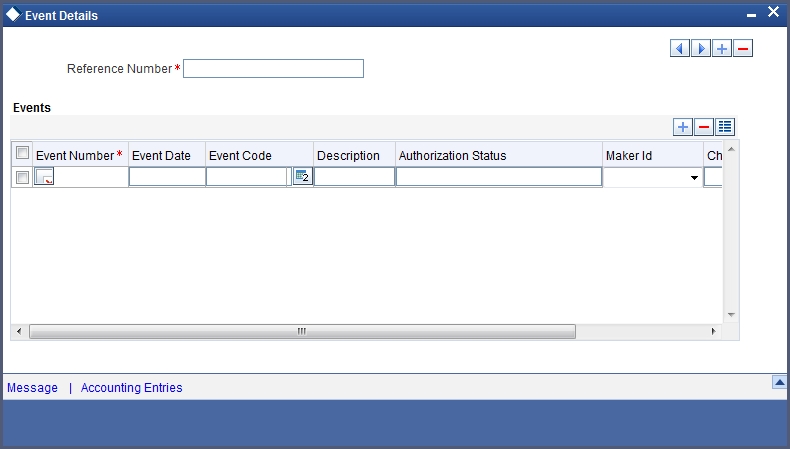
You can view the accounting entries details for a specific event clicking ‘Accounting Entries’ button.
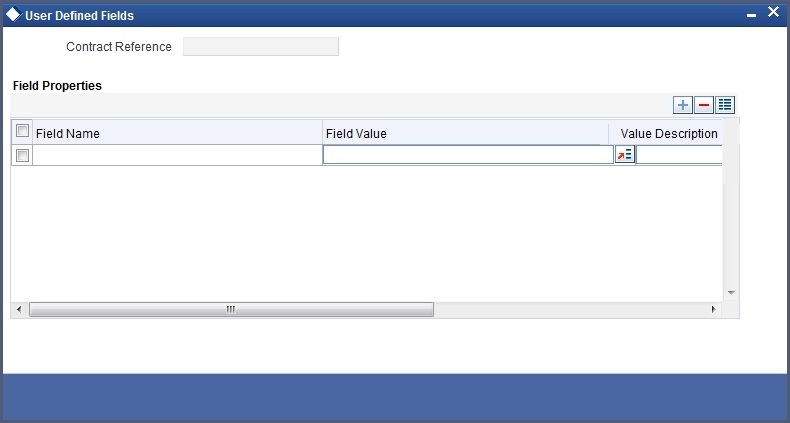
5.2.4 Selecting User Defined Fields
The user-defined fields that have been linked to the product will be defaulted to the contract. You need to capture the relevant information pertaining to these fields. Click on ‘Fields’ button in the ‘Options Contract Input’ screen the ‘User Defined Fields’ screen will be displayed along with fields for which information needs to be captured.
5.2.5 Levying Charges for Transaction
For each leg of the transaction you can specify the charges that you levy. Charges are applicable only for the customer legs of a transaction.
The characteristic feature of a charge is that it is always booked in advance and is not accrued, as a charge is collected only when it is due.
You define the attributes of a charge by defining a Charge Rule in the ‘ICCF Rule Definition’ screen. A rule identifies the basic nature of the charge. You also have to define a Charge Class in the ‘Charge Class Maintenance’ screen, where you further qualify the attributes of a rule. We shall refer to these classes as components.
Each charge component in turn is linked to a product. All the charge components linked to a product are defaulted to the contracts associated with it. Thus each time you enter a contract, you need not specify when and how charges should be collected.
However, while capturing the details of a transaction, you can choose to associate a component to the transaction. Further, you can modify some of the attributes defined for the applicable component.
From the Options Contract Input detail screen, click on the ‘Charge’ button. The ‘Contract Charge Details’ screen is displayed.
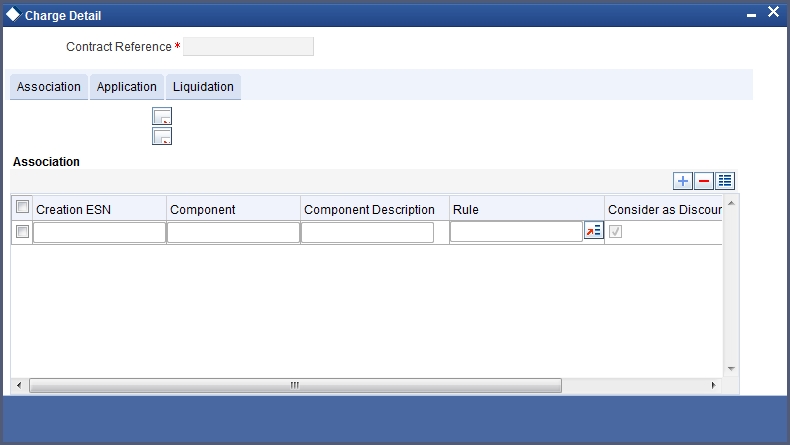
The reference number of the transaction for which you are defining charge details is displayed. The screen contains a list of all the charge components applicable to the transaction.
Associating a charge component to a transaction
All the charge components applicable to the transaction you are processing will be displayed together with the rule that is linked to the component.
In this section of the screen you can:
- Change the charge rule linked to the component
- Disassociate a charge component from the transaction
Changing the charge rule linked to a component
The rule that is linked to a charge component is displayed next to the component. To link a new rule to the component, click the option list from the field titled Rule. A list of all the charge rules maintained will be displayed. Select the appropriate rule from the pick list. The new rule will be made applicable to the charge component.
Disassociating a charge component from the transaction
You can disassociate a charge component from the transaction. In the Association section of the ‘Contract Charge’ screen, click against the waive option positioned next to the component.
In this case, the charge component is attached to the transaction but is not calculated.
Indicating the charge components to be applied to a transaction
In the application section of the screen, you can indicate the charge components that should be applied to the transaction. The list of components that is displayed depends on the charge components that you have associated to the transaction.
The following details of the component are also displayed:
- The basis component on which the charge is levied
- The currency of the basis amount
- The basis amount
- The charge amount
- The currency in which the charge amount is defined
You can change the charge amount that is calculated using the class applicable to the component.
Waiving a charge on a transaction
You also have the option to waive the component for the transaction that you are processing. If, for some reason you want to waive the charge on the transaction you are processing, you can do so by checking against the waiver option in the application section of the screen. The charge will be calculated but not applied.
Note
You can waive a charge only if it is yet to be liquidated.
Charge liquidation
When a charge component that is applied to a transaction is liquidated, the relevant accounting entries are passed. The ‘Contract Charge’ screen displays:
- The charge components that have already been liquidated
- The amount that was liquidated
- The currency in which it was liquidated
5.2.6 Maintaining Settlement Instruction Details
In order to capture the details of a contract successfully you have to capture the following details as well.
- The accounts to be debited for charges, if there are any
- The accounts to be debited for interest that the contract involves
- The method in which the contract is to be settled - whether it is an instrument or a Message (as in a SWIFT or TELEX message)
- Details about the route through which the money settlement should take place
The information that is related to the settlement method and route applicable for a transfer is referred to as Settlement Instructions.
Refer to the Settlements user manual for details on maintaining settlement instructions.
5.2.7 Levying Tax on Contract
The tax details specified for the product to which the contract is associated will be automatically applied to the contract. However, while processing a contract, you can waive the application of tax on the contract.
You can invoke the contract ‘Tax Details’ screen by clicking ‘Tax’ button from the Contract on-line screen.
![]()
5.3 Manual Knock-In Knock-Out
You can invoke the ‘Knock In Knock Out’ screen by typing ‘OTDAKIKO’ in the field at the top right corner of the Application tool bar and clicking the adjoining arrow button. The screen is as below:
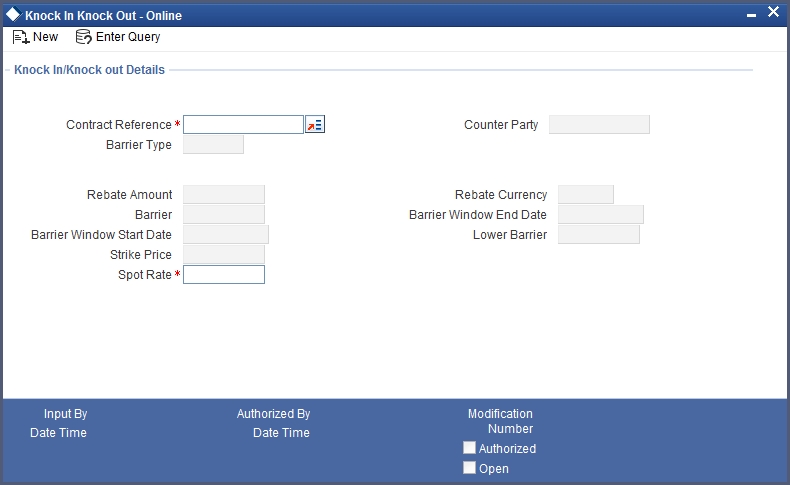
The following values get displayed here:
- Contract reference number
- Customer number (CIF)
- Barrier Type – which can be either single KI, Single KO, Double KI or a Double KO
- Rebate Amount – If a rebate was allowed for the options contract
- Rebate Currency – If a rebate was allowed for the options contract, the applicable rebate currency
- Barrier – The barrier price. This is the predetermined exchange rate at which the contract is knocked in or knocked out.
- Lower Barrier – The lower barrier in case of a double KI or a double KO.
- Barrier Window Start Date – The knock in knock out processing start date
- Barrier Window End Date – The knock in knock out processing end date
- Strike Price – The strike price at which the options contract was booked
The ‘Spot Rate’ is captured and based on the barrier option it is validated whether Knock In or Knock Out can happen at the given spot rate.
5.4 Terminating Option Contracts
You can opt for premature termination of option contracts (both COs and IROs) which have not expired.
You can invoke the ‘OT Contract Termination’ screen by typing ‘OTDXCTRM’ in the field at the top right corner of the Application tool bar and clicking the adjoining arrow button.
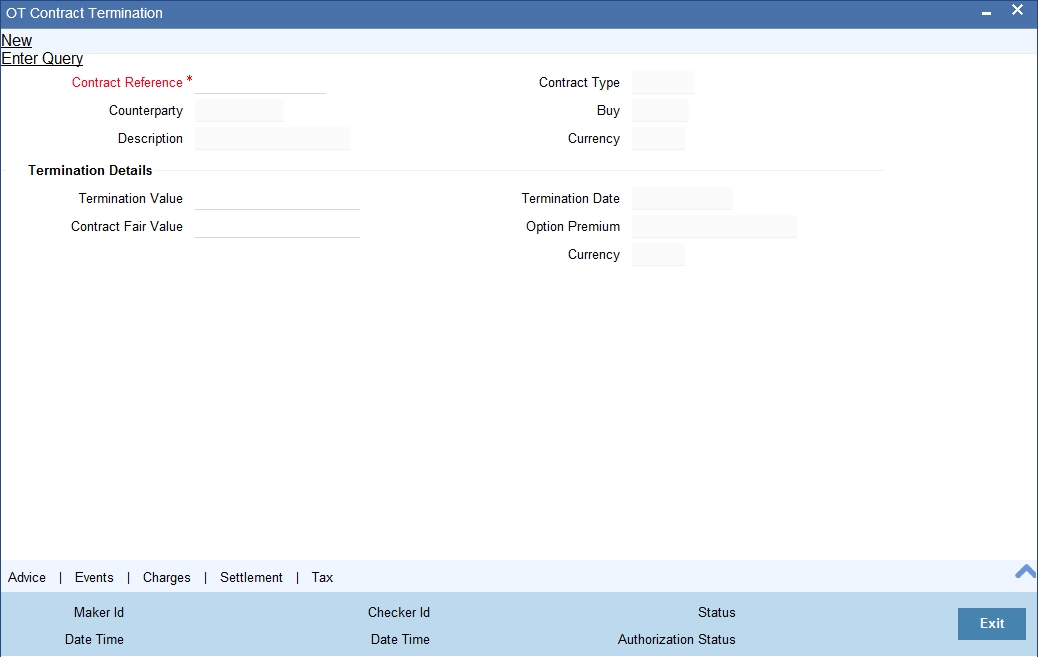
You can either enter the contract reference number or query for all active and authorized contracts and select from the list. The contract currency, name of counterparty and termination date (the date on which you are entering the termination details) are automatically displayed. The option premium paid / received at the time of inception and the currency in which it is denominated are also displayed.
Enter the termination value – the amount at which you are selling / buying back the option to / from the counterparty. This has to be a positive value.
You will also have to enter a positive market fair value for the contract at the time of termination; if left blank, the system picks up the latest revaluation fair value.
For hedge deals, if you have chosen to amortize termination gain / loss at the product level, then the same is amortized from the date of termination till the contract maturity date. Otherwise, the termination gain / loss is recognized as income / loss immediately on termination. Termination gain / loss for trade deals cannot be amortized.
You can delete a saved termination application before it is authorized.
5.5 Uploading Options Contracts
You can also upload the options contract details from an external system into Oracle FLEXCUBE. You can also upload the Derivatives contracts for external swaption (in case of IROs) and FX contracts (in case of Currency options) into Oracle FLEXCUBE. Oracle FLEXCUBE can then establish the requisite soft links between the uploaded IRO contracts and the uploaded Derivatives contracts. Similarly, it can establish a link between the uploaded FX contracts and uploaded Currency options contracts.
Note
- IROs with swaption style ‘Physical’ cannot be uploaded
- Currency options with delivery type as ‘Physical’ cannot be uploaded
The system also checks whether an FX contract is linked to a currency option with Delivery type as ‘External’. Similarly, it checks whether a Derivatives contract is linked to the IRO with swaption Style as ‘External’.
Note
DV contract must be uploaded with Swaption contract Reference Number and must go always in the ‘Authorised’ status irrespective of source preference post upload status.
You cannot upload more than one derivative contract for same swaption contract; if you are doing this, the system will throw an error “Option contract already linked with DV contract”.
Derivative reference number will display in Derivative reference number label after uploading DV contract.
5.5.1 Uploading Options Contract for Amendment
From an external system, you can upload contracts that require amendment in Oracle FLEXCUBE. The system will distinguish between the new and the contracts that require amendment based on the action code of the uploaded record. For a contract requiring amendment, the action code will be ‘AMND’. If the action code is ‘AMND’, Oracle FLEXCUBE will first check whether the contract exists in the system or not. If the contract does not exist in the system, an error message will be displayed to notify that the contract cannot be amended.
The Reference Number provided by the external system has to same if it is a new contract or if it is an amendment to an existing contract.
When you upload a new contract, the Reference Number will be displayed in the User Reference Number field for that contract. The User Reference Number will be the basis for checking whether the contract exists or not.
The upload for contract amendment will trigger the ‘AMND’ event. The same event is triggered even when the amendment is done in the ‘Options Contract Input’ screen.
The fields that can be amended for an options contract are as follows:
- Credit Line Code
- Remarks
Amendments can be of two types:
- Financial
- Non-Financial
For financial amendment, the contract is reversed and new contract is booked based on the new values created. The other values will be defaulted from the contract that is amended.
For non-financial amendment, the same contract can be modified. The non-financial fields are:
- Expiry Location
- Expiry Time
- Remarks
5.6 Exercising Option
You can manually exercise specific styles of interest rate and currency options. Automatic exercise of an option, if the option is marked for auto exercise, is handled by a system batch process if the option is in-the-money at maturity.
You can invoke the ‘OT Contract Exercise’ screen by typing ‘OTDCEXER’ in the field at the top right corner of the Application tool bar and clicking the adjoining arrow button.
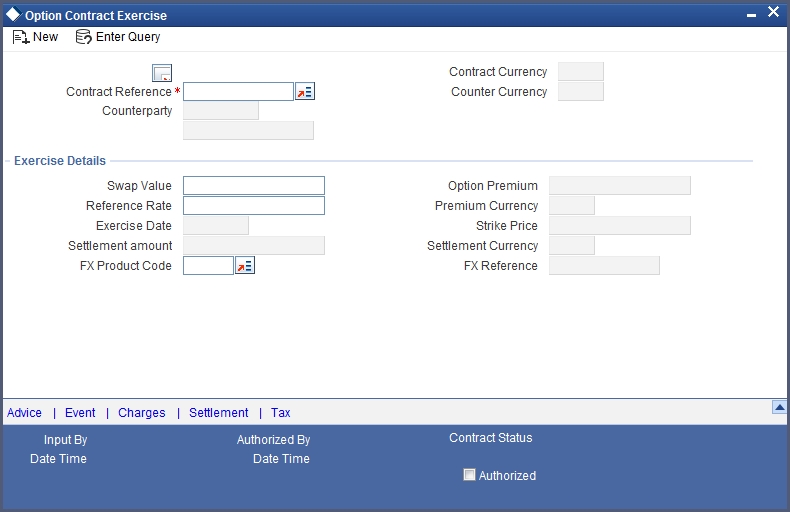
The settlement date is the date when you enter the application for manual exercise of the contract. This is populated automatically by the system.
The reference rate is also automatically picked up by the system based on your specifications for the contract. You can modify it. This is used for calculating the settlement amount.
For swaption trade deals, you have to enter the swap value. This field is disabled for other types of options.
During EOTI process, the system will run a validation to check whether the creation of DV contract is pending for any IRO contract with its Swaption style as ‘External’.
For external currency option contract, the FX contract is separately uploaded with Oracle FLEXCUBE reference number. While uploading the contract, the validation is done between maturity date of currency option contract and value date of FX contract.
Key details pertaining to the option – counterparty, contract currency, premium, premium currency, counter currency and strike rate – are automatically populated by the system.
A foreign exchange spot contract is created by the system on the exercise of physically settled currency options. For such contracts, the FX spot product under which the FX contract is to be created has to be specified. This is defaulted from your specifications at the product level. For such contracts, the contract reference number of the uploaded FX product is also displayed on the screen.
Manual exercise of an option contract is subject to the following conditions:
- Manual exercise is possible for all expiration styles for all types of options, except for non-swaption IROs – caps / collars / floors / corridors. These IROs can only have European style expiration. These IROs are automatically exercised as part of end-of-day or beginning-of-day batch process if they are in-the-money on maturity.
- For digital and no touch currency options, and for binary and plain vanilla currency options with European expiration style, auto exercise is done on the maturity date of the contract during end-of-day or beginning-of-day batch process if the option is in the money. These options can also be exercised manually, but only on the maturity date
- Swaptions can only be manually exercised. If a swaption is not exercised manually, it expires worthless on maturity. In case of manual exercise, revaluation at swap value is triggered. In case of a cash settled swaption, swap value is the settlement amount.
- For a physically settled swaption, the interest rate swap contract remains uninitiated until the manual exercise of the swaption is authorized.
- Manual exercise is permitted only if an option is in the money.