3. Maintaining Information Specific to Payments and Collections
Before you begin operations in the Payments and Collections (PC) module of Oracle FLEXCUBE, you must maintain certain basic information in the system. For example, you must maintain the:
- Local Bank Directory
- Clearing Networks
- Upload Sources
- Bank Redirection details
This data is essential for processing the payments and collections transactions during the course of the day.
Data of this sort is referred to as ‘Static Data’ because it remains constant over a period of time.
This chapter contains the following sections:
- Section 3.1, "Static Data Maintenance"
- Section 3.2, "Information Maintenance Specific to PC Module"
- Section 3.3, "Bank Code Types"
- Section 3.4, "Bank Directory"
- Section 3.5, "Clearing Network Details"
- Section 3.6, "Redirection Details Maintenance for Bank"
- Section 3.7, "Clearing Network Qualifier Details"
- Section 3.8, "Network Calendar"
- Section 3.9, "Purpose Code"
- Section 3.10, "Window Period Information"
- Section 3.11, "Redirection Details Maintenance for Account"
- Section 3.12, "Beneficiary Accounts for Counterparty Bank"
- Section 3.13, "P2P Beneficiary Details"
- Section 3.14, "P2P Payments Parameters"
- Section 3.15, "P2P Payments Beneficiary Registration Queue"
- Section 3.16, "Upload Sources"
- Section 3.17, "Parameter Specification for a Source"
- Section 3.18, "Customer Agreements"
- Section 3.19, "Creditors Maintenance"
- Section 3.20, "DD Agreement Details Maintenance for Creditors"
- Section 3.21, "DD Agreement Details Maintenance for Debtors"
- Section 3.22, "Debtor Direct Debit Instructions Maintenance"
- Section 3.23, "Mandate Cancellation Charge Details"
- Section 3.24, "Customer Stations"
- Section 3.25, "Product Categories Maintenance"
- Section 3.26, "Learning Database Creation"
- Section 3.27, "User Defined Fields for Account Statements"
- Section 3.28, "UDF Details"
- Section 3.29, "Fields to be Included in Account Statements"
- Section 3.30, "Reject Code Maintenance"
- Section 3.31, "Debtor Customer Categories"
- Section 3.32, "Preferences Definition for a Combination of a Product and a Debtor Category"
- Section 3.33, "Periodic Instructions Maintenance"
- Section 3.34, "Dispatch File Maintenance"
- Section 3.35, "Incoming Payments"
- Section 3.36, "Outgoing Payments for Local Currency Transactions in Other Modules"
- Section 3.37, "Payments Module Settlement Details to other Modules"
- Section 3.38, "Local Clearing and Cover Details for Customer Settlement Instructions"
- Section 3.39, "Local Clearing and Cover Details for Settlement Messages"
- Section 3.40, "Generation of the Local Payments Contract for Local Currency Transactions"
- Section 3.41, "Correspondent Bank Maintenance"
- Section 3.42, "Creditor Direct Debit Agreement History"
- Section 3.43, "Debtor Direct Debit Agreement History"
- Section 3.44, "Debtor Direct Debit Instructions History"
3.1 Static Data Maintenance
The static data maintained in Oracle FLEXCUBE can either be common to several modules or be specific to a module. For example, data relating to exchange rates is common to modules such as Foreign Exchange, Funds Transfer, Payments, etc. Static Data that is commonly accessed by several modules is maintained in the Core Services module.
Data that is specific to a module is maintained in the module itself. For example, the details relating to the clearing networks that you support are specific to the Payments and Collections module. It is, therefore, maintained in the PC module.
3.2 Information Maintenance Specific to PC Module
Before you proceed with operations in the Payments and Collections module, you must maintain the following information:
- Local Bank Directory
- Clearing Networks
- Bank Redirection details
- Account Redirection details
- Upload Sources
- Upload Source Parameters
- Products
- Client Agreements (after product maintenance)
- Customer Station details
- Details of Creditors
- Product Category (after product maintenance)
- Account Statement Fields
- User Defined Fields (UDF) and User Defined LOVs
- Reject Codes
- Debtor Customer Categories
- Charge Product Categories
- Charge Account Mappings
- Cover requirement
You can maintain this information in screens that are invoked from the Application Browser. The subsequent sections of this chapter talk about each of the above mentioned maintenances in detail.
3.3 Bank Code Types
This section contains the following topics:
3.3.1 Maintaining the Bank Code Type
You can maintain the different types of bank codes that you intend to maintain for banks in the System, through the ‘Bank Code Type Maintenance’ screen. This maintenance is required to distinguish between the types of bank codes.
You can invoke the ‘Bank Code Type’ screen by typing ‘PCDNKTYP’ in the field at the top right corner of the Application tool bar and click the adjoining arrow button.
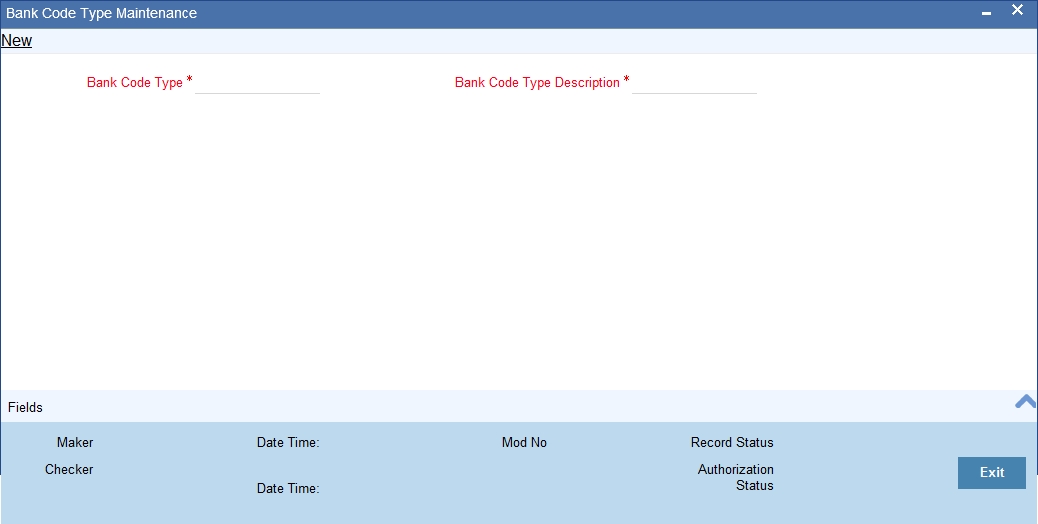
In this screen, you can specify the following details:
Bank Code Type
Specify the type of identifying code that will be maintained for a bank in the system – for instance, SWIFT, BIC, BLZ, IFSC and so on. This code is used to identify the type of Bank code maintained in bank directory.
IFSC code is a unique code used to identify the banks in NEFT/RTGS network.
Description
Specify an appropriate description of the type of bank code specified in the Bank Code Type field.
3.4 Bank Directory
This section contains the following topics:
3.4.1 Maintaining the Bank Directory
You can maintain a list of ‘Clearing Banks’ participating in payments and collections transactions in the ‘Bank Directory Maintenance’ screen. You can invoke this screen by typing ‘PCDBNKMT’ in the field at the top right corner of the Application tool bar and click the adjoining arrow button.
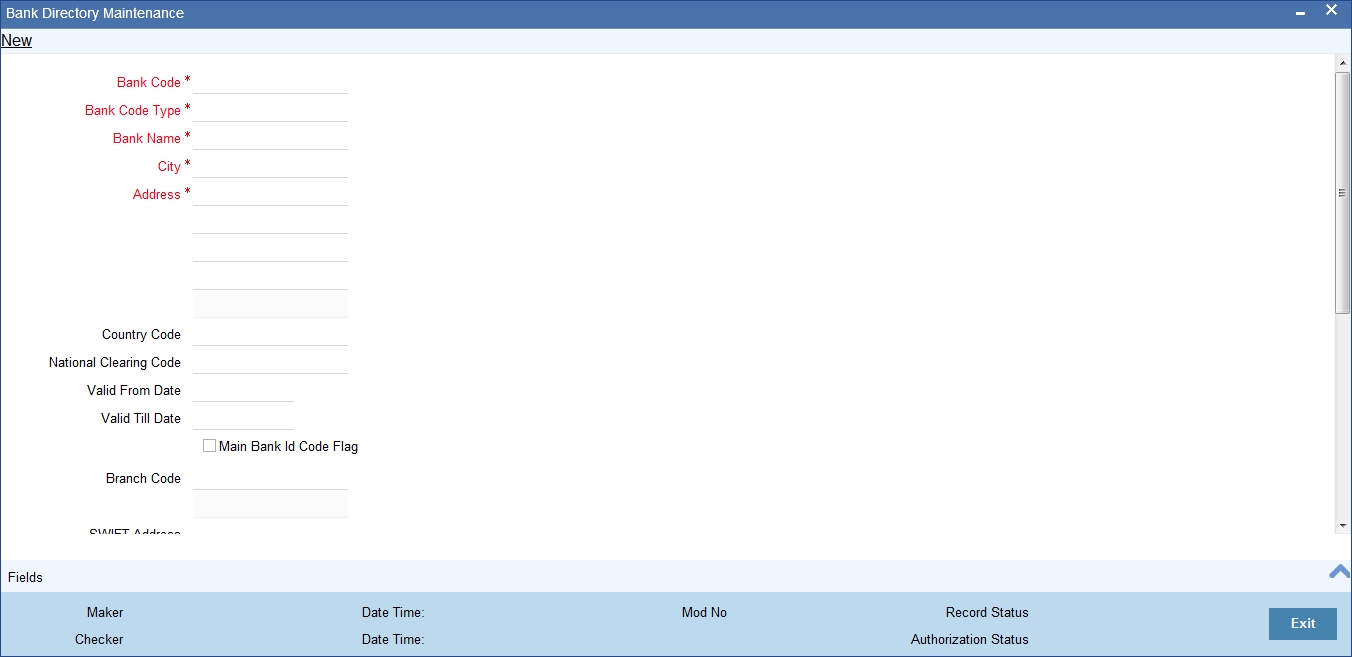
In this screen, you can to maintain the following details:
Bank Code
Every bank with which you have a relationship for processing local payments, direct debits and requests for debit should be identified by a unique code. The clearing bank will be referred by this code throughout the system.
Bank Code Type
You can select the type of identification code being specified for the bank in the directory. For instance, it could be SWIFT, BIC, BLZ, IFSC and so on. The drop down list contains the bank code types maintained in the system, and you can choose the appropriate code type.
Bank Name
Specify the name of the bank maintained in the directory.
City
Specify the name of the city of the bank in the bank directory.
Address
In addition to the bank code, you can also capture the name of the bank and the address for correspondence.
Country
Specify the country of the bank in bank directory. This adjoining option list displays all valid country codes maintained in the system. You can choose the appropriate one.
Note
The country information is captured to enable Mantas to analyse the transactions for possible money laundering activities.
For more details on Mantas, refer 'Mantas' interface document.
National Clearing Code
Enter the national clearing code to be used in case the system is not able to resolve the TARGET-2 participant based on the bank code.
TARGET–2 is a high value Euro Payment clearing system.
For more information on TARGET-2, refer Maintaining Clearing Network details section.
Valid From Date
Specify the date from which the clearing code is valid.
Valid Till Date
Specify the date up to which the clearing code is valid.
Main Bank Identification Code Flag
Main BIC Flag is used to resolve 8 characters BIC. Check this option to indicate that the main BIC must be used if the bank code is incomplete.
Branch Code
If the clearing bank being defined is a Oracle FLEXCUBE branch, you can select the appropriate branch code from the option-list available. Every branch in Oracle FLEXCUBE is identified by a unique branch code. A transaction routed through an internal branch will be processed as an Internal Book transfer.
SWIFT Address
If the clearing bank is part of the SWIFT network, you can select the corresponding SWIFT address from the available option-list.
Customer
You can indicate the customer CIF linked to the clearing bank code, for which the bank directory details are being maintained. For incoming messages in which the clearing bank code (for which the CIF has been maintained) is the counterparty bank code, the CIF maintained here is used, along with the product category of the incoming queue to which the message has been routed, to determine the settlement account.
International Bank Account Mandatory
You can indicate whether outgoing payments booked for the bank with clearing networks for which IBAN validations are made, would be subject to IBAN validation for the counterparty account number.
Cover would be generated along with the payment Message as long as Payment message is linked as an advice to the PC Product [DCLG Event].
The cover message is sent to Direct Participant and Payment message to the addressable Indirect Participant.
Internal Clearing
You need to determine whether the Clearing Bank being defined is an internal entity or an external entity. (A transaction is recognized as an ‘internal’ type when it involves accounts maintained in Oracle FLEXCUBE and another maintained in any other system at your bank. In other words, the accounts belong to the same bank but are maintained in two different systems, Oracle FLEXCUBE being one of them. A transaction is recognized as an ‘external’ type when it involves accounts maintained in Oracle FLEXCUBE and an external entity.
When processing transactions, the system looks up this directory and identifies a clearing bank as ‘internal’ if you have associated it with a valid branch code maintained in Oracle FLEXCUBE and opted for the ‘Internal Clearing’ option. If the clearing bank of the transaction is not specified for Internal Clearing, the system recognizes the clearing bank as an external entity.
Clearing Participation
Clearing Network
Typically, you would specify the clearing network for clearing banks that are defined for external clearing. To recall, external clearing involves accounts maintained in Oracle FLEXCUBE and an external entity. The clearing network will be used to send local payments, direct debits and requests for debit instructions from the bank.
Direct/Indirect
For each clearing network, you can specify the nature of the clearing relationship (whether direct or indirect). If the relationship with the entity is indirect, you have to indicate the name of the redirecting bank also.
Mention the account number that your bank maintains with the clearing network.
Cover
For each RTGS and Network combination, you can choose to generate both cover message and payment message for the direct participant of the counterparty. Check the Cover Message option against the clearing network if the cover message has to be generated along with the payment message. The system generates the cover message only if you have linked an advice format in the Dispatch event of Payment Product and also opted for cover message generation for the specified contract.
Direct Bank Code
For processing incoming payment messages, you can setup the following details in the ‘PC Bank Directory’ screen for the clearing network:
- For direct participants, the ‘Direct’ option can be chosen in the Direct / Indirect field
- For Addressable Indirect Participants, the ‘Indirect’ option can be specified, with Cover enabled and the Direct Bank Code (the option list in the Direct Bank Code field contains those bank codes for which the ‘Direct’ option has been specified for the Clearing Network)
- For Non - Addressable Indirect Participants, the ‘Indirect’ option can be specified, without Cover and the Direct Bank Code.
Addressee
This will default to the Bank Code in case the Bank Code is a Direct Participant in the Network.
If the Bank Code is a Non-addressable indirect participant, then this will default to the Direct Participant Bank Code.
If the Bank Code is an addressable Indirect Participant, then this will default to the Bank Code.
You can also change the defaulted value if required.
Participation in Direct Debit and Request For Debit Transactions
You also need to indicate the type of transactions supported by the clearing network (whether DD and/or RFD transactions). This specification will be validated when the appropriate transaction type is being processed at your bank.
If not specified, the network will be used to process only payment transactions.
3.4.2 Fields Button
Click ‘Fields’ button to provide values for the UDFs associated with the screen.
3.5 Clearing Network Details
This section contains the following topics:
3.5.1 Maintaining Clearing Network Details
In the Clearing Networks screen, you can maintain the networks (such as SORBNET and ELIXIR) through which you communicate with other banks and financial institutions for funds transfers.
You can invoke this screen by typing ‘PCDCLRNT’ in the field at the top right corner of the Application tool bar and clicking the adjoining arrow button. The screen is as below:
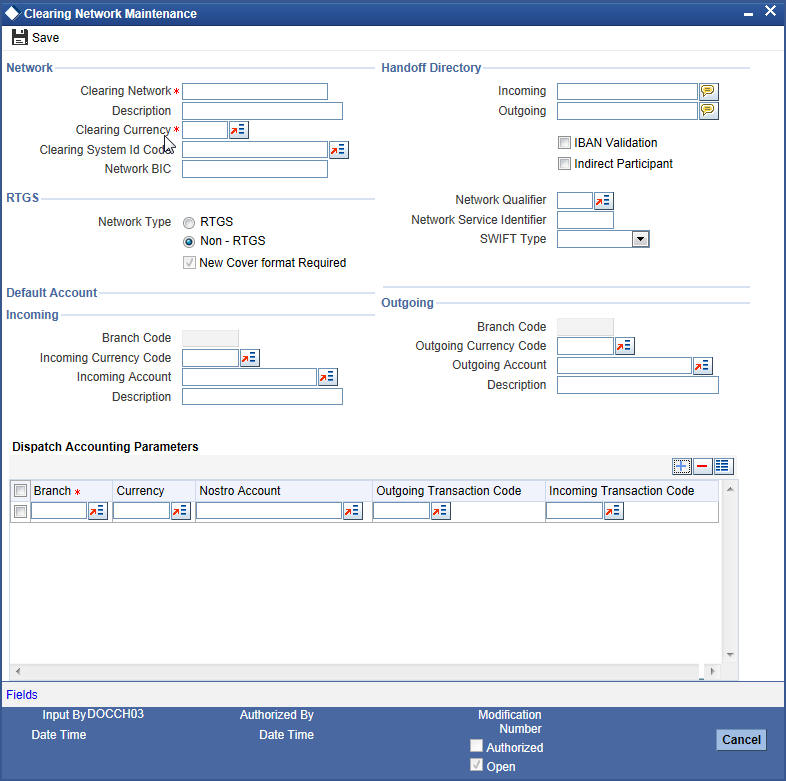
In this screen, you should specify the following details:
Network
- The Name of the Clearing Network. This will uniquely identify the network in Oracle FLEXCUBE.
- A brief description of the network
- Clearing currency of the network
- Clearing system ID code - Specify a value for the field, to identify a CSM .It is same for all the clearing networks created for different schemes. Also, static data for clearing system ID 'ST2' with description as 'EBA Clearing STEP 2' is available.
- Direct Participant - Check the box, to indicate that the processing bank is either 'Direct Participant' or 'Indirect Participant' of the clearing network and /or the scheme.
- Clearing Network BIC
Handoff Directory
- The Incoming and Outgoing Handoff directories. Incoming and Outgoing transactions will be handed off to the respective directories that you indicate in this screen.
- IBAN validation for the Counterparty Account Number is required for outgoing payments and incoming collections using the clearing network.
Note
For SEPA products (PC products where Service Level Code is SEPA) system will do the IBAN validation even if the IBAN Validation check box is not checked. For Non SEPA products (PC products where Service Level Code is not SEPA) system will do IBAN validation only when the IBAN Validation check box is checked.
- Indicate whether the processing bank is an indirect participant of the clearing network. If yes, then the counterparty account will be replaced with the currency correspondent account.
RTGS
The following RTGS network details should be specified:
Network Type
Select the network type. This can be RTGS or Non-RTGS. By default, system selects Non–RTGS. The network type is RTGS for RTGS networks and Non-RTGS for SKN networks.
If you select the ‘Network Type’ as ‘RTGS’ and ‘Network Qualifier’ as ‘RTGS’, then while saving, the system will check if the ‘Network Qualifier’ is ‘RTGS’. If yes, then the Network Type will be ‘RTGS’
If you select the ‘Network Type’ as ‘Non-RTGS’ and ‘Network Qualifier’ as ‘NEFT’, then while saving, the system will check if the ‘Network Qualifier’ is ‘NEFT’. If yes, then the Network Type will be ‘Non-RTGS’
Network Qualifier
If the network type is RTGS, indicate whether the network is TARGET 2 system. To enable the system to perform TARGET -2 specific validations during contract input and message generation, select TARGET-2 from the network qualifier option list.
You can select ‘S’ for SKN, ‘I’ for RTGS, ‘TARGET 2’ or ‘Others’ as the network qualifier. The default value is ‘Others’.
Note
This field is enabled only if the network type is chosen as ‘RTGS’.
TARGET-2 is a RTGS clearing system for high value Euro payments. All the participants in the current National RTGS system automatically become members of TARGET-2.
Following are the units of TARGET-2:
- Direct TARGET-2 participant
- Indirect TARGET-2 participant
If payment is done from direct TARGET-2 participant to another direct TARGET-2, the account of the sender will be debited and that of receiver is credited.
If payments are sent from a direct TARGET-2 participant to a direct TARGET-1 participant, an interlinking account is used.
Swift Type
Select the swift type from the drop down list. The drop down list contains the options ‘FIN’ and ‘FIN Y- Copy’. This preference is used in Funds Transfer module.
Network Service Identifier
The service identifier that is specified here will be displayed in Field 113 of Block 3 header in the RTGS message.
Note
This will be enabled if network type chosen is ‘RTGS’.
Customer cover messages are always generated in new format (MT202COV or MT205COV). This preference is used in the Funds Transfer module.
For more details on new cover message formats, refer to the Settlements user manual.
Incoming
Branch Code
Specify the code for the branch that is participating in the incoming account process.
Incoming Currency Code
If you select the currency code, all the accounts associated with the chosen currency code will be displayed in the option list provided in the adjacent field.
Incoming Account
In case of incoming transactions received over the network, the account that you indicate here will be debited by default.
Description
In case of TARGET 2 clearing network, the default incoming account will be the primary nostro account with the central bank that should be debited while processing an incoming TARGET 2 payment.
Outgoing
Branch Code
For all outgoing transactions sent over the network you are maintaining, you can specify the default account that should be credited.
Outgoing Currency code
If you select the currency code, all the accounts associated with the chosen currency code will be displayed in the option list provided in the adjacent field.
Outgoing Account
In case of outgoing transactions received over the network, the account that you indicate here will be credited by default.
Description
In case of TARGET 2 clearing network, the default incoming account will be the primary nostro account with the central bank that should be credited while processing an outgoing TARGET 2 payment.
Note
You are not allowed to maintain the same default incoming or outgoing accounts for different networks.
Dispatch Accounting Parameters
To consolidate the accounting entries such that the Clearing Nostro GL is netted to post single debit and credit entries for each file that is dispatched, you will need to identify the Clearing Nostro account through the Dispatch Accounting Parameters section in the ‘Clearing Network’ screen.
Branch
Select the appropriate branch code and the currency code from the corresponding option lists available.
Nostro Account
You can maintain different clearing Nostro accounts for the above combination of branch and currency.
Outgoing and Incoming Transaction Code
After you identify the nostro account to which the consolidated entry will be passed for all Dispatch entries you have to select separate transactions codes against which all the incoming and outgoing transactions are to be tracked. The BIC codes for the clearing network will be derived using the Nostro Account so maintained.
3.5.2 Fields Button
Click ‘Fields’ button to provide values for the UDFs associated with the screen.
3.6 Redirection Details Maintenance for Bank
This section contains the following topics:
3.6.1 Maintaining Redirection Details for a Bank
On occasions, transactions involving a specific bank may have to be redirected to another bank. In the ‘Bank Redirection Maintenance’ screen, you can maintain the redirection details for a bank. You can invoke this screen by typing ‘PCDBKRED’ in the field at the top right corner of the Application tool bar and click on the adjoining arrow button.
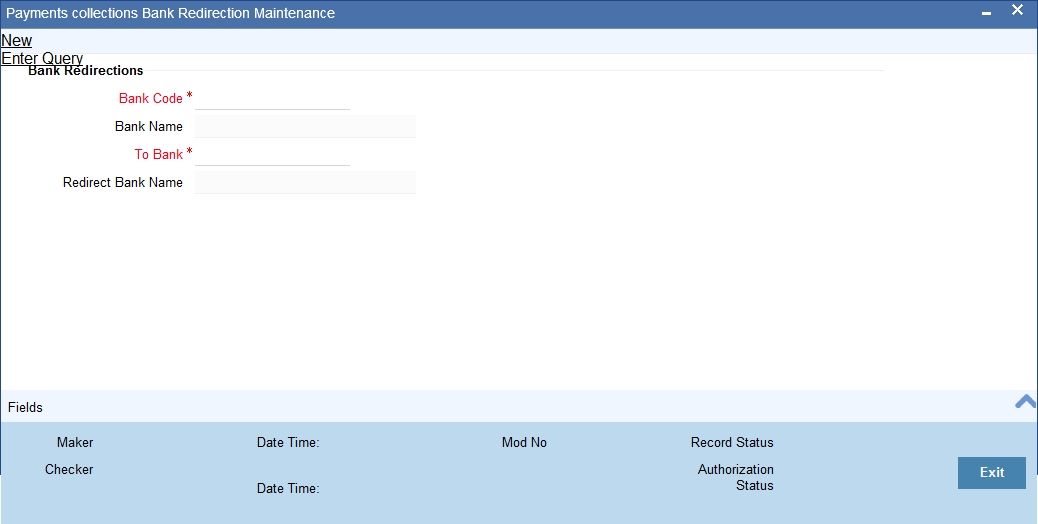
In this screen, you can specify:
From Bank
Select the bank for which you are maintaining redirection details
To Bank
Select the bank to which transactions should be redirected.
All transactions involving the bank for which you are maintaining redirection details will be automatically redirected to the bank you specify here.
Note
You can maintain redirection details only for banks maintained in the Bank Directory screen.
3.7 Clearing Network Qualifier Details
This section contains the following topics:
3.7.1 Maintaining the Clearing Network Qualifier Details
In the Clearing Network Qualifier Maintenance screen, you can maintain the network qualifiers.You can invoke this screen by typing ‘PCDCLNTQ’ in the field at the top right corner of the Application tool bar and clicking the adjoining arrow button.
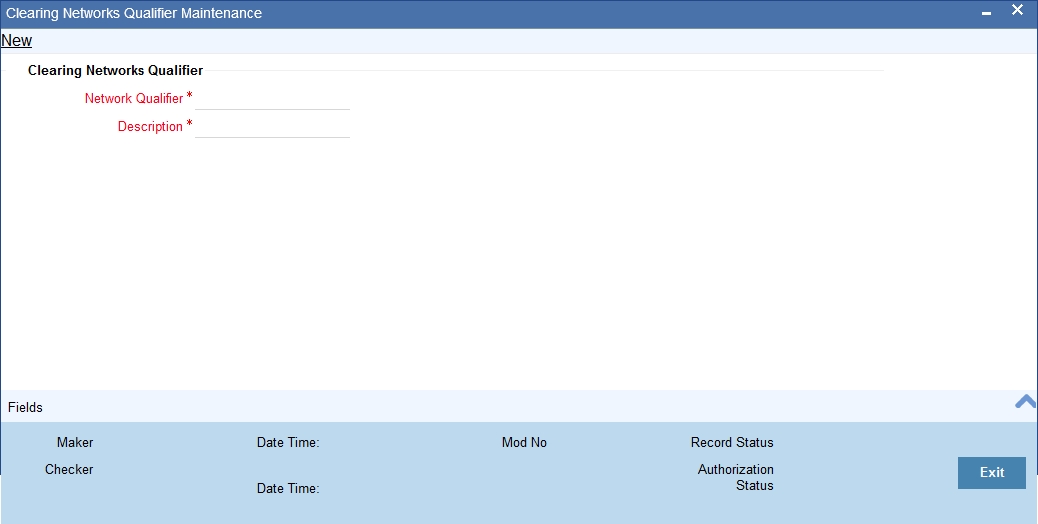
Network Qualifier
Specify the network qualifier details.
For BI-SKN network specify the network qualifier as ‘S’ and for BI-RTGS network specify the network qualifier as ‘I’.
Description
Specify the network qualifier description.
Network Qualifiers will be factory shipped as follows:
Network Qualifier |
Description |
T |
TARGET-2 |
O |
Others |
R |
RTGS-INR |
N |
NEFT |
3.8 Network Calendar
This section contains the following topics:
3.8.1 Maintaining the Network Calendar
In the ‘Network Holiday Maintenance’ screen, you can maintain the working days, half working days and holidays for the year and network.
You can invoke this screen by typing ‘PCDNWHOL’ in the field at the top right corner of the Application tool bar and clicking the adjoining arrow button.
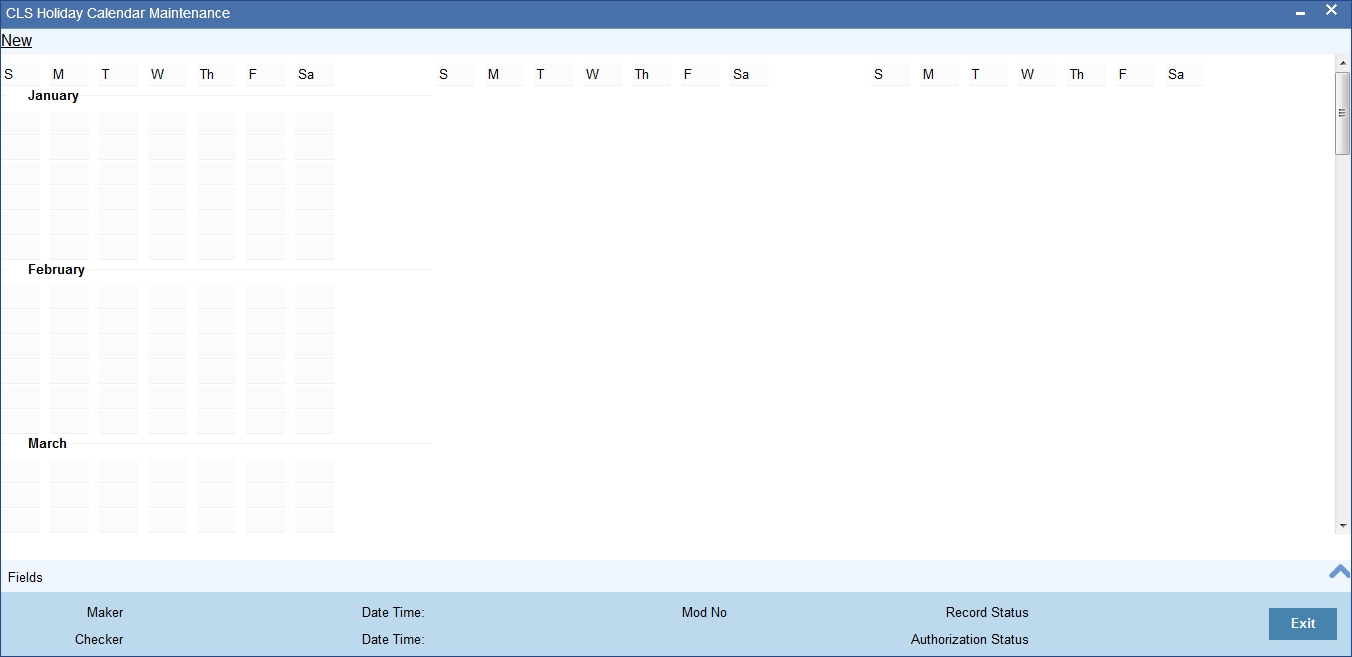
Network Code
Specify the network code.
Year
Specify the calendar year.
When calendar is added for a year, by default the system will mark all Sundays as holiday with Red color and Saturdays are marked as half-day with Orange color and remaining days are marked as Green color that indicates working day.
3.9 Purpose Code
This section contains the following topics:
3.9.1 Maintaining the Purpose Code
Purpose code specifies the purpose of the payment based on the agreement between the initiating party and the debtor’s bank. Purpose code maintained through this maintenance is made available during Payment Transaction Input.
You can invoke this screen by typing ‘PCDPCDMT’ in the field at the top right corner of the Application tool bar and clicking the adjoining arrow button.

Specify the following details:
Purpose Code
For maintaining the purpose code first time click on 'Populate ISO Codes' to view all the factory shipped purpose codes maintained by the system. Subsequently you can click Enter Query and Execute Query to view the same.
You can also add or delete the purpose code by clicking on ‘+’ or ‘-’ button respectively.
Purpose Code Description
The description is auto populated in this field. However, if a new purpose code has been specified, then specify a relevant description in this field.
3.10 Window Period Information
This section contains the following topics:
3.10.1 Maintaining Window Period Information
In the Payment Window Period Modification screen, you can modify the window period information for a product for a branch for the current process date. The window periods maintained in this screen is applicable only to the current process date.
You can invoke this screen by typing ‘PCDPRDAT’ in the field at the top right corner of the Application tool bar and clicking the adjoining arrow button.
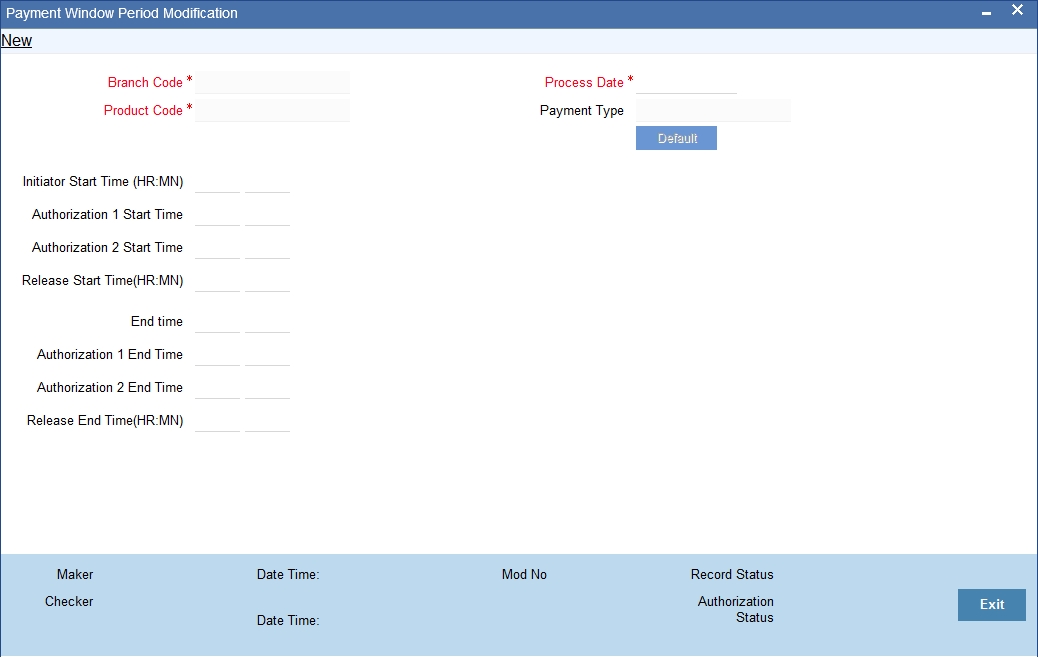
Branch Code
Specify the branch code.
Product Code
Specify the product code.
Process Date
Specify the process date.
Payment Type
The system will display the product type of the selected product.
Initiator Start Time
Specify the contract initiation start time in hours and minutes for Full Day.
End Time
Specify the contract initiation end time in hours and minutes.
Auth1 Start Time
Specify the contract Level 1 Auth start time in hours and minutes for Full Day.
Auth1 End Time
Specify the contract Level 1 Auth end time in hours and minutes for Full Day.
Auth2 Start Time
Specify the contract Level 2 Auth start time in hours and minutes for Full Day.
Auth2 End Time
Specify the contract Level 2 Auth end time in hours and minutes for Full Day.
Release Start Time
Specify the contract Release start time in hours and minutes for Full Day.
Release End Time
Specify the contract Release end time in hours and minutes for Full Day.
Clicking on the ‘Default’ button, the system will default the window period information for the given product. If the current process date is Full Day then system will default the Full Day window period information else if the Process Date is Half Day then system will default the Half Day window period information.
3.11 Redirection Details Maintenance for Account
This section contains the following topics:
3.11.1 Maintaining the Redirection Details for Account
Just as you redirect transactions from one bank to another, so also on occasions, transactions involving a specific account maintained in Oracle FLEXCUBE may have to be redirected to another valid account maintained in Oracle FLEXCUBE. In the ‘Account Redirection Maintenance’ screen, you can maintain the redirection details for an account.
You can invoke this screen by typing ‘‘PCDACARE’ in the field at the top right corner of the Application tool bar and clicking the adjoining arrow button.
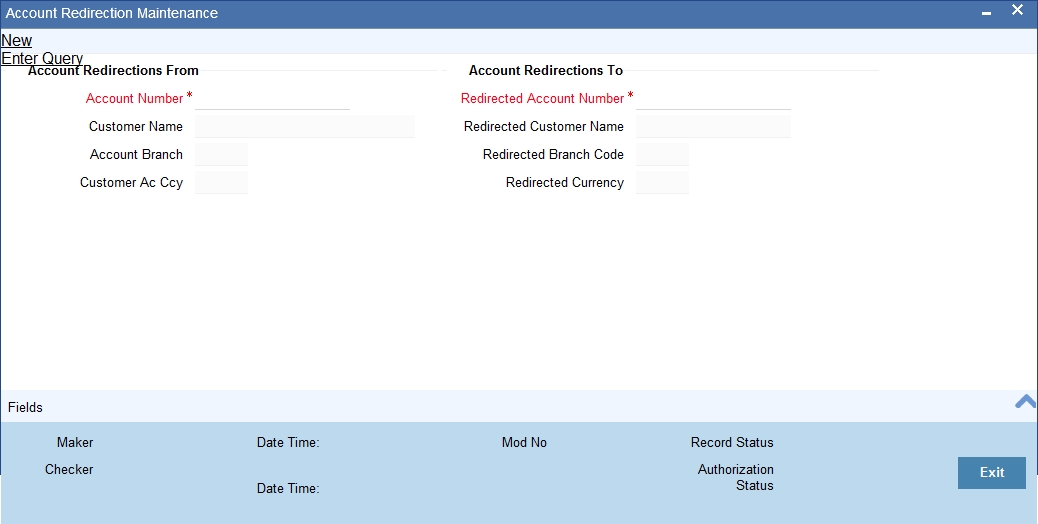
In this screen, you can specify:
From
Select the account number for which you are maintaining redirection details. The following are displayed:
- The branch code of the selected account number
- The currency of the account number
- The customer name who is holding the account
To
Select the account to which transactions should be redirected.
On selection of the account number from the option-lists available, the following details get displayed:
- The branch code of the selected account number
- The currency of the account holder
- The customer name who is holding the account
All transactions involving the account for which you are maintaining redirection details will be automatically redirected to the account that you specify here.
To view the joint holder’s details of an account and the mode of operation maintained at the account level, place the cursor on the Account Number or Redirected Account Number fields and press Ctrl+J. The system displays the ‘Joint Holder’ screen.
For more information on the ‘Joint Holder’ screen refer to the section ‘Joint Holder Maintenance’ in the Core User Manual.
3.12 Beneficiary Accounts for Counterparty Bank
This section contains the following topics:
3.12.1 Maintaining the Beneficiary Accounts for Counterparty Bank
You can maintain a list of beneficiary accounts for a counter party bank for local payments and collections transactions through the ‘Beneficiary Maintenance’ screen.
You can invoke this screen by typing ‘PCDBENMT’ in the field at the top right corner of the Application tool bar and clicking the adjoining arrow button.

Counterparty Account
Bank Code
You need to specify the Bank Code of the Counterparty Account from the option list provided. The Bank Name will be displayed alongside.
Account Number
You need to specify the Account Number of the counterparty account. This along with the Bank Code will be uniquely identified in the system.
If you have checked the option ‘IBAN Check Required’ at clearing network level, the system validates IBAN for the counterparty account for outgoing payments and incoming collections. However, the system does not validate the account number that you specify here. You need to specify the correct account number for the counterparty.
Bank Name
The system displays the name of the bank.
Counterparty Details
Counterparty Name
You need to specify the counterparty name for the local payment transaction.
Address Line1, 2, 3, 4 and 5
Specify the address of the counterparty. You can maintain up to five lines of address information.
Surname
Specify the surname of the counterparty.
Fathers Name
Specify the fathers’ name of the counterparty.
Telephone
Specify the telephone number of the counterparty.
Email Id
The system defaults the email ID if an existing beneficiary is maintained in P2P Beneficiary Maintenance screen or new records of a new beneficiary is registered.
Facebook ID
The system defaults the Facebook ID if an existing beneficiary is maintained in P2P Beneficiary Maintenance screen or new records of a new beneficiary is registered.
Remarks
Specify the free hand text related information of the beneficiary.
Identification Details
Identification
Select the option to identify the counterparty either by Organization details or by Individual person details. The options available in the drop-down list are:
- Organization Identification
- Private Identification
BIC ID
Specify the Bank Identification Code of the Counter Party.
Identification Value
Specify the identification value for the Counterparty for the given identification type. This is mandatory only if the Identification type is specified.
Issuer
Specify the Identification Issuer of the counterparty. This is used to identify if Organization identification is used as Proprietary Identification or Private Identification.
Counter Party Scheme Name Type
Select the Identification Scheme Type of the counterparty from the select list.
The valid values are:
- C - Codes
- P - Proprietary
Counter Party Scheme Name
Specify the value for Identification Scheme Name field.
If Scheme Name type is C then the Scheme Name can be selected from LOV and can have one of the values mentioned in value list depending on Organization Identification or Private Identification. If the Scheme Name Type is P then you can enter the value for the field.
Counter Party Date of Birth
Specify the date of birth of the Counter Party.
City of Birth
Specify the city of birth of the Counterparty. This is enabled and is mandatory if you have selected identification type as ‘Date and Place of birth’.
Country of Birth
Select the country of birth of the Counterparty from the option list. This is enabled and is mandatory if you have selected the identification type as ‘Date and place of Birth’.
3.13 P2P Beneficiary Details
This section contains the following topics:
- Section 3.13.1, "Maintaining the P2P Beneficiary Details"
- Section 3.13.2, "Viewing P2P Beneficiary Details"
3.13.1 Maintaining the P2P Beneficiary Details
You can maintain peer to peer payment transactions by registering beneficiary details in the ‘P2P Beneficiary Maintenance’ screen. P2P beneficiary maintenance can be done for any of the following combinations:
- Email ID
- Email ID and Telephone
- Email ID and Facebook ID
- Email ID, Telephone and Facebook ID
You can maintain same beneficiary account details with multiple email IDs or multiple combinations of Email ID, Telephone and Facebook ID.
You can invoke this screen by typing ‘PCDPTPBN’ in the field at the top right corner of the Application tool bar and clicking the adjoining arrow button.
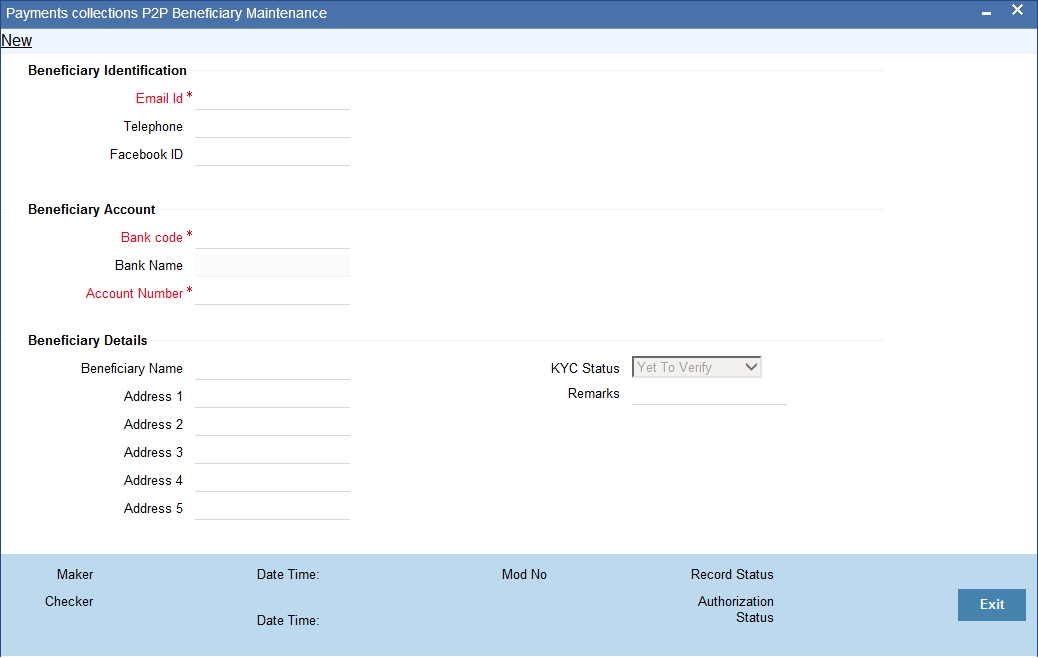
Beneficiary Identification
Email ID
Specify the email identification of the beneficiary.
Telephone
Specify the contact number detail of the beneficiary.
Facebook ID
Specify the facebook identification of the beneficiary.
Beneficiary Account
Bank Code
Select the bank code where the beneficiary holds the account from the adjoining option list.
Bank Name
The system defaults the name of the bank based on the bank code selected.
Account Number
Specify the account number of the beneficiary.
Beneficiary Details
Beneficiary Name
Specify the name of the beneficiary.
Address 1,2,3,4 and 5
Specify the address of the beneficiary.
KYC Status
Select the KYC status from the adjoining drop-down list. The options available are:
- Yet to Verify
- Verified
- Verification Failed
By default the system maintains ‘Yet to Verify’ as the KYC status.
Remarks
Specify remarks, if any.
3.13.2 Viewing P2P Beneficiary Details
You can view the peer to peer beneficiary details maintained in the 'P2P Beneficiary Maintenance' screen using the 'P2P Beneficiary Summary' screen. You can invoke this screen by typing 'PCSPTPBN' in the field at the top right corner of the Application tool bar and clicking on the adjoining arrow button.
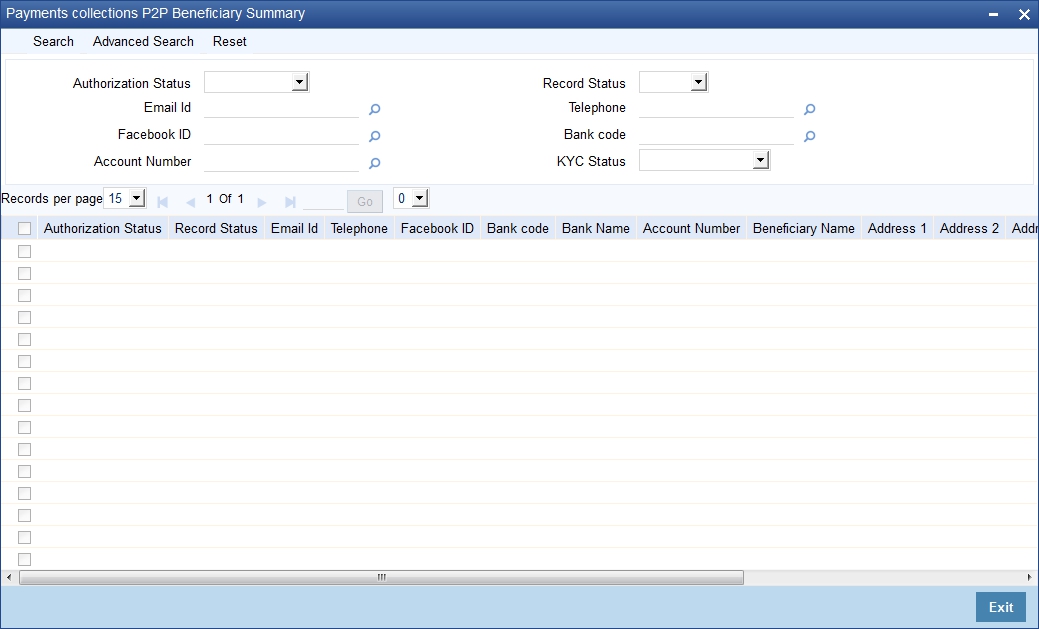
In the above screen, you can base your queries on any or all of the following parameters and fetch records:
- Authorization Status
- Email ID
- Facebook ID
- Account Number
- Record Status
- Telephone
- Bank Code
- KYC Status
Select any or all of the above parameters for a query and click ‘Search’ button. The records meeting the selected criteria are displayed.
If you are allowed to query beneficiary details, then system displays the following details pertaining to the fetched records:
- Authorization Status
- Record Status
- Email Id
- Telephone
- Facebook ID
- Bank Code
- Bank Name
- Account Number
- Beneficiary Name
- Address 1, 2, 3 4 and 5
- KYC Status
- Remarks
3.14 P2P Payments Parameters
This section contains the following topics:
3.14.1 Maintaining the P2P Payment Parameters
You can maintain peer to peer payment processing details in the ‘P2P Payments Parameters Maintenance’ screen.
You can invoke this screen by typing ‘PCDPTPPM’ in the field at the top right corner of the Application tool bar and clicking the adjoining arrow button.
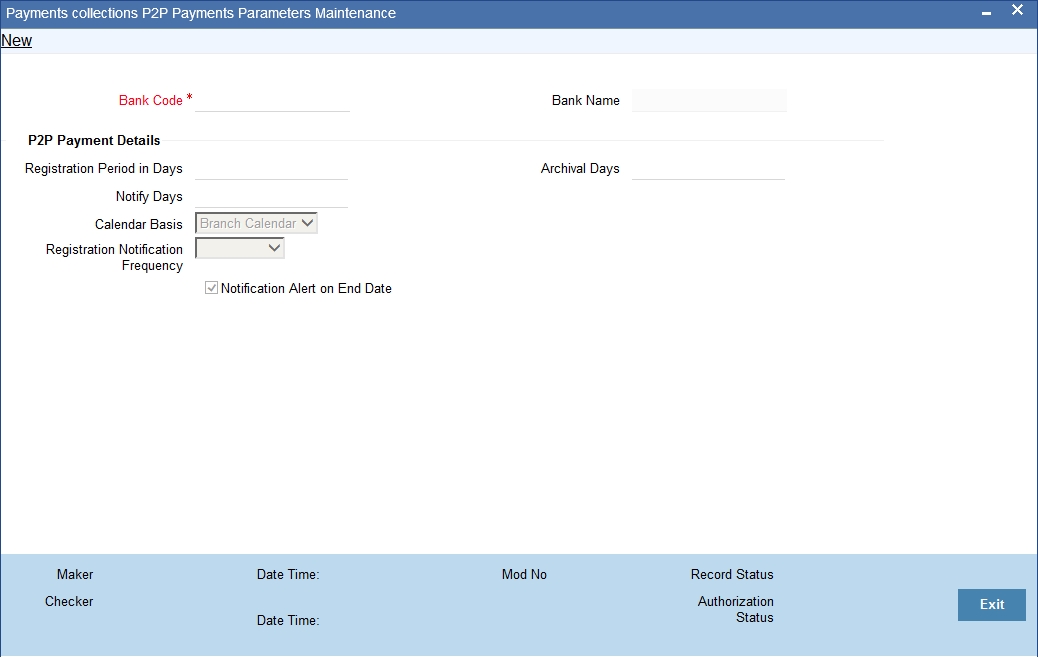
You can specify the following in this screen:
Bank Code
Select the bank code from the adjoining option list.
Bank Name
The system displays the bank name.
P2P Payment Details
Registration Period in Days
Specify the number of days within which beneficiary has to register in the sender’s bank to receive the payments.
The activation date of the customer debit or effective date of the amount block request will be considered as ‘From Date’ to calculate the end date for beneficiary registration.
Notify Days
Specify the days to notify the end date for beneficiary registration in sender’s bank. Notify Days is mandatory if the Registration Period in Days is mentioned. Registration Notification Start Date is derived based on notify days and end date for beneficiary registration.
Note
Notify days cannot be greater than or equal to ‘Registration Period in Days’.
Calendar Basis
Select the calendar basis from the adjoining drop-down list. The options available are:
- Calendar Days - Select Calendar Days to consider all days in a calendar.
- Branch Calendar - Select Branch Calendar to consider only the working days of a transaction branch.
By default the system selects ‘Branch Calendar’
Registration Notification Frequency
Select the frequency for generating registration notification from the adjoining drop-down list. The options available are:
- Daily
- Weekly
- Monthly
- Quarterly
- Half Yearly
- Yearly
The system defaults ‘Daily’ as Registration Notification Frequency.
Notification Alert on End Date
Check this box to indicate that the notification needs to be generated on the registration expiry date.
Archival Days
Specify the days after which the record should be moved from P2P Payments Registration Queue to corresponding history data store. The data movement is done if any record becomes older than the archival days maintained..
3.15 P2P Payments Beneficiary Registration Queue
This section contains the following topics:
3.15.1 Viewing P2P Beneficiary Registration Queue
You can view the customer debit transactions and amount block requests for the P2P payments in the ‘P2P Payments Beneficiary Registration Queue’ screen.
You can invoke this screen by typing ‘PCSBERGQ’ in the field at the top right corner of the Application tool bar and clicking on the adjoining arrow button.
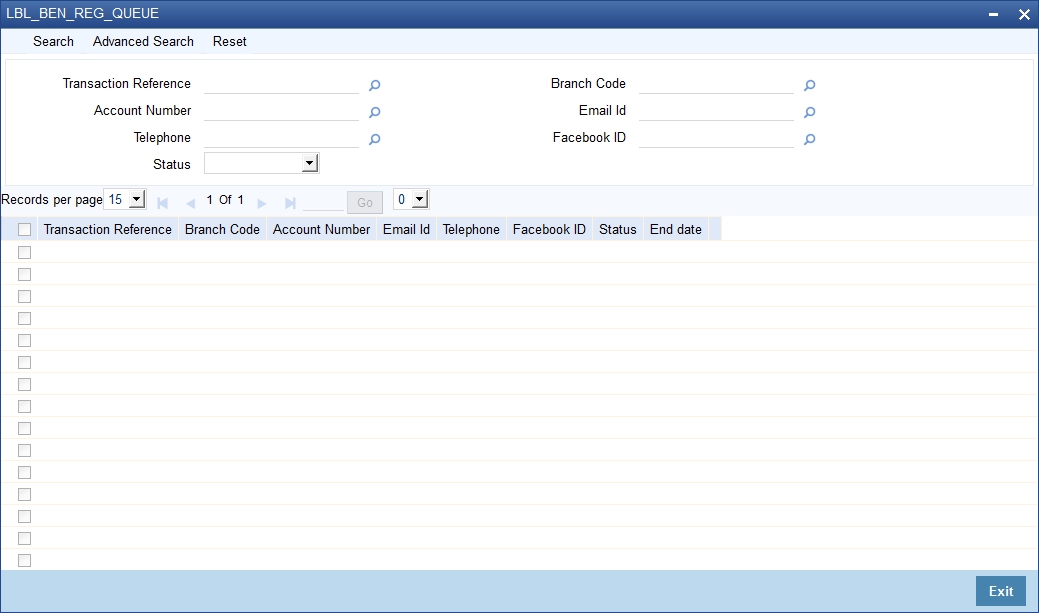
In the above screen, you can base your queries on any or all of the following parameters and fetch records:
- Transaction Reference
- Account Number
- Telephone
- Status
- Branch Code
- Email Id
- Facebook ID
Select any or all of the above parameters for a query and click ‘Search’ button. The system displays the following details pertaining to the fetched records:
- Transaction Reference
- Branch Code
- Account Number
- Email ID
- Telephone
- Facebook Id
- Status
- End Date]
3.16 Upload Sources
This section contains the following topics:
3.16.1 Maintaining Upload Sources
You can identify the sources from which you would like to receive payment and collection transactions for processing. The transactions are uploaded from these sources into Oracle FLEXCUBE. You can identify a source in the PC - Upload Sources screen and invoke the ‘Upload Sources’ screen by typing ‘PCDUPLDM’ in the field at the top right corner of the Application tool bar and clicking the adjoining arrow button.
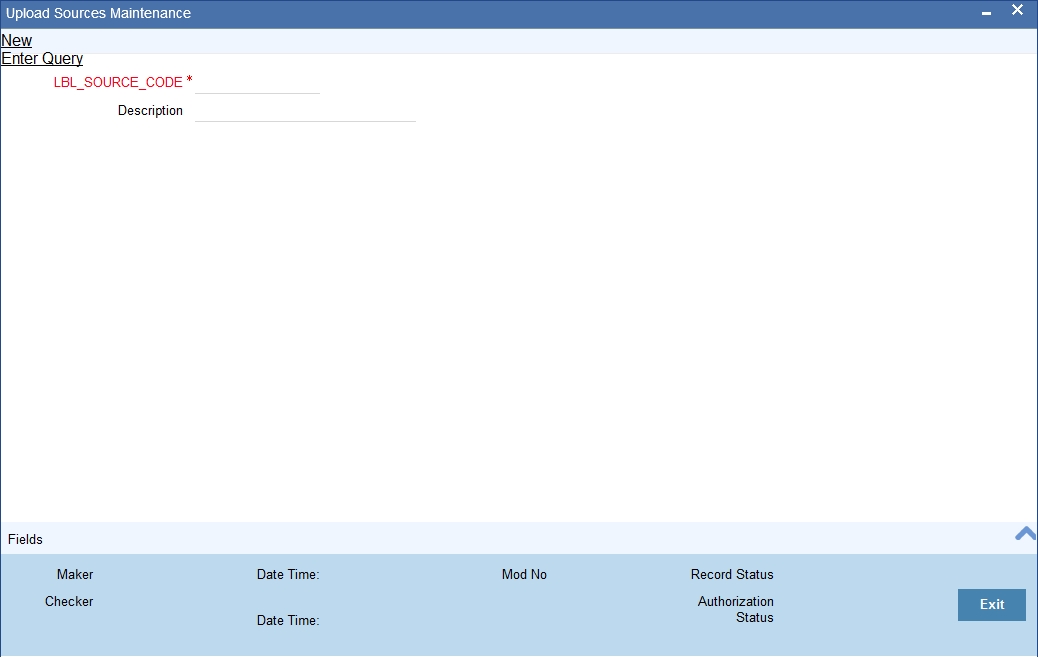
In this screen, you must enter the following details:
Source Code
Specify a unique code that will identify the source throughout the system.
Description
Enter a brief description of the source.
Oracle FLEXCUBE has the following inbuilt upload sources:
- MANUAL_BOOK (Manual Book)
- MANUAL_REJT (Manual Reject)
- MANUAL_APPR (Manual Approval)
- MANUAL_RECL (Manual Recall)
- MANUAL_RDSP (Manual Redispatch)
Note
Users at your bank can ONLY process payment transactions received from a source that is maintained in this screen.
3.17 Parameter Specification for a Source
This section contains the following topics:
3.17.1 Invoking the Source Parameters Maintenance Screen
For a combination of product category, source code and customer, you can maintain certain upload parameters such as:
- An Automatic Authorization Limit
- Whether uploaded transactions can be deleted
- The fields that can be amended
- The number of working days (calculated from the initiation date of the transaction) for which the messages need to be retained in the system
- The source parameter maintenances should be in sync with the maintenances for external systems in Gateway module
For more information on ‘Gateway Maintenances’, please refer to Gateway Maintenance user manuals.
You can setup upload parameters in the ‘Source Parameters Maintenance’ screen and invoke this screen by typing ‘PCDUPLDT’ in the field at the top right corner of the Application tool bar and clicking the adjoining arrow button.
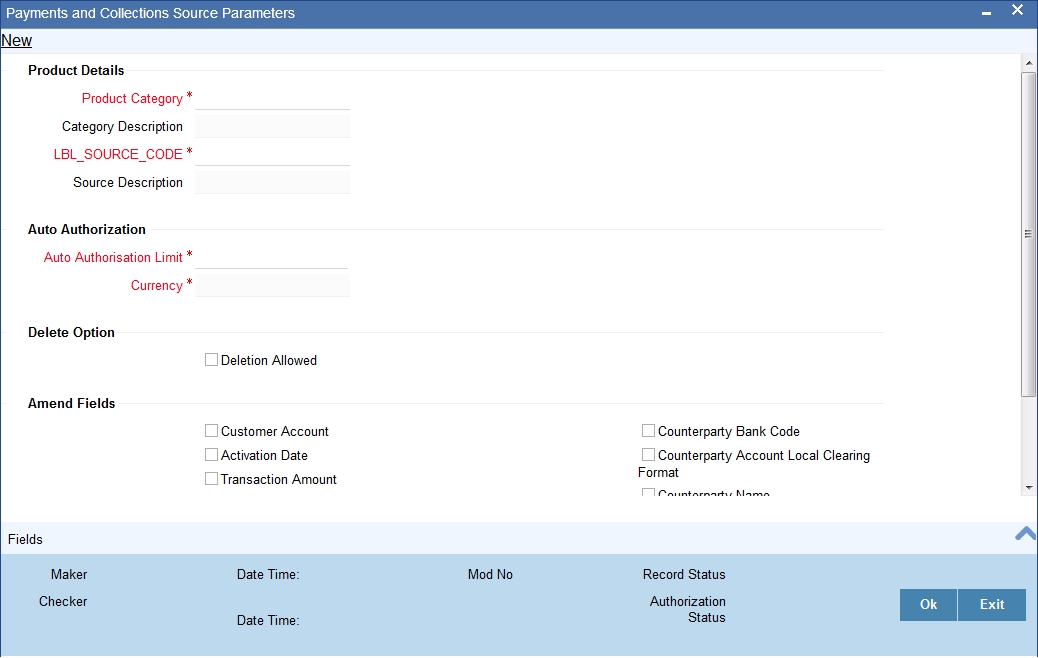
In this screen, you can specify the following details:
Product Details
Product Category
Select the product category from the list of options available.
Source Code
Select the source code from the list of options available.
Auto Authorization
Auto Authorization Limit
If you specify an automatic authorization limit, transactions (belonging to the product category and source combination) involving amounts less than or equal to the limit will be automatically authorized on upload. Transactions exceeding the limit specified have to be authorized manually after upload. The authorization limit is maintained in the local currency of the bank.
If you do not specify an authorization limit, all transactions belonging to the customer, source and product category combination will be automatically authorized on upload.
Deletion Option
Deletion Allowed
Check this box to indicate that the uploaded transaction can be deleted.
Amendable Fields
For a combination of customer, source code and product, you can also specify a list of fields that can be amended on upload. This implies that on upload, the transaction details corresponding to the fields you specify here can be amended before the transaction is processed. You can amend the following fields:
- Customer Account
- Activation Date
- Transaction Amount
- Counterparty Bank Code
- Counterparty Account Local Clearing Format
- Counterparty Name
Days
Message Retention Days
The number of working days (calculated from the initiation date of the transaction) for which the messages need to be retained in the system.
As stated earlier, Oracle FLEXCUBE has the following inbuilt sources, for which you need to maintain the corresponding preferences:
Upload Source |
Product category |
Manual Book |
Incoming Collection Reject Of Outgoing Collection Recall of Outgoing Collection |
Manual Redispatch |
Outgoing Collection |
Manual Approval |
Approval of Incoming Collection (RFD) |
Manual Reject |
Reject Of Incoming Collection |
Manual Recall |
Recall of Incoming Collection (DD) |
3.18 Customer Agreements
This section contains the following topics:
- Section 3.18.1, "Maintaining Customer Agreements"
- Section 3.18.2, "Automatic Cancellation of the Mandate"
3.18.1 Maintaining Customer Agreements
Prior to processing payment and collection transactions, you need to capture the details of the agreement between your bank and the customer involved in the transaction. The agreement details maintained in the ‘Customer Agreement Maintenance’ screen, are for a product, customer and account combination.
You can invoke this screen by typing ‘PCDCLAGT’ in the field at the top right corner of the Application tool bar and clicking the adjoining arrow button.
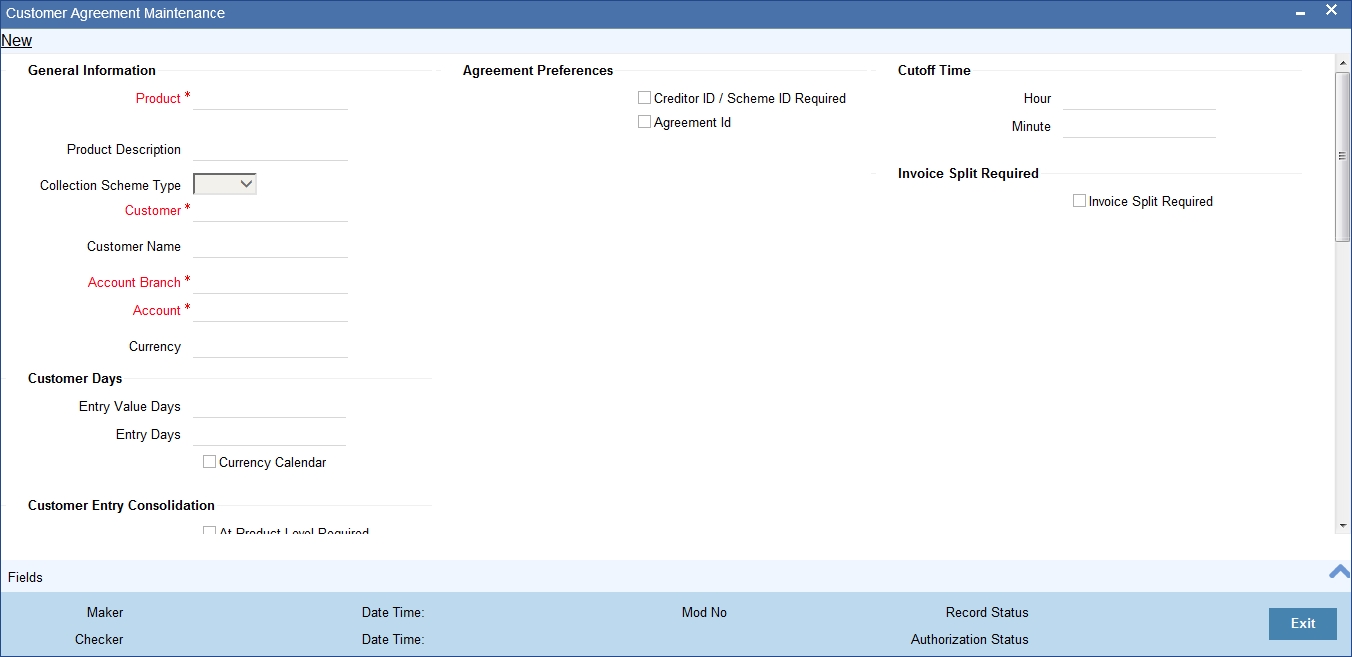
The following agreement details can be maintained:
General Information
Product
You can select the product for which the agreement details are being maintained. The agreement details will be validated only for transactions involving the product selected in this field.
Collection Scheme Type
The value for the field is defaulted from the selected product. The field is used to differentiate 'B2B' scheme customer agreements from 'CORE/COR1' scheme customer agreements.
Customer
In this field, you will select the name of the customer taking part in the agreement.
The ‘ALL’ option is available for all payment product types and for recall and reject collection product types. An incoming/outgoing DD or RFD may be rejected or recalled (applicable only to DDs) for various reasons. Thus, a reject or recall transaction (involving the appropriate reject or recall product) is in effect the child transaction of the corresponding incoming or outgoing (parent) transaction. At the time of processing the parent transactions, the system will perform the necessary validations. When processing a reject or recall (child) transaction, you will need to specify the ‘Original Collection Reference Number’ (of the parent transaction) as mandatory information. The system will use this number to associate the child transaction with the appropriate parent transaction. No further validations will be performed on the child transaction. In other words, the agreement details for a reject or recall transactions will necessarily be the same for all customers and not specific to a customer. Therefore, you can use the ‘ALL’ option in this field.
Branch
Specify the branch that is that is associated with the customer for whom the agreement is being maintained.
Account
You can specify the account for which the agreement details are being maintained. The currency of the selected account will get displayed in the adjacent field, based on the product linked.
In this field also, you can select the ‘ALL’ option for payments, reject and recall products ONLY, for reasons discussed above.
Note
- If you have specified an account that uses an account class that is restricted for debit or credit transactions for the product, an override is sought when you attempt to save the agreement.
- If a branch has been maintained as a customer of your bank, and you are specifying an internal GL of the branch as the account for the agreement, you can choose the CIF ID of such a branch in the Customer field, and the requisite GL in this field. Such agreements would be validated for whenever a direct debit transaction is entered with a GL as the account, and the branch CIF ID as the customer of the transaction.
- You can also select the CL account number as the customer account.
Mandatory Fields
Creditor ID/ Scheme ID Required
Check the box if you have the counterparty account number that is involved in the DD agreement It is mandatory to check this box to process mandate updates/validations.
Agreement Identification
Check the box if you have the DD agreement identification details. It is mandatory to check this box to process mandate updates/validations.
Cut Off Time
Hour/Minutes
You can indicate the cut off time (in hr and min) for the customer and product combination involved in the agreement. The cut off time specified here takes precedence over the one specified at the product level.
During product resolution, based on the cut off time maintained, the system will determine whether the transaction is received before the cut off time. For transactions received after the cut off time, the system will resolve the product for which ‘post cut off’ is allowed. The activation date (the current system date) of such transactions will be moved to the next day.
Transactions with activation dates in the past or future will be resolved as received before the cut off time (pre cut off).
Customer Days
Entry Days
For the transactions processed under a specific product, involving a specific customer, you can specify the manner in which the booking date of the transaction should be arrived at.
Your specification in the Customer Entry Days field will be added to the activation date to arrive at the Customer Entry Date for transactions received before the cutoff time specified for the product.
Entry Value Days
For the transactions processed under a specific product, involving a specific customer, you can specify the manner in which the value date of the accounting entries for customer leg of the transaction should be arrived at.
Your specification in the Pre-cutoff field will be added to the activation date to arrive at the Customer Entry Value Date for transactions received before the cutoff time specified for the product.
Customer Entry Consolidation
You can opt to consolidate the customer leg of transactions involving the customer and product combination.
At Product Level Required
Check the box to if you require transactions to be consolidated at product level.
Consolidation Limit
If the customer leg of the transactions should be consolidated, you can specify a transaction amount limit for the transactions that should be considered for consolidation. Transactions that exceed the limit you specify will not be taken up for consolidation. If you do not specify a consolidation limit, the customer leg of all transactions involving the customer and product will automatically be consolidated.
Note
Note that your specifications in this screen take precedence over any product or account level parameters.
Invoice Split Required
Invoice Split Required
Oracle FLEXCUBE allows you to split a transaction into multiple transactions if the transaction amount exceeds the maximum transaction amount limit specified above. However, you can choose to split the amount for transactions involving an outgoing product.
Direct Debit Agreement Fields
Agreement Required
For the product and customer combination, you have to indicate if a direct debit (DD) agreement is required for processing Incoming and Outgoing transactions. Unlike the customer agreement, which is used to validate the product and customer involved in a transaction, a DD agreement exists between the customer and the counterparty participating in a transaction.
If the selected customer is 'Individual' type then a static data for error code 'PC-SVV-09M' with description as 'Customer type cannot be Individual for B2B Collection Scheme 'will be generated.
Counterparty Bank Code
Check the box if you have the counterparty bank code that is involved in the DD agreement.
Counterparty Account Number
Check the box if you have the counterparty account number that is involved in the DD agreement.
Creditor ID / Scheme ID Required
Check the box if you have the counterparty account number that is involved in the DD agreement .Agreement Identification
Check the box if you have the DD agreement identification details.
Redispatch Details
Redispatch Required
An outgoing DD/RFD may be rejected for various reasons, one such reason being the lack of funds in the customer (debtor’s) account. The debtor’s bank may therefore, reject the Incoming DD/RFD. The creditor’s bank will process the same as a reject of Outgoing DD/RFD. However, the system allows you to redispatch a rejected outgoing DD/RFD. A redispatch initiates a new transaction, which is referred to as the child contract of the original, rejected transaction. On initiation of the child contract, the corresponding parent contract gets closed. The child contract inherits all attributes of the parent contract. The redispatched contract may be rejected by the debtor’s bank again. In such a case the creditor’s bank may redispatch the collection based on the parameters maintained in the agreement. Every redispatch creates a new child contract. The activation date of a rejected redispatch will be used to determine the date of the subsequent redispatch.
Auto Redispatch
You can also select the ‘Auto Redispatch’ option to indicate that the redispatch will be done automatically by the system.
Redispatch Count
For an automatic redispatch, you can specify the number of times a transaction can be redispatched in the ‘Redispatch Count’ field. A redispatch may eventually result in a funds transfer, if sufficient funds are available in the debtor’s account. If funds are not available even after the last redispatch, the system will process it as a reject transaction.
Redispatch Days
For an automatic redispatch, you can indicate the number of working days (redispatch days) to be added to the activation date to arrive at the date on which a transaction is to be redispatched.
Response Details
Auto Response
An RFD transaction, if not approved within the response period is considered closed. Select the ‘Auto Response’ option to indicate that the approval or closure will be handled automatically by the system.
ASCII Handoff Required
For contracts involving the product and customer combination, you can specify whether the contract information is to be written into handoff tables, to be picked up or referenced by the external agency.
Collection stmt Required
Collection statements can be generated for contracts involving the customer and product combination, if indicated in this screen.
Response Advice Required
You can also choose to generate a response advice for Incoming/Outgoing DD and RFD transactions. If selected, one of the following advices will be generated:
- Approval: An advice of approval will be sent to the creditor’s bank if the Incoming DD/RFD is approved by the debtor’s bank.
- Reject: Reject of an Incoming DD/RFD will result in the generation of the reject advice. This will be from the debtor’s bank to the creditor’s bank.
- Closure: A closure advice is sent when the transaction is closed by the system.
If you have opted to generate a response advice, you need to indicate when the advice needs to be sent. You can send the advice on the event date or on the response date.
Basis
Select the basis for response. You can select any one of the following options:
- Response Date
- Event Date
Other Details
Creditor ID/ Scheme ID
For outgoing collections initiated by the customer, you can specify the creditor ID of the customer.
Whenever an outgoing transaction involves an outgoing product and customer combination, the system defaults the creditor ID as mentioned in the customer agreement.
Debtor Category
For outgoing collections initiated by the customer, you can specify the debtor categories with which the customer deals.
Whenever an outgoing transaction involving an outgoing product and customer combination, the system defaults the preferences maintained for the debtor category that has been specified in the customer agreement.
3.18.2 Automatic Cancellation of the Mandate
For a given mandate, if there are no transactions for 36 months, system automatically cancels the mandate so that no further transactions are processed for this mandate. The End of Day batch in Oracle FLEXCUBE, which is run daily as part of EOD, checks the mandate details maintained in ‘Payments & Collections Debtor DD Agreements’ screen. System checks is the latest ‘Effective Date’ for any mandate record is earlier than the current application date by more than 36 months and the ‘Mandate Status’ is not ‘Cancelled’. In this case, ‘Mandate Status’ is updated to ‘Cancelled’ and the ‘Effective Date’ is updated to the current processing date. Also, ‘Amendment reason’ is updated as ‘AUTO CANCEL’.
For a mandate record, if the ‘Effective Date’ is either not earlier than 36 months or the ‘Mandate Status’ is maintained as ‘AUTO CANCEL’, then this record is skipped by the system.
For more details on End of Day batch process, refer the ‘AEOD’ user manual.
Note
The parameter ‘MANDATE AUTO CANCEL MONTHS’ has the configurable value of 36 and is factory shipped.
3.19 Creditors Maintenance
This section contains the following topics:
3.19.1 Maintaining the Creditors Details
You can maintain the creditor identification like the Creditor ID and description for creditors with whom your bank transacts. These details are maintained in the ‘Payments and Collections Creditor ID Maintenance’ screen.
You can invoke this screen by typing ‘PCDCREID’ in the field at the top right corner of the Application tool bar and clicking the adjoining arrow button.
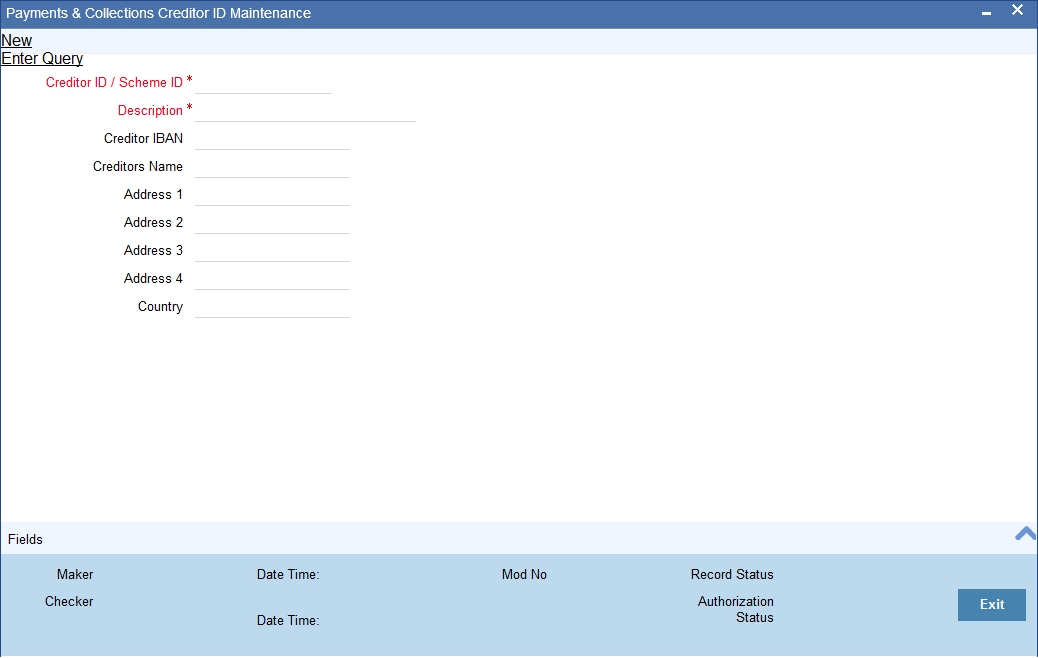
Creditor Id/ Scheme ID
Specify the Creditor Scheme ID for SEPA scheme and Creditor ID for Non-SEPA scheme.
For SEPA scheme the value for Creditor ID/ Scheme ID can be provided as below:
- Positions 1 and 2 contain the ISO country code
- Position 3 and 4 contain the check digits.
- Positions 5 to 7 contain the creditor business code. When the creditor business code is not used, then value is set to ‘ZZZ’. The creditor business code is not considered while checking for existence of the agreement.
Description
Enter a description for the creditor id that you have entered.
Creditor IBAN
Specify the International Bank Account Number of the Creditor.
Creditors Name
Specify the creditor’s name.
Address 1, 2, 3 and 4
Specify the complete address of the Creditor.
Country
Select the country from the adjoining option list.
3.20 DD Agreement Details Maintenance for Creditors
This section contains the following topics:
3.20.1 Maintaining DD Agreement Details for Creditors
This agreement is maintained by your bank on behalf of customers who participate as creditors in a direct debit transaction. The details are maintained in the ‘Creditor Direct Debit Agreement Maintenance’ screen.
You can invoke this screen by typing ‘PCDCRAGT’ in the field at the top right corner of the Application tool bar and clicking the adjoining arrow button.

The details maintained here will be used to validate outgoing transactions (initiated by the creditor).
Note
If a branch has been maintained as a customer of your bank, and you are specifying an internal GL of the branch as the account for the agreement, you can choose the CIF ID of such a branch in the Customer field, and the requisite GL in this field. Such agreements would be validated for whenever a direct debit transaction is entered with a GL as the account, and the branch CIF ID as the customer of the transaction.
Product Code
Select the product code from the list option provided. This is applicable only if the corresponding customer agreements exist and you have indicated that a DD agreement is required for the respective customer agreements.
Product Description
Give a brief description on the product.
Customer No
Specify the customer if the corresponding customer agreements exist and you have indicated that a DD agreement is required for the respective customer agreements.
Customer Account Branch
Specify the branch if the corresponding customer agreements exist and you have indicated that a DD agreement is required for the respective customer agreements.
Account No
Specify the account if the corresponding customer agreements exist and you have indicated that a DD agreement is required for the respective customer agreements.
You can also select CL account number as the customer account.
Service Level Code
The system displays the value of 'Service Level Code' maintained at product level, once you select the product code.
Collection Scheme Type
The value for the field is defaulted from the selected product. The value is specified in Payments and collections product definition screen (PCDPRMNT).
The field is used to differentiate 'B2B' scheme mandates from 'CORE/COR1' scheme mandates.
Creditor ID / Scheme ID
Specify the value for the collection scheme types CORE, COR1 and B2B.The field value is validated against the format specified for 'Creditor ID/Scheme ID' field in 'Payments and Collections Creditors details maintenance (PCDCREID).While processing contracts for collection transaction, the system will validate Creditor Scheme Identifier for the space between the positions 5 and 7 in Creditor Scheme Identifier.
If there are spaces, then the system displays an error during manual contract creation in 'Payment & Collection Transaction Input'. Then the incoming messages will be moved to Transaction Repair queue. Positions 5 to 7 contain the creditor business code. When the creditor business code is not used, then value is set to 'ZZZ'. The creditor business code is not considered while checking for existence of the agreement.
Agreement Identification
Specify a unique ID to identify the agreement between the creditor and the debtor participating in a transaction.
Creditor Reference Code
Specify creditor's reference code here, the field is optional. The maximum length of the value in the field is 35 characters.
Counterparty Details
Couterparty Account Number
Specify the counterparty account number.
Counterparty Bank Code
Select the counterparty bank code from the adjoining option list.
Bank Name
Specify the name of the bank.
Date of Signature
Specify the date of signature from the adjoining calendar.
Counterparty Name
Specify the counterparty name.
Address 1, 2, 3 and 4
Specify the complete address of the counterparty.
Country
Specify the country from the adjoining option list.
Transaction Details
Agreement Cancellation Charge
To indicate applicability of charges or fees levied on setting up and / or amending direct debit creditor or debtor agreements, you can enable the Charges Applicable option in the PC Creditor Agreements screen.
The applicable charges are computed through the Interest and Charges (IC) module. For details, refer the Interest and Charges module user manual.
The preferences for product debtor categories are discussed in a later section of this chapter.
Payment Details 1, Payment Details 2, Payment Details 3 and Payment Details 4
Specify unstructured remittance information. The fields hold free format text of 35 characters each
Purpose of Collection
Specify the need of the collection transaction here. The field is optional.
Charge Reference Number
Specify the charge reference number in this field.
Transaction Type
Select the debit transaction type from the drop-down list. The options are:
- One-off
- Recurrent
Validity Details
Expiry Date
Specify the end date for a particular Creditor DD agreement here. On the maintained date, agreement status will get updated as 'Expired' as part of the existing batch process.
Agreement Status
Specify the value for the field. The value determines the status of the mandate at any point of time.
Options available for this field:
- Active - The agreement is available for usage.
- Used - One-Off transaction sent.
- Auto Cancelled - Agreement auto cancelled because of non-usage for specified period.
- Final - FRST, RCUR and FNAL transactions sent.
- Customer Cancelled - Agreement closed by Creditor.
- Expired - Agreement has crossed expiry date.
- Amended - Unique identification of an agreement changes.
Agreements with agreement status as 'Active' and record status as 'Open' is considered as valid agreement.
Modify operation changes the agreement status from 'Active' to 'Customer Cancelled' when creditor is initiating the closure of agreement.
Agreements with status as 'Used/Auto Cancelled/Final/Expired/Amended' cannot be changed back to 'Active'. There are validations to restrict this status change.
'Used/Auto Cancelled/Final/Expired/Amended' agreements can be closed and these agreements cannot be re-opened.
'Customer Cancelled' agreements can be closed and can be re-opened.
The agreement status is 'Active' for future effective dated agreements.
If a Final collection is rejected/cancelled/returned/reversed (i.e. any R transaction on a FNAL collection) then the agreement status will be changed back from 'Final' to 'Active'.
However if a Used collection is rejected/cancelled/returned/reversed (i.e. any R transaction on a OOFF collection) then the agreement status will not be changed back to Active but remain as Used.
For Outgoing Collection transactions, there will be a check for the existence of Creditor Mandate for the 'B2B' scheme if 'DD Agreement Required' is checked at customer agreement level. If the creditor mandate for the B2B scheme is not found, the outgoing collection will not be saved.
Effective Date
Specify the date from which the agreement is valid or invalid.
At the Customer Agreement level, you can choose the Agreement ID, Counterparty Bank and / or the Counterparty Account fields to validate the DD agreement details.
Amendment Reason
Specify the reason for which the mandate details are amended.
Effective date
Effective Date
Specify the date from which the agreement is valid or invalid.
Note
At the Customer Agreement level, you can choose the Agreement ID, Counterparty Bank and / or the Counterparty Account fields to validate the DD agreement details.
Amendment Reason
Specify the reason for which the mandate details are amended.
3.21 DD Agreement Details Maintenance for Debtors
This section contains the following topics:
3.21.1 Invoking the Debtor Direct Debit Agreement Maintenance
This agreement is maintained by your bank on behalf of customers who participate as debtors in a direct debit transaction. The details are maintained in the ‘Debtor DD Agreements’ screen.You can invoke this screen by typing ‘PCDDRAGT’ in the field at the top right corner of the Application tool bar and clicking the adjoining arrow button.
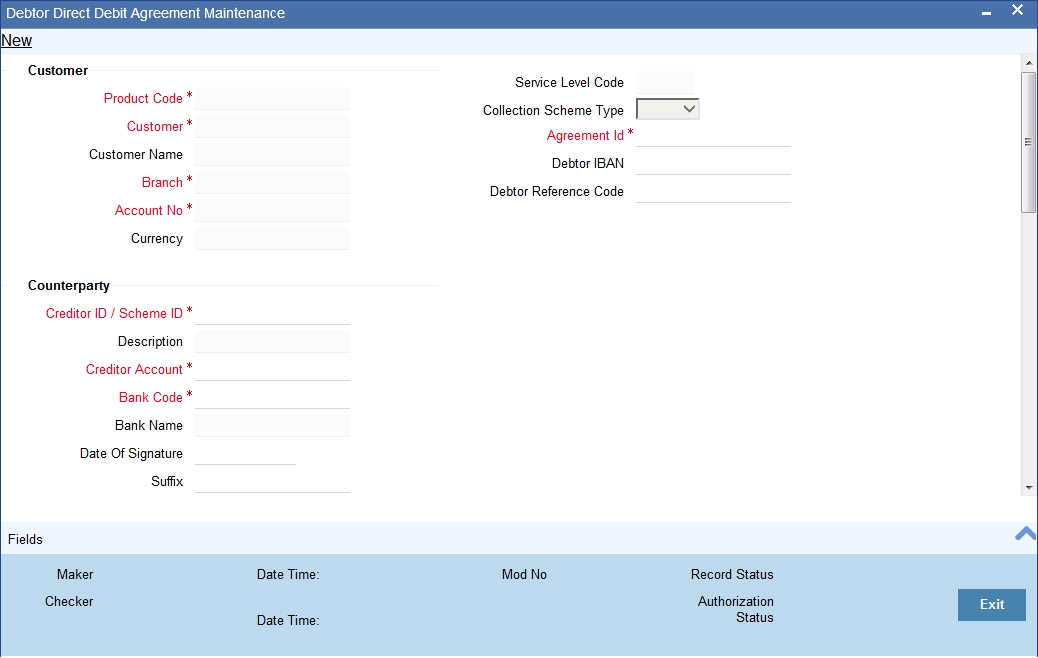
The details maintained here will be used to validate incoming transactions (initiated by the creditor). The agreement is maintained for a Product, Customer and Customer Account combination only if the corresponding customer agreements exist and you have indicated that a DD agreement is required for the respective customer agreements.
Customer
Product Code
Select the product from the list option provided. This is applicable only if the corresponding customer agreements exist and you have indicated that a DD agreement is required for the respective customer agreements.
Customer
Specify the customer if the corresponding customer agreements exist and you have indicated that a DD agreement is required for the respective customer agreements.
Branch
Specify the branch if the if the corresponding customer agreements exist and you have indicated that a DD agreement is required for the respective customer agreements.Account No
Specify the account if the corresponding customer agreements exist and you have indicated that a DD agreement is required for the respective customer agreements.
Service Level Code
The system displays the value of 'Service Level Code' maintained at product level, once you select the product code.
Collection Scheme Type
The value for the field is defaulted from the selected product. The value is initially Specified in Payments and collections product definition screen (PCDPRMNT).
The field is used to differentiate 'B2B' scheme mandates from 'CORE/COR1' scheme mandates.
Agreement Id
Specify a unique ID to identify the agreement between the creditor and the debtor participating in a transaction.
Debtor IBAN
Specify International Bank Account Number of Creditor from the adjoining list of values (displaying IBAN number).If the number is not available in the list, and then insert the number in the field.
Debtor Reference Code
Specify the reference of the debtor of the mandate as the value for the field. The Maximum length of the field is 35 characters.The field is optional.
Charges Applicable
To indicate applicability of charges or fees levied on setting up and / or amending direct debit creditor or debtor agreements, you can enable the Charges Applicable option in the PC Debtor DD Agreements screen.
The applicable charges are computed through the Interest and Charges (IC) module. For details, refer the Interest and Charges module user manual.
Counterparty
Creditor ID / Scheme ID
Specify a value from a list of values. The list of values fetches the creditor ID's from 'Payments and Collections Creditor Details Maintenance'.
On selecting Creditor ID from list of values, FLEXCUBE defaults the address details in the corresponding fields.
Specify the value for the collection scheme types CORE, COR1 and B2B.The field value is validated against the format specified for 'Creditor ID/Scheme ID' field in 'Payments and Collections Creditors details maintenance (PCDCREID).
If the value is not available in the list of values. During save of the agreement, FLEXCUBE maintains a record for the entered Creditor ID in 'Payments and Collections Creditor Details Maintenance'.
While processing contracts for collection transaction, the system will validate Creditor Scheme Identifier for the space between the positions 5 and 7 in Creditor Scheme Identifier.
If there are spaces, then the system displays an error during manual contract creation in 'Payment & Collection Transaction Input'. Then the incoming messages will be moved to Transaction Repair queue. Positions 5 to 7 contain the creditor business code. When the creditor business code is not used, then value is set to 'ZZZ'. The creditor business code is not considered while checking for existence of the agreement.
Description
The system displays a description of the creditor identification specified.
Creditor Account
Specify the creditor account in Local Clearing Format (LCF). Banks within the same local clearing network will be assigned unique account numbers based on the local clearing format specific to the network.
Bank code
Select the bank of the counterparty (creditor).
Bank Name
Specify the name of the counterparty bank.
Date of Signature
Specify the date of signature from the adjoining calendar.
Suffix
Specify the suffix for the creditor.
Debtor IBAN
Specify International Bank Account Number of Creditor from the adjoining list of values (displaying IBAN number).If the number is not available in the list, and then insert the number in the field.
Direct debit Reference No
Specify the direct debit reference number.
Maximum Amount per Transaction
Specify maximum transaction amount allowed per incoming collection in this field.The amount is in Debtor's customer account's currency.The default value is null.
Maximum Amount per Calendar Year
Specify maximum sum of incoming collection transactions, allowed against particular mandate per calendar year as a value for the field.
Maximum value for this field is 999999999999999.99.The amount is in Debtor's customer account's currency.The field is optional and has a default value as null.
Utilized Amount for Calendar Year
The field displays sum of successful incoming collection transactions amount against particular mandate at any point of the time within a calendar year.
Number of Transactions per Calendar Year
Specify maximum number of incoming collection transactions allowed against particular mandate per calendar year.
Maximum value for this field is 999.
The field is optional and has a default value as null.
Utilized Transactions for Calendar Year
The field displays number of successful incoming collection transactions against particular mandate at any point of the time within a calendar year.
Address 1 2 3 and 4
Specify the counterparty address.
Agreement Cancellation Charge
To indicate applicability of charges or fees levied on setting up and / or amending direct debit creditor or debtor agreements, you can enable the Charges Applicable option in the PC Debtor DD Agreements screen.
The applicable charges are computed through the Interest and Charges (IC) module. For details, refer the Interest and Charges module user manual.
System applies mandate cancellation charge only if 'Charge Applicable' is checked.
For more details on mandate cancellation charges, refer section 'Maintaining Mandate Cancellation Charge Details' later in this chapter.
Charge Reference Number
System displays a reference number for the mandate cancellation charge.
For more details on mandate cancellation charges, refer section 'Maintaining Mandate Cancellation Charge Details' later in this chapter.
Transaction Type
Specify the value from the adjoining drop-down list.
The list has following options:
- One-off
- Recurrent
Maximum length for this field is 9. Transaction type is mandatory if the collection scheme type is 'B2B'.
Payment Details 1, Payment Details 2, Payment Details 3 and Payment Details 4
Specify unstructured remittance information. The fields hold free format text of 35 characters each.
Purpose of Collection
Specify the need of the collection transaction here. The field is optional.
Validity Details
Expiry Date
Specify the end date for a particular Creditor DD agreement here. On the maintained date, agreement status will get updated as 'Expired' as part of the existing batch process.
Agreement Status
Specify the value for the field. The value determines the status of the mandate at any point of time.
Options available for this field:
- Active - The agreement is available for usage.
- Used - One-Off transaction sent.
- Auto Cancelled - Agreement auto cancelled because of non-usage for specified period.
- Final - FRST, RCUR and FNAL transactions sent.
- Customer Cancelled - Agreement closed by Creditor.
- Expired - Agreement has crossed expiry date.
- Amended - Unique identification of an agreement changes.
Agreements with agreement status as 'Active' and record status as 'Open' is considered as valid agreement.
Modify operation changes the agreement status from 'Active' to 'Customer Cancelled' when creditor is initiating the closure of agreement.
Agreements with status as 'Used/Auto Cancelled/Final/Expired/Amended' cannot be changed back to 'Active'. There are validations to restrict this status change.
'Used/Auto Cancelled/Final/Expired/Amended' agreements can be closed and these agreements cannot be re-opened.
'Customer Cancelled' agreements can be closed and can be re-opened.
The agreement status is 'Active' for future effective dated agreements.
If a Final collection is rejected/cancelled/returned/reversed (i.e. any R transaction on a FNAL collection) then the agreement status will be changed back from 'Final' to 'Active'.
However if a Used collection is rejected/cancelled/returned/reversed (i.e. any R transaction on an OOFF collection) then the agreement status will not be changed back to Active but remain as Used.
For Outgoing Collection transactions, there will be a check for the existence of Creditor Mandate for the 'B2B' scheme if 'DD Agreement Required' is checked at customer agreement level. If the creditor mandate for the B2B scheme is not found, the outgoing collection will not be saved.
Effective Date
Specify the date from which the agreement is valid or invalid.
- The effective date from which the debtor agreement becomes valid
Note
At the Customer Agreement level, you can choose the Agreement ID, Counterparty Bank and / or the Counterparty Account fields to validate the DD agreement details.
3.22 Debtor Direct Debit Instructions Maintenance
This section contains the following topics:
- Section 3.22.1, "Maintaining the Debtor Direct Debit Instructions"
- Section 3.22.2, "Processing of Incoming Collection Transaction for a Mandate"
- Section 3.22.3, "Processing Based on Sequence Type"
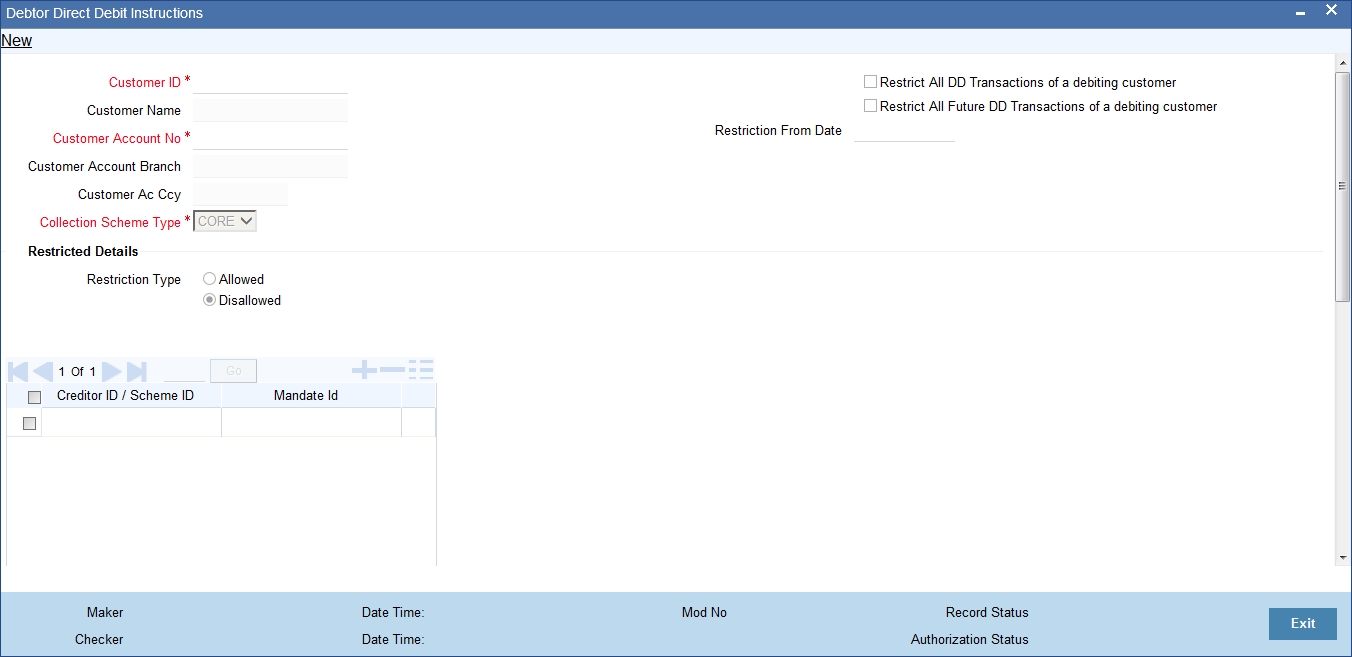
3.22.1 Maintaining the Debtor Direct Debit Instructions
You can maintain details of debtor direct debt instructions in 'Debtor Direct Debit Instructions' screen. You can invoke this screen by typing 'PCDIDRES' in the field at the top right corner of the Application tool bar and click on the adjoining arrow button.
The following details are captured in the screen:
Customer Id
Select the customer ID from the adjoining option list
Customer Name
System defaults the Customer name based on the Customer ID selected.
Customer Account No
Specify the value for the field. It helps in identifying a particular instruction.
List of values will be attached to display the list of customer accounts. List of values will also have 'ALL' value.
The Debtor DD instruction can be set up at a customer level or at a customer account level. If specified at a customer level then the customer account and Branch should be with value 'ALL'.
Customer Account Branch
The field displays customer account branch. The value for the field gets populated on selecting Customer Account.
Collection Scheme Type
Specify the value for the field from the adjoining drop-down list, to distinguish the Debtor restriction instructions across collection scheme types.
The following options are available for this field:
- CORE
- COR1
- B2B
- ALL
The field is mandatory.
Customer Account Currency:
The field displays customer account currency. The value for the field gets populated on selecting Customer Account.
Restrict All DD Transactions
Check this box to reject all Incoming DD transactions for the selected customer
Restrict All Future DD Transactions
Check this box to reject all Incoming future DD transactions for the selected customer
Restriction from Date
Select the date from which the future DD transactions to be restricted using the adjoining calendar. You need to enter the date only if you have selected the option 'Restrict All Future DD Transactions'.
Restrict All DD Transactions of Ordering Customer
Restriction Type
A list of creditors are either allowed or restricted from initiating the collection transactions.
The restriction types are:
- Allowed - > Represents the approved (White Listed) Creditors.
- Disallowed - > Represents the disapproved (Black listed) Creditors.
The parameters that are used to identify the incoming collection transaction and restrict or allow collection from processing are:
- Creditor ID/Scheme ID
- Debtor Mandate ID
- Creditor IBAN
The default value is 'Disallowed'.
Creditor ID / Scheme ID
The field is optional and accepts multiple values.
Specify the Creditor ID for NON-SEPA scheme and Creditor Scheme ID for SEPA scheme here.
The value for the field can be specified from a list of values. The list of values fetches the creditor ID's from 'Payments and Collections Creditor Details Maintenance'.
If the value is not available in the list of values. During save of instructions, Oracle FLEXCUBE maintains a record for the entered Creditor ID in 'Payments and Collections Creditor Details Maintenance' with Creditor IBAN.
Mandate ID
Specify Creditor's agreement Id of a selected customer from the list of values. If the value is not available in the list, then enter the value in the field.
All the attributes, Creditor ID/Scheme ID, Creditor IBAN and Mandate ID are maintained.
If Mandate ID is entered then it is mandatory to input Creditor ID / Scheme ID for a record.
Creditor IBAN
Specify international bank account number of creditor here, the field is optional and accepts multiple values.
Document Ref No
Select the document Reference Number
Suffix
Specify the suffix
Reference
Specify the reference identification.
3.22.2 Processing of Incoming Collection Transaction for a Mandate
Following are the fields that are inserted/ updated with the mandate data during processing of Incoming Collection:
Sl.No. |
Field in 'PC - Debtor DD Agreement |
Value |
1 |
Product |
PC Product |
2 |
Customer |
Customer No of account |
3 |
Customer Account |
Customer Account of Debtor IBAN |
4 |
Creditor Scheme ID |
Creditor Scheme Identification |
5 |
Agreement ID |
Mandate Identification |
6 |
Bank Code |
Creditor Agent |
7 |
Name |
Creditor Name |
8 |
Effective Date |
Processing date |
9 |
Amendment Reason |
Internal values (explained below) |
10 |
Mandate Status |
Internal values (explained below) |
The mandate is inserted whenever the sequence type is FRST/ OOFF and is updated if the sequence type is RCUR, if required. For sequence type FNAL, the 'Mandate Status' is updated to 'Final'.
For more details of processing of sequence types, refer section 'Processing Based on Sequence Type' explained later in this chapter.
Note
Before performing insert/ update of the mandate details, based on the sequence type of the message, system performs validations to check if the mandate exists.
During processing of Incoming Collection contracts, there could be updates to the mandate details. Based on the sequence type of the mandate present in the Incoming Collection, the updates can either be update of the existing mandate details or insertion of mandate details.
The different types of transactions for which the mandates are validated and the mandate details are inserted/ updated in the Payments & Collections Debtor DD Agreement Maintenance' screen are given below:
Sl.No. |
Transaction Type |
Validation |
Insert/Update |
1 |
Incoming Collection |
Yes |
Yes |
2 |
Outgoing Collection |
No |
No |
3 |
Reject of Incoming Collection |
No |
No |
4 |
Reject of Outgoing Collection |
No |
No |
5 |
Cancellation of Incoming Collection |
No |
No |
6 |
Cancellation of Outgoing Collection |
No |
No |
7 |
RSF rejects for Incoming Collection |
No |
No |
8 |
RSF rejects for Outgoing Collection |
No |
No |
9 |
Reversal of Incoming Collection |
No |
No |
10 |
Reversal of Outgoing Collection |
No |
No |
11 |
Return of Incoming Collection |
No |
No |
12 |
Return of Outgoing Collection |
No |
No |
13 |
Refund of Incoming Collection |
No |
No |
14 |
Refund of Outgoing Collection |
No |
No |
15 |
Return of Reversal of Incoming |
No |
No |
16 |
Return of Reversal of Outgoing |
No |
No |
3.22.3 Processing Based on Sequence Type
The different sequence type values are OOFF, FRST, RCUR and FNAL.
During transaction processing, system checks the following parameters to verify if the mandate details are already maintained:
- Product
- Customer Number
- Customer Account
- Agreement ID (mandate identification)
- Creditor Scheme ID
While processing Incoming pacs.003, the different sequence types and the amendment indicator parameters result into possible scenarios with relation to the mandate details, as explained below.
3.22.3.1 Transaction with Sequence Type 'OOFF'
When an Incoming Collection is processed with the sequence type 'OOFF', system checks whether the mandate details are maintained in the 'Payments & Collections Debtor DD Agreements' screen. If the mandate details are not maintained, system inserts a record into the mandate details and updates 'Mandate Status' to 'Used'. In this case, the mandate details are obtained from the transaction details.
If a mandate record with the combination Product Code, Customer, Account, Agreement Id and Creditor Scheme Id exists along with any 'Mandate Status', then, system generates pacs.002 reject message which is sent to SIBS; 'Payment Status' is updated as 'Rejected'.
If Incoming Collection is processed successfully, then 'Amendment Reason' is updated with the value 'PACS003' and the 'Mandate Status' is updated as 'Used'.
During subsequent processing of the same Incoming Collection, if the Incoming Collection is rejected due to reasons other than mandate validation failure, the status of the mandate record will remain unchanged.
3.22.3.2 Transaction with Sequence Type 'FRST'
When an Incoming Collection is processed with the sequence type 'FRST', system checks whether the mandate details are maintained in the 'Payments & Collections Debtor DD Agreements' screen. If the mandate details are not maintained, system inserts a record into the mandate details and updates 'Mandate Status' to 'Active' and 'Amendment Reason' to 'PACS003'.
If a mandate record with the combination Product Code, Customer, Account, Agreement Id and Creditor Scheme Id exists along with any 'Mandate Status', then, system generates pacs.002 reject message which is sent to SIBS; 'Payment Status' is updated as 'Rejected'.
Processing the Incoming Collection with sequence type 'FRST' and with no amendment details is same as processing a transaction with 'Amendment Indicator' set to 'TRUE'. This is because amendment is only in the debtor agent.
During subsequent processing of the same Incoming Collection, if the Incoming Collection is rejected due to reasons other than mandate validation failure, the status of the mandate record will remain unchanged.
3.22.3.3 Transaction with Sequence Type 'RCUR' and with No Amendment Details
When an Incoming Collection is processed with the sequence type 'RCUR' and with no amendment details, the mandate details are not inserted/ updated.
System checks whether the mandate details are maintained in the 'Payments & Collections Debtor DD Agreements' screen. If the mandate details are maintained and 'Mandate Status' is 'Active', then, the Incoming Collection is processed further and 'Amendment Reason' is updated to 'PACS003'.
3.22.3.4 Transaction with Sequence Type 'RCUR' and with Amendment Details
When an Incoming Collection is processed with the sequence type 'RCUR', system checks whether the mandate details are maintained in the 'Payments & Collections Debtor DD Agreements' screen. If mandate details are not maintained, then, system generates pacs.002 reject message which is sent to Creditor.
For existing mandate details, if 'Mandate Status' is set as 'Cancelled', then, system generates pacs.002 reject message which is sent to Creditor. However, if 'Mandate Status' is set as 'Active', then existing mandate status is updated as used and a new effective date is inserted with 'Mandate Status' as 'Active'.
3.22.3.5 Transaction with Sequence Type 'FNAL'
When an Incoming Collection is processed with the sequence type 'FNAL', system checks whether the mandate details are maintained in the 'Payments & Collections Debtor DD Agreements' screen. If mandate details are maintained with 'Mandate Status' as 'Active', then the 'Mandate Status' is updated to 'Final' and 'Amendment reason' is updated to 'PACS003'. Also, the Incoming Collection is processed further.
For the different transaction types, the action taken as part of mandate maintenance, based on the status of the existing mandate, is summarized below:
Sl.No |
Transaction |
Existing Mandate Status |
Action |
New mandate Status |
1 |
Incoming pacs.003 with OOFF |
No mandate |
Mandate details would be inserted. |
Used |
Active Used Final Cancelled |
Incoming Collection would be rejected |
No Change |
||
2 |
Incoming pacs.003 with FRST |
No mandate |
Mandate details would be inserted. |
Active |
Active Used Final Cancelled |
Incoming Collection would be rejected |
No Change |
||
3 |
Incoming pacs.003 with RCUR and no amendment details |
Active |
Incoming Collection would be processed |
No Change |
No mandate Used Final Cancelled
|
Incoming Collection would be rejected |
No Change |
||
4 |
Incoming pacs.003 with RCUR and amendment details present |
Old mandate details status - Cancelled |
Incoming Collection would be rejected |
No Change |
Mandate Status is active |
Existing Mandate status would be updated. |
Used |
||
New Mandate details would be inserted. |
Active |
|||
5 |
Incoming pacs.003 with FNAL |
Active |
Mandate Status would be updated |
Final |
No mandate Used Final Cancelled |
Incoming Collection would be rejected |
No change |
3.23 Mandate Cancellation Charge Details
This section contains the following topics:
- Section 3.23.1, "Maintaining Mandate Cancellation Charges"
- Section 3.23.2, "Processing Mandate Cancellation"
- Section 3.23.3, "Viewing Mandate Cancellation Charges Summary Details"
3.23.1 Maintaining Mandate Cancellation Charges
In Oracle FLEXCUBE, you can capture the details related to handling of charges for the mandate cancellation in the 'Mandate Cancellation Charges Maintenance' screen.
You can invoke this screen by typing 'PCDMNDCN' in the field at the top-right corner of the Application tool bar and clicking the adjoining arrow button.
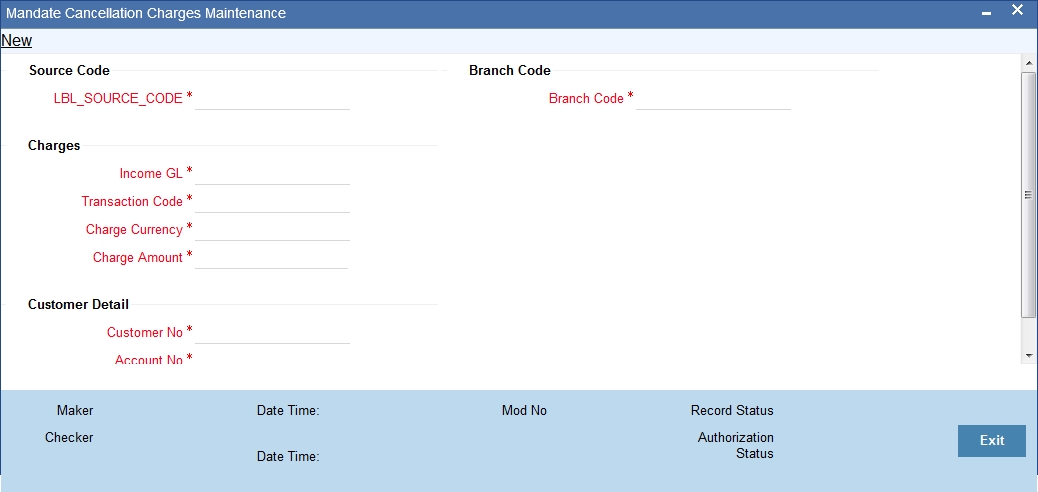
Specify the following mandate cancellation charge details:
Source Code
Source Code
Specify the source code for which the mandate cancellation charges are applicable. The adjoining option list displays all the valid source codes maintained in the system. You can choose the appropriate one.
Here, you can maintain mandate cancellation charges applicable to specific external system/channel. If the cancellation is from Oracle FLEXCUBE, specify the source code as 'FLEXCUBE'.
Branch Code
Branch Code
Specify the branch code for which mandate cancellation charges are applicable. The adjoining option list displays all the valid branch codes maintained in the system. You can choose the appropriate one.
You can maintain mandate cancellation charges for a Branch Code-Source Code combination.
Charges
Income GL
Specify the income GL into which the charges should be credited. The adjoining option list displays all the valid income GL's maintained in the system. You can choose the appropriate one.
Transaction Code
Specify the transaction code for passing accounting entries. The adjoining option list displays all the valid transaction codes maintained in the system. You can choose the appropriate one.
Charge Currency
Specify the currency of the charge amount. The adjoining option list displays all a list of currencies maintained in the system. You can choose the appropriate one.
Charge Amount
Specify the charge amount that should be collected from the customer when a mandate is cancelled. The charge amount should be a flat amount and cannot be a percentage or tier/slab.
You can configure different charge amounts for every 'Source Code', 'Branch Code', 'Customer No', and 'Account No' combination.
Customer Detail
Account No
Specify the account number for which the mandate cancellation charges should be maintained. The adjoining option list displays all the valid account numbers maintained in the system. You can choose the appropriate one.
Customer No
Specify the customer id for which the mandate cancellation charges should be maintained. The adjoining option list displays all the valid customer id's maintained in the system. You can choose the appropriate one.
3.23.2 Processing Mandate Cancellation
You can initiate mandate cancellation from the 'Payments & Collections Debtor DD Agreement Maintenance' screen. To cancel the mandate, click the 'Close' button on the Application tool bar. System will mark the 'Payments & Collections Debtor DD Agreement Maintenance' screen as closed and will trigger the 'CLIQ' event. The reference number used for posting the accounting entry related to this charge uses the process code 'ZMND' and this reference number will be updated as 'Charge Reference Number' in the 'Payments & Collections Debtor DD Agreement Maintenance' screen.
Example
Assume the following charges for mandate cancellation:
Sl.No. |
Source |
Branch |
Txn Code |
Income GL |
Charge CCY |
Charge Amt |
1 |
Channel1 |
GTS |
023 |
32005510 |
EUR |
5 |
2 |
Channel2 |
GTS |
023 |
32005510 |
EUR |
7 |
Assume account A1 is in EUR currency and account A2 is in USD currency.
Let the number of mandate cancellations on a given day be as follows:
Sl.No. |
Source |
Branch |
Account No |
1 |
Channel 1 |
GTS |
A1 |
2 |
Channel 1 |
GTS |
A1 |
3 |
Channel 1 |
GTS |
A2 |
4 |
Channel 1 |
GTS |
A1 |
5 |
Channel 1 |
GTS |
A1 |
6 |
Channel 2 |
GTS |
A2 |
7 |
Channel 2 |
GTS |
A1 |
8 |
Channel 2 |
GTS |
A2 |
Assume the following exchange rate between USD and EUR:
Ccy1 |
Ccy2 |
Buy |
Mid |
Sell |
EUR |
USD |
1.45 |
1.4 |
1.35 |
In the above scenario, the accounting entries posted on the day by the mandate charge batch will be as follows:
Sl.No. |
Trn Ref No |
Account |
Debit/Credit |
Fcy Amount |
Ex Rate |
LCY Amt |
Txn Code |
1 |
GTSZMND080400001 |
A1 |
Debit |
|
|
5.00 |
023 |
|
GTSZMND080400001 |
32005510 |
Credit |
|
|
5.00 |
023 |
2 |
GTSZMND080400002 |
A1 |
Debit |
|
|
5.00 |
023 |
|
GTSZMND080400002 |
32005510 |
Credit |
|
|
5.00 |
023 |
3 |
GTSZMND080400003 |
A1 |
Debit |
|
|
5.00 |
023 |
|
GTSZMND080400003 |
32005510 |
Credit |
|
|
5.00 |
023 |
4 |
GTSZMND080400004 |
A1 |
Debit |
|
|
7.00 |
023 |
|
GTSZMND080400004 |
32005510 |
Credit |
|
|
7.00 |
023 |
5 |
GTSZMND080400003 |
A2 |
Debit |
7.25 |
1.35 |
5.00 |
023 |
|
GTSZMND080400003 |
32005510 |
Credit |
|
|
|
|
6 |
GTSZMND080400004 |
A2 |
Debit |
10.15 |
1.35 |
7.00 |
023 |
|
GTSZMND080400004 |
32005510 |
Credit |
|
|
7.00 |
023 |
3.23.3 Viewing Mandate Cancellation Charges Summary Details
You can view a summary of the mandate cancellation charges in the 'Mandate Cancellation Charges Summary' screen. You can invoke this screen by typing 'PCSMNDCN' in the field at the top-right corner of the Application tool bar and clicking the adjoining arrow button.
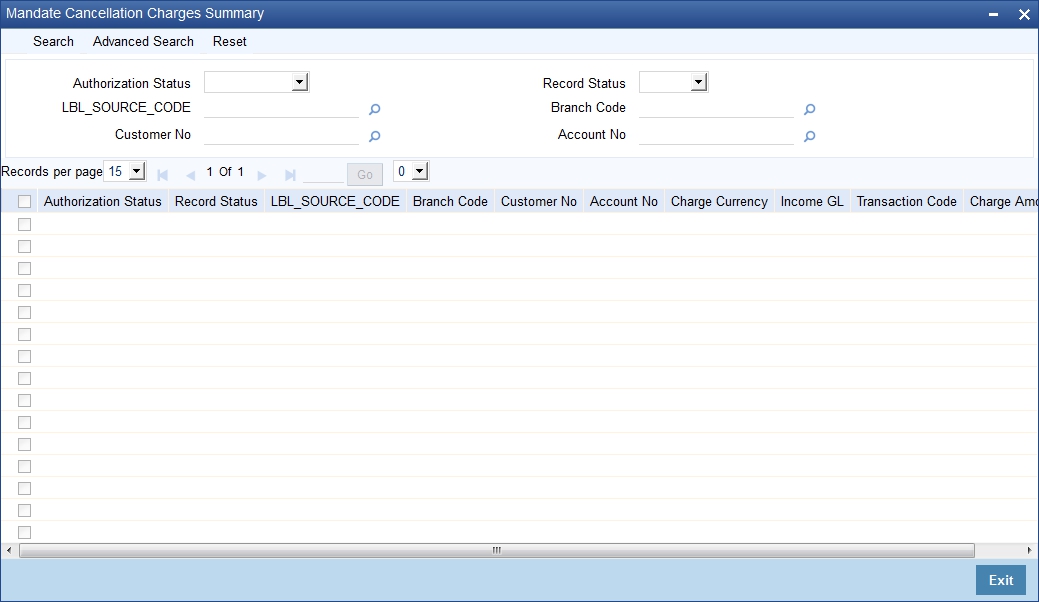
In this screen, you can view the following details:
- Source Code
- Branch Code
- Customer Id
- Customer No
- Transaction Code
- Income GL
- Charge Amount
- Charge Currency
You can view specific details of mandate cancellation charges by specifying values for the following parameters:
- Source Code
- Branch Code
- Customer Id
- Customer Account
3.24 Customer Stations
This section contains the following topics:
3.24.1 Invoking the Payments and Collection Customer Station Maintenance Screen
You can maintain customer station details in the ‘Payments & Collection Customer Station Maintenance’ screen.
You can invoke this screen by typing ‘PCDCUSST’ in the field at the top right corner of the Application tool bar and clicking the adjoining arrow button.
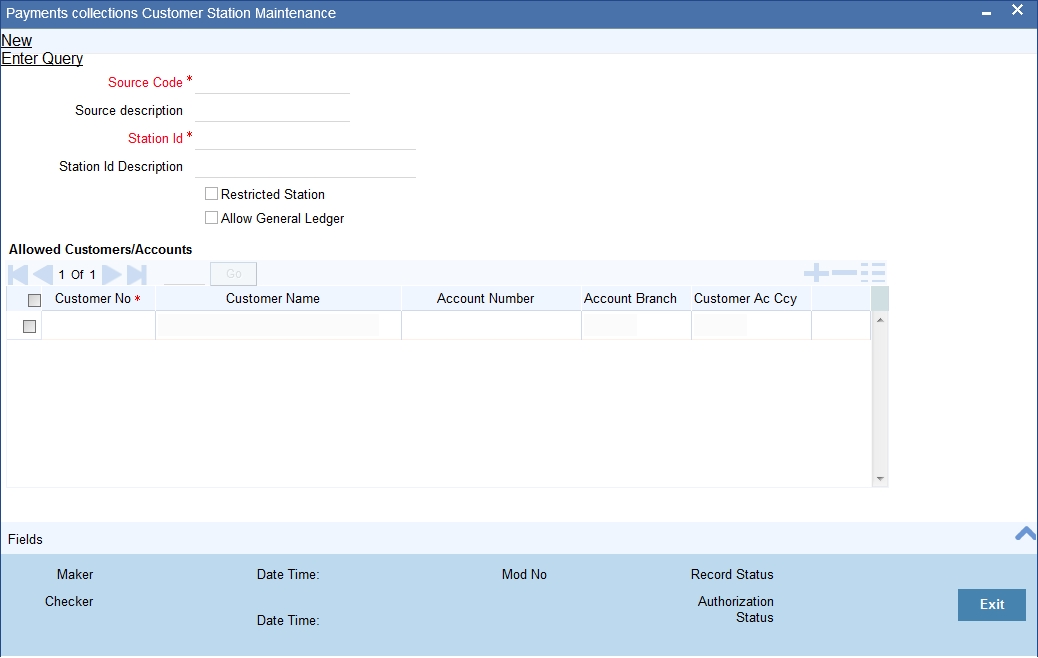
First of all, you must choose the Source for which you are maintaining Station details.
Source Code
Identify the Station you are maintaining with a unique code.
Station Identification
Specify a unique id for the station you have chosen.
Description
Give a small description for the station you are maintaining.
Restricted Station
The station provides restricted access to specific customers and accounts, and if so the list of customers and accounts.
Allow General Ledger
You would like to allow access to a GL from the station.
If you have opted to restrict access to a station to specific customers, you must identify the customers. You must also identify the account(s) that the customer can access from the station.
Allowed Customer/Accounts details
Customer
System displays the customer who is allowed for the station maintenance.
Customer Name
System displays the customer name that is allowed for the station maintenance.
Branch
System displays the branch that is allowed for the station maintenance.
Account
System displays the account details that are allowed for the station maintenance.
Currency
System displays the currency details of the transaction that is allowed for the station maintenance.
3.25 Product Categories Maintenance
This section contains the following topics:
- Section 3.25.1, "Maintaining Payment Product Categories"
- Section 3.25.2, "Main Tab"
- Section 3.25.3, "Detail Tab "
- Section 3.25.4, "Clearing Tab"
- Section 3.25.5, "Fields Tab"
- Section 3.25.6, "Rule Button"
- Section 3.25.7, "Network Button"
3.25.1 Maintaining Payment Product Categories
You can associate the products that you have maintained at your bank with ‘product categories’. A product category helps in identifying the product that should be used to process a transaction that is received.
You can maintain product categories in the ‘Payments Product Categories Maintenance’ screen. You can invoke this screen by typing ‘PCDPDCAT’ in the field at the top right corner of the Application tool bar and clicking the adjoining arrow button.
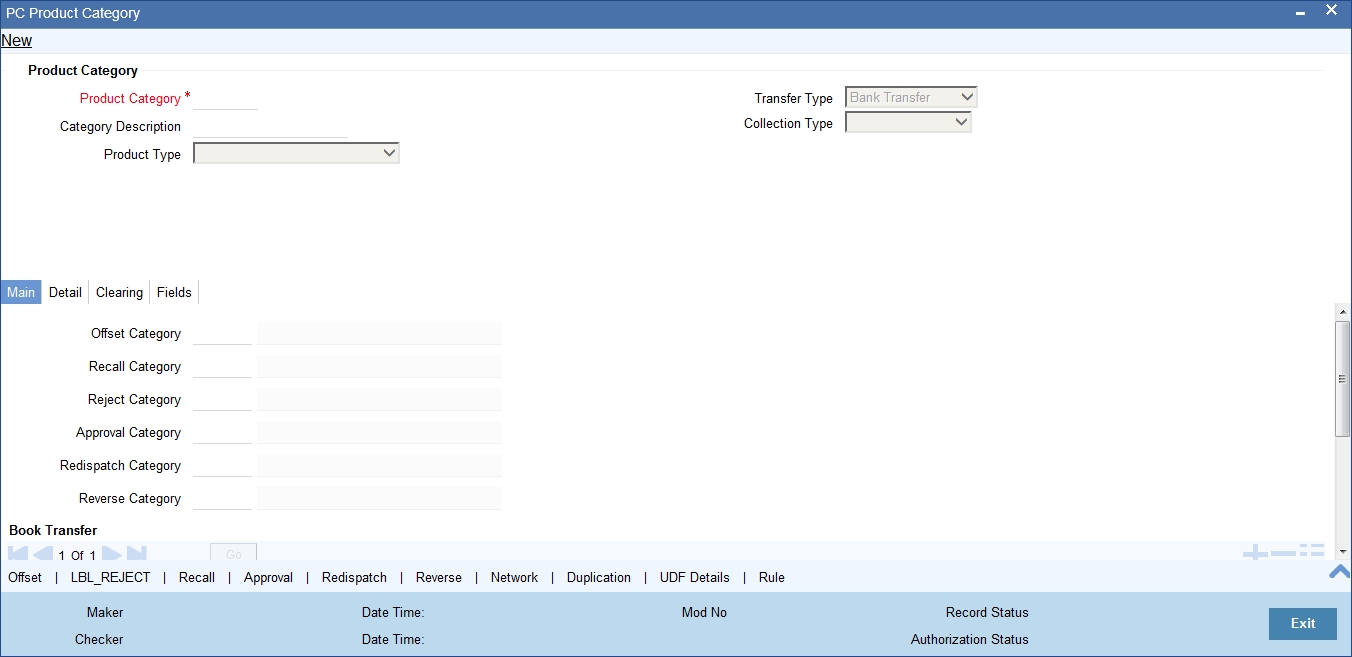
Product Category
Identify the Product Category that you maintain with a unique code and a brief description.
Product Type
You should also specify the product category type. A product category can be of either of the following types:
- Incoming Payment
- Outgoing Payment
- Outgoing Collection
- Incoming Collection
- Reject of Incoming Collection
- Reject of Outgoing Collection
- Recall of Incoming Collection
- Recall of Outgoing Collection
- Outgoing Request for Debit
- Incoming Request for Debit
- Reverse of Outgoing collection
- Reverse of Incoming collection
Category Description
Give a brief description of the product here.
Transfer Type
Select the type of transfers that can be processed from the drop-down list. Following are the option available in the drop-down list:
- Bank Transfers
- Customer Transfers
- Internal Transfer
Only bank transfer types of products can be mapped to product categories defined for bank transfers. Book transfer products cannot be mapped to product categories defined for bank transfers.
Similarly, only customer transfer types of outgoing payment products can be mapped to product categories defined for customer transfers.
Bank transfer is allowed for outgoing payment type of products only. EXTERNAL clearing is permitted for such products. However, BOOK and INTERNAL clearings are not permitted.
Collection Type
Specify the collection type of the product category. This could be either:
- DD
- RFD
3.25.2 Main Tab
Once you have maintained these basic details, you can proceed to associate products that have been created at your bank with the category. For a product category, you have to identify products for the following types of processing:
- Book Transfers
- Internal Clearing
- External Clearing
For internal and external clearing, you also have to specify the sequence in which the products should be taken up for product resolution.
An outgoing transfer includes information about the outgoing product category. When this transaction is received, Oracle FLEXCUBE resolves the product to be used for processing as follows:
Case One
- The outgoing product category maintenance is referred.
- If a book transfer, the system picks up the outgoing book transfer product specified here (the customer leg is processed using this product) along with the product clearing currency. You can capture multiple products for a book transfer.
- The Incoming Product Category specified for the outgoing product is picked up.
- The Incoming Product Category maintenance is referred and the product which corresponds to the incoming transaction within this product category is picked up. The counterparty leg of the transaction is processed using this product.
Case Two
- The outgoing product category maintenance is referred.
- If the transaction does not fit the specifications of the book transfer product, the system tries to fit the transaction in the list of internal clearing products you have maintained (in the sequence you have specified).
- If the transaction fits the parameters defined for an internal clearing product, the transaction is processed using the product.
Case Three
- The outgoing product category maintenance is referred.
- If the transaction does not fit the specifications defined for any internal clearing product, the system tries to match the transaction with the external clearing products you have specified for the product category (in the sequence you have specified).
- The transaction is then processed using the first product in the list of external clearing product whose parameters match that of the transaction.
Offset Category
As stated earlier, a book transfer is the movement of funds between two accounts within the bank. Thus while processing an outgoing book transfer the system will also need to process the incoming leg of the book transfer. It would resolve the incoming product using the offset category specified adjacent to the book transfer product in the Product Category maintenance.
Similarly while processing transactions belonging to an incoming collection product category; it is necessary to maintain the reject, recall or approval product categories. In such a case, while rejecting an incoming collection transaction the system generates a ‘reject’ of an incoming transaction automatically using the offset Reject Category. For incoming transactions resulting in a recall or approval the system resolves a recall or approval product using the product category specified therein.
You need to maintain the offset categories for the different product categories as follows:
Table of Offset Categories for Direct Debit |
|
Product Category |
Offset Product Category |
Outgoing Collection category for DD |
Incoming Collection category DD |
Incoming Collection category DD |
Incoming Reject category DD Incoming Recall category DD |
Reject of Incoming Category DD |
Reject of Outgoing Category DD |
Recall of Incoming Category DD |
Recall of Outgoing Category DD |
Product Category |
Offset Product Category |
Outgoing Collection category for RFD |
Incoming Collection category RFD |
Incoming Collection category RFD |
Incoming Approval category RFD (Outgoing Payment Category) Incoming Reject category RFD |
Approval of Incoming Category RFD (Outgoing Payment Category) |
Approval of Outgoing Category RFD (Incoming Payment Category) |
Reject of Incoming Category RFD |
Reject of Outgoing Category RFD |
Product Category |
Offset Product Category |
Reject of Incoming payments |
Reject of Outgoing payments |
Reject Category
For collection transactions for this product category that are rejected, the reject product category needs to be specified. This is not applicable for Reject of Incoming payment, Reject of outgoing payment, Reverse of Outgoing collection, and Reverse of Incoming Collection.
Recall Category
For collection transactions for this product category that are recalled, the recall product category needs to be specified. This is applicable to Direct Debit collections only.
This is not applicable for Reject of Incoming payment, Reject of outgoing payment, Reverse of Outgoing collection, and Reverse of Incoming Collection.
Apart from specifying the different clearing products, you can specify certain preferences for a product category. The preferences you specify for a category determine the manner in which transactions are ultimately processed. The following are the preferences that you can specify for a product category.
Approval Category
Select the approval category from the option list. The corresponding description is displayed. Approval categories are required to approve RFD collections. For incoming collections RFD, outgoing payment is the approval category. Similarly, for outgoing collections RFD, incoming payments are the approval categories.
Redispatch Category
For collection transactions for this product category that are redispatched, the redispatch product category needs to be specified.
Redispatch is applicable to outgoing collections only.
Reverse Category
For Outgoing collections product category you can specify the reverse product category from the option list.
3.25.3 Detail Tab
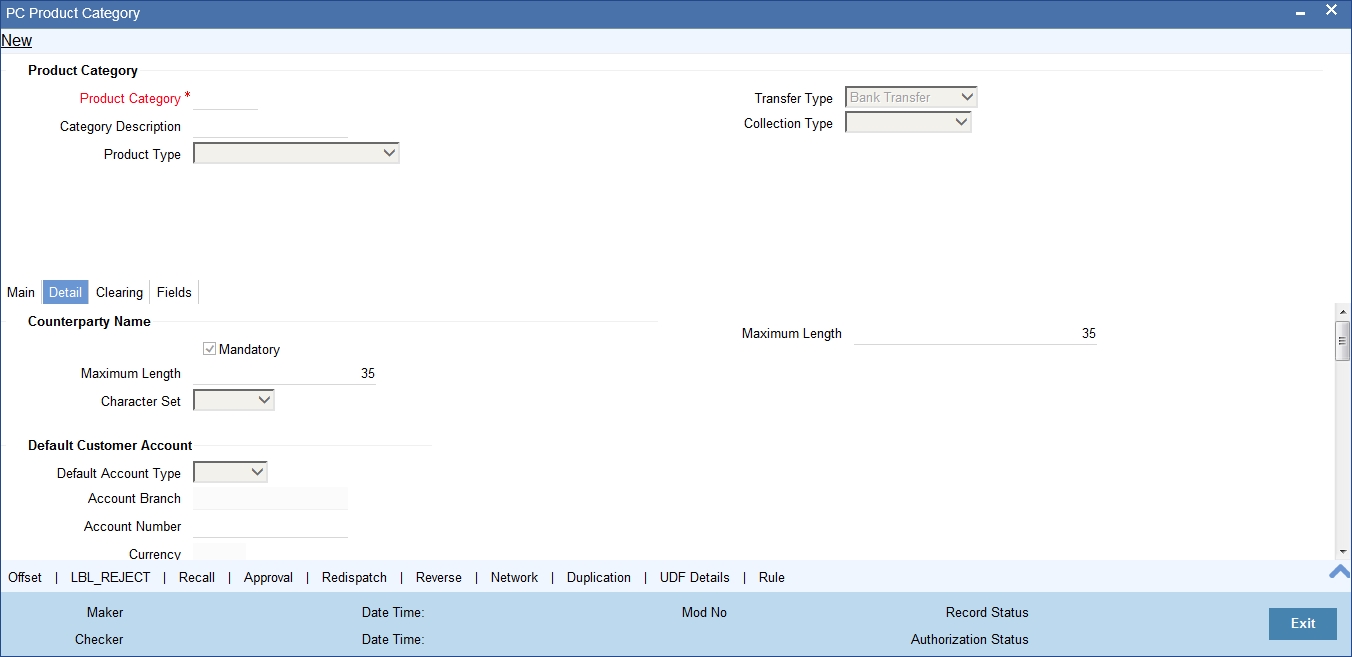
Counterparty Name
Mandatory
For instance, you can specify if transactions processed under a product should contain the Counterparty Name.
Maximum Length
If you choose this option, you can also specify the maximum length of that the name can extend to.
Character set
You can specify if the characters must adhere to Non- Swift standards.
Maximum Length
If you choose this option, you can also specify the maximum length of the character set can extend to.
Default Customer Account
Default A/C typeFor the product category, you can specify the default customer account to be used for payments or collection transactions. This account will be defaulted (in the Transaction Input screen) when you enter a payments or collection transaction involving the product category, and it cannot be changed.
Default account type indicate the type of account that will be defaulted when an incoming collection is received. The default customer maintained in the product category will be picked up and the transaction will be processed.
Account No
Specify the account number of the default customer account. The currency and the branch is displayed.
Automatic User Ref No. Generation
Auto Custom Ref. No.
You can specify whether custom reference numbers must be automatically generated for payments or collection contracts using the product.
Custom Ref. Seq. Code
You can specify the custom code to be used for sequential reference number generation.
The format specified for the selected sequence code in the Sequence Generation maintenance (in the Branch Parameters) is used to generate the custom reference numbers.
For details about the Sequence Generation screen, refer to the Core Services User Manual.
Re-Key
Required
You can specify the values of a contract that have to be rekeyed when authorizing it.
All operations on a contract have to be authorized as follows:
- By a user other than the one who carried out the operation
- Before you can begin the End of Day operations
As a cross-checking mechanism to ensure that you are invoking the right contract for authorization, you can specify that the values of certain fields should be entered before the other details are displayed. The complete details of the contract will be displayed only after the values to these fields are entered. This is called the re-key option. The fields for which the values have to be given are called the re-key fields.
If no re-key fields have been defined, the details of the contract will be displayed immediately after the authorizer calls the contract for authorization.
The re-key option also serves as a means of ensuring the accuracy of inputs.
Fields
You can specify any or all of the following as re-key fields:
- Customer Account
- Activation Date
- Amount
- Counterparty Bank
- Counterparty Account
- Counterparty Name
- Exchange Rate
- Currency
Duplication Recognition
Required
You can ensure that the same transaction is not taken up a second time for processing by opting for the Duplicate Recognition – Required feature. If you choose this option, you also have to specify the fields in a transaction that need to be matched with records in the transaction table for duplication.
For duplicate recognition, you can choose any of the following fields listed below:
Fields
- Source
- Station Id
- Source Ret
- Customer Account
- Amount
- Counter Party Bank
- Counterparty Account
- Counterparty Name
If you have opted for Duplicate Recognition, during transaction processing, Oracle FLEXCUBE provides an override message if it finds a matching record in the transaction table. Deleted or reversed transactions will not be considered for Duplicate Recognition.
Note
You can specify additional fields for duplicate record recognition in the ‘Duplicate Recognition – User Defined Fields’ screen.
Validate Customer Name
While maintaining Product Categories meant for Incoming Payments you can indicate whether the Counterparty Name should be validated against the authorized variations of the customer’s name maintained in the Customer Names screen. If you enable this option, all incoming PC transactions involving the product category are processed only after the customer’s Account Number and Name correspond to the authorized variations of the customer’s name.
Note
If the validation fails the contract will be uploaded as unauthorized. Even during manual authorization of such contracts, an override is displayed asking whether the customer name needs to be added to the existing list. It will be added to the existing list on confirming the override.
Contract details
Response Days
As mentioned earlier, an RFD transaction, if not approved within the response period is considered closed. You can specify the number of response days applicable to contracts using the product category.
Archival Days
You can also maintain the number of days for archival of transactions using the product category.
Purge Days
You can also maintain the number of days for purging the transactions using the product category.
Learning Database details
Applicable
While maintaining details of a product category you can choose to check the Applicable box positioned next to the Learning Database field to indicate that the UDF details that you capture while processing a payment or collection contract should be stored in the Learning Database.
Consequently, while processing a transaction involving the product category the UDF values involved in the transaction will be saved in the learning database for the given Counterparty Bank and Account Number combination.
3.25.4 Clearing Tab
![]()
You can specify the following details:
Specifying Internal Clearing details
Product
Specify the product details.
Sequence Number
Specify the sequence number.
Description
The system will display the description for the selected product.
Specifying External Clearing details
Product
Specify the product details.
Sequence Number
Specify the sequence number.
Description
The system will display the description for the selected product.
3.25.5 Fields Tab
While defining a product category you can choose to associate UDF Values to the product category through the Product Category - User Defined Fields sub-screen.
You can choose to associate UDF Values with a product category to capture additional information, which should be included in the payment or collection contract. This information can pertain to the inclusion of option lists, Numeric Text based or Date fields in the payments contract.
For the system to validate the correctness of the data captured against the user defined fields during contract processing, you can choose to maintain the following information as well:
- Compose Derivation Rules, whereby you can capture the logical derivation for the specified user defined fields. These rules will be executed during contract processing.
- Define Validation Rule(s). Validation rules are multiple conditions for validating the UDF values that you capture while processing a transaction. The validation that the system needs to perform can pertain to the length of the field, whether the field is a mandatory field and the value restriction of the field and so on.
Click Fields tab in the ‘Product Category Maintenance’ screen to invoke the ‘PC – UDF’ screen.
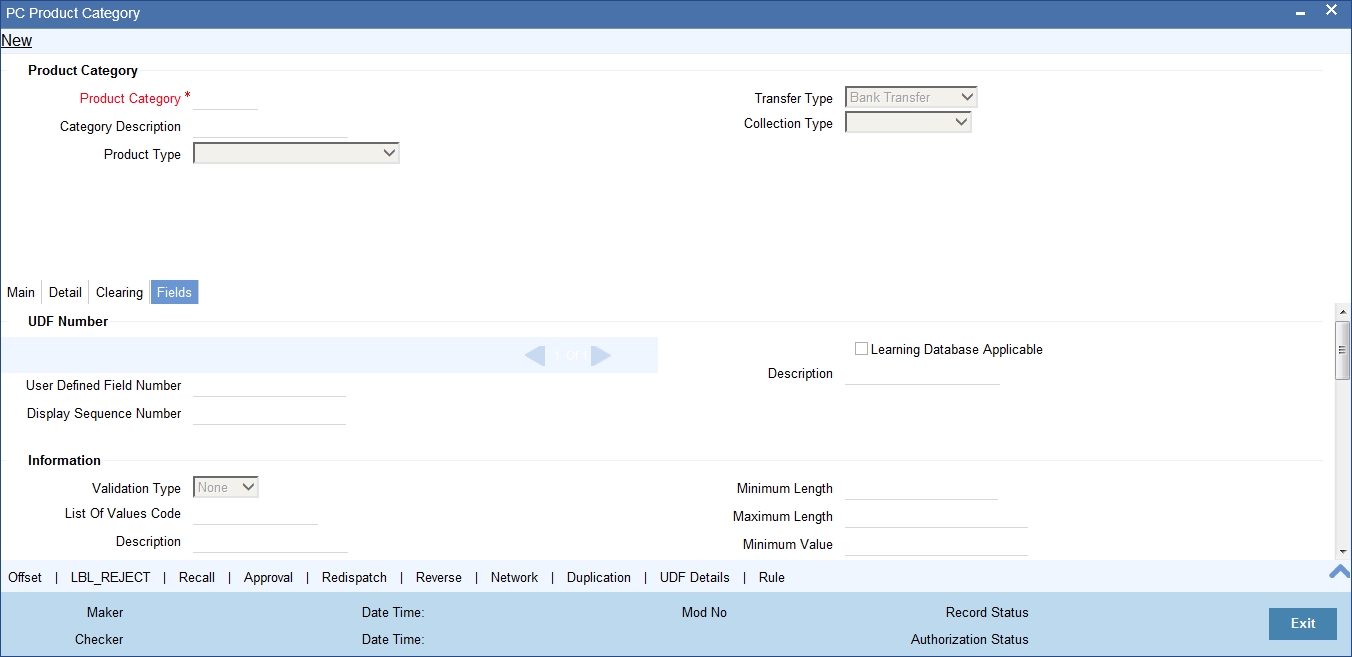
You need to define the specific attribute of each UDF that you choose to associate with the product category.
For more details on how to create user Defined fields, refer chapter 'Creating custom fields in Oracle FLEXCUBE' in the User Defined Fields User Manual under Modularity.
After you capture the derivation logic, specify whether it is mandatory for the system to capture the corresponding value based on the derivation logic that you have maintained. You can do this by checking the box positioned next to the Force Derivation Logic field.
3.25.6 Rule Button
To specify the multiple conditions for validating the UDF values that you capture while processing a transaction you can click on the Rule button in this screen.
The Validation Rule Logic screen is displayed as shown below:
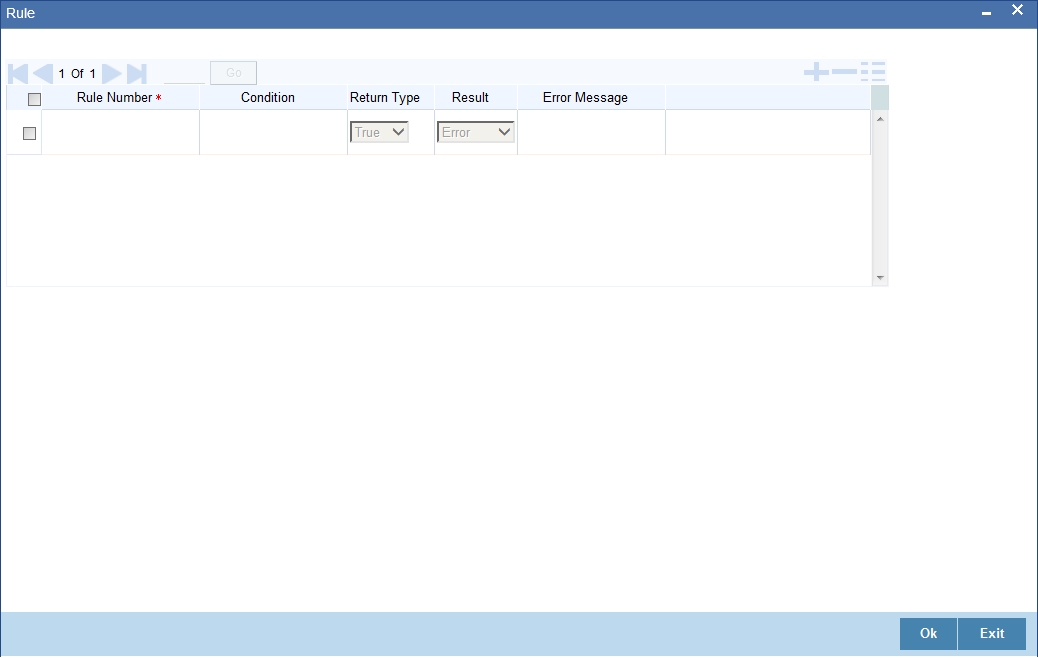
During contract processing the system validates the check-digit against each of these validations.
3.25.7 Network Button
You can define and associate the Clearing Network Restrictions at the product category level in the product category through the ‘Product Category – Clearing Network Restrictions’ sub-screen.
Click ‘Network’ button in the ‘PC Product Category Maintenance’ to invoke the ‘Clearing Network Restrictions’ screen, where you can define the clearing network restrictions for a Product Category.
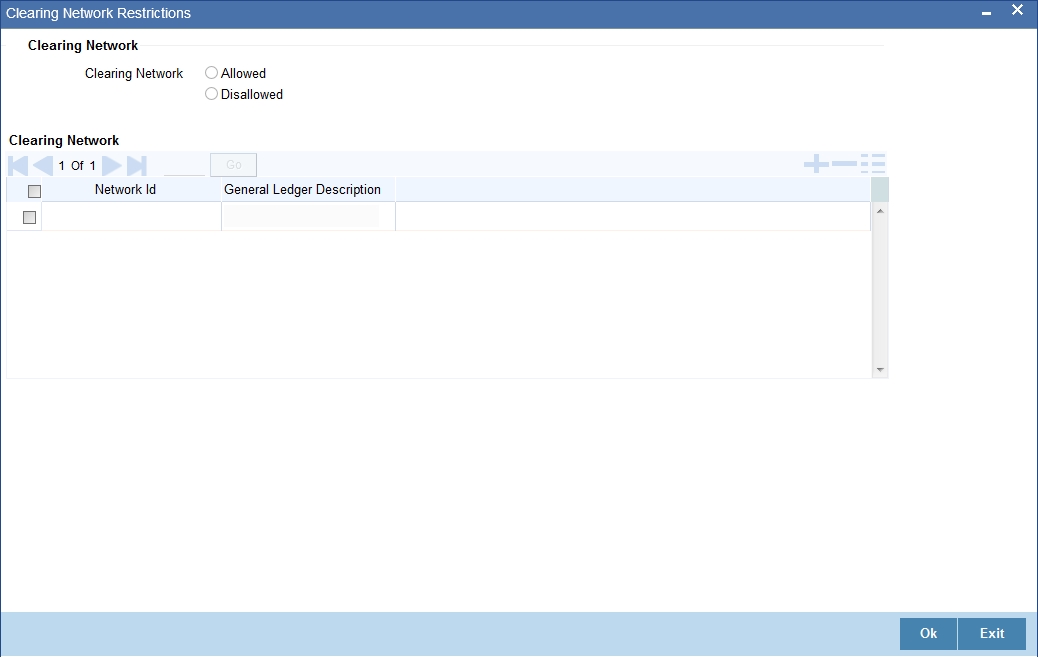
Specifying Clearing Network Details
You can maintain an ‘allowed’ or ‘disallowed’ list of networks. The available networks are displayed in the Available list, from where you can select the required networks and move them to the Allowed / Disallowed section.
When a product category is defined the system validates that the network specified for the External Clearing Products linked to the Product Category are allowed for the Product Category also.
Also during modification of an existing Product with Clearing Mode as "External Clearing" the system validates that the Network being linked to the Product is not disallowed for any of the existing Product Categories which would have been already linked to the Product.
The Bank Codes linked to the available clearing networks are displayed in PC Contract Online screen and PC Fast Input Screen for the Product Category. The displayed bank codes list sequence is driven by the way of you navigate through the Contract Online screen:
After entering the product category details, if you proceed to the bank code without entering the product code and network, the entire list of bank codes used by that product is displayed.
If you enter the product code after entering the product category details, then:
- If the Product is Book Transfer Type, the network field is blank. The Book Transfer Type of Bank Codes from the PC Bank Directory is displayed in the list of Bank Codes from the PC Bank Directory.
- If the specified Product is internal type, the network field is blank. The entire list of bank codes used by that Product is displayed.
- If the product is of the type external, the default network chosen in the product preference screen is displayed. Only those bank codes using this network are displayed.
On entering the product category details, if you click on the Networks option list, then only networks allowed for that product category are displayed, and on selecting the network,
- If you click on the bank code without entering the product code, then only the banks using this network are displayed.
- If the product code is entered, the network defaulting happens as explained.
Specifying the Clearing Network Details
Network ID
Select the identification for the network.
Description
The system displays the description of the network as electronic network or clearing.
3.26 Learning Database Creation
This section contains the following topics:
3.26.1 Creating Learning Database
The learning database facility enables the system to intuitively ‘learn’ about customers and the counterparties that are involved in payments or collection transactions that use a product category. These transaction details are stored in the learning database, to enable defaulting of transaction details whenever transactions are entered for the same customer, counterparty and product category combination.
You can also:
- Manually create a learning database according to your requirement, by entering the details to be stored, in the Learning Database Counterparty Details screen.
- Upload details from an external system into the learning database.
You can create a custom learning database by specifying details in the Learning Database Counterparty Details screen.
You can invoke this ‘Counter Party Details’ screen by typing ‘PCDPTYDM’ in the field at the top right corner of the Application tool bar and clicking the adjoining arrow button.
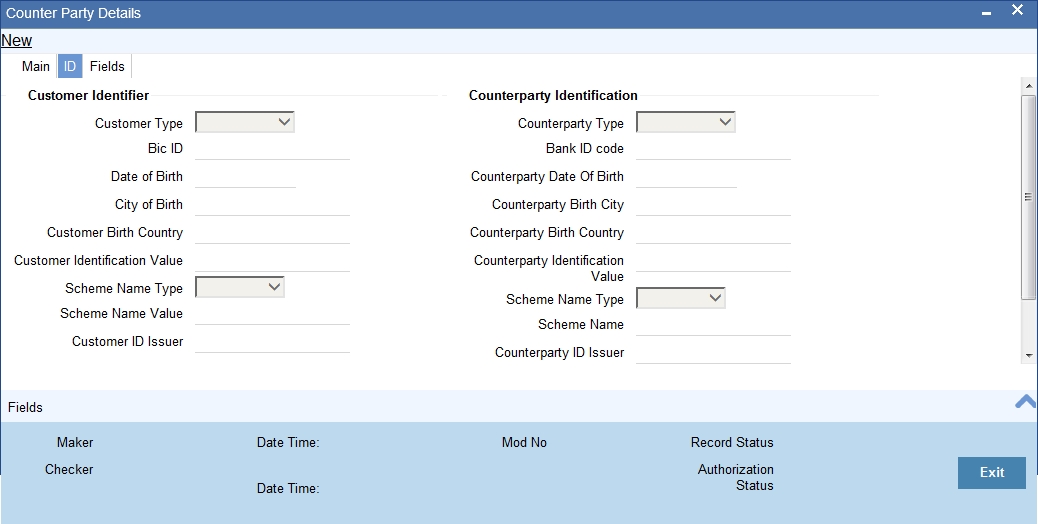
You must specify the following details:
- The product category for which the data is being maintained
- The Creditor ID of the customer for whom the database is being maintained
- The ID of the agreement in the context of which the learning database is to be used
- Details of the customer, such as the name and address, Customer Number and Account Number, as well as any user defined fields for customer information. You can also select the CL Account number as the customer account number.
- The customer identification details like identification type, identification value, other identification type, issuer, city of birth, country of birth.
- Details of the counterparty, such as the name and address, Account Number and Bank Code, as well as any user defined fields for counterparty information.
- The counterparty identification details like identification type, identification value, other identification type, issuer, city of birth, country of birth.
- The user defined fields applicable for the product category in which the learning database would be used.
Customer BIC ID
Specify the Bank Identification Code for the Customer.
Customer Scheme Name Type
Select the Identification Scheme Type of the Customer from the drop down list.
The valid field can be:
- C - Code
- P - Proprietary
Customer Scheme Name
Specify the value for Identification Scheme Name field.
If Scheme Name type is C then the Scheme Name can be selected from LOV and can have one of the values mentioned in value list depending on Organization Identification or Private Identification.
If the Scheme Name Type is P then you can enter the value for the field.
Customer Date of Birth
Specify the date of birth of the Customer.
Counter Party BIC ID
Specify the Bank Identification Code for the Counter Party.
Counter Party Scheme Name Type
Select the Identification Scheme Type of the Counter Party from the drop down list.
The valid field can be:
- C - Code
- P - Proprietary
Counter Party Scheme Name
Specify the value for Identification Scheme Name field.
If Scheme Name type is C then the Scheme Name can be selected from LOV and can have one of the values mentioned in value list depending on Organization Identification or Private Identification.
If the Scheme Name Type is P then you can enter the value for the field.
Counter Party Date of Birth
Specify the date of birth of the Counter Party.
3.27 User Defined Fields for Account Statements
This section contains the following topics:
3.27.1 Invoking the User Defined Fields Maintenance Screen
The ‘User Defined Fields Maintenance’ screen in the Payments and Collections module allows you to define fields that you wish to appear in the account statements as well as the list of values for the user defined fields that need to appear in the statements.
You can invoke this screen by typing ‘PCDUDMNT’ in the field at the top right corner of the Application tool bar and clicking the adjoining arrow button.
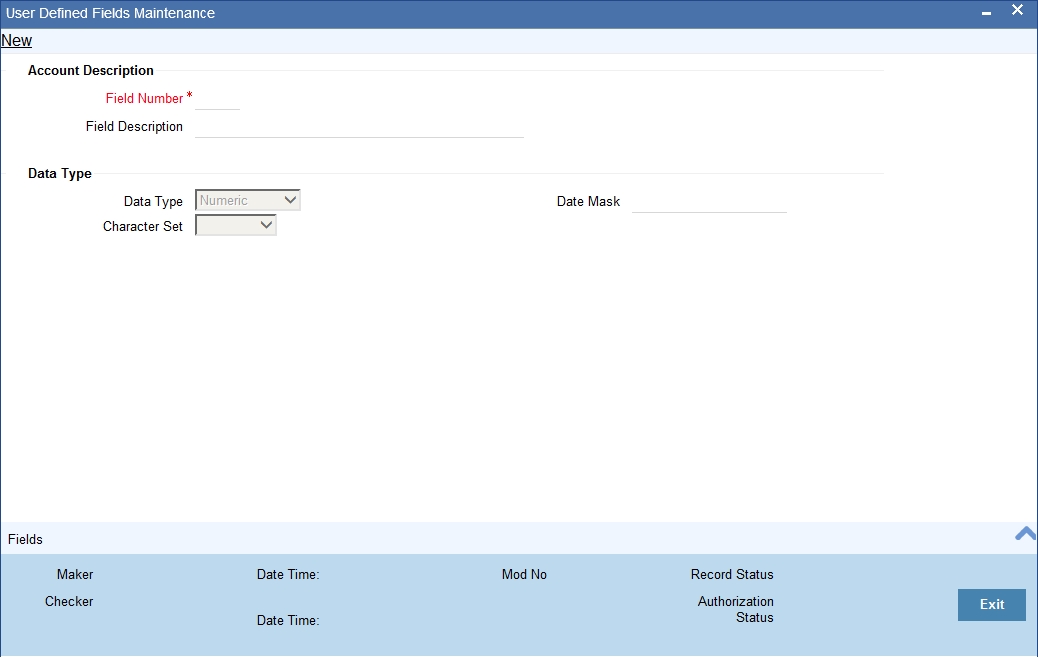
In the ‘User Defined Fields Maintenance’ screen, you specify the following details for each user defined field you create:
Description
Field Number
Specify the identification number.
Field Description
Specify the description of the field,
Data Type
Date Type
Specify whether the field is alphanumeric, numeric, or a date, or an integer.
Date Mask
If you specify a date field, you can indicate a format for the date to be displayed.
Character Set
Specify whether the values for the field should only contain Non SWIFT compatible characters.
3.28 UDF Details
This section contains the following topics:
3.28.1 Invoking the User Defined LOV Maintenance
In the ‘User Defined LOV Maintenance’ screen, you can specify a list of values applicable for a user defined field that you have created. Each list can be identified by an LOV Code and description.
You can invoke this screen by typing ‘PCDLUPMT’ in the field at the top right corner of the Application tool bar and click the adjoining arrow button.
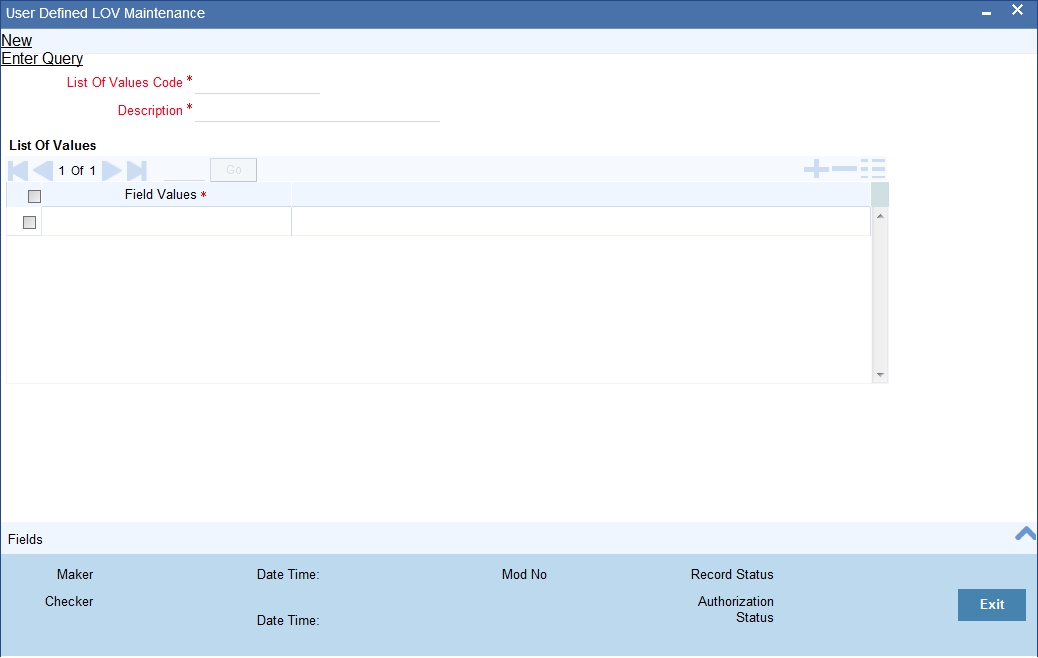
List of Values Code
Specify the code for the list of values.
Description
Specify the description of the code.
3.29 Fields to be Included in Account Statements
This section contains the following topics:
3.29.1 Invoking the fields to be included in Account Statements
You can specify the fields that should be included in the account statements that you generate.
You can do this in the ‘Account Statement Fields’ screen, invoked from the Application Browser by typing ‘PCDACSMT’ in the field at the top right corner of the Application tool bar and clicking the adjoining arrow button.
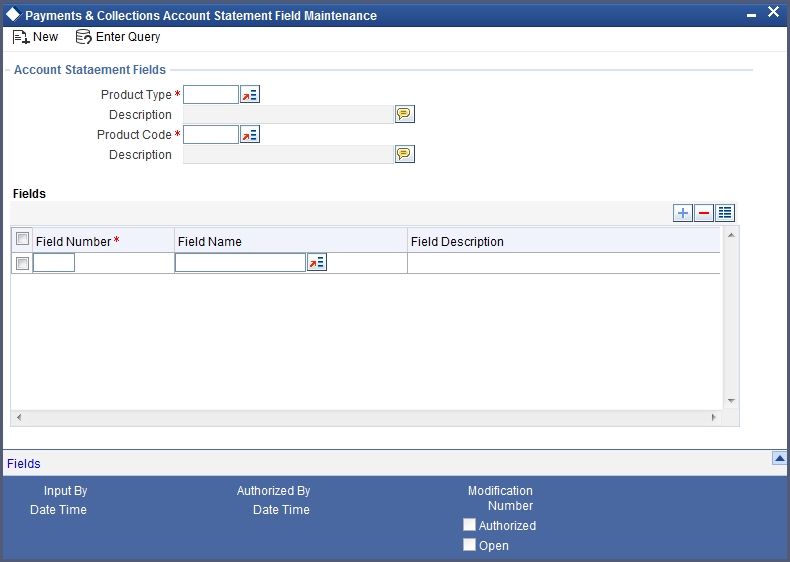
You need to specify the product type and the product code before specifying the fields. You can specify a maximum of fifteen fields for an account statement. In this screen, you must also specify the sequence in which the fields must be printed.
3.30 Reject Code Maintenance
This section contains the following topics:
3.30.1 Maintaining Rejection Codes
Collection transactions can be rejected for various reasons – for example, insufficiency of funds in the debtor’s account. In such a case, the debtor’s bank sends a reject transaction with relevant reject codes to the creditor’s bank. The ‘Reject Code Maintenance’ screen allows you to describe each reject code that you specify.
You can invoke this screen by typing ‘PCDRJCOD’ in the field at the top right corner of the Application tool bar and clicking the adjoining arrow button.
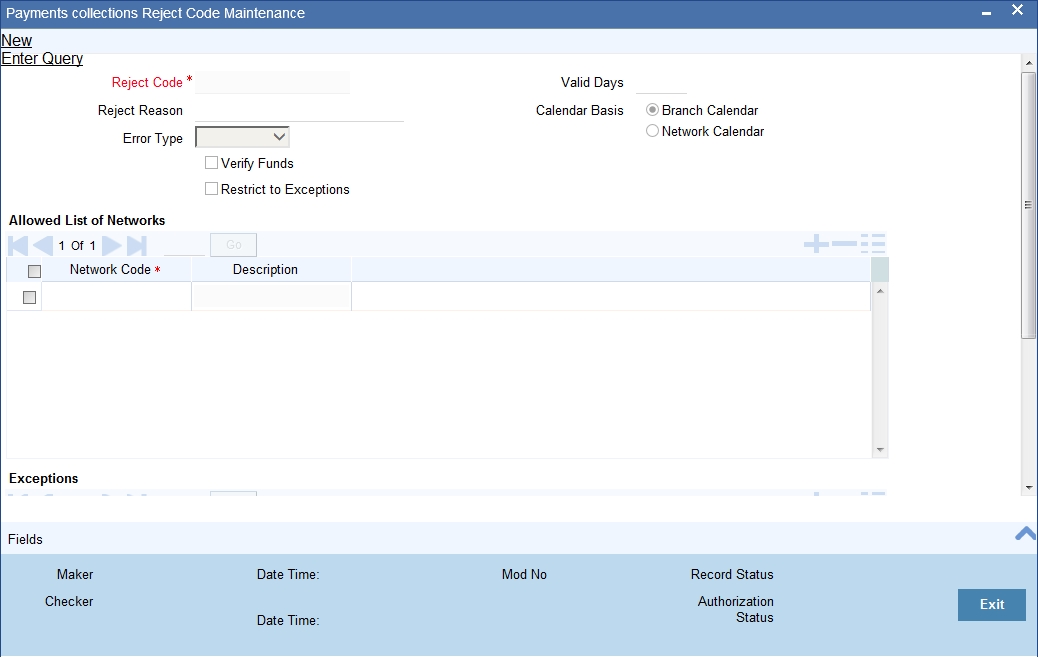
Reject Code
Specify the reject code for the rejected transaction here.
Description
You can give a small description for the reject code you have specified.
Error Type
Select the type of reject code values from the drop-down list. Following are the options available in the option list:
- Error
- Reschedule
Verify Funds
A collection transaction, which has been rejected, is redispatched only if the reject reason is ‘insufficiency of funds’ and if the ‘Verify Funds’ box is checked.
Restrict to Exceptions
Check this option to restrict the usage of ISO reject code to the list of Exceptions maintained. If the option is checked then the system will restrict the usage of ISO Reject code.
If the option is unchecked then the system will not restrict the usage of ISO Reject code i.e. a particular ISO Reject Code is applicable for all possible exceptions.
Allowed List of Networks
Specify the list of allowed Networks for which the Reject code would be applicable.Click on the “+” button to add the networks. The details to be provided are:
- Network Code -Specify the valid code assigned to the clearing network. Alternatively, you can select the network code from the option list.The list displays all the relevant network codes maintained in the system.
- Description - Give a brief description for the specified clearing network.
Valid Days
Specify the number of valid days within which reject should be performed.
Calendar Basis
Select the Calendar Basis. The options are:
- Branch Calendar
- Network Calendar
Exceptions
You can add multiple values to this option field. This field is used to input exceptions applicable for the Reject Codes. List of Values are attached to display the valid exceptions based on the static data provided.
Description
This field indicates the selected Exception type.
ISO reject codes for SEPA transactions can be maintained in the system using the PC –Reject Code screen and the data is also factory shipped.
The following Reject Codes are factory shipped:
ISO Code |
ISO Name |
SEPA Reasons |
AC01 |
IncorrectAccountNumber |
Account identifier invalid
(i.e. invalid IBAN or |
AC04 |
ClosedAccountNumber |
Account closed |
AC06 |
BlockedAccount |
Account blocked, reason not specified |
AG01 |
TransactionForbidden |
Credit transfer or Direct Debit forbidden on this type of account (For example, savings account) or for regulatory reasons |
AG02 |
InvalidBankOperationCode |
Operation/ Transaction code incorrect, invalid file format |
AM01 |
ZeroAmount |
AOS |
AM02 |
NotAllowedAmount |
AOS |
AM03 |
NotAllowedCurrency |
AOS |
AM04 |
InsufficientFunds |
Insufficient Funds |
AM05 |
Duplication |
Duplicate collection |
AM06 |
TooLowAmount |
AOS |
AM07 |
BlockedAmount |
AOS |
AM09 |
WrongAmount |
AOS |
AM10 |
InvalidControlSum |
AOS |
BE01 |
InconsistentWithEndCustomer |
AOS |
BE04 |
Missing Creditor Address |
Account address invalid |
BE05 |
UnrecognisedInitiatingParty |
AOS |
BE06 |
UnknownEndCustomer |
AOS |
BE07 |
MissingDebtorAddress |
AOS |
DT01 |
InvalidDate |
AOS |
ED01 |
CorrespondentBankNotPossible |
AOS |
ED03 |
BalanceInfoRequested |
AOS |
MD01 |
NoMandate |
No valid mandate |
MD02 |
MissingMandatoryInformationInMandate |
Mandate Data missing or
incorrect |
MD03 |
InvalidFileFormatForOtherReasonThanGroupingIndicator |
Operation/ Transaction code incorrect, invalid file format |
MD04 |
InvalidFileFormatForGroupingIndicator |
AOS |
MD06 |
RefundRequestByEndCustomer |
Disputed Authorized transaction |
MD07 |
EndCustomerDeceased |
Beneficiary/ Debtor deceased |
MS02 |
NotSpecifiedReasonCustomerGenerated |
By order of the Beneficiary |
MS03 |
NotSpecifiedReasonAgentGenerated |
Reason not specified |
NARR |
Narrative |
AOS |
RC01 |
BankIdentifierIncorrect |
Bank Identifier Incorrect |
RF01 |
NotUniqueTransactionReference |
AOS |
TM01 |
CutOffTime |
File received after cut-off time |
ED05 |
SettlementFailed |
AOS |
RR01 |
- |
Regulatory reason |
DNOR |
Debtor bank is not registered |
Debtor Bank is not registered under this BIC in the CSM (Reject code DNOR is not applicable for return transactions) |
CNOR |
Creditor bank is not registered |
Creditor Bank is not registered under this BIC in the CSM (Reject code CNOR is not applicable for return transactions) |
AC13 |
InvalidDebtorAccountType |
Debtor account type missing or invalid |
ARDT |
AlreadyReturned |
Cancellation not accepted as the transaction has already been returned. |
CUTA |
CancelUponUnableToApply |
Cancellation requested because an investigation request has been received and no remediation is possible. |
FF01 |
Invalid File Format |
File Format incomplete or invalid |
FF05 |
InvalidLocalInstrumentCode |
Local Instrument code is missing or invalid |
FOCR |
FollowingCancellationRequest |
Return following a cancellation request |
FRAD |
FraudulentOrigin |
Cancellation requested following a transaction that was originated fraudulently. The use of the FraudulentOrigin code should be governed by jurisdictions. |
LEGL |
LegalDecision |
Reported when the cancellation cannot be accepted because of regulatory rules. |
NOAS |
NoAnswerFromCustomer |
No response from beneficiary (to the cancellation request). |
NOOR |
NoOriginalTransactionReceived |
Original SCT never received |
RR02 |
Missing Debtor Name or Address |
Specification of the debtor's name and/or address needed for regulatory requirements is insufficient or missing. |
RR03 |
Missing Creditor Name or Address |
Specification of the creditor's name and/or address needed for regulatory requirements is insufficient or missing. |
RR04 |
RegulatoryReason |
Regulatory Reason |
TECH |
TechnicalProblem |
Cancellation requested following technical problems resulting in an erroneous transaction. |
3.31 Debtor Customer Categories
This section contains the following topics:
3.31.1 Maintaining the Payments & Collection Debtor Categories
Debtor categories are used to define preferences for a group of debtors rather than for each debtor. For instance, a creditor might wish to allow a longer recall period to debtors of a certain category.
The ‘Payments & Collection Debtor Categories Maintenance’ screen allows you to define such debtor categories. This information is picked up while capturing customer agreement details.
You can invoke this screen by typing ‘PCDDCCAT’ in the field at the top right corner of the Application tool bar and clicking the adjoining arrow button.

Debtor Customer Category
Specify the Debtor Customer Category code here.
Description
Enter a small description of the Debtor Customer Category you have entered.
3.32 Preferences Definition for a Combination of a Product and a Debtor Category
This section contains the following topics:
3.32.1 Invoking the Payments And Collections Debtor Preferences Maintenance Screen
The ‘Payments And Collections Debtor Preferences Maintenance’ screen allows you to define the preferences for a debtor category created by you.
You can invoke this screen by typing ‘PCDPRCAT’ in the field at the top right corner of the Application tool bar and clicking the adjoining arrow button.
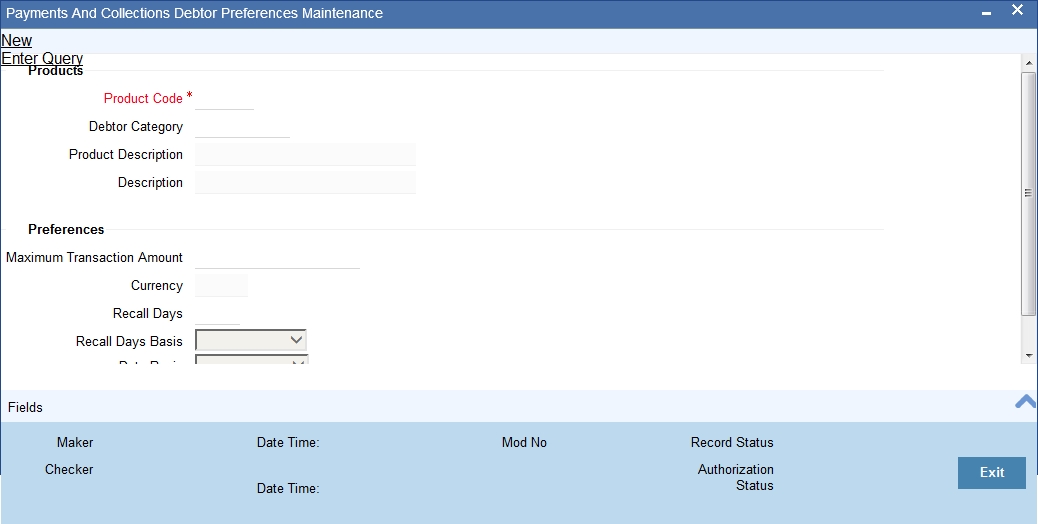
Specifying Product details
Product
Select the product from the list of options available.
You define a product, the maximum amount for each transaction, the number of recall days and the basis (working days or calendar days) for computing recall days.
Debtor Category
Select the debtor category from the list of options available.
Specifying Preferences
Maximum Transaction Amount
Specify the maximum amount that can be used for a transaction. The currency for this amount will be defaulted as the product currency.
Recall Days
Specify the number of recall days here.
Recall Days Basis
Select the basis for computing the recall days, whether it has to be working days or calendar days.
Recall Date Basis
Select the basis for computing the recall dates, whether it has to be working days or calendar days.
3.33 Periodic Instructions Maintenance
This section contains the following topics:
- Section 3.33.1, "Maintaining Periodic Instructions"
- Section 3.33.2, "Customer Details Tab"
- Section 3.33.3, "Counterparty Details Tab "
- Section 3.33.4, "Periodicity Tab"
- Section 3.33.5, "User-defined fields Tab"
3.33.1 Maintaining Periodic Instructions
Your bank could process outgoing payments or collections that need to be initiated periodically, at pre-defined frequencies. Oracle FLEXCUBE facilitates maintenance of details for such periodic payments or collections. A batch process that is executed during the Beginning of Day processes generates periodic transactions for which details have been maintained.You can maintain details of periodic payment or collection transactions in the ‘Periodic Instruction Maintenance’ screen, which you can invoke from the application browser. You must maintain basic details such as the product category, product code, customer and counterparty details, transaction amount and user-defined fields.
You can invoke this screen by typing PCDINSTM’ in the field at the top right corner of the Application tool bar and clicking the adjoining arrow button.
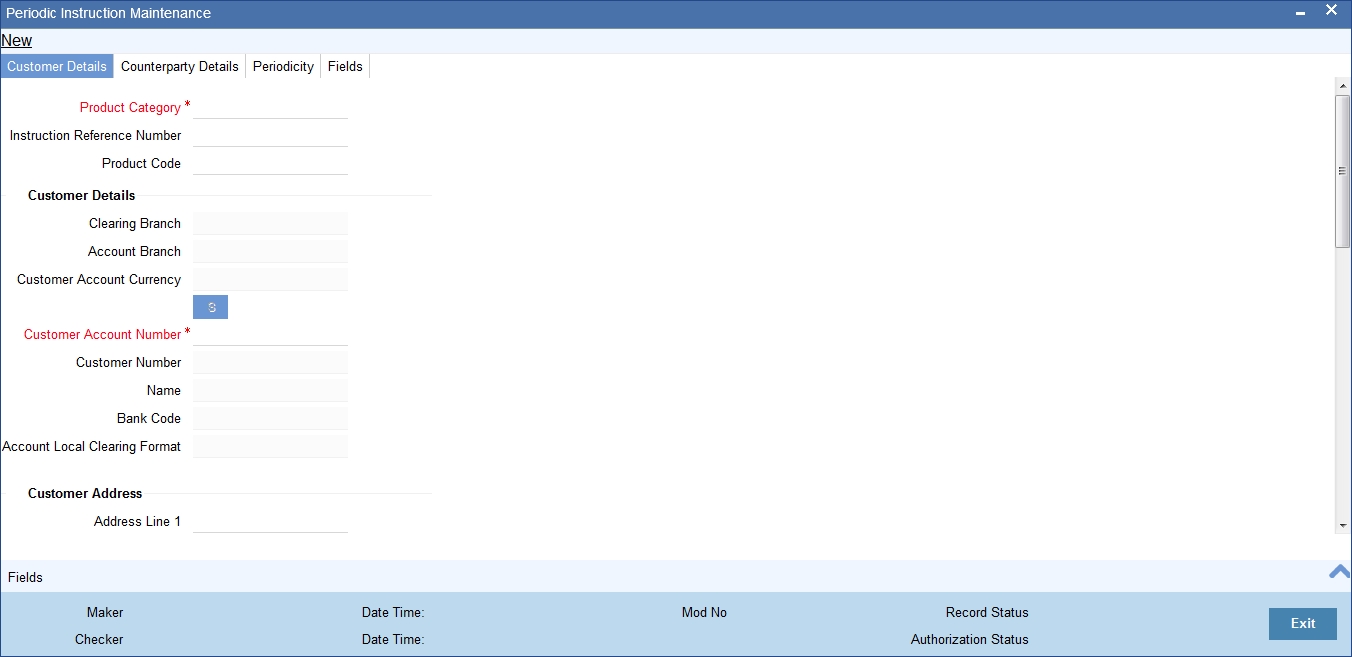
In the Periodic Instruction Maintenance screen, you can capture the following details for periodic payment or collection transactions:
Product Category
View the product category that would be used to pick up default information for the periodic outgoing payment or collection. The product to be used for the transaction will be picked up from this information. You can only indicate an outgoing product category.
Instruction Reference umber
This is the system-assigned reference number of the periodic instruction.
Product Code
It is not mandatory that you indicate the outgoing payment or collection product to be used for the periodic outgoing transaction, since the system picks up this information from the outgoing product category specified. However, you can specify the product, if required; if you choose to do so, you can only choose a product belonging to the same product type as the product category that you specified. Based on the product code, the system will default the currency code linked to this product in the ‘Txn CCY’ field. Alternately, the system can also arrive at the product code based on the currency specified in the ‘Txn CCY’ field.
3.33.2 Customer Details Tab
Clearing Branch
Specify the clearing branch where the amount is getting cleared.
Customer Account Branch
Specify in which branch a customer is holding an account.
Customer Account Currency
Select the currency for the customer account in which it is maintained.
Customer Account Number
If you choose to specify the customer account, the name and number will be displayed when you save the contract. You must enter a valid customer account maintained in Oracle FLEXCUBE in this field, or a GL for which posting is allowed. If you use the option list available in this field, the customer number and name will be displayed instantly.
You can also select the CL account number as the customer account number. The loan accounts are allowed for Outgoing Collection- Direct Debit product types. You have to create the periodic instruction manually for the loan account.
To view the joint holder’s details of an account and the mode of operation maintained at the account level, place the cursor on the Customer Account Number field and press Ctrl+J. The system displays the ‘Joint Holder’ screen.
For more information on the ‘Joint Holder’ screen refer to the section ‘Joint Holder Maintenance’ in the Core User Manual.
Customer Number
System defaults the customer number when you select the customer account number.
Name
System defaults the customer name when you select the customer account number.
Bank Code
Specify the code for the bank that is used in the clearing activity.
Account Local Clearing Format
Specify the local format used in the clearing the amount.
Customer Information
Customer Information 1 2 3 and 4
If you need to specify other information regarding the customer of the transaction, free format 35-character text fields are provided, with appropriate labels applicable for your installation. You can specify the customer information in these fields.
Customer Reference
Specify the reference number to identify a customer.
Source Code
System displays the source code when you provide the customer reference and information.
Station Identification
System displays the identification number of the station when you specify the customer information and reference numbers.
Creditor Identification
Specify the identification number of the creditor.
Agreement Identification
Specify the identification number to identify an agreement.
Customer Address
Address Line 1, 2, 3, 4 and 5
Specify the address of a customer in the lines 1, 2, 3, 4 and 5.
Customer Identification details
Identification
Select the option to identify the customer either by Organization details or by Individual person details. The options available in the drop-down list are Organization and Private.
Identification Value
Specify the identification value for the Customer for the given identification type. This is mandatory only if the Identification type is specified.
Issuer
Specify the issuer of the customer. This is used to identify if the Organization identification is used as Proprietary Identification or Private Identification
City of Birth
Specify the city of birth of the customer. This is enabled and is mandatory if you have selected identification type as ‘Date and Place of birth’.
Customer Country of Birth
Select the country of birth of the customer from the option list. This is enabled and is mandatory if you have selected the identification type as ‘Date and place of birth’.
Country
Specify the country of residence of the customer. This adjoining option list displays all valid country codes maintained in the system. You can choose the appropriate one.
Note
The country information is captured to enable Mantas to analyse the transactions for possible money laundering activities.
Oracle FLEXCUBE supports 24x7 functionality for PC periodic instruction.
For more details on Mantas, refer 'Mantas' interface document.
3.33.3 Counterparty Details Tab
The counterparty details are defaulted on selection of counterparty account number, if the counterparty identification details are maintained in PC Beneficiary Maintenance screen.
Identification
Select the option to identify the counterparty either by Organization details or by Individual person details. The options available in the drop-down list are Organization Identification and Private Identification.
Identification Value
Specify the identification value for the counterparty for the given identification type. This is mandatory only if the Identification type is specified.
Issuer
Specify the Identification Issuer of the counterparty. This is used to identify if Organization identification is used as Proprietary Identification or Private Identification.
City of Birth
Specify the city of birth of the counterparty. This is enabled and is mandatory if you have selected identification type as ‘Date and Place of birth’.
Country of Birth
Select the country of birth of the counterparty from the option list. This is enabled and is mandatory if you have selected the identification type as ‘Date and place of birth’.
Country
Specify the country of residence of the counter party. This adjoining option list displays all valid country codes maintained in the system. You can choose the appropriate one.
Note
The country information is captured to enable Mantas to analyse the transactions for possible money laundering activities.
For more details on Mantas, refer 'Mantas' interface document.
Multiple Dr/Cr Account for Periodic Instruction
To specify the multiple debit/credit account for Outgoing Payment or Outgoing Collection PC category types, with facility to specify MIS for each of the leg, you can click the ‘S’ button provided in the Periodic Instruction Maintenance which facilitates capturing the ‘Split Details’ screen as shown below. This button is enabled for Outgoing Payments and Outgoing Collection type of PC Product Categories.
The sum total of all debits/ credits is defaulted to the total transaction provided in the Split Details, and the MIS details can also be provided.
Split Details
Serial Number
Specify the serial number to know the order of the preference.
Branch
Specify the branch where the split details are stored.
Account Number
You can specify the multiple debit/credit accounts for Outgoing Payments and Outgoing Collection Type of PC Product Categories.
Amount
You can specify the amount for each of the debit / credit accounts you have specified. The sum of amounts specified for all the accounts must be equal to the transaction amount.
CCY
Specify the currency used in the split process.
MIS
Click this button to capture MIS parameters.
Total Amount
Specify the total amount that is used in the split process.
Note
- Split of debit / credit amount is allowed only when currency is local currency and debit/credit accounts are GL’s.
- In case of Multiple debit’s/credit’s, the first account is defaulted as the Customer Account in the ‘Periodic Instruction’ screen.
- During generation of Outgoing Payment/Collection the multiple accounts would be debited/credited depending upon the instruction maintenance.
- You can only select a local currency account for periodic instructions.
Customer No. and Name
If you opted to specify the customer account, the name and number will be displayed when you save the contract. If you selected the customer account using the option list available in the customer account field, these fields will display the customer name and number respectively.
Clearing Branch
The clearing branch for the specified customer bank code is displayed in this field.
Customer Bank Code and Account (LCF)
You can input the bank code and the account in LCF (local clearing format; this is the clearing account number) for the transaction.
Customer Address
You can specify the address of the customer involved in the contract. You can specify up to five lines of address information.
Customer Information
If you need to specify other information regarding the customer of the transaction, free format text fields are provided, with appropriate labels applicable for your installation. You can specify the customer information in these fields.
Specifying Counter Party details
Counterparty Bank
Select a valid bank code maintained in Oracle FLEXCUBE. If you select a code from the option list, the bank name is displayed instantly. If you choose to enter the code, the name of the bank is displayed when you save the transaction.
Counterparty Account
You can specify the account of the counterparty here. In case of internal transfers, the account needs to be a valid account of Oracle FLEXCUBE either in Oracle FLEXCUBE or in the Local Clearing Format. You can also select an account number from the option list provided. In such a case, the system will default the name and the address lines and counterparty information fields as maintained for that account. If at the time of selecting Counterparty Account, Bank Code is null, then the Bank Code and Name will also appear by default.
Counterparty Name
You can enter the name of the counterparty.
Counterparty Address
You can specify the address of the counterparty involved in the contract. You can specify up to five lines of address information.
Counterparty Information
If you need to specify other information regarding the counterparty of the transaction, free format 35-character text fields are provided, with appropriate labels applicable for your installation. You can specify the counterparty information in these fields.
Note
The country information is captured to enable Mantas to analyse the transactions for possible money laundering activities.
For more details on Mantas, refer 'Mantas' interface document.
Specifying Transaction Details
Txn CCY
Enter the currency for the transaction. You can click on the adjoining option list to choose from a list of valid currency codes maintained in the system. Input to this field is mandatory. If the product code is input, then the system will display the currency linked to the product in this field. You will not be able to change the defaulted value.
Actual Amount
Specify the actual transaction amount in local currency.
If the account number is CL account, the amount specified in the periodic instruction will be overridden during instruction execution by the schedule amount due.
Remarks
Specify any requisite narrative regarding the transaction that is to be generated.
Charge Mode
You can indicate whether charges applicable for the transaction are to be applied over and above the transaction amount (premium) or subtracted from the transaction amount (discount).
Counterparty ID Details
The counterparty details are defaulted on selection of counterparty account number, if the counterparty identification details are maintained in PC Beneficiary Maintenance screen.
Identification
Select the option to identify the counterparty either by Organization details or by Individual person details. The options available in the drop-down list are Organization Identification and Private Identification.
Identification Value
Specify the identification value for the counterparty for the given identification type. This is mandatory only if the Identification type is specified.
Issuer
Specify the Identification Issuer of the counterparty. This is used to identify if Organization identification is used as Proprietary Identification or Private Identification.
Counterparty Scheme Name Type
Select the Identification Scheme Type of the Counterparty from the drop down list.
The valid field can be:
- C - Code
- P - Proprietary
Counterparty Scheme Name
Specify the value for Identification Scheme Name field.
If Scheme Name type is C then the Scheme Name can be selected from LOV and can have one of the values mentioned in value list depending on Organization Identification or Private Identification.
If the Scheme Name Type is P then you can enter the value for the field.
Counterparty Date of Birth
Specify the date of birth of the Counterparty.
City of Birth
Specify the city of birth of the counterparty. This is enabled and is mandatory if you have selected identification type as 'Date and Place of birth'.
Country of Birth
Select the country of birth of the counterparty from the option list. This is enabled and is mandatory if you have selected the identification type as 'Date and place of birth'.
Country
Specify the country of residence of the counter party. This adjoining option list displays all valid country codes maintained in the system. You can choose the appropriate one.
Note
The country information is captured to enable Mantas to analyse the transactions for possible money laundering activities.
For more details on Mantas, refer 'Mantas' interface document.
3.33.4 Periodicity Tab
You can capture the following details:
Activation Date
Specify the collection due date. Activation date is applicable only for outgoing direct debit collection type. The activation date will be the first execution date.
First Generation Date
Specify the date of first generation of the transaction.
Next Generation Date
When you first maintain periodic instructions for an outgoing collection transaction, the next generation date is considered by default to be the same as the first generation date that you specified.
End Date
You can specify an end date for generation of transactions for the instruction.
Holiday Exception
Indicate whether generation of transactions must be rolled forward when the generation date falls on a currency holiday. If you check this box, the system will check transaction value dates against the currency calendar of the transaction currency.
Frequency
You must specify the frequency of generation of the instruction, in terms of:
- Days
- Months
- Years
Month End Flag
In addition, you can indicate that the transactions must be generated on the month-end day.
Specifying Consolidation Details
Consolidation
This indicates if the customer leg of the transaction needs to be consolidated. In case the customer account is in a foreign currency, you cannot opt for consolidation.
Consolidation Reference
If a reference is provided by the customer for the consolidation of the customer leg, you must capture the same.
Specifying Other Details
Generate Advice
You can indicate whether a customer advice needs to be generated for the contract. If you do not specify this, after product resolution, the transaction acquires the specification defined for the product.
Response Advice Basis
Specify whether the response advice for the collection transaction is to be generated on the event date or the response date. By default, the system picks up this specification from the customer agreement.
Redispatch Reqd
Indicate if this outgoing collection transaction needs to be redispatched if rejected.
Debtor Category
Specify the debtor category to which the debtor of the transaction belongs. If you do not specify this, the system will use a default value from the customer maintenance (for incoming collections) or creditor DD agreement (for outgoing collections).
Priority
This indicates the priority assigned to the contract in the processing queue. If you do not specify this, after product resolution, the transaction acquires the specification defined for the product.
Split Indicator
This indicates whether the collection transaction has been split into multiple contracts. If it has not been split, this field indicates ‘Not Applicable’. If the transaction has been split, this field indicates whether the transaction being viewed is a parent transaction or a child transaction.
Creditor ID
For an Incoming Collection transaction or its reject / recall, mention the Creditor ID.
Agreement ID
For Collection transactions, enter the Creditor or Debtor Agreement ID as applicable.
Source Code
The source of the transaction is displayed here
Station ID
The customer station of the transaction is displayed here
3.33.5 User-defined fields Tab
The user-defined fields are displayed in the UDF screen, which can be accessed using the (UDF) Tab. The fields will be displayed based on the display sequence no defined at the product category level and the label of the field will be shown in the language of the Oracle FLEXCUBE user.
Payment Details
You can indicate any specific details regarding the payment in this section.
Closing periodic instructions
When you close a periodic instruction and subsequently have another user authorize the closure, the instruction ceases to generate any transactions in future.
3.34 Dispatch File Maintenance
This section contains the following topics:
- Section 3.34.1, "Invoking the Dispatch File Parameter Screen"
- Section 3.34.2, "Viewing Dispatch File Parameters Summary"
3.34.1 Invoking the Dispatch File Parameter Screen
You can define the parameters of dispatch files generated from Oracle FLEXCUBE using ‘Dispatch File Parameters’ (PCDSFPRM) screen.
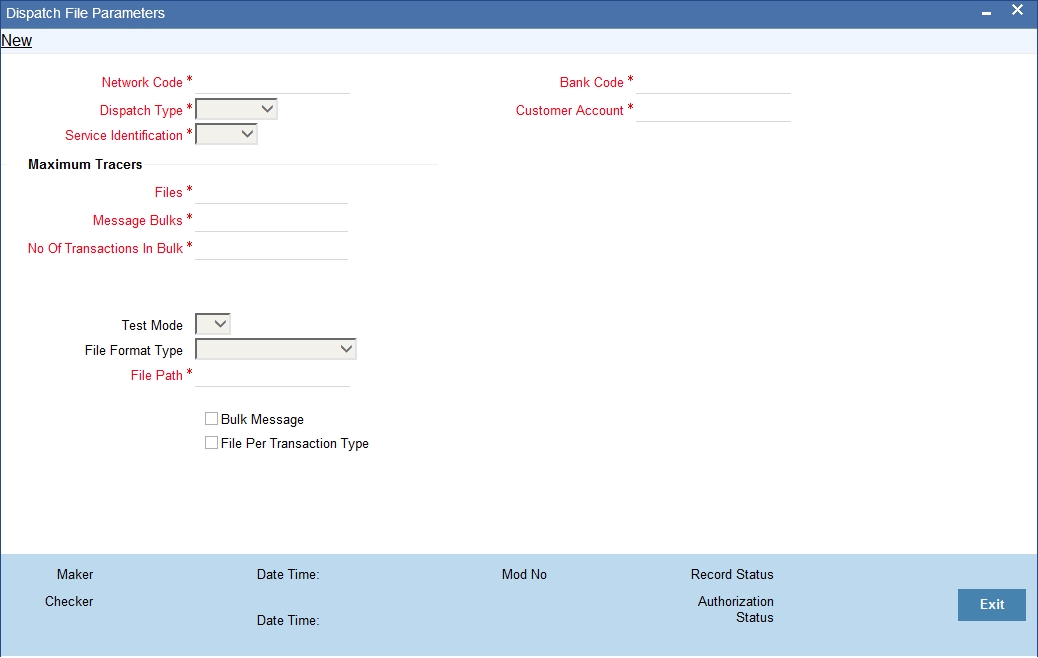
You can capture the following details here:
Dispatch Type
Specify the type of the dispatch. The drop-down list displays the following details:
- Network – If you choose this, you must specify the clearing network code. The system will default the Bank Code and the Customer Number as ‘ALL’.
- Bank Code - If you choose this, you must specify the bank code. The system will default the Clearing Network and the Customer Number as ‘ALL’.
- Customer - If you choose this, you must specify the customer number. The system will default the Bank Code and the Clearing Network as ‘ALL’.
- ALL – If you choose this, the system will generate XML files for all customers.
Choose the appropriate one.
Service Identifier
Specify the service type as of the clearing network. The drop-down list displays the following details:
- SCT
- SDD
Choose the appropriate one.
Clearing Network
Specify the clearing network for which the dispatch file parameters are maintained. The option list displays all valid clearing networks maintained in the system. Choose the appropriate one.
Bank Code
Specify the direct or the indirect participant bank code for which the dispatch file parameters are maintained.
Customer Account
Select the customer account number for whom the file parameters are maintained. from the option list. The list displays all valid account numbers maintained in the system.
You can also select CL account number as the customer account.
Test Mode
Specify the test or production mode for the clearing network. If you have chosen dispatch type as ‘Network’, you must specify the test mode.
File Format Type
Specify the format of the file. The supported file format is XML.
File Path
Specify the path to locate the file.
Bulk Message
Check this option to indicate that the message bulk should be created with many transactions.
Maximum No of Files
Specify the maximum number of files that can be sent to the clearing network in one settlement cycle.
Maximum No of Message Bulks
Specify the maximum number of message bulks in a file.
Maximum No of Transaction
Specify the maximum number of transactions that can be bulked in a message bulk.
File Per Transaction Type
Check this option to create dispatch files with message bulks of each of the transaction types. If you do not check this option, the file is created with the following transaction types in the same order:
- SCT
- Credit Transfer (Pacs.008)
- Payment Cancellation Request/Recall(Camt.056)
- Returns/Positive Answer to Recall (Pacs.004)
- Resolution of Investigation/Negative Answer to Recall (Camt.029)
- SDD
- Direct Debit Instructions (pacs.008)
- Rejects (pacs.002)
- Reversals (pacs.007)
- Return/Refunds (pacs.004)
If this option is selected then the one file is created for each transaction type.
3.34.2 Viewing Dispatch File Parameters Summary
You can view a summary of dispatch file parameters using ‘Dispatch File Parameters – Summary’ (PCSSFPRM) screen.
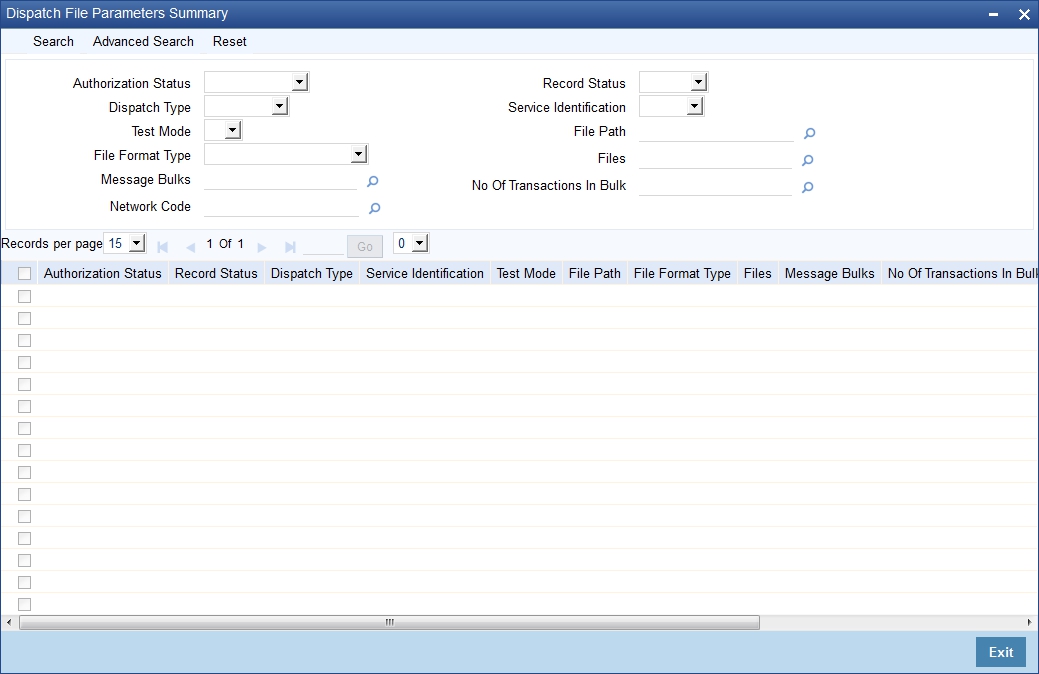
The parameters given above are STEP2 clearing system specific to handle SEPA Credit Transfers and SEPA Direct Debits. Files sent to STEP2 clearing system follow the naming conventions given below:
1. File Naming Convention
EEVVSSSBBBBBBBBX…X.Z
Where-
- EE is S2 (STEP2)
- VV is the format version (02 = XML)
- SSS is the three character service identifier, SCT in this case; or SDD
- BBBBBBBB is the BIC (8) of the Direct Participant
- X…X (optional - up to 15 characters) is to be used by the Direct Participant
- Z indicates the type of the file, where: I = ICF (SCT) or I = IDF (SDD)
The STEP2 central system generates files with X…X fields as follows and the same will be done in FLEXCUBE -
YYMMDDHHMMSSNNN, where:
YYMMDDHHMMSS indicates the file creation date and time and NNN an incremental number starting from 000. This is reset to 000 every time the DD (date) is changed.
2. File Size parameters
The STEP 2 clearing system allows a maximum of 500 files in one settlement cycle. Each file can have a maximum of 500 message bulks. System can include 100,000 transactions in each of the message bulks.
Files are generated for customer or bank with the following naming convention.
EEVVSSSBBBBBBBBX…X
Where -
- EE is PC
- VV is the format version (02 = XML)
- SSS is the three character service identifier, SCT in this case; or SDD
- BBBBBBBB indicate the BIC the processing bank
- X…X (optional - up to 15 characters) is to be used by the Direct Participant
- YYMMDDHHMMSS indicates the file creation date and time. NNN is an incremental number starting from 000. This is reset to 000 every time the DD (date) is changed.
3.35 Incoming Payments
This section contains the following topics:
- Section 3.35.1, "Processing of Incoming Payments"
- Section 3.35.2, "Mapping Product Categories to Message Queues"
- Section 3.35.3, "Invoking the Product Mapping Detailed Screen"
- Section 3.35.4, "Mapping of Incoming Message Tags to Fields in Payments and Collection Module"
- Section 3.35.5, "Invoking the Payments and Collections Message Mapping Maintenance Screen"
- Section 3.35.6, "Maintaining the Unsettled Payment Account or GL"
3.35.1 Processing of Incoming Payments
Oracle FLEXCUBE provides the facility of processing incoming payment messages, which are uploaded into Oracle FLEXCUBE and processed as incoming payment transactions in the Payments and Collections module. In order to facilitate such processing for incoming payments, you must:
- Map the requisite product categories in the Payments and Collections module to the requisite message queues to which the incoming payment messages are routed when they are uploaded.
- For different combinations of incoming message type, product category, source code and station ID, maintain mappings between the CPG fields and their corresponding fields in the Payments and Collections module. This enables the STP process to interpret the incoming message and resolve the details into a PC contract in the system.
3.35.2 Mapping Product Categories to Message Queues
To recall, in order to facilitate the processing of incoming payment messages, you must map the requisite product categories in the Payments and Collections module to the requisite message queues to which the incoming payment messages are routed when they are uploaded. You can do this in the ‘Product Mapping Detailed’ screen.
3.35.3 Invoking the Product Mapping Detailed Screen
You can invoke this screen by typing ‘MSDPRMAP’ in the field at the top right corner of the Application tool bar and clicking the adjoining arrow button.
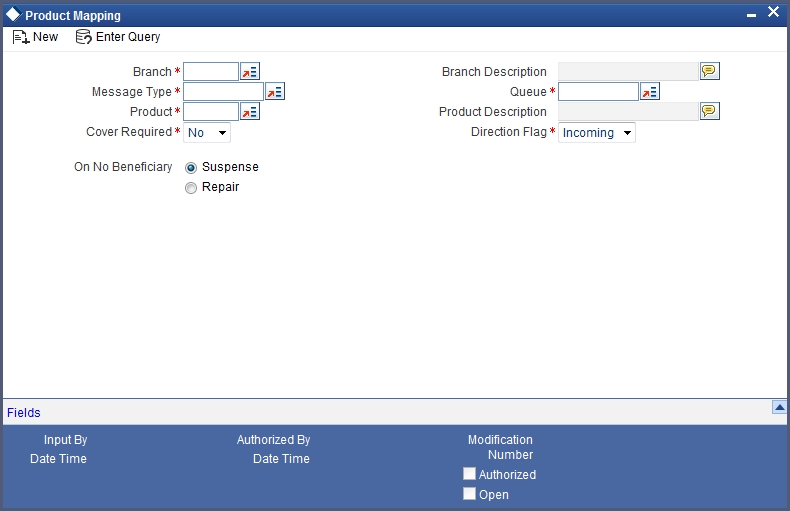
For each incoming message type, you can indicate the queue to which the messages must be routed, and the Payments and Collection product /product types / instrument type that is to be linked to the queue, to be used to process the resulting incoming payments transaction.
3.35.4 Mapping of Incoming Message Tags to Fields in Payments and Collection Module
To recall, in order to facilitate the processing of incoming payment messages, you must maintain mappings between the CPG fields and their corresponding fields in the Payments and Collections module, for different combinations of incoming message type, product category / product / instrument type, source code, station ID and network id. You can do this in the PC Message Mapping screen.
Based on the Product Category / Product / Instrument type chosen the corresponding description will be displayed alongside.
Depending on the status of the instrument being uploaded, the instrument will be uploaded as creation of a new instrument or liquidation of an issued instrument in the system.
3.35.5 Invoking the Payments and Collections Message Mapping Maintenance Screen
You can invoke the ‘Payments & Collections Message Mapping Maintenance’ screen by typing ‘PCDMSGMA’ in the field at the top right corner of the Application tool bar and clicking the adjoining arrow button.
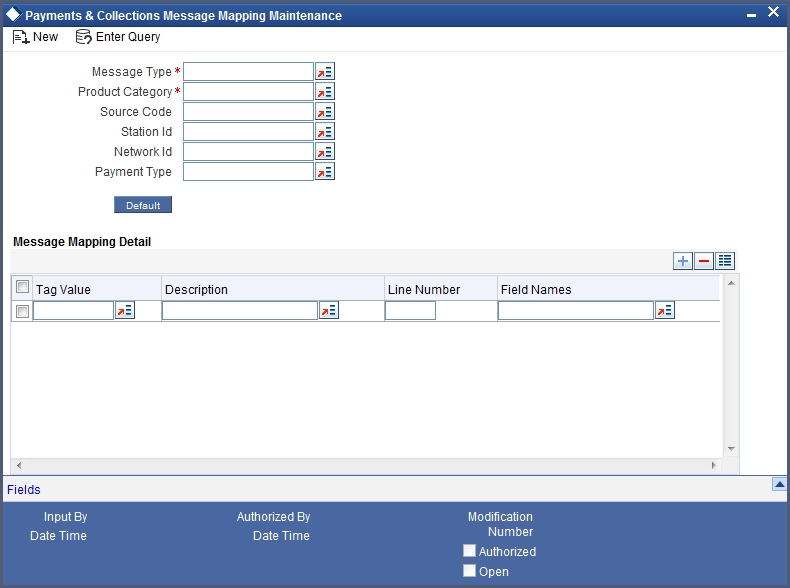
In the ‘Payment Type’ select the Payment type from the adjoining option list. Once you select the ‘Payment Type’ and click ‘Default’ button, the field mapping for the selected Payment Type is done. However, you can change the field mapping after it is defaulted.
Note
System does not validate the default type and product/product category type.
This mapping enables the STP process to interpret the CPG fields in uploaded incoming payment messages and resolve the tags into a PC contract in the system.
The list of fields supported as a part of the instruments transaction will be factory shipped in the common payments gateways fields’ data store.
Example of an Incoming Message resulting in an outgoing RTGS:
{1:F01 RTGPDEFFAXXX1111111111}
{2:O103 CITIGB21XXXXN}
{3 :{ 103: RTP} {113: LIYN} {108:0211042130840011} {119: STP}}{4:
20:000PRTG033650001
23: CRED
32A:031231EUR1000
57A: AABSDE31
59:/BENAC-12345}
Sender - RTGPDEFF
Amount – 1000
Currency – EUR
Value Date – 31-Dec-2003
AWI - AABSDE31
Beneficiary - BENAC-12345
Incoming Message from a direct participant for passing funds to Non- Addressable Indirect participant
For a truly incoming message, you will need to link tag 57 content to the customer account and sender to the counterparty BIC.
Example of a truly Incoming Message:
{1:F01UBSWGB2LAXXX1111111111}
{2:O103 CITIGB21XXXXN}
{3 :{ 103: RTP} {113: LIYN} {108:0211042130840011} {119: STP}}{4:
20:000PRTG033650001
23: CRED
32A:031231EUR1000
57A:AABSDE31
59:/BENAC-12345
-}
Sender - UBSWGB2L
Non-Addressable Indirect Participant – AABSDE31
Amount – 1000
Currency – EUR
Value Date – 31-Dec-2003
Beneficiary - BENAC-12345
For SEPA transactions the mapping between Common Payment Gateway Fields and PC will be as follows:
- SEPA Credit Transfer - CPG-PC mapping -
- SEPA Direct Debits- CPG-PC mapping -
3.35.6 Maintaining the Unsettled Payment Account or GL
Details in regard to maintaining the unsettled Payment Account or GL are explained below.
3.35.6.1 Incoming Payments
Processing an incoming payment message could be aborted due to specific reasons; for instance, the beneficiary of the payment not being resolved. You can ensure that such aborted incoming payments are processed using an unsettled payment account or a GL.
You can specify the requisite unsettled account or GL to be used for processing rejected incoming payments, for each payments product category, in the ‘Payments and Collections Product Category Maintenance’ screen.
When the aborted transactions are posted to the unsettled GL that you specify, they can be rejected subsequently if communication is received from the customer. Such rejection would generate a corresponding outgoing payment transaction.. The reject category for the rejected transaction can be maintained in the Product Category Maintenance for the incoming payment category.
If you do not specify the unsettled account or GL for a product category, then incoming payments using the product category, which are rejected, will not be processed, and no accounting entries will be posted in respect of them.
3.35.6.2 Incoming Collections
In the case of incoming collections processing could be aborted due to the DD mandate being closed, or posting to the relevant account not being possible, and so on. Such aborted transactions are rejected automatically, and the customer account is replaced by the Unsettle GL Account that you specify in the Product Category maintenance.
Maintaining error codes for automatic rejection
Also, it is possible to maintain a list of errors that would result in rejection of the incoming collection contract and in posting to the Unsettle GL. Auto reject of errors for multiple networks can be done using network specific reject codes.You can maintain this list in the ‘Auto Reject Mapping Maintenance’ screen. You can invoke this screen by typing ‘PCDERRCD’ in the field at the top right corner of the Application tool bar and clicking the adjoining arrow button.
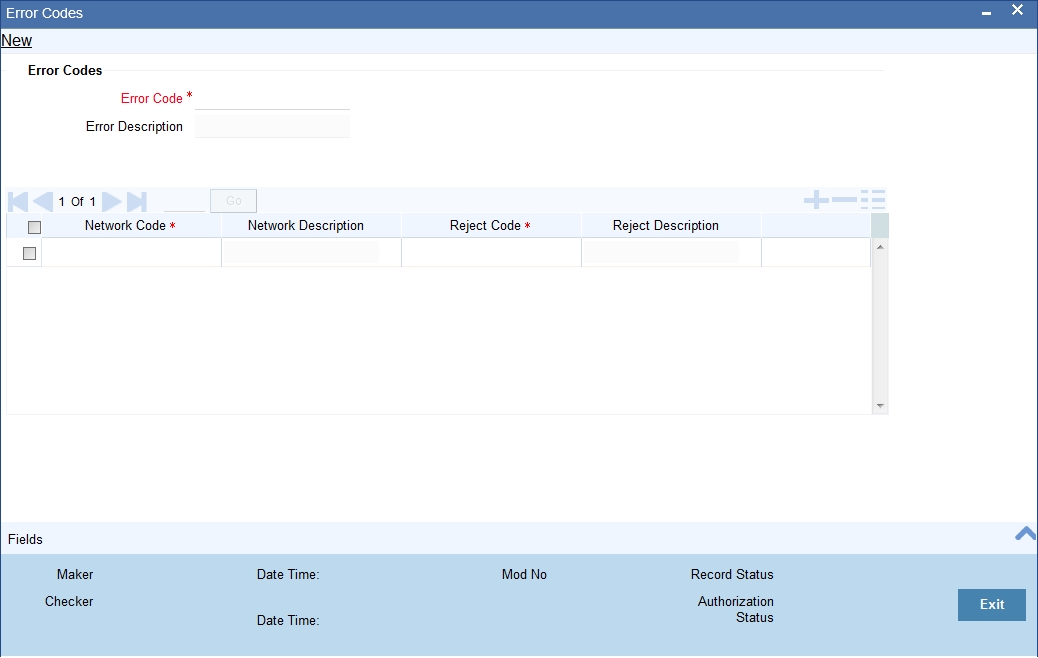
You can specify the following here:
Error Code
Specify the relevant error code. Alternatively, you can select the error code from the option list.The list displays all the relevant error codes maintained in the system.
Error Description
The system displays the description of the specified error code.
Network Code
Specify the valid code assigned to the clearing network. Alternatively, you can select the network code from the option list.The list displays all the relevant network codes maintained in Clearing Network Maintenance (PCDCLRNT).
Network Description
The system displays the description of the specified clearing network.
Reject Code
Specify the relevant reject code for transaction rejection. Alternatively, you can select the reject code from the option list.The list displays all the relevant reject codes maintained in the system.
Reject Description
The system displays the description of the specified reject code.
In this screen, you can map the relevant error codes to the appropriate reject codes.If any of the errors mapped in this screen are encountered in processing, the customer account in the incoming collection would be replaced with the Unsettle GL that you have specified in the Product Category maintenance.
The following error codes can be mapped:
Error Code |
Description |
PC-BK064 |
Currency restriction occurred |
PC-BK043 |
Customer account is closed |
PC-BK045 |
Customer account is unauthorized |
PC-SAV-024 |
Customer account has been blocked |
PC-SAV-025 |
Stop Payment has been issued against customer account |
PC-SAV-026 |
No Credit is allowed for the customer account |
PC-SAV-027 |
No Debit is allowed for the customer account |
PC-SAV-028 |
Customer account is dormant |
PC-SAV-029 |
Customer account is frozen |
PC-SVV-092 |
Unable to get creditor DD agreement for product $1, customer $2 and account $3 - $4 |
PC-SVV-093 |
Unable to get creditor DD agreement for product $1, customer $2 and account $3 - $4 |
PC-SVV-094 |
Creditor DD agreement for product $1, customer $2 and account $3 - $4not valid as of $5 |
PC-SVV-095 |
Creditor DD agreement for product $1, customer $2 and account $3 - $4not valid as of $5 |
PC-SAV-024 |
Customer account is blocked |
PC-SAV-025 |
Payment not allowed for customer account |
PC-SAV-026 |
Credit not allowed for customer account |
PC-SAV-027 |
Debit not allowed for customer account |
PC-SAV-028 |
Customer account is dormant |
PC-SAV-029 |
Customer account is frozen |
3.36 Outgoing Payments for Local Currency Transactions in Other Modules
This section contains the following topics:
3.36.1 Maintaining outgoing payments for local currency transactions
Oracle FLEXCUBE provides the facility of generating outgoing payment instructions through the Payments and Collections module, for local currency transactions in any of the following modules:
- Foreign Exchange
- Money Market
- Loans and Deposits
- Letters of Credit
- Bills and Collections
- Securities
- Standing Instructions
In the Branch Parameters, you can specify whether these payment instructions (for LCY transactions in the branch) must be routed either through messaging, or through the local clearing network.
You can invoke the ‘Branch Parameters Maintenance’ screen by typing ‘STDBRANC’ in the field at the top right corner of the application tool bar and clicking the adjoining arrow button. Click the ‘LCY Msg Pref’ button in the ‘Branch Parameters Preferences’ screen to invoke the ‘LCY Message Preference’ screen.
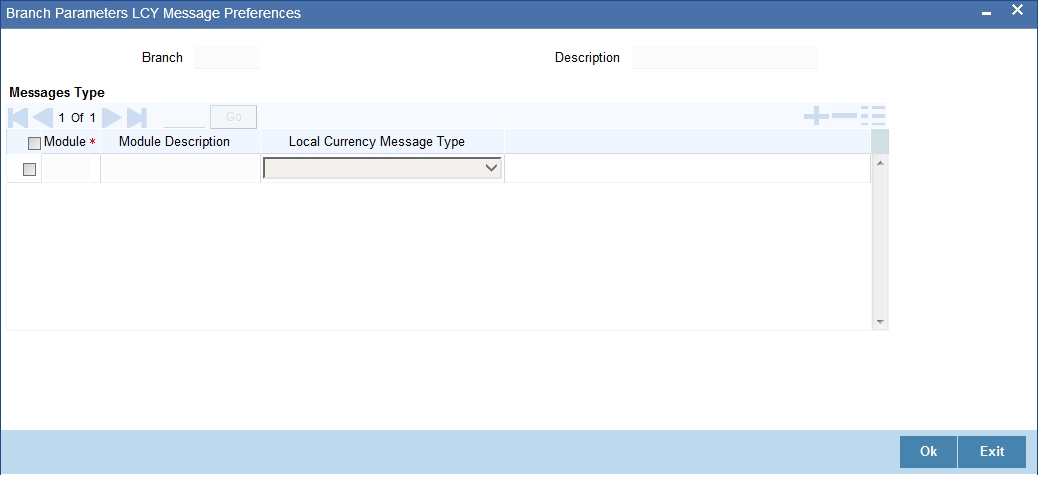
In this screen, you can specify any of the following options for messages related to LCY transactions, in any of the modules mentioned above.
In the LCY Message Type field, the following options are available:
Suppress LCY message
If this option is chosen, then the payment is routed through the local clearing network, external to Oracle FLEXCUBE and the message is suppressed.
Gen PC Contract
If this option is chosen, a contract is generated in the Payments and Collections module for the local currency payment, provided that the payment option chosen is ‘Local Clearing’; or if the payment option is ‘Message’ and the cover option is ‘Local Clearing’.
3.37 Payments Module Settlement Details to other Modules
This section contains the following topics:
3.37.1 Maintaining Payment UDF Mapping Screen
In order to facilitate processing of outgoing payments instructions for local currency transactions in any module, through the Payments module, you must map the requisite settlement details defined for specific payments product categories, to the products in other modules. You can do this using the ‘Settlements to Payment Product and UDF Mapping’ screen.
You can invoke the ‘Payment UDF Mapping Maintenance’ screen by typing ‘PCDISMAP’ in the field at the top right corner of the Application tool bar and clicking the adjoining arrow button.
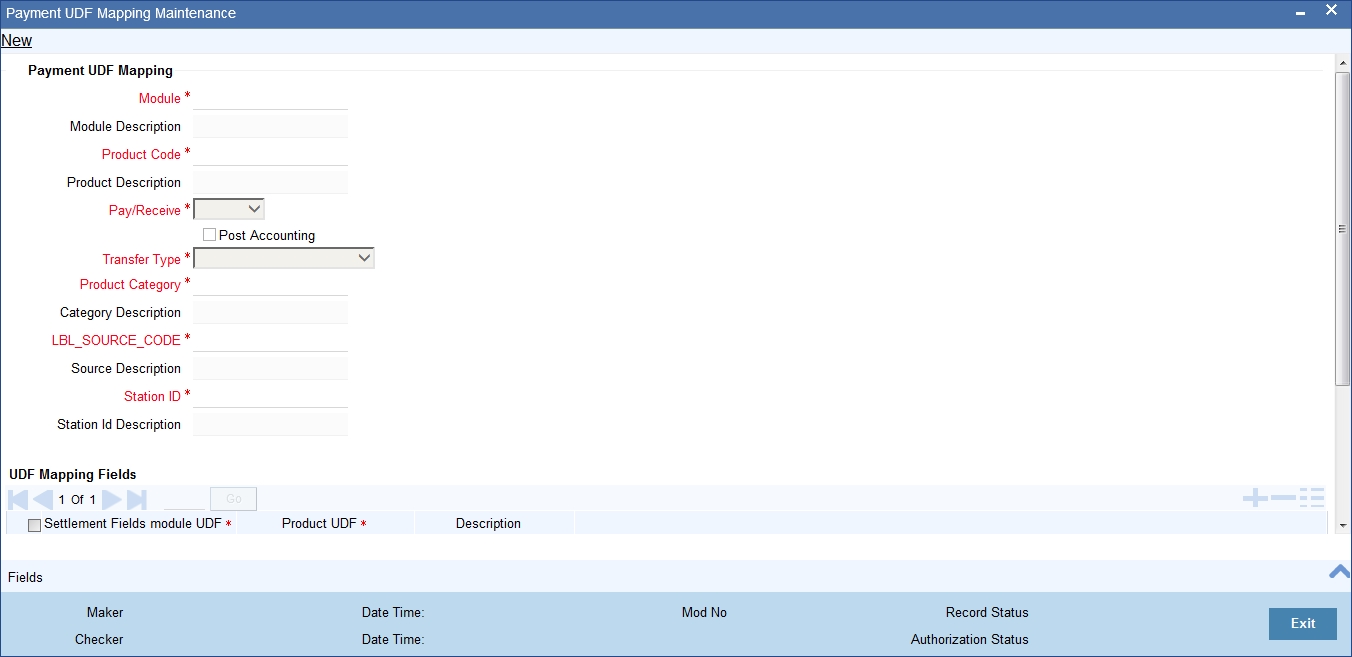
In this screen, you can map settlement details and user-defined fields designated for specific product categories in the Payments module:
- To a specific product defined for a specific module
- To all products defined for a specific module
Pay/ Receive Option
You will also need to identify the process direction of the settlement. It can either be Pay or Receive. If you select the Pay option, a list of all Outgoing Payment categories will be displayed in the option list. Similarly, settlement will be restricted to Outgoing Collections if the process direction is Receive.
Transfer Type
You can also specify the Transfer type, which enables the System to distinguish whether the payment is a Customer Transfer or a Bank Transfer. You can choose to maintain different Payment product categories for different types of payments. In case of bank transfer, select a Bank Transfer type of PC product category. Similarly, for customer transfer select Customer Transfer type of product category. For the Receive Leg, the Customer Transfer option is defaulted in the Transfer Type field and disabled.
Oracle FLEXCUBE allows you to route MT 400 messages from the Bills and Collections (BC) module through the PC module. A separate Transfer Type called Collection Payment Advice is available for the purpose. This is only applicable for the BC module, when the settlement direction is Pay. The PC Product Categories available for mapping in such a case will be Bank Transfer Type of Products.
You can specify the following details as part of the mapping for each module, product, process direction, payments product category, source code and station ID combination:
- Any or all settlement related fields defined for the payments product category
- Any or all user-defined fields defined for the Payments module
- Any or all user-defined fields defined for the payments product category
Source Code and Customer Station id
You must specify the code of the upload source and the ID of the customer station maintained for the source.
Enabling Post Accounting Entries option
If you have indicated that PC Contracts should be generated for local currency payments within your bank (LCY Message Type) and if the settlement is routed through the Clearing House you have the option of posting accounting entries as part of PC processing.
Your specification in this field is defaulted to the Settlement sub-screen.
Local Clearing for Funds Transfer transactions through the PC Module
For funds transfer transactions with local clearing through the PC module, you must map the requisite settlement details defined for the requisite payments product categories, to the FT products in the Settlements to UDF Mapping screen. When this setup is authorized, the payment for such FT contracts is processed as follows:
- If payment is indicated by message, the corresponding message is generated upon authorization of the contract.
- If payment is through local clearing, a PC contract is generated with the clearing details mentioned in the Settlements screen. In this case, the FT contract reference number will be the source reference for the PC contract.
3.38 Local Clearing and Cover Details for Customer Settlement Instructions
This section contains the following topics:
3.38.1 Maintaining Local Clearing and Cover Details Customer Settlement Instructions
When you specify settlement instructions for a customer, you can indicate whether payment for local currency transactions is to be effected via messaging or over the local clearing network. You can also indicate whether a cover is required for payment, and whether the cover is through messaging or over the local clearing network.
You can specify these details in the ‘Settlement Instructions’ screen. You can invoke this screen by typing ‘ISDINSTN’ in the field at the top right corner of the Application tool bar and clicking the adjoining arrow button.
In the Payment By field, indicate the mode of payment, either Message or Local Clearing; and in the ‘Cover By’ field, indicate the mode through which cover must be available.
The screen is as below:
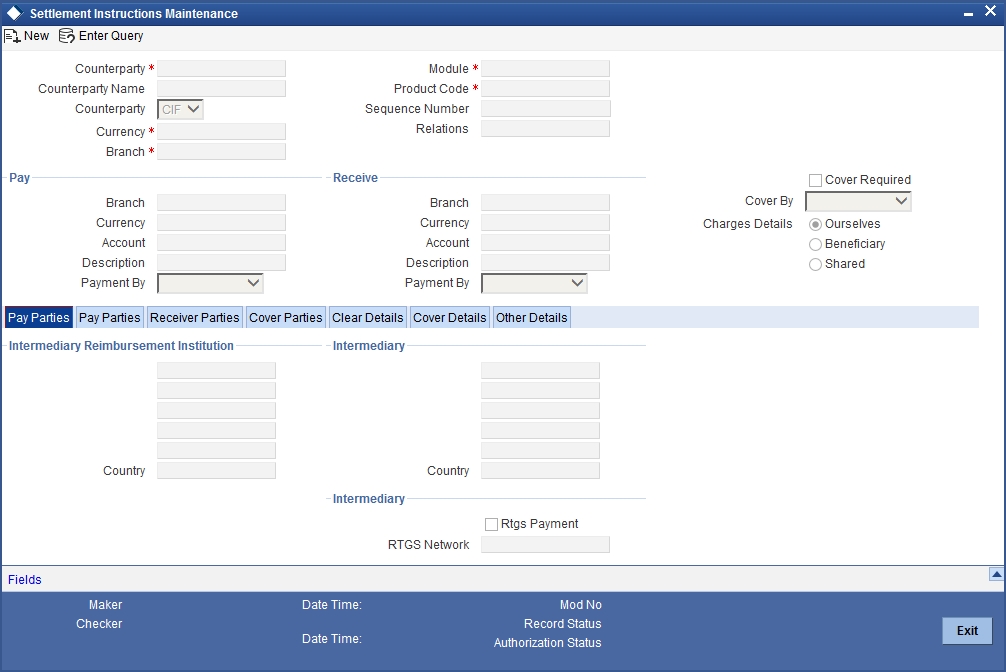
If you indicate payment over a clearing network, you must also specify the account details of the external counterparties both pay and receive accounts, in the Local Clearing tab (change name?), in the ‘Settlement Instructions’ screen.
![]()
For the counterparty details, you can specify:
Bank Code
Select the bank code from the list of options available.
Account
Specify the account here.
Name
Specify the name of the account here.
If you indicate cover for payment via the local clearing network, you must specify the account details of the cover party, in the Cover Details tab in the Settlement Instructions screen.
The screen is as below:
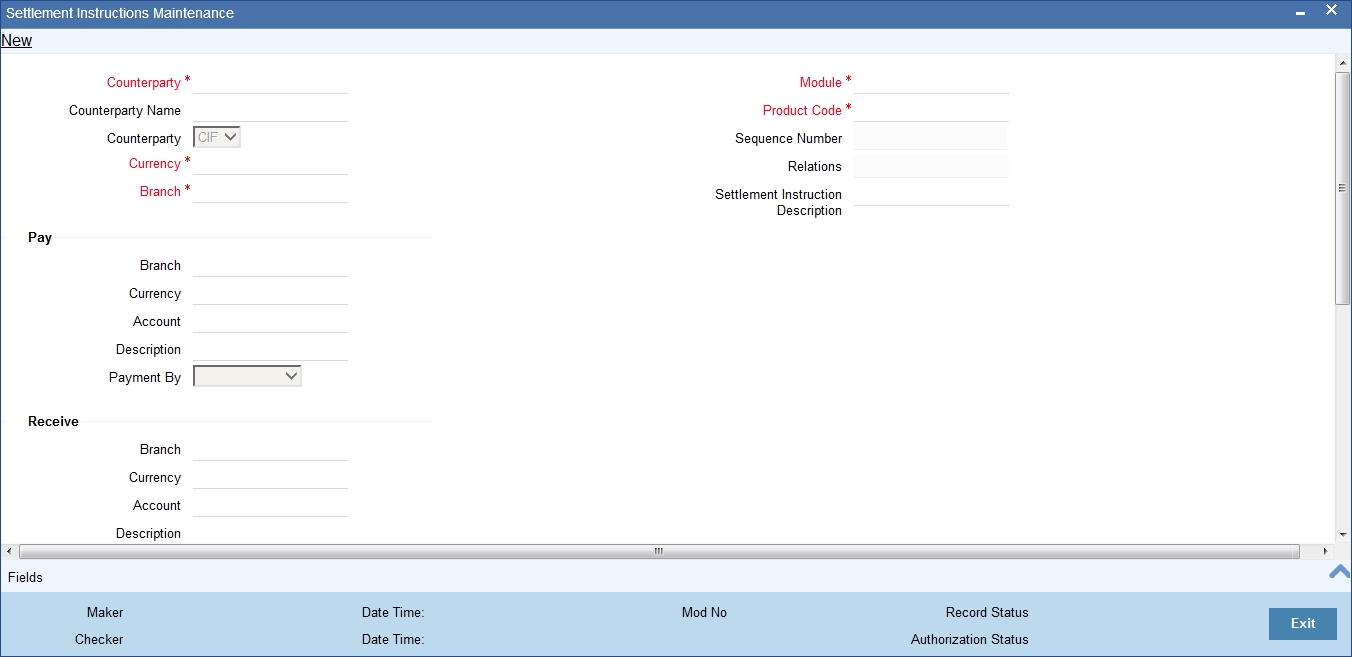
For the cover party account details, you can specify:
Bank Code
Select the bank code from the list of options available.
Account
Specify the account here.
Name
Specify the name of the account here.
The following scenarios are possible:
Cover Required |
Cover By |
Payment By |
Local Clearing Counterparty Details? |
Cover Details? |
Yes |
Message |
Message |
No |
No |
Yes |
Local Clearing |
Message |
No |
Yes |
No |
|
Message |
No |
No |
No |
|
Local Clearing |
Yes |
No |
3.39 Local Clearing and Cover Details for Settlement Messages
For local currency transactions for which the payment instructions are to be generated through the Payments module, you can specify the following settlement details:
- Whether the payment is to be effected through messaging or via the local clearing network
- Whether a cover is required for the payment
- Whether the cover must be available through messaging or through the local clearing network
You can specify these details in the Settlements Message Details screen. In the Message Details tab, you can indicate the payment mode, and the cover details.
If you indicate payment through the local clearing network, or cover through the local clearing network, you must indicate the external counterparty details in the Local Clearing tab in the ‘Settlement Message Details’ screen.
For processing direct debits on loans you will also need to capture the Agreement ID of the counterparty in order to facilitate a cross-referencing between the Loans Payment and the Direct Debit instruction when a reversal of payment is carried out due to rejection of the outbound DD.
The post accounting option is defaulted from the Settlements to Payment Product and UDF Mapping screen. If enabled this indicates that accounting entries maintained for the PC product should be posted for the PC contract initiated for Clearing
3.40 Generation of the Local Payments Contract for Local Currency Transactions
In cases where outgoing payment transactions need to be generated for local currency transactions for a module (as specified in the LCY Message Preferences in the Branch Parameters), the payments transaction is created with the following fields:
- Product Category – This is derived from the mapping in the Settlements to Payment Product and UDF Mapping maintenance (in the Settlements to Payment Product and UDF Mapping screen) for the module and product.
- Source – This is derived from the mapping in the Settlements to Payment Product and UDF Mapping maintenance (in the Settlements to Payment Product and UDF Mapping screen) for the module and product.
- Branch – This is the branch from which the contract was entered.
- Customer Branch – The branch where the customer account resides, derived from the Settlement Message Details maintenance for the contract.
- Counterparty Name – This information is picked up from the counterparty details in the Settlement Instructions maintenance.
- Their Reference Number – This is the same as the Contract Reference Number of the entered contract.
- Customer Account and Customer Entry Value Date– This is the debit account of the contract. For every amount tag, an offset amount tag is defined. During the generation of the contract the debit account and the debit value date are picked up for the ESN and Contract Reference Number and offset amount tag.
- Station - This is derived from the mapping in the Settlements to Payment Product and UDF Mapping maintenance (in the Settlements to Payment Product and UDF Mapping screen) for the module and product.
- Counterparty Bank – This is picked up from the Settlement Instructions maintenance, where it has been defined for the customer of the contract.
- Counterparty Account - This is picked up from the Settlement Instructions maintenance, where it has been defined for the customer of the contract.
- Activation Date – This is considered to be the Credit Value Date.
- Clearing Bank Code – This is derived from the Clearing Bank Code maintained for the branch.
- UDF 1 – 30 – These user-defined fields are derived mapping in the Settlements to Payment Product and UDF Mapping maintenance (in the Settlements to Payment Product and UDF Mapping screen) for the module and product.
The PC contract for the local currency transaction is generated if the LCY Message Preferences option chosen is ‘Generate PC Contract’, and provided:
- Payment By option chosen for the contract is ‘Local Clearing’
- Payment By option chosen for the contract is ‘Message’ and cover is required, and the Cover By option chosen is ‘Local Clearing’.
It is not possible to have both Payment By and Cover By options as ‘Local Clearing’.
3.41 Correspondent Bank Maintenance
This section contains the following topics:
3.41.1 Invoking the Correspondent Bank Maintenance Screen
You can specify these details in the 'Correspondent Bank Maintenance' screen.
You can invoke this screen by typing 'PCDCYCOR' in the field at the top right corner of the Application tool bar and clicking the adjoining arrow button.
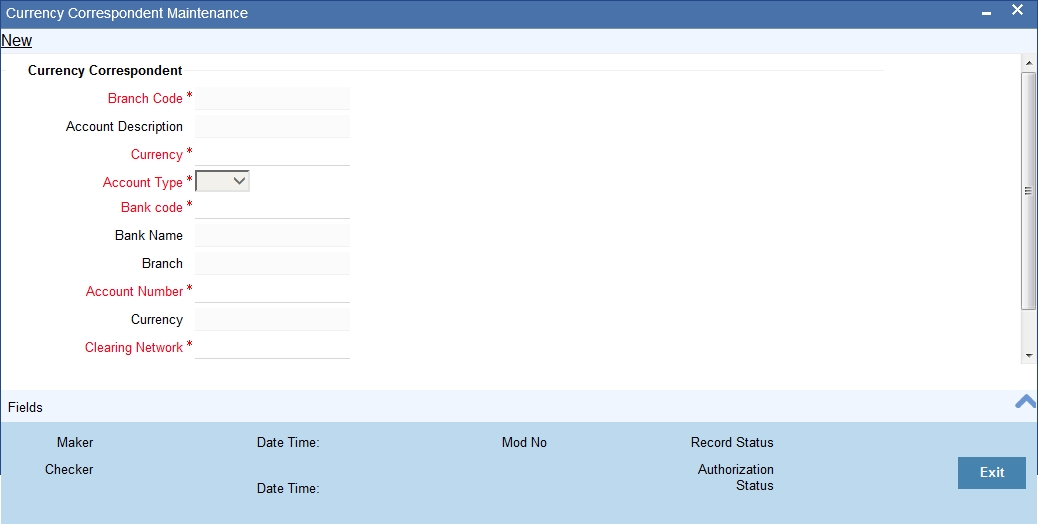
The following details are maintained:
Branch Code
The system defaults the code of the current bank here.
Description
The system defaults the description of the current bank here.
Currency
Specify the currency code from the adjoining option list.
Account Type
Select the account type from the adjoining drop-down list.
Bank Code
Specify the bank code of the correspondent from the adjoining option list.
Bank Name
The system displays the bank name of the bank code specified.
Branch
The system displays the branch name of the bank code specified.
Account Number
Specify the account number of the correspondent from the adjoining option list.
Currency
The system displays the currency code of the account number specified
Clearing Network
Specify a value for the field from the adjoining list of values. The field is used to specify the clearing network for the currency correspondent.
3.42 Creditor Direct Debit Agreement History
This section contains the following topics:
- Section 3.42.1, "Invoking the Creditor Direct Debit Agreement History"
- Section 3.42.2, "Viewing Creditor Direct Debit Agreement History"
3.42.1 Invoking the Creditor Direct Debit Agreement History
Oracle FLEXCUBE facilitates retrieval of the history of agreement records pertaining to particular Creditor using 'Creditor Direct Debit Agreement History' screen.
You can invoke this screen by typing 'PCDCRAHS' in the field at the top right corner of the Application tool bar and clicking the adjoining arrow button.
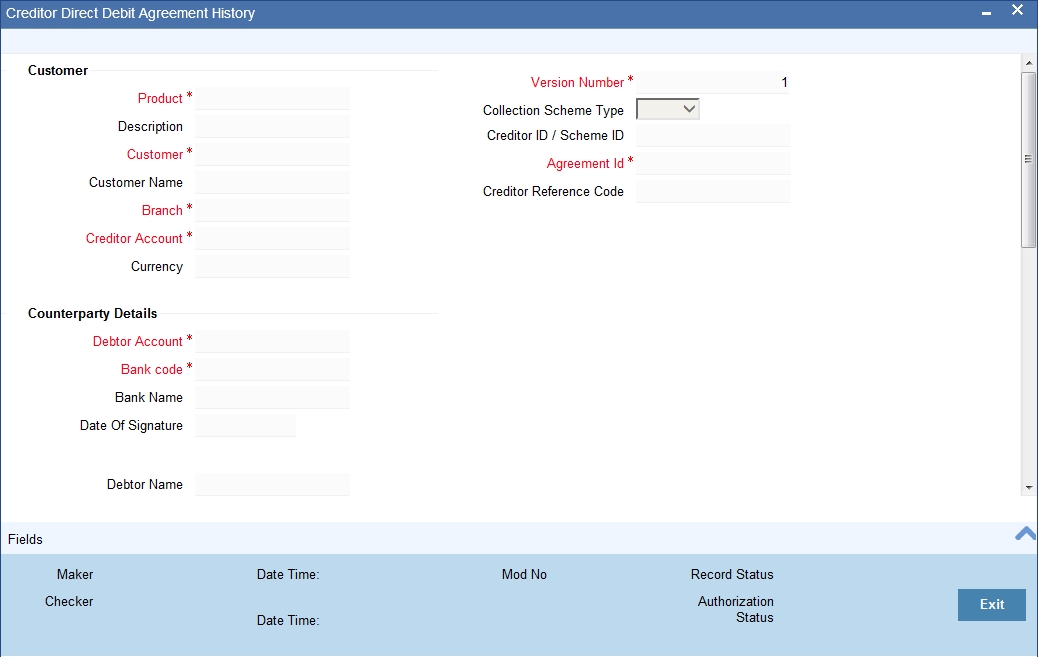
Version Number
This field displays the corresponding version number.
For further details refer the section ‘Maintaining DD Agreement Details for Creditors' in this user manual.
3.42.2 Viewing Creditor Direct Debit Agreement History
You can view the history of agreement records pertaining to particular Creditor using 'Creditor Direct Debit Agreement History Summary' screen. You can invoke this screen by typing 'PCSCRAHS' in the field at the top right corner of the Application tool bar and clicking the adjoining arrow button.
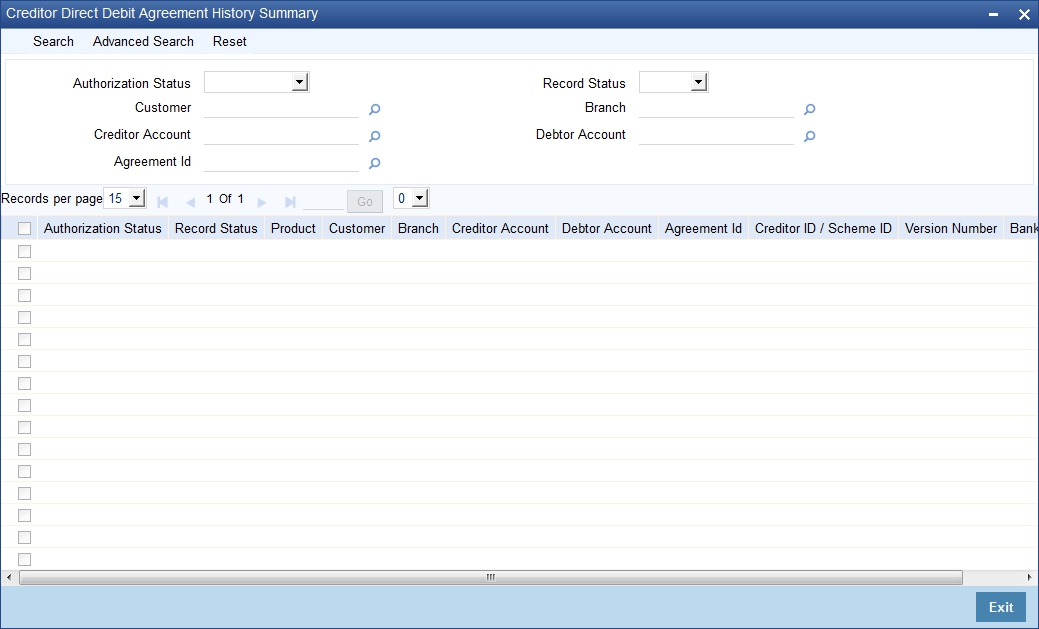
You can query based on any or all of the following criteria:
- Authorization Status
- Record Status
- Customer
- Branch
- Creditor Account
- Bank Code
- Debtor Account
- Agreement ID
Click 'Search'. The system displays the following values:
- Authorization Status
- Record Status
- Product
- Customer
- Branch
- Creditor Account
- Debtor Account
- Agreement ID
- Creditor ID/Schema ID
- Version Number
The system displays the records in descending order of the version number.
3.43 Debtor Direct Debit Agreement History
This section contains the following topics:
- Section 3.43.1, "Invoking the Debtor Direct Debit Agreement History"
- Section 3.43.2, "Viewing Debtor Direct Debit Agreement History"
3.43.1 Invoking the Debtor Direct Debit Agreement History
Oracle FLEXCUBE facilitates retrieval of the history of agreement records pertaining to particular Debtor using 'Debtor Direct Debit Agreement History' screen.
You can invoke this screen by typing 'PCDDRAHS' in the field at the top right corner of the Application tool bar and clicking the adjoining arrow button.
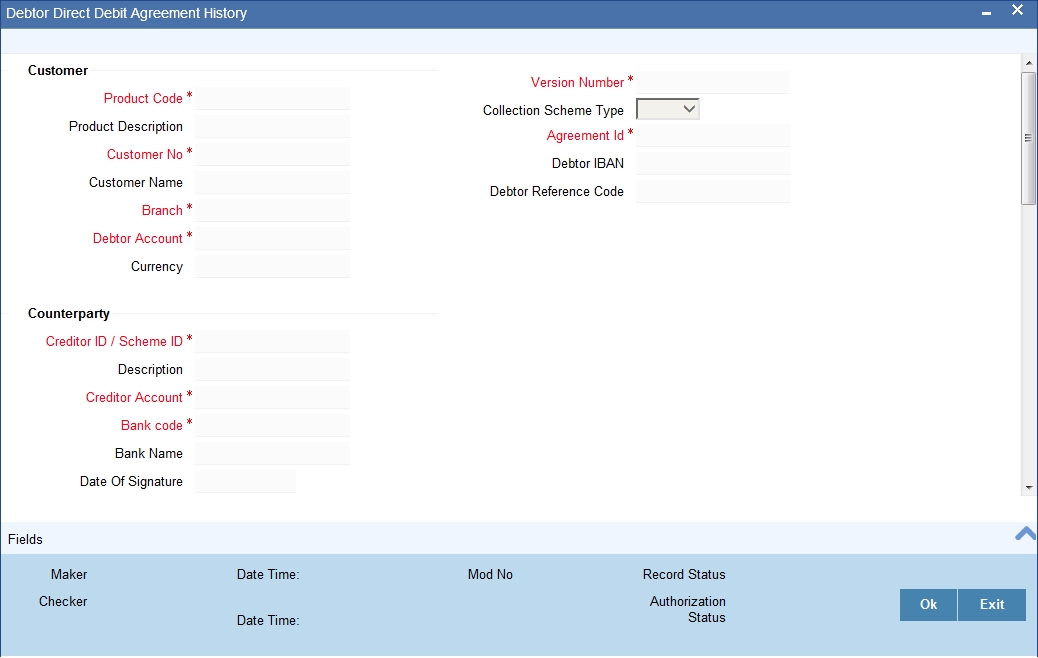
Version Number
This field displays the corresponding version number.
For further details refer the section ‘Maintaining DD Agreement Details for Debtors’ in this user manual.
3.43.2 Viewing Debtor Direct Debit Agreement History
You can view the history of agreement records pertaining to particular Debtor using 'Debtor Direct Debit Agreement History Summary' screen. You can invoke this screen by typing 'PCSDRAHS' in the field at the top right corner of the Application tool bar and clicking the adjoining arrow button.

You can query based on any or all of the following criteria:
- Authorization Status
- Record Status
- Branch
- Debtor Account
- Agreement ID
- Creditor Name
- Product Code
- Customer
Click 'Search'. The system displays the following values:
- Authorization Status
- Record Status
- Branch
- Debtor Account
- Key Details
- Creditor ID/Schema ID
- Agreement ID
- Creditor Name
- Product Code
- Customer
- Version Number
The system displays the records in descending order of the version number.
3.44 Debtor Direct Debit Instructions History
This section contains the following topics:
- Section 3.44.1, "Invoking the Debtor Direct Debit Instructions History Screen"
- Section 3.44.2, "Viewing Debtor Direct Debit Instructions History"
3.44.1 Invoking the Debtor Direct Debit Instructions History Screen
Oracle FLEXCUBE facilitates retrieval of the history of instruction records pertaining to particular Debtor and Debtor Account combination using 'Debtor Direct Debit Instructions History' screen.You can invoke this screen by typing 'PCDIDRHS' in the field at the top right corner of the Application tool bar and clicking the adjoining arrow button.
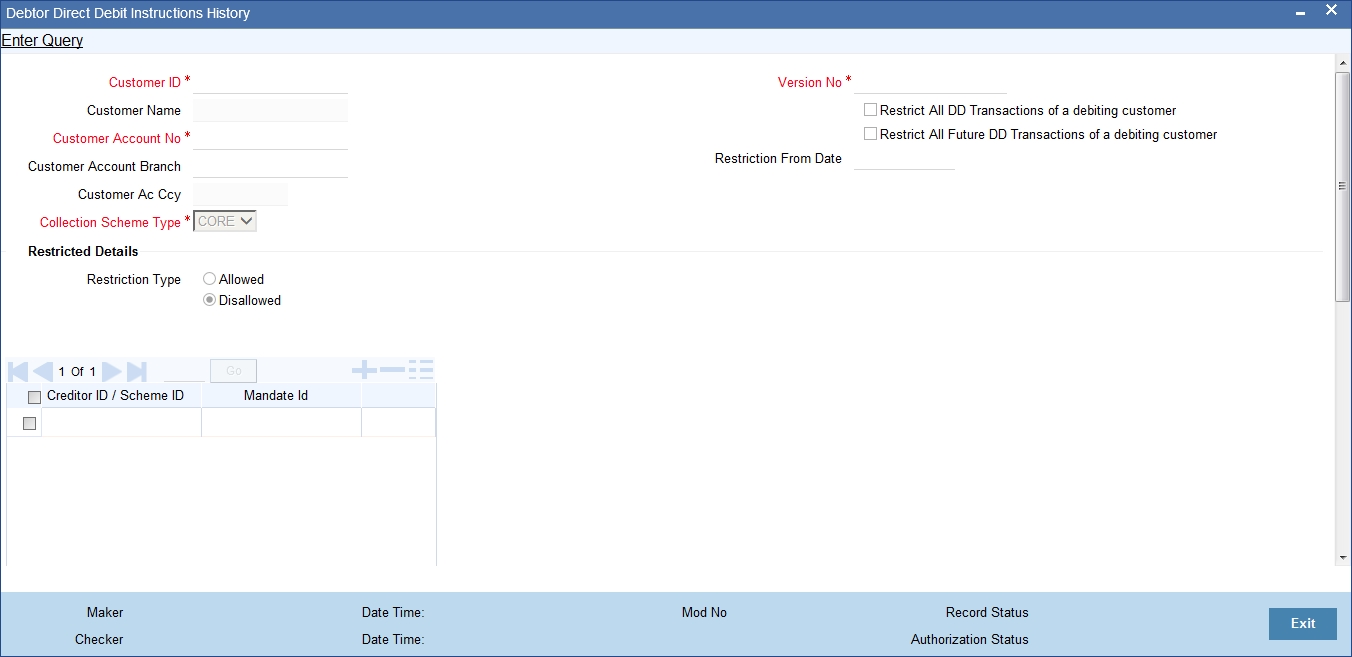
Version Number
This field displays the corresponding version number.
For further details refer the section ‘Maintaining Debtor Direct Debit Instructions’ in this user manual.
3.44.2 Viewing Debtor Direct Debit Instructions History
You can view the history of Instructions records pertaining to particular Debtor using 'Debtor Direct Debit Agreement History Summary' screen. You can invoke this screen by typing 'PCSIDRHS' in the field at the top right corner of the Application tool bar and clicking the adjoining arrow button.
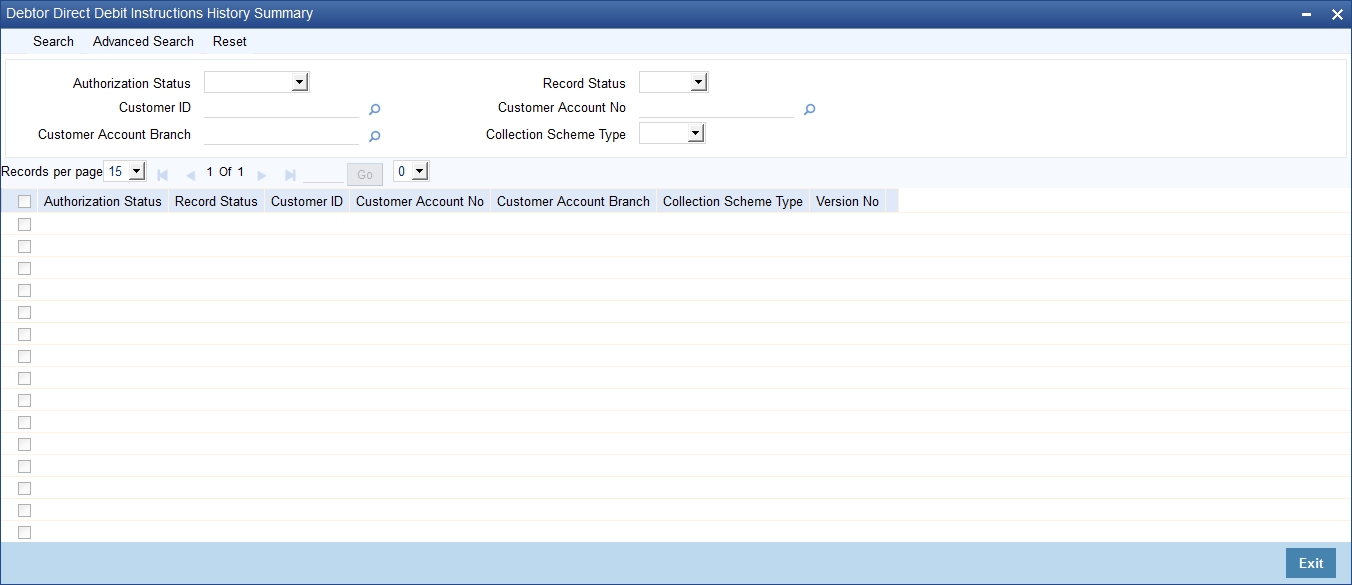
You can query based on any or all of the following criteria:
- Authorization Status
- Record Status
- Customer ID
Click 'Search'. The system displays the following values:
- Authorization Status
- Record Status
- Customer ID
- Version Number
The system displays the records in descending order of the version number.