5. Processing a Payment or Collection Transaction
In the Payments and Collections module of Oracle FLEXCUBE, a product refers to a specific type of transfer of funds. For example, you may process payments/collections that involve transfer of funds between accounts maintained at your bank. You can define this type of internal payment /collection as one of the payment/collection products at your bank.
Defining a product makes it easier for you to enter transactions. The other advantage of defining a product is that you can define certain general attributes for a product, which will default to all contracts processed under it.
Note
Contracts are customer specific. A customer could make a payment through your bank (local payments) or collect payments from debtors through your bank (direct debits or requests for debit).
Every time you process a transaction, you do not have to specify its general attributes, since a transaction acquires the attributes defined for the product it involves. You can change these default attributes to suit a specific transaction.
You can capture the details of a Payment/Collection transaction in the PC Transaction Input online screen.
This chapter contains the following sections:
- Section 5.1, "Payment/Collection Transactions Details"
- Section 5.2, "Simplified Entry of Payments and Collection Transactions"
- Section 5.3, "Transaction Authorization"
- Section 5.4, "Multilevel Authorization of a Contract"
- Section 5.5, "Collection Transaction"
- Section 5.6, "Exchange Rate for a Transaction"
- Section 5.7, "Input of Exchange Rates Authorization"
- Section 5.8, "Exchange Rate Refresh"
- Section 5.9, "Credit Exceptions"
- Section 5.10, "Customer Legs Consolidation"
- Section 5.11, "Consolidation Exception Queues"
- Section 5.12, "Transaction History Summary"
- Section 5.13, "Transaction Exception Summary"
- Section 5.14, "Split Transactions Summary"
- Section 5.15, "Process Exception Queues"
- Section 5.16, "Exchange Rate Queues"
- Section 5.17, "Periodic Exception Queues"
- Section 5.18, "The Batch Browser"
- Section 5.19, "Updating Cut-Off Time Status"
- Section 5.20, "SEPA Credit Transfers and Direct Debits"
- Section 5.21, "Payment Cancellation Request"
- Section 5.22, "Handling Cancellation of Outgoing Payments & Collections that are not dispatched to CSM"
- Section 5.23, "Handling Manual Rejection of Cancellation (Camt.056) for Payments and Collections"
- Section 5.24, "SEPA Payment Cancellation Summary Details"
- Section 5.25, "Incoming Camt.056 Messages"
- Section 5.26, "Handling of Camt.056 for Incoming payments in Transaction Repair queue"
- Section 5.27, "Handling of Camt.056 for Incoming Collections in Transaction Repair queue"
- Section 5.28, "Handling Conflict Scenarios"
- Section 5.29, "Viewing SEPA Payment Cancellation Approval Summary Details"
- Section 5.30, "Negative Answer to Recall of a Credit Transfer - Camt.029.001.03"
- Section 5.31, "Incoming Camt.029.001.03"
- Section 5.32, "Maintaining Parameters for SEPA Transactions"
- Section 5.33, "SEPA Transaction Process Flow"
- Section 5.34, "Validations done on the SCT and SDD Messages"
- Section 5.35, "Refund Compensation and Balancing Payment for Debtor Bank"
- Section 5.36, "Dispatch File Parameters"
- Section 5.37, "Dispatch File Generation"
- Section 5.38, "Payment Gateway Message Browser"
- Section 5.39, "Payment Gateway Message Bulks"
- Section 5.40, "Payment Status Report"
- Section 5.41, "Black List and White List of Creditors"
- Section 5.42, "Managing Mandate"
- Section 5.43, "Expiry Date Processing"
- Section 5.44, "Maximum Amount per Transaction Restrictions"
- Section 5.45, "Maximum Amount per Calendar Year Restrictions"
- Section 5.46, "Number of Transactions Restrictions per Calendar Year"
5.1 Payment/Collection Transactions Details
This section contains the following topics:
- Section 5.1.1, "Entering a Transaction"
- Section 5.1.2, "Main Tab"
- Section 5.1.3, "Transaction Details Tab"
- Section 5.1.4, "Collection Details Tab"
- Section 5.1.5, "Party Details Tab"
- Section 5.1.6, "Message Details Tab"
- Section 5.1.7, "UDF Tab"
- Section 5.1.8, "Split Details Button"
- Section 5.1.9, "MIS Details Button"
- Section 5.1.10, "Event Details Button"
- Section 5.1.11, "Duplication Details Button"
- Section 5.1.12, "Project Details Button"
- Section 5.1.13, "Tax Button"
- Section 5.1.14, "Queue Log Button"
- Section 5.1.15, "Viewing Payments and Collection Transactions"
5.1.1 Entering a Transaction
You can invoke the ‘PC Transaction Input online’ screen from the Application Browser.
You can invoke this screen by typing ‘PCDTRONL’ in the field at the top right corner of the Application tool bar and click on the adjoining arrow button. To enter a transaction in this screen, select new icon from the toolbar.

In this screen, you must enter the following details:
Product Category
Enter a valid product category code. The transaction that you are capturing will be associated with the product category you specify. If you enter a valid code, the Transaction Input screen is displayed.
Batch Number and Batch Description
Specify the Batch Number and a description of the batch. (A batch is used to group transactions.).
When you confirm your input, the main ‘PC Transaction Input’ screen is displayed. In this screen, you will view the batch number to which your transaction will be posted, the current number, and the reference number of the transaction you are capturing..

The following details are displayed in the main screen of the contract:
Product Category
The category you specified on invoking this screen will default here. You cannot change the default.
Product Code
Specify the product that you wish to use to process the contract. Based on the product code, the system will default the currency code linked to this product in the ‘Txn CCY’ field. Alternately, the system can also arrive at the product code based on the currency specified in the ‘Txn CCY’ field.
Network
Specify the clearing network for the contract. Based on the network ID, the system will default the currency code linked to this network in the ‘Txn CCY’ field.
Collection Type
The Collection Type of the transaction will be displayed. This could be either DD or RFD.
RFD Type
If the incoming collection transaction is an RFD, specify the RFD type. This could be any one of the following:
- No Tracking: indicates that the RFD is not considered for approval or rejection
- Full Payment: indicates that the RFD is processed for payment of full transaction amount
Partial Payment: indicates that the RFD is processed for partial payment
Contract Reference
The system identifies every transaction with a unique reference number. You can view the reference number for the transaction that you are capturing.
Customer Reference
The custom reference number for the contract is displayed.
Product Type
It defines the product and the product category of collection, payment. In PC transaction input it will be defaulted from the Product Category.
Source Reference
The system identifies every transaction with a unique source reference number. You can view the reference number for the transaction that you are capturing.
Specify the following details in the main screen of the contract:
5.1.2 Main Tab
As mentioned earlier, the PC Transaction Input screen is used to enter the details of a local payment/collection transaction.
Apart from the standard fields that are available, you will view the user-defined fields that the administrator at your customer station has maintained. These fields will be displayed in the sequence that your administrator has specified when defining the product category.
Customer Details
Account Number
Click ‘A’ and select a valid customer account form the option list. The list displays all customer accounts maintained in Oracle FLEXCUBE, or a GL for which posting is allowed (for instance, a cash GL in case of remittance of cash handed over the counter) in this field. The option list displays customer accounts and internal GLs with the corresponding Clearing Account Number and the IBAN Account Number (for GLs, as maintained in the ‘Chart of Accounts’).
Note
- If you have specified an account that uses an account class that is restricted for debit or credit transactions for the product, an override is sought when you attempt to save the contract.
- If the customer account is the debit account for a transaction, you can indicate a GL of type Asset, Liability, Income and Expense type only. Cash GLs cannot be specified.
- During upload of incoming payments (File upload), the batch process checks whether the beneficiary/customer account number is an IBAN account and resolves the customer account for the specified IBAN. If it is not found, the System checks the customer account (or GL) in LCF format, and resolves the customer account for the specified LCF number. If checks for IBAN and LCF formats fail, the System checks for the customer account. If the customer account is also not present the contract is marked for repair.
- If you specify a Trust account, you will have to capture project details in the ‘Project details’ sub-screen by clicking ‘Project Details’ button. If you do not capture project details, the system will display an error message while saving.
You can also select the account number as the CL account number. If the account is CL account, then the system will initiate CL manual payment for the following product types:
- Incoming Payment
- Direct Debit (Outgoing Collection)
The system will reverse the CL manual payments for Reject/Recall /Reversal of Outgoing Collection or Incoming Payment product types.
The IBAN of the loan account will be displayed in the ‘Counterparty IBAN’ field of the transaction.
To view the joint holder’s details of an account and the mode of operation maintained at the account level, place the cursor on the Account Number field and press Ctrl+J. The system displays the ‘Joint Holder’ screen.
For more information on the ‘Joint Holder’ screen refer to the section ‘Joint Holder Maintenance’ in the Core User Manual.
Account Description
The system displays the description of the specified account number based on the details maintained at ‘Customer Account Maintenance’ level.
Account Branch
This is maintained for the branch in customer account maintenance screen. The branch will be defaulted when you save the PC transaction.
Account Currency
This is maintained for the account in customer account maintenance screen. The values maintained will be defaulted when you save the PC transaction.
Available Balance
The available balance of the customer will be defaulted here when you save the PC transaction. The balance is maintained in the customer account maintenance screen.
Account in LCF
You can specify the customer account in Local Clearing Format in the A/C LCF field.
Customer Name
The name of the customer who is linked to the customer account will be defaulted here when you save the PC transaction. The name is maintained in the customer account maintenance screen.
Customer Number
The system defaults the customer number of the customer linked to the PC transaction.
Bank Code
You can enter the bank code and the account in LCF (local clearing format) for the transaction. The option list displays the Bank Code, Name, Bank Code Type and City for each bank in the list. The Bank Code, Name and City details are displayed on the Transaction Input screen when you select the bank code.
Bank Name
The system displays the name of the bank.
Bank Address 1
Specify the address of the customer’s bank name specified.
Bank Address 2
Specify the address of the customer’s bank name specified.
Note
- The fields Bank Name, Bank Address 1 and 2 are not sent out in the outgoing Pacs.008.001.02 message.
- These fields available at common payment message browser are mapped to fields at Payments and Collections Transaction Input for the new fields
Branch Name
The system displays the branch name of the bank.
Clearing Branch
The clearing branch for the specified customer bank code is displayed in this field.
Bank City
The system displays the bank city.
Additional Customer Details
Click on ‘Additional Customer Details’ to maintain the additional details of the customer.
Customer Address
You can specify the address of the customer involved in the contract. You can specify up to five lines of address information.
Customer Information
If you need to specify other information regarding the customer of the transaction, free format 35-character text fields are provided, with appropriate labels applicable for your installation. You can specify the customer information such as Surname, Email, ID No, Telephone and Customer Reference in these fields.
Communication Mode
Indicate the mode of the communication to the customer to intimate about the beneficiary account credit. You can select one of the following options:
- Mobile
- Email ID
The above field is enabled only for the product that uses the NEFT clearing network, i.e., Network Qualifier of the Clearing network should be NEFT.
Customer Reference
Specify the customer reference number.
Mobile Number/Email ID
Specify the mobile number or Email ID of customer.
Customer BIC ID
Specify the Bank Identification Code for the Customer.
Customer Scheme Name Type
Select the Identification Scheme Type of the Customer from the drop-down list and the available options are:
- C - Code
- P - Proprietary
Customer Scheme Name
Specify the value for Identification Scheme Name field.
If Scheme Name type is C then the Scheme Name can be selected from LOV and can have one of the values mentioned in value list depending on Organization Identification or Private Identification.
If the Scheme Name Type is P then you can enter the value for the field.
Customer Identification details
You need to specify customer identification details of the customer of the transaction, free format 35-character text fields are provided, with appropriate labels applicable for your installation.
You can specify the following details:
- Identification
- Identification Value
- Country
- Issuer
- City Of Birth
- Country of birth
Counter party Details
The Bank Code, Name and City details are displayed on the Transaction Input screen when you select the bank code.
Account Number
You can specify the account of the counterparty here. In case of internal transfers, the account needs to be a valid account of Oracle FLEXCUBE either in Oracle FLEXCUBE or in the Local Clearing Format. You can also select an account number from the option list provided. In such a case, the system will default the counterparty name and the address lines as maintained for that account. If at the time of selection of counterparty account, Bank Code is null, then Bank Code and Name will also get defaulted.
Counter party Name
Specify the nameof the customer (counter party).
You can click ‘Learning Database’ button to invoke the learning database to specify the counter party details. All counter parties involved with the specific customer of the contract, are displayed in the learning database.
You can select the Counter party Bank Code, Counter party Account Number and Name of the required counter party.
Bank code
Select a valid bank code maintained in Oracle FLEXCUBE. If you select a code from the option list, the bank name is displayed instantly. If you choose to enter the code, the name of the bank is displayed when you save the transaction.
Validations for counterparty details for bank transfers:
- For bank-to-bank transfers it is not mandatory to specify the counterparty account and name. If you indicate only the counterparty bank code it is considered as a beneficiary institution. If you indicate both the Counterparty Bank Code and Counterparty Name, the Counterparty Bank Code is interpreted as the Account With Institution, and the Counterparty Name is interpreted as Beneficiary Institution.
- If both the Counterparty Bank Code and Counterparty Name are specified for bank-to-bank transfers, the system validates the Counterparty name with that maintained in the PC Bank Directory. The System also checks to ensure that both the Counterparty Bank Code and Counterparty Name have been defined with the same Bank Code Type.
Bank Name
Specify the counterparty bank name.
Bank Address 1
Specify the address of the counterparty bank.
Bank Address 2
Specify the address of the counterparty bank.
Virtual Account
Specify the virtual account number in this field. Based on the virtual account code and transaction currency, the system derives the linked physical account. If no physical account is mapped, then the default physical account linked to the virtual account is derived.
If you change the defaulted physical account and if is not linked to the virtual account then system will replace the derived physical account providing an override for the same.
Virtual Account will not be allowed for Outgoing Payments (as it is applicable only for Credit transactions) and Collections.
Virtual Account Name
The account name of the virtual account number is displayed in this field.
Additional Counterparty Details
Click on ‘Additional Counterparty Details’ to maintain additional details on the counterparty.
Counterparty Information
If you need to specify other information regarding the counterparty of the transaction, free format 35-character text fields are provided, with appropriate labels applicable for your installation.
You can specify the counterparty information in these fields:
Surname
Specify the surname of the counterparty.
Father Name
Specify the father’s name of the counterparty.
Telephone
Specify the contact number of the counterparty.
Email ID
Specify the email Id of the counerparty.
Facebook ID
Specify the facebook Id of the counterparty.
Remarks
Specify remarks, if any.
Counterparty Address
You can specify the address of the counterparty involved in the contract. You can specify up to five lines of address information.
Counterparty BIC ID
Specify the Bank Identification Code for the Counterparty.
Counterparty Scheme Name Type
Select the Identification Scheme Type of the Counterparty from the drop down list.
The valid field can be:
- C - Code
- P - Proprietary
Counterparty Scheme Name
Specify the value for Identification Scheme Name field.
If Scheme Name type is C then the Scheme Name can be selected from LOV and can have one of the values mentioned in value list depending on Organization Identification or Private Identification.
If the Scheme Name Type is P then you can enter the value for the field.
Counterparty Date of Birth
Specify the date of birth of the Counterparty.
Counterparty Identification details
You need to specify other information regarding the counterparty of the transaction, free format 35-character text fields are provided, with appropriate labels applicable for your installation.
You can specify the following details:
- Currency
- ID
- ID Type
- ID Value
- Other ID Type
- Country
- Issuer
- City Of Birth
- Country Of birth
Counterparty Bank
Direct Participant
This is the Direct Participant for the Counterparty BIC and is derived from the Clearing Network information maintained in the ‘PC Bank Directory’ screen. Only if the counterparty is an indirect participant of the network, the system displays the direct participant of the corresponding counterparty BIC. In case of counterparty being direct participant, the field is null.
Transaction Details
Book Date
The system displays the book date of the transaction.
Activation Date
This is the activation date of the contract. The system defaults to the current date. However, you can change this. Since you can post back-value dated PC transactions, for the purpose of risk tracking you can indicate a date beyond which users will be prevented from posting a back value dated transaction by enabling the Back-Value Check Required in the ‘Branch Preference’ screen. The System validates whether the activation date falls within the maximum period up to which back valued posting can be processed.
Transaction Currency
Enter the currency for the transaction. You can click on the adjoining option list to choose from a list of valid currency codes maintained in the system. Input to this field is mandatory. If the network ID is input, then the system will be display the currency linked to the clearing network in this field. If the product code is input, then the system will display the currency linked to the product in this field. You will not be able to change the defaulted value. The system will ensure that this currency code is the same as that linked to the product code and network ID of the contract.
Amount
This refers to the transaction amount, i.e. the actual amount transferred during the transaction. For example, if the you have maintained the Charge Mode’ as ‘Discount’ at the Product Preference level, then the actual amount sent to the beneficiary will be the difference between transaction amount and charge.
On saving the transaction after entering all the required details in the system, the system validates the value of the transaction amount against the following:
- Product transaction limit
- User Input limit
If the transaction currency and the limit currency are different, then the system converts the amount financed to limit currency and checks if the same is in excess of the product transaction limit and user input limit. If this holds true, the system indicates the same with below override/error messages:
- Number of levels required for authorizing the transaction
Transaction amount is in excess of the input limit of the user
Foreign Currency Amount
The system displays the foreign currency which is involved in the PC transaction.
Remitted Amount
The system displays the remitted amount that is involved in the PC transaction.
LCY Equivalent
The system displays the transaction amount in the local currency.
Total Charge Amount
This field displays the total charge amount in local currency which is the sum of all the charge amount computed or specified for all five charge sets.
Collection Status
The status of the transaction is displayed at the bottom of the screen.
The following details are displayed.
- Contract Status
- Authorization Status
- Exception Queue
- Collection Status
Exchange Rate
The exchange rate of the transaction will be displayed in case the customer account is in a foreign currency (only for payment transactions).
Exception Queue
The name of the queue to which the transaction is logged in case of any processing exception is displayed here
Message Status
If the outgoing payments workflow is applicable for the transaction, the status of the message is displayed here.
Batch Number
The batch number, to which the transaction will be posted, is displayed here.
Batch Description
The description associated with the batch is displayed here.
FX Contract Reference
Specify the FX Contract Reference number you need to link to the PC contract, for the currency pair. The adjoining option list displays Forward Deal Type FX contracts which are authorized and active. Select the appropriate one.
The system disables Rate Date and Rate Serial, if the FX Contract Reference number is specified.
While entering a payment contract, the system facilitates you to choose a FX forward contract. This FX forward contract must meet the following requirements:
- The FX contract must be the only Forward Deal Type
- The FX forward contract must be active and authorized.
- Option Date is mandatory for the FX forward contract
- For an outgoing PC Transaction, the Transaction Currency of the PC Transaction must be equal to the Sold Currency of the FX contract and Customer Account Currency of the PC Transaction must be equal to the Bought Currency of the FX contract.
- For Incoming PC Transaction the Transaction Currency of the PC Transaction will be equal to the Bought Currency of the FX contract and Customer Currency of the PC Transaction will be equal to the Sold Currency of the FX contract.
- For Outgoing or Incoming PC Transaction the Customer Entry Date must be greater than or equal to the Option date and less than the maturity date (min of Bought Value Date and Sold Value Date) of the FX contract
- The Customer of the PC Transaction must be the Counterparty of the FX contract
- The unutilized Amount of the FX contract must be greater than or equal to the PC Transaction amount.
- The unutilized sold Amount of the FX contract must be greater than or equal to the transaction amount for Outgoing PC Transaction or unutilized buy Amount of the FX contract must be greater than or equal to the transaction amount for Incoming PC Transaction.
- The FX forward contract linked to PC Transaction cannot be part of combination product. It cannot have NDF feature and settlement cannot be through CLS
- The FX contract linked as Collateral cannot be linked to PC Transaction.
If any of the above criteria is not met then the system displays an appropriate error message.
The following validations and processes are involved:
- FX contract can be linked only for Payment transactions.
- Linking FX contract to PC transaction is optional for cross currency transaction. If linked, then the system considers the FX contract exchange rate as the exchange rate for the PC transaction
- During creation and modification of the PC transaction, FX Contract can be linked to PC transaction
- FX contract will not be linked to a PC transaction with Auto Exchange Rate checkbox checked at PC product level.
- While saving a PC Transaction, the system triggers LINK event in FX to decrease the available utilization amount
- If the FX linked PC Transaction is deleted before authorization, then the system deletes the existing LINK event in FX to increase the unutilized amount.
- If the FX linked PC Transaction is modified before authorization,
then if;
- FX linkage is removed, the system deletes the existing LINK event in FX to increase the unutilized amount
- FX linkage is attached, the LINK event is created in FX to decrease the unutilized amount
- The transaction amount is increased, the system validates if the outstanding amount of the linked FX forward contract would cover the increased amount. If it is, then the system deletes the existing LINK event (FX with old amount) and increases the unutilized amount. This is followed by creation of new LINK event and decrease in the unutilized amount.
- The transaction amount is decreased, the system deletes the existing LINK event and increases the unutilized amount followed by LINK event to create a new linkage and decrease the unutilized amount.
- The Customer Entry Date is modified, the system will validate if the new Customer Entry Date is greater than or equal to the option date and less than the maturity date (min of Bought Value Date and Sell Value Date). If it is, then the system deletes the existing LINK event (FX with old Value date) and increases the unutilized amount followed by LINK event to create the new linkage (FX with new Value date) and decreases the unutilized amount. If the condition is not satisfied, then the system displays an appropriate error message.
- For an Outgoing Payment Transaction, if Debit Entry Liquidation (DRLQ) event is triggered, then the system creates PLIQ event in FX to pass the reverse contingent entries to the equivalent amount of the PC Transaction.
- For PC Incoming Payment Transaction, if Credit Entry Liquidation (CRLQ) event is triggered, then the system creates PLIQ event in FX to pass the reverse contingent entries to the equivalent amount of the PC Transaction.
- If the FX linked PC Transaction (future dated) is amended after authorization,
then if
- FX linked is removed, the system creates DLNK event FX to increase the unutilized amount.
- New FX linkage is created, the system creates LINK in FX to decrease the unutilized amount
- The transaction amount is increased, the system validates if the outstanding amount of the linked FX forward contract would cover the increased amount. If it is, then the system triggers DLNK event to delink the old linkage (FX with old amount), increase the unutilized amount followed by LINK event to create the new linkage (FX with new amount) and decrease the unutilized amount.
- The transaction amount is decreased, the system triggers DLNK event to delink the old linkage, increase the unutilized amount. This is followed by LINK event to create the new linkage and decrease the unutilized amount
- The Customer Entry Date is modified, the system validates if the new Customer Entry Date is greater than or equal to the Option Date and less than the maturity date (min of the Bought Value Date and Sell Value Date). If it is, then the DLNK event will delink the old linkage (FX with old Value date) and increase the unutilized amount. This is followed by LINK event to create the new linkage (FX with new Value date) and decrease the unutilized amount.
- If in FX linked PC Transaction the Customer or the Currency is modified, then the system will not allow you to save transaction, unless the linked FX Contract is removed from the PC Transaction
- Reversal of FX linked PC transaction before liquidation will decrease the FX contract utilization. However, if the reversal is after liquidation, it will have no impact on the utilization of the FX contract. So if the PC contract is reversed prior to liquidation, then the system will send DLNK details to FX contract to update the utilization.
Customer Consolidation at Product Level
Specify the preference for consolidating customer at product level, by selecting an appropriate option from the drop-down list. The options available in the drop-down list are:
- Yes
- No
- Blank
Customer Consolidation Across Products
Check this box to consolidate the transactions of a customer across the products.
Customer Consolidation Reference
The system displays the customer consolidation reference number. If ‘Customer Consolidation at Product Level’ or 'Customer Consolidation Across Products' is checked, then a unique customer consolidation reference number is captured for all those transactions booked Manually. If 'Customer Consolidation Across Products' is checked then system populates the customer consolidation reference number with Payment Information ID generated at the Common Payment Gateway for all those transactions consolidated for a customer across different products.
Account Entry Reference
The system displays the account entry reference.
Service Level Code
Priority, which is a user defined field, set at the product category level is defaulted in this screen.
5.1.3 Transaction Details Tab
Click on the ‘Transaction Details’ tab to capture transaction details.
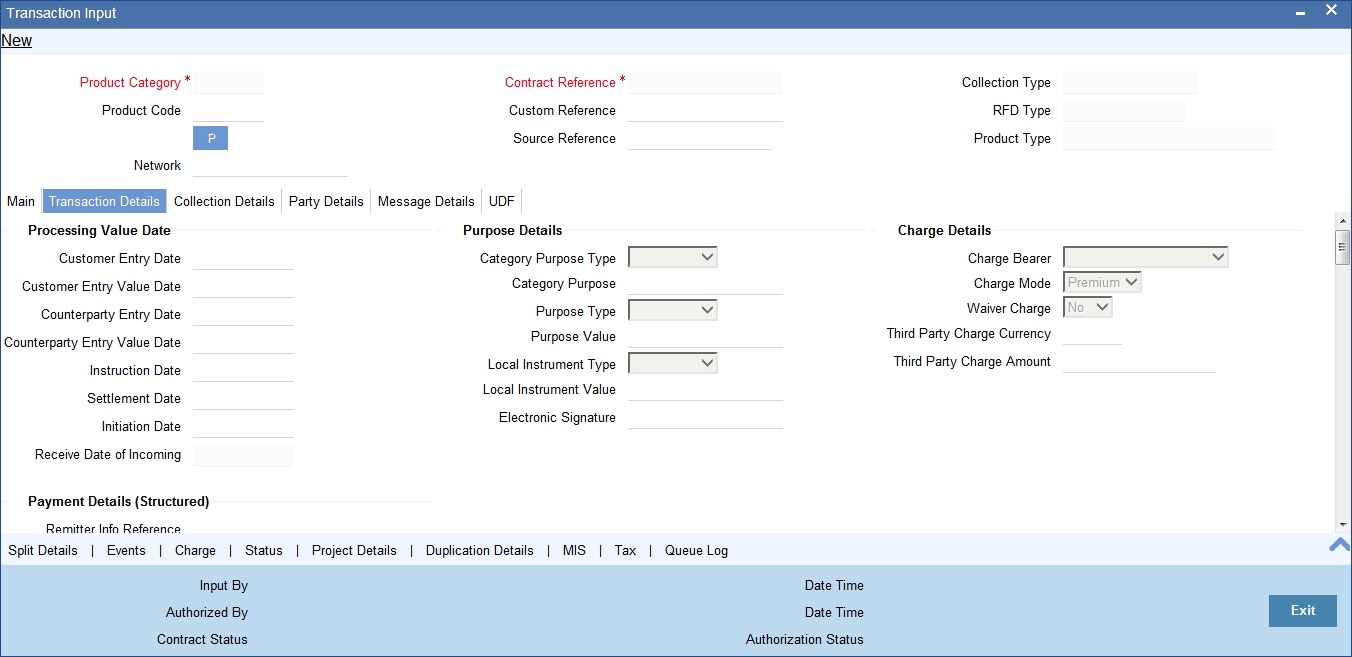
Processing Value Date
Customer Entry Date
This indicates the date on which the customer account will be debited for outgoing transfers and credited for incoming transfers. If you do not input a date here, it will be derived from the activation date by adding the working days to the value of customer entry days specified for the product. The values will be used based on the cutoff status of the transaction.
Customer Entry Value Date
This indicates the value date of the debit entry for outgoing transfers and credit entry for incoming transfers. If you do not input a date, it will be derived from the activation date by adding the working days to the value of customer entry value days specified for the product. The values will be used based on the cutoff status of the transaction.
Counterparty Entry Date
This indicates the date on which the counterparty account will be credited for outgoing transfers and debited for incoming transfers. If you do not input a date, it will be derived from the activation date by adding the working days to the value of counterparty entry days specified for the product. The pre/post cutoff values will be used based on the cutoff status of the transaction.
Counterparty Entry Value Date
This indicates the value date of the credit entry for outgoing transfers and debit entry for incoming transfers. If you do not input a date, it will be derived from the activation date by adding the working days to the value of counterparty entry value days specified for the product. The pre/post cutoff values will be used based on the cutoff status of the transaction.
Instruction Date
This indicates the requested execution date of the SCT transaction and Collection due date of an SDD transaction. This is a display only field.
Settlement Date
Specify the inter bank settlement date of the incoming instruction.
Initiation Date
The date and time when the transaction was received through the Electronic Banking System is displayed.
Receive Date of Incoming
The system displays the incoming receive date.
Purpose Details
Category Purpose
Specify the category purpose of the credit transfer from the option list.
Purpose Type
Select the purpose type of the credit transfer from the drop-down list. Following are the options available in the drop-down list:
- Proprietary
- Code
Purpose Value
Specify the purpose value of the credit transfer.
Local Instrument Type
Select the local instrument type from the drop-down list. Following are the options available in the drop-down list:
- Proprietary
- Code
The value for the field is defaulted as 'CODE'. The field is enabled if the 'product type 'is 'Outgoing Collection'.
Note
- If the 'Collection Scheme type' is maintained at product level, then system validates 'local instrument value' to 'Collection Scheme Type' value maintained at product level and 'local instrument type' as 'Code'.
- If the 'Collection Scheme type' is not maintained at product level, then System will not validate on 'local Instrument value' and 'Local instrument type'.
- If 'product type' is 'Incoming Collection',STP rule and Setup are done in such a way that value of 'Local Instrument value' is considered in addition to the existing parameters to resolve in to the product with collection scheme type as 'COR1,CORE and B2B'.
- A new static data for the ISO Code 'FF05' with description as 'Invalid Local Instrument Code' will be released.
- A new static data for an error code 'PC-SVV-09K' will be released and used if Debtor mandate not found for shorter time cycle transactions.
- A new static data for an error code 'PC-SVV-09L' will be released and used if Creditor mandate not found for shorter time cycle transactions.
- During incoming Collection Processing, System checks for the Debtor Mandate created for shorter time cycle transactions (COR1), if it is not found then it raises an error (FF05).
- The error code 'PC-SVV-09K' is mapped with ISO Code 'FF05' in 'Payments & Collections Auto Reject Mapping Maintenance' screen (PCDERRCD) in order to reject the Incoming Collection Transaction automatically when debtor mandate not found. If auto reject mapping is not configured then incoming collection transaction will be moved into Transaction Repair (TR) queue.
- During Outgoing Collection Processing, System checks for the creditor mandate created for shorter time cycle transactions. If it is not found then it will display an error (PC-SVV-09L) and saves the transaction.
Local Instrument Value
The value for the field is defaulted from the 'collection scheme type 'field, maintained at product level. You can modify this value. The field is enabled if the 'product type 'is 'Outgoing Collection'.
- The Local Instrument Value defaulted or entered for the transaction should be same as the Collection Scheme Type of the outgoing collection Product. Validation would be added for the same.
- Static data for error code 'PC-SVV-09N' would be available and used when Local Instrument Value and Collection Scheme Type doesn't matches.
- If Local Instrument Value is not specified for outgoing collection, the collection scheme type specified at the product would be defaulted with Local Instrument Type as 'Code'.
- If 'Collection Scheme Type' is not maintained at product level then system will not validate on 'Local Instrument Value' and 'Local Instrument Type'.
- Validation will be done such that for the Collection Scheme type 'B2B', the selected customer should not be of type 'Individual'.
- During processing, if Local Instrument Value is 'B2B' and if Creditor's account is individual customer's account then system will raise an error 'PC-SVV-09M'.
- In case the creditor account is Joint account then the customer type of the main customer only will be checked. Customer types of the joint customers will not be checked.
Electronic Signature
Specify the electronic signature of the debtor.
Charge Details
Charge Bearer
This indicates which party will bear the charges associated with the payment. This value is received from the incoming SEPA instruction and you are not allowed to change this. For manually input transaction this will be defaulted from the Product Maintenance.
Charge Mode
You can indicate whether charges applicable for the transaction are to be applied over and above the transaction amount (premium) or subtracted from the transaction amount (discount).
Waive Charge
This field defaults the value of charge waiver from the product preference maintenance. Also, the option in this field can be changed and the selected option is reflected across the individual charge waivers for all charge sets.
Third Party Charge Currency
Select the third party charge currency from the adjoining option list.
Third Party Charge Amount
Specify the third party charge amount.
Payment Details (Unstructured)
Remitter Reference
Specify the remitter reference number.
Remitter Code
Specify the remitter code.
Remitter Information Issuer
Specify the issuer of the remitter information.
Additional Remittance Info
Specify additional remittance information, if any.
Structured Invoicee Details
Identification Type
Select the identification type from the adjoining drop-down list. The options available are:
- Private
- Organization
BIC
Specify the bank identifier code.
Name
Specify the name of the invoicee.
Address 1 and 2
Specify the address of the invoicee.
Country
Specify the country of the invoicee.
Structured Invoicer Details
Identification Type
Select the identification type from the adjoining drop-down list. The options available are:
- Private
- Organization
BIC
Specify the bank identifier code.
Name
Specify the name of the invoicer.
Address 1 and 2
Specify the address of the invoicer.
Country
Specify the country of the invoicer.
Payment Details (Structured)
Payment Details 1, 2, 3 and 4
Specify the payment details.
Sender Receiver Information
Sender Receiver Details
Specify the sender receiver details.
Sender Receiver 1, 2, 3 and 4
Specify the sender receiver information.
P2P Payments
Customer Debit Reference Number
The system displays the customer debit reference number.
Note
If the P2P payment type is ‘Customer Debit’, then the customer debit reference number will be same as the contract reference number.
If the P2P payment type is ‘Test Transaction’ or P2P Final Payment, then the customer debit reference number will be customer debit reference.
Amount Block Reference Number
The system displays the amount block reference number.
Test Transaction Reference Number
The system displays the test transaction reference number.
Note
If the P2P payment type is ‘Customer Debit’, then the test transaction reference number will be null.
If the P2P payment type is ‘Test Transaction’, then the test transaction reference number will be same as the contract reference number.
If the P2P payment type is ‘P2P Final Payment’, then the test transaction reference number will be reference number of the test transaction involved in P2P payment.
P2P Payment Type
The system displays the value maintained for ‘P2P Payment Type’ maintained for the product in the transaction.
Processing P2P Final Payment
During the P2P final payment transaction, an outgoing payment is created for P2P Final Payment Transaction. When the customer debit transaction is processed, the customer ledger in the debit liquidation is replaced with the suspense GL of the bank for debiting the transaction amount. The debit GL used for debit liquidation is maintained at contract level. This GL is used during the reject of P2P final payment transaction processing to credit the transaction amount in credit liquidation. When an ‘Amount Block’ request is processed, the amount block on senders’s account is released. Hence for the final payment the transaction amount will be debited from sender’s account and will be credited to the clearing suspense GL.
Processing P2P Customer Debit Payment
During customer debit transaction, an outgoing payment of type ‘Book Transfer’ is created. You have to specify the email ID, telephone number or facebook details for the transactions with P2P payment type as ‘Customer Type’. For the customer type other than ‘Customer Debit’, it is mandatory to specify the counterparty bank code and counterparty account umber details. During the customer debit transaction processing, following transaction data would be logged into 'P2P Payment Beneficiary Registration Queue' to track the beneficiary registration till the end date:
- Contract Reference Number
- Branch Code
- Sender Account Number
- Beneficiary's Email ID
- Beneficiary's Telephone
- Beneficiary's Facebook ID
The end date for the beneficiary registration is derived based on the 'Registration Period in Days' parameter value from P2P payments parameters level. The derived end date will also be logged into 'P2P Payment Beneficiary Registration Queue'. Credit GL used for the credit liquidation will be maintained at contract level. This GL is used during the Reject of customer debit transaction processing for debiting the transaction amount in debit liquidation.
Processing Amount Block
The system creates an amount block on the sender's account for the transaction amount on receipt of amount block request from the external system. A failure response message is sent to the external system in case of any error during amount block processing.
During the amount block processing, following transaction data would be logged into 'P2P Payment Beneficiary Registration Queue' to track the beneficiary registration till the end date.
- Amount Block Number
- Branch Code
- Account Number
- Beneficiary's Email ID
- Beneficiary's Telephone
- Beneficiary's Facebook ID
The end date for the beneficiary registration would be derived based on the 'Registration Period in Days' parameter value from P2P payments parameters level.The derived end date is logged into 'P2P Payment Beneficiary Registration Queue' and will be updated as expiry date in Amount Block Input function.
Exception Details
Reject Code
The reject code, if any, that was specified for rejection of the transaction, is displayed here.
Reject Detail
The reject reason, if any, corresponding to the reject code is displayed here.
Reject Code Additional
This is the reject reason for the reject messages. This will be used in case the reject reason is not covered by available ISO reject codes.
Compensation Amount
Specify the amount that the debtor bank has to receive from the creditor bank.
It should always be Euro (EUR)
Their Reference
This is the reference number of the counterparty bank for collections (for instance, incoming collections). This is the reference that would be sent back when any responses are sent back to the counterparty bank.
Original Collection Reference
If you are rejecting or recalling a collection transaction, you must specify the reference number of the original collection transaction.
CSM Reject Reference No
The system displays the CSM reject reference number.
CSM Reject Code
The system displays the ISO reject code for the rejection from Clearing Settlement Mechanism.
CSM Reject Detail
The system display the CSM Reject Detail to describe the ISO reject code for the rejection from CSM.
Reject Originator Name
The system displays the reject originator name.
Reject Originator Bank
The system displays the reject originator bank.
Reject Reference Number
The system displays the reject reference number.
Payment Reject Date
Specify the payment reject date from the adjoining calendar.
Other Details
Cutoff Status
This indicates if the transaction was received before the cutoff time defined for the product.
Cover required
The system displays the cover message preference you have maintained for the counterparty as part of the Clearing Network maintenance. The system defaults the values in Direct Participant and Cover field only if you have maintained the information for the contract. In case you have maintained the counter party bank code without a clearing network, the system defaults the values for both the above fields only after you save the contract.
Generate Advice
You can indicate whether a customer advice needs to be generated for the contract. If you do not specify this, after product resolution, the transaction acquires the specification defined for the product.
Generate Remit Slip
Check this box to generate remit slip.
Bank Redirect
Check this box to indicate whether the transaction must be redirected from the customer or counterparty bank to any other bank.
Auto Response
Indicate if a system generated response is required for the collection transaction.
Account Redirected
Check this box to redirect the transaction from customer or counterparty account to any other account.
Auth Reject Remarks
The system displays the authorization reject remarks.
Payment Reference
Station ID
The system displays the station identification
Clearing System ID
Specify the clearing system identification.
Priority
The system displays the priority order of the messages.
Source Code
The system displays the source code.
Event Details
Last Event Code
The system displays the last event code.
Next Event Code
The system displays the next event code.
Next Event Date
The system displays the next event date.
Payment Split Details
You can maintain the following payment split details here:
Split Number
Specify a valid number for the payment split.
Split Transaction Reference
Specify a valid transaction number for payment split.
Split Indicator
Select a valid indicator for the payment split from the adjoining drop-down list. The list displays the following values:
- Not Applicable
- Parent
- Child
Invoice Split Required
Check this box if you need to invoice the split required.
5.1.4 Collection Details Tab

General Collection Details
Creditor Identification
For an Incoming Collection transaction or its reject / recall, mention the Creditor ID
Agreement Identification
For Collection transactions, enter the Creditor or Debtor Agreement ID as applicable.
Debtor Category
Select the debtor category from the adjoining option list.
Mandate/ Agreement Details
Sequence Type
Select the sequence type of the DD transaction as first collection or One-off. The following options are available:
- FRST – First Collection
- FNAL – Final Collection
- OOFF – One Off Transaction
- RCUR – Recurring Transaction
Sign Date
This indicates the date on which the mandate was signed by the debtor. This would be defaulted based on the mandate ID selected. This is a display only field.
Amend Indicator
Select the option to indicate if the mandate has been amended or not. The values available in the drop down are ‘Yes’ and ‘No’. The value that you select here is populated in the outgoing message for an outgoing collection transaction.
Amend Type
Specify the type of mandate amend that has been done. This is applicable only if ‘Mandate Amend Ind’ is selected as ‘Yes’. This value is populated in the outgoing message of the outgoing collection transaction
Original Mandate ID
Specify the original mandate ID if the mandate is amended. This is applicable only if amend indicator is selected as ‘Yes’.
Orginal Debtor Account
Specify the original Debtor Account under the scheme if the mandate is amended. This is applicable only if amend indicator is selected as ‘Yes’ scheme if the mandate is amended. This is applicable only if amend indicator is selected as ‘Yes’.
Original Debtor Bank
Specify the original Debtor bank BIC under the scheme if the mandate is amended. This is applicable only if amend indicator is selected as ‘Yes’.
Creditor Scheme Details
Scheme Identification
Select the scheme identification code of the creditor from the drop-down list. Following are the options available in the drop-down list:
- Private Identification
Scheme Identification Type
Specify the scheme identification type of the creditor from the option list.
Scheme Identification Value
Specify the scheme identification value of the creditor.
Scheme Type
Specify the scheme type of the creditor.
Original Creditor Scheme Details
Identification
Select the scheme identification code of the original creditor from the drop-down list. Following are the options available in the drop-down list:
- Private Identification
Creditor Name
Specify the name of the original creditor.
Identification Value
Specify the scheme identification value of the original creditor.
Scheme Type
Specify the scheme type of the original creditor.
Other Details
Collected Amount
Specify the collected amount.
Related Transaction
The system displays the related transaction.
Response Date
Specify the date beyond which an incoming collection transaction cannot be rejected. If you do not specify this, the date is picked up from the customer agreement.
Response Advice Required
Indicate whether response advice needs to be sent for this collection transaction. By default, the system picks up this specification from the customer agreement
Response Advice Basis
Specify the response advice basis from the adjoining drop-down list. the options are:
- Response Date
- Event Date
5.1.5 Party Details Tab
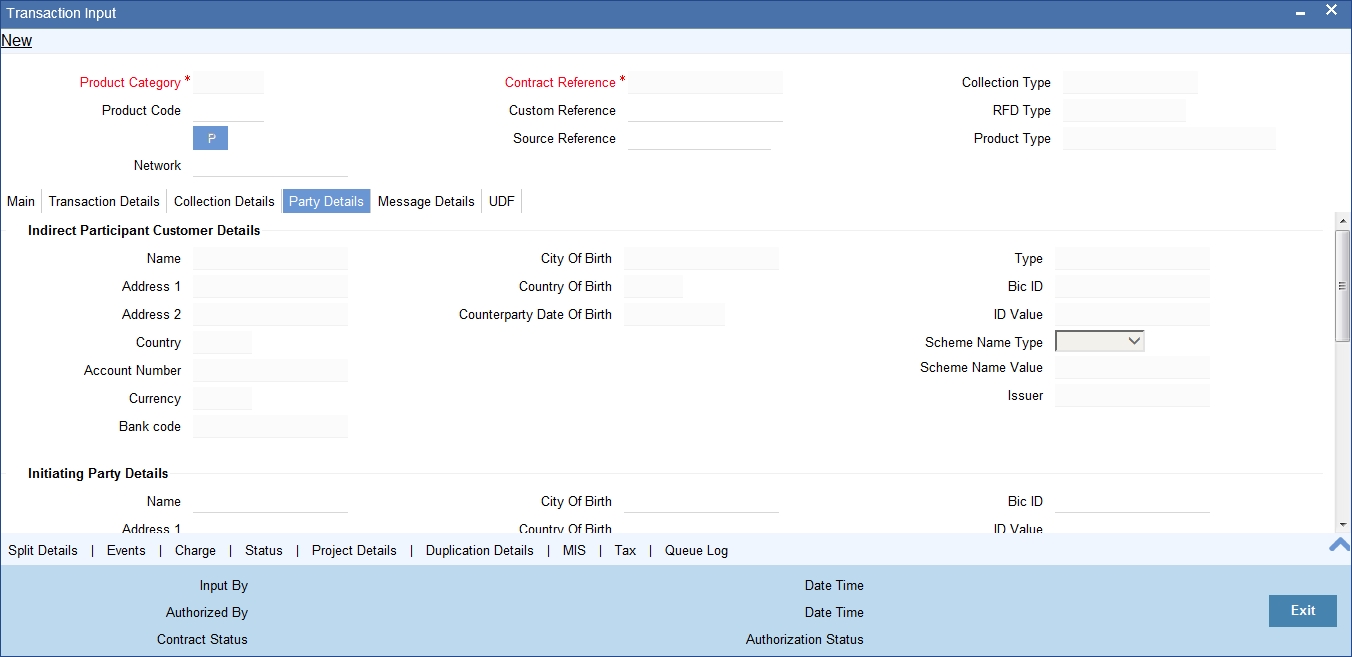
Indirect Participant Customer Details
Indirect Participant Customer Name
Specify the name of the customer participating in the indirect transaction.
Indirect participant Customer Address1 and 2
Specify the address of the customer participating in the indirect transaction.
Indirect participant Country
Specify the country of the customer participating in the indirect transaction.
Indirect Participant BIC ID
Specify the Bank Identification Code for the Indirect Participant.
BIC ID is only applicable for Organizational identification details.
Indirect Participant Scheme Name Type
Select the Identification Scheme Type of the Indirect Participant from the drop down list.
The valid values are:
- C - Code
- P - Proprietary.
Indirect Participant Scheme Name
If Scheme Name type is C then select the Scheme Name from the values mentioned in the LOV depending on Organization Identification or Private Identification.
If Scheme Name type is P then enter the Scheme Name your own.
Indirect Participant Date of Birth
Specify the Date Of Birth of the Indirect Participant. Input the Date of Birth is only for Private identification.
Identification Value
Specify the identification value. This is optional.
Issuer
Specify the Identification Issuer of the customer. This is an optional field. This is applicable for Organization identification as Proprietary Identification or Private Identification.
City of Birth
Specify the city of birth of the Customer. This will be enabled and is mandatory for identification type as Date and place of birth.
Country of Birth
Select the country of birth of the Customer. Country - Specify the address country code of the customer from the option list. This is optional.
Account Number
Specify the account number of the customer participating in the indirect transaction.
Currency
Specify the currency that is used in an indirect transaction
Bank Code
Specify the Bank code of the bank that has participated in a transaction.
Initiating Party Details
Name
Specify the name of the initiating party. This is an optional field.
Address Line 1
Specify the address line1 of the initiating party. This is an optional field.
Address Line 2
Specify the address line 2 of the initiating party. This is an optional field.
Country
Select the country of the initiating party from the option list. This is a mandatory field if the address details are specified.
Issuer
Specify the Identification Issuer of the initiating party. This is an optional field. This is applicable for Organization identification as Proprietary Identification or Private Identification.
City of Birth
Specify the city of birth of the Initiating party.
Initiating Party Identification
Select the unique way of identifying the initiating party from the drop-down list. The following are the options available:
- Organization Identification
- Private Identification
Country of Birth
Select the country of birth of the Initiating Party from the option list.
Initiating Party BIC ID
Specify the Bank Identification Code of the Initiating Party.
Initiating Party Scheme Name Type
Specify the Identification Scheme Type of the Initiating party and available options are:
- C - Code
- P - Proprietary.
Initiating Party Scheme Name
If Scheme Name type is C then select the Scheme Name from the values mentioned in the LOV depending on Organization Identification or Private Identification.
If Scheme Name type is P then enter the Scheme Name your own which can contain free format text and should of length 35.
Initiating Party Date of Birth
Specify the Date Of Birth of the Initiating party.
Identification Value
Specify the identification value. This is optional.
Ultimate Debtor Details
Customer Name
Specify the name of the ultimate debtor.
ID
Select the identification code of the ultimate debtor from the drop-down list. Following are the options available in the drop-down list:
- Organization Identification
- Private Identification
ID Value
Specify the identification value of the ultimate debtor.
Issuer
Specify the other identification type issuer of ultimate debtor.
City of Birth
Specify the city of birth of ultimate debtor.
Country of Birth
Specify the country of birth of ultimate debtor.
Ultimate Debtor BIC ID
Specify the Bank Identification Code for the Ultimate Debitor.
BIC ID is only applicable for Organizational identification details.
Ultimate Debtor Scheme Name Type
Specify the Identification Scheme Type of the Ultimate Creditor and the available options are:
- C - Code
- P - Proprietary.
Ultimate Debtor Scheme Name
If Scheme Name type is C then select the Scheme Name from the values mentioned in the LOV depending on Organization Identification or Private Identification.
If Scheme Name type is P then enter the Scheme Name your own which can contain free format text and should of length 35.
Ultimate Debtor Date of Birth
Specify the Date Of Birth of the Ultimate Creditor.
Input the Date of Birth is only for Private identification.
Ultimate Creditor Details
Name
Specify the name of the ultimate creditor.
ID
Select the identification code of the ultimate creditor from the drop-down list. Following are the options available in the drop-down list:
- Organization Identification
- Private Identification
ID Value
Specify the identification value of the ultimate creditor.
Issuer
Specify the other identification type issuer of ultimate creditor.
City of Birth
Specify the city of birth of ultimate creditor.
Country of Birth
Specify the country of birth of ultimate creditor.
Ultimate Creditor Name
Specify the Name of the Beneficiary Reference Party.
The field can contain any free format text of length 70.
Ultimate Creditor BIC ID
Specify the Bank Identification Code for the Ultimate Creditor.
BIC ID is only applicable for Organizational identification details.
Ultimate Creditor Scheme Name Type
Specify the Identification Scheme Type of the Ultimate Creditor.
The valid values are:
- C - Code
- P - Proprietary.
Ultimate Creditor Scheme Name
If Scheme Name type is C then select the Scheme Name from the values mentioned in the LOV depending on Organization Identification or Private Identification.
If Scheme Name type is P then enter the Scheme Name your own which can contain free format text and should of length 35.
Ultimate Creditor Date of Birth
Specify the Date Of Birth of the Ultimate Creditor. Input the Date of Birth is only for Private identification.
5.1.6 Message Details Tab

You can capture the following details here:
Dispatch Details
Dispatch
This indicates whether the contract needs to be dispatched to clearing. In case of incoming transactions, dispatch is not allowed. If you do not specify this, after product resolution, the transaction acquires the specification defined for the product.
Redispatch Required
Indicate if this outgoing collection transaction needs to be redispatched if rejected.
Dispatch Date
This is the date on which the transaction will be sent for dispatch. If you do not enter a date, it will be derived from the activation date by adding the working days to the value of dispatch days specified for the product. The pre/post cutoff values will be used based on the cutoff status of the transaction.
Recall Message Details
Message Creation Date
The system displays the message creation date.
Recall Message Reference
The system displays the recall message reference number.
Recall Message Name
The system displays the recall message name.
Recall File Reference Number
The system displays the recall file reference number.
Status
The system displays the status of the recall request.
Note
- When you generate the recall request (Camt.056) message for the contract, then the system displays the details with status as 'Sent'.
- When you receive the negative response to the recall request (Camt.029) message, then the system displays the status as 'Failed'.
If the network is SEPA then for Local Instrument Type 'CODE', the Local Instrument Value should be CORE (COR) or B2B for outgoing collection. If Local Instrument Value is not entered as COR/B2B for outgoing collection contract, then system displays an error message as Invalid Local Instrument Value, value should be either CORE/B2B'.
When the system generates Camt.056 message, then the system displays the recall details in the Message Details tab. The system changes the recall message status to Rejected if the Camt.056 message is either rejected by SEPA or Camt.029 message is received. On receipt of Pac.004, system reverses the original contract. The system does not change the recall message status to any other status as it remains 'Sent'.
Incoming Message Details
Specify the following incoming message details:
File Reference
Specify the reference number of the file that is used in the incoming message processing.
Message ID
Specify the mode to identify a message.
Message Name
Specify the name of the message that is been referred in the incoming messages.
Message Creation Date
Specify the date on which a message was created.
Instructing Bank
Specify code of the instructing bank from which the message was instructed.
Instructed Bank
Specify code of the instructed bank to which the message was instructed.
Settlement Method
Specify the settlement mode.
Outgoing Message Details
You can maintain the following outgoing message details:
Outgoing File Reference No
This indicates the file reference number of the incoming message. This is a display only field.
Outgoing Message ID
This is a unique message bulk reference number populated from the incoming instruction. This is a display only field.
Outgoing Message Name
This indicates the message name identifier of the outgoing message. For e.g. Pain.001.001.01.
Message Creation Date
This indicates the date and time the transaction was created. This is a display only field and is defaulted with the value in the incoming message.
Original Message Details
Name
This indicates the message name of the original instruction for which a new instruction is received. This is a display only field.
Reference Number
This indicates the message identification of the original instruction for which a new instruction is received. This is a display only field.
Amount
The system displays the new instructions received for the original amount.
Original Settlement Currency
This indicates the settlement amount and currency of the original instruction. This is a display only field.
Source Reference
This indicates the source reference number of the original instruction for which reject/refund is received. This is a display only field.
Settlement Date
This indicates the settlement date of the original instruction. This is a display only field.
Original Payment Info ID
Specify the unique identification, as assigned by the original sending party, to unambiguously identify the payment information group. This field maps to field Payment Info ID of Common Payment Gateway.
Redispatch Details
Redispatch Number
Specify the redispatch count for the parent transaction which is being redispatched.
Redispatch Reference
For collection transactions, specify the reference number of the parent transaction that is being redispatched.
Redispatch Indicator
This indicates whether the collection transaction has been redispatched. If it has not been redispatched, this field indicates 'Not Applicable'. If the transaction has been redispatched, this field indicates whether the transaction being viewed is a parent transaction or a child transaction.
Auto Redispatch
Indicate if this outgoing collection transaction needs to be redispatched automatically if rejected.
Redispatch Date
Specify the date of redispatch of the parent transaction
5.1.7 UDF Tab
In the ‘PC Transaction Input’ main screen, based on the preferences assigned to the product category of the transaction, the contract User Defined Fields are displayed in the UDF tab in the screen, and you can specify the values for these fields, which are applicable for the contract.
You can execute queries on the user-defined fields, and select specific records based on the user-defined fields.

You can maintain the following details:
Field Name and Description
System displays the name and description of the UDF.
5.1.8 Split Details Button
Click the ‘Split Details’ button to specify multiple debit / credit accounts for the transaction so that the ‘Split Details’ screen can be viewed.
Only leaf GL transactions involving local currency can be entered in the Split Details screen. You can specify the MIS code for each split leg using the ‘MIS’ button against each split entry.
The sum of the amounts specified in the ‘Split Details’ screen is defaulted to the main transaction input screen. The first GL account specified in the ‘Split Details’ screen is defaulted as the customer account in the main ‘PC Transaction Input’ screen, and is also used in the corresponding payment message.

Specifying Contract Split Details
Serial Number
The system displays the serial number of the contract.
Branch
The system displays the branch where a contract is present.
Account Number
The system displays the account number of the contract
Currency
The system displays the currency that is used in a transaction.
Amount
The system displays the amount here.
MIS
The system displays the MIS details of the contract
Total Amount
The sum of the split amount is displayed in this field. This amount is displayed in the main screen as the actual amount.
The following details need to be specified in the respective tabs of the Transaction Input Screen:
- Transaction Details Tab
- Split Number
- Split Parent Reference Number
- Split Indicator
- Invoice Split Required
- Authorization Reject Remarks
- Message Details Tab
- Auto Redispatch
- Redispatch Date
- Message Details Tab
- Incoming Message Details
File Ref No
Message Identification
Message Name
Msg Creation Date
Instructing Bank
Instructed Bank
Settlement Method
Note
While you are processing a transaction you have the option of retrieving details based on Product Category, Counterparty bank and Account combination by clicking the History button.
Reactivate Event Processed
This is a display field that indicates that the contract is re-activated on rejection of rejection process.
5.1.9 MIS Details Button
The MIS details for the contract can be captured through the MIS screen. Click the ‘MIS’ button from the PC Transaction Input screen to invoke the ‘Transaction MIS Details’ screen. If you do not specify MIS details for a transaction, it acquires the MIS specifications made for the product under which it is processed.
5.1.10 Event Details Button
All events, overrides, and accounting entries triggered by the user who processes the transaction during its life cycle are logged in the ‘PC Contract View Events’ screen, which you can invoke by clicking ‘Events’ button in the ‘PC Transaction Input’ screen.
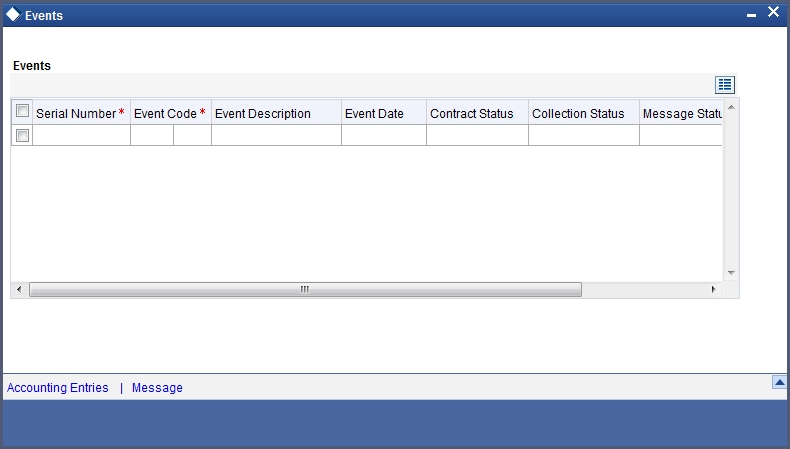
The following details are displayed:
- Event Details – This provides all the user-initiated events during the life cycle of the contract.
- Accounting Details - This provides all a list of the accounting entries passed by the system for the contract. Click ‘Accounting Entries’ button in the ‘PC Contract ‘View Events’ screen to view these details.
- Override Details – Here you can view the overrides provided for the transaction during its life cycle.
- Message Details - Click ‘Message’ in the ‘PC Contract View Events’ screen to view the messages (advices) generated against each event. Click the Print button to print the advices.When you click the EXIT button the system displays a message if the advices are printed for the first time, Click OK if the print is successful
Note
When Duplicate Advice Tracker field is checked and you click the EXIT button on the advice generation screen, the system displays a message “Print Successful?”. Click OK button to confirm the successful printing. Every subsequent print of the advices will be considered as duplicate advice. For more information on Duplicate Advice Tracker refer to section “Messaging Branch Parameters Maintenance” in the Core User Manual.
5.1.11 Duplication Details Button
The system checks for duplicate transactions while booking contracts based on the number of days for duplicate check maintained at the ‘Branch Parameters Maintenance’ screen and the duplication preferences set at the product category level. The system displays the duplicate contract reference number if there is a single match else it displays the following override message;
‘Duplicate Contracts recognized based on the product category preference’
You can view all the duplicate contracts in the ‘Duplication Details’ screen. Click ‘Duplication Details’ button in the ‘PC Transaction Input’ screen to invoke this screen.

Here you can view the following details:
- Contract reference no
- Custom Reference no
- Source Ref no
- Product Cat
- Customer Acc No
- Counterparty Acc No
- Counterparty Bank Code
- Counterparty Name
- Txn Ccy
- Txn Amt
- Activation Date
- Payment Details
Note
Duplication check is done based on the following criteria:
- Number of duplication days that is maintained at the ‘Branch Parameters Maintenance’ screen.
- Duplication recognition that is selected at the ‘Payments and Collection Product Category Maintenance’ screen,
- The duplication details are persistent and can be viewed by the authorizer too.
- If duplication details are not maintained at branch level for Payments and Collections, no duplicate checks will be carried out.
5.1.12 Project Details Button
Click the ‘Project Details’ button in the ‘Payments & Collections Transaction Input’ screen and invoke the ‘Project Details’ screen. You will have to capture project details in this screen only if the credit account is a Trust account.
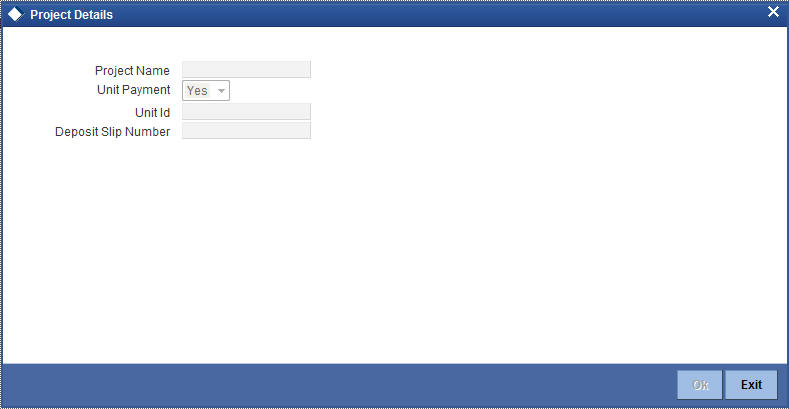
Specify the following details:
Project Name
Specify the developer project name for which payment is being made. The adjoining option list displays all valid projects maintained in the system. You can select the appropriate one. Input to this field is mandatory.
If you specify the Unit ID, the system will display the corresponding project name here.
Unit Payment
Indicate whether the transaction is a unit payment or not by choosing the appropriate value from the adjoining drop-down list. The following values are available:
- Yes
- No
Unit ID
Specify the unit ID of the project. This field will be enabled only if you have selected ‘Yes’ against ‘Unit Payment’. The adjoining option list displays all unit IDs along with the unit holder names corresponding to the project name chosen. You can select the appropriate one.
Deposit Slip Number
Specify the deposit slip number for the payment.
5.1.13 Tax Button
You can view a tax scheme defined in the tax. Click ‘Tax’ button in the ‘Payments and Collection Transaction Input’ screen to invoke the ‘Tax’ screen.
You can compute the tax based upon the tax rule and linked amount from PC contract and liquidate the tax in the appropriate event.
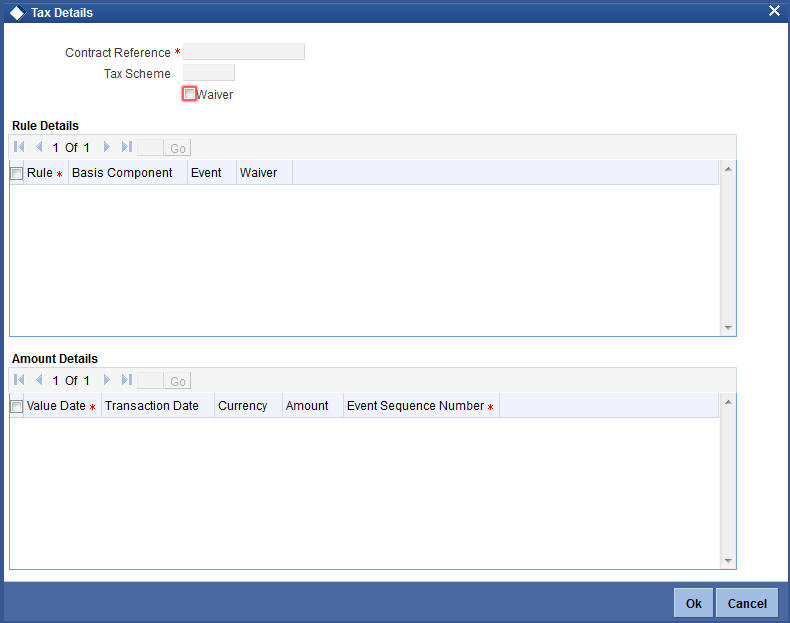
You can specify the following details:
Contract Reference
The system displays the contract reference number.
Tax Scheme
The system displays the tax scheme details.
Waiver
Check this box to indicate waiver details.
Rule Details
Rule
The system displays the rule details.
Basis Component
The system displays the basis component details.
Event
The system displays the event details.
Waiver
Check this box to indicate waiver details.
Amount Details
Value Date
The system displays the value date.
Transaction Date
The system displays the transaction date.
Currency
The system displays the currency details.
Amount
The system displays the amount details.
Event Sequence Number
The system displays the ESN details.
While saving a PC contract, for outgoing PC payment, the beneficiary bank will be the beneficiary customer. If there is no classification for the beneficiary bank, then the system will treat the contract as a normal PC contract with no applicability of FATCA. This is applicable in case of external clearing contracts also.
For an incoming PC payment, the customer who owns the account being credited will be the beneficiary customer.
If an incoming collection results in an independent outgoing payment, the system will consider FATCA applicability as part of the outgoing payment and not as part of the incoming collection. If an incoming collection results in a direct debit, then the beneficiary customer will be the bank to which the payment is being sent.
If the contract is being closed, then the system will remove the contract row from the tracking table and the customer’s FATCA balance will be updated accordingly if required.
5.1.14 Queue Log Button
Audit logs will be logged when a PC transaction is entered into the queue due to exception and an action is triggered on it. Audit logs will be triggered for the following actions on queue.
- Accept
- Carry Forward
- Retry
- Reject
- Reverse
- Post to Suspense
- Authorize
The Audit logs are captured whenever a PC transaction moves into the following queues:
- Consolidation Exception Queue (PCSCNLEX)
- Credit Exception Queue (PCDCRXSQ)
- Credit Exception Detailed Queue (PCSCRXSD)
- Exchange Rate Queue (PCSXRXSQ)
- Incoming Authorization Queue (PCSIAUTQ)
- Incoming Cancellation Exception Queue (PCSCANEX)
- Incoming Payment Repair Queue (PCSIPRSQ)
- Authorizer 1 Queue (PCSAUTQ1)
- Authorizer 2 Queue (PCSAUTQ2)
- Process Exception Queue (PCSPEXSQ)
- Release Queue (PCSRLXSQ)
- Transaction Exception Queue (PCSTEXSQ)
You can view the audit log information using the ‘Queue Log’ screen. Click ‘Queue Log’ button on the ‘Payments and Collection Transaction Input’ screen to invoke the ‘Queue Log’ screen.

You can view the following details:
User ID
The system displays the User ID.
Action
The system displays the action taken on the queue.
Date Time
The system displays the date and time when the action was taken.
Function ID
The system displays the function ID.
Queue Name
The system displays the name of the queue on which action was taken.
5.1.15 Viewing Payments and Collection Transactions
You can view the Payments and Collection Transactions using ‘Payments and Collection Transactions Summary’ screen. To invoke this screen, type ‘PCSTRONL’ in the field at the top right corner of the Application tool bar and click the adjoining arrow button:
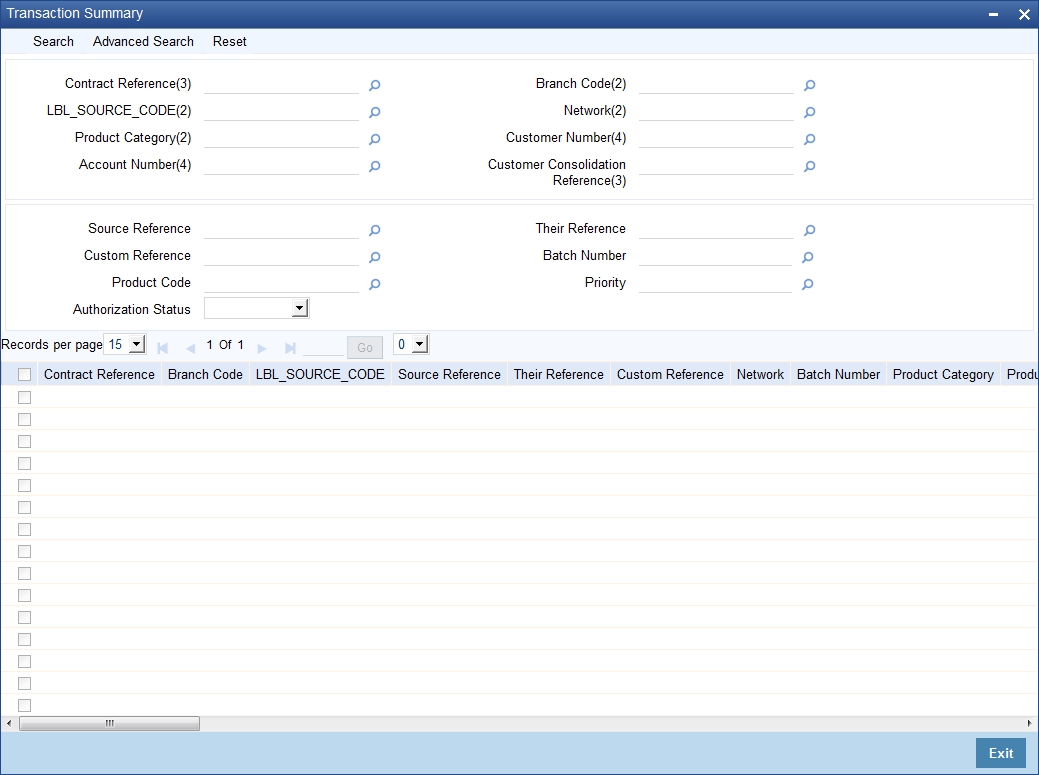
You can click ‘Search’ button to view all the pending functions. However, you can to filter your search based on any of the following criteria:
- Contract Reference
- Source Code
- Their Reference
- Network
- Product Category
- Priority
- Branch Code
- Source Reference
- Custom Reference
- Batch Number
- Product Code
- Customer Number
Click ‘Search’, the system displays the following details based on the specified search criteria:
- Contract reference
- Branch Code
- Source Code
- Source reference
- Their Reference
- Custom reference
- Network
- Batch Number
- Product Category
- Product Code
- Priority
- Customer Number
- Bank Code
- Account LCF
- Account Branch
- Account Number
- Account Currency
- Foreign Currency Amount
- Remitted Amount
- Exchange Rate
- Bank Code
- Account Number
- Counter Party Name
- Cutoff Status
- Activation date
- Redispatch Required
- Agreement ID
- Reject Code
- Reject detail
- Compensation Amount
- Original Collection Reference
- Clearing Branch
- Transaction Currency
- Local Currency Equivalent
- Auto/manual
- Acknowledgement Status
- Contract Status
- Reject reference Number
- Creditor ID
- Exception Queue
- Collection Status
- Authorization Status
- FX Contract Reference
- BIC ID
5.2 Simplified Entry of Payments and Collection Transactions
This section contains the following topics:
5.2.1 Invoking PC Fast Transaction Input Screen
For entry of transactions using the following product types, a simplified transaction entry screen, the ‘PC Fast Transaction Input’ screen, is provided to enable you to key in transactions with the basic transaction details.
- Outgoing/Incoming Payments
- Outgoing/Incoming Direct Debits
- Outgoing/Incoming Request For Debits
You can invoke the ‘PC Fast Transaction Input’ screen from the Application Browser by typing ‘PCDFSTNL’ in the field at the top right corner of the Application tool bar and clicking the adjoining arrow button.
Transaction Branch
Select the appropriate branch from the list of branches available in the option list.
On clicking ‘O’ button, the system validates the access rights of the selected branch and function for the user.

If you don’t have appropriate rights on the selected branch and function, the system will display an error message. If you select a valid branch, the system updates the same as transaction branch and the transaction will be posted for this branch.
In the ‘Fast Transaction Input’ screen, you enter details for a transaction as given below. All validations to values entered in fields are made just as they are in the ‘PC Transaction Input’ screen:
Refer PC Transaction Input screen details in the same manual.
Basic Details
- Product Code (you can only select those products that are linked to Outgoing / Incoming Payment, Direct Debit or Requests for Debit product categories)
- Network
5.2.1.1 Specifying Clearing Network Restriction
Bank Code lists linked to the available clearing networks are displayed in ‘PC Fast Input’ screen for the Product Category. The displayed bank codes list sequence is driven by the way you navigate through the ‘PC Fast Input’ screen:
After entering the product category details, if you proceed to the bank code without entering the product code and network, the functionality will remain as before. (The entire list of bank codes used by that product is displayed)
If you enter the product code after entering the product category details, then
- If the Product is Book Transfer Type, the network field would be blank. The Book Transfer Type of Bank Codes from the PC Bank Directory will be displayed in the list of Bank Codes from the PC Bank Directory.
- If the specified Product is internal type, the network field would be blank. The entire list of bank codes used by that Product would be displayed.
- If the product is of the type external, the default network chosen
in the product preference screen will be displayed. Only those bank codes
using this network would be displayed.

Transaction Details
- User-defined fields, if any
- MIS Details
Customer Details
- Customer Account, in Oracle FLEXCUBE as well as in Local Clearing Format
- Customer Name
- Customer Information
- Customer Bank Code and account details
To view the joint holder’s details of an account and the mode of operation maintained at the account level, place the cursor on the Customer Account No field and press Ctrl+J. The system displays the ‘Joint Holder’ screen.
For more information on the ‘Joint Holder’ screen refer to the section ‘Joint Holder Maintenance’ in the Core User Manual.
Saving a transaction in the PC Fast Transaction Input screen
When a transaction is saved in the ‘PC Fast Transaction Input’ screen, any overrides or errors in respect of the transaction are displayed. On saving the transaction after entering all the required details in the system, the system validates the value of the transaction amount against the following:
- Product transaction limit
- User Input limit
If the transaction currency and the limit currency are different, then the system converts the amount financed to limit currency and checks if the same is in excess of the product transaction limit and user input limit. If this holds true, the system indicates the same with below override/error messages:
- Number of levels required for authorizing the transaction
- Transaction amount is in excess of the input limit of the user
The transaction is automatically authorized if automatic authorization is allowed for the profile of the user that has entered the transaction.
Viewing the main PC Transaction Input screen
From the ‘Fast Transaction Input’ screen, in View Mode, you can view the main ‘PC Transaction Input’ screen by clicking the arrow icon.
5.3 Transaction Authorization
This section contains the following topics:
- Section 5.3.1, "Authorizing a Transaction"
- Section 5.3.2, "Invoking the Payments and Collections Transaction Authorize Screen"
- Section 5.3.3, "Reject Button"
- Section 5.3.4, "Error Button"
- Section 5.3.5, "Change Log Button"
- Section 5.3.6, "Amending Authorized Contracts"
- Section 5.3.7, "Viewing Transaction Authorization Details"
5.3.1 Authorizing a Transaction
All operations on a contract need to be authorized before the end of day. Any user with the requisite rights can authorize an operation. Importantly, you cannot authorize an operation that you yourself have performed on a transaction. For instance, you cannot authorize a transaction that you have input, even if you have the rights to authorize transactions.
If you have the requisite rights, you can invoke the ‘Payments and Collections Transaction Authorize’ screen.
5.3.2 Invoking the Payments and Collections Transaction Authorize Screen
You can invoke this screen from the Application Browser by typing ‘PCDTRAUT’ in the field at the top right corner of the Application tool bar and clicking the adjoining arrow button.
In this screen, you can authorize the following operations that are unauthorized:
- Contract input
- Amend/Modification of contracts
- Reversal of contracts
When you launch the ‘PC Authorization’ screen from the application browser, you must specify a product category, and click ‘Authorize’ button. If you wish to authorize all contracts in all product categories, you can select the ‘ALL’ option.
When you specify a valid product category, all contracts pending authorization in the selected product category (or all categories, as per your selection) are displayed.
Contract Reference
Specify the reference number of the contract you need to authorize.
The system displays the following values related to the contract reference number specified:
- Product Category
- Contract Details
- Custom Reference No
- Rekey Details
- Counterparty Bank Code
- Counterbank Account Number
- Counterparty Name
- Activation Date
- Customer Account Number
- Exchange Rate
- Transaction Currency
- Transaction Amount
- Overrides
- Confirmed
- Override Text
- Status
- Authorized By
- Authorized Date Stamp
- Override Authorize Status
To view the joint holder’s details of an account and the mode of operation maintained at the account level, place the cursor on the Customer Account Number field and press Ctrl+J. The system displays the ‘Joint Holder’ screen.
For more information on the ‘Joint Holder’ screen refer to the section ‘Joint Holder Maintenance’ in the Core User Manual.
5.3.3 Reject Button
Click ‘Reject’ link to mention authorization reject remarks, if you have rejected any transaction.
5.3.4 Error Button
Click ‘Error’ link, the system displays the Error Code details screen. You can view Error code details here.
5.3.5 Change Log Button
Click ‘Change Log’ link view the changes from the contract before and after Amendment. The system displays the old and new values of the modified fields of the contract.

The following details are displayed here:
- Contract Ref No
- Description
- Event Sequence Number
- Old Value
- New Value
Status Details for Contracts Pending Authorization
The status details for each contract are displayed in the Status Fields section:
- Contract Status
- Collection Status
- Exception Queue
- Message Status
- ID of the user that entered the transaction, with the date time stamp.
Rekey Fields for Contract Authorization
If your bank has enforced re-key of contract details during authorization, the values to the re-key fields will not be displayed. You have to enter these values to authorize the contract. If the re-key values you enter do not match the contract you are calling for authorization, an error message will be displayed. If authorization is successful, the next unauthorized contract in the batch will be displayed.
Overrides for Contracts Pending Authorization
All override conditions that occurred at the time of contract input are also displayed for information in the Overrides section. Click on the checkbox alongside the override field, to confirm the override. When confirmed, the checkbox contains a tick mark.
Viewing contracts while authorizing them
While in the ‘PC Authorization’ screen, you can view the details of a contract that you wish to authorize. However, you must first specify the details that are to be rekeyed (if any) in the Rekey Fields section.
Authorizing contracts
To authorize a contract after you have verified it, select it in the grid at the top of the screen and click ‘Ok’ button. The contract is marked as authorized.
To authorize all transactions, choose the ALL option at the top of the screen, and then click the ‘Ok’ button.
All validations that are performed at the time of input or amendment of the contract are performed at the time of authorization to ensure consistency. The details relating the authorization time and User ID of the person authorizing the contract are recorded for audit purposes.
You cannot authorise a transaction in the following cases:
- the contract has multilevel of authorization pending, the same will be done using the ‘Multilevel Authorization Detailed’ screen
- the level of authorization is greater than or equal to ‘N’
- the ‘Nth’ or the final level of the users authorisation limit is less than the difference between amount financed and sum of the limits of all the users involved in authorizing a transaction, this case holds good when the ‘Cumulative’ field is checked in the ‘Product Transaction Limits Maintenance’ screen
- the transaction amount is greater than the authoriser’s authorisation limit if the ‘Cumulative’ field is unchecked in the ‘Product Transaction Limits Maintenance’ screen
Canceling operations in the PC Authorization screen
To cancel your operations and exit the ‘PC Authorization’ screen, click ‘Exit’ button.
5.3.6 Amending Authorized Contracts
The Payments and Collections screen enables you to modify the contract which is not liquidated or dispatched, post-authorization. When a contract is modified, the system triggers AMND event. The features of the event are as follows:
- A new event ‘AMND’ is triggered, whenever an authorized contract, for which either DRLQ or CRLQ or DCLG events are not triggered, is modified.
- When AMND event is triggered, the system computes the values in the event log table (cstb_contract_change_log) for all the modified fields.
- AMND event need not be attached in product; it is triggered internally for all modifications performed as part of Step 1.
- AMND event is not triggered when un-authorized contracts are modified.
- No accounting entries will be passed for AMND event.
- When a contract is booked with activation date in future and when the same contract's activation date is modified to current date, the system will not trigger liquidation events, since the system will not default the customer entry value dates. To trigger liquidation events, you need to visit ‘Transaction Details’ tab, modify the customer entry value date, and save the contract.
5.3.7 Viewing Transaction Authorization Details
You can view the transaction authorize details in ‘Transaction Authorize Summary screen, You can invoke this screen from the Application Browser by typing ‘PCSTRAUT’ in the field at the top right corner of the Application Browser.

In the above screen, you can base your queries on any or all of the following parameters and fetch records:
- Contract Reference
- Custom Reference No
- Product Category
- Customer Name
Select any or all of the above parameters for a query and click ‘Search’ button. The records meeting the selected criteria are displayed.
- Contract Reference
- Custom Reference No
- Product Category
- Product Code
- CUST_NO
- Customer Account Currency
- Customer Name
- Auth Status
5.4 Multilevel Authorization of a Contract
High value transactions may require multilevel of authorization. The levels of authorizations are defined in the ‘Product Transaction Limits’ screen. You can use the ‘Multilevel Authorization Detailed’ screen for authoring a contract n-1 times. However, final authorization can take place only in the contract screen.
For more details, refer the ‘Multilevel Authorization of Contract/Loan Account’ section in the ‘Procedures’ User Manual.
5.5 Collection Transaction
This section contains the following topics:
- Section 5.5.1, "Operations on Collection Transaction"
- Section 5.5.2, "Collection Status of a Transaction"
- Section 5.5.3, "Status of a Transaction"
5.5.1 Operations on Collection Transaction
The operations that you can perform on a collection transaction in the ‘PC Transaction Input’ screen depend upon whether it is authorized. If the transaction is unauthorized, you can:
- Put the transaction on hold, if any of the details are incomplete. The system performs no further processing on such transactions, unless they are subsequently amended and saved again.
- Amend the details of the transaction, if necessary. If a contract has been uploaded through the upload facility, you can amend only those details that have been allowed for amend, in the product category and the upload source preferences.
- Delete the transaction. Again, in the case of contracts uploaded using the upload facility, deletion is possible only if allowed in the upload source preferences, for the source from which the contract was uploaded.
You can perform any of the following operations (as required) on an authorized collection transaction:
- Redispatch an outgoing transaction that needs to be manually redispatched. Click roll-over icon in the toolbar to redispatch the transaction manually. Only collection transactions can be redispatched.
- Approve a transaction, in the case of active incoming RFD collection transactions. Click liquidate icon in the toolbar to approve a transaction.
- Close an outstanding collection transaction. Click close button to close the transaction.
- Recall an incoming direct debit transaction. Click ‘Re-open’ to recall the transaction. The ‘Recall Contract Details’ screen is opened, where you must specify the Activation Date for the recall and the interest amount applicable. You must also indicate whether the recall must be dispatched.
- Reject a transaction. In the case of incoming DD and RFD contracts, the system marks the parent contracts are rejected and automatically generates new transactions. Click re-open to reject such transactions. The ‘Reject Contract Details’ screen is opened. You must specify the Activation Date for the rejection, and indicate whether the reject must be dispatched. You must also specify the reason for rejection by selecting the appropriate reject code. In the case of Outgoing DD and RFD contracts, before the settlement date contract can be rejected the system marks the contract as rejected. Click re-open to reject such transactions. The ‘Reject Contract Details’ screen is opened. You must specify the Activation Date for the rejection, and indicate whether the reject must be dispatched. You must also specify the reason for rejection by selecting the appropriate reject code.
Note
For transaction rejects (outgoing or incoming DD) that are uploaded after the applicable response days have elapsed, an override is sought by the system. The processing for such transactions is based on two factors:
- Whether the Process After Response Days option has been set in the product preferences for the product used by the transaction.
- Whether the override that is sought in such cases is accepted. Accepting the override in the case of incoming DD transactions would result in rejection of the transaction. In the case of outgoing DD, the transaction is placed in the Process Exception Queue from where it can be taken up for processing or rejected.
For more details about the rejection process in the case of such transactions, refer the chapter ‘Defining the attributes specific to Payment and Collection products’ in this user manual.
- Reverse an authorized active or liquidated collection transaction. During reversal, all accounting entries passed for the contract are reversed out. A reversal operation must be authorized to be effective; once authorized, no further operations are possible on the transaction. Click reversal icon to reverse a transaction.
Note
During reversal of a transaction, the System verifies whether the transaction has been dispatched earlier. If so, an override is sought. On accepting the override, the reversal will proceed.
5.5.2 Collection Status of a Transaction
The collection status of a transaction depends on the operations that have been performed in respect of it. Accordingly, a collection transaction could be in any of the following statuses:
- Pending
- Approved
- Rejected
- Closed
- Recalled
5.5.3 Status of a Transaction
The status of a payments or collection transaction indicates the processing stage of the contract in the system. The following statuses are possible:
- Work in Progress: This status indicates that the transaction has been booked manually and no subsequent operation has been performed on the transaction.
- Held: This status indicates the transaction is on hold (typically due to incomplete transaction details) and no operation can be performed on the transaction. In such a case, you must amend the transaction, enter the missing details, and save it again, to release it from the ‘Hold’ status.
- Uninitiated: This status indicates that the transaction has been uploaded into the system and no subsequent operation has been performed on the transaction.
- Active: This status indicates that the transaction has been initiated in the system.
- Outstanding: This status, only applicable for outgoing collection transactions, indicates that the system has completed all requisite operations that need to be performed from the creditor’s bank, and that the contract is awaiting approval or rejection from the debtor’s bank.
- Liquidated: This status indicates that the processing cycle of the transaction has been completed.
- Reversed: This status indicates that the transaction has been reversed in the system.
- Split Master: This status, applicable only for outgoing collection transactions, indicates that the transaction has been split into multiple contracts, because the transaction amount has exceeded the maximum possible transaction amount. The system does not allow any operations on such split transactions.
- Partial: This status, only applicable for outgoing request for debit transactions, indicates that the collection transaction has only been settled partially.
- Deleted: This status indicates that the transaction is marked for deletion. No further operations are possible on deleted transactions.
5.6 Exchange Rate for a Transaction
If payment transactions involve a customer account maintained in a foreign currency, the exchange rate to be used is either picked up automatically (based on the product specifications), or manually entered.
In the ‘Exchange Rate’ screen, invoked from the Application Browser, you can specify the exchange rate for contracts involving customer accounts maintained in a foreign currency.
When you invoke the ‘Exchange Rate Input’ screen from the Application Browser, all details of the contract are displayed. However, you can only enter a value in the Exchange Rate field. If the rate you input exceeds the override variance limit defined for the product, an override message is displayed. However, if the rate variance is more than the maximum limit maintained for the product, an error message is displayed. You have to specify a rate that is within the variance limits specified for the product.
If the contract amount exceeds the Auto Exchange Rate limit defined for the remitter account, an override is displayed.
If you have specified an appropriate rate for the contract, you can save your specification by clicking on the SAVE button.
Any manual exchange rate input requires an authorization. Once the exchange rate is authorized, the contract is moved from the Exchange Rate Queue to the normal processing queue for further processing.
5.7 Input of Exchange Rates Authorization
All contracts for which the exchange rate has been input manually need to be authorized before the end of day. The date and time, and the User ID of the person authorizing the contract will be recorded for audit purposes.
Note that the person who entered the exchange rate for a contract cannot authorize it.
When you invoke the authorization function from the Application Browser, you will be prompted to specify a product category. If you enter a valid code, the authorization screen is displayed. To begin the authorization process, click on the AUTH button. You will be prompted to specify a valid Batch Number. A User ID or Reference number is then displayed.
If re-key of exchange rate is required during authorization, the value will not be displayed. You have to input the values in the re-key fields to authorize the contract. If the re-keyed values for the contract do not match the contract you are calling for authorization, an error message is displayed.
All overrides provided by maker of the record will be displayed. On confirmation, the contract is marked as authorized.
You can Skip a record that is displayed for authorization or choose not to authorize it by clicking on the Reject button. All records that you reject will form a part of the Transaction Re-input Queue.
5.8 Exchange Rate Refresh
This section contains the following topics:
5.8.1 Invoking the Exchange Rate Refresh Screen
As mentioned earlier, the exchange rate applicable for transactions involving foreign currency customer accounts is either automatically picked up or manually entered, depending upon the product preferences. On a given business day, you can trigger the refreshing of exchange rates for all products used at a branch, in the ‘Exchange Rate Refresh’ screen.
You can invoke this screen by typing ‘PCDTRFSH’ in the field at the top right corner of the Application tool bar and clicking the adjoining arrow button.
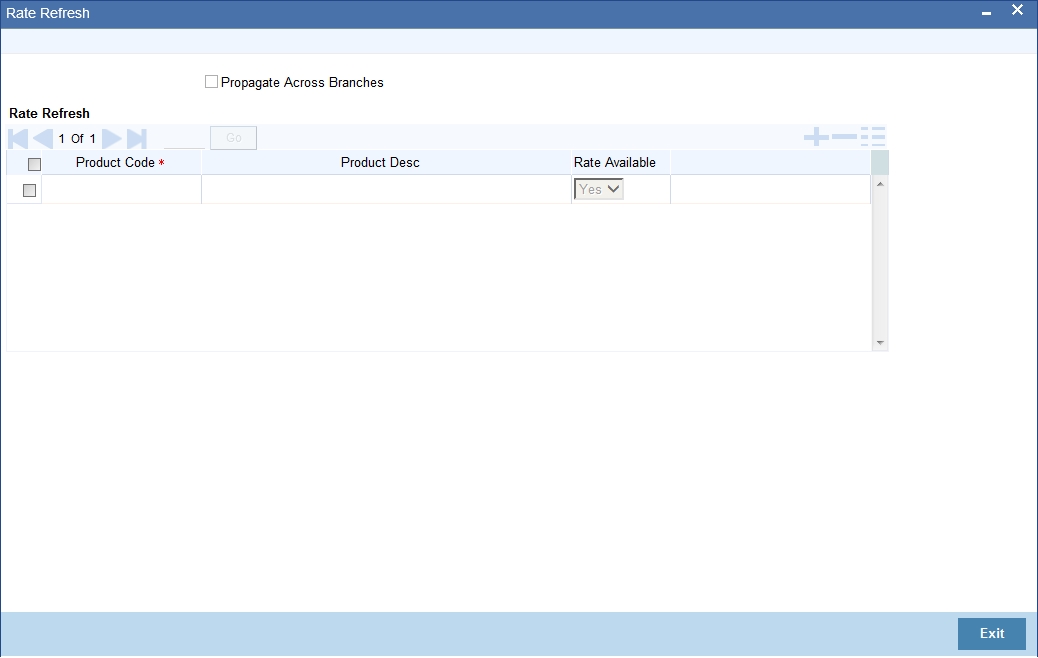
You can also update the refreshed exchange rate across all branches, by selecting the ‘Propagate Across Branches’ option.
5.9 Credit Exceptions
This section contains the following topics:
5.9.1 Invoking the Credit Exception Queue
If the customer liability exceeds the specified limit as a result of a contract, an exception is raised and the contract is moved to the Credit Exception Queue. You can Confirm or Reject these overrides in this screen. You can invoke this screen by typing ‘PCDCRXSQ’ in the field at the top right corner of the Application tool bar and clicking the adjoining arrow button.
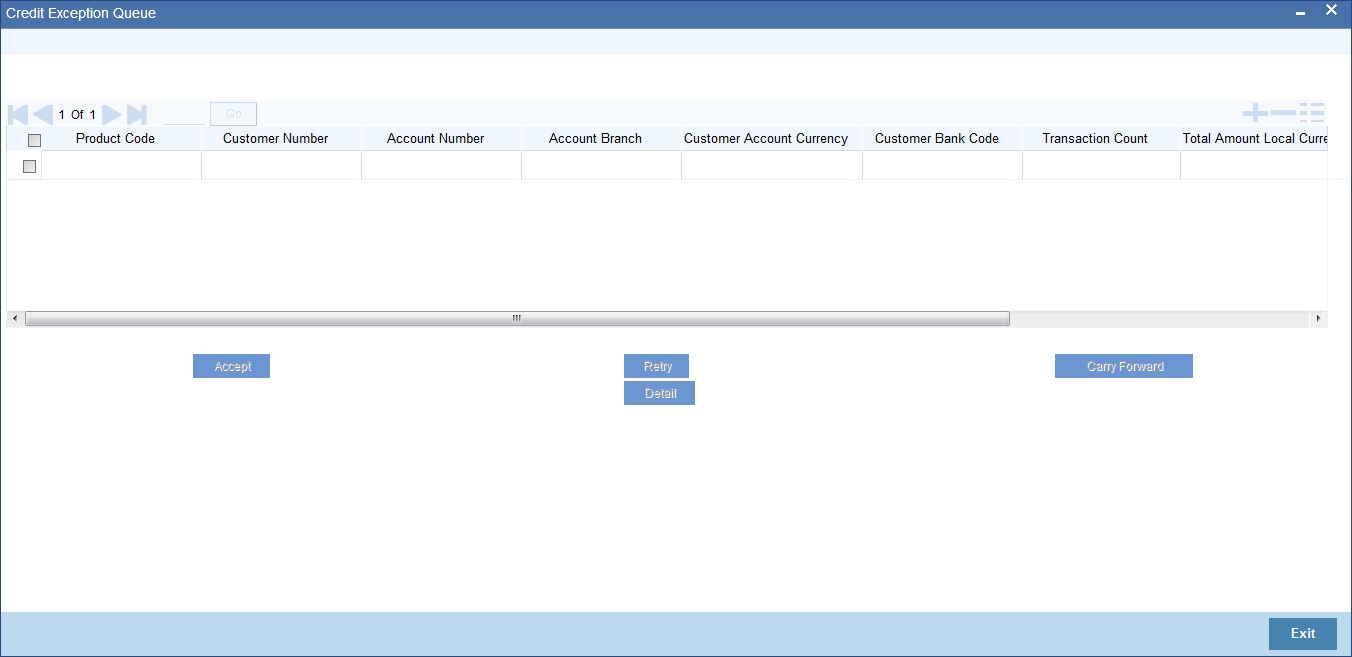
The contracts are grouped on the product code and customer account. A consolidated amount for each combination is also furnished.
The information is sorted/queried along the following criteria:
- Product Code
- Customer Number
- Customer Account
- Customer Account Branch
- Customer Account Currency
- Customer Bank Code
- Total Amount – Local Currency
- Total Amount – Account Currency
- Limit Amount – Account Currency
Choose any of the following options by clicking on the appropriate buttons in the toolbar in the ‘Credit Exceptions Queue’ screen:
- ‘Detail’ – Choosing this option allows you to drill down to the details of a contract for the combination of Product and Customer Account. The detailed view consists of two portions. The upper half of the window displays all contracts where consolidation is not required. The lower half shows contracts grouped by the consolidation parameters. All options provided on the main screen are provided on this screen as well. You can opt to process all the contracts or select contracts.
- ‘Reject’ – Choosing this option allows you to reject contracts. If a contract is rejected, the contract status is updated as “rejected”. No further processing of such transactions is allowed. Click ‘Reject’ to reject a transaction. The ‘Reject Contract Details’ screen is opened. You must specify the Activation Date for the rejection, and indicate whether the reject must be dispatched. You must also specify the reason for rejection by selecting the appropriate reject code.
- Choose ‘Carry Forward’ option if you would like to forward the activation date to the next working day. The contract will be marked for pickup on the next working day.
- Retry – This option marks the contracts for reprocessing. If funds have been credited to the customer account subsequent to the credit exception, a retry would result in the successful processing of the contract. Click ‘Retry’ to retry a transaction.
- Accept – Choose this option if the contract can be processed even without adequate funds in the customer account. This, typically, means you are providing an overdraft to the customer. If you specify a limit amount, transactions grossing the limit amount would be allowed for processing. However, if you do not specify a limit amount, all transactions for the product customer combination would be processed. Click ‘Accept’ to force accept a transaction.
Note
- The carry forward option is not available for incoming collections.
- All contracts need to be processed before the end of day operations for the day.
5.10 Customer Legs Consolidation
This section contains the following topics:
- Section 5.10.1, "Accounting Entries for Customer Legs Consolidation"
- Section 5.10.2, "Invoking the Consolidation Summary Screen"
5.10.1 Accounting Entries for Customer Legs Consolidation
If you wish to consolidate the accounting entries of customer legs of collection transactions, use the ‘Consolidation Summary’ screen. Only contracts marked for customer entry consolidation will be grouped into batches based on the following:
- Consolidated Status
- Customer Account Number
- Amount
- Customer Entry Date
- Consolidation Reference No
- Transaction Count
- Customer Number
- Account Currency
- Customer Entry Value Date
- Product Code
- Exception Queue
- Customer Account Branch
Through consolidation, you can post a single entry for the customer leg of all transactions grouped under the consolidation batch. The transaction with customer consolidation across products are also grouped under a consolidation batch. The batch populated for Contracts with customer consolidation across products will have Product Code as Blank.
5.10.2 Invoking the Consolidation Summary Screen
You can invoke this screen by typing ‘PCSCNSOL’ in the field at the top right corner of the Application tool bar and clicking the adjoining arrow button.

Choose any of the following options in the ‘Consolidation Summary’ screen:
- ‘Search’- Allows for querying of specific records.
- ‘Reset’ - Resets the required details.
5.11 Consolidation Exception Queues
This section contains the following topics:
5.11.1 Invoking the Consolidation Exception Queue
There could be many reasons why rejections can occur during processing of payment and collection transactions for consolidation. Exceptions are raised in respect of transactions that are rejected. Such transactions, which are not considered for consolidation (due to rejection), can be viewed in the Consolidation Exception Queue. You can invoke this screen by typing ’ ‘PCSCNLEX’ in the field at the top right corner of the Application tool bar and click on the adjoining arrow button.
Here, you can manually verify the rejections. To confirm a rejection, click ‘Reject’ button. This operation must be performed before the end of day cycle can be run.
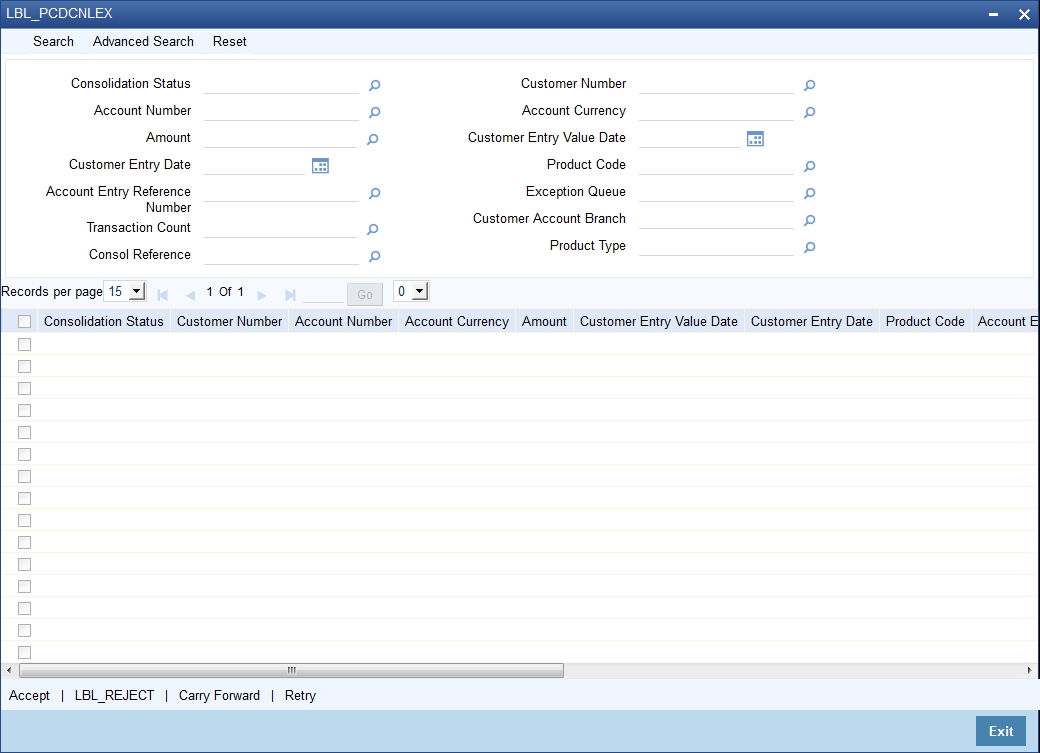
The other options available are:
- This option marks the contracts for reprocessing of consolidation. Click ‘Retry’ to retry consolidation of the transaction.
- Click ‘Accept’ to force accept a transaction.
- Forward – Choose this option if you would like to forward the consolidation processing to the next working day. The contract will be marked for pickup on the next working day, for consolidation. Click the ‘Carry Forward’ button to forward the consolidation processing date of the transaction to the next working day.
The parameters considered are:
- Consolidation Status
- Customer Number
- Customer Account Number
- Account Currency
- Account
- Customer Entry Value Date
- Customer Entry Date
- Product Code
- Account Entry Reference Number
- Exception Queue
- Transaction Count
- Customer Account Branch
- Consol Account Reference Number
- Product Type
All contracts that are rejected during the accounting of a file consolidated entry forms part of a “Consolidation Exception Queue”
The file level consolidation batches falling under this exception queue has the product code value as 'Null'.
The consolidation exception queue has the following options
- Accept -Select the option to accept the transaction so that it can be processed even without adequate funds in the customer account by providing an overdraft to the customer.
- Retry -Select this option if the funds have been credited to customer account subsequent to the credit exception, a retry will result in successfully processing of debiting the consolidating amount.
- Carry forward - This option forwards the consolidation processing to the next working day. The consol batch will be marked for pickup on the next working day.
- Reject - This option is to manually confirm the rejection
5.12 Transaction History Summary
This section contains the following topics:
5.12.1 Invoking the Transaction History Summary Screen
You can view all the transaction history using ‘Transaction History Query’ screen. You can invoke this screen by typing ‘PCSCONHS’ in the field at the top right corner of the Application tool bar and clicking the adjoining arrow button.
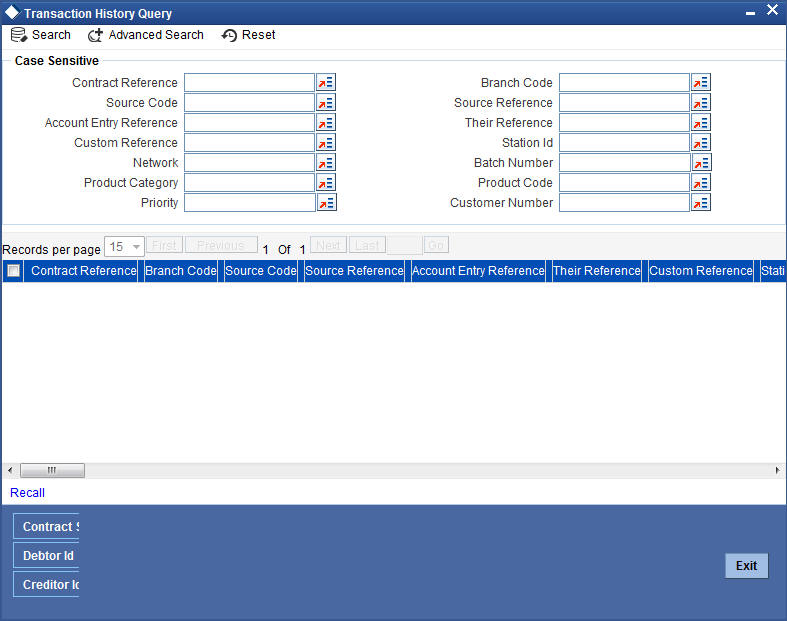
In this screen you can use the following fields to search the PC Transactions:
- Creditor Identification
- Reject Code
- Original Collection Reference Number
- Clearing Branch
- Local Currency Equivalent Amount
- Agreement Identification
- Interest Amount
- Reject Detail
- Transaction Currency
To recall all the contracts, click on ‘Recall’ button.
When you click ‘Search’ button the records matching the specified search criteria are displayed.
5.13 Transaction Exception Summary
This section contains the following topics:
5.13.1 Invoking the Transaction Exception Summary Screen
You can view all contracts that encountered a Transaction Exception (TR) during upload, through the ‘Transaction Exception Summary’ screen.
You can invoke this screen by typing ‘PCSTEXSQ’ in the field at the top right corner of the Application tool bar and clicking the adjoining arrow button.
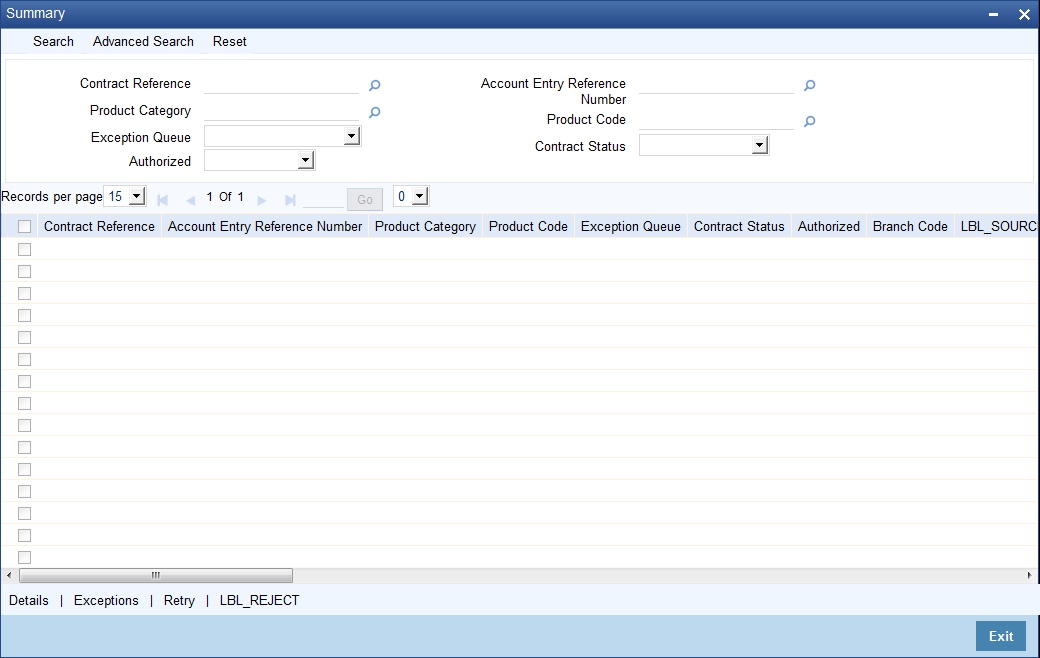
In this screen you can maintain the following details:
- Authorization Status
- Exception Queue
- Contract Reference Number
- Product Category
- Contract Status
- Account Entry Reference NO
- Product code
To re-upload all the contracts, click the ‘Retry’ button. If the contracts are successfully uploaded, they will no longer be visible in the screen.
5.14 Split Transactions Summary
This section contains the following topics:
5.14.1 Invoking the Split Transaction Summary Screen
In certain cases, you may find it necessary to split an outgoing collection transaction into multiple transactions, due to restrictions on the amount of each payment that can be sent over the payment network. In the ‘Split Summary’ screen, you can view details of such split transactions, by drilling down from the parent transaction to the child transactions. You can invoke this screen by typing ‘PCSSPLTS’ in the field at the top right corner of the Application tool bar and clicking the adjoining arrow button.
In the ‘Split Summary’ screen, contracts marked for splitting (in the transaction details) are displayed based on the following:
- Contract Reference Number of the parent contract
- Activation Date
- Transaction Currency
- Branch Code
- Network
- Initiation Date
- Amount
To view any of the child contracts for a split contract, select it in the ‘Split Summary’ screen and click ‘Child’ button to view the child contracts.
5.15 Process Exception Queues
This section contains the following topics:
5.15.1 Invoking the Process Exception Queue Screen
The Process Exception Queue lists exceptions that are raised in respect of transactions rejected during processing. You have options for re-processing or rejecting any or all of the transactions appearing in this queue. These operations must be performed before the end of day cycle can be run. You can invoke this screen by typing ‘PCSPEXSQ’ in the field at the top right corner of the Application tool bar and clicking the adjoining arrow button.
In this screen you can maintain the following details:
- Authorization Status
- Exception Queue
- Contract Reference Number
- Product Category
- Contract Status
- Account Entry Reference No
- Product code
To view the exceptions, click ‘Exception’ button. Click ‘Retry’ button to re-process all the contracts.
5.16 Exchange Rate Queues
This section contains the following topics:
5.16.1 Invoking the Exchange Rate Queue Screen
For a payments or collection contract involving a foreign currency customer account, the exchange rate required for processing is picked up by the system based on the exchange rate parameters specified for the branch and product combination involved in the transaction.
If the exchange rate is not picked up or if the exchange rate input process fails, the contract is logged into the Exchange Rate Queue. In this queue, you can manually enter the required exchange rate for the transaction. Until the exchange rate is manually entered for a contract logged in the Exchange Rate Queue, it cannot be processed. Also, such a manually entered exchange rate must be authorized to be effective, before the End of Day processes are executed, for that business day.
You can access the exchange rate queue, in the Exchange Rate Exception Queue. You can invoke this screen by typing ‘PCSXRXSQ’ in the field at the top right corner of the Application tool bar and click on the adjoining arrow button.

All contracts logged into the exchange rate queue are displayed, grouped according to the following:
- Authorization
- Exception Queue
- Contract Reference Number
- Product Category
- Contract Status
- Account Entry Reference No
- Product code
- Customer Number
- Customer Account Number
- Activation Date
Click ‘Exception’ to view the exceptions.
5.17 Periodic Exception Queues
This section contains the following topics:
5.17.1 Invoking the Periodic Exception Queue Screen
All periodic instructions that have failed to be executed in the immediate previous Beginning of Day batch and which are still pending resolution, can be viewed in the Periodic Exception Queue. You can access this queue in the ‘Periodic Exception Queue’ screen.
You can invoke this screen by typing ‘PCSPRXSQ’ in the field at the top right corner of the Application tool bar and clicking the adjoining arrow button.
In this queue, you can also view any instructions that have failed execution on any date earlier than the application date.
The periodic instructions in the queue are displayed grouped according to:
- Instrument Reference Number
- Product Code
- Customer Account
- Customer Number
- Counterparty Name
- Counterparty Bank
- Product Category
- Transaction Amount
- Customer Account Branch
- Account Currency
- Customer Bank
- Counter Account Number
To view the exceptions, click the ‘Exception’ button. Click ‘Retry’ to re-process all the periodic instructions in the queue that have failed execution and have not been resolved on the application date. If the generation is successful for any of the instructions, they are marked ‘resolved’.
You can also choose to reject any of the instructions. To reject a transaction, click ‘Ignore’ in the toolbar.
5.18 The Batch Browser
This section contains the following topics:
5.18.1 Viewing Batches Summary
The Batch Browser lists all open batches in the system for collection transactions. You can close or re-assign batches that you opened.
You can invoke this screen by typing ‘PCSROWSE’ in the field at the top right corner of the Application tool bar and clicking the adjoining arrow button.
For each batch, the following are displayed:
- Branch
- Batch Description
- Blocked
- Checker Identification
- Batch Number
- Authorize Status
- Maker Identification
5.19 Updating Cut-Off Time Status
This section contains the following topics:
5.19.1 Invoking the Cutoff Time Update Screen
During the end of day run for a branch, the system resets cut-off time for all products to the time mentioned in the respective product definitions. You can use the ‘ Cutoff Time Update ’ screen to update the cut-off time for a collection product at a branch. This update can be made applicable only for a specific branch-product combination, or can be propagated across all branches for the same product.
The screen displays all products active at the branch. The cut-off times for each product can be changed here if desired.You can also invoke this screen by typing ‘PCDUTOFF’ in the field at the top right corner of the Application tool bar and clicking the adjoining arrow button.
Select the ‘Propagate Across Branches’ option to update the cut-off time across all branches.
5.20 SEPA Credit Transfers and Direct Debits
A SEPA credit transfer (SCT) is a transaction done on behalf of the Originator holding a payment account with the Originator Bank, in favour of a Beneficiary holding a payment account with the Beneficiary Bank.
The picture below gives the schematic representation for SEPA credit transfers processing.
![]()
The picture below gives the schematic representation for SCT processing from indirect participants (Originator and Beneficiary of Indirect participants of SEPA).
![]()
A SEPA Direct Debit Transfer (SDD) is a transaction done for collecting funds from a debtor’s account with a debtor bank and is initiated by a creditor via its bank (the creditor bank) as agreed between the Debtor and Creditor.
The picture below gives the schematic representation for SEPA Direct Debits processing.
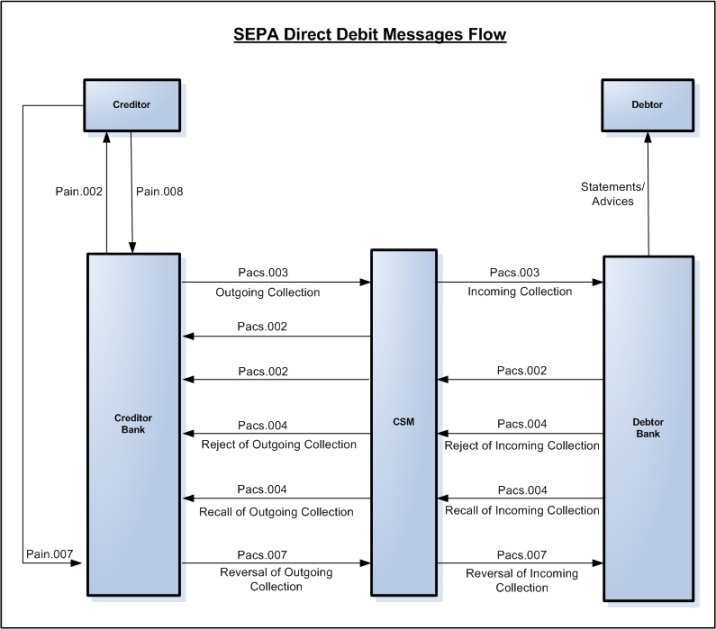
The Common Payments Gateway is used to handle the SEPA (Single Euro Payments Area) messages for Credit/Debit Transfers. The incoming XML messages for SCT and SDD are uploaded into Common Payments Gateway and based on the STP rules specified the SCT and SDD transactions are created in the PC module.
Creditor Bank
Manual Creation
The following are the features for manual creation:
- The Local Instrument Value defaulted or entered for the transaction must be same as the Collection Scheme Type of the outgoing collection Product and is validated.
- Static data for error code 'PC-SVV-09N' is used, when Local Instrument Value and Collection Scheme Type doesn't matches.
- If Local Instrument Value is not specified for outgoing collection, then the system defaults the collection scheme type specified at the product with Local Instrument Type as 'Code'.
- If 'Collection Scheme Type' is not maintained at product level, then the system will not validate 'Local Instrument Value' and 'Local Instrument Type'.
- The system validates such that for the Collection Scheme type 'B2B', the selected customer must not be of type 'Individual'.
- During processing, if Local Instrument Value is 'B2B' and if Creditor's account is individual customer's account then system will display 'PC-SVV-09M' error.
- If the creditor account is Joint account, then the system checks the customer type of the main customer.
File Processing
The following are the features for manual creation:
- For Incoming file processing of Outgoing Collection, STP rule must be setup in such a way that 'Local_Instrument_Value' needs to be considered in addition to the existing parameters to resolve into product with collection scheme type as 'B2B'.
- During processing, if Local Instrument Value is 'B2B' and if Creditor's account is individual customer's account, then the system displays an error and transaction is moved into Transaction Repair (TR) queue.
Debtor Bank
Manual Creation
For manual creation of Incoming Collection, collection scheme type and customer type are validated, with respect to Incoming Collection product.
File Processing
- For Incoming Collection file processing, STP rule is setup in such a way that 'Local_Instrument_Value' is considered in addition to the existing parameters to resolve in product with collection scheme type as 'B2B'.
- During processing, if Local Instrument Value is 'B2B' and if Debtor's account is individual customer's account then system will raise an error.
- If the debtor account is Joint account, then the system checks the customer type of the main customer.
- The system rejects the above by default with the error code 'PC-SVV-09M' and ISO reject code 'AC13'.
- If auto reject mapping is not configured, then the system moves the incoming collection transaction into Transaction Repair (TR) queue.
- Static data for ISO Reject code is 'AC13'.
Note
The message generated from DP to CSM is compliant with EBA STEP2 SEPA rule book and the message generated from DP to IP is ISO standard compliant.
5.21 Payment Cancellation Request
This section contains the following topics:
5.21.1 Recalling Credit Transfer - Camt.056.001.01
The Payment/Collection Cancellation Request (Camt.056.001.01) message is sent by a Case Creator/Case Assigner to a Case Assignee. This message is used to request the cancellation of an original payment instruction. The Payment Cancellation Request message is exchanged between the instructing agents. The instructing agent requests the cancellation of an interbank payment message previously sent (such as FIToFICustomerCreditTransfer, FIToFICustomerDirectDebit or FinancialInstitutionCreditTransfer). The negative answer to the Payment Cancellation message is Camt.029 message.
Note
- For Recalling the Outgoing Collection and for Recalling of Credit Transfer, the system uses the Camt.056 message.
- The Camt.029 is resolution of investigation message which is used to answer the Camt.056.
Oracle FLEXCUBE provides a facility to identify the contracts which needs to be re-called for which pacs.003.01.02 or pacs.008.01.02 message already sent. The system generates the Camt.056 message and sends it to the assignee to cancel the already sent message. The Camt.056 message caters for single or group cancellation requests.
You can mark the list of contracts for which Camt.056 needs to be generated through 'Payments and Collections Cancellation' screen. You can invoke this screen by typing 'PCDRCLIN' in the field at the top right corner of the Application tool bar and click on the adjoining arrow button.
You need to capture the following details here:
Original Message Reference Number
Select the original message reference number from the adjoining option list.
Contract Reference Number
Select the contract reference number from the adjoining option list.
Customer Reference
Select the customer reference number from the adjoining option list.
Account Number
Select the account number from the adjoining option list.
To view the joint holder’s details of an account and the mode of operation maintained at the account level, place the cursor on the Account Number field and press Ctrl+J. The system displays the ‘Joint Holder’ screen.
For more information on the ‘Joint Holder’ screen refer to the section ‘Joint Holder Maintenance’ in the Core User Manual.
Settlement Date
Specify the settlement date.
Recall Reference Number
System displays the unique sequence number.
Recall Reason
Select the recall reason from the adjoining list of values that display the valid ISO Reject codes applicable for the Payments and Collections Cancellations.
Cancellation' initiation processing in this screen validates the entered ISO Reject code against the applicable exceptions as maintained in the 'Reject Code maintenance'.
An error message would be displayed if the entered Reject code is not applicable to the 'Cancellation' initiation exception.
Additional Recall Reason
Specify a text value of 105 characters for the field, which must be a description about the fraudulent origin of the transaction.
Note
If 'Fraudulent' field is not 'Additional recall Reason' and 'Additional Recall Information' field is defined, then the system throws an error.
Additional Recall Information
If 'Fraudulent' is selected in the 'Additional Recall Reason' field, then specify details on the fraudulent origin of the transaction. The system will throw an error if 'Additional Recall Information' is entered when 'Fraudulent' is not the additional recall reason. A maximum of 105 characters can be specified in this field.
Service Type
Specify the value for the field from the adjoining drop-down list.
The field takes following values-
- SCT
- SDD CORE
- SDD COR1
- SDD B2B
Note
- Option 'SDD B2B' should be used for Request for Cancellation of Collections executed for B2B.
- SDD COR1 is selected for 'Request for cancellation of collections for shorter time cycle transactions.
Click on the 'Search' button to fetch the matching contracts based on the search criteria provided.
Note
The system generates the Camt.056 message only for liquidated contracts.
Contract Reference Number
Select Contract Reference Number from the adjoining option list
Cancellation Originator Name
Specify the name of the cancellation originator.
The system validates the cancellation originator name fro cancellation request with reason 03.
Cancellation Originator Bank
Specify the bank of the cancellation originator.
Note
Specify either Cancellation Originator Name or Cancellation Originator Bank.
The cancellation originator bank is validated for cancellation request with reasons 01 and 02.
The system defaults the following:
- Account Number
- Cpty Account Number
- Product Code
- Customer Ac Branch
- Customer Ac Currency
- Customer No
- Bank Code
- Transaction Amount
- Transaction Currency
- File Ref No
- Out Message Ref No
- Out Msg Name
- Out Msg Date
- CSM Reject Reference Number
- CSM Reject Code
Recall Status
The system updates the recall status.
Original Contract Reference Number
Specify the original contract reference number.
If the cancellation request is initiated with reason as Duplicate transference then the system captures the original contract reference number.
Cancellation Commission Code
Select the cancellation commission code from the adjoining option list.
Cancellation Commission Amount
Specify the cancellation commission amount.
You have an option to select the contracts from the list of contracts. While saving the selected contracts, the system creates a reference number and inserts the contract details in new data store.
The table below explains the list of Recall Reason:
Recall Reason |
||
AGNT |
Incorrect Agent |
Agent in the payment workflow is incorrect |
CURR |
Incorrect Currency |
Currency of the payment is incorrect |
CUST |
Requested By Customer |
Cancellation is requested by the debtor |
CUTA |
Cancel Upon Unable To Apply |
Cancellation requested because an investigation request has been received and no remediation is possible |
DUPL |
Duplicate Payment |
Payment is a duplicate of another payment |
UPAY |
Undue Payment |
Payment is not justified. |
The set of transaction stored for payment cancellation is authorized and the system picks only authorized records for payment cancellation message generation.
Note
The system generates the Camt.056 for all contracts for which recall is requested through 'SEPA Payment Cancellation'. It does not validate the number of days before which the recall can be made.
You can manually reject the cancellation request by inputting the CSM Reject Detail , Reject Code and Reject Reference Number.
On saving the cancellation status will be changed into Rejected By STEP 2.
Rejection of Cancellation of Payments
On rejection, 'Cancellation Status' at cancellation request level would be marked as 'Rejected'.
'Reject Code', 'Reject Detail' entered during reject operation would populate 'CSM Reject Code' and 'CSM Reject Detail' fields respectively at cancellation request level.
Rejection of Cancellation of Collections
On rejection, 'Cancellation Status' at cancellation request level would be marked as 'Rejected'. 'Reject Code', 'Reject Detail' entered during reject operation would populate 'CSM Reject Code' and 'CSM Reject Detail' fields respectively at cancellation request level.
This rejection process would re-activate the original Outgoing Collection with the contract details as prior to the cancellation. An event 'RACT' will be logged for the original Outgoing Collection in the contract events data store.
5.22 Handling Cancellation of Outgoing Payments & Collections that are not dispatched to CSM
Cancellation requests are made in 'Payments and Collections Cancellation' (PCDRCLIN) screen. You can 'Reject' the Outgoing Payment contract by performing pre-settlement rejection (RJBS) if the Outgoing Payment is not dispatched. On Rejection The status will be changed into Recall Success. Accounting entries passed during debit liquidation and credit liquidation would be reversed. Dispatch process does not consider this rejected Outgoing Payment contract and Cancellation request. Cancellation of Outgoing Collections that are not dispatched to CSM would follow the same processing as described in the above points.
5.23 Handling Manual Rejection of Cancellation (Camt.056) for Payments and Collections
This section contains the following topics:
- Section 5.23.1, "Payments and Collections Cancellation (PCDRCLIN)"
- Section 5.23.2, "Credit Validation File (CVF) Process"
- Section 5.23.3, "Settled Credit File (SCF) Process"
- Section 5.23.4, "Debit Verification File (DVF) Messages"
- Section 5.23.5, "Debit Notification File (DNF) Process"
- Section 5.23.6, "Incoming Cancellation Exceptions Queue (PCSCANEX)"
5.23.1 Payments and Collections Cancellation (PCDRCLIN)
You can manually reject cancellation for Payments and Collections using 'Payments and Collections Cancellation' screen.
- Rejection of Cancellation of Payments - On rejection, 'Cancellation Status' at cancellation request level would be marked as 'Rejected'. 'Reject Code', 'Reject Detail' entered during reject operation would populate 'CSM Reject Code' and 'CSM Reject Detail' fields respectively at cancellation request level.
- Rejection of Cancellation of Collections
- On rejection, 'Cancellation Status' at cancellation request level would be marked as 'Rejected'.
- 'Reject Code', 'Reject Detail' entered during reject operation would populate 'CSM Reject Code' and 'CSM Reject Detail' fields respectively at cancellation request level.
- This rejection process would re-activate the original Outgoing Collection with the contract details as prior to the cancellation.
- A new event 'RACT' will be logged for the original Outgoing Collection in the contract events data store.
5.23.2 Credit Validation File (CVF) Process
If Camt.056 recall request is sent for the outgoing payment, the status of the Camt.056 is sent in CVF file by STEP2. On receipt of the CVF file by the sender bank, system reads the CVF file and finds the status of the Camt.056 message. If the status is rejected, then the status is updated as rejected in the system.
5.23.3 Settled Credit File (SCF) Process
STEP2 will send the SCF file to the receiver bank. The SCF file will contain the below details
- Notification of Credit Transfer
- Return / Positive Answer to CT Recall
- Payment Recall
- Negative Answer to a CT Recall
On receipt of the SCF file, if any payment recall request is available in SCF, system cancels the incoming payment contracts which is already created using pacs.008.
5.23.4 Debit Verification File (DVF) Messages
If Camt.056 recall request is send for the outgoing collection, the status of the Camt.056 will be send in DVF file by STEP2. On receipt of the DVF file by the sender bank, system will read the DVF file and find the status of the Camt.056 message. If the status is rejected, then the status will be updated as rejected in the system.
5.23.5 Debit Notification File (DNF) Process
The messages and bulks sent to the receiving Direct Participants are grouped by Interbank Settlement Date, but there is not a one to relationship between the Bulk messages received by STEP2 and the Bulk messages sent by STEP2. Only pacs.003 (Debit requests), pacs.002 (Rejections), and camt.056 (Payment Cancellation Request) are forwarded in a DNF.
On receipt of DNF file, the receiver bank system will process the new message camt.056 and cancel the already received incoming collection contract which is created using pacs.003.
5.23.6 Incoming Cancellation Exceptions Queue (PCSCANEX)
The 'Incoming Cancellation Exception Queue' (PCSCANEX) is used to log the transactions that are failed during cancellation Acceptance and Rejection processing. The exception queue status for the failed transactions during cancellation processing will be 'CR'. The error code and error description for the failures can be displayed in this screen against each transaction.You can invoke this screen by typing 'PCSCANEX' in the field at the top right corner of the Application tool bar and click on the adjoining arrow button.
This screen will have the following fields,
Recall Reference Number
Indicates the reference number generated for cancellation. Maximum length can be 16 characters.
Contract Reference
Indicates the original contract reference number for which cancellation is received. Maximum length can be 16 characters.
Direction
Indicates whether the transaction is incoming or outgoing. Maximum length can be 1 character.
Recall Status
Indicates the status of cancellation. Maximum length can be 1 character.
Customer No
Indicates the customer involved in the transaction.Maximum length can be 9 characters.
Product Code
Indicates the product used for the original contract.Maximum length can be 4 characters.
Account
Indicates the customer account used in the transaction. Maximum length can be 35 characters.
Transaction Amount
Indicate the amount of the original transaction. Maximum amount can be 999999999999999.99
Transaction Currency
Indicates the currency used in the original transaction. Maximum length can be 3 characters.
Error Code
Indicates the error faced during cancellation processing.Maximum length can be 11 characters
Error Description
A display field to describe the error faced during cancellation processing.
Exception Queue
Indicates the status of exception queue. Maximum length can be 2 characters.
Click' Retry' button to retry the cancellation processing. Once the transaction is corrected from the error cause, cancellation processing can be retried by using 'Retry' button. 'Retry' option will execute the cancellation processing on the selected transaction. On successful processing, the exception queue status of a transaction will be changed to '##'.
5.24 SEPA Payment Cancellation Summary Details
This section contains the following topic:
5.24.1 Invoking the SEPA Payment Cancellation - Summary Screen
You can view the summary details of a SEPA Payment Cancellation in 'SEPA Payment Cancellation - Summary' screen.You can invoke this screen by typing 'PCSRCLIN' in the field at the top right corner of the Application tool bar and clicking the adjoining arrow button.

In this screen, you can query based on any combination of the following fields:
- Authorization Status
- Recall Ref No
- Recall Reason
- Account Number
- Record Status
- Contract Ref no
- Recall Status
- Cpty Account Number
After specifying the parameters for the query, click 'Search'. The system displays all the records matching the parameters specified.
5.25 Incoming Camt.056 Messages
On receipt of incoming Camt.056, system identifies matching Pacs.008/Pacs.003 based on the Original Message ID and Original transaction ID provided in the incoming Camt.056. If no matching contract found, system updates the Camt.056 message status as Repair. Oracle FLEXCUBE provides a facility to approve/reject the incoming Camt.056 for Incoming payment messages through 'Incoming Payment Cancellation Approval' screen
5.25.1 Invoking the Incoming Payment Cancellation Approval Screen
On receipt of incoming Camt.056, system identifies matching Pacs.008/Pacs.003 based on the Original Message ID and Original transaction ID provided in the incoming Camt.056. If no matching contract found, system updates the Camt.056 message status as Repair. Oracle FLEXCUBE provides a facility to approve/reject the incoming Camt.056 for Incoming payment messages through 'Incoming Payment Cancellation Approval' screen. You can invoke this screen by typing 'PCDRCLOT' in the field at the top right corner of the Application tool bar and clicking the adjoining arrow button.
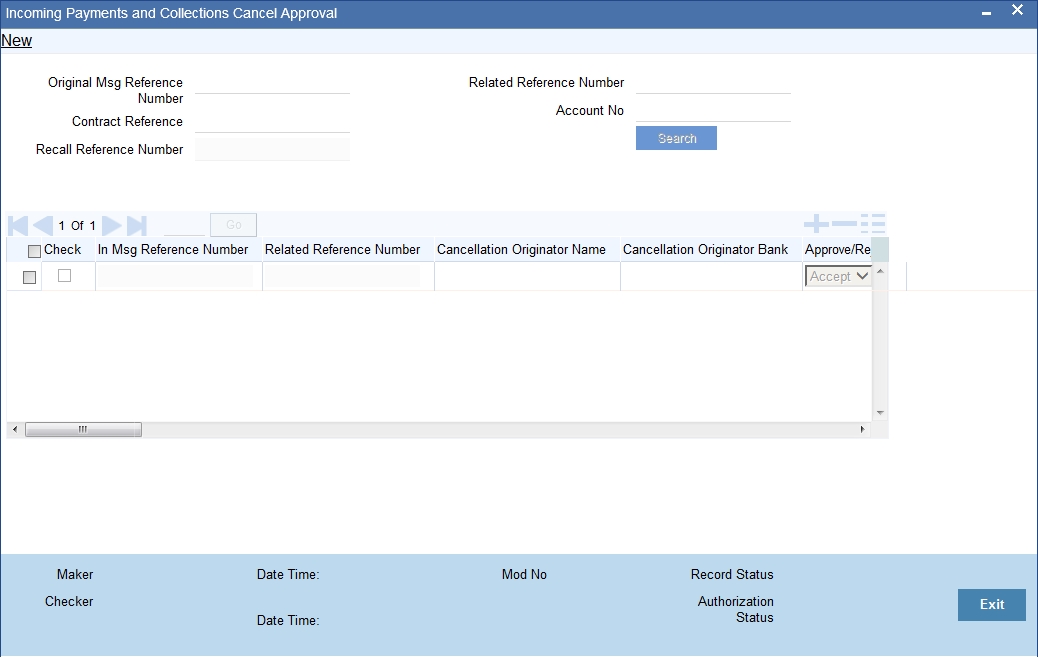
You need to capture the following details here:
Original Message Reference Number
Select the Original Message Reference Number from the adjoining option list.
Contract Reference Number
Select the Contract Reference Number from the adjoining option list.
Recall Reference Number
System defaults the unique sequence number.
Related Reference Number
Select the Related Reference Number from the adjoining option list.
Account Number
Select the Account Number from the adjoining option list.
To view the joint holder’s details of an account and the mode of operation maintained at the account level, place the cursor on the Account Number field and press Ctrl+J.The system displays the ‘Joint Holder’ screen.
For more information on the ‘Joint Holder’ screen refer to the section ‘Joint Holder Maintenance’ in the Core User Manual.
Click on 'Search' button to fetch the matching incoming messages based on the search criteria.
Incoming Cancellation Request
You can accept or reject the process of incoming cancellation request through Incoming Payment Cancellation Approval screen. The options for rejecting cancellation for incoming payment are:
|
|
51 |
Insufficient balance |
53 |
Customer specific order to not attend the request. |
54 |
Charged account cancelled or audited or confiscated. |
55 |
Public restrained account. |
61 |
Absence of beneficiary authorization |
62 |
Already cancelled |
65 |
Non existent or wrong data |
The option for accepting cancellation for incoming payment is:
|
|
08 |
Issuing entity request |
All the cancellation request transaction is logged to the CPG. The system defaults the request with message type CNLCT. You can accept or reject the request within the number of days maintained at product level.
If the request is accepted then the cancellation status will be approved.
If the request is rejected then the system updates the cancellation status as 'Rejected'
There is no accept or reject process for incoming collection cancellation requests. The system books a reject of incoming collection contract with message type as CNLDD.
Cancellation Originator Name
Specify the name of the cancellation originator.
Cancellation Originator Bank
Specify the Bank of the cancellation originator.
Note
Specify either Cancellation Originator Name or Cancellation Originator Bank.
Approve/Reject
Select Approve or Reject from the adjoining option list.
Reject Code
Select the reject code from the adjoining option list.
You can specify the ISO Reject code in this screen during the 'Cancellation' acceptance/rejection operation.
During 'Cancellation' acceptance/rejection processing in this screen system validates the entered ISO Reject code against the applicable exceptions as maintained in the 'Reject Code maintenance'. An error message would be displayed if the entered Reject code is not applicable to the 'Cancellation' acceptance/rejection exception. The system defaults the following:
- In Msg Reference Number
- Related Reference Number
- Account No
- Counterparty Account Number
- Product Code
- Customer Account Branch
- Customer Account Currency
- Customer No
- Counterparty Bank Code
- Transaction Amount
- Transaction Currency
- Recall Reference Number
- Contract Reference
- Direction
- Recall Status
- Dispatch Reference Number
- Dispatch File Name
- Out File Reference Number
- Out Msg Reference Number
- Out Msg Name
- Out Msg Creation Date
- CSM Reject Reference No
- CSM Reject Code
- CSM Reject Detail
- Step 2 Reject Reference
- Step 2 Reject Code
- Process Status
- Error Code
Original Recall Reason
The value for the field is defaulted from the CPG upload data store. Cancellation requests can be approved or Rejected based on the reasons defined in the field.
Original Additional Recall Reason
The value for the field is defaulted from the CPG upload data store. Cancellation requests can be approved or Rejected based on the reasons defined in the field.
Original Additional Recall Information
The value for the field is defaulted from the CPG upload data store. Cancellation requests can be approved or Rejected based on the reasons defined in the field.
Cancellation Originator Name
Specify the value for the field, which is of length 70 characters.
Note
The name is viewed in the following messages-
- Customer and FI Payment Cancellation(Camt.056.001.01)
- FI to FI Negative answer to Payment Cancellation(Camt.029.001.01)
Additional Reject Reason
Select the additional reject reason from the adjoining option list
Note
Specify either Reject code or Additional reject reason.
Cancellation Commission Code
Select the cancellation commission code from the adjoining option list.
Cancellation Commission Amount
Specify the cancellation commission amount.
The ‘Incoming Payment Cancellation Approval’ screen lists only the incoming payment contracts. You can select the message and approve or reject the recall request. The system does not validate the number of days before the recall request can be processed. If you reject the incoming recall message, then you have to input the reject reason. On save of the selected contracts, the system creates a reference number and inserts the message details in new data store.
The table below lists the reject reason maintained in the system:
Reject Reason |
|
LEGL |
Legal Decision Reported when the cancellation cannot be accepted because of regulatory rules. |
AGNT |
Agent Decision Reported when an agent refuses to cancel. |
CUST |
Customer Decision Reported when the cancellation cannot be accepted |
The system authorizes the set of transaction stored for payment cancellation. It picks only authorized records for payment cancellation initiation. During recall of the contract, the recall reason should be the recall reason provided in the camt.056 message.
Note
For incoming collection contracts cancellation, the approval is not applicable and system recalls the contract with reject reason provided in camt.056.
Since incoming collection cancellation requests cannot be rejected by the receiver bank, on receipt of Camt.056 for Incoming Collection Cancellation, system directly recalls the original contract. The mark EOTI validations check the pending approval for the cancellation requests. Validation is done considering the cancellation acceptance parameters captured at product level. Number of days from the product will be validated for pending approval based on the cancellation reason. If any of the cancellation request is not approved then the system aborts the EOTI process.
5.26 Handling of Camt.056 for Incoming payments in Transaction Repair queue
Any Incoming Camt.056 on repaired Incoming Payment will fail since the original Incoming Payment contract is in 'TR'queue. A static data for the error code 'PC-SVV-106' is made available and used during cancellation processing when the original contract is in 'TR' queue.
This error code and error description is logged against the Camt.056 received and the cancellation transaction is logged into 'CR' queue. An information message is displayed/logged describing that the cancellation transaction is logged into 'CR' queue.
In order to respond to the received Camt.056 message, Original Incoming Payment contract in 'TR' queue is corrected by re-processing original contract with Unsettle GL. Once the original Incoming Payment contract is cleared from TR queue, cancellation transaction is retried in 'Incoming Cancellation Exception Queue' screen and the response for the cancellation request is sent to CSM.
5.27 Handling of Camt.056 for Incoming Collections in Transaction Repair queue
Manual approval of cancellation of Incoming Collections
You can approve the cancellation request received for Incoming Collection transactions that are not auto approved or failed during auto approval using the screen 'Incoming Payments and Collections Cancel Approval'.
'Approval' process on Incoming Camt.056 on Incoming Collection will fail since the original Incoming Collection is in 'TR' queue. Cancellation transaction would be logged into 'CR' queue.
An information message is displayed/logged that describes that the cancellation transaction would be logged into 'CR' queue.
In order to process received Camt.056 message, Original Incoming Collection contract in 'TR' queue is corrected by re-processing original contract after correcting the error cause.
Once the original Incoming Collection contract is cleared from TR queue, cancellation transaction is retried in 'Incoming Cancellation Exception Queue' screen.
5.28 Handling Conflict Scenarios
Payments
Case 1 - Receipt of Pacs.004 from Creditor Bank for Outgoing Payments for which Camt.056 is already sent by Debtor Bank.When CSM processes Pacs.004 for Outgoing Payment, Debtor Bank processes the incoming Pacs.004 and cancellation request is rejected.
- When original Outgoing Payment is unaffected after Cancellation (Camt.056) request, Incoming Pacs.004 on original Outgoing Payment is processed as Reject of outgoing payment.
- The cancellation request can be manually rejected in 'Payments and Collections Cancellation' (PCDRCLIN) screen or can be rejected by processing Pacs.002 on Camt.056 sent by CSM.
Case 2 - Receipt of Camt.056 from Debtor Bank for Incoming Payments for which Pacs.004 is already sent by Creditor Bank.
- When CSM processes Camt.056 for Incoming Payment, Creditor Bank processes the incoming Camt.056 and reject of Incoming Payment is rejected.
- When the original Incoming Payment contract is not active, cancellation processing on original Incoming Payment fails and the cancellation transaction gets logged into 'CR' queue.
- In order to respond to received Camt.056 message, 'Reject of Incoming Payment' has to be rejected either manually in 'Payments and Collections Transaction Input' (PCDONONL) screen by the reject operation available or on receipt of Pacs.002 for Pacs.004 from CSM.
- This rejection process re-activates the original Incoming Payment with the contract details as prior to the initial rejection.
- An event 'RACT' will be logged for the original Incoming Payment in the contract events data store.
- Once the original Incoming Payment gets re-activated, the cancellation transaction is retried in 'Incoming Cancellation Exception Queue' screen and the response for the cancellation request is sent to CSM.
Collections
Case 3 - Receipt of Camt.056 from Creditor Bank for Incoming Collections for which Pacs.002 is already sent by Debtor Bank.
- When CSM processes Camt.056 for Incoming Collection, Debtor Bank processes the incoming Camt.056.
- When the original Incoming Collection contract is not active, cancellation processing on original Incoming Collection fails and the cancellation transaction gets logged into 'CR' queue.
- In order to respond to received Camt.056 message, 'Reject of Incoming Collection' is rejected either manually in 'Payments and Collections Transaction Input' (PCDONONL) screen by the reject operation available or on receipt of Pacs.002 for Pacs.002 from CSM.
- This rejection process would re-activate the original Incoming Collection with the contract details as prior to the initial rejection.
- An event 'RACT' is logged for the original Incoming Collection in the contract events data store.
- Once the original Incoming Collection gets re-activated, the cancellation transaction is retried in 'Incoming Cancellation Exception Queue' screen and the response for the cancellation request is sent to CSM.
Case 4 - Receipt of Pacs.002 from Debtor Bank for Outgoing Collections for which Camt.056 is already sent by Creditor Bank.
- When CSM processes Pacs.002 for Outgoing Collection, Creditor Bank processes the incoming Pacs.002 and cancellation request is rejected.
- The cancellation request Camt.056 for Outgoing Collection is rejected manually in 'Payments and Collections Cancellation' (PCDRCLIN) screen or on receipt of Pacs.002 for Camt.056 from CSM.
- This rejection process would re-activate the original Outgoing Collection with the contract details as prior to the cancellation.
- An event 'RACT' will be logged for the original Outgoing Collection in the contract events data store.
- Now, pre-settlement rejection Pacs.002 on Outgoing Collection is processed.
Case 5 - Receipt of Pacs.007 from Creditor Bank for Incoming Collections for which Pacs.004 (Recall) is already sent by Debtor Bank.
- When CSM processes Pacs.007 for Incoming Collection, Debtor Bank processes the incoming Pacs.007.
- When the original Incoming Collection contract is not active, reversal processing on original Incoming Collection fails and the reversal transaction gets logged into 'TR' queue.
- In order to respond to received Pacs.007 message, 'Recall of Incoming Collection' is rejected either manually in 'Payments and Collections Transaction Input' (PCDONONL) screen by the reject operation available or on receipt of Pacs.002 for Pacs.004 from CSM.
- This rejection process would re-activate the original Incoming Collection with the contract details as prior to the initial recall.
- An event 'RACT' will be logged for the original Incoming Collection in the contract events data store.
- Once the original Incoming Collection gets re-activated, the reversal transaction is retried in 'Transaction Exception' screen (PCSREXQ).
Case 6 - Receipt of Pacs.004 (Recall) from Debtor Bank for Outgoing Collections for which Pacs.007 is already sent by Creditor Bank.
- When CSM processes Pacs.004 for Outgoing Collection, Creditor Bank processes the incoming Pacs.004.
- When the original Outgoing Collection contract is not active, recall processing on original outgoing collection fails and the recall transaction gets logged into 'TR' queue.
- In order to process the received Pacs.004 message, 'Reversal of Outgoing Collection' is rejected manually in 'Payments and Collections Transaction Input' (PCDONONL) screen by the reject operation available or on receipt of Pacs.002 for Pacs.007 from CSM.
- This rejection process re-activates the original Outgoing Collection with the contract details as prior to the reversal event.
- An event 'RACT' will be logged for the original Outgoing Collection in the contract events data store.
- Once the original Outgoing Collection gets re-activated, the recall transaction is retried in 'Transaction Exception' screen (PCSREXQ).
5.29 Viewing SEPA Payment Cancellation Approval Summary Details
This section contains the following topic:
5.29.1 Invoking the SEPA Payment Cancellation Approval - Summary Screen
You can view the summary details of a SEPA Payment Cancellation Approval in 'SEPA Payment Cancellation Approval - Summary' screen.You can invoke this screen by typing 'PCSRCLOT' in the field at the top right corner of the Application tool bar and clicking the adjoining arrow button.
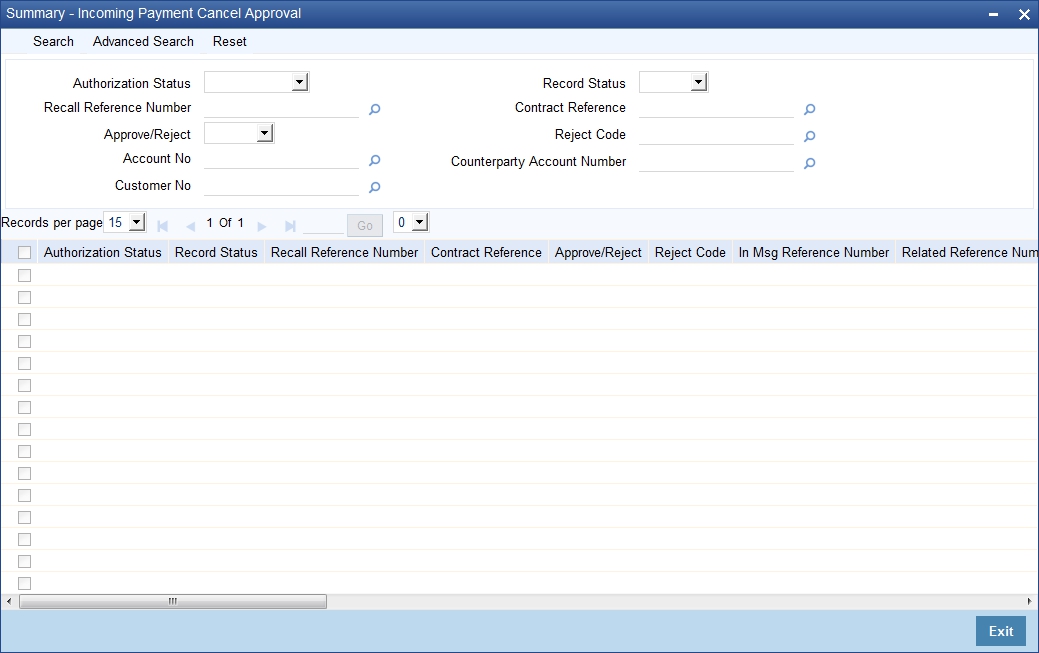
In this screen, you can query based on any combination of the following fields:
- Authorization Status
- Recall Reference Number
- Approve/Reject
- Account Number
- Customer Number
- Record Status
- Contract Reference Number
- Reject Code
- Cpty Account Number
After specifying the parameters for the query, click 'Search'. The system displays all the records matching the parameters specified.
5.30 Negative Answer to Recall of a Credit Transfer - Camt.029.001.03
The receiver bank sends the Camt.056 message to recall already sent Pacs.008/Pacs.003. If the receiver bank is unable to process the Camt.056, then the receiver bank sends the Camt.029.001.03 message to STEP2 in case of Payment Cancellation. You can generate the Camt.029.001.03 for all incoming Camt.056 which are rejected from Incoming Payment Cancellation Approval screen.
5.31 Incoming Camt.029.001.03
The receiver bank sends resolution of investigation message to notify the sender that the cancellation request has been rejected. On receipt of the Incoming Camt.029 message, system reads the message and updates the original Camt.056 message status as 'Rejected'.
5.32 Maintaining Parameters for SEPA Transactions
The following maintenances need to be done for the SEPA transactions to be carried out.
Product and Product Category
To handle SEPA transactions, the following product types and product categories are maintained:
- Outgoing payment
- Incoming Payments
- Reject of Incoming payment
- Reject of Outgoing payment
- Outgoing Collections
- Incoming Collections
- Reject of Outgoing Collections
- Reject of Incoming Collections
- Recall of Outgoing Collections
- Recall of Incoming Collections
- Reverse of Outgoing Collection
- Reverse of Incoming Collection
For more details refer section ‘Maintaining Product Categories’ in the chapter ‘Maintaining Information specific to the Payments and Collections Module’ of this User Manual.
Clearing Network
To include the ISO codes in the outgoing XML messages for SEPA transactions the ISO clearing system identification codes for clearing networks are maintained in the Clearing network maintenance screen.
For more details refer section ‘Maintaining Clearing Network details’ in the chapter ‘Maintaining Information specific to the Payments and Collections Module’ of this User Manual.
Common Payment Gateway Parameters
To handle SEPA transactions the following maintenance needs to be done as part of maintaining the Common Payments Gateway parameters:
- Message types for SCT and SDD messages like:
- pain.001 – Customer Credit Transfer Initiation
- pain.008 – Customer Direct Debit Initiation
- pain.007 – Payment Reversal
- pacs.008 – Customer Credit Transfer
- pacs.003 – Customer Direct Debit
- pacs.007 – Payment Reversal
- pacs002. – Payment status report
- pacs.004 – Payment return/refund
- A unique message name to distinguish and identify SCT and SDD messages.
For more details on how to maintain Common Payments Gateway Messages Type, refer section ‘Maintaining Common Payment Gateway Message Parameters’ in the chapter ‘Processing of Non SWIFT Incoming Payment Messages’ of the Funds Transfer User Manual.
Queue Parameters
To handle SEPA transactions the following maintenance needs to be done as part of maintaining the Queue details:
- The Queue name for SCT and SDD messages. For e.g., PCINSCT
- The Queue Description. For e.g., Incoming SEPA Credit Transfers
- The code of the SCT and SDD messages that will be routed to this queue. For e.g., PAIN001
For more details on how to maintain Queues, refer section ‘Queues Maintenance’ in the chapter ‘Straight Through Processing – An Overview’ of the Funds Transfer User Manual.
Product Mapping
To handle SEPA transactions, as part of mapping message types to product and queues, you need to map PC product category for SCT and SDD message types. This can be done using the Product Mapping Detailed screen.
For more details on mapping message types to products refer section ‘Mapping Message Types to Products and Queues’ in the chapter ‘Straight Through Processing – An Overview’ of the Funds Transfer User Manual.
Message Mapping
To handle the processing of incoming SEPA transaction messages, you must maintain mappings between the Common Payment gateway fields and their corresponding fields in the Payments and Collections module, for different combinations of incoming message type, product category / product / instrument type, source code, station ID and network id
For more details on mapping message tags to payment fields refer section ‘Mapping of Incoming Message Tags to Fields in Payments and Collection Module’ in the chapter ‘Maintaining Information specific to the Payments and Collections Module’ of this User Manual.
Error Code Maintenance
To handle auto rejection of incoming payments for SEPA, you need to maintain some error codes, based on which the system rejects the payment.
For more details on maintaining error codes, refer section ‘Maintaining error codes for automatic rejection’ in the chapter ‘Maintaining Information specific to the Payments and Collections Module’ of this User Manual.
Reject Code Maintenance
You need to maintain the ISO reject codes that are used for SCT rejects using the ‘PC Reject Code’ screen.
For more details on maintaining reject codes, refer section ‘Reject Code Maintenance’ in the chapter ‘Maintaining Information specific to the Payments and Collections Module’ of this User Manual.
STP Rule Maintenance
To handle SEPA transactions the following maintenance needs to be done as part of maintaining the STP Rule maintenance:
- Rules for incoming SCT and SDD messages
- Message queue for the incoming SCT and SDD messages
- The PC product category will be picked up from the Product mapping maintenance based on the queue evaluated in the rule maintenance.
- STP Preferences
- Post upload status and preferences when the uploaded file is invalid
Based on the above mentioned maintenance, the STP rule is set for the following:
- Outgoing Payments
- Incoming Payments
- Reject of Outgoing Payments
- Reject of Incoming Payments
- Outgoing Collections
- Incoming Collections
- Reject of Outgoing Collections
- Reject of Incoming Collections
- Recall of Outgoing Collections
- Recall of Incoming Collections
- Reversal of Outgoing Collections
- Reversal of Incoming Collections
PC Beneficiary Maintenance
The counterparty identification details for the SEPA transaction is maintained in the PC Beneficiary Maintenance screen.
For more details on this refer section ‘Maintaining Beneficiary Accounts for a Counterparty Bank’ in the chapter ‘Maintaining Information specific to the Payments and Collections Module’ of this User Manual.
Learning Database Maintenance
The customer and counterparty details of the SEPA transaction is maintained in the Counterparty Details screen. These details that you maintain here can be viewed in the Contract Online screen if the learning database option is selected.
For more details on this refer section ‘Maintaining a Learning Database’ in the chapter ‘Maintaining Information specific to the Payments and Collections Module’ of this User Manual.
Creditor DD Agreement
The details of the Creditor involved in the SEPA Direct Debit Transactions are maintained in the ‘PC-Creditor DD Agreements’ screen.
For more details on this refer section ‘Maintaining DD agreement details for creditors’ in the Chapter ‘Maintaining Information specific to the Payments and Collections Module’ of this User Manual.
PC Periodic Instructions
The identification details of the customer and the counterparty involved in the SEPA transactions are also captured in the PC Periodic Instructions screen.
For more information on this refer section ‘Maintaining Details for Periodic Instructions’ in the chapter ‘Maintaining Information specific to the Payments and Collections Module’ of this User Manual.
PC Transaction Input
The SEPA related details of the contract are captured in the PC Transaction Input screen.
For more information on this refer section ‘Capturing the details of payment/collection transactions’ in this User Manual.
5.33 SEPA Transaction Process Flow
The various stages involved in processing a SEPA transaction are as given below:
- Receiving Incoming messages for SCT and SDD
- Using the Common Payments Gateway to upload data (from the Incoming SCT and SDD) into PC module. Queue is derived from STP rules.
- The PC product category will be picked up from the Product mapping maintenance based on the queue evaluated in the rule maintenance
- Mapping the Common Payment gateway fields to PC contract fields for the product category, using the PC message Mapping Maintenance screen, for different combinations of incoming message type, product category/product/instrument type, source code, station ID and network id
- Using the contents of the message together with the static maintenance in the system to resolve the contract fields.
- Automatic booking of contracts in the system depending on the resolved contract fields.
- Processing the contracts depending on the status of the contract.
- Generating dispatch files which is sent to CSM, Bank or the Customer.
The contract in the Common Payments gateway can have any of the following statuses:
- Unprocessed
- Processed
- Suppressed
- Repair
- Rejected
- Waiting for Queue Exchange
The contracts with status ‘Unprocessed’ or ‘Waiting for Queue Exchange’ in the Common Payments Gateway browser will be picked up for processing and the PC contract will be created. If the creation of the PC contract fails, the transaction is marked as ‘Repair’ in the Common Payments Gateway. However, you can amend and process this contract again. In such a case, a new version will be created for the amendment operation in the Common payments Gateway message browser.
The transaction in the reject messages (Reject – Payments Status Report pacs.002.001.02) from the Clearing and Settlement Mechanisms (CSM) will be kept in common payments gateway with status as ‘Unprocessed’ and queue as ‘REJECT’. When you click ‘Process Reject’ button, the system does a pre-settlement reject of a SEPA transaction. The status is further updated as ‘Processed’. There will be no transactions created in PC module for these reject transactions and no further processing will be allowed on such transactions.
The incoming payment messages with the following error codes are automatically rejected:
Error Code |
Error Description |
PC-SAV-024 |
Account is blocked |
PC-SAV-025 |
Payment Not allowed for customer account |
PC-SAV-026 |
Credit not allowed for customer account |
PC-SAV-027 |
Debit not allowed for customer account |
PC-SAV-028 |
Customer account is dormant |
PC-SAV-029 |
Customer account is frozen |
For more details on maintaining error codes for automatic rejection, refer section ‘Maintaining error codes for automatic rejection’ in ‘Maintaining Information specific to the Payments and Collections Module’ chapter in this User Manual.
For more details on events and accounting entries for SEPA transactions, refer chapter Annexure A - Accounting Entries and Advices’ in this User Manual.
5.34 Validations done on the SCT and SDD Messages
The system performs certain validation on the incoming and outgoing instructions for SCT and SDD. Following are some of the validations done by the system:
- The SCT and SDD transactions should have the debtor and the creditor account should be in the IBAN format.
- The SCT and SDD messages elements should not start or end with ‘/’ and should not contain ‘//’. This character set validation will be done during save of outgoing SDD and SCT transactions.
- The Counterparty account number should be in IBAN format if the IBAN validation is set as true in the network preferences or IBAN Mandatory flag is set as true in the PC Bank Directory Maintenance. This validation is also done for outgoing messages.
- The customer account should be in IBAN number format if the IBAN validation is set as true in the network preferences or IBAN Mandatory flag is set as true in the Customer Account maintenance. System will display an override if the IBAN is not maintained for the customer account. This validation is also done for outgoing messages.
- The incoming XML SEPA SCT and SDD messages are validated for BIC. The debtor agent BIC and creditor agent BIC should have valid bank codes maintained in the PC Bank directory maintenance or BIC upload directory.
5.35 Refund Compensation and Balancing Payment for Debtor Bank
The processing done at Debtor bank, CSM and Credit Bank for handling refund of compensation is given below:
Debtor Bank Processing
On Debtor's request for Refund, Debtor bank sends Refund instruction to CSM.
Debtor bank has rights to collect refund compensation for the loss incurred by crediting the debtor with value date as settlement date of original collection transaction. Crediting the debtor with back value dated will be achieved by configuring 'Original Transaction Value Date' parameter at product level.
This compensation facility is only for the Refund transactions originated by the Debtor.
Apart from the compensation amount, balancing payment charges from the Creditor Bank to the Debtor Bank can be recovered by existing charge mechanism. Hence Debtor Bank can send the Refund instructions with original collection amount + compensation amount + charges amount.
During Refund processing, Debtor bank debits CSM for the original collection amount, compensation amount and charge amount and credits original collection amount into Debtor account as of value date of the original collection transaction. Compensation amount and charge amount will get credited into 'compensation suspense account' and 'charge suspense account' respectively with value date as the date on which refund is initiated.
CSM Processing
Once CSM receives the Refund instructions with compensation amount and charges amount, it will debit the creditor bank with Returned Interbank settlement amount and credit debtor bank with Returned Interbank settlement amount. Returned Interbank settlement amount comprises of 'Original Interbank Settlement Amount' + 'Compensation Amount' + 'Charge Amount'.
Credit Bank Processing
Debiting the creditor with back value dated will be achieved by configuring 'Original Transaction Value Date' parameter at product level.
Creditor bank on receipt of Refund instructions will debit the creditor for the original collection transaction amount and debits 'compensation suspense account' for the compensation amount and debits 'charge suspense account' for charges amount. The original collection transaction amount + compensation amount + charge amount will get credited in to CSM.
5.36 Dispatch File Parameters
This section contains the following topics:
5.36.1 Invoking the Dispatch File Parameters
You can maintain the details of the dispatch file to be generated using the ‘Dispatch File Parameters’ screen. You can invoke this screen by typing ‘PCDSFPRM’ in the field at the top right corner of the Application tool bar and clicking the adjoining arrow button.
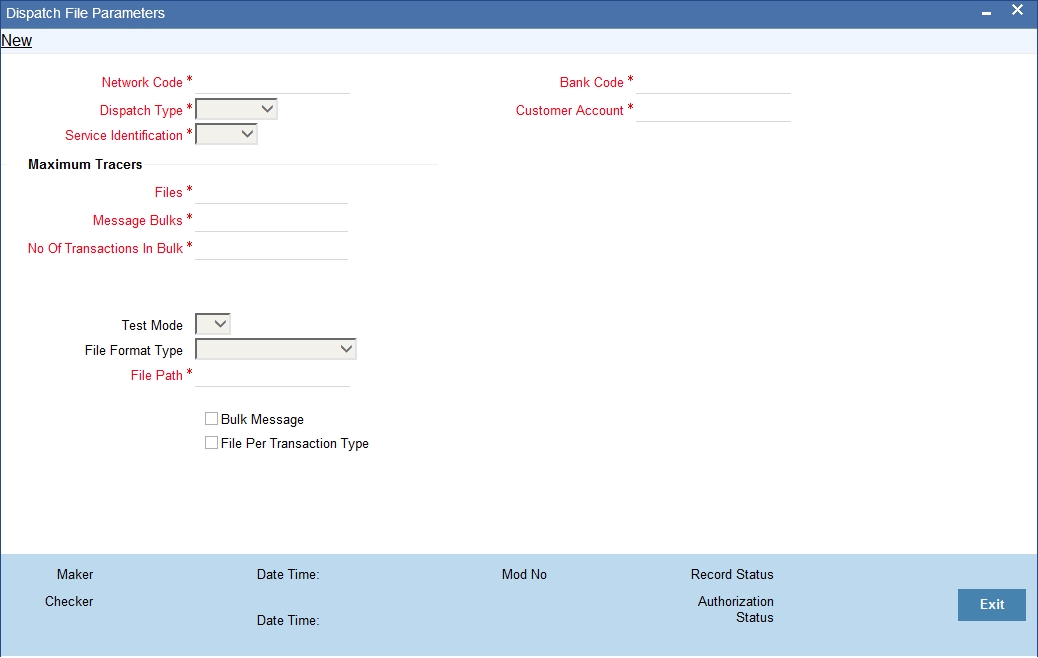
The following details are captured here:
Dispatch Type:
Select the type of the dispatch from the drop-down list. The following options are available in the drop-down list:
- Network - If you select the dispatch type as network then clearing network code is mandatory and bank code and customer number will be defaulted value ‘ALL’
- Bank - If you select dispatch type as bank code then bank code is mandatory and clearing network and customer number will be defaulted value ‘ALL’.
- Customer - If you select dispatch type as customer then Customer number is mandatory and clearing network and bank code will be defaulted value ‘ALL’. There will be a provision to select ‘ALL’ to generate XML files for all customers.
This is a mandatory field.
Network Code
Select the clearing network for which the dispatch file parameters are maintained from the adjoining option list. The list displays all valid clearing network maintained in the system. This is a mandatory field.
Service Identifier
Select the service type as of the clearing network from the drop-down list. The options available are:
- SCT - SEPA Credit Transfer
- SDD - SEPA Direct Debits
Bank Code
Specify the direct or the indirect participant bank code for which the dispatch file parameters are maintained. This is enabled for ‘Bank’ dispatch type.
Customer Account
Select the customer account number for which the dispatch file details are maintained. This is enabled only for ‘Customer’ dispatch type. If you want to generate dispatch files for every customer you can select the option ‘ALL’.
Reference Number
This indicates the reference number entered for every dispatch run. This reference number is used to track the number of files generated as part of every dispatch run.
Maximum Number
The following details are captured:
Files
Specify the maximum number of files that can be sent to the clearing network in one settlement cycle.
Message Bulks
Specify the maximum number of message bulks in a file.
No of Transaction in Bulk
Specify the maximum no of transactions that can be bulked in a message bulk.
Test Mode
Select the test mode from the drop-down list. The options available in the drop-down list are:
- T – Test
- P - Production mode for the clearing network.
This is a mandatory field for dispatch type as Network.
File Format Type
Specify the format of the file. The supported file format is XML. This is mandatory field.
File Path
Specify the path where the file has to be generated.
Bulk Message
Check this box to indicate that the message bulk should be created with many transactions.
File Per Transaction Type
Check this box if you want the system to generate one file for each transaction type.
If this option is not selected then one file is created with the following transaction type in the same order:
- SCT
- Credit Transfer Message Bulk (pacs.008)
- Payment Return (pacs.004)
- SDD
- Direct Debit Instructions (pacs.008)
- Rejects (pacs.002)
- Reversals (pacs.007)
- Return/Refunds (pacs.004)
If this option is selected then one file is created for each transaction type.
5.37 Dispatch File Generation
This section contains the following topic:
5.37.1 Invoking the Dispatch File Generation Screen
Once the SCT and SDD messages are processed in Oracle FLEXCUBE, the system needs to generate and dispatch the handoff files. You can generate the dispatch file using the ‘Dispatch File Generation’ screen. You can invoke this screen by typing ‘PCDIFGEN’ in the field at the top right corner of the Application tool bar and clicking the adjoining arrow button.
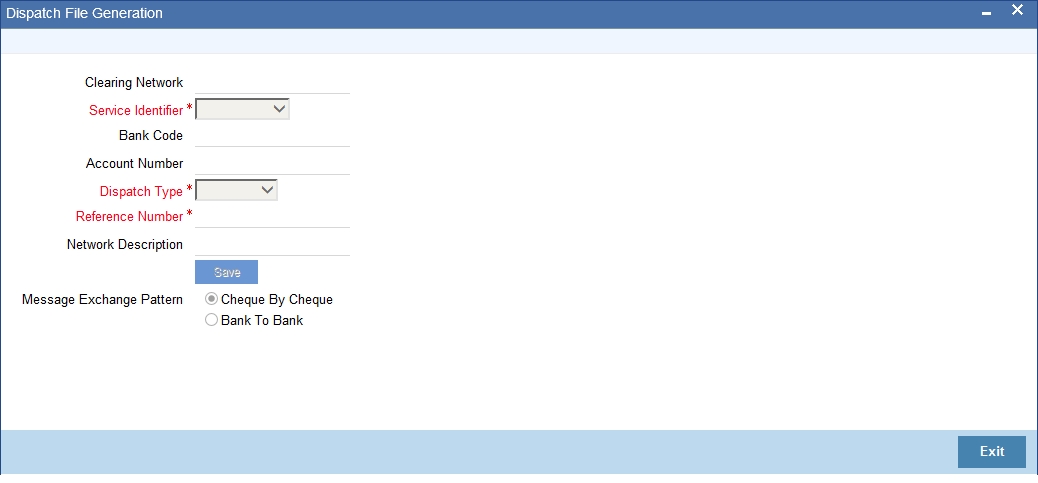
You can capture the following details in this screen:
Dispatch Type
Select the option from the drop-down list to indicate to whom you want to send the generated file. It can be send to the CSM or another bank. Files are sent to bank only for messages sent from direct participant to indirect participant or indirect participant to direct participant. The options available in the drop-down are:
- CSM
- Bank
- Customer
Clearing Network
Select the clearing network for the dispatch file to be generated.
Service Identifier
Select the service identifier from the drop-down list. The options available are:
- SCT
- SDD
- SDD CORE
- SDD B2B - ‘SDD B2B’ option is used for dispatch of outgoing collection for B2B transactions, and ‘SDD CORE’ option is used for dispatch of ‘CORE’ and ‘COR1’ transactions.
- Dispatch file name has either 'COR' or 'B2B' as part of complete file name.
- CORE or COR1: S202CORABNDEXXX120224110227001.I.XML
- B2B: S202B2BABNDEXXX120224110227001.I.XML
Bank Code
Specify the bank code for which the dispatch file is sent. This is enabled for ‘Bank’ dispatch type.
Account Number
Select the account number for which the dispatch file has to be sent. This is enabled only for ‘Customer’ dispatch type. If you want to generate dispatch files for every customer you can select the option ‘ALL’.
You can also select the CL account number as the customer account number.
Reference Number
This indicates the reference number entered for every dispatch run. This reference number is used to track the number of files generated as part of every dispatch run.
5.38 Payment Gateway Message Browser
This section contains the following topics:
5.38.1 Invoking the Common Payment Message Browser
You can handle the rejection (Pacs.002) transaction on all outgoing messages through Payment gateway Message Browser screen. This screen displays the payment status reports for which 'Reject Message' is enabled in the 'Common Payment Message Browser'.You can invoke the 'Payment Gateway Message Browser' screen by typing 'MSSPMTSR' in the field at the top right corner of the application tool bar and clicking the adjoining arrow button.
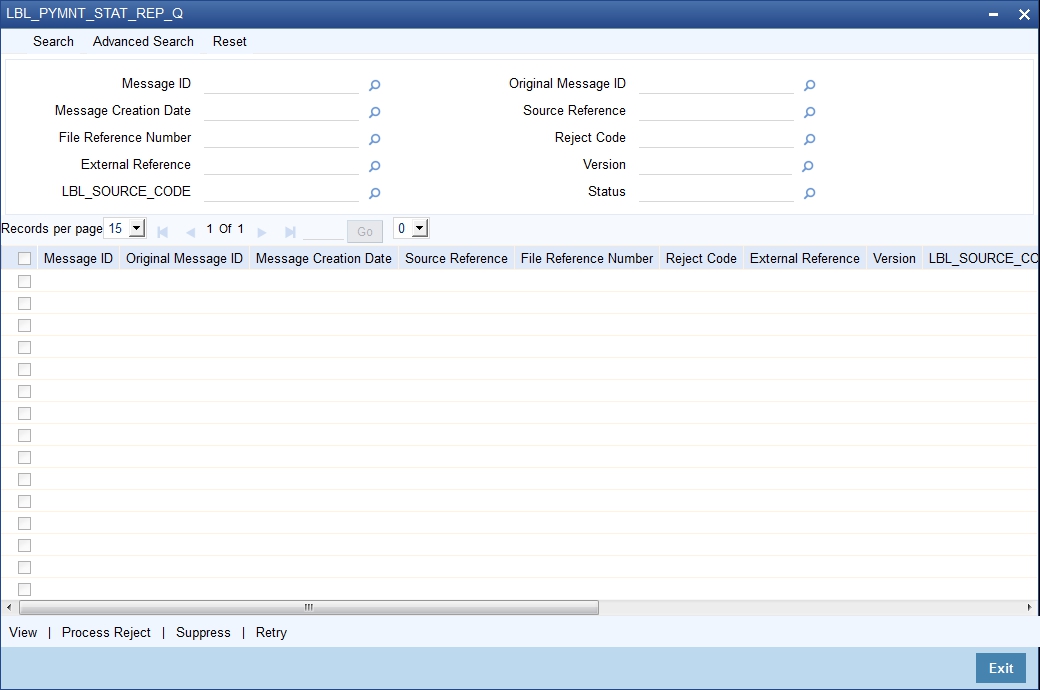
You can filter your search based on any of the following criteria:
- Message ID
- Message Creation Date
- File Reference
- External Reference
- Source Code
- Original Message ID
- Original Transaction ID
- Reject Code
- Version
- Status
Once you have set the filters you want, click 'Search' button to view the payment status report summary.
- Message ID
- Original Message ID
- Message Creation Date
- Original Transaction ID
- File Reference
- Reject Code
- External Reference
- Version
- Source Code
- Original Settlement Amount
- Value Date
- Currency
- Status
- Error Reason
- Customer Reference
Click on 'View' button to view the complete details of received payment status report in a Common Payment Gateway detailed screen.
Click on 'Process Reject' to process the received payment status report. Once the payment status report is processed successfully the status is changed to 'Processed'.In case of failure during payment status report processing, the error reason will be populated with the corresponding error and the status will be changed to 'Repair'.
Click on 'Suppress' to suppress the received payment status report.Once the payment status report is processed successfully the status will be changed to 'Suppressed'. This button option can also be used to suppress the 'Repair' payments status reports.
Click on 'Retry' to retry the failed payment status reports which are in 'R' (Repair) status. Payment Status Reports that are failed during processing can be retried using this button option. Once the payment status report is processed successfully the status will be changed to 'Processed'.
Note that EOD Processing will stop if any received payment status report exists with status other than 'Processed' and 'Suppressed'.
5.39 Payment Gateway Message Bulks
This section contains the following topics:
5.39.1 Invoking the Payment Gateway Message Bulk Screen
You can maintain all bulk messages in the 'Payment Gateway Message Bulk' screen. To invoke this screen type 'MSSBLKBR' in the field at the top right corner of the application tool bar and click on the adjoining arrow button.
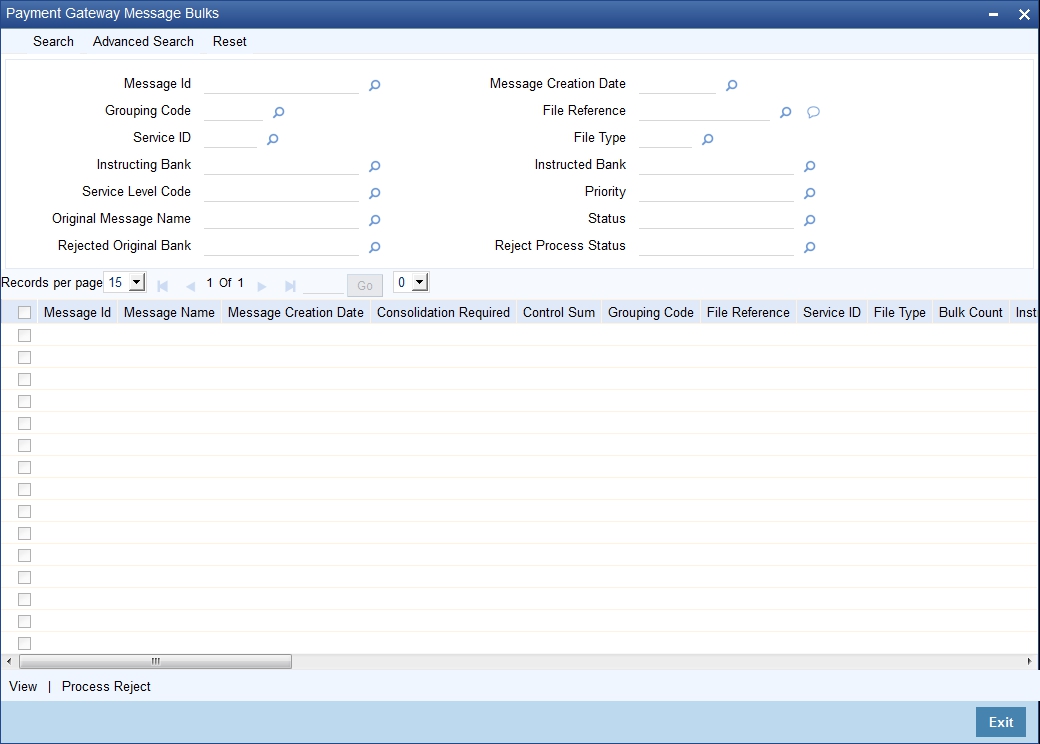
You can filter your search based on any of the following criteria:
- Message ID
- Message Creation Date
- File Reference
- Service ID
- File Type
- Instructing Bank
- Instructed Bank
- Service Level Code
- Priority
- Original Message Reference
- Status
- Reject Code
- Reject Process Status
Once you have set the filters you want, click 'Search' button to view the payment status report summary.
- Message ID
- Message Name
- Message Creation Date
- Consolidation Required
- Control Sum
- Grouping Code
- File Reference
- Service ID
- File Type
- Bulk Count
- Instructing Bank
- Instructed Bank
- Total Settlement Amount
- Settlement Currency
- Settlement Date
- Settlement Method
- Clearing System ID
- Service Level Code
- Priority
- Original Message Name
- Original Message Reference
- Original Number of Transaction
- Original Control Sum
- Status
- Reject Originator Bank
- Reject Originator Name
- Reject Code
- Reject Code Additional
- Reject Process Status
5.40 Payment Status Report
This section contains the following topics:
- Section 5.40.1, "Handling Payment Status Report"
- Section 5.40.2, "Processing Pacs.002 Messages (Payments)"
- Section 5.40.3, "Processing pacs.002 messages (Collections)"
- Section 5.40.4, "Processing Re-activation Event"
5.40.1 Handling Payment Status Report
You can process the received payment status report automatically or manually. You can process the payment status report for the following outgoing messages:
- Reject of Incoming Payments - Pacs.004
- Positive Response to Payment Cancellation Requests - Pacs.004
- Cancellation of Outgoing Payments - Camt.056
- Negative Response to Payments Cancellation Requests - Camt.029
- Pre-Settlement Rejection of Incoming Collection - Pacs.002
- Reject of Incoming Collection - Pacs.004
- Recall of Incoming Collection - Pacs.004
- Cancellation of Outgoing Collection - Camt.056
- Reversal of Outgoing Collection - Pacs.007
5.40.2 Processing Pacs.002 Messages (Payments)
The processing of Pacs.002 message received from Clearing Settlement Mechanism for SEPA Credit Transfer is as follows:
Pacs.002 for Outgoing Payments (Pacs.008) sent by Debtor Bank
- On receipt of Pacs.002 for the Outgoing Payment from CSM, the underlying Outgoing Payments will be rejected by processing pre-settlement reject (RJBS).
- Accounting entries during debit liquidation and credit liquidation if posted will be reversed.
Pacs.002 for Cancellation of Outgoing Payments (Camt.056) sent by Debtor Bank
- On receipt of Pacs.002 for an Outgoing Camt.056, the cancellation request for outgoing payments will be marked as 'Rejected'.
- Fields 'CSM Reject Code', 'CSM Reject Detail' and 'CSM Reject Reference Number' for the cancellation request will be populated with the received reject code, reject description and reject reference number from Pacs.002.
- Cancellation requests for the outgoing payments can be initiated again.
Pacs.002 for Reject of Incoming Payments (Pacs.004) sent by Creditor Bank
- Reject of incoming payments are generated when Incoming payment is rejected by processing post-settlement rejection (REJT event).
- On receipt of Pacs.002 for Reject of Incoming Payments, the underlying Reject of Incoming Payment contract will be rejected by processing pre-settlement reject (RJBS event).
- RJBS event on Reject of Incoming Payment
- Will mark the contract as rejected and accounting entries if posted will be reversed.
- Will populate new fields 'CSM Reject Code', 'CSM Reject Detail' and 'CSM Reject Reference Number' at contract level with the received reject code, reject description and reject reference number from Pacs.002.
- Will also reactivate the Original Incoming Payment by processing Reactivation Event.
- The reactivation event for the Original Incoming payment will revert the status of the incoming payment prior to post-settlement rejection event processing (REJT). This enables incoming payment to be rejected further.
Pacs.002 for Positive Response to Cancellation Requests (Pacs.004) sent by Creditor Bank
- Reject of incoming payments are generated when cancellation request for Incoming Payment is accepted and thereby processing post-settlement rejection (REJT event).
- On receipt of Pacs.002 for positive response, the underlying Reject of Incoming Payment contract will be rejected by processing pre-settlement reject (RJBS event)
- RJBS event on Reject of Incoming Payment:,
- Will mark the contract as rejected and accounting entries if posted will be reversed.
- Will populate new fields 'CSM Reject Code', 'CSM Reject Detail' and 'CSM Reject Reference Number' at contract level with the received reject code, reject description and reject reference number from Pacs.002.
- Will also reactivate the Original Incoming Payment by processing Reactivation Event.
- Will enable cancellation request as active and the cancellation request can be further accepted.
- The reactivation event for the Original Incoming Payment will revert the status of the Incoming Payment prior to post-settlement rejection event processing (REJT).
Pacs.002 for Negative Response to Cancellation Requests (Camt.029) sent by Creditor Bank
- On receipt of Pacs.002 for Negative Response (Camt.029), Cancellation Request will be nullified.
- Fields 'CSM Reject Code', 'CSM Reject Detail' and 'CSM Reject Reference Number' for the cancellation negative response would be populated with the received reject code, reject description and reject reference number from Pacs.002.
- This process will enable the cancellation request (Camt.056) as active and the cancellation request can be responded with Negative response again.
5.40.3 Processing pacs.002 messages (Collections)
The processing of Pacs.002 message received from Clearing Settlement Mechanism for SEPA Direct debit is as follows:
Pacs.002 for Outgoing Collections (Pacs.003) sent by Creditor Bank
- On receipt of Pacs.002 for the Outgoing Collection from CSM, the underlying Outgoing Collection will be rejected by processing pre-settlement reject (RJBS).
- The processing of Pacs.002 messages received on due date for the Outgoing Collection, will follow the same procedure as stated above and the accounting entries posted during debit liquidation and credit liquidation would be reversed.
Pacs.002 from Debtor Bank for Outgoing Collections (Pacs.003) sent by Creditor Bank
- On receipt of Pacs.002 for the Outgoing Collection from debtor bank, the underlying Outgoing Collection will be rejected by processing pre-settlement reject (RJBS).
- Accounting entries during debit liquidation and credit liquidation if posted will be reversed.
Pacs.002 for Cancellation of Outgoing Collections (Camt.056) sent by Creditor Bank
- The cancellation operation on outgoing collection will process pre-settlement (RJBS) reject and generate Camt.056 message.
- On receipt of Pacs.002 for an Outgoing Camt.056 for outgoing collection,
- The cancellation request would be marked as 'Rejected'.
- Fields 'CSM Reject Code', 'CSM Reject Detail' and 'CSM Reject Reference Number' for the cancellation request will be populated with the received reject code, reject description and reject reference number from Pacs.002.
- The RJBS event processed will be nullified by processing reactivation event on the outgoing collection with contract details as prior to the cancellation.
- This would enable the outgoing collection for further cancellation operation.
Pacs.002 for Reversal of Outgoing Collections (Pacs.007) sent by Creditor Bank
- Reversals of Outgoing Collections are generated by processing reversal operation (REVP event).
- On receipt of Pacs.002 for Reversal of Outgoing Collections, the underlying Reversal of Outgoing Collection contract would be rejected by processing pre-settlement reject (RJBS event).
- RJBS event on Reversal of Outgoing Collection
- Will mark the contract as rejected and accounting entries if posted would be reversed.
- Will populate new fields 'CSM Reject Code', 'CSM Reject Detail' and 'CSM Reject Reference Number' at contract level with the received reject code, reject description and reject reference number from Pacs.002.
- Will also reactivate the Original Outgoing Collection by processing Reactivation Event.
- The reactivation event for the Original Outgoing Collection will revert the status of the Outgoing Collection prior to reversal processing (REVP). This enables Outgoing Collections to be reversed further.
Pacs.002 for Pre-settlement Rejection of Incoming Collection (Pacs.002) sent by Debtor Bank
- Reject of Incoming Collections are generated when Incoming Collection is rejected by processing pre-settlement rejection (RJBS event).
- On receipt of Pacs.002 for pre-settlement Reject of Incoming Collection, the underlying Reject of Incoming Collection contract will be rejected by processing pre-settlement reject (RJBS event).
- RJBS event on pre-settlement Reject of Incoming Collection
- Will mark the contract as rejected.
- Will populate new fields 'CSM Reject Code', 'CSM Reject Detail' and 'CSM Reject Reference Number' at contract level with the received reject code, reject description and reject reference number from Pacs.002.
- Will reactivate the Original Incoming Collection by processing Reactivation Event.
- The reactivation event for the Original Incoming Collection will revert the status of the Incoming Collection prior to pre-settlement rejection event processing (RJBS).This enables Incoming Collection to be rejected further.
Pacs.002 for Rejection of Incoming Collection (Pacs.004) sent by Debtor Bank
- Reject of Incoming Collection are generated when Incoming Collection is rejected by processing post-settlement rejection (REJT event).
- On receipt of Pacs.002 for Reject of Incoming Collection, the underlying Reject of Incoming Collection contract would be rejected by processing pre-settlement reject (RJBS event).
- RJBS event on Reject of Incoming Collection:
- Will mark the contract as rejected and accounting entries if posted would be reversed.
- Will populate new fields 'CSM Reject Code', 'CSM Reject Detail' and 'CSM Reject Reference Number' at contract level with the received reject code, reject description and reject reference number from Pacs.002.
- Will also reactivate the Original Incoming Collection by processing Reactivation Event.
- The reactivation event for the Original Incoming Collection will revert the status of the incoming Collection prior to post-settlement rejection event processing (REJT). This enables incoming collection to be rejected further.
Pacs.002 for Recall of Incoming Collection (Pacs.004) sent by Debtor Bank
- Recalls of Incoming Collections are generated when Incoming Collection is recalled by processing recall operation (RECL event).
- On receipt of Pacs.002 for Recall of Incoming Collection, the underlying Recall of Incoming Collection contract will be rejected by processing pre-settlement reject (RJBS event).
- RJBS event on Reject of Incoming Collection:
- Will mark the contract as rejected and accounting entries if posted will be reversed.
- Will populate new fields 'CSM Reject Code', 'CSM Reject Detail' and 'CSM Reject Reference Number' at contract level with the received reject code, reject description and reject reference number from Pacs.002.
- Will also reactivate the Original Incoming Collection by processing Reactivation Event.
- The reactivation event for the Original Incoming Collection will revert the status of the incoming Collection prior to recall event processing (RECL). This enables incoming collection to be recalled further.
5.40.4 Processing Re-activation Event
You can process the reactivation event to reactivate the contract from further processing after it has been rejected, cancelled, recalled or reversed. This is a system driven event and triggered when rejection is received for any of the following operations -
- Rejection of incoming payment
- Approval of Cancellation of incoming payment
- Cancellation of Outgoing collection
- Reversal of outgoing collection
- Pre-settlement Rejection of Incoming Collection
- Post settlement Rejection of Incoming Collection
- Recall or Refund of Incoming Collection
This event will revert the changes that were done as part of the post settlement rejection (REJT), pre-settlement rejection (RJBS), reversal (REVP) and recall (RECL) event processing.
5.41 Black List and White List of Creditors
Black List
You can restrict/allow incoming collection transaction to be processed based on Creditor Scheme ID, Creditor IBAN and combination of Mandate ID and Creditor Scheme ID, for a specific collection scheme type with Restriction Type as 'Disallowed' in 'Debtor Direct Debit Instructions'. Web services for Black List and White List of Creditors are available.
If Incoming Collection transaction for a Debtor matches with these maintained data, then the system moves the transaction to Transaction Repair (TR) queue.
Static data for error code 'PC-INDD-11' is available and auto rejection can be configured for this error code. If auto rejection is configured, then the system rejects the Incoming Collection transaction when details match with black list.
The system rejects the transaction in following scenarios:
- If any of the incoming collection transaction's Creditor Scheme ID matches with maintained value.
- If any of the incoming collection transaction's Creditor IBAN matches with maintained value.
- If any of the incoming collection transaction's Creditor Scheme ID or Creditor IBAN matches with the maintained value.
- If any of the incoming collection transaction's Creditor Scheme ID and Mandate ID matches with the maintained values.
- If any of the incoming collection transaction's Creditor Scheme ID and Mandate ID or Creditor IBAN matches with the maintained values.
White List
You can restrict/allow incoming collection transaction to be processed based on Creditor ID / Scheme ID, Mandate ID and Creditor IBAN for a specific collection scheme type with Restriction Type as 'Allowed' in 'Debtor Direct Debit Instructions'.
If Incoming Collection transaction for a Debtor does not match with these maintained data, then the system moves the transaction to Transaction Repair (TR) queue.
If restriction type is 'Allowed' and 'Creditor ID / Scheme ID', 'Mandate ID' and 'Creditor IBAN' are not maintained, then the system moves all incoming collections for the Debtor accounts to Transaction Repair (TR) queue.
Static data for error code 'PC-INDD-12' is available and auto rejection can be configured for this error code.
If auto rejection is configured then Incoming Collection transaction will be automatically rejected when does not match with white list.
The system rejects the transaction in following scenarios:
- If any of the incoming collection transaction's Creditor Scheme ID does not match with maintained value.
- If any of the incoming collection transaction's Creditor IBAN does not match with maintained value.
- If any of the incoming collection transaction's Creditor Scheme ID or Creditor IBAN not matches with the maintained value.
- If any of the incoming collection transaction's Creditor Scheme ID and Mandate ID are not matches with the maintained values.
- If any of the incoming collection transaction's Creditor Scheme ID and Mandate ID or Creditor IBAN are not matches with the maintained values.
The creditor business code in Creditor ID / Scheme ID are not considered, while checking for Black List/White List of Creditors.
If Debtor Direct Debit Instructions are not maintained for a Debtor, then the system will allow all the incoming collection transactions for that Debtor.
5.42 Managing Mandate
This section contains the following topics:
- Section 5.42.1, "Validating Mandate Existence for incoming collections"
- Section 5.42.2, "Restricting Automatic Upload of Mandate"
5.42.1 Validating Mandate Existence for incoming collections
The system validates mandate existence for incoming collection of a SDD B2B scheme, if 'DD Agreement Required' check box at Customer Agreement maintenance is checked after receiving incoming collection.
If the mandate exists, then the system validates to match the transaction type as below:
- For One-Off collection transactions, transaction type of mandate is matched with 'OOFF'.
- For First, Recurrent and Final collection transactions, transaction type of mandate is matched with 'RCUR'.
- For the above cases, if transaction type of mandate doesn't match with the sequence type of collection transaction, then the system displays the override message as ‘Sequence Type mismatch for an Incoming Collection’ and processes the transaction further.
- Static data for error code 'PC-SEQT-01' is available.
- PC-SEQT-01' can be configured as type 'Error' and auto rejection can be configured for sequence type checks failures.
The order of sequence type for the incoming collections transaction would be validated as shown in the following table.
SL.No. |
Sequence Type of Incoming Collection |
Amendment Indicator |
Validation |
Action on Failure case |
1 |
FRST |
False |
To check whether this is the first collection transaction for the Debtor Mandate. |
Transaction will be moved into Transaction Repair (TR) queue or auto rejected with the error code 'PC-SEQT-02' |
2 |
RCUR |
False |
To check whether FRST has been received and processed successfully and FNAL has not received yet. |
Transaction will be moved into Transaction Repair (TR) queue or auto rejected with the error code 'PC-SEQT-03' |
3 |
FNAL |
False |
To check whether FRST and RCUR has been received and processed successfully and FNAL has not received already. |
Transaction will be moved into Transaction Repair (TR) queue or auto rejected with the error code 'PC-SEQT-04' |
4 |
FRST |
True |
To check whether sequence type is FRST if 'Identification' under 'Other' under 'Financial Institution Identification' is 'SMNDA'. SMNDA stands for Same Mandate with New Debtor Agent'
|
Transaction will be moved into Transaction Repair (TR) queue or auto rejected with the error code 'PC-SEQT-05' |
5 |
FRST |
True |
To check whether sequence type is FRST if 'Mandate ID' is changed. |
Transaction will be moved into Transaction Repair (TR) queue or auto rejected with the error code 'PC-SEQT-06' |
Static data for error code 'PC-SEQT-02', 'PC-SEQT-03', 'PC-SEQT-04', 'PC-SEQT-05' and 'PC-SEQT-06' are available.
If 'DD Agreement Required' is selected and Debtor Mandate for 'B2B' scheme doesn't exist, then the system moves the transaction to Transaction Repair (TR) Queue.
If auto reject mapping is configured, then system will automatically reject the incoming collection transaction.
5.42.2 Restricting Automatic Upload of Mandate
- For incoming collections transactions, if the 'DD Agreement Required' check box at Customer agreement is checked and when there is no debtor mandate maintained, the system automatically populates the mandate details from the incoming collection transaction.
- For CORE/COR1 scheme, Mandate upload process will upload debtor mandate, even if 'DD Agreement Required' check box at Customer agreement and 'Restrict Automatic upload of Mandate' is unchecked at product level.
- During automatic upload of mandate, if unique identification of a particular mandate changes then a new mandate is created with agreement status as 'Active'. The agreement status for existing record is updated as 'Amended'.
- Mandate exists check will not be done after the automatic upload of mandate when 'DD Agreement Required' is not setup at Customer Agreement..
- To support the SDD B2B schemes, the automatic upload of mandate when debtor mandate is not maintained is driven by the value of the parameter 'Restrict Automatic upload of Mandate'.
- For B2B scheme, 'Restrict Automatic upload of Mandate' check box must be checked. This will disallow automatic upload of debtor mandate.
5.43 Expiry Date Processing
- For the expiry date maintained, agreement records with status as 'Active' are updated as 'Expired' as part of batch process.
- Each incoming collection transaction is checked against status of the corresponding mandate.
- "If the status of agreement is 'Expired' then incoming collection transaction will be moved into Transaction Repair (TR) queue.
- Static data for error code 'PC-MAND-07' with description as 'Agreement Expired' is available.
- Auto rejection for the above error can be configured and the incoming transaction is rejected automatically.
- Incoming Collection transaction will be processed only if the agreement status is 'Active'.
- Expiry Date validation is applicable to Outgoing Collection transaction also with respect to Creditor Direct Debit Agreement.
5.44 Maximum Amount per Transaction Restrictions
- 'Maximum Amount per Transaction' maintained at Debtor Mandate level will be checked for each Incoming Collection transactions.
- Currency is converted when the incoming collection transaction's currency is different from debtor account's currency.
- If incoming collection transaction amount exceeds maintained 'Maximum Amount per Transaction', then the system moves the incoming collection transaction to Transaction Repair (TR) queue.
- Auto rejection for the error code 'PC-SVV-09D' is configured and the incoming collection transaction is rejected automatically, when transaction amount exceeds 'Maximum Amount per Transaction'.
- If 'Maximum Amount per Transaction' is not maintained, then the system considers 'Maximum Transaction Amount' maintained at 'Payments & Collections Debtor Preferences Maintenance'.
- If 'Maximum Transaction Amount' is not maintained at 'Payments & Collections Debtor Preferences Maintenance', then the system considers 'Maximum Transaction Amount' maintained at PC product definition.
5.45 Maximum Amount per Calendar Year Restrictions
- Each incoming collection transaction is validated against the 'Utilized Amount for Calendar Year' with 'Maximum Amount per Calendar Year' for a particular mandate.
- Currency is converted when the incoming collection transaction's currency is different from debtor account's currency.
- If the 'Utilized Amount for Calendar Year' is less than the 'Maximum Amount per Calendar Year' then the system processes the incoming collection and the 'Utilized Amount for Calendar Year' gets incremented on receiving the incoming collection transaction.
- If the incoming collection transaction amount and the 'Utilized Amount for Calendar Year' are greater than the 'Maximum Amount per Calendar Year', then the system moves the incoming collection transaction to Transaction Repair (TR) queue.
- Static data for error code 'PC-SVV-09O' with description as 'Maximum Amount per Calendar Year exceeded' is available.
- Auto rejection for the above error is configured and the incoming transaction is rejected automatically.
- Debtor bank originated R-transactions such as Pre-settlement Reject and Post settlement Reject on incoming collection transactions will decrement the transaction amount in 'Utilized Amount for Calendar Year' field on receipt of the incoming collection transaction.
- Debtor originated R-transactions such as Pre-settlement Reject and Post settlement Reject on incoming collection transactions will not decrement the transaction amount in 'Utilized Amount for Calendar Year' field.
- All Cancellations of incoming collections would decrement the transaction amount in 'Utilized Amount for Calendar Year' field on receipt of the incoming collection transaction.
- Reversal of incoming collection will not decrement the transaction amount in 'Utilized Amount for Calendar Year' field.
- For 'CORE' and 'COR1' collections scheme types, Debtor originated recall (Refund) transactions will not decrement the transaction amount in 'Utilized Amount for Calendar Year' field.
- The R transaction will decrement the 'Utilized Amount for Calendar Year', only if the R transaction is received in the same calendar year as the due date of original collection. If the R transaction is received in a different calendar year then it will not decrement the 'Utilized Amount for Calendar Year'.
- 'Utilized Amount for Calendar Year' field will get reset to '0' on beginning of every new calendar year if there are no active incoming collection transactions. If there are active incoming collections at beginning of calendar year, then 'Utilized Amount for Calendar Year' field is updated with transactions amount.
- If 'Maximum Amount for Calendar Year' is not maintained then incoming collection transaction would not be validated against maximum amount and 'Utilized Amount for Calendar Year' is not updated.
- During the course of the calendar year, when 'Maximum Amount for Calendar Year' gets maintained, then the subsequent incoming collection transactions and its R - transactions will impact updating of 'Utilized Amount per Calendar Year'.
- Any incoming collection transaction and its R - transaction processed prior to 'Maximum Amount for Calendar Year' maintenance is not considered for updating 'Utilized Amount per Calendar Year'.
- R - Transaction received after 'Maximum Amount for Calendar Year' maintenance for the original parent transaction processed before 'Maximum Amount for Calendar Year' is not considered for updating 'Utilized Amount per Calendar Year'.
5.46 Number of Transactions Restrictions per Calendar Year
- Each incoming collection transaction will be checked against the 'Utilized Transactions for Calendar Year' with 'Number of Transactions per Calendar Year' for a particular mandate.
- If the 'Utilized Transactions for Calendar Year' is less than the 'Number of Transactions per Calendar Year', then the system processes the incoming collection and 'Utilized Transactions for Calendar Year' are incremented on receipt of the incoming collection transaction.
- If the 'Utilized Transactions for Calendar Year' equals 'Number of Transactions per Calendar Year', then the system moves the incoming collection transaction will to Transaction Repair (TR) queue.
- Static data for error code 'PC-SVV-09P' with description as 'Number of Transaction per Calendar Year exceeded' is available.
- Auto rejection for the above error can be configured and the incoming transaction is rejected automatically.
- Debtor bank originated R-transactions such as Pre-settlement Reject and Post settlement Reject on incoming collection transactions will decrement the count in 'Utilized Transactions for Calendar Year' field, on receipt of the incoming collection transaction.
- Debtor originated R-transactions such as Pre-settlement Reject and Post settlement Reject on incoming collection transactions will not decrement the count in 'Utilized Transactions for Calendar Year' field.
- All cancellations of incoming collections must decrement the transaction amount in 'Utilized Transactions for Calendar Year' field on receipt of the incoming collection transaction.
- Reversal of incoming collection will not decrement the count in 'Utilized Transactions for Calendar Year' field.
- For 'CORE' and 'COR1' collections scheme types, Debtor originated recall (Refund) transactions will not decrement the count in 'Utilized Transactions for Calendar Year' field.
- The R transaction will decrement the 'Utilized Transactions for Calendar Year', only if the R transaction is received in the same calendar year as the original collection. If the R transaction is received in a different calendar year, then it will not decrement the 'Utilized Transactions for Calendar Year'.
- 'Utilized Transactions for Calendar Year' field will get reset to '0' on beginning of every new calendar year, if there are no active incoming collection transactions. If there are active incoming collection transactions at beginning of calendar year, then the 'Utilized Transactions for Calendar Year' field will get updated with transactions amount.
- If 'Number of Transactions per Calendar Year' is not maintained, then incoming collection transaction is not validated against transactions count and 'Utilized Transactions for Calendar Year' is not updated.
- During the course of the calendar year, when 'Number of Transactions per Calendar Year' gets maintained, then the subsequent incoming collection transactions and its R - transactions will impact updating 'Utilized Transactions for Calendar Year'.
- Any incoming collection transaction and its R-transaction processed prior to 'Number of Transactions per Calendar Year' maintenance are not considered for updating 'Utilized Transactions for Calendar Year'.
- R-transaction received after 'Number of Transactions per Calendar Year' maintenance for the original parent transaction processed before 'Number of Transactions per Calendar Year' is not considered for updating 'Utilized Amount per Calendar Year'.