5. Outward Retail Bill Contract
5.1 Introduction
This chapter explains the process to create and maintain outward retail bills contracts in Oracle FLEXCUBE.
This chapter contains the following sections:
- Section 5.2, "Outward Retail Bills/Cheques for Collection"
- Section 5.3, "Capturing Additional Details for Outward Retail Bills/Cheques for Collection"
- Section 5.4, "Outward Cheques for Clearing (PDCs)"
- Section 5.5, "Outward Retail Bills/Cheques for Collection in Bulk"
- Section 5.6, "Outward Cheques for Clearing (PDCs) in Bulk"
- Section 5.7, "Outward Retail Bills/Cheques for Collection"
- Section 5.8, "Outward Cheques for Clearing (PDCs)"
- Section 5.9, "Financing Existing Outward Retail Bills/Cheques"
- Section 5.10, "Outward Retail Bills and Cheques"
- Section 5.11, "Dishonour/Protest/Return Details"
- Section 5.12, "Outward Retail Bills/Cheques in Bulk"
- Section 5.13, "Bulk Dishonour/Protest/Return of Instruments"
- Section 5.14, "Change Status/Location Manually"
- Section 5.15, "Capturing Outward Dispatch Process Details"
- Section 5.16, "Dispatch Query"
- Section 5.17, "Clearing Intra Day Batch"
- Section 5.18, "Reversal of Outward Retail Collection Bill/Cheque Contract"
- Section 5.19, "Reversal of Outward Retail Cheque for Clearing (PDC) Contract"
5.2 Outward Retail Bills/Cheques for Collection
This section contains the following topics:
- Section 5.2.1, "Creating Outward Retail Bills/Cheques for Collection"
- Section 5.2.2, "Main Tab"
- Section 5.2.3, "Other Details Tab"
5.2.1 Creating Outward Retail Bills/Cheques for Collection
You can capture details for an Outward Retail Bills/Cheques for Collection in the 'Outward Retail Instrument for Collection' screen. You can access this screen from the Application Browser. You can also invoke this screen by typing ‘RBDOCONL’ in the field at the top right corner of the Application tool bar and clicking on the adjoining arrow button.
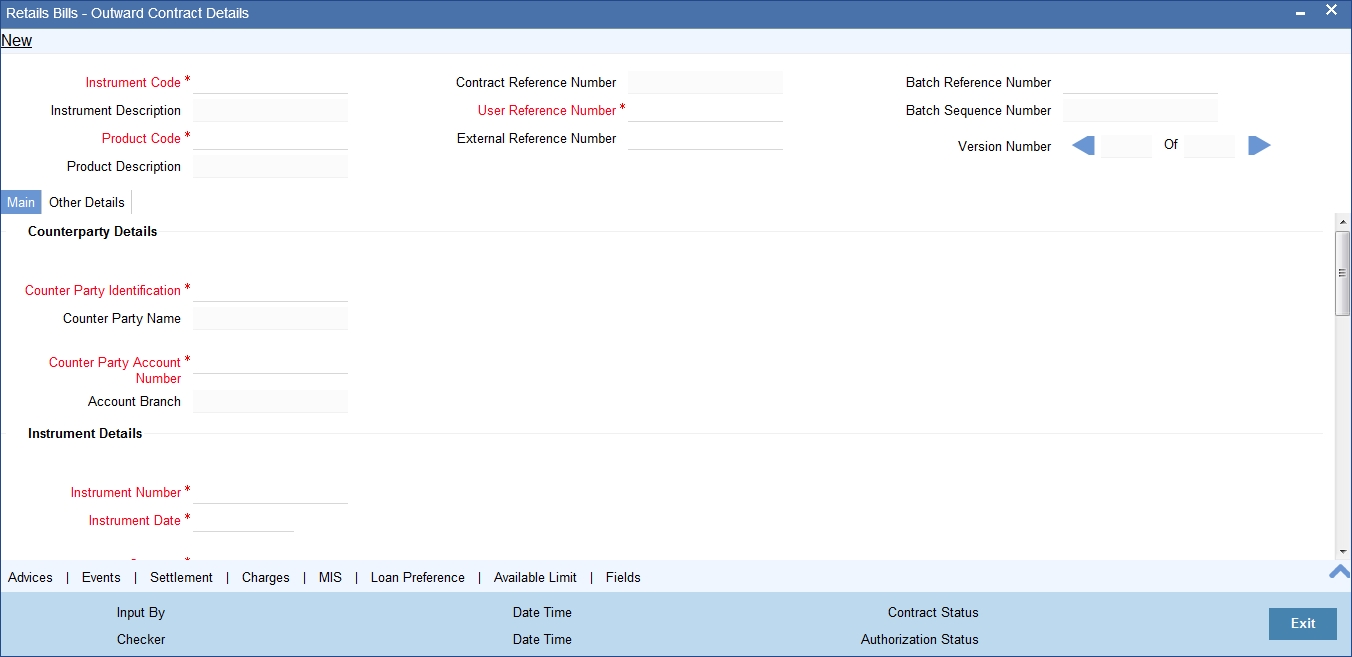
Specify the following details:
Instrument Code
Select the instrument code from the option list.The list contains only those instruments for selection which are linked to the following Product Types:
- Outward Bills for Collection
- Outward Cheques for Collection
Instrument Description
The system displays the description for the instrument code selected.
Product Code
Select the product code from the adjoining option list. The list contains each unique combination of product code and instrument code for selection. This is derived based on the association of product type to the instrument Code.
Note
Products of Outward bills and Outward Cheques for collection are listed.
Product Description
System displays the description of the product selected above.
Contract Reference Number
System generates and displays a Contract Reference Number. This is a unique reference for the bill contract.
This reference is used in all accounting entries and transactions related to this contract.
User Reference Number
By default, the system displays the contract reference number in this field.You can change the value if needed.
External Reference Number
The External Reference Number is used when the contract is being uploaded from an external system. During Manual booking, system will default the contract reference number In this field.
Batch Reference Number
Select the reference from the option list. Batch reference number is applicable only for contracts that are to be considered as part of a batch.The field is applicable for missed out entries in a bulk booking.
Batch Sequence Number
The system generates the batch sequence number only for contracts that are to be considered as part of a batch.The value is applicable only if the batch reference number is selected.
5.2.2 Main Tab
Click ‘Main’ tab to capture the main details of the contract.
Counter party Details
Counter Party Identification
Select the customer Id here.It indicates who has submitted the instrument for collection.
Counter Party Name
The system displays the customer name based on the counterparty id selected.
Counter Party Account Number
Select the account number of the customer from the adjoining option list.
The Counterparty Account Number selected here will be defaulted to the Settlement subsystem on click of Settlement sub system or save.
Note
- Current, savings accounts of counterparty id selected will be available in option list.
- If counterparty account number is selected first, then all the accounts will be listed. Once account number is selected, then the counterparty id will be defaulted immediately.
To view the joint holder’s details of an account and the mode of operation maintained at the account level, place the cursor on the Counterparty Account Number field and press Ctrl+J. The system displays the ‘Joint Holder’ screen.
For more information on the ‘Joint Holder’ screen refer to the section ‘Joint Holder Maintenance’ in the Core User Manual.
Account Branch
The branch to which the customer account belongs is defaulted by the system.
Note
If the account branch selected is different from transaction branch, an override will be displayed.
Instrument Details
Instrument Number
Specify the instrument number.In case of cheques, this is the cheque number.
Instrument Date
Specify the date of the bill or cheque.
Currency
Select the bill/Instrument currency from the adjoining option list.The system defaults the local currency as the bill currency.You can edit this value if needed.
Amount
Specify the bill/cheque amount.
Local Currency Amount
The system defaults the Local Currency Amount on save or subsystem visit.
Other Party Details
Other Party Identification
Select the Other Party ID from the adjoining option list.
Payment Mode
Select the payment mode for realization of outward instruments from the drop-down list. The list displays the following values:
- Normal
- Clearing
Other Party Name
The system displays the other party name, based on the other party Id selected.
Debit Account for Realization
Select the account from the option list.It is the account debited at the time of realization of proceeds.
If the other party is customer of the bank, the list maintains the customer account number to select. If other party is a non-customer, the list contains the Nostro and Vostro accounts intermediary GL accounts maintained at the branch parameter.
System defaults the account number maintained for the currency, module code, product code and branch combination on save if no value is selected.
The debit account for realization selected here will be defaulted to the Nostro component of the entry in the Settlement sub system.
Note
If the ‘Payment Mode’ selected is ‘Clearing’ then the Debit account for realization LOV will have only the clearing GL maintained in the ‘Clearing GL for Outward Collection in RB Branch parameters’. If no value is selected, then, on clicking ‘Default’ button, this clearing GL will be defaulted, which can be edited.
To view the joint holder’s details of an account and the mode of operation maintained at the account level, place the cursor on the Debit Account for Realization field and press Ctrl+J. The system displays the ‘Joint Holder’ screen.
For more information on the ‘Joint Holder’ screen refer to the section ‘Joint Holder Maintenance’ in the Core User Manual.
Debit Account Branch
The system displays the debit account branch based on the debit account for realization selected.
Collecting Bank Details
Bank Code
Select the collecting bank code from the adjoining option list.
Branch Code
The system displays the branch of the collecting bank or the same bank’s branch number to which the instrument is being sent.
Bank Name
The system displays the name of the collecting bank.
Branch Name
The system displays the branch name.
Date
Specify the acknowledgement date of the collecting bank. This field is applicable only during amendment.
Default
Once you click on 'Default' button, system defaults the values for 'Due date for payment', 'To be Dispatched On', 'Local Currency Amount' in the ‘Main’ tab and the Party ID and other details related to the party in ‘Parties’ tab.
Reference Number
Specify the collecting bank reference number, This is applicable only during amendment.
Additional Details
Booking Date
System displays the application date as booking date.
Maturity Date
Specify a value for this field.System allows the lodging of bills after the maturity date.
Lead days for dispatch
The system defaults the value from the Product definition screen and you can modify this value.
To be dispatched on
The system displays the Maturity date minus Lead Days for Dispatch as ‘To be dispatched on Date’.
If Booking Date is greater than Maturity Date minus Lead days for Dispatch, then Booking Date will be the ‘To be Dispatched on Date’.
Grace Days
System defaults the grace days captured at the product level and the value can be modified if needed. Grace days represents the number of days after the maturity date where the payment can be done without dishonour or protest.
Due Date for Payment
The System defaults the 'Due Date for Payment' with two values-
- With maturity date when Booking Date is less than or equal to Maturity Date minus Lead Days for Dispatch.
- With Booking date + Lead days for Dispatch if booking date is greater than Maturity date minus Lead days for dispatch.
Protest
Check this box to indicate that the bill/Cheque should be protested in case of non-payment by the drawee.
The value available for instrument is defaulted here. You can change the value defaulted from protest required to not required, but cannot change the value from protest not required to protest required.
Auto Liquidation
Check this box to indicate that the bill contract should be liquidated automatically as part of a batch process on the Value Date. This is defaulted from the product and can be modified by the user.
Note
Auto Liquidation is allowed only for Payment Mode, ‘Normal’. If this check box is selected for ‘Clearing’ mode, then the system will display an error on saving.
Internal Remarks
Specify your remarks on the transaction.
5.2.3 Other Details Tab
Click ‘Other Details’ tab to capture the additional details of the contract.
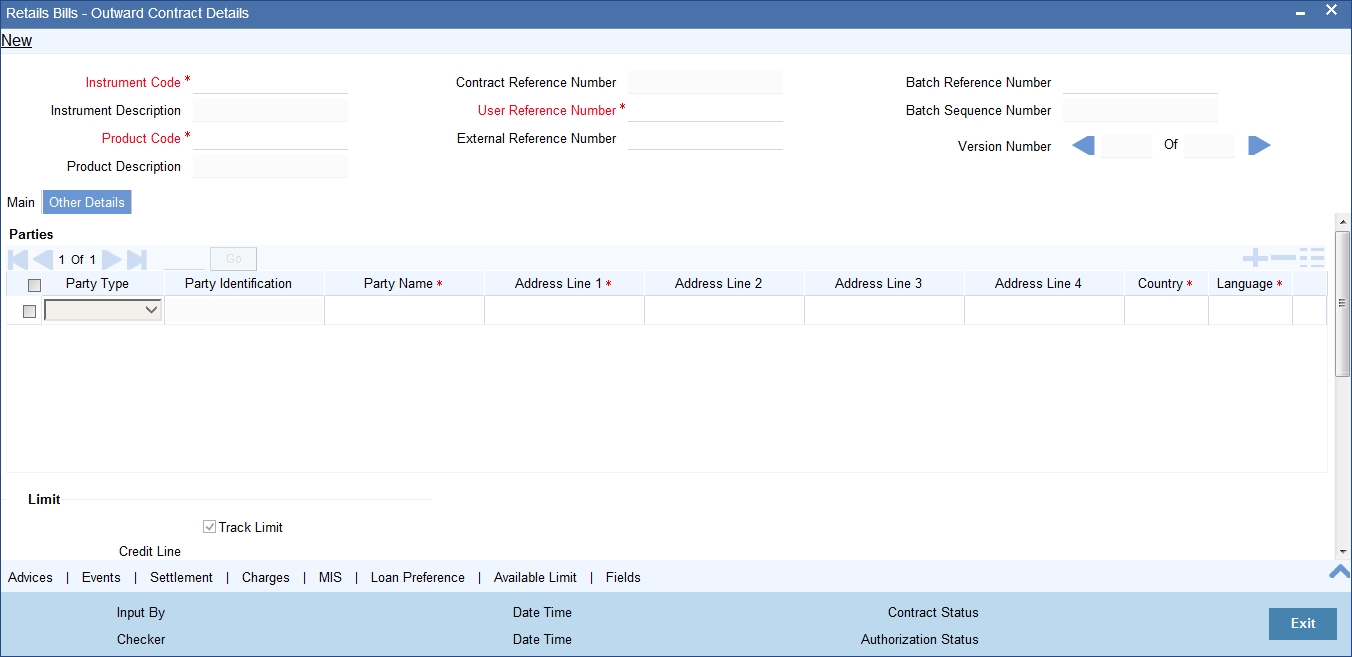
Specify the following details:
Parties
Party Type
System displays the party type here.
In case of 'Outward Bills for Collection' system defaults counterparty as drawer and other party as drawee.
In case of 'Outward Cheques for Collection' system defaults counterparty as payee and other party as drawer.
Party Identification
The system displays the party identification.
In case of collecting bank, the CIF ID of the walk-in customer of the branch is displayed as party identification.
Party Name
System displays the party name based on the CIF.
Address Line 1
System defaults the value for the field based on the CIF defined.You can edit this value if needed.
Address Line 2
System defaults the value for the field based on the CIF defined.You can edit this value if needed.
Address Line 3
System defaults the value for the field based on the CIF defined.You can edit this value if needed.
Address Line 4
System defaults the value for the field based on the CIF defined.You can edit this value if needed.
Country
System defaults the value for the field based on the CIF defined.You can edit this value if needed.
Language
System defaults the value for the language field based on the CIF defined.You can edit this value if needed.
Limit
Track Limit
The value is defaulted by the system as 'Yes'.However,the value can be changed later from 'Yes' To 'No', the system displays an override at the time of saving a record.
Check this box to indicate that the counter party limits should be tracked.
Track limit is applicable only in case of financing of the instruments. In case of collateral, other party limit check is applicable.
If you check the option ‘Track Limit’ for a collateral, then when you try to save the record, the system will display an override message 'Track limit is applicable only for financing and will be set to No'.
Credit Line
Select the credit line from the option list. The list contains only those lines that belong to the counter party.
It is applicable only if the track limit is set to ‘Yes’.
Other Party Limit Check Required
The system defaults the value from product and you can modify this value by using the check-box.
If the other party limit is set as 'Required' at product, you cannot change it to 'Not Required' at contract. However you can change the value from 'not required' to 'required'.
In case of collateral, you can check the option ‘Other Party Limit Check Required’ is applicable.
Margin
Margin Percentage
System defaults the margin% from instrument maintained.You can edit this value if needed.
Finance
Financing
The value for field is defaulted based on the instrument selected. However you can change the value by choosing it from the drop-down list and the available options are:
- Eligible
- Not Eligible
- Financed
Note
If the financing is set to ‘Not Eligible’ at instrument level, then you cannot change it to ‘Eligible’ or ‘Financed’ at contract level.
If you select ‘Financed’ for an outward bill or cheque, then the system creates a loan account in Retail Lending module and uses the counter party account in Retail Bills module as the CR_SETTL_BRIDGE for the loan account.
Discount Amount
System calculates and displays this value when the 'Financed' value is selected in 'Financing'.
Collateral
Collateral
Select the value from the adjoining drop-down list and the available options are:
- Eligible
- Not Eligible
- Collateralized
- To be Collateralized - you cannot select this field manually.
If the instrument is eligible for collateral, then the value shown will be 'Eligible'.If the instrument is not eligible for collateral, then the value shown will be 'Not Eligible'.
Note
- If a bill is collateralized, then the collateral and pool will be created in ELCM. Collateral category will be RETAILBILLS and haircut percent should be 0.
- The collateral pool will list the collaterals of category RETAILBILLS alone.
- The start and end date of collateral will be updated as the book date of bills / Collateral creation date (if on EOD). and end date will be the due date of bills.
- Collateral will not be created, if the other party and drawer-drawee limits are not sufficient. if there are o/s items against a other party, then the bills booked with Collateral against same other party will not be collateralized and will be in To be Collateral state.
- On EOD, if the limit is available, then the CBAT event will be fired and Collateral will be created.
- If multiple contracts are booked and there are o/s items against an other party, then on EOD, when limits are available the contracts will be collateralized on FIFO basis. However during batch operations, if the contract amount is more than the limit availability for a contract, the system will ignore that contract and consider the next contract that has its contract amount within the limit.
- If the collateral is not eligible at instrument level, then same cannot be changed as eligible / collateralized at contract level.
Collateral Value
System calculates and displays the value considered for collateral
If the limits are not available, then the Collateral status will be in 'To be Collateralized' and the collateral value will be displayed.
Collateral Pool
Select the collateral pool Id from the option list. If there is no existing pool, then the system creates the pool and links the collateral to the pool on save.
Once you have specified the above details, click ‘Save’ button to save the contract.
5.3 Capturing Additional Details for Outward Retail Bills/Cheques for Collection
This section contains the following topics:
- Section 5.3.1, "Viewing Advices"
- Section 5.3.2, "Events"
- Section 5.3.3, "Accounting Entries"
- Section 5.3.4, "Messages"
- Section 5.3.5, "Settlement Details"
- Section 5.3.6, "Viewing Charge Details"
- Section 5.3.7, "MIS Details"
- Section 5.3.8, "Loan Preference Details"
- Section 5.3.9, "Viewing Available Limit Details"
- Section 5.3.10, "Viewing User Defined Fields"
- Section 5.3.11, "Viewing Summary of Outward Retail Instrument Collection"
5.3.1 Viewing Advices
An important part of processing a Retail Bill is the generation of various advices applicable for a contract.
The details of the advices for an event are displayed in the Advices screen. The party type to whom a specific advice should be sent is picked up automatically based on the type of RB being processed and the parties involved.
For Retail Bills Contract details screen click 'Advices' tab.The advices screen is displayed.
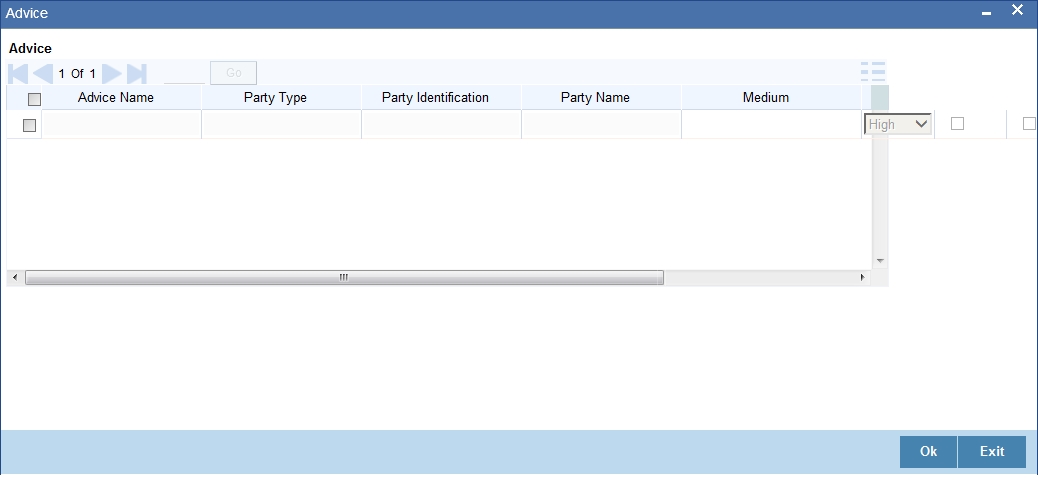
The following advice details are displayed:
Advice
Advice Name
This is the code that identifies the advice that can be generated for a Retail bill. All the advices specified for the product to which the Retail bill is linked will be displayed in this screen. If the advice is not applicable to the bill you are processing you can suppress its generation in the corresponding fields on this screen.
Party Type
This is the type of party involved in the Retail bills. For example, drawee, drawer etc. The party type is displayed based on your specifications in the Parties screen.
Party Identification
System displays the party identification.
Party Name
This is the name of the party involved in the Retail bill to whom the advice is to be sent.
Medium
The system displays the medium through which an advice is transmitted.
Priority
The system displays the priority with which the generated messages are transmitted through media.
Suppress
By default, all the advices that have been defined for a product will be generated for the Retail Bills involving it. As certain advices may not be applicable to the bills you are processing, you can suppress its generation by indicating the same in this screen.
Charge Required
The flag is enabled if you have specified to collect charges for advice generation.
5.3.2 Events
Click ‘Events’ button in the ‘Outward Retail instrument for Collection’ screen and invoke the ‘Event’ screen.
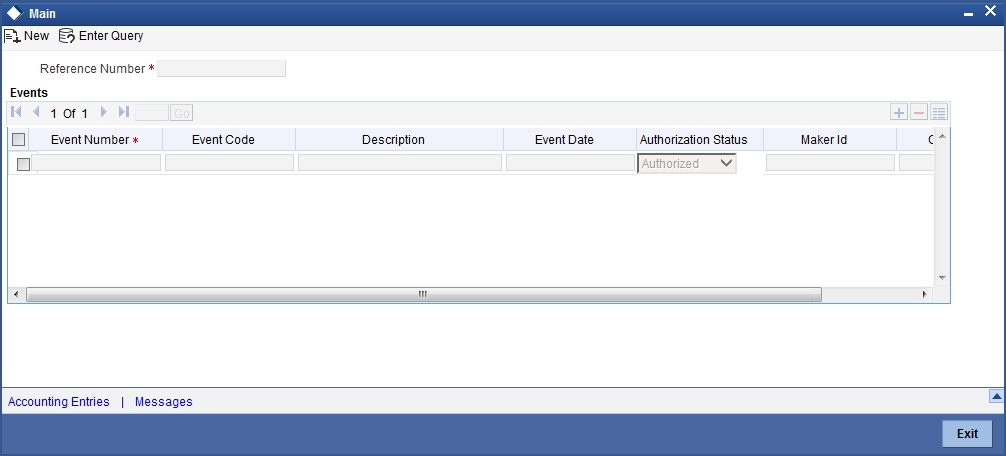
Here the following details of the events, that have taken place on the contract, will be displayed along with the pending events.
- Reference Number
- Event Number
- Event Code
- Description
- Event Date
- Authorization Status
- Maker Id
- Checker Id
5.3.3 Accounting Entries
To view the accounting entries that are passed for each event, click on 'Accounting Entries' button on the 'Event' sub-screen of the product maintenance screen.Here,all the accounting entries that were passed and the overrides that were encountered for the event are displayed.
5.3.3.1 Accounting Entries Tab
You can view the accounting entries that are passed for each event in ‘Accounting Entries’ tab.
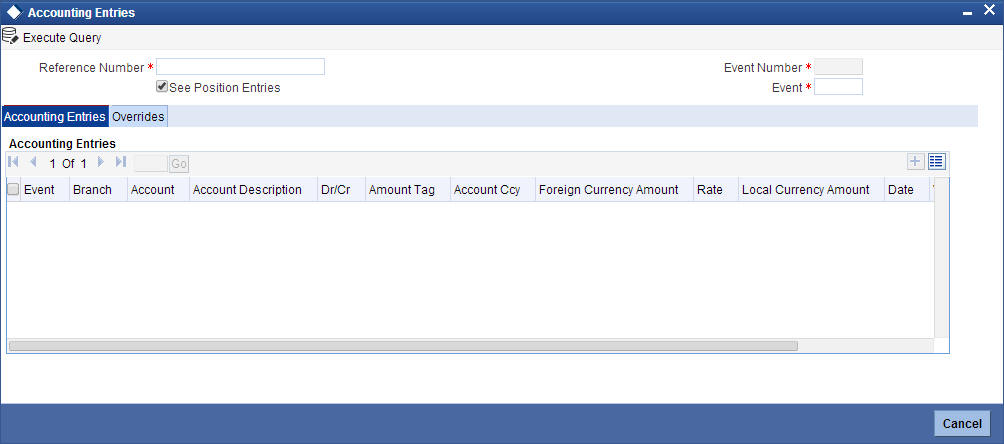
The following details are displayed here:
- Reference Number
- Event Number
- Event
- See Position Entries (enabled)
- Accounting Entries
- Event
- Branch
- Account
- Account Description
- Dr/Cr
- Amount Tag
- Account currency
- Foreign Currency Amount
- Rate
- Local Currency Amount
- Date
- Value Date
- Transaction Code
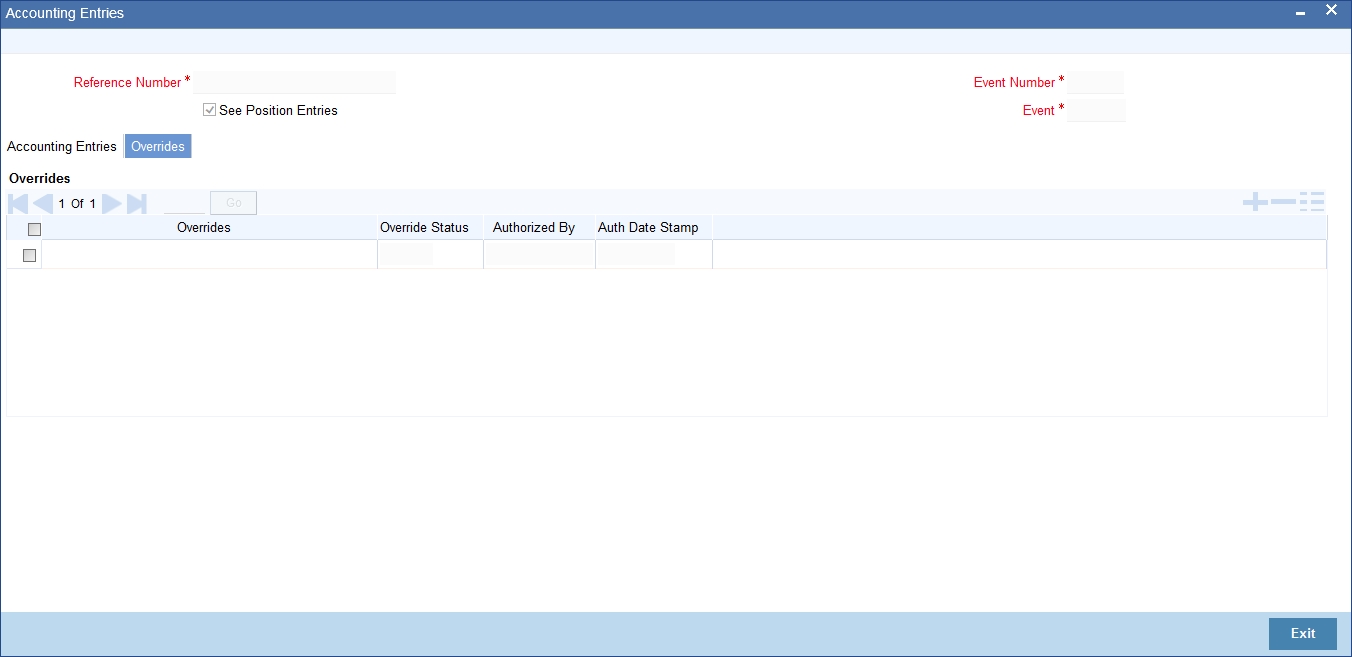
5.3.3.2 Overrides Tab
You can view the overrides that occur for an event in 'Overrides' tab.
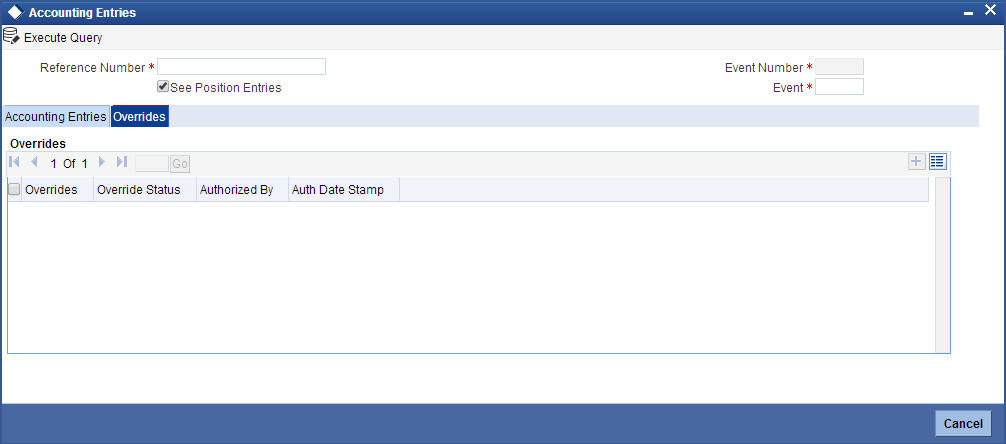
The following details are displayed here:
- Reference Number
- Event Number
- See Position Entries (Enabled)
- Event
- Overrides
- Overrides
- Override Status
- Authorized By
- Authorization date stamp
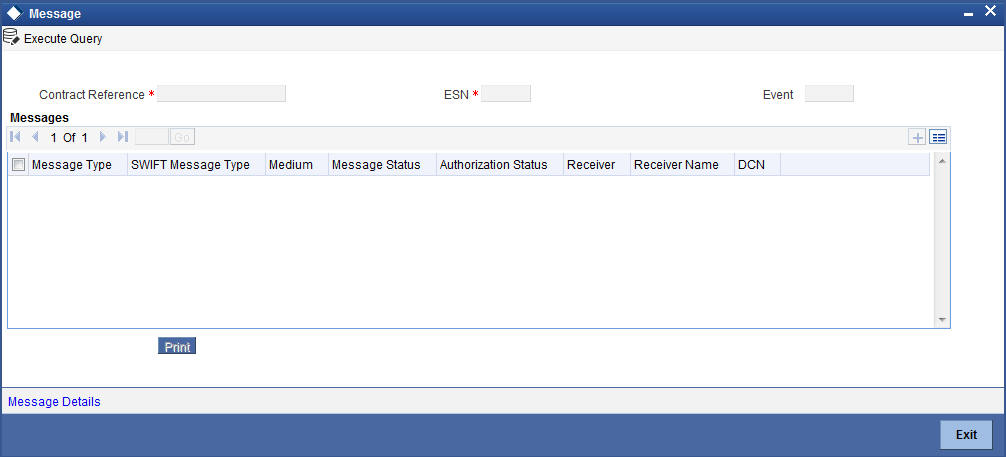
5.3.4 Messages
Click ‘Message’ button from the ‘Events’ screen and view the list of messages applicable to a particular event in the life cycle of the retail bill.

The following details of a message are displayed:
- The message type
- The Name and ID of the recipient of the message
- The status of the message
- Medium
- DCN
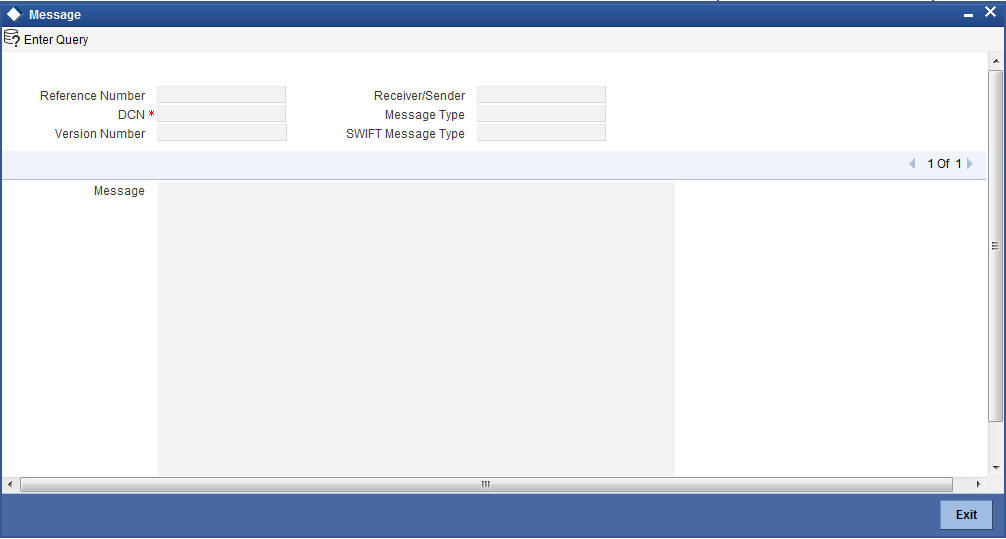
5.3.4.1 Message Details
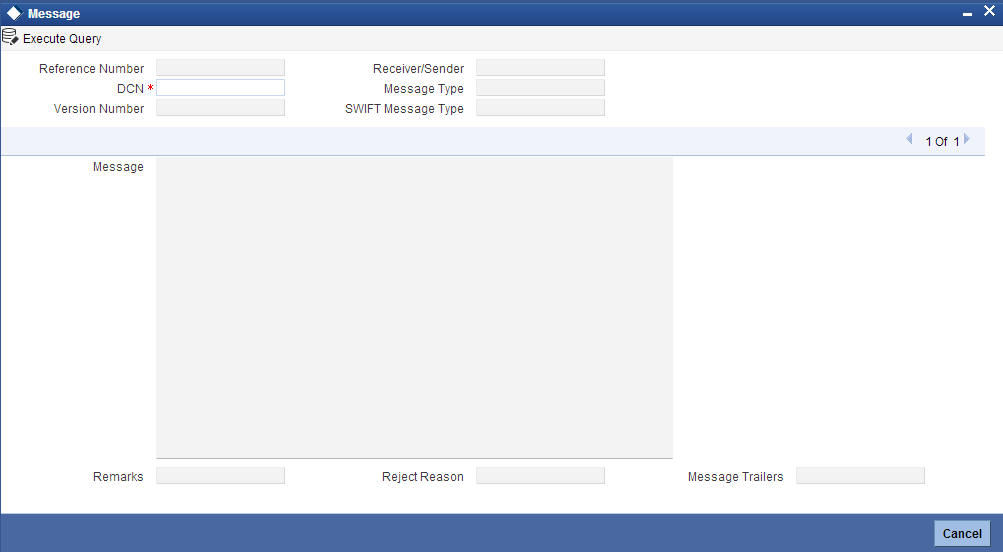
Here in order to view the text of a message, you need to highlight the message and click ‘Message’ button. Click ‘Exit’ or ‘Cancel’ button to exit the screen.
5.3.5 Settlement Details
You can capture the settlement details of a Retail bill in ‘Settlement Details’ screen. Click ‘Settlement’ button in ‘Outward Retail instrument for Collection’ screen to invoke the ‘Settlement Details’ screen.
The ‘Settlement Details’ screen shows the settlement details of the latest event only.
5.3.5.1 Account Details Tab
Click ‘Account Details’ tab to specify details for the account.
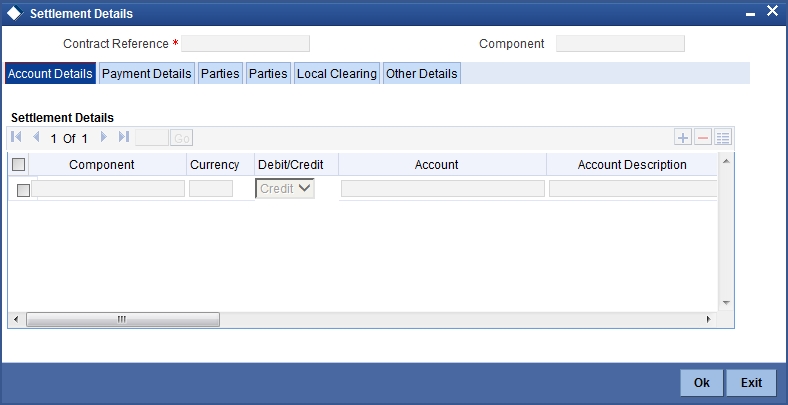
Account Details
The account details that get defaulted include the following:
- Component and its Currency
- Payment Account and its Currency
- Branch of your bank to which the account belongs
Debit/Credit
System displays the debit/Credit value.
Account
This is the account number for the component. If the contract is amended/modified and authorized, then the system will update this account based on the details in the modified contract.
Account Description
Specify a brief description on account.
Netting Indicator
In addition to maintaining a netting agreement for each counter party, you have to specify whether or not the contract is under the netting agreement for each contract involving the counter party.
Check this box to indicate that you would like to enable the Netting option for the various components (Amount Tags) involved in the transaction. These components could be commission, interest, tax, charges etc.
Rate Code
Specify rate code by selecting appropriate rate code from selection list. Following values are available:
- Buy
- Sell
- Mid
Spread Definition
Select the spread definition from the adjoining drop-down list. The options available are:
- Point
- Percentage
Customer Spread
This defaults from your specification of tenor-wise spread for the relevant Currency Pair in the Customer Spread Maintenance screen. You can change this for a specific contract.
Original Exchange Rate
If the component currency is different from the account currency, the system requires an exchange rate for the conversion. The components of the final exchange rate used for conversion are:
- The Base Rate – this is defaulted from the exchange rate that you have maintained for the currency pair involved. It is computed as Mid Rate +/- Spread (depending on whether it is the Buy Spread or the Sell Spread).
- The Customer Spread - the spread that you have maintained for the specified Counter party, Currency Pair and Tenor combination in the Customer Spread Maintenance screen is picked up and applied for the customer involved in the deal.
Exchange Rate
For transactions involving any relationship pricing benefit scheme, the customer specific exchange rate derived by adding the original exchange rate and the customer spread maintained for the relationship pricing scheme, gets displayed here.
If Relationship Pricing is not applicable, Exchange Rate will be the same as the Original Exchange Rate.
Negotiated Cost Rate
Specify the negotiated cost rate.
Negotiation Reference
Specify the negotiation reference here.
Generate Message
Enable this option if a payment messages has to be generated for the settlement instruction.
IBAN Account Number
The system displays the IBAN Account Number here.
Euro In Currency and Euro In Amount
SWIFT messages (MT103/MT202) generated towards settlement can furnish the value of the settlement amount in both the settlement account currency, and a Euro Related Information (ERI) currency of your choice. If you opt to furnish the ERI value of the amount, you have to enter the following in this screen:
- The ERI currency
- The ERI Amount
The system defaults to the ERI currency specified for the customer and currency combination.You can change the default ERI currency. The ERI amount that you specify will be validated against the Tolerance Limit specified for the ERI currency (in the Currency Maintenance screen).
Note
- The counterparty and debit account for realization is defaulted here. However, the same can be changed at settlement subsystem.
- The account changed at settlement subsystem will not be re-defaulted to main screen.
5.3.5.2 Payment Details Tab
The details of the payment have to be specified in the ‘Payment Details’ screen.
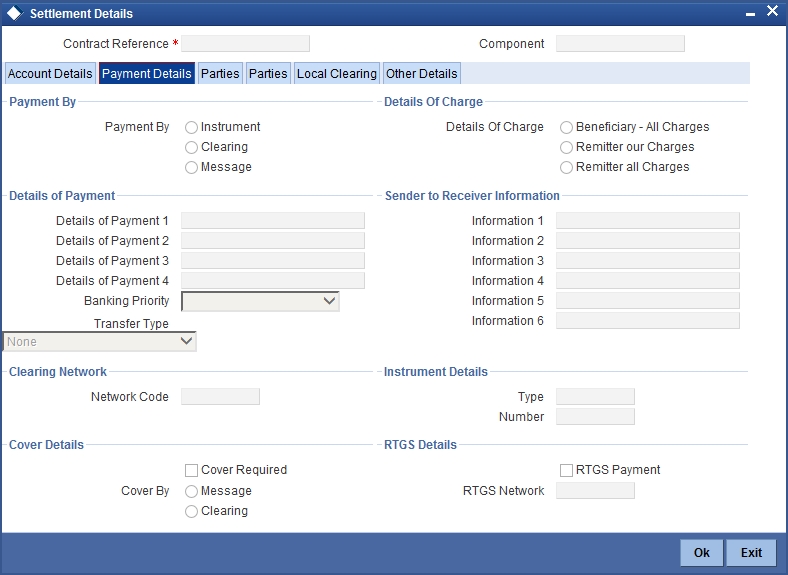
Specify the following details:
Payment By
Indicate the method of payment for both Outgoing as well as Incoming Payments, for a Branch, Account and Currency combination. The following options are available:
- Instrument (settlement is done through a Cheque, MCK etc.)
- Message (payment is made by means of a SWIFT Message)
- Clearing (the transaction is a local payment transaction and the settlement is routed through the Clearing House of the bank)
Note
You can indicate the payment method as ‘Clearing’ only,
- If the payment currency is the local currency of the branch
- If it is one of the clearing currencies defined for the branch
- If you have selected ‘ALL’ in the currency field
No payment message will be generated for settlements routed through a Clearing House.
Depending on the method in which you want to settle the contract, you should specify either Instrument or Message details.
Details Of Charge
In this section you can maintain details of the party who will bear the charges incurred in processing the transaction. It could be either:
- Remitter – All Charges
- Beneficiary – All Charges
- Remitter – Our Charges
Details of Payment
Here you can specify information, from the Ordering Party to the Beneficiary Customer, about the reason for the payment.
This field can contain reference numbers, invoice numbers or any other details, which will enable the Beneficiary to identify the transaction. This information is to be passed through the payment chain to the Beneficiary.
Banking Priority
Select the priority of the payment messages from the drop down list. The options available are:
- Highly Urgent
- Urgent
- Normal
The default value is Normal.
Sender to Receiver Information
Information 1 to 6
This could be instructions or additional information for the Receiver, Intermediary, Account With Institution or Beneficiary Institution.
Clearing Network
Network Code
Indicates the clearing network code.
Instrument Details
If you opt to settle a contract with an instrument, you should specify the type of instrument that you would use. For example, you could settle a contract using a Manager’s Cheque, a Cheque or a Demand Draft. You should also specify the number that identifies the instrument. This number will be printed on the instrument.
If the settlement is through an instrument, you cannot specify the party details.
Cover Details
Cover Required
Check this box if cover is required.
Cover By
Select the cover by as Message or Clearing.
RTGS Details
RTGS Payment
If the settlement chosen is one of the RTGS Nostro that is, RTGS outgoing Nostro account in case of Outgoing customer and Bank transfer and RTGS incoming Nostro in case of outgoing Direct Debit transfer then the system will check this check box as per the validations done in RTGS Network. The user cannot change this value.
RTGS Network
If in a RTGS Network the accounts are maintained as ‘Pay account’ or ‘Receiver Account’ during the save of settlement instruction, then a set of validations will be performed as mentioned below:
For Pay message, it will validate the intermediary (if intermediary is not present, the Account with Institution (AWI) will be validated and if the AWI is also not present then receiver will be validated) is a RTGS participant.
For Pay+ Cover message, it will validate that a receiver correspondent is a RTGS network participant.
If the above conditions are satisfied, the RTGS Network will be updated and the system will check RTGS Payments check box.
5.3.5.3 Parties Details Tab
When you settle a contract, funds may have to pass through a series of banks before it actually reaches the Ultimate Beneficiary. In the Parties screen, you can capture details of all parties involved in a contract.
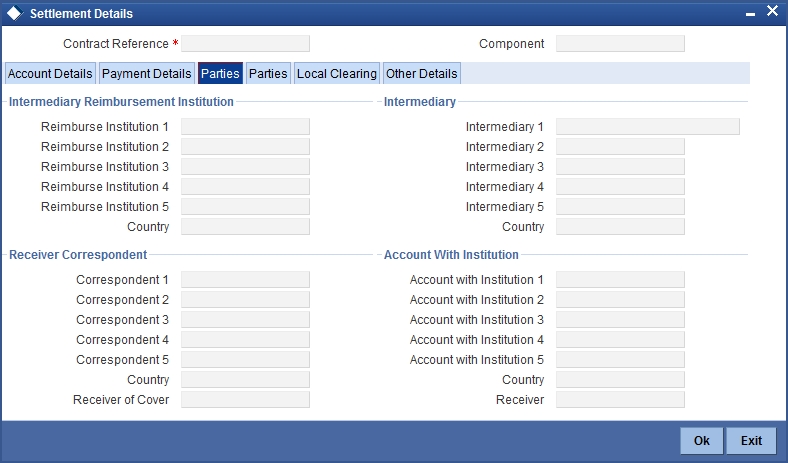
Specify the following details:
Intermediary Reimbursement Institution
Reimbursement Institution 1 to 5
An Intermediary Reimbursement Institution is the financial institution between the Sender’s Correspondent and the Receiver’s Correspondent, through which the reimbursement of the funds will take place.
Country
Specify the country of the intermediary reimbursement institution. This adjoining option list displays all valid country codes maintained in the system. You can choose the appropriate one.
Intermediary
Intermediary 1 to 5
The Intermediary in a contract refers to the financial institution, between the Receiver and the ‘Account with Institution’, through which the funds must pass.
The Intermediary may be a branch or affiliate of the Receiver or the ‘Account With Institution’, or an entirely different financial institution. Here you can enter either the:
- ISO Bank Identifier Code of the bank
- Name and address of the Bank
Country
Specify the country of the intermediary institution. This adjoining option list displays all valid country codes maintained in the system. You can choose the appropriate one.
Receiver Correspondent
Correspondent 1 to 5
The Receiver’s Correspondent is the branch of the Receiver or another financial institution at which the funds will be made available to the Receiver.
You can enter one of the following:
- ISO Bank Identifier Code of the bank
- The branch of the Receiver’s Correspondent
- Name and address of the Receiver’s Correspondent
Country
Specify the country of the receiver’s correspondent. This adjoining option list displays all valid country codes maintained in the system. You can choose the appropriate one.
Receiver of Cover
Specify the details of the Receiver of the cover message, which can be any one of the following:
- ISO Bank Identifier Code of the bank
- Branch of the Receiver
- Name and address of the Receiver
Account With Institution
Account With Institution 1 to 5
An Account with Institution refers to the financial institution, at which the ordering party requests the Beneficiary to be paid. The ‘Account with Institution’ may be a branch or affiliate of the Receiver, or of the Intermediary, or of the Beneficiary Institution, or an entirely different financial institution.You can enter one of the following:
- ISO Bank Identifier Code of the bank
- The branch of the Receiver’s Correspondent
- Name and address of the Receiver’s Correspondent
- Other identification codes (for example, account number)
If no selection is made for Account with Institution, all beneficiaries will appear for selection in the option list for Ultimate Beneficiaries in the Parties tab 2 screens. If a particular Ultimate Beneficiary is selected in Parties tab 2, then the Account with Institution for the selected ultimate beneficiary will appear by default in the AWI field in the Parties tab 1 screen.
Country
Specify the country of the account with institution. This adjoining option list displays all valid country codes maintained in the system. You can choose the appropriate one.
Receiver of Cover
Specify the details of the Receiver of the cover message, which can be any one of the following:
- ISO Bank Identifier Code of the bank
- Branch of the Receiver
- Name and address of the Receiver
- Other identification codes (for example, account number)
5.3.5.4 Parties Details Tab
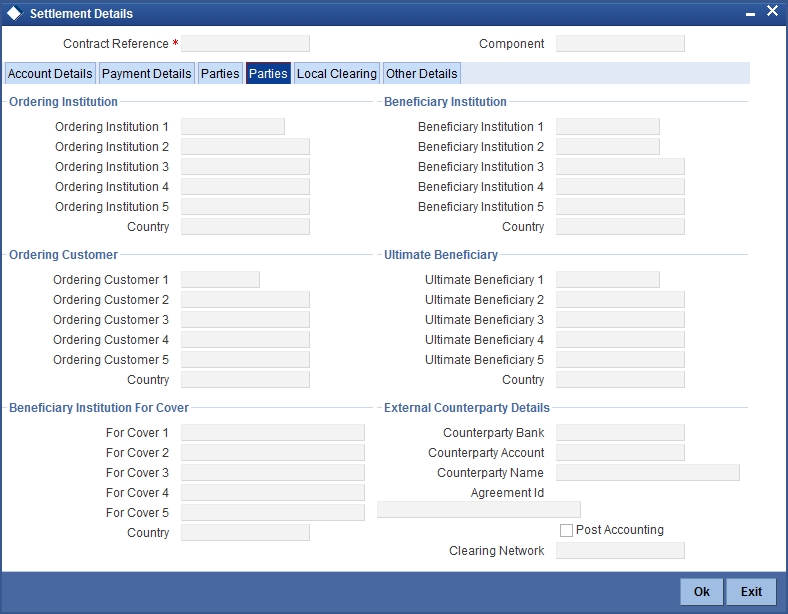
Specify the following details:
Ordering Institution
Ordering Institution 1 to 5
The Ordering Institution is the financial Institution, which is acting on behalf of itself, or a
customer, to initiate the transaction. In this field, you can enter one of the following:
- The ISO Bank Identifier Code of the Ordering Institution
- The branch or city of the Ordering Institution
- The Name and address of the Bank
Country
Specify the country of the ordering institution. This adjoining option list displays all valid country codes maintained in the system. You can choose the appropriate one.
Beneficiary Institution
Specify the details of the beneficiary institution.
Country
Specify the country of the beneficiary institution. This adjoining option list displays all valid country codes maintained in the system. You can choose the appropriate one.
Ordering Customer
Ordering Customer 1 to 5
The Ordering Customer refers to the customer ordering the transfer. Here, you can enter the name and address or the account number of the Customer, ordering the transaction. You will be allowed to enter details in this field only if you have initiated a customer transfer (MT 103 and MT 102).
Country
Specify the country of the ordering customer. This adjoining option list displays all valid country codes maintained in the system. You can choose the appropriate one.
Ultimate Beneficiary
Ultimate Beneficiary 1 to 5
Specify details of the institution in favour of which the payment is made. It is in reality the bank, which services the account of the Ultimate Beneficiary. This is applicable only in the case of bank transfers and not for customer transfers. You will be allowed to make entries into this field only for Bank Transfers (when the remitter and beneficiary of the transfer are financial institutions –MT 202). Here you can enter either:
- The ISO Bank Identifier Code of the Beneficiary Institution
- The Name and Address of the Beneficiary Institution
Country
Specify the country of the beneficiary institution. This adjoining option list displays all valid country codes maintained in the system. You can choose the appropriate one.
Beneficiary Institution For Cover
For Cover 1 to 5
Specify details of the institution in favour of which the payment is made. Here, you will be allowed to make entries into this field only for Bank transfers (MT 200 or MT 202).
In this field you can enter either the:
- The ISO Bank Identifier Code of the Beneficiary Institution
- The Name and Address of the Beneficiary Institution
Country
Specify the country of the beneficiary institution for cover. This adjoining option list displays all valid country codes maintained in the system. You can choose the appropriate one.
External Counterparty Details
Counterparty Bank
Select the Counterparty Bank from the adjoining option list.
Counterparty Account
Select the Counterparty Account from the adjoining option list.All the Counterparty Accounts pertaining to this Bank will appear for selection.
Counterparty Name
On selecting the Counterparty Account, the system defaults the Counterparty Name as maintained for that account.
Agreement Id
Specify the Agreement ID of the counterparty in order to facilitate a cross-referencing between the Payment and the Direct Debit instruction when a reversal of payment is carried out due to rejection of the outbound DD.
Post Accounting
The Post Accounting option is defaulted from the Settlements to Payment Product and UDF Mapping screen.
Clearing Network
Here, The Clearing Network in settlement screen will be defaulted with 'Clearing Network' maintained in local clearing section in settlement instruction.
5.3.5.5 Local Clearing Tab

Specify the following details:
Message Details
Ultimate Bank Code
Select the ultimate bank code from the adjoining option list.
Sender Receiver Participant
Specify the sender receiver participant.
Additional Identifier
Specify the additional identifier.
SORBNET Specific Details
Payment Code
Specify the payment code.
Additional Information
Specify additional information, if any.
ZUS Transaction
Nip Payer
Specify the nip payer.
Payer Identifier
Specify the payer identifier.
Declaration
Specify the declaration.
Supplement Id
Select the supplement Id from the adjoining drop-down list.
Payment Type
Select the payment type from the adjoining drop-down list.
No of Declaration
Specify the number of declaration.
FFT
Free text 1, 2 and 3
Specify free text, if any.
Receiver Information
Receiver Name
Specify the receiver name.
Address 1,2 and 3
Specify the address here.
Repair Reason
Reason 1, 2, 3 and 4
Specify the reason for repair.
Send Receiver Information
Information 1, 2, 3, 4, 5 and 6
Specify the sender receiver information here.
Additional Information
Information 1, 2, 3 and 4
Specify additional information, if any.
5.3.5.6 Other Details Tab
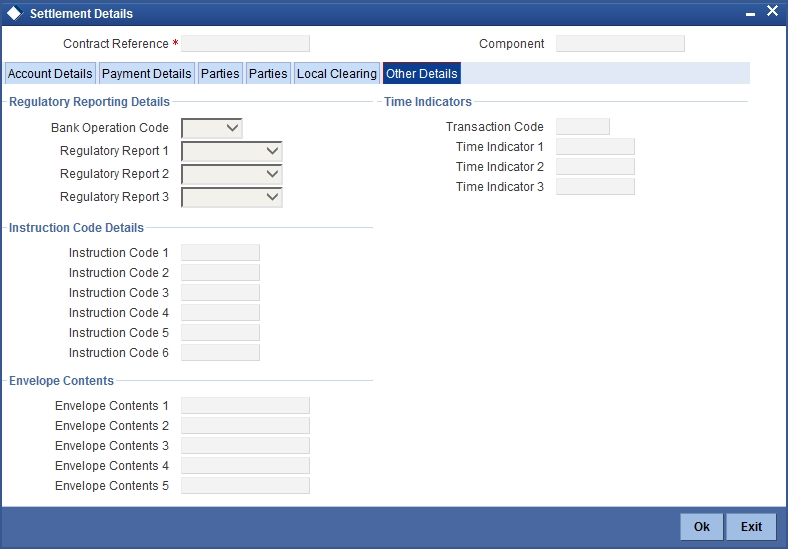
Specify the following details:
Regulatory Reporting Details
Bank Operation Code
Specify the bank operation code here.The options available are SPRI, SSTD, SPAY and CRED.
Regulatory Report 1 to 3
Select the Regulatory Reporting Details from the option list displaying the following values:
- /BENEFRES/
- /ORDERRES/
Time Indicators
Transaction Code
This is the code for the transaction type.
Time Indicator 1 to 3
Specify one or several time indication(s) here. Select the time indication code from the following values available in the adjoining option list:
- /CLSTIME/ - Time by which funding payment must be credited, with confirmation, to the CLS Bank's account at the central bank, expressed in CET.
- /RNCTIME/ - Time at which a TARGET payment has been credited at the receiving central bank, expressed in CET
- /SNDTIME/ - Time at which a TARGET payment has been debited at the sending central bank, expressed in CET
Instruction Code Details
Instruction Code 1 to 6
Specify the instruction codes here.You can add a maximum of six instruction codes. However, you cannot repeat any code that has already been specified. The options available are:
- CHBQ
- TELE
- PHON
- PHOI
- REPA
- INTC
- TELI
- SDVA
- PHOB
- TELB
- HOLD
- CORT
Envelope Contents
Envelope Contents 1 to 6
Specify the envelope contents here.
5.3.6 Viewing Charge Details
Click ‘Charges’ button to view the ‘Charge Details’ screen.
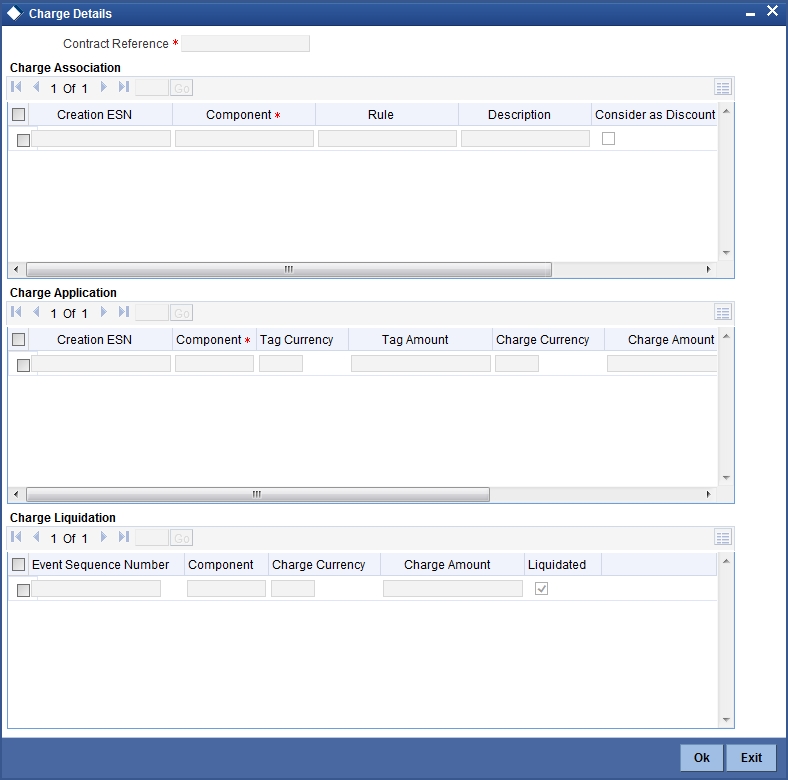
The following fields are displayed here.
Contract Reference
The system displays the contract reference number of the contract you are processing.
Charge Association
Creation ESN
The system displays the event sequence number which depends on the life cycle of the contract processing.
Component
The system displays the name given to the charge component here.
Rule
The system displays the rule.
Description
The system displays the description.
Consider as Discount
If the charge component is considered for discount accrual on a constant yield basis then the 'consider as Discount' option will be checked and you cannot modify this value.
Waiver
The system defaults this option to waive the charge or fee on a contract you are processing.
Accrual Required
The system defaults the option from the product charge class maintenance and the value cannot be modified.
Charge Application
Creation ESN
The system displays the event sequence number which depends on the life cycle of the contract processing.
Component
The system displays the name given to the charge component here
Tag Currency
The system displays the tag currency.
Tag Amount
The system displays the tag amount.
Charge Currency
The system displays the charge currency.
Charge Amount
The system displays the charge amount.
Consider as Discount
If the charge component is considered for discount accrual on a constant yield basis then the 'consider as Discount' option will be checked and you cannot modify this value.
Waiver
The system defaults this option to waive the charge or fee on a contract you are processing.
Liquidated
The system displays the charge or fee liquidated.
Charge Liquidation
Event Sequence Number
The system displays the event number which depends on the life cycle of the contract processing.You cannot modify this value.
Component
The system displays the name given to the charge component here.
Charge Currency
The system displays the currency in which the charge is specified if it is a flat amount and the flat amount itself.
Charge Amount
The system displays the charge amount.
Liquidated
The system displays the charge or fee liquidated.
For further details on this screen, refer to the section ‘Processing Charges’ in Charges and Fees user manual.
5.3.7 MIS Details
To invoke the MIS details screen for a contract, click on the ‘MIS’ button while processing the contract.
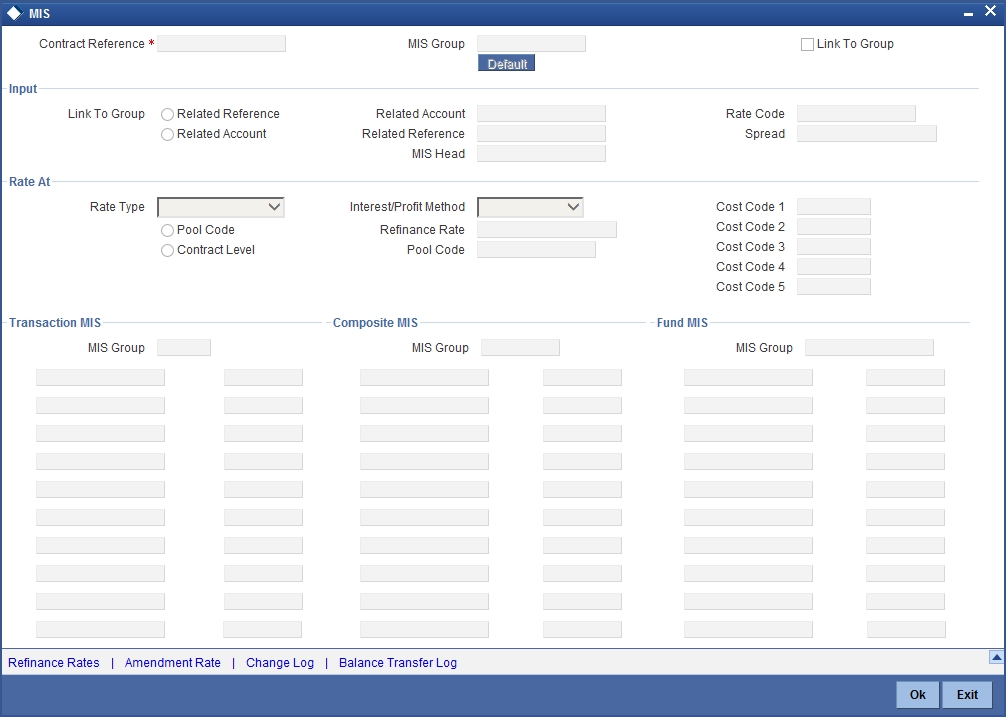
For a contract, the transaction type of MIS class, the cost code and pool code will be picked up from the product under which the contract is processed. The composite MIS code will be picked up from the definition made for the customer, on behalf of whom the contract is being processed.
The interest calculation method for the refinancing rates of the pool will also be picked up, by default, from Pool Codes maintenance and these can be changed. For an account, the transaction type of MIS class will be picked up from the account class, along with the cost codes and pool codes. The composite type of MIS class will be defaulted from those defined for the customer. These too can be changed.
5.3.8 Loan Preference Details
To invoke the 'Loan Preference' screen for a contract, click on the ‘Loan Preference’ button while processing the contract.In this screen you can maintain the details for the loan.

To recall, you have the option to create a loan from Retail bills module. In case you opt for this option, the preferences you maintain in this screen will be used to create a loan during liquidation of retail bills.
The following details are captured:
Contract Reference
The system displays the contract reference number.
Contract Currency
The system will display the currency of the contract. You cannot change this value.
Product
The system displays the loan product code defined for the retail bills product.
Counterparty
The system displays the counter party id.
Currency
The System displays the currency of the bill as the currency of the loan.
Latest ESN
The system displays the latest event sequence number of the contract.
Product Description
The system displays the description of the CL product code here.
Tenor
Here it indicates the tenor for each loan being maintained. The tenor is expressed in days. The minimum/maximum tenor specified in the loan product underlying the contract has to be adhered to.
Units
Indicates the units in which the tenor is specified.
Loan Contract Reference Number
System displays the loan reference number on save of bill.
Rate
Rate Code
The System displays the rate code and value is defaulted from loan product.
Exchange Rate
The system displays the exchange rate and value is defaulted from loan product.However,you can change the exchange rate.
Rate Type
The System displays the rate type and value is defaulted from loan product.
Maximum
The minimum rate variance % allowed for exchange rate is displayed here.
Minimum
The maximum rate variance % allowed for exchange rate is displayed here.
Payment Mode
The system displays the payment mode.It indicates whether the transaction is a debit or credit.
Loan Value Date
The System displays finance/discounting date of a bill as the loan value date.
Maturity Date
The system displays the due date of bills as maturity date of loans.
User Defined Element ID
Specify the unique identification for the user defined element. The adjoining option list displays all valid IDs maintained in the system. You can choose the appropriate one.
UDE Description
Specify the description for the UDE defined above.
Rate as of
Specify a unique rate value here.
Usage
Select the usage type from the adjoining drop-down list and the available options are:
- Periodic
- Automatic
UDE value
Specify the value for the UDE ID.
5.3.9 Viewing Available Limit Details
To view the limit availability of counterparty and other party involved in a transaction, click on the ‘Available Limit’ button while processing the contract.
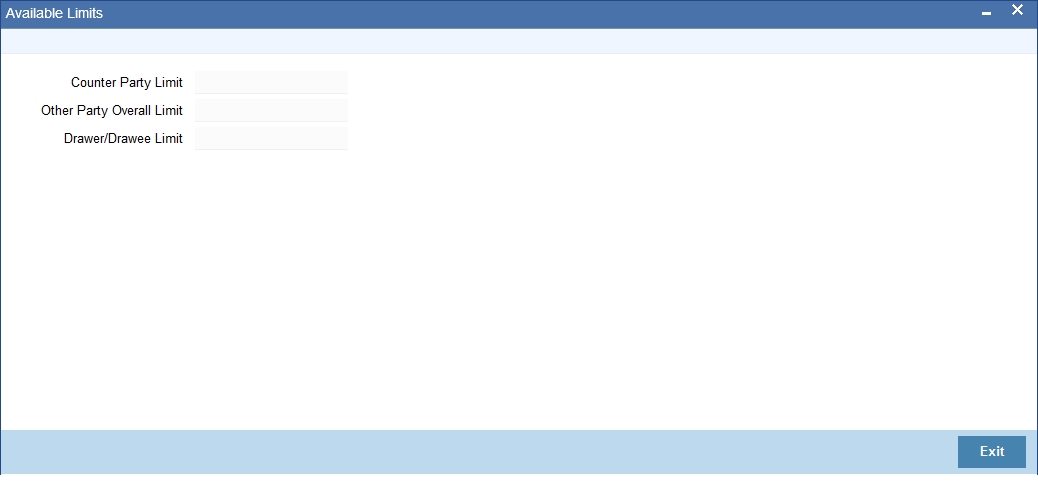
Here,if the limits maintained are in different currency, then the available limits are converted and displayed in the contract currency.
The following details are displayed:
Counter Party Limit
System displays the available limit for the credit line selected in the other details tab.
Other Party Overall Limit
System displays the available limit of the Other Party selected in the main tab.
Drawer/Drawee Limit
System displays the available limit of the Drawer – Drawee combination limit.
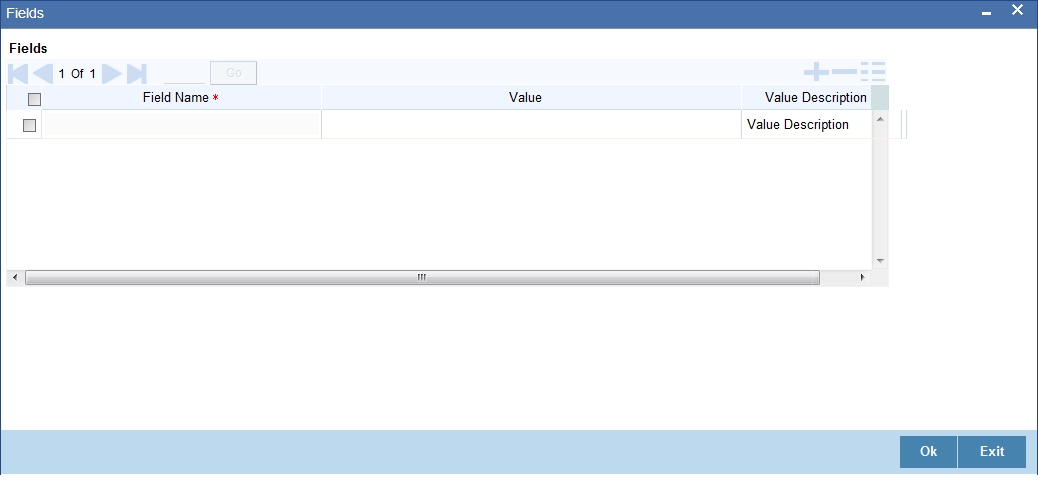
5.3.10 Viewing User Defined Fields
The UDFs linked to a particular product will be available when a contract is processed under that product. In the 'Outward Retail instrument for Collection' contract input screen, click ‘Fields’ button to invoke the ‘Fields’ screen.
5.3.11 Viewing Summary of Outward Retail Instrument Collection
You can view a summary of outward retail instruments in ‘Outward Retail Instrument Collection Summary’ screen. To invoke this screen, type ‘RBSOCONL’ in the field at the top right corner of the application toolbar and click the adjoining arrow button.
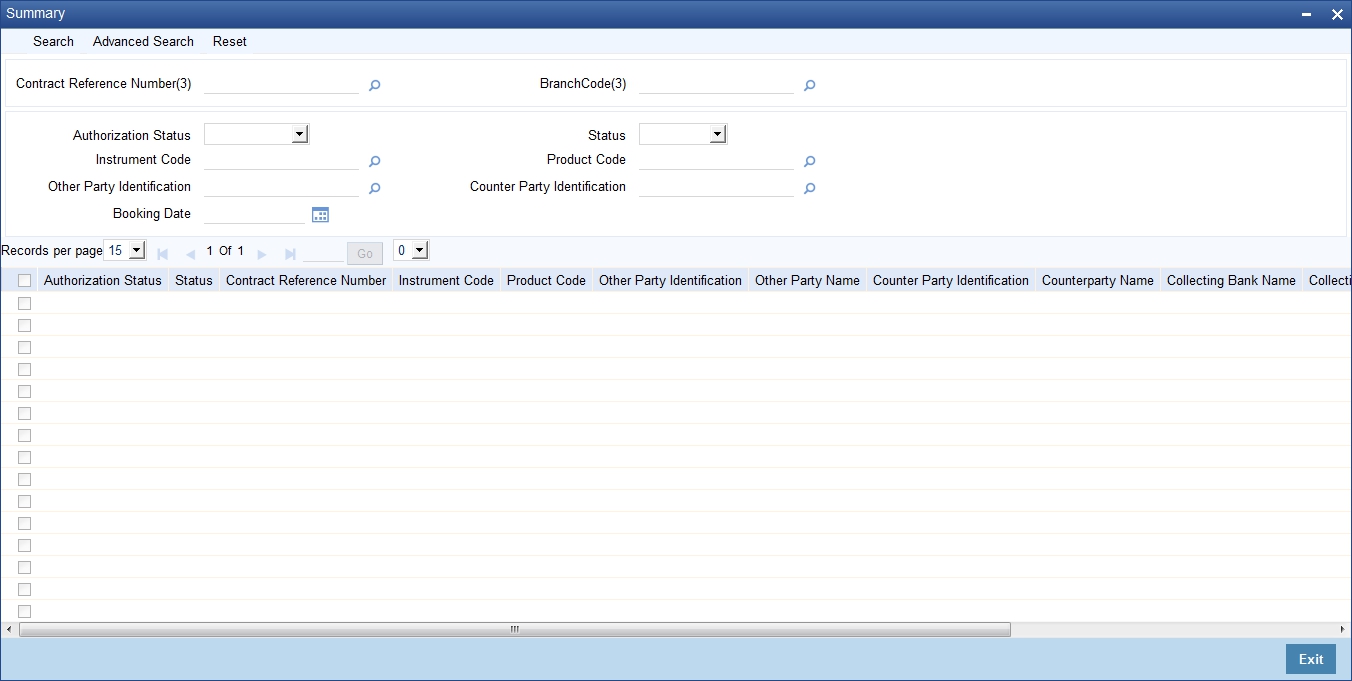
You can search for the records based on one or more of the following parameters:
- Authorization Status
- Contract Reference Number
- Product Code
- Counterparty Identification
- Status
- Instrument Code
- Other Party Identification
- Booking Date
Once you have specified the search parameters, click ‘Search’ button. The system displays the records that match the search criteria. You can view the following details of the resultant records:
- Authorization Status
- Status
- Contract Reference Number
- Instrument Code
- Product Code
- Other Party Identification
- Other Party Name
- Counterparty Identification
- Counterparty Name
- Collecting Bank Name
- Collecting Bank Branch Name
- Booking Date
- Protest
5.4 Outward Cheques for Clearing (PDCs)
This section contains the following topics:
- Section 5.4.1, "Creating Outward Cheques for Clearing (PDCs)"
- Section 5.4.2, "Main Tab"
- Section 5.4.3, "Clearing Tab"
- Section 5.4.4, "Other Details"
- Section 5.4.5, "Viewing Advices"
- Section 5.4.6, "Events"
- Section 5.4.7, "Accounting Entries"
- Section 5.4.8, "Messages"
- Section 5.4.9, "Settlement Details"
- Section 5.4.10, "Viewing Charge Details"
- Section 5.4.11, "MIS Details"
- Section 5.4.12, "Loan Preference Details"
- Section 5.4.13, "Viewing Available Limit Details"
- Section 5.4.14, "Viewing User Defined Fields"
- Section 5.4.15, "Viewing Summary of Outward Cheques Clearing"
5.4.1 Creating Outward Cheques for Clearing (PDCs)
You can capture details for a Outward Cheques for Clearing in the 'Outward Cheques Clearing Details' screen. You can access this screen from the Application Browser. You can also invoke this screen by typing ‘RBDOCCNL’ in the field at the top right corner of the Application tool bar and clicking on the adjoining arrow button.
5.4.2 Main Tab
Click ‘Main’ tab to capture the main details of the contract.
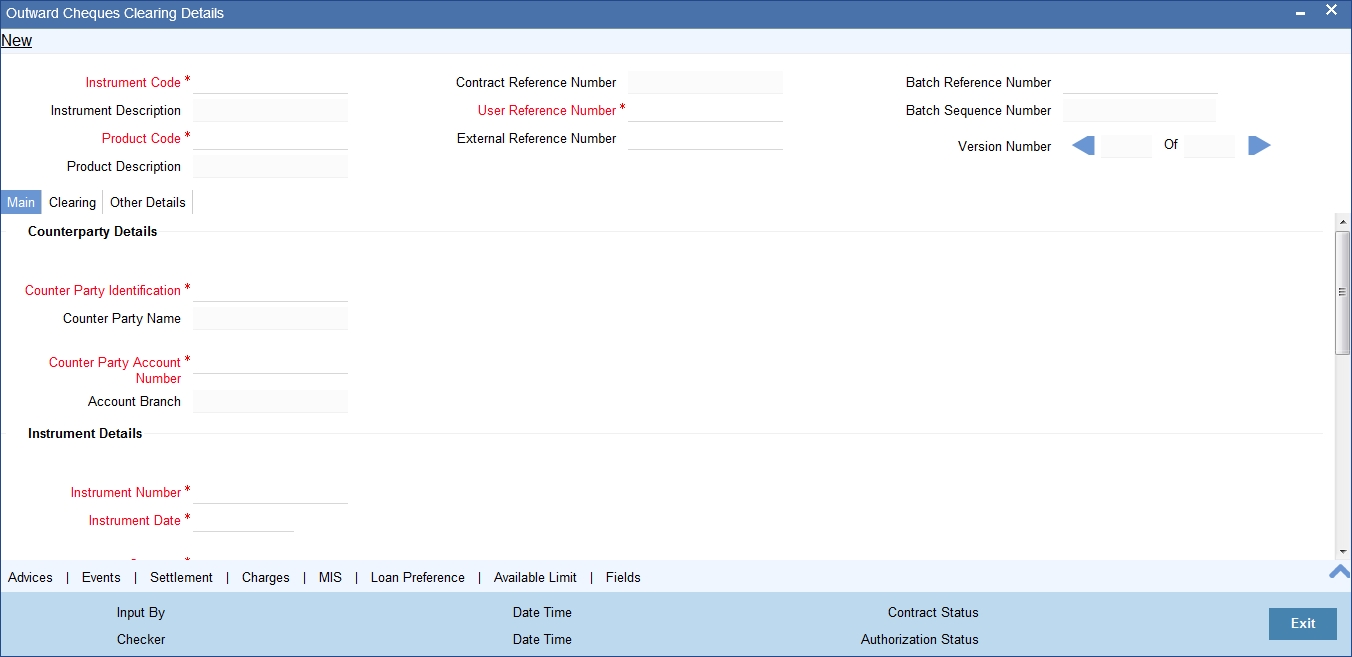
The screen is used for capturing the details of Outward Clearing Cheques (Post Dated Cheques), to initiate the transaction, facilitate financing and collateralization of instrument.
Specify the following details:
Instrument Code
Select the instrument code from the adjoining option list.
Instrument codes associated with product type ‘Outward Cheques for Clearing (PDCs)’ only will be available for selection.
Instrument Description
The system displays the description for the instrument code selected.
Product Code
Select the product code from the adjoining option list. The list contains all the products with product type ‘Outward Cheques for Clearing (PDCs)’.
Product Description
System displays the description for the product code selected.
Contract Reference Number
System generates a Contract Reference Number. This is a unique reference for the bill contract.
This reference is used in all accounting entries and transactions related to this Contract.
User Reference Number
By default, the system displays the contract reference number in this field.You can change the value if needed.
External Reference Number
The External Reference Number is used when the contract is being uploaded from an external system. During Manual booking, system defaults the contract reference number In this field.
Batch Reference Number
Select a batch reference from the option list when an instrument needs to be added to a batch already booked. Batch reference number is applicable only for contracts that are to be considered as part of a batch. The field is applicable for missed out entries in a bulk booking. This is an optional field and you can leave this field blank.
Batch Sequence Number
The system generates the batch sequence number only for contracts that are to be considered as part of a batch.The value is applicable only if the batch reference number is selected.
Counterparty Details
Counterparty Identification
Select the customer Id here.It indicates who has submitted the instrument for collection.
Counterparty Name
The system displays the name of the customer based on the Counterparty ID selected.
Counterparty Account Number
Select the account number of the customer from the adjoining option list.
To view the joint holder’s details of an account and the mode of operation maintained at the account level, place the cursor on the Counterparty Account Number field and press Ctrl+J. The system displays the ‘Joint Holder’ screen.
For more information on the ‘Joint Holder’ screen refer to the section ‘Joint Holder Maintenance’ in the Core User Manual.
Account Branch
The branch to which the customer account belongs is defaulted by the system.
Instrument Details
Instrument Number
Specify the instrument number.In case of cheques, this is the cheque number.
Instrument Date
Specify the instrument date.
Currency
Select the bill/Instrument currency from the adjoining option list.The system defaults the local currency as the bill currency.You can edit this value if needed.
Amount
Specify the bill/cheque amount.
Local Currency Amount
The system defaults the Local Currency Amount on save or subsystem visit.
Other Party Details
Other Party Identification
Select the Other Party ID from the adjoining option list.
Other Party Name
The system displays the other party name, based on the other party Id selected.
Debit Account for Realization
The system defaults the Clearing GL maintained in the Retail Bills branch parameters here.
To view the joint holder’s details of an account and the mode of operation maintained at the account level, place the cursor on the Debit Account for Realization field and press Ctrl+J. The system displays the ‘Joint Holder’ screen.
For more information on the ‘Joint Holder’ screen refer to the section ‘Joint Holder Maintenance’ in the Core User Manual.
Debit Account Branch
System defaults the contract booking Branch into this field.
Additional Details
Booking Date
System displays the application date as booking date.
Activation Date
System displays the date on which the clearing contract will be created for the PDC being booked.It displays the instrument date as the activation date.
Value Date
System displays the date on which the proceeds will be available to the customer.Here the value date is equal to the activation date + customer float.
Auto Liquidation
Check this box to indicate that the bill contract should be liquidated automatically as part of a batch process on the Value Date. This is defaulted from the product and can be modified by the user.
Internal Remarks
Specify your remarks on the transaction.
5.4.3 Clearing Tab
Click ‘Clearing’ tab to capture clearing details.
![]()
Specify the following details:
Clearing Details
Clearing Product
System defaults the value from the product definition screen and you can may modify it using adjoining option list.
Issuer Bank
Select a Bank on which the cheque was issued from the adjoining option list.
Issuer Bank Name
The system displays the name of the issuer bank based on the issuer bank selected.
Issuer Branch
Select the branch code of the issuer bank, from the adjoining option list.
Issuer Branch Name
The system displays the branch name of the issuer bank based on the issuer branch code selected.
End Point
Select the end point mapped for clearing house from the option list. If no value is selected in this field, then the end point value maintained in the ARC maintenance will be defaulted.
Routing No
Select the Routing number from the adjoining option list.List contains values from the bank code maintenance screen.
Clearing Bank
System displays clearing bank code based on the Routing number selected.
Clearing Bank Name
System displays the name of the clearing bank
Clearing Branch
System displays clearing branch code based on the Routing number selected.
Clearing Branch Name
System displays the name of the clearing branch.
Sector Code
System displays the clearing sector code based on the Routing number selected.
5.4.4 Other Details
Click ‘Other Details’ tab to capture additional details.
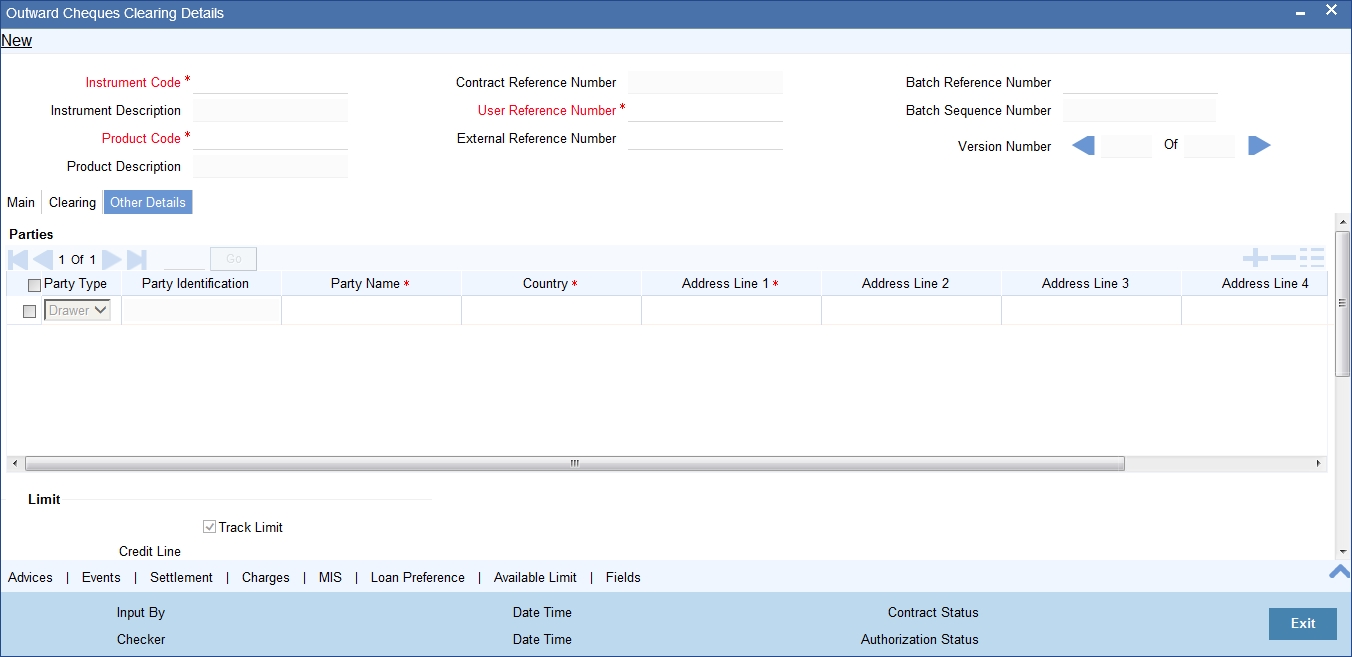
Specify the following details:
Parties
Party Type
System displays the party type here.
Cheque - Counterparty will be defaulted as Drawer and Other party will be defaulted as Payee.
Party Identification
System displays the party Id based on the CIF defined in the main tab.
Party Name
System displays the party name based on the CIF.
Address Line 1
System defaults the value for the field based on the CIF defined.You can edit this value if needed.
Address Line 2
System defaults the value for the field based on the CIF defined.You can edit this value if needed.
Address Line 3
System defaults the value for the field based on the CIF defined.You can edit this value if needed.
Address Line 4
System defaults the value for the field based on the CIF defined.You can edit this value if needed.
Country
System defaults the value for the field based on the CIF defined.You can edit this value if needed.
Language
System defaults the value for the language field based on the CIF defined.You can edit this value if needed.
Limit
Track Limit
Check this box to indicate that the counterparty limits should be tracked.
The value is defaulted by the system as 'Yes'.However,the value can be changed later from 'Yes' To 'No', the system displays an override at the time of saving a record.
Credit Line
Select the credit line from the option list. The list contains only those lines that belong to the counterparty.
It is mandatory to specify the credit line if the instrument is considered for financing and the option ‘Track Limit’ is checked.
Other Party Limit Check Required
Check this box to indicate that the limit of the Other party should to be validated.
Margin
Margin Percentage
System defaults the margin% from instrument maintained.You can edit this value if needed. Here, the value should be between 0 and 99.99.
Finance
Financing
The value for field is defaulted based on the instrument selected. However you can change the value by choosing it from the drop-down list and the available options are:
- Eligible
- Not Eligible
- Financed
Discount Amount
The system calculates and displays this value when the 'Financed' value is selected in 'Financing'.
System calculates the amount being financed as instrument amount less margin.
Collateral
Collateral
Select the value from the adjoining drop-down list and the available options are:
- Eligible
- Not Eligible
- Collateralized
- To be Collateralized
If the instrument is eligible for collateral, then the value shown will be 'Eligible'.If the instrument is not eligible for collateral, then the value shown will be 'Not Eligible'.
Note
If the buyer-seller combination limit or overall buyer exposure limit is not available, then when you save the contract, the system displays an override message ‘Limits not available - instrument will not be considered as collateral’.
The system then updates the value in ‘Collateral’ field to ‘To be collateralized’.
Such contracts are tagged as waiting to be considered for collateral. When the limit is available, the system will consider these contracts for collateralization on a FIFO basis up to the due date of payment or realization, dishonour or protest, whichever is earlier.
However during batch operations, if the contract amount is more than the limit availability, the next contract with the contract amount within the limit will be considered.
Collateral Value
The collateral value of the instrument will be the instrument amount less margin or the Collateral Capital on Bill amount, whichever is lower. When the instrument amount minus margin is more than the cap amount, during save, system provides and override message saying that the collateral value is reduced to the capital amount for single bill.
Collateral Pool
Select the collateral pool Id from the option list. If there is no existing pool, then the system creates the pool and links the collateral to the pool on save.
5.4.5 Viewing Advices
An important part of processing a Retail Bill is the generation of various advices applicable for a contract.
The details of the advices for an event are displayed in the Advices screen. The party type to whom a specific advice should be sent is picked up automatically based on the type of RB being processed and the parties involved.
For Retail Bills Contract details screen click 'Advices' tab.The advices screen is displayed.
The following advice details are displayed here:
Advice
Advice Name
This is the code that identifies the advice that can be generated for a Retail bill. All the advices specified for the product to which the Retail bill is linked will be displayed in this screen. If the advice is not applicable to the bill you are processing you can suppress its generation in the corresponding fields on this screen.
Party Type
This is the type of party involved in the Retail bills. For example, drawee, drawer etc. The party type is displayed based on your specifications in the Parties screen.
Party Identification
System displays the party identification.
Party Name
This is the name of the party involved in the Retail bill to whom the advice is to be sent.
Medium
If advices are to be generated, for the bill you are processing, it is mandatory for you to also specify the medium through which an advice is to be transmitted.An advice that is generated can be transmitted through Mail.
Priority
For messages sent through media l you can specify the priority with which the advice should be generated. By default, the priority of all advices is marked as Normal. You have the option to prioritize advices to one of the following options:
- Normal
- Medium
- High
Suppress
By default, all the advices that have been defined for a product will be generated for the Retail Bills involving it. As certain advices may not be applicable to the bills you are processing, you can suppress its generation by indicating the same in this screen.
Charge Required
The flag is enabled if you have specified to collect charges for advice generation.
5.4.6 Events
Click ‘Events’ button in the ‘Outward Cheques Clearing Details’ screen and invoke the ‘Event’ screen.
Here the following details of the events, that have taken place on the contract, will be displayed along with the pending events.
- Reference Number
- Event Number
- Event Code
- Description
- Event Date
- Authorization Status
- Maker Id
- Checker Id
5.4.7 Accounting Entries
Click ‘Accounting Entries’ button to view the accounting entries for the event.
5.4.7.1 Accounting Entries Tab
You can view the accounting entry details herein ‘Accounting Entries’ tab.
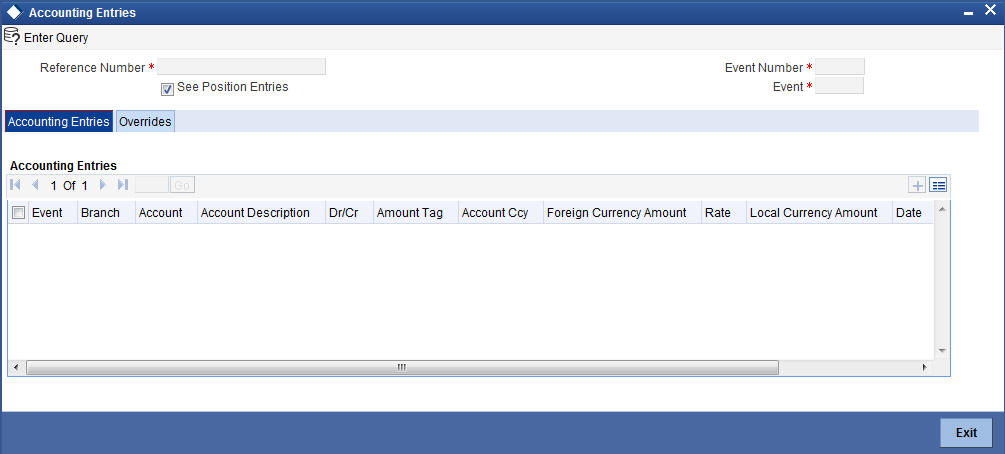
The following details are displayed here:
- Reference Number
- Event Number
- Event
- See Position Entries (enabled)
- Accounting Entries
- Event
- Branch
- Account
- Account Description
- Debit/Credit
- Amount Tag
- Account Currency
- Foreign Currency Amount
- Rate
- Local Currency Amount
- Date
- Value Date
- Transaction Code
5.4.7.2 Overrides Tab
You can view the overrides that occur in the life cycle of a contract in 'Overrides' tab.
The following details are displayed here:
- Reference Number
- Event Number
- See Position Entries (Enabled)
- Event
- Overrides
- Overrides
- Override Status
- Authorized By
- Authorization date Stamp
5.4.8 Messages
Click ‘Message’ button from the ‘Events’ screen and view the list of messages applicable to a particular event in the life cycle of the retail bill.
The following details of a message are displayed:
- The message type
- The Name and ID of the recipient of the message
- The status of the message
- Medium
- DCN
5.4.8.1 Message Details
Here in order to view the text of a message, You need to highlight the message and click ‘Message’ button. Click ‘Exit’ or ‘Cancel’ button to exit the screen.
5.4.9 Settlement Details
You can capture the settlement details of a Retail bill in ‘Settlement Details’ screen. Click ‘Settlement’ button in ‘Outward Cheques Clearing Details’ screen to invoke the ‘Settlement Details’ screen.
5.4.9.1 Account Details Tab
Account Details
The account details that get defaulted include the following:
- Component and its Currency
- Payment Account and its Currency
- Branch of your bank to which the account belongs
Debit/Credit
System displays the debit/Credit value.
Account
Specify the account number here.
Account Description
Specify a brief description on account.
Netting Indicator
In addition to maintaining a netting agreement for each counterparty, you have to specify whether or not the contract is under the netting agreement for each contract involving the counterparty.
Check this box to indicate that you would like to enable the Netting option for the various components (Amount Tags) involved in the transaction. These components could be commission, interest, tax, charges etc.
Rate Code
Specify rate code by selecting appropriate rate code from selection list. Following values are available:
- Buy
- Sell
- Mid
Spread Definition
Select the spread definition from the adjoining drop-down list. The options available are:
- Point
- Percentage
Customer Spread
This defaults from your specification of tenor-wise spread for the relevant Currency Pair in the Customer Spread Maintenance screen. You can change this for a specific contract.
Original Exchange Rate
If the component currency is different from the account currency, the system requires an exchange rate for the conversion. The components of the final exchange rate used for conversion are:
- The Base Rate – this is defaulted from the exchange rate that you have maintained for the currency pair involved. It is computed as Mid Rate +/- Spread (depending on whether it is the Buy Spread or the Sell Spread).
- The Customer Spread - the spread that you have maintained for the specified Counterparty, Currency Pair and Tenor combination in the Customer Spread Maintenance screen is picked up and applied for the customer involved in the deal.
Exchange Rate
For transactions involving any relationship pricing benefit scheme, the customer specific exchange rate derived by adding the original exchange rate and the customer spread maintained for the relationship pricing scheme, gets displayed here.
If Relationship Pricing is not applicable, Exchange Rate will be the same as the Original Exchange Rate.
Negotiated Cost Rate
Specify the negotiated cost rate.
Negotiation Reference
Specify the negotiation reference here.
Generate Message
Enable this option if a payment messages has to be generated for the settlement instruction.
IBAN Account Number
The system displays the IBAN Account Number here.
Euro In Currency and Euro In Amount
SWIFT messages (MT103/MT202) generated towards settlement can furnish the value of the settlement amount in both the settlement account currency, and a Euro Related Information (ERI) currency of your choice. If you opt to furnish the ERI value of the amount, you have to enter the following in this screen:
- The ERI currency
- The ERI Amount
The system defaults to the ERI currency specified for the customer and currency combination.You can change the default ERI currency. The ERI amount that you specify will be validated against the Tolerance Limit specified for the ERI currency (in the Currency Maintenance screen).
5.4.9.2 Payment Details Tab
The details of the payment have to be specified in the ‘Payment Details’ screen.
The following details are captured:
Payment By
Indicate the method of payment for both Outgoing as well as Incoming Payments, for a Branch, Account and Currency combination. The following options are available:
- Instrument (settlement is done through a Cheque, MCK etc.)
- Message (payment is made by means of a SWIFT Message)
- Clearing (the transaction is a local payment transaction and the settlement is routed through the Clearing House of the bank)
Note
You can indicate the payment method as ‘Clearing’ only,
If the payment currency is the local currency of the branch
If it is one of the clearing currencies defined for the branch
If you have selected ‘ALL’ in the currency field
No payment message will be generated for settlements routed through a Clearing House.
Depending on the method in which you want to settle the contract, you should specify either Instrument or Message details.
Details Of Charge
In this section you can maintain details of the party who will bear the charges incurred in
processing the transaction. It could be either:
- Remitter – All Charges
- Beneficiary – All Charges
- Remitter – Our Charges
Details of Payment
Here you can specify information, from the Ordering Party to the Beneficiary Customer, about the reason for the payment.
This field can contain reference numbers, invoice numbers or any other details, which will enable the Beneficiary to identify the transaction. This information is to be passed through the payment chain to the Beneficiary.
Banking Priority
Select the priority of the payment messages from the drop down list. The options available are:
- Highly Urgent
- Urgent
- Normal
The default value is Normal.
Sender to Receiver Information
Information 1 to 6
This could be instructions or additional information for the Receiver, Intermediary, Account With Institution or Beneficiary Institution.
Clearing Network
Network Code
Indicates the clearing network code.
Instrument Details
If you opt to settle a contract with an instrument, you should specify the type of instrument that you would use. For example, you could settle a contract using a Manager’s Cheque, a Cheque or a Demand Draft. You should also specify the number that identifies the instrument. This number will be printed on the instrument.
If the settlement is through an instrument, you cannot specify party details.
Cover Details
Cover Required
Check this box if cover is required.
Cover By
Select the cover by as Message or Clearing.
RTGS Details
RTGS Payment
If the settlement chosen is one of the RTGS Nostro that is, RTGS outgoing Nostro account in case of Outgoing customer and Bank transfer and RTGS incoming Nostro in case of outgoing Direct Debit transfer then the system will check this check box as per the validations done in RTGS Network. The user cannot change this value.
RTGS Network
If in a RTGS Network the accounts are maintained as ‘Pay account’ or ‘Receiver Account’ during the save of settlement instruction, then a set of validations will be performed as mentioned below:
For Pay message, it will validate the intermediary (if intermediary is not present, the Account with Institution (AWI) will be validated and if the AWI is also not present then receiver will be validated) is a RTGS participant.
For Pay+ Cover message, it will validate that a receiver correspondent is a RTGS network participant.
If the above conditions are satisfied, the RTGS Network will be updated and the system will check RTGS Payments check box.
5.4.9.3 Parties Details Tab
When you settle a contract, funds may have to pass through a series of banks before it actually reaches the Ultimate Beneficiary. In the Parties screen, you can capture details of all parties involved in a contract.
Specify the following details:
Intermediary Reimbursement Institution
Reimbursement Institution 1 to 5
An Intermediary Reimbursement Institution is the financial institution between the Sender’s Correspondent and the Receiver’s Correspondent, through which the reimbursement of the funds will take place.
Country
Specify the country of the intermediary reimbursement institution. This adjoining option list displays all valid country codes maintained in the system. You can choose the appropriate one.
Intermediary
Intermediary 1 to 5
The Intermediary in a contract refers to the financial institution, between the Receiver and the ‘Account with Institution’, through which the funds must pass.
The Intermediary may be a branch or affiliate of the Receiver or the ‘Account With Institution’, or an entirely different financial institution. Here you can enter either the:
- ISO Bank Identifier Code of the bank
- Name and address of the Bank
Country
Specify the country of the intermediary institution. This adjoining option list displays all valid country codes maintained in the system. You can choose the appropriate one.
Receiver Correspondent
Correspondent 1 to 5
The Receiver’s Correspondent is the branch of the Receiver or another financial institution at which the funds will be made available to the Receiver.
You can enter one of the following:
- ISO Bank Identifier Code of the bank
- The branch of the Receiver’s Correspondent
- Name and address of the Receiver’s Correspondent
Country
Specify the country of the receiver’s correspondent. This adjoining option list displays all valid country codes maintained in the system. You can choose the appropriate one.
Receiver of Cover
Specify the details of the Receiver of the cover message, which can be any one of the following:
- ISO Bank Identifier Code of the bank
- Branch of the Receiver
- Name and address of the Receiver
Account With Institution
Account With Institution 1 to 5
An Account with Institution refers to the financial institution, at which the ordering party requests the Beneficiary to be paid. The ‘Account with Institution’ may be a branch or affiliate of the Receiver, or of the Intermediary, or of the Beneficiary Institution, or an entirely different financial institution.You can enter one of the following:
- ISO Bank Identifier Code of the bank
- The branch of the Receiver’s Correspondent
- Name and address of the Receiver’s Correspondent
- Other identification codes (for example, account number)
If no selection is made for Account with Institution, all beneficiaries will appear for selection in the option list for Ultimate Beneficiaries in the Parties tab 2 screens. If a particular Ultimate Beneficiary is selected in Parties tab 2, then the Account with Institution for the selected ultimate beneficiary will appear by default in the AWI field in the Parties tab 1 screen.
Country
Specify the country of the account with institution. This adjoining option list displays all valid country codes maintained in the system. You can choose the appropriate one.
Receiver of Cover
Specify the details of the receiver of the cover message, which can be any one of the following:
- ISO Bank Identifier Code of the bank
- Branch of the Receiver
- Name and address of the Receiver
- Other identification codes (for example, account number)
5.4.9.4 Parties Details Tab
Specify the following details:
Ordering Institution
Ordering Institution 1 to 5
The Ordering Institution is the financial Institution, which is acting on behalf of itself, or a
customer, to initiate the transaction. In this field, you can enter one of the following:
- The ISO Bank Identifier Code of the Ordering Institution
- The branch or city of the Ordering Institution
- The Name and address of the Bank
Country
Specify the country of the ordering institution. This adjoining option list displays all valid country codes maintained in the system. You can choose the appropriate one.
Beneficiary Institution
Beneficiary Institution 1 to 5
Specify the details of the beneficiary institution.
Country
Specify the country of the beneficiary institution. This adjoining option list displays all valid country codes maintained in the system. You can choose the appropriate one.
Ordering Customer
Ordering Customer 1 to 5
The Ordering Customer refers to the customer ordering the transfer. Here, you can enter the name and address or the account number of the Customer, ordering the transaction. You will be allowed to enter details in this field only if you have initiated a customer transfer (MT 103 and MT 102).
Country
Specify the country of the ordering customer. This adjoining option list displays all valid country codes maintained in the system. You can choose the appropriate one.
Ultimate Beneficiary
Ultimate Beneficiary 1 to 5
Specify details of the institution in favour of which the payment is made. It is in reality the bank, which services the account of the Ultimate Beneficiary. This is applicable only in the case of bank transfers and not for customer transfers. You will be allowed to make entries into this field only for Bank Transfers (when the remitter and beneficiary of the transfer are financial institutions –MT 202). Here you can enter either:
- The ISO Bank Identifier Code of the Beneficiary Institution
- The Name and Address of the Beneficiary Institution
Country
Specify the country of the beneficiary institution. This adjoining option list displays all valid country codes maintained in the system. You can choose the appropriate one.
Beneficiary Institution For Cover
For Cover 1 to 5
Specify details of the institution in favour of which the payment is made. Here, you will be allowed to make entries into this field only for Bank transfers (MT 200 or MT 202).
In this field you can enter either the:
- The ISO Bank Identifier Code of the Beneficiary Institution
- The Name and Address of the Beneficiary Institution
Country
Specify the country of the beneficiary institution for cover. This adjoining option list displays all valid country codes maintained in the system. You can choose the appropriate one.
External Counterparty Details
Counterparty Bank
Select the Counterparty Bank from the adjoining option list.
Counterparty Account
Select the Counterparty Account from the adjoining option list.All the Counterparty Accounts pertaining to this Bank will appear for selection.
Counterparty Name
On selecting the Counterparty Account, the system defaults the Counterparty Name as maintained for that account.
Agreement Id
Specify the Agreement ID of the counterparty in order to facilitate a cross-referencing between the Payment and the Direct Debit instruction when a reversal of payment is carried out due to rejection of the outbound DD.
Post Accounting
The Post Accounting option is defaulted from the Settlements to Payment Product and UDF Mapping screen.
Clearing Network
Here, The Clearing Network in settlement screen will be defaulted with 'Clearing Network' maintained in local clearing section in settlement instruction.
5.4.9.5 Local Clearing Tab
Specify the following details:
Message Details
Ultimate Bank Code
Select the ultimate bank code from the adjoining option list.
Sender Receiver Participant
Specify the sender receiver participant.
Additional Identifier
Specify the additional identifier.
SORBNET Specific Details
Payment Code
Specify the payment code.
Additional Information
Specify additional information, if any.
ZUS Transaction
Nip Payer
Specify the nip payer.
Payer Identifier
Specify the payer identifier.
Declaration
Specify the declaration.
Supplement Id
Select the supplement Id from the adjoining drop-down list.
Payment Type
Select the payment type from the adjoining drop-down list.
No of Declaration
Specify the number of declaration.
FFT
Free text 1, 2 and 3
Specify free text, if any.
Receiver Information
Receiver Name
Specify the receiver name.
Address 1,2 and 3
Specify the address here.
Repair Reason
Reason 1, 2, 3 and 4
Specify the reason for repair.
Send Receiver Information
Information 1, 2, 3, 4, 5 and 6
Specify the sender receiver information here.
Additional Information
Information 1, 2, 3 and 4
Specify additional information, if any.
5.4.9.6 Other Details Tab
Specify the following details:
Regulatory Reporting Details
Bank Operation Code
Specify the bank operation code here.The options available are SPRI, SSTD, SPAY and CRED.
Regulatory Report 1 to 3
Select the Regulatory Reporting Details from the option list displaying the following values:
- /BENEFRES/
- /ORDERRES/
Time Indicators
Transaction Code
This is the code for the transaction type.
Time Indicator 1 to 3
Specify one or several time indication(s) here. Select the time indication code from the following values available in the adjoining option list:
- /CLSTIME/ - Time by which funding payment must be credited, with confirmation, to the CLS Bank's account at the central bank, expressed in CET.
- /RNCTIME/ - Time at which a TARGET payment has been credited at the receiving central bank, expressed in CET
- /SNDTIME/ - Time at which a TARGET payment has been debited at the sending central bank, expressed in CET
Instruction Code Details
Instruction Code 1 to 6
Specify the instruction codes here.You can add a maximum of six instruction codes. However, you cannot repeat any code that has already been specified. The options available are:
- CHBQ
- TELE
- PHON
- PHOI
- REPA
- INTC
- TELI
- SDVA
- PHOB
- TELB
- HOLD
- CORT
Envelope Contents
Envelope Contents 1 to 6
Specify the envelope contents here.
5.4.10 Viewing Charge Details
Click ‘Charges’ button in the ‘Outward Cheques Clearing Details’ screen to view the charge details.
The following fields are displayed here.
- Contract Reference
Charge Association
- Creation ESN
- Component
- Rule
- Description
- Consider as Discount
- Waiver
- Accrual Required
Charge Application
- Creation ESN
- Component
- Tag Currency
- Tag Amount
- Charge Currency
- Charge Amount
- Consider as Discount
- Waiver
- Liquidated
Charge Liquidation
- Event Sequence Number
- Component
- Charge Currency
- Charge Amount
- Liquidated
5.4.11 MIS Details
To invoke the MIS details screen for a contract, click on the ‘MIS’ button in the ‘Outward Cheques Clearing Details’ screen while processing the contract.
For a contract, the transaction type of MIS class, the cost code and pool code will be picked up from the product under which the contract is processed. The composite MIS code will be picked up from the definition made for the customer, on behalf of whom the contract is being processed.
The interest calculation method for the refinancing rates of the pool will also be picked up, by default, from Pool Codes maintenance and these can be changed. For an account, the transaction type of MIS class will be picked up from the account class, along with the cost codes and pool codes. The composite type of MIS class will be defaulted from those defined for the customer. These too can be changed.
5.4.12 Loan Preference Details
To invoke the 'Loan Preference' screen for a contract, click on the ‘Loan Preference’ button in the ‘Outward Cheques Clearing Details’ screen while processing the contract.In this screen you can maintain the details for the loan.
To recall, you have the option to create a loan from Retail bills module. In case you opt for this option, the preferences you maintain in this screen will be used to create a loan during liquidation of Retail bills.
Specify the following details:
Contract Reference
The system displays the contract reference number.
Contract Currency
The system will display the currency of the contract. You cannot change this value.
Product
The system displays the product code of CL with which the loan account is created. The value is defaulted from Retail bills product maintenance.
Counterparty
The system displays the counter party details.
Currency
The system displays the currency of the loan. Here, Instrument Currency will be defaulted.
Latest ESN
The system displays the latest event sequence number of the contract.
Product Description
The system displays the description of the CL product code here.
Tenor
Here it indicates the tenor for each loan being maintained. The tenor is expressed in days. The minimum/maximum tenor specified in the loan product underlying the contract has to be adhered to.
Units
Indicates the units in which the tenor is specified.
Loan Contract Reference Number
The system displays the reference number of the loan contract.
Rate
Rate Code
Select the rate to be applied for the conversion.The following are the options available:
- Mid Rate
- Buy/Sell Rate
Exchange Rate
For a customer availing any Relationship Pricing scheme, the customer specific exchange rate derived by adding the original exchange rate and the customer spread maintained for the relationship pricing scheme gets displayed here.If Relationship Pricing is not applicable, Exchange Rate will be the same as the Original Exchange Rate.
Rate Type
The Rate Type indicates whether the rate to be applied for the conversion is the Buy rate, Mid Rate or the Sell Rate. Select the appropriate rate type from the Option list.
Maximum
The minimum rate variance% allowed for exchange rate is displayed here.
Minimum
The maximum rate variance% allowed for exchange rate is displayed here.
Payment Mode
The system displays the payment mode.It indicates whether the transaction is a debit or credit.
Loan Value Date
The system displays the debit value date.
Maturity Date
The system computes and displays the maturity date, based on the entries made to the previous fields.
User Defined Element ID
Specify the unique identification for the user defined element. The adjoining option list displays all valid IDs maintained in the system. You can choose the appropriate one.
UDE Description
Specify the description for the UDE defined above.
Rate as of
Specify a unique rate value here.
Usage
Select the usage type from the adjoining drop-down list and the available options are:
- Periodic
- Automatic
UDE value
Specify the value for the UDE ID.
5.4.13 Viewing Available Limit Details
To view the limit availability of counterparty and other party involved in a transaction, click on the ‘Available Limit’ button in the ‘Outward Cheques Clearing Details’ screen while processing the contract.
The following details are displayed:
Counterparty Limit
System displays the available limit for the credit line selected in the other details tab.
Other Party Overall Limit
System displays the available limit of the Other Party selected in the main tab.
Drawer/Drawee Limit
System displays the available limit of the Drawer – Drawee combination limit.
5.4.14 Viewing User Defined Fields
The UDFs linked to a particular product will be available when a contract is processed under that product. In the 'Outward Cheques Clearing Details' contract input screen, click ‘Fields’ button to invoke the ‘Fields’ screen.
5.4.15 Viewing Summary of Outward Cheques Clearing
You can view a summary of outward cheques clearing in ‘Outward Cheques Clearing Details’ screen. To invoke this screen, type ‘RBSOCCNL’ in the field at the top right corner of the application toolbar and click the adjoining arrow button.
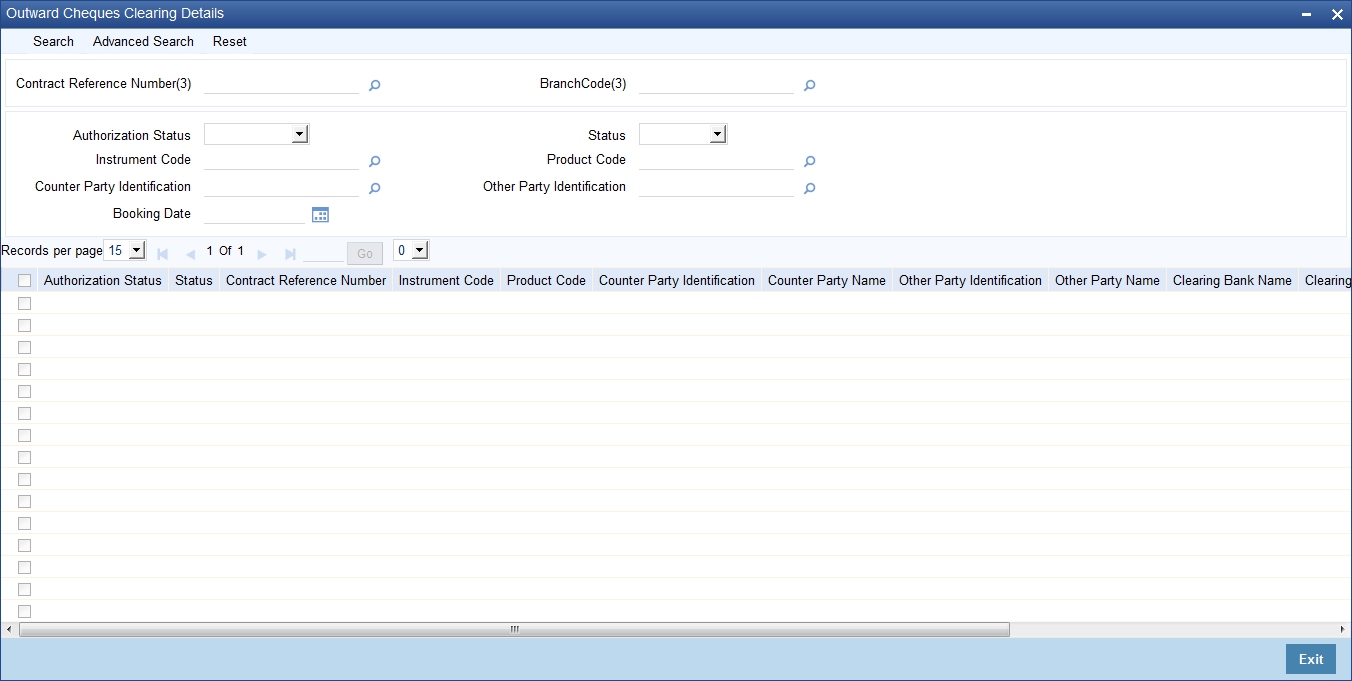
You can search for the records based on one or more of the following parameters:
- Authorization Status
- Contract Reference Number
- Product Code
- Other Party Identification
- Status
- Instrument Code
- Counterparty Identification
- Booking Date
Once you have specified the search parameters, click ‘Search’ button. The system displays the records that match the search criteria. You can view the following details of the resultant records:
- Authorization Status
- Status
- Contract Reference Number
- Instrument Code
- Product Code
- Counterparty Identification
- Counterparty Name
- Other Party Identification
- Other Party Name
- Clearing Bank Name
- Clearing Branch Name
- Booking Date
- Instrument Date
5.5 Outward Retail Bills/Cheques for Collection in Bulk
This section contains the following topics:\
- Section 5.5.1, "Creating Outward Retail Bills/Cheques for Collection in Bulk"
- Section 5.5.2, "Viewing Available Limit Details"
- Section 5.5.3, "Viewing Override Details"
- Section 5.5.4, "Viewing Summary of Bulk Outward Retail Bills/Cheques for Collection"
5.5.1 Creating Outward Retail Bills/Cheques for Collection in Bulk
You can book multiple retail outward bill/cheques using 'Bulk Outward Retails Bills-Cheques for Collection' screen. You can also invoke this screen by typing ‘RBDBOCOL’ in the field at the top right corner of the Application tool bar and clicking on the adjoining arrow button.
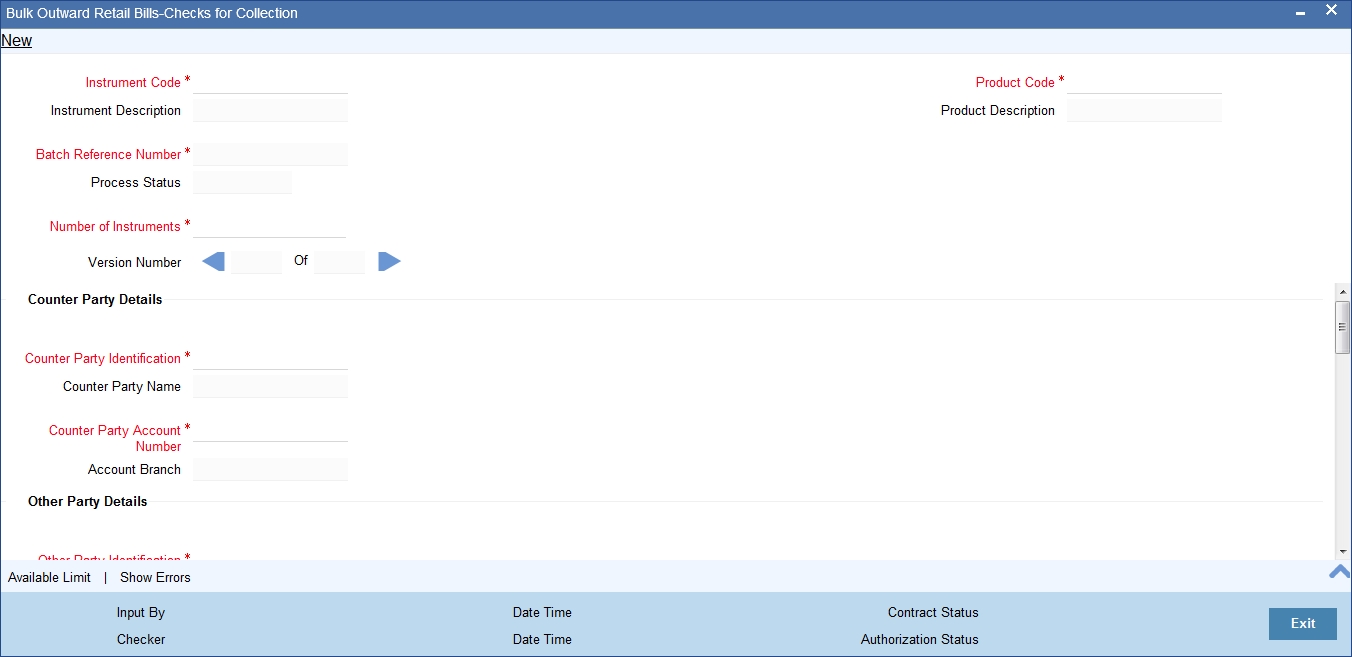
Here all the common details of instruments such as instrument code, product code, financing or collateral etc will be captured as header and the individual instrument details such as amount, maturity date will be captured each contract wise in the multi record grid.
On save the system validates the inputs in the header section and displays the relevant errors or overrides.There will not be any override messages during authorization of the bulk transaction. Contract creation for individual entry in the bulk input and the accounting entries generation, advice generation will happen as part of a background process after authorization of the bulk input.
If limit validation fails for even a single entry in the bulk input, system will not consider all the entries in the batch for financing. They all will be created as simple collection.
After authorization of bulk input, the background process will create the contract and update the contract reference numbers in the bulk-input screen. If any contract fails, system will show the contract in ‘Hold’ stage.
All the failed transactions can be viewed in the bulk input screen.
Specify the following details:
Instruction Code
Select an Instrument Code from the adjoining option list.
Instrument Description
System displays the description of the instrument code selected.
Batch Reference Number
System generates and displays a unique reference number for the batch of instruments being booked.
Process Status
The System displays the process status value as either processed or unprocessed.
Product Code
Select a product code from the adjoining option list.
Product Description
System displays the description of the Product code selected.
Number of Instruments
Specify the number of records in a multi record section.
Counter Party Details
Counterparty Identification
Select a Customer Id from the adjoining option list.The list contains the Id's of the customers who has submitted the instruments.
Counterparty Name
The System displays the counter party name based on the counter party id selected above.
Counterparty Account Number
Select the account number of the customer from the adjoining option list.
Note
Account number of the selected counter party is displayed.
If the counter party account number is selected first, then all the accounts will be listed. once account number is selected, then the counterparty id and name will be defaulted.
To view the joint holder’s details of an account and the mode of operation maintained at the account level, place the cursor on the Counterparty Account Number field and press Ctrl+J. The system displays the ‘Joint Holder’ screen.
For more information on the ‘Joint Holder’ screen refer to the section ‘Joint Holder Maintenance’ in the Core User Manual.
Account Branch
System displays the name of the branch associated with the account.It generates an override if the account branch is different from the transaction branch.
Other Party Details
Other Party Identification
Select the Other Party Id from the adjoining option list.
Other Party Name
The system displays the other party name, based on the other party Id selected.
Payment Mode
Select the payment mode for realization of outward instruments from the drop down list. The list displays the following values:
- Normal
- Clearing
Debit Account for Realization
Select the account number of the other party or GL or Nostro which should be debited. Alternatively, you can select the debit account from the option list.
Note
If the ‘Payment Mode’ selected is ‘Clearing’ then the option list will have only the clearing GL maintained in the ‘Clearing GL for Outward Collection in RB Branch parameters’. If not selected, on clicking ‘Default’ button, this clearing GL will be defaulted, which can be edited.
To view the joint holder’s details of an account and the mode of operation maintained at the account level, place the cursor on the Debit Account for Realization field and press Ctrl+J. The system displays the ‘Joint Holder’ screen.
For more information on the ‘Joint Holder’ screen refer to the section ‘Joint Holder Maintenance’ in the Core User Manual.Debit Account Branch
The system displays a debit account branch based on the debit account for realization selected.
Collecting Bank Details
Bank Code
Select the code of the collecting bank from the adjoining option list.
Bank Name
System displays the name of the collecting bank.
Branch Code
System displays the branch of the collecting bank or the same bank’s branch to which the instrument is being sent.
Branch Name
System displays the name of the branch.
Additional Details
Booking Date
System displays the date on which the batch is booked.
Currency
Select the instrument currency from the adjoining option list.The system defaults the local currency as the instrument currency.You can edit this value if needed.
Track Limit
Check this box to indicate that the counterparty limits should be tracked.
Credit Line
Select the credit line from the option list. The option list displays all lines that belong to the counterparty. It is applicable only if the track limit is set to ‘YES’.
Margin Percentage
System defaults the margin% from instrument maintained.You can edit this value if needed.
You can specify a number between 0 and 99.99.
Other Party limit check required
Check this box to indicate that the other party limits should be tracked.
Protest
Check this box to indicate that the instrument should be protested in case of non-payment by the drawee.
The value available for instrument is defaulted here. You can change the value defaulted from protest required to not required, but cannot change the value from protest not required to protest required.
Financing
The value for field is defaulted based on the instrument selected.However you can change the value by choosing it from the drop-down list and the available options are:
- Eligible
- Not Eligible
- Financed
Collateral
Select the value from the adjoining drop-down list and the available options are:
- Eligible
- Not Eligible
- Collateralized
- To be Collateralized
It indicates if the instruments in the batch are being considered for collateral or not.
Note
If the buyer-seller combination limit or overall buyer exposure limit is not available, then when you save the contract, the system displays an override message ‘Limits not available - instrument will not be considered as collateral’.
The system then updates the value in ‘Collateral’ field to ‘To be collateralized’.
Such contracts are tagged as waiting to be considered for collateral. When the limit is available, the system will consider these contracts for collateralization on a FIFO basis up to the due date of payment or realization, dishonour or protest, whichever is earlier.
However during batch operations, if the contract amount is more than the limit availability, the next contract with the contract amount within the limit will be considered.
Collateral Pool
Select the collateral pool Id from the adjoining option list.
Contract Reference Number
System generates and displays a unique reference number for the contract being booked.
Instrument Number
Specify the instrument number.In case of cheques, this is the cheque number.
Instrument Date
Select the bill/cheque date as the instrument date.
Amount
Specify the bill/cheque amount.
LCY Amount
The system defaults the Local Currency Amount on save.
Maturity Date
Specify the maturity date of a bill/cheque.For cheques, the instrument date is defaulted as the maturity date.
Discount Amount
System computes and displays the amount being financed as instrument amount less margin.
Collateral Value
The collateral value of the instrument will be the instrument amount less margin or the Collateral Cap on Bill amount, whichever is lower. When the instrument amount minus margin is more than the cap amount, during save, system will provide override message saying that the collateral value is reduced to the cap amount for single bill
Internal Remarks
Specify your remarks on the transaction.
Process Status
System displays the process status value here.
Once you have captured the details, save the record. The system creates the contract once the record has been authorized.
Note
Note the following:
In case of a collection without financing or collateralizing, the system generates bill advices, passes accounting entries and updates the instrument status and instrument location as part of the background process for contract creation.
In case of a collection with financing, the system triggers creation of loan contract in Retail Lending module for the finance. The loan account is created under the product code specified in retail bills product. The system also generates bill advices, passes accounting entries and updates the instrument status and instrument location.
In case of collection with collateralizing, once the bulk input is authorized, the system triggers creation of collateral in ELCM module as part of background process for contract creation. The system also generates bill advices, passes accounting entries and updates the instrument status and instrument location as part of the process.
After authorization, if the contract creation fails, then the system will update the process status as ‘Hold’ or ‘Failed’ as the case may be. You can view the errors using ‘Show Errors’ button.
5.5.2 Viewing Available Limit Details
To view the limit availability of a counterparty and other party involved in a transaction, click on the ‘Available Limit’ button in the ‘Bulk Outward Retail Bills-Cheques for Collection’ screen while processing the contract.
The following details are displayed:
- Available limit for the credit line selected in the other details tab
- Available limit of the other party selected in the main tab
- Available limit of the Drawer – Drawee combination limit
5.5.3 Viewing Override Details
Click ‘Show errors’ button from the ‘Bulk Outward Retails Bills-Cheques for Collection’ screen to view the list of overrides in the bulk input of Outward Retail Bills-Cheques for Collection.
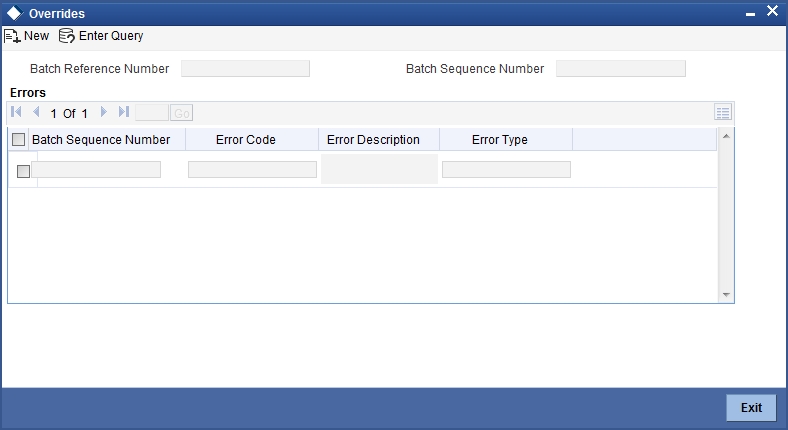
The following details are displayed here:
Batch Reference Number
The system displays a batch reference number of the contracts that are considered as part of a batch.
Batch Sequence Number
The system displays the batch sequence number of the contracts that are considered as part of a batch.
The system displays the following details of the overrides:
- Batch Sequence Number
- Error Code
- Error Description
- Error Type
5.5.4 Viewing Summary of Bulk Outward Retail Bills/Cheques for Collection
You can view a summary of multiple outward retail bills/cheques for collection as a batch using 'Bulk Outward Retail Bills-Checks for Collection’ screen.You can invoke this screen by typing ‘RBSBOCOL’ in the field at the top right corner of the Application tool bar and clicking on the adjoining arrow button.
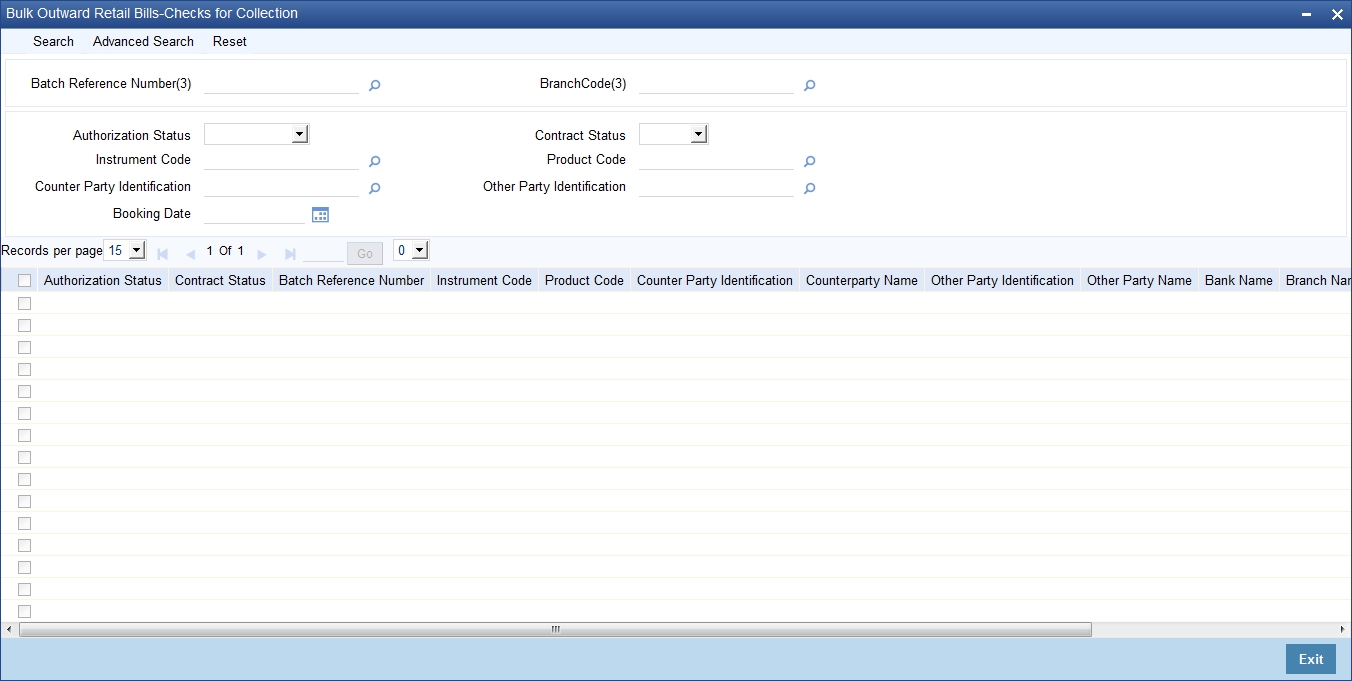
You can search for the records based on one or more of the following parameters:
- Authorization Status
- Batch Reference Number
- Product Code
- Other Party Identification
- Contract Status
- Instruction Code
- Counterparty Identification
- Booking Date
Once you have specified the search parameters, click ‘Search’ button. The system displays the records that match the search criteria. You can view the following details of the resultant records:
- Authorization Status
- Contract Status
- Batch Reference Number
- Instruction Code
- Product Code
- Counterparty Identification
- Counterparty Name
- Other Party Identification
- Other Party Name
- Bank Name
- Branch Name
- Booking Date
- Protest
5.6 Outward Cheques for Clearing (PDCs) in Bulk
This section contains the following topics:
- Section 5.6.1, "Creating Outward Cheques for Clearing (PDCs) in Bulk"
- Section 5.6.2, "Viewing Available Limit Details"
- Section 5.6.3, "Viewing Override Details"
- Section 5.6.4, "Viewing Summary of Bulk Outward Cheques for Clearing"
5.6.1 Creating Outward Cheques for Clearing (PDCs) in Bulk
You can book multiple outward cheques for clearing as a batch using 'Bulk Outward Cheques for Clearing' screen. You can also invoke this screen by typing ‘RBDBOCCL’ in the field at the top right corner of the Application tool bar and clicking on the adjoining arrow button.
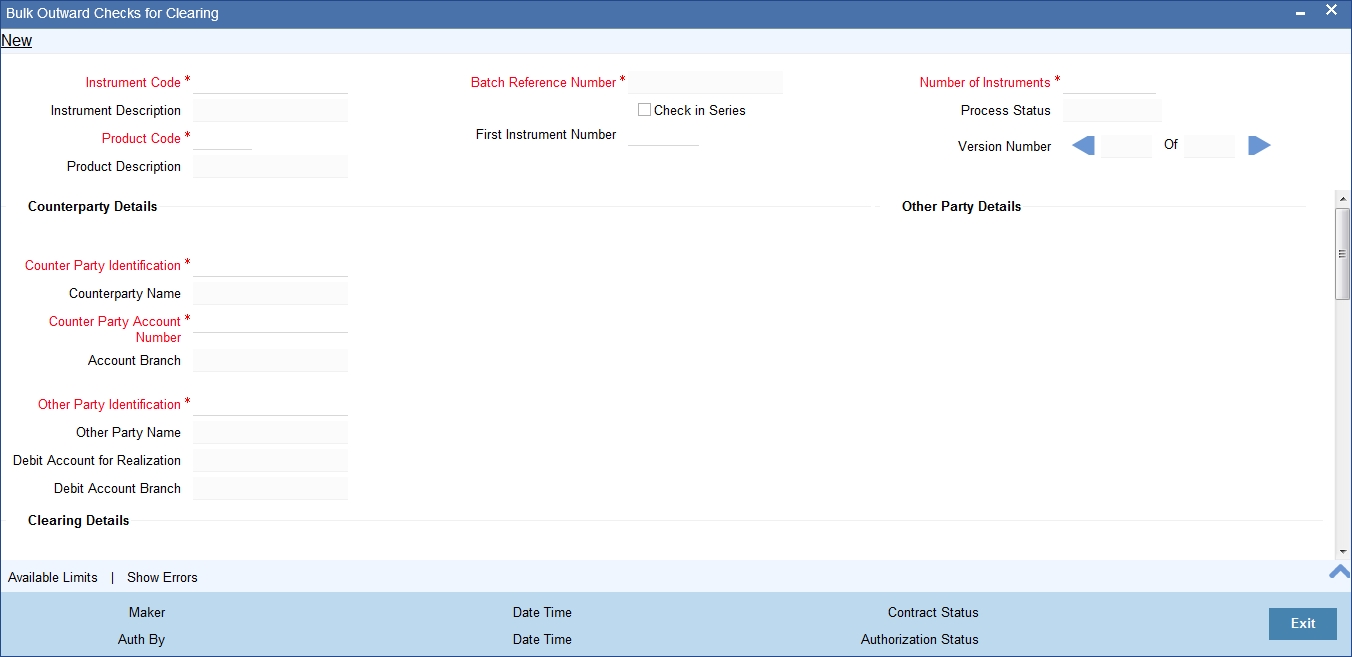
Here all the common details of instruments such as instrument code, product code, financing or collateral etc will be captured as header and the individual instrument details such as amount, maturity date will be captured each contract wise in the multi record grid.
Specify the following details:
Instrument Code
Select an Instrument Code from the adjoining option list. The list contains the Instrument codes associated with the product type ‘Outward Cheques for Clearing (PDCs)’ for selection.
Instrument Description
System displays the description of the instrument code selected.
Product Code
Select a product code from the adjoining option list. The list contains the product codes associated with the instrument code selected above.
Product Description
System displays the description of the Product code selected.
Batch Reference Number
System generates and displays a unique reference number for the batch of instruments being booked.
Check In Series
Check this box to indicate that the cheques that were booked are in series or not.
First Instrument Number
Specify an Initial number in the series of cheques.The field is Mandatory if 'checks in series' flag is selected.
Number of Instruments
Specify the number of instruments that are booked.
Process Status
System displays the process status value here.
Counter Party Details
Counterparty Identification
Select a Customer Id from the adjoining option list.The list contains the Id's of the customers who has submitted the instruments.
Counterparty Name
The system displays the name of the customer based on the Counterparty ID.
Counterparty Account Number
Select the account number of the customer from the adjoining option list.
To view the joint holder’s details of an account and the mode of operation maintained at the account level, place the cursor on the Counterparty Account Number field and press Ctrl+J. The system displays the ‘Joint Holder’ screen.
For more information on the ‘Joint Holder’ screen refer to the section ‘Joint Holder Maintenance’ in the Core User Manual.
Account Branch
System displays the name of the branch associated with the account.
Other Party Details
Other Party Identification
Select the Other Party Id from the adjoining option list.
Other Party Name
The system displays the other party name, based on the other party Id selected.
Debit Account for Realization
The system displays the Clearing GL maintained in the Retail Bills branch parameters here.
To view the joint holder’s details of an account and the mode of operation maintained at the account level, place the cursor on the Debit Account for Realization field and press Ctrl+J. The system displays the ‘Joint Holder’ screen.
For more information on the ‘Joint Holder’ screen refer to the section ‘Joint Holder Maintenance’ in the Core User Manual.
Debit Account Branch
System defaults the contract booking branch into this field.
Clearing Details
Clearing Product
System defaults the value from the product definition screen and you can may modify it using adjoining option list.
Issuer Bank
Select a bank on which the cheque was issued from the adjoining option list.
Issuer Bank Name
The system displays the name of the issuer bank based on the issuer bank selected.
Issuer Branch
Select the branch code of the issuer bank from the adjoining option list.
Issuer Branch Name
The system displays the branch name of the issuer bank based on the issuer branch code selected.
End Point
Select the end point mapped for clearing house from the option list. If no value is selected in this field, then the end point value maintained in the ARC maintenance will be defaulted.
Routing No
Select a routing number from the adjoining option list.
Clearing Bank
System displays clearing bank code based on the Routing number selected.
Clearing Bank Name
System displays the name of the clearing bank.
Clearing Branch
System displays clearing branch code based on the Routing number selected.
Clearing Branch Name
System displays the name of the clearing branch.
Sector Code
System displays the clearing sector code based on the routing number selected.
Additional Details
Booking Date
System displays the date on which the batch is booked.
Currency
Select the currency of the cheque from the adjoining option list.The system defaults the base currency as the cheque currency.You can edit this value if needed.
Track Limit
Check this box to indicate that the counterparty limits should be tracked.
Credit Line
Select the credit line from the option list. The option list displays all lines that belong to the counterparty. It is applicable only if the track limit is set to ‘YES’.
Margin Percentage
System defaults the margin% from instrument maintained.You can edit this value if needed.
You can specify a number between 0 and 99.99.
Other Party Limit Check Required
Check this box to indicate that the other party limits should be tracked. The value is defaulted from the product preferences.
Financing
The value for the field is defaulted based on the instrument selected.However you can change the value by choosing it from the drop-down list and the available options are:
- Eligible
- Not Eligible
- Financed
Collateral
Select the value from the adjoining drop-down list and the available options are:
- Eligible
- Not Eligible
- Collateralized
- To be Collateralized
It indicates if the instruments in the batch are being considered for collateral or not.
Note
If the buyer-seller combination limit or overall buyer exposure limit is not available, then when you save the contract, the system displays an override message ‘Limits not available - instrument will not be considered as collateral’.
The system then updates the value in ‘Collateral’ field to ‘To be collateralized’.
Such contracts are tagged as waiting to be considered for collateral. When the limit is available, the system will consider these contracts for collateralization on a FIFO basis up to the due date of payment or realization, dishonour or protest, whichever is earlier.
However during batch operations, if the contract amount is more than the limit availability, the next contract with the contract amount within the limit will be considered.
Collateral Pool
Select the collateral pool Id from the adjoining option list. If there is no existing pool, then the system creates the pool and links the collateral to the pool on save.
Contract Reference Number
System generates and displays a unique reference number for the contract being booked.
Instrument Number
Specify the instrument number.In case of cheques, this is the cheque number
Instrument Date
Select the Cheque date as the instrument date.
Amount
Specify the Cheque amount.
Local Currency Amount
The system defaults the Local Currency Amount on save or subsystem visit.
Value Date
System displays the date on which the proceeds will be available to the customer.Here the value date is equal to the instrument date + customer float.
Discount Amount
System computes and displays the amount being financed as instrument amount less margin.
Collateral Value
The collateral value of the instrument will be the instrument amount less margin or the Collateral Cap on Bill amount, whichever is lower. When the instrument amount minus margin is more than the cap amount, during save, system will provide override message saying that the collateral value is reduced to the cap amount for single bill
Internal Remarks
Specify your remarks on the transaction.
Process Status
System displays the process status value here.
5.6.2 Viewing Available Limit Details
To view the limit availability of a counterparty and other party involved in a transaction, click on the ‘Available Limit’ button in the ‘Bulk Outward Cheques for Clearing’ screen while processing the contract.
The following details are displayed:
Counterparty Limit
System displays the available limit for the credit line selected in the additional details tab.
Other Party Overall Limit
System displays the available limit of the Other Party selected in the main tab.
Drawer/Drawee Limit
System displays the available limit of the Drawer – Drawee combination limit.
5.6.3 Viewing Override Details
Click ‘Show errors’ button from the ‘Retail Bills-Bulk Outward Bill Realization Details’ screen to view the list of overrides in the bulk realization of ‘Outward Retail Bills-Cheques for Collection’.
The following details are displayed here:
Batch Reference Number
The system displays a batch reference number of the contracts that are considered as part of a batch.
Batch Sequence Number
The system displays the batch sequence number of the contracts that are considered as part of a batch.
The system displays the following details of the overrides:
- Batch Sequence Number
- Error Code
- Error Description
- Error Type
5.6.4 Viewing Summary of Bulk Outward Cheques for Clearing
You can view a summary of multiple outward cheques for clearing as a batch using 'Bulk Outward Cheques for Clearing' screen.You can invoke this screen by typing ‘RBSBOCCL’ in the field at the top right corner of the Application tool bar and clicking on the adjoining arrow button.
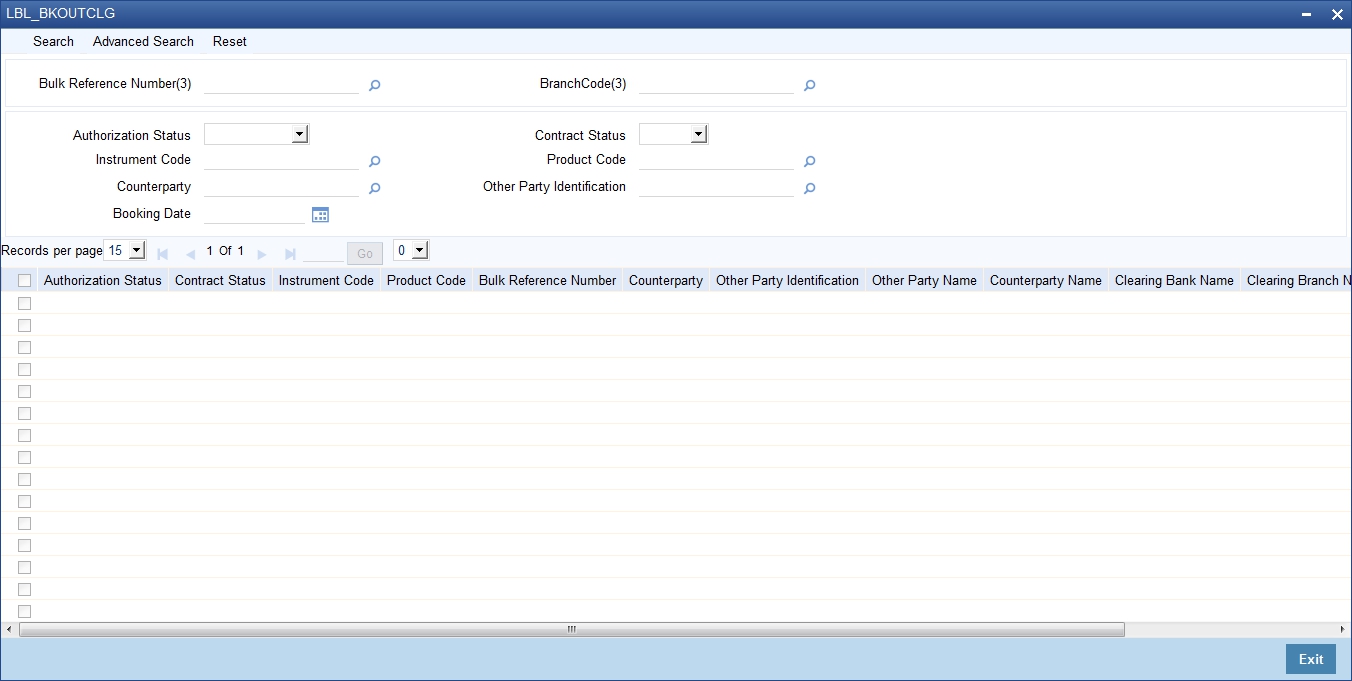
You can search for the records based on one or more of the following parameters:
- Authorization Status
- Instruction Code
- Bulk Reference Number
- Other Party Identification
- Contract Status
- Product Code
- Counterparty
- Booking Date
Once you have specified the search parameters, click ‘Search’ button. The system displays the records that match the search criteria. You can view the following details of the resultant records:
- Authorization Status
- Contract Status
- Instruction Code
- Product Code
- Bulk Reference Number
- Counterparty
- Other Party Identification
- Other Party Name
- Counterparty Name
- Clearing Bank Name
- Clearing Branch Name
- Booking Date
5.7 Outward Retail Bills/Cheques for Collection
This section contains the following topics:
- Section 5.7.1, "Amending Outward Retail Bills/Cheques for Collection"
- Section 5.7.2, "Main Tab"
- Section 5.7.3, "Other Details Tab"
5.7.1 Amending Outward Retail Bills/Cheques for Collection
You can amend certain details of an existing contract based on the user request.The amendment process is initiated for an existing contract from the 'Outward Retail Instrument for Collection' screen by using 'unlock' option.
You can invoke ‘Outward Retail Instrument for Collection’ screen by typing ‘RBDOCONL’ in the field at the top right corner of the Application tool bar and clicking on the adjoining arrow button.
The amendment of an existing contract is allowed in the following scenarios:
- Bill contract is not closed/reversed
- Bill contract is not realized
- Bill contract is not dishonoured or protested or returned
5.7.2 Main Tab
Following fields are editable for amendment:
- Counterparty Account Number
- Instrument Number
- Instrument Date
- Amount
- Other Party Identification
- Debit Account for Realization
- Collecting Bank Code
- Maturity Date
- Grace Days
- Lead Days for dispatch
- Protest
- Auto Liquidation
Note
- Amount cannot be changed if the bill is financed / collateralized.
- Other party identification cannot be changed if the bill is already dispatched, financed or collateralized.
- Maturity date cannot be edited if the bill is already financed.
- Grace days cannot be amended if the instrument is already financed.
- Lead days for dispatch cannot be changed if the bill is already dispatched.
- While creating the contract, if you had not opted for collateralization, then you may do it at the time of contract amendment if required.
5.7.3 Other Details Tab
Following fields are editable for amendment:
- Parties Address
- Parties Country
- Collateral
- Finance
- Collateral Value
- Margin %
- Other Party Limit Checks
Note
- Margin % cannot be changed if the bill is already financed / collateralized.
- The field ‘Finance’ can be changed only from 'Eligible' to 'Not eligible'. It cannot be changed from 'Not eligible' to 'Eligible' if there is restriction at the instrument level.
- Other party limit checks cannot be changed to 'No', if it is defined as 'Yes' at product level. If ‘Other Party Limit Check’ is unchecked at the product level, you can change it and check the box at the contract level.
- You cannot select the status ‘To be Collateralized’ manually
- For financed contracts, you cannot change the options ‘Track Limit’ and ‘Credit Line’
- If ‘Other Party Limit’ is checked, you cannot change it
- For financed/collateralized contracts, you cannot change the margin percent
- For already dispatched instruments, you cannot modify the option ‘Protest’
- You can specify the collecting bank reference and date only during amendment
You can amend the details for the following subsystems:
- Settlements
- Charges
- MIS
- Fields
For detailed information on Settlements, Charges, MIS and Fields, refer ‘Contract Input –Outward Retail Bills/Cheques for Collection’ of this User Manual.
On amendment, the system generates advice to the counter party and collecting bank.
If you make an amendment before dispatch, then the system suppresses the advice to collecting bank. You need to manually control this.
5.8 Outward Cheques for Clearing (PDCs)
This section contains the following topics:
- Section 5.8.1, "Amending Outward Cheques for Clearing (PDCs)"
- Section 5.8.2, "Main Tab"
- Section 5.8.3, "Clearing Tab"
- Section 5.8.4, "Other Details Tab"
5.8.1 Amending Outward Cheques for Clearing (PDCs)
You can amend an outward clearing cheque which is already booked in the system.The amendment process is initiated for an existing contract from the 'Outward Cheques Clearing Details' screen by using 'unlock' option.
You can invoke ‘Outward Cheques Clearing Details’ screen by typing ‘RBDOCCNL’ in the field at the top right corner of the Application tool bar and clicking on the adjoining arrow button.
5.8.2 Main Tab
Following fields are editable for amendment:
- Counter Party Account Number
- Instrument Number
- Instrument Date
- Amount (Amount cannot be modified if the cheque was Discounted or considered as collateral earlier)
- Other Party Identification (Amendment of the other party identification is allowed only if the instrument is not financed or considered for collateral)
- Auto Liquidation
5.8.3 Clearing Tab
![]()
Following fields are editable for amendment:
- Routing Number
- Issuer Bank
- End Point
5.8.4 Other Details Tab
Following fields are editable for amendment:
- Party Address
- Party Country
- Financing - Modification is allowed only from 'Eligible' to 'Not Eligible'. It cannot be changed from 'Not Eligible' to 'Eligible' if this is specified as 'Not Eligible' at the instrument level.
- Collateral - If the contract is not financed and clearing contract is not created, then you can change it from ‘Eligible’ to ‘Not Eligible’. If the contract is not financed and clearing contract is not created, then you can change it from ‘Eligible’ to ‘Collateralized’. However, you cannot change the value from ‘Not Eligible’ to ‘Eligible’, if it is set as ‘Not Eligible’ at the instrument level.
- Collateral Value - The value is defaulted on save if the contract is collateralized.
- Other Party Limit Checks Required - The value can be changed from 'Not required' to 'Required'.
You can amend the details for the following subsystems:
- Settlements
- Charges
- MIS
- Fields
For detailed information on Settlements, Charges, MIS and Fields, refer ‘Contract Input Outward Cheques for Clearing (PDCs)’ of this User Manual.
5.9 Financing Existing Outward Retail Bills/Cheques
This section contains the following topics:
- Section 5.9.1, "Capturing Additional Details"
- Section 5.9.2, "Viewing Summary of Finance Existing Outward Retail Bills/Cheques"
You can capture the finance details of an existing retail outward bill/cheque in the 'Finance existing Outward Retail Bills-Cheques' Screen.You can access this screen from the Application Browser. You can also invoke this screen by typing ‘RBDFINOL’ in the field at the top right corner of the Application tool bar and clicking on the adjoining arrow button.
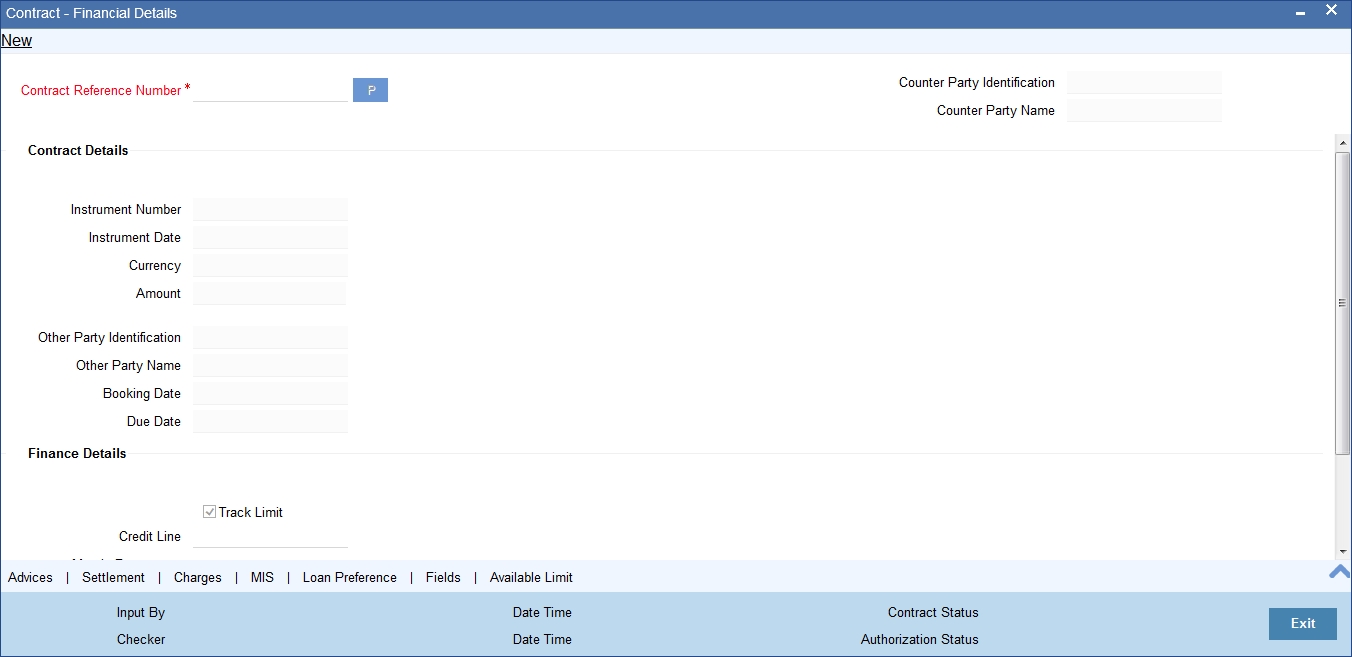
Specify the following details:
Contract Reference Number
Select the Contract reference number of the instrument which needs to be financed from the adjoining option list.The list displays only those contracts which have finance as eligible.
Once you have specified the contract reference number, click 'P' button to populate the contract details.
Based on the contract reference number selected, the system displays the following details:
- Counterparty Identification
- Counterparty Name
- The following contract details are displayed:
- Instrument Number
- Instrument Date
- Currency
- Amount
- Other Party Identification
- Other Party Name
- Booking Date
- Due Date
Finance Details
Track Limit
Check this box to indicate that the counterparty limits should be tracked.
Even if this option was not checked at the time of contract creation, you can check this at the time of financing. The system will track the counterparty limits if you check this box.
Credit Line
Select credit line from the adjoining option list. This is applicable only if track limit is set to Yes. Only those lines that belong to the counterparty will be listed here.
Margin Percentage
System defaults the margin% from instrument maintained.You can edit this value if needed.
You can specify a number between 0 and 99.99.
Other Party Limit Check Required
The value is defaulted from the product.If the 'Other party limit checks required' is enabled, You cannot disable it. However you can change the value from 'Not required' to 'Required'.
If the option ‘Other party limit checks required’ is not checked at the product level, then you can check it at the time of financing. In such case, both other party and drawer-drawee limits will be utilized.
In case of finance, if the other party limit and drawer-drawee limit is not sufficient, then the system will over-utilize it and display an override message ' Other party / Drawer-drawee limit is not available / sufficient. Limit will be over-utilized.’
Financing
The system displays the status as 'Financed'.
Discount Amount
The system computes and displays the discount amount based on the bill amount and the percentage amount.
5.9.1 Capturing Additional Details
A horizontal array of buttons are provided at the bottom of the screen for capturing additional details. You can capture/view the following additional details outward retail cheque/bill financing.
- Advices
- Settlement
- Charge
- MIS
- Loan Preference
- Available Limit
- User Defined Fields
For further details on these sub-systems, refer to the section 'Capturing Additional Details for Outward Retail Bills/Cheques for Collection' in chapter 'Outward Retail Bill Contract' of this user manual.
5.9.2 Viewing Summary of Finance Existing Outward Retail Bills/Cheques
You can view a summary of financing of existing outward retail bills or cheque in ‘Finance existing Outward Retail Bills-Cheques’ screen. To invoke this screen, type ‘RBSFINOL’ in the field at the top right corner of the application toolbar and click the adjoining arrow button.
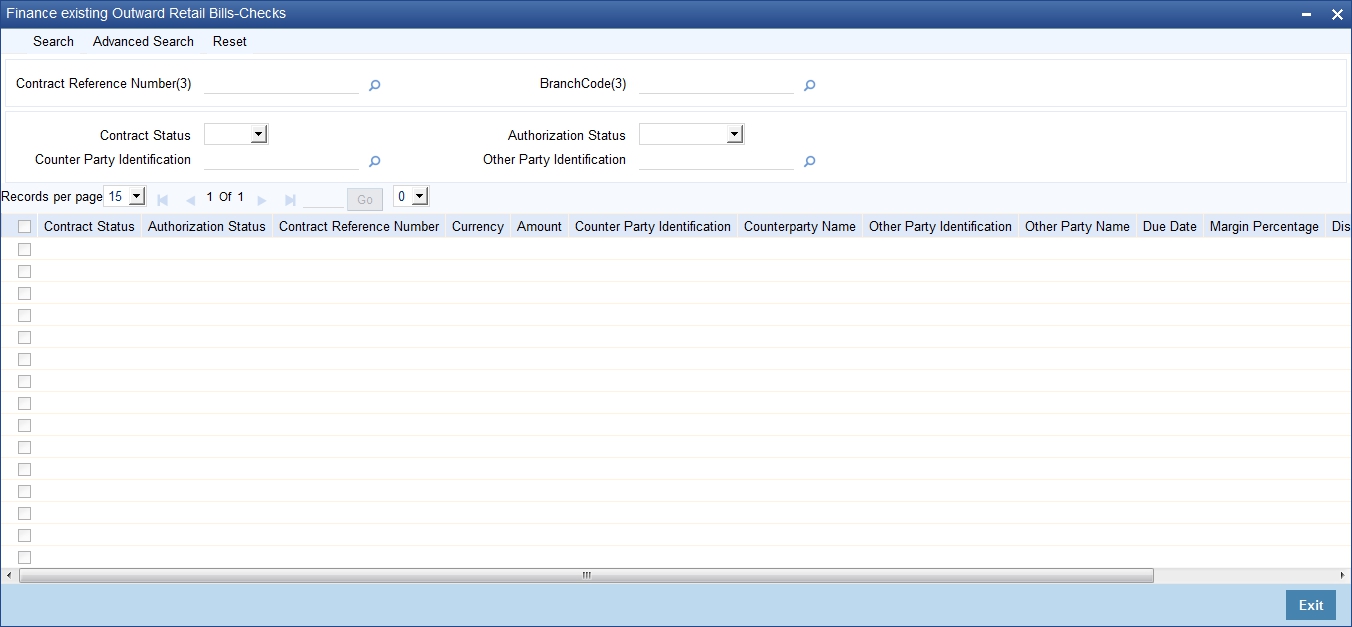
You can search for the records based on one or more of the following parameters:
- Contract Status
- Contract Reference Number
- Other Party Identification
- Authorization Status
- Counterparty Identification
Once you have specified the search parameters, click ‘Search’ button. The system displays the records that match the search criteria. You can view the following details of the resultant records:
- Contract Status
- Authorization Status
- Contract Reference Number
- Currency
- Amount
- Counterparty Identification
- Counterparty Name
- Other Party Identification
- Other Party Name
- Due Date
- Margin Percentage
- Discount Amount
5.10 Outward Retail Bills and Cheques
This section contains the following topics:
- Section 5.10.1, "Realizing Outward Retail Bills and Cheques"
- Section 5.10.2, "Main Tab"
- Section 5.10.3, "Clearing Tab"
- Section 5.10.4, "Capturing Additional Details"
- Section 5.10.5, "Viewing Summary of Outward Contract Realization"
5.10.1 Realizing Outward Retail Bills and Cheques
You can invoke ‘Outward Contract Realization Details’ screen by typing ‘RBDOREAL’ in the field at the top right corner of the Application tool bar and clicking on the adjoining arrow button.
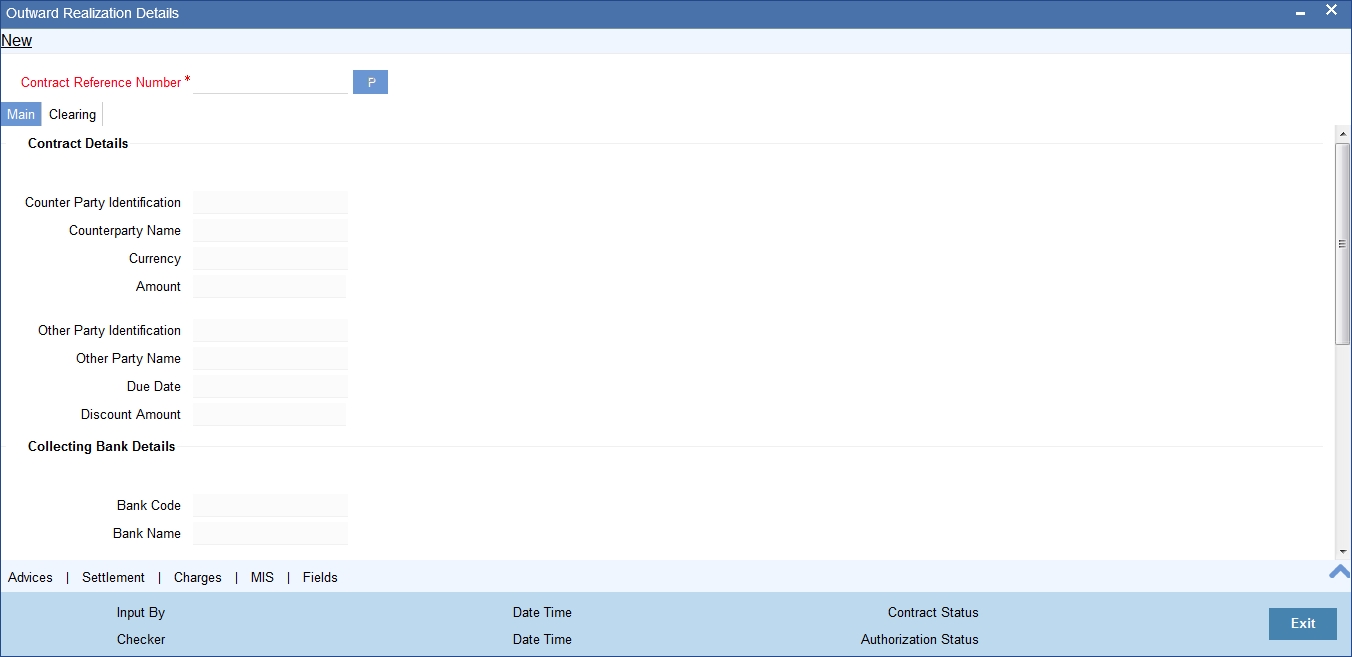
Specify the following details:
Contract Reference Number
Select the contract reference number of the instrument from the adjoining option list.
5.10.2 Main Tab
On clicking the populate button ‘P’, the system populates the contract details associated with it based on the contract reference number selected.
The system displays the following details:
Contract Details
- Counterparty Identification
- Counterparty Name
- Currency
- Amount
- Other Party Identification
- Other Party Name
- Due Date
- Discount Amount
Collecting Bank Details
- Bank Code
- Bank Name
- Branch Code
- Branch Name
Realization Details
- Counterparty Account Number
- Account Branch
- Debit Account for Realization
- Debit Account Branch
To view the joint holder’s details of an account and the mode of operation maintained at the account level, place the cursor on the Counterparty Account Number or Debit Account for Realization field and press Ctrl+J. The system displays the ‘Joint Holder’ screen.
For more information on the ‘Joint Holder’ screen refer to the section ‘Joint Holder Maintenance’ in the Core User Manual.
Note
If the ‘Debit Realization Account’ defined in ‘Branch Parameters Maintenance’ is ‘Intermediary GL’, then that GL has to be manually funded before realization of the bill.
You can specify the following details:
Value Date
The system displays the value date. If the ‘Payment Mode’ selected is ‘Clearing’ then the Value date will be Automatically calculated as "Transaction date + Float days maintained in Bank Code maintenance screen" and if the float days are not maintained in Bank code maintenance screen then the float days will be defaulted from the Arc maintenance.
Net Realized
Specify the net realized amount. When you save the contract, the system checks whether the net realized amount is more than the instrument amount.
If the net realized amount is more than the instrument amount, the system displays an error message.
For financed bills, if the net realized amount is less than the loan amount, then the loan has to be manually settled before liquidating the bill. The bill can be liquidated after settling the loan.
If a bill is realized after the due date and the overdue principal penalty is accrued to the loan, then the loan has to be settled before liquidating the bill. The bill can be realized after settling the loan.
Payment Mode
The system displays payment mode for realization of outward instruments. This is defaulted from ‘Outward Retail Instrument for Collection Contract Creation Screen’. You can modify the mode if required. The drop down list displays the following values:
- Normal
- Clearing
Other Bank Charges
System computes and displays the difference of instrument amount and net realized amount as the other bank charges.
If the other bank charges computed is greater than the other bank charges tolerance amount, then an override 'Calculated other bank charges is greater than the tolerance limit' is displayed.
Collecting Bank Reference Number
Specify a reference number which is provided by the collecting bank for payment.
The system liquidates the loan account and the bridge GL in the retail bill product is used as 'Dr Settlement Bridge GL' for the loan account Bridge general ledger is debited and loan account is credited.
5.10.3 Clearing Tab
You can capture the clearing details in the Clearing Tab.
![]()
If the Payment Mode selected is Clearing, you have to capture the clearing details to create a clearing contract. If not, system displays an error on saving.
You can specify the following details here:
Clearing Details
Clearing Product
Specify the Product code for creation of clearing contract. Alternatively you can select a product code from the option list.The list displays all the product code available. The default value displayed will be the product code from the Product Preferences in product definition and the defaulted product can be modified in the Outward Contract Realization screen.
Routing Number
Specify the routing number for the transactions. Alternatively, you can select the routing number from the option list. The list displays all the values maintained in Bank Code Maintenance.
Clearing Instrument Number
Specify the number of the instrument received.
Clearing Instrument Date
Specify the date of the received instrument.
Clearing End Point
The system displays the end point mapped for clearing house. This value is derived from the Clearing Product Maintenance at ARC level.
If Clearing End Point is not captured here, then the system defaults the value maintained in ARC maintenance.
Clearing Reference Number
The system displays the Clearing Contract Reference number which is populated during Realization of Outward Bills/Cheques for collection upon Authorization.
Clearing Bank
The system displays the Clearing Bank based on the Routing Number selected.
Clearing Bank Name
The system displays the Clearing Bank Name based on the Routing Number selected.
Clearing Branch
The system displays the Clearing Branch based on the Routing Number selected
Clearing Branch Name
The system displays the Clearing Branch Name based on the Routing Number selected
Sector Code
The system displays the Sector Code based on the Routing Number selected
5.10.4 Capturing Additional Details
A horizontal array of buttons are provided at the bottom of the screen for capturing additional details. You can capture/view the following additional details outward contract realization.
- Advices
- Settlement
- Charge
- MIS
- User Defined Fields
For further details on these sub-systems, refer to the section 'Capturing Additional Details for Outward Retail Bills/Cheques for Collection' in chapter 'Outward Retail Bill Contract' of this user manual.
5.10.5 Viewing Summary of Outward Contract Realization
You can view a summary of Outward Contract Realization in ‘Outward Contract Realization Summary’ screen. To invoke this screen, type ‘RBSOREAL’ in the field at the top right corner of the application toolbar and click the adjoining arrow button.
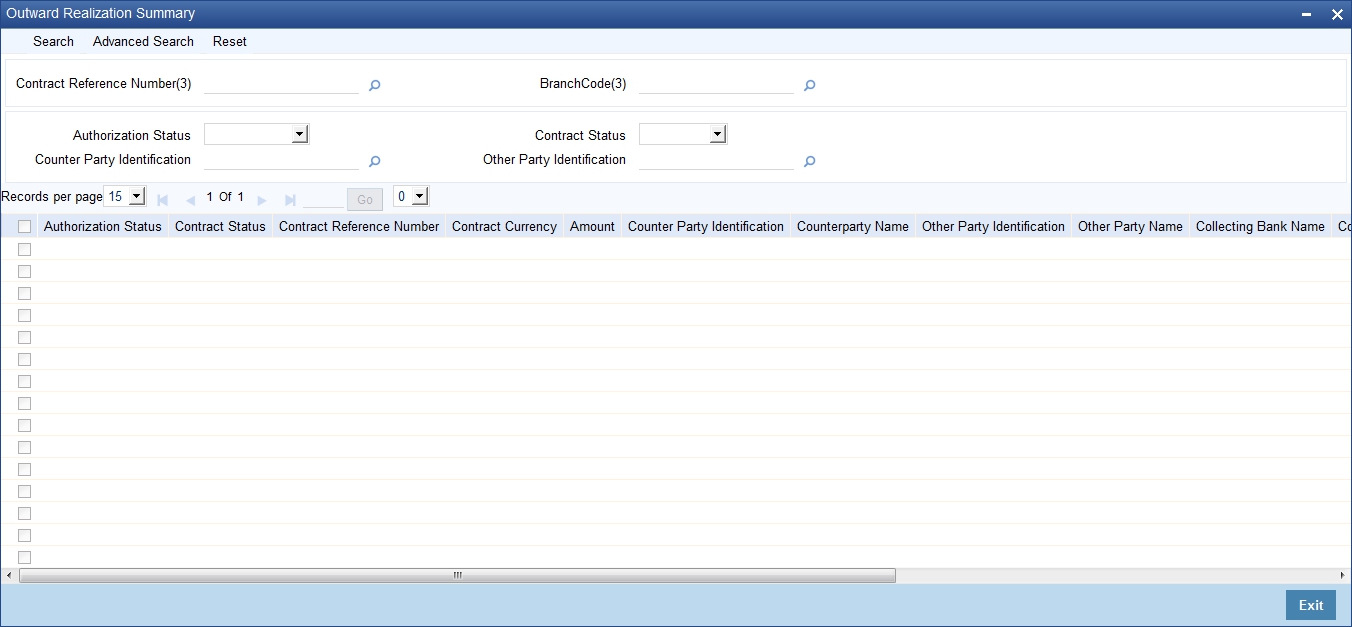
You can search for the records based on one or more of the following parameters:
- Authorization Status
- Contract Reference Number
- Other Party Identification
- Contract Status
- Counterparty Identification
Once you have specified the search parameters, click ‘Search’ button. The system displays the records that match the search criteria. You can view the following details of the resultant records:
- Authorization Status
- Contract Status
- Contract Reference Number
- Contract Currency
- Amount
- Counterparty Identification
- Counterparty Name
- Other Party Identification
- Other Party Name
- Collecting Bank Name
- Collecting Bank Reference Number
- Value Date
- Net Realized
- Other Bank Charges
5.11 Dishonour/Protest/Return Details
This section contains the following topics:
- Section 5.11.1, "Capturing Dishonour/Protest/Return Details"
- Section 5.11.2, "Capturing Additional Details"
- Section 5.11.3, "Viewing Summary of Outward Dishonour/Protest/Return"
5.11.1 Capturing Dishonour/Protest/Return Details
The 'Dishonour-Protest-Return Details' screen is used to capture the details of non-payment of the instrument, protest of an unpaid instrument and to mark the instrument as returned in case of non-payment. You can capture dishonour, return and protest details of retail instruments using this screen. You can invoke this screen by typing ‘RBDDPROL’ in the field at the top right corner of the Application tool bar and clicking on the adjoining arrow button.
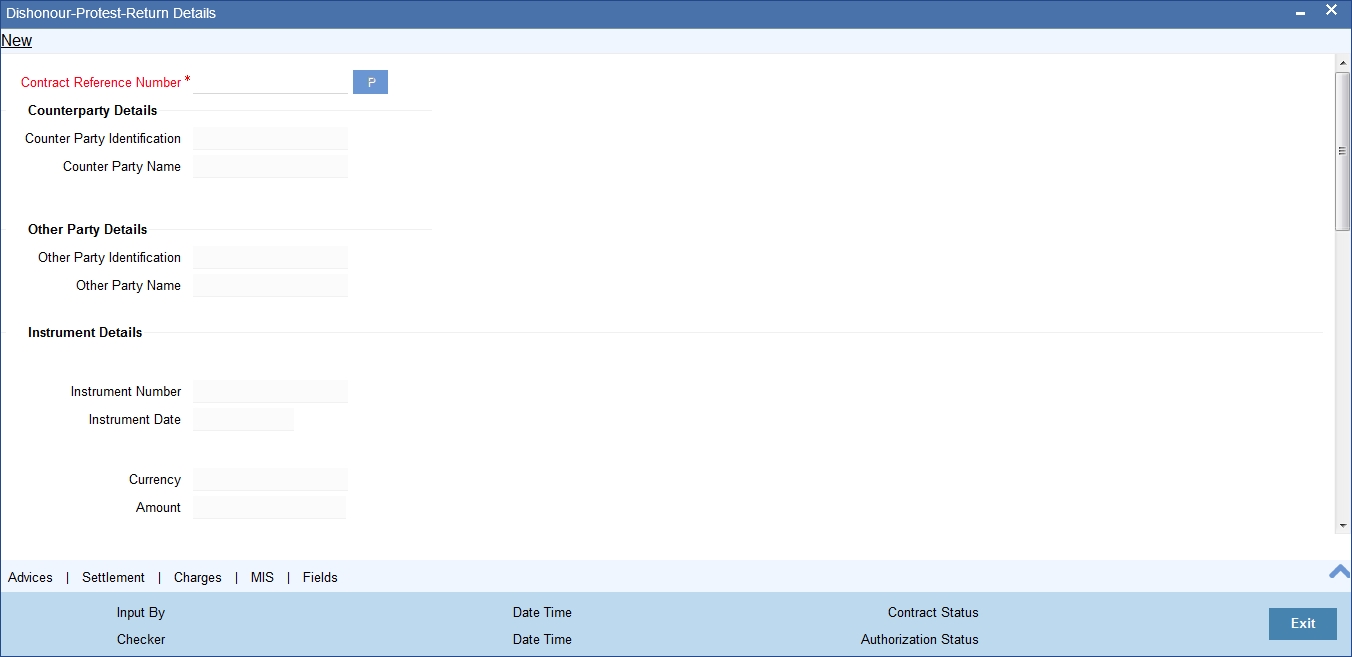
Note
You can protest an instrument only if the instrument is eligible for protest as per the instrument type maintenance.
Specify the following details:
Contract Reference Number
Select the Contract reference number of the instrument which needs to be dishonoured/protested/returned from the adjoining option list.
Once you have specified the contract reference number, click ‘P’ button to populate the contract details.
Based on the contract reference number, the system displays the following details:
- Counterparty Details
- Counterparty Identification
- Counterparty Name
- Other Party Details
- Other Party Identification
- Other Party Name
- Instrument Details
- Instrument Number
- Instrument Date
- Currency
- Amount
- Collecting/Remitting Bank Details
- Bank Code
- Bank Name
- Additional Details
- Booking Date
- Discount Amount
- Collateral Value
Dishonour/Protest/Return Reason
Reason Code
Select a reason code from the adjoining option list. The list contains all the codes from the ‘Reason code maintenance’ screen.
Reason
System displays a reason description based on the reason code selected.
Protest Details
Protest Date
Specify the date of protest. The date of protest specified should not be earlier than the booking date or later than the system date. The protest date should not be earlier than dishonour date for already dishonoured instruments.
Notary Code
Select a notary code from the adjoining option list.
Notary Description
System displays the Notary Description based on the Notary code selected and you can edit this value whenever required.
During Return, if protest has already happened, then the system defaults the protest details.
Dishonour Details
Dishonour Date
Specify a date of dishonour and it should not be earlier than the booking date or later than the system date.
For protest and return, if the bill/cheque was already dishonoured, then the system defaults the date.
Other Details
Other Bank Charges
Specify the Charges that are claimed by the other bank.Here, the charges are defined for information purpose only.
Charges Claimed
Specify the Charges that are claimed by the bank from other bank.
Remarks
Specify your remarks on the transaction.
Return Details
Return Date
Specify a date of return of the instrument.
The return date should not be earlier than the dishonour date or protest date (for instruments that are already dishonoured or protested) and booking date and later than the system date.
In case of dishonour/protest/return of a financed bill or cheque, the system liquidates the loan account. The counter party account will be force debited and loan account will be credited.
5.11.2 Capturing Additional Details
A horizontal array of buttons are provided at the bottom of the screen for capturing additional details. You can capture/view the following additional details outward dishonour/protest/return.
- Advices
- Settlement
- Charge
- MIS
- User Defined Fields
For further details on these sub-systems, refer to the section 'Capturing Additional Details for Outward Retail Bills/Cheques for Collection' in chapter 'Outward Retail Bill Contract' of this user manual.
5.11.3 Viewing Summary of Outward Dishonour/Protest/Return
Dishonour/Protest/Return of Retail Bills/Cheques is viewed through a common summary screen 'Dishonour-Protest-Return Details ' for both outward and inward instruments.You can invoke this screen by typing ‘RBSDPROL’ in the field at the top right corner of the Application tool bar and clicking on the adjoining arrow button
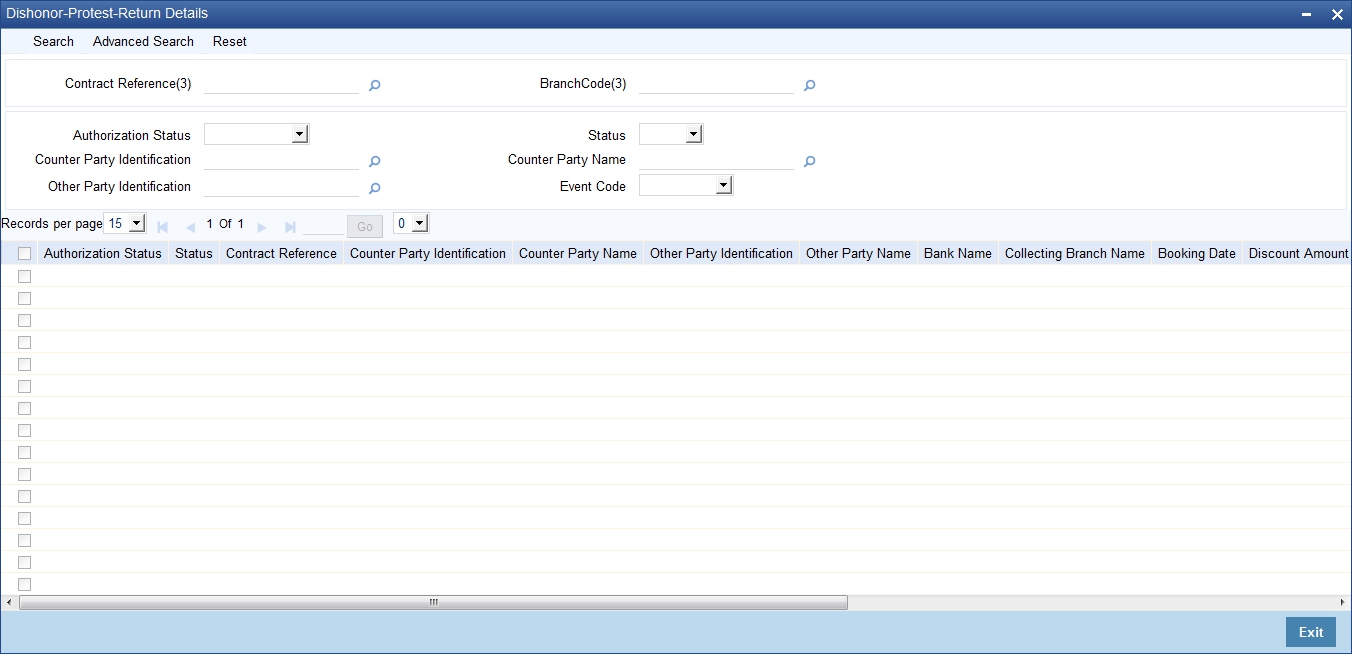
.You can search for the records based on one or more of the following parameters:
- Authorization Status
- Contract Reference
- Counterparty Name
- Event Code
- Status
- Counterparty Identification
- Other Party Identification
Once you have specified the search parameters, click ‘Search’ button. The system displays the records that match the search criteria. You can view the following details of the resultant records:
- Authorization Status
- Status
- Contract Reference
- Counterparty Identification
- Counterparty Name
- Other Party Identification
- Other Party Name
- Bank Name
- Collecting Branch Name
- Booking Date
- Discount Amount
- Collateral Value
- Dishonour Date
- Protest Date
- Return Date
- Event Code
- Notary Code
- Reason.
5.12 Outward Retail Bills/Cheques in Bulk
This section contains the following topics:
- Section 5.12.1, "Realizing Outward Retail Bills/Cheques in Bulk"
- Section 5.12.2, "Main Tab"
- Section 5.12.3, "Clearing Tab"
- Section 5.12.4, "Viewing Error Details"
- Section 5.12.5, "Viewing Summary of Bulk Outward Bill Realization"
5.12.1 Realizing Outward Retail Bills/Cheques in Bulk
You can realize multiple retail instruments in bulk using ‘Retail Bills-Bulk Outward Bill Realization Details’ screen. You may select all the instruments that are part of a dispatch lot or a few of them for realization.
You can invoke the ‘Retail Bills-Bulk Outward Bill Realization Details’ screen by typing ‘RBDBOREA’ in the field at the top right corner of the Application tool bar and clicking on the adjoining arrow button.
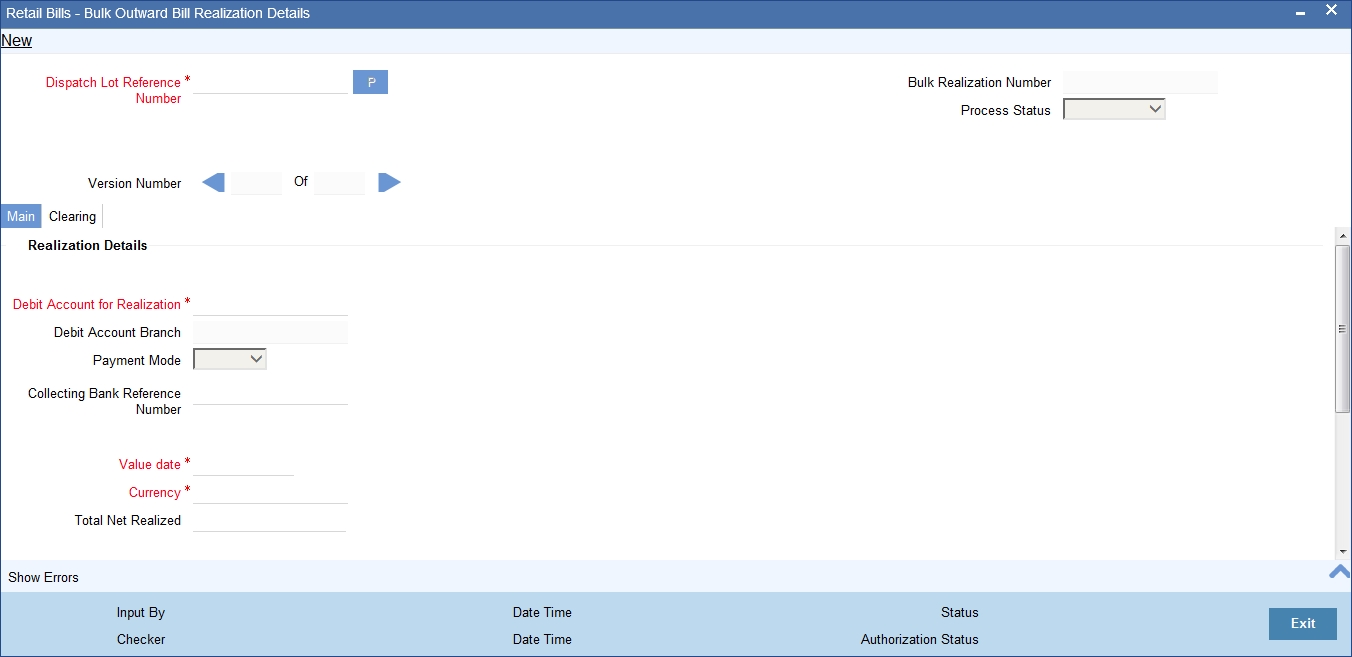
Specify the following details:
Dispatch Lot Reference Number
Select a dispatch lot reference of the batch which needs to be realized from the adjoining option list.
After Selecting the dispatch lot reference number, click on 'P' button to populate the details of instruments in the dispatch lot.
Bulk Realization Number
System displays a unique reference number for bulk realization.
Process Status
System displays the process status value here.
5.12.2 Main Tab
Realization Details
Debit Account for Realization
The value is defaulted based on bulk contract input and you can edit this account number selected.
The system generates an override message on save, whenever the account number that is captured during the booking stage is modified.
To view the joint holder’s details of an account and the mode of operation maintained at the account level, place the cursor on the Debit Account for Realization field and press Ctrl+J. The system displays the ‘Joint Holder’ screen.
For more information on the ‘Joint Holder’ screen refer to the section ‘Joint Holder Maintenance’ in the Core User Manual.
Debit Account Branch
The system displays the debit account branch based on the debit account for realization.
Payment Mode
The system displays payment mode for realization of outward instruments. This is defaulted from ‘Outward Retail Instrument for Collection Bulk Contract Creation Screen’. You can modify the mode if required. The drop-down list displays the following values:
- Normal
- Clearing
Collecting Bank Reference Number
Specify a reference number provided by the collecting bank for payment.This will be passed on as a related reference for the Nostro account.
Value Date
Specify a Value date with which the accounting entries are generated and initially the application date is defaulted in this field.
Here the system generates an override message if the value date is greater than the current date.
Currency
The system displays the currency based on the dispatch lot selected. However, you can modify the displayed currency.
Total Net Realized
Specify the total proceeds that are received by the bank. Here the ‘Total net realized’ should be equal to the individual contract's net realized amount.
Contract Reference Number
System displays the contract reference number based on the dispatch lot reference number selected above.
Instrument Number
System displays the instrument number based on the dispatch lot reference number selected above.
Customer Identification
System displays the customer identification number based on the dispatch lot reference number selected above.
Amount
System displays the amount based on the dispatch lot reference number selected.
Net Realized Amount
Specify the Net realized amount for the instrument.
Other Bank Charges
System displays the difference of instrument amount and net realized amount as the 'other bank charges'.
Internal Remarks
Specify your remarks on the transaction.
Process Status
System displays the process status value here.
Once you have specified the details, click ‘Save’ button. A different user having sufficient access rights must authorize the record for the system to begin realization of the instruments.
When you save the record, the system validates the details captured in the header section of the screen. Errors/overrides in the validation process, if any, will be displayed. There will not be any override messages during authorization of the bulk transaction.
After authorization, the system liquidates the individual contracts considered for bulk realization as a background process. Relevant accounting entries will be passed during this process.
In case of instruments that are financed, the system triggers liquidation of the loan account associated with the instrument. In case of instrument that are considered for collateral, the system triggers closure of the collateral created in ELCM module.
During liquidation of the contracts selected for bulk realization, if any applicable validation fails, some of the contracts may not get liquidated. Sometimes, all contract in the batch may not get liquidated. You can get the details of such contracts by searching the records in the summary screen.
After viewing the contracts that failed in the bulk realization process, you can use the option ‘Close’ to close the batch. You can close the batch after authorization of bulk realization and creation of contracts, but before marking EOTI (first stage in End of Day operations) stage. If the bulk realization batch is not closed, the system will not allow marking of EOTI stage. Advice are generated during closure of the batch.
5.12.3 Clearing Tab
You can capture the clearing details in the Clearing Tab.
![]()
If the Payment Mode selected is Clearing, you have to capture the clearing details to create a clearing contract. If not, system displays an error on saving.
You can specify the following details here:
Clearing Details
Clearing Product
Specify the Product code for creation of clearing contract. Alternatively you can select a product code from the option list.The list displays all the product code available. The default value displayed will be the product code from the Product Preferences in product definition.
Routing Number
Specify the routing number for the transactions. Alternatively, you can select the routing number from the option list. The list displays the values from Bank Code Maintenance.
Clearing Instrument Number
Specify the number of the instrument received.
Clearing Instrument Date
Specify the date of the received instrument.
End Point
Specify the end point mapped for clearing house. Alternatively, you can select the clearing end point from the option list.The list displays the value from End Point Maintenance in Teller Common Maintenance.
If Clearing End Point is not captured here, then the system defaults the value maintained in ARC maintenance.
Clearing Reference Number
The system displays the Reference Number of the Clearing Contract. This value is populated during Bulk Realization of Outward Bills/Cheques for collection upon Authorization
Clearing Bank
The system displays the Clearing Bank based on the Routing Number selected.
Clearing Bank Name
The system displays the Clearing Bank Name based on the Routing Number selected.
Clearing Branch
The system displays the Clearing Branch based on the Routing Number selected
Clearing Branch Name
The system displays the Clearing Branch Name based on the Routing Number selected
Sector Code
The system displays the Sector Code based on the Routing Number selected
5.12.4 Viewing Error Details
Click ‘Show errors’ button from the ‘Retail Bills-Bulk Outward Bill Realization Details’ screen to view the list of overrides applicable to bulk realization of outward bills/cheques for collection.
Batch Reference Number
The system displays the batch reference number. It is applicable only for contracts that are to be considered as part of a batch.
Batch Sequence Number
The system displays the batch sequence number. This sequence number is applicable only if the batch reference number is available on the screen.
The following error details are displayed here:
- Batch Sequence Number
- Error Code
- Error Description
- Error Type
5.12.5 Viewing Summary of Bulk Outward Bill Realization
You can view a summary of retail instruments realization in a bulk using 'Retail Bills - Bulk Outward Bill Realization Details - Summary' screen.To invoke this screen, type ‘RBSBOREA’ in the field at the top right corner of the application toolbar and click the adjoining arrow button.
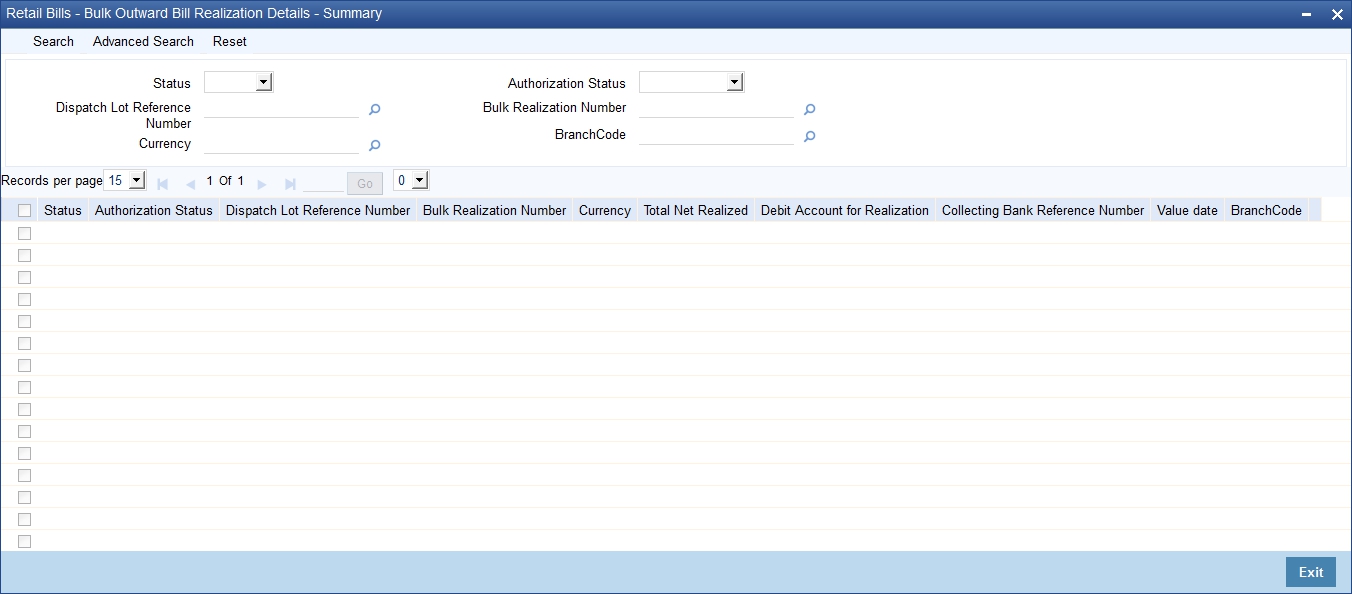
You can search for the records based on one or more of the following parameters:
- Status
- Dispatch Lot Reference Number
- Currency
- Authorization Status
- Bulk Realization Number
Once you have specified the search parameters, click ‘Search’ button. The system displays the records that match the search criteria. You can view the following details of the resultant records:
- Status
- Authorization Status
- Dispatch Lot Reference Number
- Bulk Realization Number
- Currency
- Total Net Realized
- Debit Account for Realization
- Collecting Bank Reference Number
- Value date
5.13 Bulk Dishonour/Protest/Return of Instruments
This section contains the following topics:
- Section 5.13.1, "Invoke Bulk Dishonour/Protest/Return of Instruments"
- Section 5.13.2, "Viewing Override Details"
- Section 5.13.3, "Viewing Summary of Outward Bulk Dishonour/Protest/Return"
5.13.1 Invoke Bulk Dishonour/Protest/Return of Instruments
You can invoke the ‘Retail Bills-Outward Bulk Dishonour-Protest-Return Details’ screen by typing ‘RBDBODPR’ in the field at the top right corner of the Application tool bar and clicking on the adjoining arrow button.
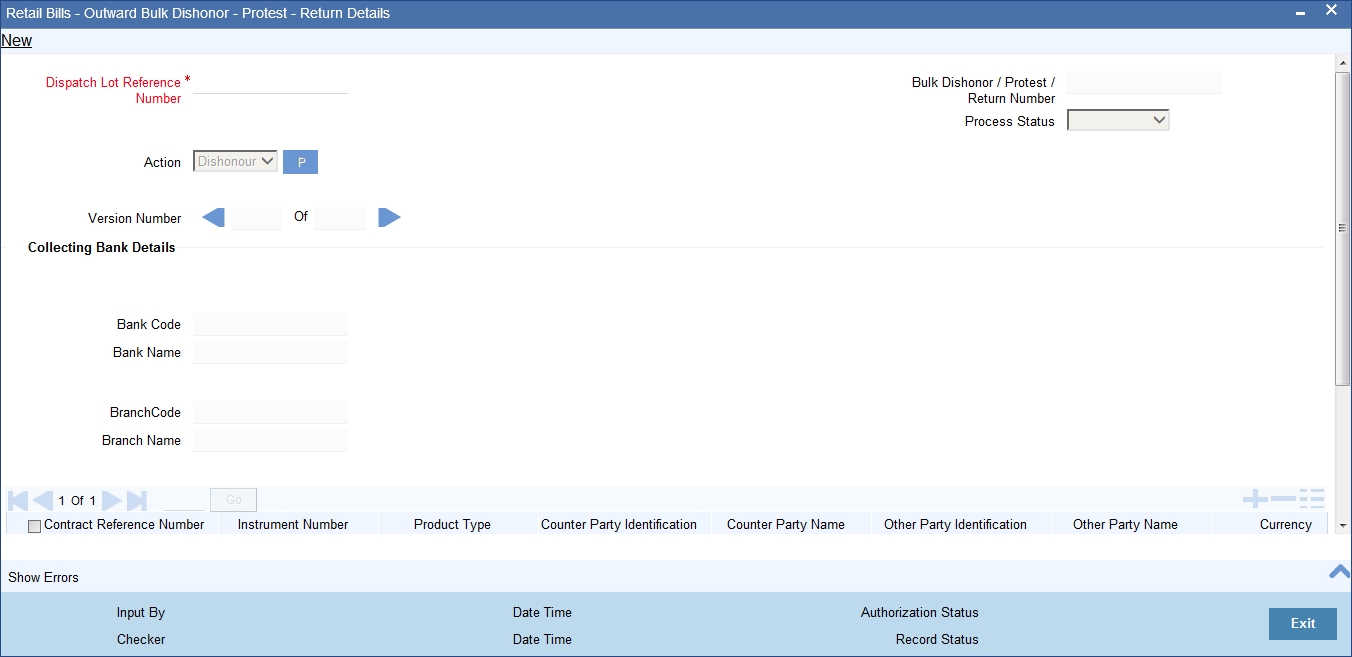
The ‘Retail Bills-Outward Bulk Dishonour-Protest-Return Details’ screen is used to apply the actions - Dishonour, Protest or Return on the unpaid instruments that are selected from the dispatch lot.
Specify the following details:
Dispatch Lot Reference Number
Select a dispatch lot reference of the instrument batch which needs to be Dishonoured/Protested/Returned from the adjoining option list.
Action
Select an action that needs to be performed on the instruments in a batch from the adjoining drop-down list and the available options are:
- Dishonour
- Protest
- Return
After Selecting an action, click on 'P' button to populate the details of instruments in the multi record block.
Bulk Dishonour/Protest/Return Number
System displays a unique number here.
Process Status
System displays the process status value here.
Collecting Bank Details
Bank Code
System displays a bank code based on the dispatch lot reference number selected.
Bank Name
System displays a bank name based on the dispatch lot reference number selected.
Branch Code
System displays a branch code based on the dispatch lot reference number selected.
Branch Name
System displays a branch name based on the dispatch lot reference number selected.
Contract Reference Number
System displays the contract reference number based on the value specified for 'dispatch lot reference number' and the ‘action’ fields.
Instrument Number
System displays the instrument number based on the dispatch lot reference number selected above.
Product Type
System displays the product type based on the dispatch lot reference number selected above.
Counterparty Identification
System displays the counterparty ID based on the value specified for 'dispatch lot reference number' and the ‘action’ fields.
Counterparty Name
System displays the counterparty name based on the value specified for 'dispatch lot reference number' and the ‘action’ fields.
Other Party Identification
System displays the other party identification number based on the 'dispatch lot reference number' and the ‘action’ selected.
Other Party Name
System displays the other party name based on the 'dispatch lot reference number' and the ‘action’ selected.
Currency
System displays the currency based on the 'dispatch lot reference number' and the ‘action’ selected.
Amount
System displays the amount based on the 'dispatch lot reference number' and the ‘action’ selected.
Dishonour Reason
Select a dishonour reason code from the adjoining option list.
Dishonour Date
Select a date of dishonour from the adjoining option list, the field is mandatory if the ‘action’ chosen is dishonour and it should be between the booking date and current system date.
Notary Code
Select a notary code for protest from the adjoining option list and the field is mandatory if the ‘action’ chosen is protest.
Protest Date
Select a protest date from the adjoining option list.The value for the field should not be earlier than the booking date or later than the current date and not earlier than the dishonour date if the instrument is already marked as dishonoured.
Return Date
Select a return date from the adjoining option list and the value for the field should not be earlier than the booking date or later than the current system date.
For instruments that are already dishonoured or protested, the value or return date should not be earlier than dishonour date/protest date.
Internal Remarks
Based on the contract reference number, the system displays the internal remarks.
Process Status
System displays the process status value here.
Once you have specified the details, click ‘Save’ button. A different user having sufficient access rights must authorize the record for the system to begin dishonour, protest or return of the instruments.
When you save the record, the system validates the details captured in the header section of the screen. Errors/overrides in the validation process, if any, will be displayed. There will not be any override messages during authorization of the bulk transaction.
After authorization, the system processes the individual contracts considered for bulk dishonour/protest/return as a background process. Relevant accounting entries will be passed during this process.
In case of instruments that are financed, the system triggers liquidation of the loan account associated with the instrument. In case of instrument that are considered for collateral, the system triggers closure of the collateral created in ELCM module.
During dishonour/protest/return of the contracts selected for bulk processing, if any applicable validation fails, some of the contracts may not be processed. Sometimes, all contract in the batch may not be processed. You can get the details of such contracts by searching the records in the summary screen.
After viewing the contracts that failed in the bulk dishonour/protest/return process, you can use the option ‘Close’ to close the batch. You can close the batch after authorization of bulk process and creation of contracts, but before marking EOTI (first stage in End of Day operations) stage. If the bulk dishonour/protest/return batch is not closed, the system will not allow marking of EOTI stage.
5.13.2 Viewing Override Details
Click ‘Show Errors’ button from the ‘Retail Bills-Bulk Outward Bill Realization Details’ screen to view the list of overrides in the bulk realization of ‘Outward Retail Bills-Cheques for Collection’.
Batch Reference Number
The system displays a batch reference number of the contracts that are considered as part of a batch.
Batch Sequence Number
The system displays the batch sequence number of the contracts that are considered as part of a batch. The value is applicable only if the batch reference number is available on the screen.
The following details are displayed here:
Errors
- Batch Sequence Number
- Error Code
- Error Description
- Error Type
5.13.3 Viewing Summary of Outward Bulk Dishonour/Protest/Return
You can view a summary of outward bulk dishonour, protest or return in ‘Retail Bills - Outward Bulk Dishonour - Protest - Return - Summary’ screen. To invoke this screen, type ’RBSBODPR’ in the field at the top right corner of the application toolbar and click the adjoining arrow button.
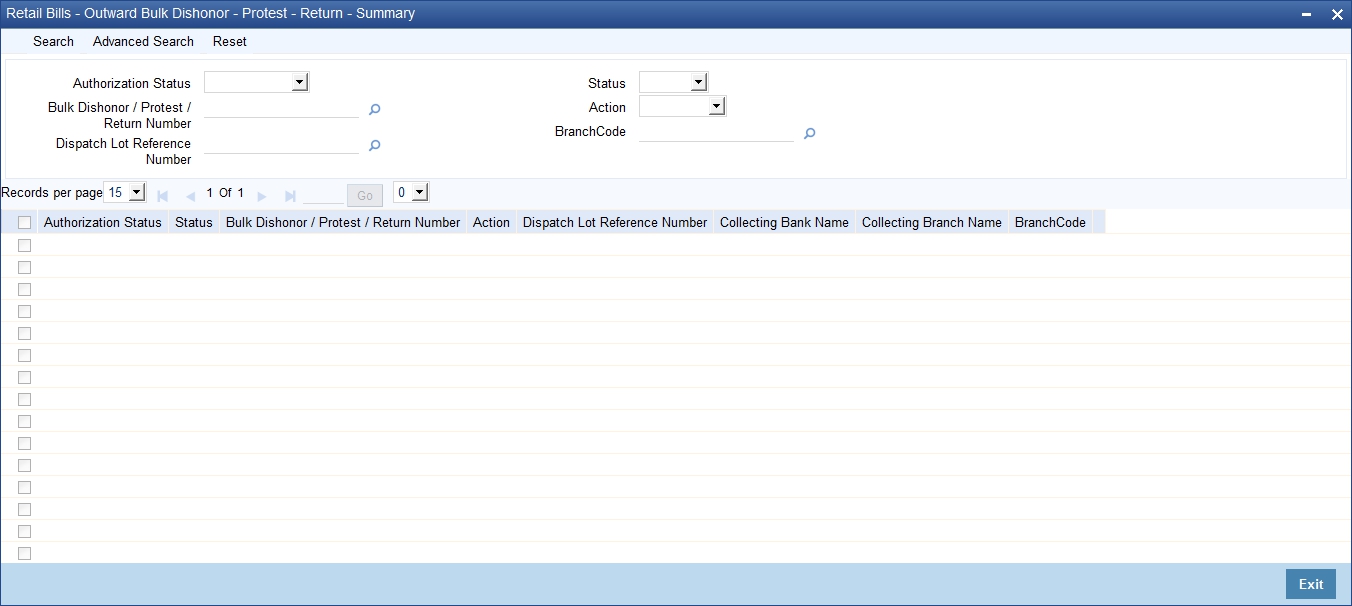
You can search for the records based on one or more of the following parameters:
- Authorization Status
- Bulk Dishonour / Protest / Return Number
- Dispatch Lot Reference Number
- Status
- Action
Once you have specified the search parameters, click ‘Search’ button. The system displays the records that match the search criteria. You can view the following details of the resultant records:
- Authorization Status
- Status
- Bulk Dishonour / Protest / Return Number
- Action
- Dispatch Lot Reference Number
- Collecting Bank Name
- Collecting Branch Name
5.14 Change Status/Location Manually
This section contains the following topics:
- Section 5.14.1, "Changing Status/Location Manually"
- Section 5.14.2, "Viewing Summary of Manual Status/Location Change"
5.14.1 Changing Status/Location Manually
You can invoke the ‘Retail Bills - Manual Status/Location Change’ screen by typing ‘RBDMSTCH’ in the field at the top right corner of the Application tool bar and clicking on the adjoining arrow button.

The ‘Retail Bills-Manual Status-Location Change’ screen is used to change the status of the instrument and/or location of the instrument manually.
Specify the following details:
Contract Reference Number
Select a unique reference number for the contract from the adjoining option list.
Once you have specified the above details, Click on 'P' button to populate the contract details.
Counterparty Details
Counterparty Identification
System displays the Counter Party Id based on the contract reference number selected.
Counterparty Name
System displays the Counter Party Name based on the contract reference number selected.
Counterparty Account Number
System displays the Counter Party Account Number based on the contract reference number selected.
To view the joint holder’s details of an account and the mode of operation maintained at the account level, place the cursor on the Counterparty Account Number field and press Ctrl+J. The system displays the ‘Joint Holder’ screen.
For more information on the ‘Joint Holder’ screen refer to the section ‘Joint Holder Maintenance’ in the Core User Manual.
Instrument Details
Instrument Number
System displays the instrument number based on the contract reference number selected.
Instrument Date
System displays the instrument date based on the contract reference number selected.
Currency
System displays the currency based on the contract reference number selected.
Amount
System displays the amount based on the contract reference number selected.
Other Party Details
Other Party Identification
System displays the Other party Id based on the contract reference number selected.
Other Party Name
System displays the Other party name based on the contract reference number selected.
Debit Account for Realization
System displays a debit account based on the contract reference number selected.
To view the joint holder’s details of an account and the mode of operation maintained at the account level, place the cursor on the Debit Account for Realization field and press Ctrl+J. The system displays the ‘Joint Holder’ screen.
For more information on the ‘Joint Holder’ screen refer to the section ‘Joint Holder Maintenance’ in the Core User Manual.
Collecting/Remitting Bank Details
Bank Code
System displays a collecting bank code based on the contract reference number selected.
Bank Name
System displays a collecting bank name based on the contract reference number selected.
Branch Code
System displays a collecting bank branch based on the contract reference number selected.
Branch Name
System displays a collecting bank branch name based on the contract reference number selected.
Additional Details
Booking Date
System displays a booking date based on the contract reference number selected.
Maturity Date
System displays a maturity date based on the contract reference number selected.
Internal Remarks
Specify your remarks on the transaction.
Status/Location
Instrument Status
Specify the status of an instrument from the adjoining option list and the available options are obtained from the 'Instrument Status code maintenance' screen.
Instrument Location
Specify the location of an instrument from the adjoining option list and the available options are obtained from the 'Instrument Location maintenance' screen.
5.14.2 Viewing Summary of Manual Status/Location Change
You can view a summary of manual status/location change in ‘Retail Bills-Manual Status-Location Change’ screen. To invoke this screen, type ‘RBSMSTCH’ in the field at the top right corner of the application toolbar and click the adjoining arrow button.
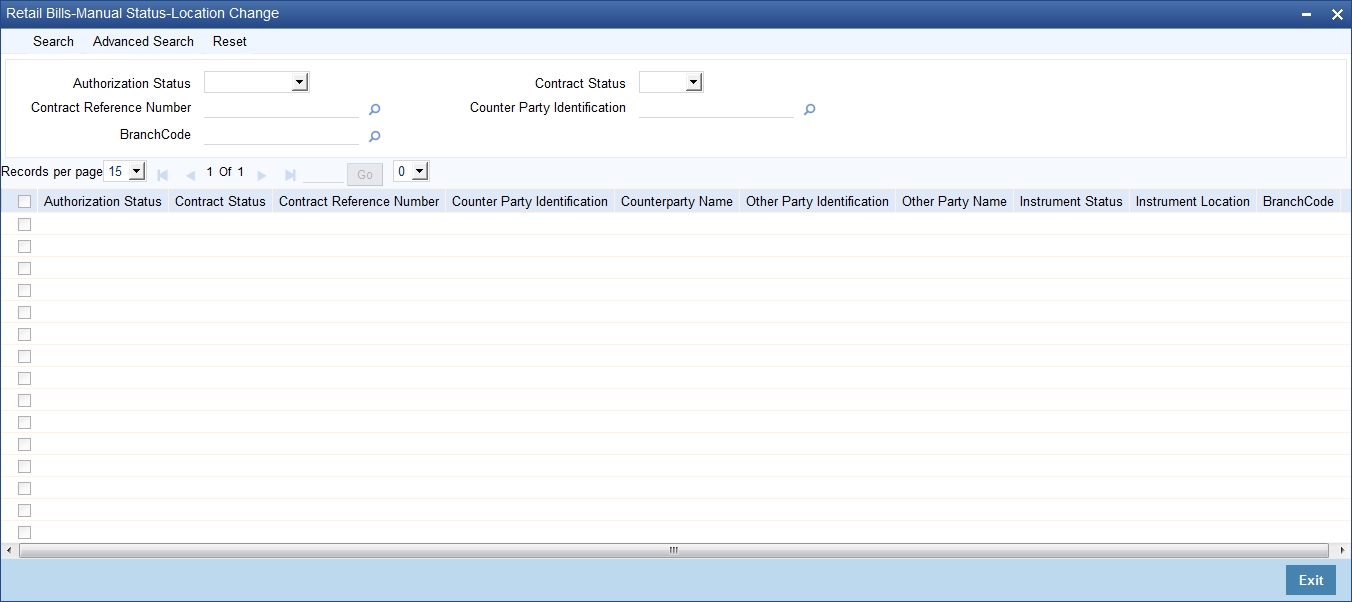
You can search for the records based on one or more of the following parameters:
- Authorization Status
- Contract Reference Number
- Contract Status
- Counterparty Identification
Once you have specified the search parameters, click ‘Search’ button. The system displays the records that match the search criteria. You can view the following details of the resultant records:
- Authorization Status
- Contract Status
- Contract Reference Number
- Counterparty Identification
- Counterparty Name
- Other Party Identification
- Other Party Name
- Instrument Status
- Instrument Location
5.15 Capturing Outward Dispatch Process Details
The ‘Retail Bills-Outward Dispatch Process’ screen is used to initiate a batch process which marks the outward instruments that are due for dispatch on a specific date as dispatched.
Here the Instruments booked under the following product types are considered for dispatch:
- Outward Retail Bills for Collection
- Outward Retail Cheques for Collection
Once the Dispatch process is run, system generates separate Dispatch Lot Reference for the combination of Currency, Collecting Bank Code and Collecting Branch Code and updates the same along with the Instrument Status and Location for all the applicable Contracts. System also generates the Dispatch Annexure and the Dispatch Advice for each Dispatch Lot Reference Number as part of Dispatch Process.
You can invoke the ‘Retail Bills-Outward Dispatch Process’ screen by typing ‘RBDDIBAT’ in the field at the top right corner of the Application tool bar and clicking on the adjoining arrow button.
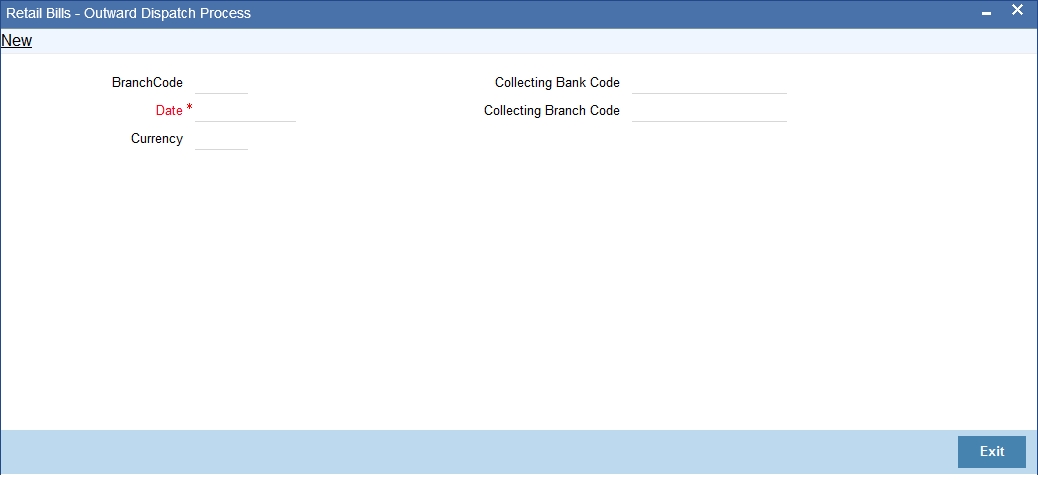
Specify the following details:
Branch Code
Select the branch code in which the instruments are to be marked as dispatched from the adjoining option list.
Date
Initially, System displays the current system date as dispatch date.You can change this value by specifying the system date or next working date as the dispatch date.System provides an error message, if the dispatch date is less than system date or greater than next working date.
Currency
Select the currency of the instruments that needs to be considered for dispatch from the adjoining option list.
Collecting Bank Code
Select the collecting bank code from the adjoining option list and the value is used for filtering the instruments which are to be dispatched.
Collecting Branch Code
Select the collecting bank branch from the adjoining option list and the value is used for filtering the instruments which are to be dispatched.
You can filter the instruments to be dispatched on the basis of Currency, Collecting Bank, Collecting Branch.
Once you have specified the above details, click on 'Save' button to run the intraday batch for dispatch.
Note
For outward bills for collection product type,
- If the other party is the same branch customer / walk-in customer, then the dispatch will not happen in case the collecting bank details are present.
- If the other party is a different branch customer or not a customer, then the dispatch will happen, provided that the collecting bank details are available in the contract.
For outward cheques for collection,
- If the other party is same branch customer/different branch customer within same bank, then dispatch will not happen.
- If the other party is a non-customer, then dispatch will happen based on the collecting bank details available in the contract.
5.16 Dispatch Query
You can invoke the 'Retail Bills-Dispatch Details' screen by typing ‘RBDDIQRY’ in the field at the top right corner of the Application tool bar and clicking on the adjoining arrow button.
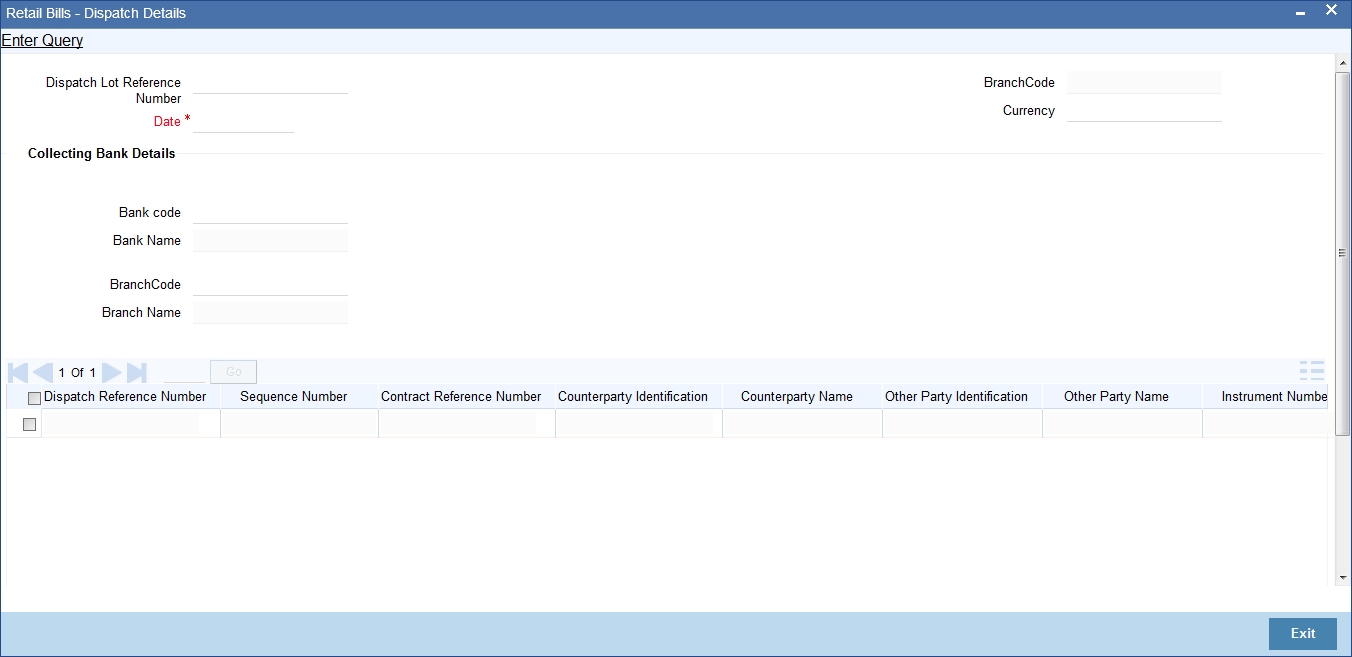
The ‘Retail Bills-Dispatch Details’ screen is used to view dispatch details of an outward retail collection bill/Cheque which is marked as dispatched in the system as part of a dispatch batch process.
Specify the following details
Dispatch lot Reference Number
Specify the dispatch lot reference number for which you need to view the details of the instruments. You can select the appropriate dispatch lot reference number from the option list.
Branch Code
System displays the logged in branch code.
Date
Specify the date of dispatch.You can Select the appropriate date using the calender button.The system defaults the application date as the dispatch date.
Currency
Select the currency of the instruments that were dispatched from the adjoining option list.
Collecting Bank Details
Bank Code
Select the collecting bank code.You can select the appropriate collecting bank code from the option list.
Bank Name
System displays the collecting bank name based on the collecting bank code selected above.
Branch Code
System displays the collecting branch code based on the collecting bank code selected above.
Branch Name
System displays the collecting branch name based on the collecting bank code selected above.
Multi Record Grid
Dispatch Lot Reference Number
System displays the dispatch lot reference number.
Sequence Number
System displays the sequence number.
Contract Ref No
System displays the Contract reference number based on the search criteria selected in the header section.
Counterparty ID
System displays the Counterparty ID based on the search criteria selected in the header section.
Counterparty Name
System displays the Counterparty name based on the search criteria selected in the header section.
Other Party ID
System displays the Other party ID based on the search criteria selected in the header section.
Other Party Name
System displays the Other party name based on the search criteria selected in the header section.
Instrument No
System displays the Instrument number based on the search criteria selected in the header section.
Instrument Date
System displays the Instrument date based on the search criteria selected in the header section.
Currency
System displays the currency based on the search criteria selected in the header section.
Amount
System displays the amount based on the search criteria selected in the header section.
5.17 Clearing Intra Day Batch
If the activation date of an instrument that is associated with the product type ‘Outward Cheque for Clearing’ is less than or equal to the current system date, then you can generate the clearing contract. It is mandatory that the instrument has not been realised, closed or returned.
You can invoke the ‘Retail Bills-Clearing-Intra Day-Batch‘ screen by typing ‘RBDCLBAT’ in the field at the top right corner of the Application tool bar and clicking on the adjoining arrow button.
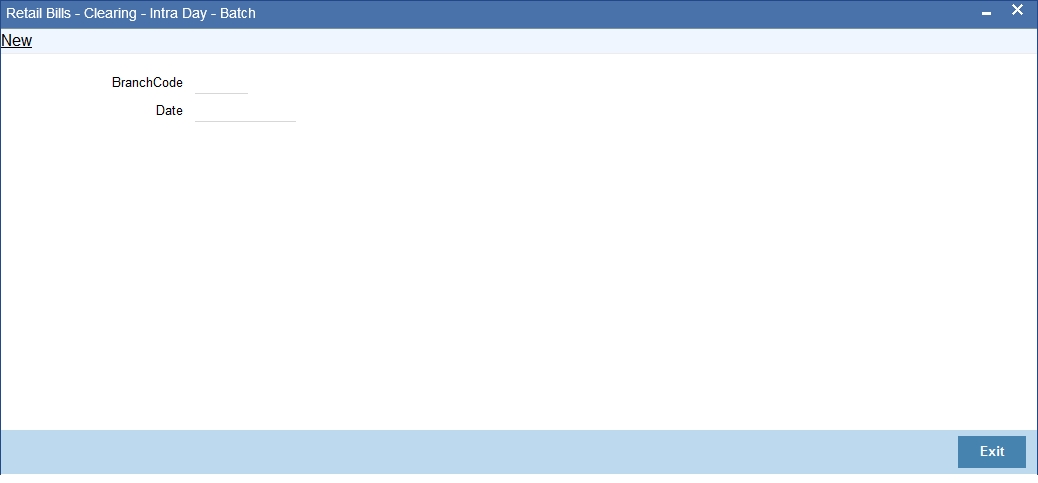
Specify the following details:
Branch Code
Specify a branch for which the intra day batch can be executed.
Date
System displays an application date as the value date.
Once you have specified the above details, click on 'Save' button to run the intra-day batch for clearing.
5.18 Reversal of Outward Retail Collection Bill/Cheque Contract
You can reverse the invalid contracts using 'Contract Input - Outward Retail Bills/Cheques for Collection' Screen by using the ‘Reverse’ action button. You can invoke this screen by typing ‘RBDOCONL’ in the field at the top right corner of the Application tool bar and clicking on the adjoining arrow button.
Once 'input mistake' is identified after authorization of contract, you can reverse the invalid contract using 'Reverse' action button
On reversal of the contract, the system validates the following parameters:
- The system validates whether the instrument is already dispatched, reversed, realized, dishonoured, returned or protested. If any of these conditions are met, then the system will display an error message.
- The system validates whether the loan account associated with the
instrument is reversed or not. If the loan account is not reversed, the
system displays an error message. If the loan account is reversed, then
the system reverses the respective contract and proceeds with the following
steps.
- If the instrument is collateralized, then the system closes the collateral and pool created in ELCM module.
- The system updates the contract status as 'Reversed'.
- The system reverses all accounting entries generated during the previous events.
5.19 Reversal of Outward Retail Cheque for Clearing (PDC) Contract
You can reverse the invalid contracts using 'Contract Input - Outward Retail Cheques for Clearing (PDC)' Screen by using the ‘Reverse’ action button.You can invoke this screen by typing ‘RBDOCCNL’ in the field at the top right corner of the Application tool bar and clicking on the adjoining arrow button.
Once 'input mistake' is identified after authorization of contract, you can reverse the invalid contract using 'Reverse' action button.
On reversal of the contract, the system validates the following parameters:
- The system validates whether the clearing contract is already created for the instrument in the clearing module. If any of these conditions are met, then the system will display an error message.
- The system validates whether the contract is already reversed, realized or returned.
- The system validates whether the loan account associated with the
instrument is reversed or not. If the loan account is not reversed, the
system displays an error message. If the loan account is reversed, then
the system reverses the respective contract and proceeds with the following
steps.
- If the instrument is collateralized, then the system reverses the collateral created in ELCM module.
- The system updates the contract status as 'Reversed'.
- The system reverses all accounting entries generated during the previous events.