3. Maintaining Accounting Details
3.1 Introduction
After you have maintained the requisite products for retail teller transactions, you must maintain the accounting information that will be used by the system to process such transactions involving the product.
In the Account, Rates and Charges (ARC) screen, you can maintain accounting information that will be used to
- Identify the transaction account and offset account to which accounting entries arising from a retail teller transaction using the product will be posted
- Identify whether the offset account or the transaction account must be considered to be the debit account in a retail teller transaction using the product
- Identify whether any applicable charges in a retail teller transaction using the product must be paid out from the offset account or the transaction account
- Compute the applicable charges that would be levied.
- Identify the transaction codes to be used for the accounting entries
Note
In order to compute applicable charges, the following screens need to be maintained, before proceeding with ARC Maintenance:
- Charge Code Maintenance
- Entity Maintenance
Details on the above mentioned maintenances are provided in subsequent sections of this chapter.
This chapter contains the following sections:
- Section 3.2, "ARC Maintenance"
- Section 3.3, "View Teller Transactions"
- Section 3.4, "Generate Transaction Sequence Number"
- Section 3.5, "Reversing of Online Charge"
- Section 3.6, "Maintain Intra Bank Transit Account"
3.2 ARC Maintenance
This section contains the following topics:
- Section 3.2.1, "Invoke ARC Maintenance screen"
- Section 3.2.2, "Identifying Offset Account"
- Section 3.2.3, "Identifying Transaction Account"
- Section 3.2.4, "Identifying Offset and Debit Transaction Codes"
- Section 3.2.5, "Indicating Service Charges for Inter-branch Transactions"
- Section 3.2.6, "Indicating Exchange Rate Revaluation"
- Section 3.2.7, "Defining Charge Details"
- Section 3.2.8, "Charge Code Maintenance"
- Section 3.2.9, "ARC Branch Group Maintenance"
- Section 3.2.10, "Entity Maintenance"
3.2.1 Invoke ARC Maintenance screen
In the ARC Maintenance screen, you maintain accounting and charges information that would be applicable for processing retail teller transactions involving a specific branch, retail teller product and specific currency combination.
You can invoke the ‘ARC Maintenance’ screen from the application browser. You can invoke this screen by typing ‘IFDATMMN’ in the field at the top right corner of the Application tool bar and clicking on the adjoining arrow button.
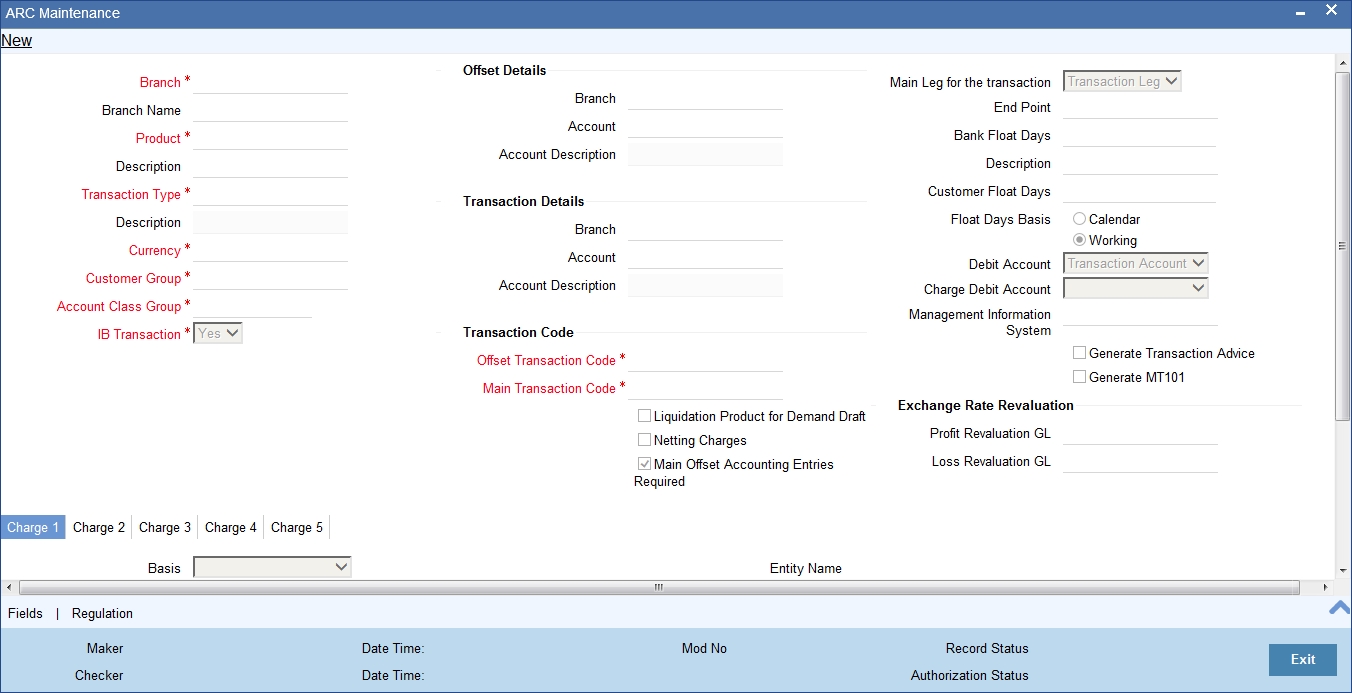
In the ARC Maintenance screen, you maintain accounting and charges information (known as ARC details) that would be applicable when processing retail teller transactions involving a specific branch, retail teller product and specific currency combination.
Note
It is recommended that you maintain ARC details for all possible combinations of retail teller branch, product, offset currency, transaction currencies, customer and customer group. If you do not maintain specific records for each currency, customer and branch combination, you can use the ‘*.* ‘ option.
Product
While maintaining the ARC details, you have to indicate the retail teller product, transactions involving which the details would apply. Each product in Oracle FLEXCUBE is identified with a unique four character alphanumeric code. You can indicate the appropriate product.
It is recommended that you maintain ARC details to be applicable for each retail teller product that you set up.
You can select CCDM (Cash and Cheque Deposit Machines) product to indicate that as soon as cash is deposited it will be reflected in the customer’s account. A separate GL is created to differentiate this CCDM transaction.
Currency
You must indicate the currency, transactions involving which the ARC details would be applied.
For each currency in which retail teller transactions would be processed involving the selected product, you can maintain a separate set of ARC details in this screen. You can also choose the “ALL” option under currency, which the system, will use if no specific record for a currency is available.
Customer Group
Specify the customer group to define charges. This adjoining option list displays all valid customer groups maintained in the system. You can choose the appropriate one. Input to this field is mandatory.
Account Class Group
Select the account class group from the adjoining option list.
Note
If ARC is maintained for an account class group, then the charges computed is applicable for all the account classes defined under that account class group,
The ARC resolution logic is as below:
| Sequence | Account Class Group | Branch | Product | Currency | Customer Group | Transaction Type | |||||||
|---|---|---|---|---|---|---|---|---|---|---|---|---|---|
| 1 | Specific | Specific | Specific | Specific | Specific | Specific | |||||||
| 2 | Specific | *.* | Specific | Specific | Specific | Specific | |||||||
| 3 | Specific | Specific | Specific | *.* | Specific | Specific | |||||||
| 4 | Specific | Specific | Specific | Specific | *.* | Specific | |||||||
| 5 | Specific | Specific | Specific | Specific | Specific | *.* | |||||||
| 6 | Specific | *.* | Specific | *.* | Specific | Specific | |||||||
| 7 | Specific | *.* | Specific | Specific | *.* | Specific | |||||||
| 8 | Specific | *.* | Specific | Specific | Specific | *.* | |||||||
| 9 | Specific | Specific | Specific | *.* | *.* | Specific | |||||||
| 10 | Specific | Specific | Specific | *.* | Specific | *.* | |||||||
| 11 | Specific | *.* | Specific | *.* | *.* | Specific | |||||||
| 12 | Specific | *.* | Specific | *.* | Specific | *.* | |||||||
| 13 | Specific | *.* | Specific | Specific | *.* | *.* | |||||||
| 14 | Specific | Specific | Specific | *.* | *.* | *.* | |||||||
| 15 | Specific | *.* | Specific | *.* | *.* | *.* | |||||||
| 16 | *.* | Specific | Specific | Specific | Specific | Specific | |||||||
| 17 | *.* | *.* | Specific | Specific | Specific | Specific | |||||||
| 18 | *.* | Specific | Specific | *.* | Specific | Specific | |||||||
| 19 | *.* | Specific | Specific | Specific | *.* | Specific | |||||||
| 20 | *.* | Specific | Specific | Specific | Specific | *.* | |||||||
| 21 | *.* | *.* | Specific | *.* | Specific | Specific | |||||||
| 22 | *.* | *.* | Specific | Specific | *.* | Specific | |||||||
| 23 | *.* | *.* | Specific | Specific | Specific | *.* | |||||||
| 24 | *.* | Specific | Specific | *.* | *.* | Specific | |||||||
| 25 | *.* | Specific | Specific | *.* | Specific | *.* | |||||||
| 26 | *.* | *.* | Specific | *.* | *.* | Specific | |||||||
| 27 | *.* | *.* | Specific | *.* | Specific | *.* | |||||||
| 28 | *.* | *.* | Specific | Specific | *.* | *.* | |||||||
| 29 | *.* | Specific | Specific | *.* | *.* | *.* | |||||||
| 30 | *.* | *.* | Specific | *.* | *.* | *.* |
3.2.2 Identifying Offset Account
You can specify the offset account or GL into which offset entries are to be booked, as a result of the teller transaction involving the product, branch and currency.
You can also indicate the branch in which the offset account resides. You can also choose the “ALL” option, which the system interprets as the branch in which the transaction is being input.
Indicating the offset account as the debit account
You could indicate that the offset account is to be the debit account for the transaction, in teller transactions involving the product, branch and currency combination. To indicate this, select the ‘Offset Account’ option in the Debit Account field on this screen.
Indicating the offset account as the default charge account
You could indicate that the offset account is to be the default charge account for the transaction, in teller transactions involving the product, branch and currency combination. This means that the charges would be recovered from this account. To indicate this, select the ‘Offset Account’ option in the Charge From Account field on this screen.
Note
If the offset account you have specified uses an account class that is restricted for debit or credit transactions for the product, an override is sought when you attempt to save the contract.
3.2.3 Identifying Transaction Account
You must specify the transaction account for the retail teller transaction, as well as the branch in which this account resides. The branch information you specify here could also be used in the case of an inter-branch transaction.
If you wish to maintain ARC details for a specific customer, you can specify a valid customer account here. In such a case, the ARC record will be applicable to all retail teller transactions involving the customer, product, branch and currency combination that you have specified in this record, in this screen.
Indicating the transaction account as the debit account
You could indicate that the transaction account is to be the debit account for the transaction, in teller transactions involving the product, branch and currency combination. To indicate this, select the ‘Transaction Account’ option in the Debit Account field on this screen.
Indicating the transaction account as the default charge account
You could indicate that the transaction account is to be the default charge account for the transaction, in teller transactions involving the product, branch and currency combination. This means that the charges would be recovered from this account. To indicate this, select the ‘Transaction Account’ option in the Charge From Account field on this screen. Typically for a “Cash Deposit” type of a transaction, in which the customer account will be specified when the transaction is entered, the same account would also be used to debit the charges.
Note
If the transaction account you have specified uses an account class that is restricted for debit or credit transactions for the product, an override is sought when you attempt to save the contract.
3.2.4 Identifying Offset and Debit Transaction Codes
In addition, you have to also identify the transaction codes against which offset and debit related entries for the transaction ought to be tracked.
For instrument-based products (such as check deposit / check withdrawal products) you must ensure that you specify a transaction code for which check numbers are mandatory.
Charge Debit Account
You can choose the charge debit account from the adjoining drop-down list. The available options are:
- Offset Account
- Transaction Account
Main Offset Accounting Entries Required
Check this box to pass the Main accounting entries along with charges defined at ARC for a Product, else only the charges accounting entries defined for the product alone will get passed which is used for Online charge collection.
Note
When RT products are used for On-line charge definition (STDCHGMN) this checkbox has to be unchecked.
Generate Transaction Advices
You can indicate that advices must be generated for retail teller transactions involving the product, branch and currency combination.
The advice types that are available for the Retail Teller module are the debit and credit advices generated for the debit or credit entries that would be passed to customer accounts, namely, “DR ADVICE” and “CR ADVICE”.
For further information on the debit and credit advices, please refer the Annexure –B.
Generate MT101
Check this box to generate MT101.
3.2.5 Indicating Service Charges for Inter-branch Transactions
In a transaction, if the account branch of the teller transaction is different from the transaction branch, then charges maintained by inter-branch product will be applied to the transaction.
If you select the IB transaction as 'Yes' for a RT product at ARC, the system picks up and process the charge entries as maintained.
If you select the IB transaction as 'NO' for a RT product at ARC, then the charges maintained in Non-IB product are applied to the transaction.
IB Transaction
Check this box if you want the system to pick up the product, for inter-branch transactions.You will notice the difference in the service charges processed for two transactions with same kind of product.
Note
This is supported for Cash Deposit (1401), Cash Withdrawal (1001) and Account to Account Transfer (1006)
Netting Charge
You have the option to net the accounting entries for the debit leg of the charges along with the main transaction entries.
Check this box to indicate that the debit leg of the charges is to be netted before passing the accounting entries. Leave the box unchecked to pass the entries without netting the charges of the debit leg.
End Point
In case of Outward Clearing, Clearing House is derived based on the End Point maintained for the ARC combination.
Description
End Point Description (Display Only field).
Bank Float Days
In case Bank Float Days is not maintained at the Clearing Bank/Branch level, it is picked up from here.
Customer Float Days
In case Customer Float Days is not maintained at the Clearing Bank/Branch level, it is picked up from here.
Float Days Basis
Whether to consider the Calendar Days or Working Days for computing the Value Date based on the Floats maintained.
3.2.6 Indicating Exchange Rate Revaluation
You can specify the following details:
Profit Revaluation GL
Specify the profit revaluation GL details.
Loss Revaluation GL
Specify the loss revaluation GL details.
Exchange rate values are maintained at CCDRATES. Rate type and Rate code preferred is maintained at product level and Negotiated cost rate is maintained at transaction level.
The Revaluation amount = (Transaction amount/exchange rate) - (Transaction amount/negotiated rate),
Where,
Exchange rate is picked for the rate type and rate code maintained at Product level.
The system will display an override message if the negotiated rate is not within the exchange rate variance maintained at the product.
3.2.7 Defining Charge Details
You can define a maximum of five charges. A charge can be computed based either on the transaction amount or on an earlier charge amount
As part of defining the Charge details for each charge, you need to capture the following details in the corresponding charge tabs:
Charge Type
The Charge Type that should be applied on the transaction. It could either be a Percentage of the transaction amount or a Flat Charge.
Slab type
Select whether the Charge computation has to be over different Amount Slabs or Tiers (0-100 @ 10, 101-500 @ 15 etc.).
Basis
You can indicate the basis amount on which the charge is to be computed.
Since you can maintain five different charge amounts, the basis amount that you enter could either be the ‘Transaction Amount’ or any of the earlier charge amounts. For example, let us assume you are maintaining Charge 1. The only basis for charge 1 can be the transaction amount. While defining Charge 2 you can choose either the transaction amount or Charge 1 as the basis. Similarly while defining Charge 3, you can choose the transaction amount or Charge 1 or Charge 2 as the basis. NUM-ACC-OPN-DAYS' is used as basis to define the Account closure Charge product. When this basis is used, Slab type should be maintained as "SLAB" and Rate Type as "FLAT RATE". As system will check the slab for charges to be collected based on the Number of days account kept open by the customer. ‘System Entity’ can be selected to calculate those teller transactions that exceed the restriction amount. If ‘System Entity’ is selected, then the linked system entity returns the basis amount on which the charge is calculated.
Entity Name
The field is enabled if ‘System Entity’ is selected in the ‘Basis’ field. Select the Entity Name, from the adjoining option list. The list of values are populated from the ‘Entity Maintenance’ screen (STDENMNT). Further details on the ‘Entity Maintenance’ screen is provided in subsequent sections of this chapter.
Based on Charge Code
Check this box to indicate whether the charge is based on the charges maintained in the ‘Charge Code Maintenance’ screen. If this field is checked, then the system checks the parameters applicable to the selected charge code from the ‘Charge Code Maintenance’ screen (which is detailed in the subsequent section) and passes the relevant parameter value(s). The system also passes the “Basis” amount to the charge code as the basis is captured at ARC charge level.
If the system is unable to pass a parameter value to a charge code because of unavailability of data, the same parameter is treated as *.*.
Charge Code
This field is enabled if ‘Based on Charge Code’ field is checked. Select the charge code from the adjoining option list. All charge codes as maintained in the charge code maintenance screen is listed in this field.
Currency
You can indicate the currency in which the charge amount would be expressed. If the transaction currency is different from the charge currency, a conversion would be done, using the rate code and rate type that you specify for each charge.
Charge Debit Account
Select the charge debit account into which charge related entries are to be posted from the adjoining option list.
Note
- If charge debit account is maintained at both ARC and charge level with different values, the system will take precedence of the charge debit account at the charge level to debit the charges.The charge debit account can either be "TXN_ACC" or "OFS_ACC" or GL's (Income or Expense)
- If netting charge is checked at ARC level, charge debit account should be maintained at ARC level. This charge debit account and charge credit account is used when bank has to remit tax on income they receive as part of each and every RT transactions.
Charge Credit Account
Select the charge credit account from the adjoining option list. The other leg of the charge is posted to a GL, as specified in the ARC record.
For example,
To collect tax from the income received will be as follows:
For cash deposit transactions, bank wants to collect a charge of 5% on the transaction amount (inclusive of tax). The bank has to remit Tax @ 9.090909% of gross charge collected from the income GL.
The ARC maintenance can be done as follows to achieve the same:
Charge 1:
Charge Basis: Transaction Amount
% Charge: 5 %
Charge Debit Account: Transaction Account
Charge Credit Account: Income GL (say INC00001)
Charge 2:
Charge Basis: Charge 1
% Charge: 9.090909%
Charge Debit Account: Income GL (INC00001)
Charge Credit Account: Tax Payable GL (say PAYB0001)
For a cash deposit of USD 1000 in account CASA0001, the gross charge (inclusive of tax) will be USD 50 and Tax will be 4.55 after rounding.
The accounting entries for the maintained ARC will be as below:
| Dr/Cr | Account | Currency | Amount | ||||
|---|---|---|---|---|---|---|---|
| DR | CASH GL | USD | 1000 | ||||
| CR | CASA0001 | USD | 1000 | ||||
| DR | CASA0001 | USD | 50 | ||||
| CR | INC00001 | USD | 50 | ||||
| DR | INC00001 | USD | 4.55 | ||||
| CR | PAYB0001 | USD | 4.55 |
Netting
If two or more accounting entries, for the same event, are to be passed to the same account, on the same Transaction Date, these entries can be netted. You can choose to net the charge leg of the Transaction Account (debit) entry with the main leg of the customer accounting entry.
Transaction Code
You can indicate the code using which the accounting entries would be booked, for each charge.
Rate Code and Rate Type
While settling charges for cross currency transactions, you can choose to debit the customer by applying the mid rate, buy rate or by using the buy/sell spread over the mid-rate. Therefore you need to specify the Exchange Rate details for each ARC definition record that you maintain in the system.
Firstly, indicate the Rate Code for which different rates can be maintained. A list of all the rate codes maintained in the Floating Rates Maintenance screen is displayed in the list. You can choose the appropriate code.
In addition to specifying the Rate Code you have to indicate the Rate Type which should be picked up for exchange rate conversions involving settlement of charges for cross currency transactions.
You can maintain any one of the following as the Rate Type:
- Buy
- Mid
- Sell
After identifying the Rate Code and Rate Type you can indicate the basis amount on which charges are to be computed.
Amount
You have to specify the flat amount only when the charge type is a Flat Amount.
The flat amount will be collected in the currency that you have specified in the Currency Code field.
Rate
If you have indicated that the charge should be a percentage of the transaction amount, you have to necessarily capture the rate that is to be applied on the transaction amount. The rate that you specify will be applied after converting the amount into the Account Currency.
Minimum and Maximum Charge Amount
When the charge type applicable on the transaction is a percentage of the transaction amount you have to capture the minimum and maximum charge amounts that should be applied on the transaction.
If the charge percentage involving a particular transaction is less than the minimum charge the system will by default debit the customer account with the minimum charge amount. Similarly, when the charge percentage exceeds the maximum amount, the system will debit the customer account with the maximum charge amount.
Note
The charge amount will be deducted in the currency that you specified earlier.
MIS Head
Specify the MIS Head that is applicable for the charge-related accounting entry.
Description
You can indicate a short description for the charge.
Charge Tracking Preference
Select charge tracking preference from the adjoining drop-down list. The options available are:
- Part Debit/Part Waive - If your account does not have an amount sufficient to collect the full charge, then the system collects the available amount and waives off the remaining amount. There will not be any tracking for the waived amount. For example: If the charge amount is Rs100 and there is Rs70 in the customer account, then Rs70 will be collected as the charge and the remaining Rs30 would be waived off.
- Part Debit/Part Track - If your account does not have an amount sufficient to collect the full charge, then the system collects the available amount and tracks the remaining amount. For example: If the charge amount is Rs100 and there is Rs70 in the customer account, then Rs70 will be collected as the charge and the remaining Rs30 would be tracked for collection.
- Full Waive - If your account does not have sufficient balance then the system waives off the full charge amount. For e.xample: If the charge amount is Rs100 and there is Rs70 in the account, the entire Rs100 charge will be waived off.
- Full Track - If your account does not have sufficient balance to cover the charge, then the system tracks the entire amount as receivable. For example: If the charge is Rs100 and the amount in the account is Rs70, charge will not be collected, instead Rs100 will be tracked as receivable and this would be tracked till closure.
- Force Debit - The system debits the charge amount forcefully from your account. If the amount available in the account is not sufficient then force debit results in negative balance. For example: If the charge is Rs100 and the customer account has Rs70, then the system forcibly debits the customer account of Rs100 resulting in the customer account balance of Rs30. The amount is not tracked in this case. This option if selected, ignores all other validations for balance check and will debit the customer account for the charge amount. The same balance check validations are skipped here too which are currently skipped by the system if balance check required flag is unchecked at transaction code level. However, other validations such as No debit, account freeze will not be skipped.
- Not Required - Select ‘Not Required’ if charge for tracking is not preferred. The system behaves in the same manner as it is when “Tracking required auto liquidation” flag is unchecked. This will consider the validations for balance check, that is preference at transaction code level or account overdraft errors (e.g. AC-OVD)
- Reject - If the account does not have sufficient balance, then the system rejects entire transaction.
Note
- If “Charge Tracking Preference” is any of the above other than “Not Required”, the given preference will take precedence over the account overdraft check validation (AC-OVD). For example, if account overdraft check validation (AC-OVD) is set up as an override, but tracking preference is selected as full track or part debit/ part track, the charge amount will be tracked if available balance is insufficient to cover the charges. If tracking preference is selected as “Not Required”, then the system will debit the account for charge even if available balance is insufficient to cover the charges.
- If account overdraft check validation (ACOVD) is set up as an error, but tracking preference is selected as “Force Debit”, then the charge amount will be debited to the customer account by skipping the balance check validation and if available balance is insufficient to cover the charges. But if the tracking preference is selected as “Not Required”, the transaction fails due to insufficient fund.
Note
- The charge tracking preference is not applicable if the charge debit account is a GL
- The charge tracking preference is not applicable for Account close out products or NUM-ACC-OPN-DAYS if selected as basis.
Liquidation Preference for Tracked Charges
- Select liquidation preference for tracked charges from the adjoining drop-down list. The options available are:Partial - If ‘Partial’ is selected, the system liquidates the tracked charge amounts partially during EO only if part amount is available in the account. For example: If Rs.30 is tracked for an account and during next day EOD, system finds Rs10 is available in the account, system will try to collect the available Rs10.
- Full - If this is selected, then the system tries to liquidate the individual tracked charge amount fully during EOD. If only part amount is available in the account, system will not try to collect the part amount. For example: If Rs30 is tracked for a charge in an account and during next day EOD, system finds Rs10 is available in the account; system will not try to collect the available Rs10. But, system will wait till the time balance available in the account becomes Rs30.
Note
- The system does not validate the “Charge Tracking Preference” selected and “Liquidation Preference for Tracked Charges” selected for a given charge. This has to be operationally controlled. The “Liquidation Preference for Tracked Charges” is applicable only if the Charge tracking preference is selected as “Full Track” or “Part Debit/ Part Track”. In all other cases, the liquidation preference can be maintained as “Full” or “Partial” which will not have any impact unless any charges are tracked.
- Liquidation of IC tracked charges are done as per the logic available for other tracked amounts like RT, CL tracked amounts.
- You can define the priority of liquidation order product-wise at account class AMT block screen for IC charge products also.
If track receivable is checked at RT product level, then the non sufficient treatment or charge tracking preference at ARC maintenance level is ignored by the system.
If track receivable is not checked at RT product level, the non sufficient treatment or charge tracking preference selected at ARC maintenance level for the product is applicable. The non sufficient treatment or charge tracking preference at ARC level is applicable to charges and not for the original transaction amount. For ARC product, the processing is done by RTAUTDLY batch.
If one charge has been used as a basis to arrive at another charge, then the ‘Charge Tracking Preference’ will be same for both the charges.
During evaluation of charge tracking preference for a transaction with multiple charges, the system calculates all the charges and then considers charges from 1 to 5.
The system displays override messages when:
- Available balance is sufficient to cover the transaction amount but not sufficient for the charge.
- Product level tracking is checked and when transaction amount is greater than the available balance.
The non sufficient funds tracked transactions can be reversed on the same day only, next day reversal is not allowed.
If netting is disabled for credit transactions, the charges will be deducted from the account. Hence, NSF charge tracking preference will be applicable if system is unable to collect the charge amount.
Process flow for Non sufficient Funds Treatment
If ‘Charge Tracking Preference’ is selected as ‘Part track’ or ‘Full track’ then, once the amount for tracking has been calculated then the system does the following:
- Creates an internal amount block for the amount to be tracked against the charge account in table CSTB_AUTO_SETTLE_BLOCK.
- The tracked amount will be updated in receivable amount in the CASA account
- Once the receivable amount is updated, the available balance is affected. The receivable amount is deducted from current balance while arriving at the available balance.during tracking.
- The receivable amount will be displayed in customer account
- For all the online transaction screens during SAVE at enrich stage, if any charge amount is being tracked or waived or force debited to the account, the same information is displayed as an override. If you accept the override, the transaction will be completed and if the override is rejected, the transaction will not proceed.
- If you modify or waive any of the charges after the override is displayed, the override should be cancelled and modify the charges. After the modification of charges, system will re-evaluate the NSF preferences based on the available balance and the modified charges. On save, system displays if any charge amount is being tracked or waived or force debited to the account.
Whenever an account is credited for which there are tracked receivables, the system will do the following:
- For all the existing internal amount blocks, system checks for earmarking the credit of book date, blocking order and liquidation order.
- If there are multiple charges tracked as a part of a single RT transaction, like all five ARC charges, the order of evaluation will be in increasing order from Charge 1 to charge 5.
- During online apportionment of credit and subsequent liquidation, the system will not consider account level receivable tracking for NSF tracked charges. If there are any NSF tracked charge amount for the account, system will go ahead with the online apportionment of credit and subsequent liquidation of the charges during EOD.
During EOD the does the following to liquidate the tracked receivables:
- The system evaluates every tracked records with apportioned amount.
- If apportioned amount is equal to the tracked amount, the system will liquidate the tracked amount completely.
- If apportioned amount is less than the tracked amount and liquidation preference is ‘FULL’, the liquidation will not happen and system will wait for the apportioned amount to become equal to the tracked amount.
If apportioned amount is less than the tracked amount and liquidation preference is ‘Partial’, system will liquidate partially and the tracked amount will be reduced.
3.2.8 Charge Code Maintenance
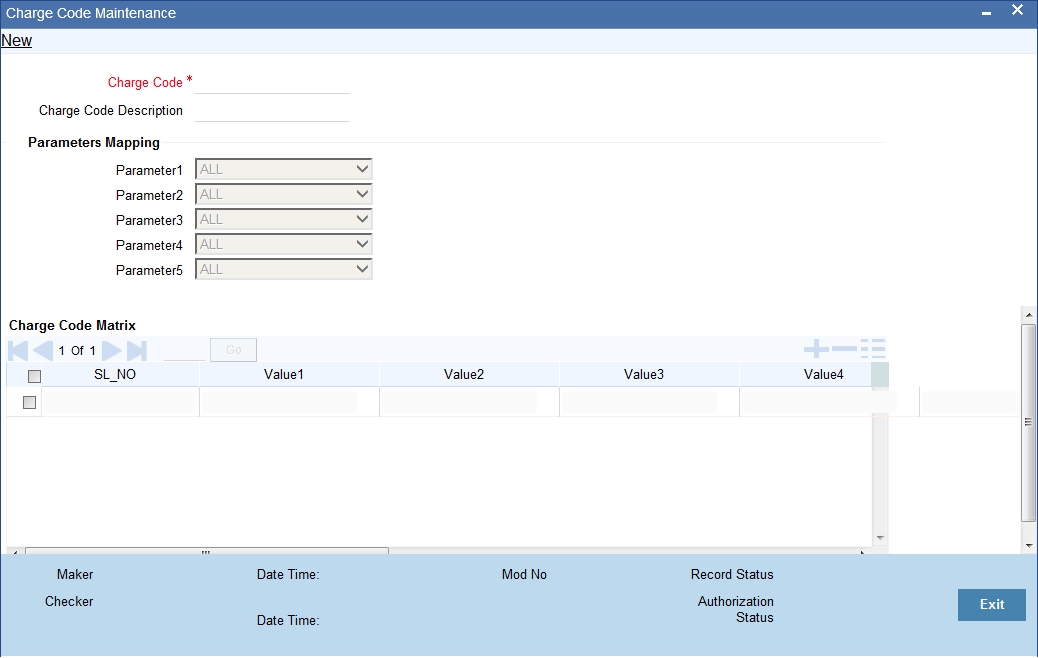
In the ‘Charge Code Maintenance’ screen, charges based on some additional parameters which are not a part of ‘ARC maintenance’ can be maintained. The charge matrix in this screen can be attached to the ARC maintenance screen for arriving at charges based on additional parameters.
You can invoke this screen by typing ‘STDCHGCD’ in the field at the top right corner of the Application tool bar and clicking the adjoining arrow button.
Specify the following details in this screen:
Charge Code
Specify a unique identifier to identify a charge code.
Charge Code Description
The description of the charge code is defaulted here.
Parameters Mapping
In this section, parameters based on which charges are differentiated are mapped to fixed parameter IDs. There are 5 parameter IDs provided in this section. At least one parameter should be mandatorily defined. Select the appropriate value from the adjoining option list. This list contains the following values:
- TRANSACTION_BRANCH_GROUP- This is the ARC branch group code to which the transaction branch belongs to. If the transaction branch is not grouped under any ARC branch group *.* is returned for the same.
- ACCOUNT_BRANCH_GROUP - This is the ARC branch group code to which the account branch belongs to. If the account branch is not grouped under any ARC branch group *.* is returned for the same.
- PAYABLE_BANK_CODE - This is the beneficiary Bank Code which is used while sending an outgoing interbank BC/DD/TT.
- PAYABLE_BRANCH_CODE- This is the beneficiary Bank’s branch Code which is used while sending an outgoing interbank BC/DD/TT.
The list of factory shipped parameters which is made available in this screen are as follows:
| Parameter Specific To | Differentiating Parameter | Description | Applicable to transaction | ||||
|---|---|---|---|---|---|---|---|
| Customer | CUSTOMER_CATEGORY | Customer category specified at customer CIF level | ALL | ||||
| GROUP_CODE | Group code specified at customer CIF >Additional tab level | ALL | |||||
| CLEARING_GROUP | Clearing group specified at customer CIF >Additional tab level | ALL | |||||
| TAX_GROUP | Tax group specified at customer CIF >Additional tab level | ALL | |||||
| CUSTOMER_CLASSIFICATION | Customer Classification specified at customer CIF >Additional tab level | ALL | |||||
| NATIONALITY | Nationality specified at customer CIF level> personal/corporate tab | ALL | |||||
| Transaction | TRANSACTION_BRANCH | Branch code at which transaction is being done | ALL | ||||
| TRANSACTION_BRANCH_GROUP | Branch group to which transaction branch belongs to | ALL | |||||
| ACCOUNT_BRANCH | Branch code of the transaction account | ALL | |||||
| ACCOUNT_BRANCH_GROUP | Branch group to which account branch belongs to | ALL | |||||
| PAYABLE_BANK_CODE | Payable bank code for BC/DD/TT | BC/DD/TT | |||||
| PAYABLE_BRANCH_CODE | Payable Branch for BC/DD/TT | BC/DD/TT | |||||
| TO_ACCOUNT_BRANCH | Branch code of the Credit account | LOCH and Account to Account transfer | |||||
| TO_ACCOUNT_BRANCH_GROUP | Branch group to which credit account branch belongs to | LOCH and Account to Account transfer |
Charge Matrix
Values 1 to 5
Values 1 to 5 correspond to the respective parameter value in the Parameter Mapping section. For example: Value 1 corresponds to the Parameter Value 1 and so on and so forth. Select the specific values from the adjoining option list.
Charge Type
Select the charge type from the drop down list. The charge type can be flat or percentage.
Amount
Specify the charge amount in this field.
Rate
Specify the rate in this field.
Minimum Charge
Specify the minimum charge in this field.
Maximum Charge
Specify the maximum charge in this field.
Slab Type
Select the Slab Type as Slab or Tier from the drop down list. If Slab Type is Slab or Tier, then provide the slab or tier details in the slab or tier sub-screen by clicking ‘S’ button.
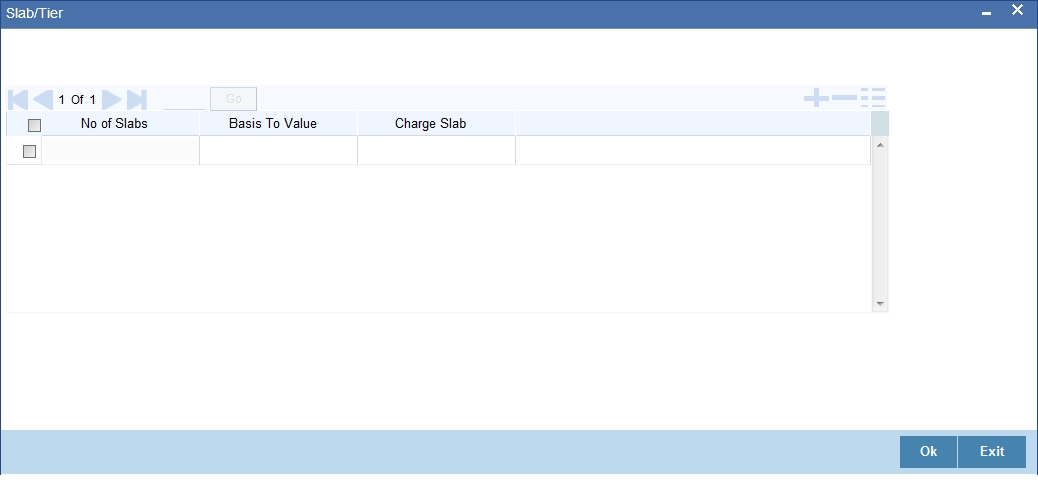
In this screen, you need to specify the number of slabs, the basis to value, and charge slab details.
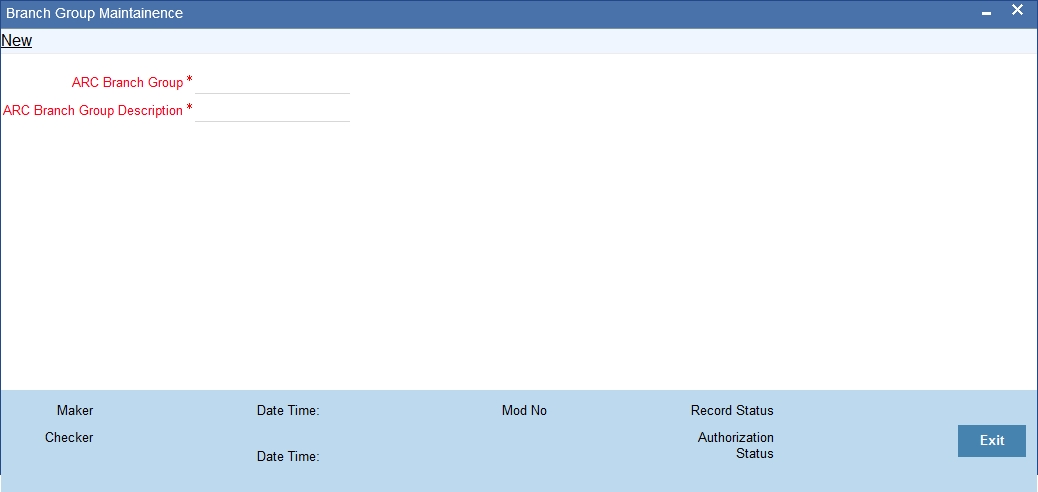
3.2.9 ARC Branch Group Maintenance
To define branch groups which are equivalent to cities or regions that the bank operates in, invoke the ‘ARC Branch Group Maintenance’ screen by typing ‘STDBRGMT’ in the field at the top right corner of the application tool bar and clicking the adjoining arrow button.
Specify the following details in this screen:
ARC Branch Group
Specify a group code to identify a group of branches.
ARC Branch Group Description
Specify a description for the branch group.
After specifying details in the ‘ARC Branch Group Maintenance’ screen, all the ARC branch groups are displayed in the ‘Branch Parameter Maintenance’ screen (STDBRANC). Select the branch group from the ‘ARC Branch Group’ field.
For more information on the Branch Parameters Maintenance screen, refer section 5 ‘Branch Parameters’ in the Core Service module.
3.2.10 Entity Maintenance
In the ARC Maintenance screen, fees or charges as a percentage of the transaction amount can be calculated for transactions exceeding the restriction amount. To calculate this fee or charge, you need to select ‘System Entity’ in the ‘Basis Field’ in the ARC Maintenance screen. Thereafter, the ‘Entity Name’ field is enabled which displays values obtained from the ‘Entity Maintenance’ screen. You can invoke this screen by typing ‘STDENMNT’ in the field at the top right corner of the application tool bar and clicking the adjoining arrow button.
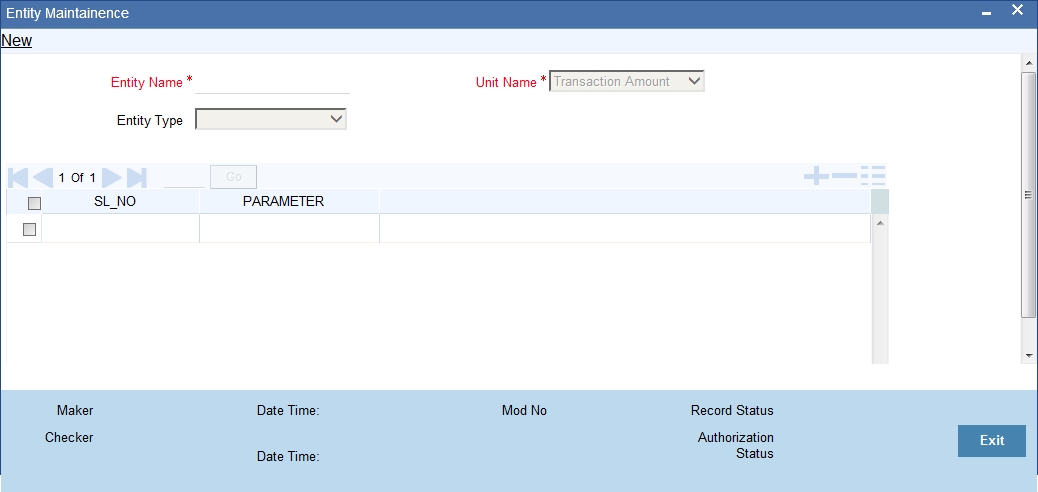
Specify the following in this screen:
Entity Name
Specify the entity name to be considered for fee maintenance.
Unit Name
Select a value for charge consideration from the drop down list. The value provided in the drop down list are as follows:
- Exceeded Amount
- Transaction Amount
During ARC Maintenance, the following scenarios are considered if exceeded amount is selected:
- If the transaction is not exceeding the restriction utilization, then the value provided is 0.
- If the transaction is exceeding the restriction utilization partially, then the portion of the transaction amount which exceeds the restriction amount, is provided.
During ARC Maintenance, the following scenarios are considered if transaction amount is selected
- If the transaction is not exceeding the restriction utilization, then the value provided is 0.
- If the transaction is exceeding the restriction utilization partially, then the transaction amount is provided.
- If the transaction is exceeding the restriction utilization fully, then the transaction amount is provided.
Entity Type
Select the Entity Type from the drop down list. The values provided in the drop down list are as follows:
- Null
- Restriction Code
Parameter
Select the Parameter if ‘Restriction Code’ is selected in the Entity Type field, from the adjoining option list. All active restriction codes as maintained in the system are displayed in this field. For more information on restriction code maintenance, refer to the section ‘Restriction Amount Maintenance’ in the Core Services Module.
3.2.10.1 Viewing Entity Types
You can view the entity types in the ‘Entity Summary’ screen. You can invoke this screen by typing ‘STSENMNT’ in the field at the top right corner of the application tool bar and clicking the adjoining arrow button.
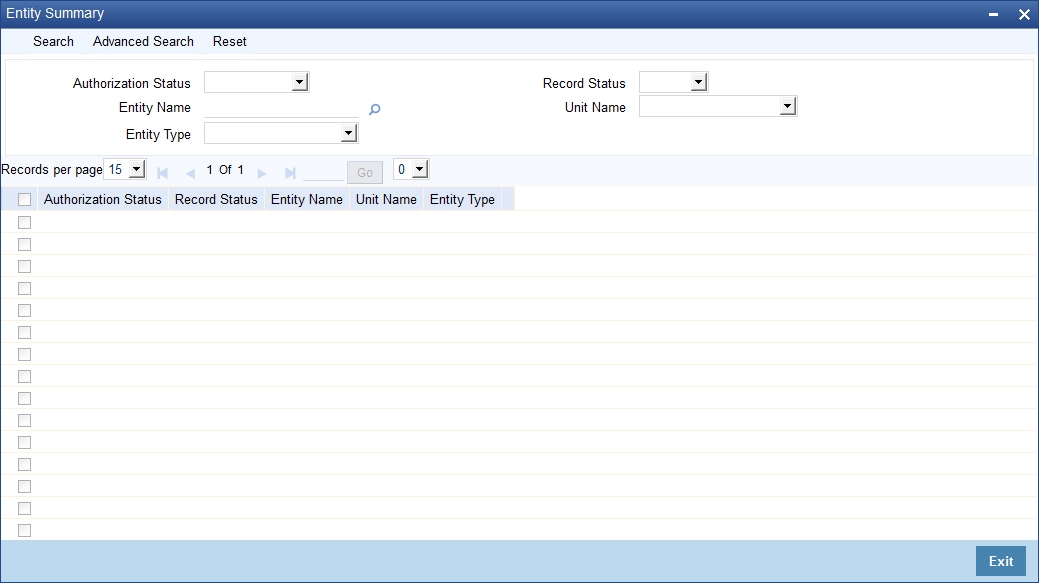
You can search for entities by specifying values in the following fields:
- Authorization Status
- Record Status
- Entity Name
- Unit Name
- Entity Type
On updating these details and clicking the ‘Search’ button, the following columns are populated:
- Authorization Status
- Record Status
- Entity Name
- Unit Name
- Entity Type
3.3 View Teller Transactions
This section contains the following topics:
- Section 3.3.1, "Viewing Teller Transactions"
- Section 3.3.2, "Viewing Transaction Leg Details"
- Section 3.3.3, "Specifying Offset Leg Details"
- Section 3.3.4, "Viewing Instrument Codes"
3.3.1 Viewing Teller Transactions
You can view retail teller transactions in the ‘Retail Teller Transaction Query’ screen. Invoke this screen from the application browser.
You can invoke this screen by typing ‘DEDQUERY’ in the field at the top right corner of the Application tool bar and clicking on the adjoining arrow button.
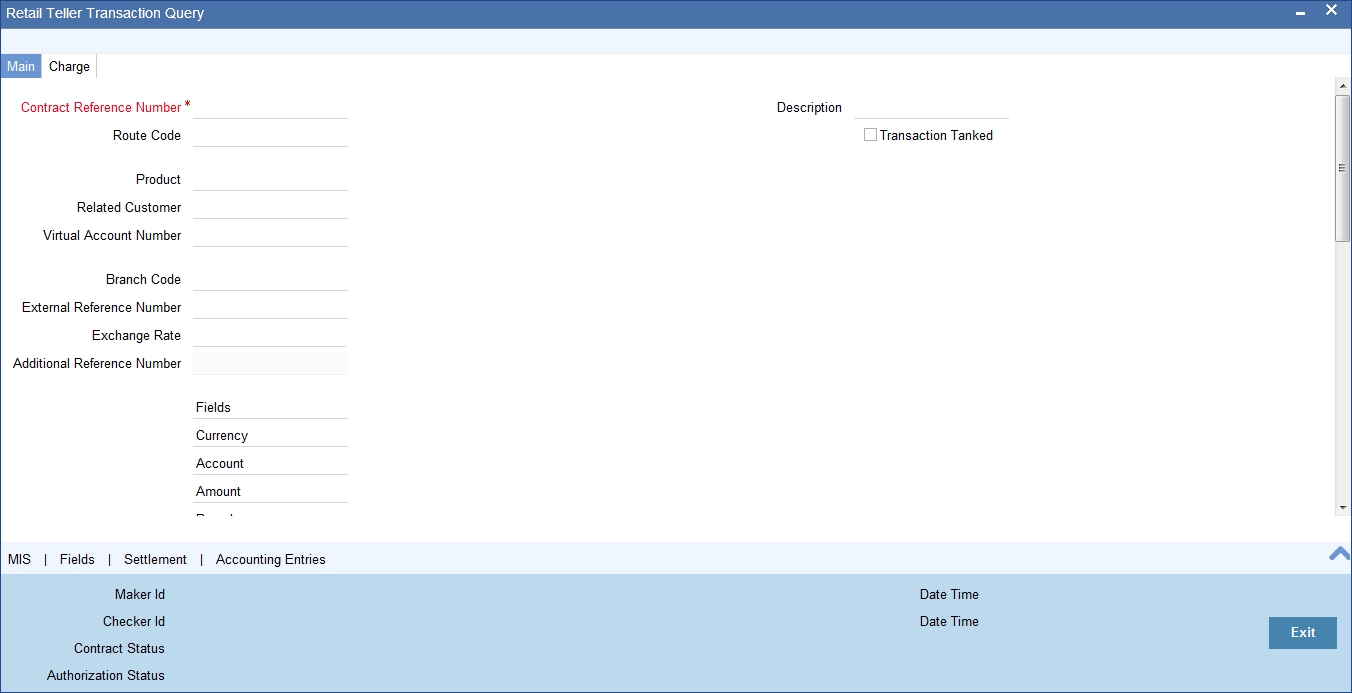
In this screen, you can view the following details for each teller transaction:
- Product
- Related Customer
- Virtual Account Number
- User Reference Number
- Reference Number
- Tanked Transaction
- Additional Reference Number
Note
Value against Virtual Account Number field is displayed only when the transaction is done with a Virtual Account. The related Physical account number will be displayed in the field Account. If Transaction is done with physical account, then Virtual Account Number field will be blank..
For more information on Tanked Transaction, refer Branch Parameters chapter under Core Services module.
3.3.2 Viewing Transaction Leg Details
Here you can view the following details:
- Transaction Currency
- Transaction Branch
- Transaction Account
- Transaction Amount
- Transaction Code
3.3.3 Specifying Offset Leg Details
- Offset Currency
- Offset Account Branch
- Offset Account
- Offset Amount
- Transaction Code
3.3.4 Viewing Instrument Codes
You can view the following details here.
- Value Date
- Exchange Rate
- Local Currency Exchange Rate
- Local Currency Amount
- Narrative
- Track Receivable
3.4 Generate Transaction Sequence Number
This section contains the following topics:
- Section 3.4.1, "Generating Transaction Sequence Number"
- Section 3.4.2, "Generation of Advices for Retail Teller Transactions"
- Section 3.4.3, "Maintaining Branch level Cash Deposit and Cash Holding details"
- Section 3.4.4, "Viewing Teller Branch Parameter"
- Section 3.4.5, "Viewing Branch Breaching Limits"
3.4.1 Generating Transaction Sequence Number
The system generates a unique transaction sequence number and displays an Information Message as “Transaction Sequence number is XX”, indicating the generated transaction number after completion of each teller transaction INPUT stage.
The generated transaction sequence number is also displayed at the following levels of ‘Work Flow’:
- Completed
- Reversed
- Pending
- Assigned
- Query option in ‘Search Task’
Note
- This sequence number would be reset on every date change during Mark BOD. The sequence number after date change always starts from 1.
- The number is reset to ‘1’ during Mark BOD for every date change.
3.4.2 Generation of Advices for Retail Teller Transactions
As mentioned earlier, the system generates debit / credit advices if so specified in the ARC Maintenance record for the product, currency and branch combination involving the transaction. For an ODC transaction, payment and cover messages are generated based on the route code specified. The formats for the same are given in the Annexure –B.
3.4.3 Maintaining Branch level Cash Deposit and Cash Holding details
You can maintain branch level cash deposit and cash holding details of Retail Teller. You can invoke this screen by typing ‘STDTBRAN’ in the field at the top right corner of the Application tool bar and clicking on the adjoining arrow button
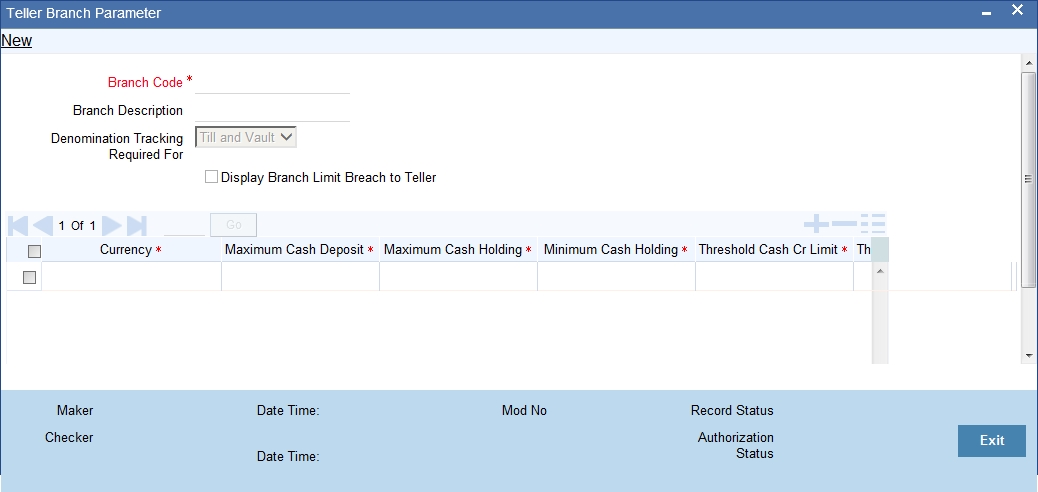
You can specify the following in this screen:
Branch Code
Select the branch code from the available option list.
Branch Description
System displays the branch description based on selected branch.
Preferences
Denomination Tracking Required For
Select the denomination tracking preference from the drop-down list. The list displays the following values:
- Till and Vault - To track denomination for both Tills and Vaults. By default, this option is selected.
- Vault - To track denomination only for Vault, if a Vault is involved in the transaction.
- None - To indicate that denomination tracking is not required for any transaction.
Display Branch Limit Breach to Teller
Check this box to display the branch limit breach to the teller. If you check this box, both till and branch breaching override messages will be displayed to the teller. If you do not select this check box, only till breaching override messages will be displayed to the teller.
Currency Wise Cash Limits
Currency
Select the currency code from the available option list..
Maximum Cash Deposit
Specify the maximum deposited cash amount.
Note
- The maximum cash deposit amount should not be greater than maximum cash holding amount.
- The maximum cash deposit amount should not be greater than product level limit amount.
Minimum Cash Holding
Specify the minimum cash holding amount.
Maximum Cash Holding
Specify the maximum cash holding amount.
The maximum cash holding amount should not be less than minimum cash holding amount.
Threshold Cash Credit Limit
Specify the threshold amount for cash credit limit.
Threshold Cash Debit Limit
Specify the threshold amount for cash debit limit.
3.4.4 Viewing Teller Branch Parameter
You can view retail teller branch parameters in the ‘Teller Branch Parameter’ screen. You can invoke this screen by typing ‘STSTBRAN’ in the field at the top right corner of the Application tool bar and clicking on the adjoining arrow button.
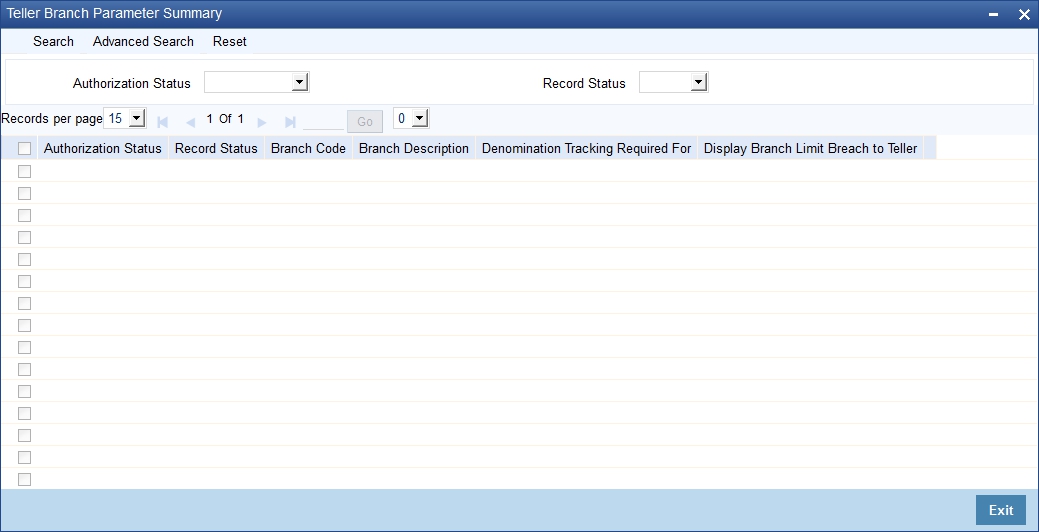
You can view the following details here:
- Branch Code
- Currency
- Maximum Cash Deposit
- Minimum Cash Holding
- Maximum Cash Holding
3.4.5 Viewing Branch Breaching Limits
You can view the details of the current logged in branch's Till and Branch level cash withholding limit breach. You can invoke this screen by typing ‘TVQB’ in the field at the top right corner of the Application tool bar and clicking on the adjoining arrow button.
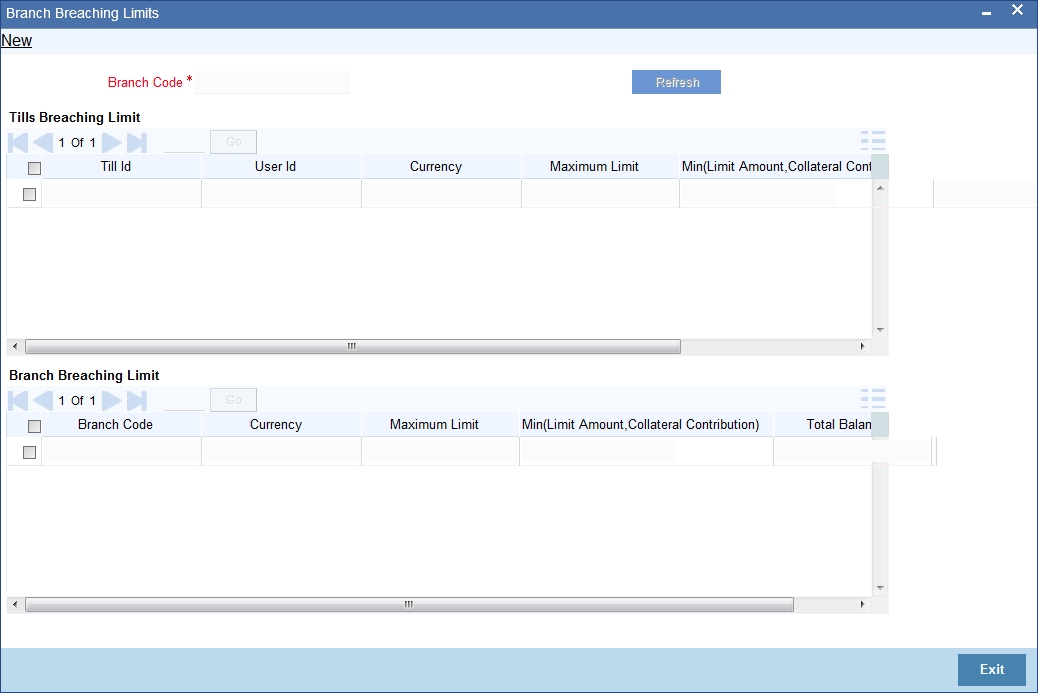
Branch officer can view the details of the tills or vaults whose balances are breaching cash withholding limits.
Branch Code
The system defaults the current branch code.
You can view the following details in this screen:
Tills Breaching Limit
- Till Id
- User Id
- Currency
- Maximum Limit
- Minimum Limit
- Current Till Balance
Branch Breaching Limit
- Branch Code
- Currency
- Maximum Limit
- Minimum Limit
- Total Balance
When you click ‘Refresh’ button, the following actions are performed:
- Currency wise details of the tills that breach minimum or maximum till balance limit are displayed.
- Currency wise details of the branch’s current cash status is displayed if the branch limit of individual currencies are breached.
- Branch current cash status is validated. The sum of total balances of vaults and tills in a branch, including the closed tills will be compared against the branch’s minimum or maximum holding limit.
- Till breaching details of the currencies that are maintained in the Till/Vault maintenance are displayed.
- Branch breaching details of the currencies that are maintained in the Teller Branch Parameter are displayed.
3.5 Reversing of Online Charge
You can reverse the online charge transactions using 'Transaction Reversal' screen. You can invoke this screen by typing 'DEDONLRV' in the field at the top right corner of the Application tool bar and clicking the adjoining arrow button.
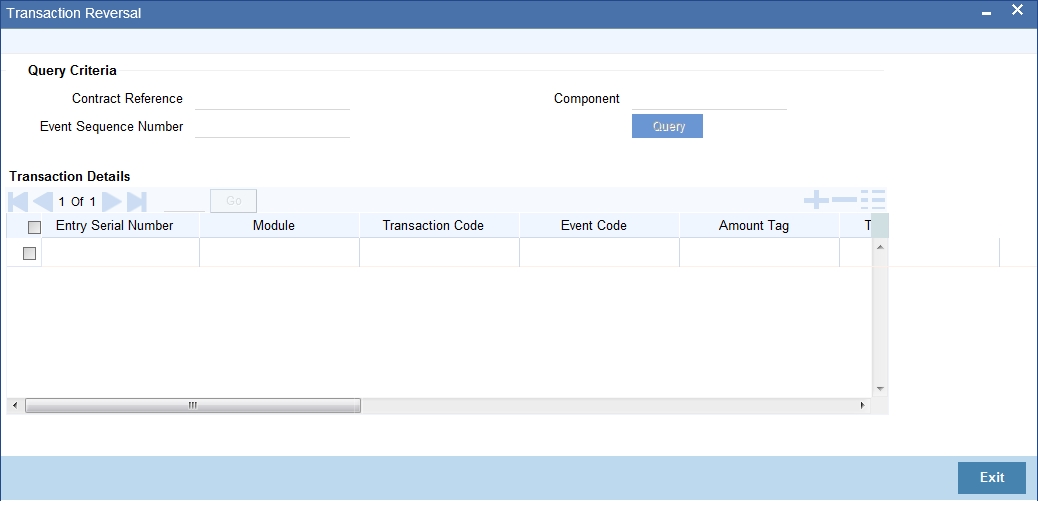
Query Criteria
You can base your query by providing any or all of the following details:
- Contract Reference - Transaction reference number for the contract
- Event Sequence Number - Event sequence number of the transaction
- Component - Charge component to be reversed
On clicking the 'Query' button, system identifies all records satisfying the above specified criteria and displays in the 'Transaction Details' section.
Transaction Details
System displays following details under 'Transaction Details' section.
- Entry Serial Number
- Module
- Transaction Code
- Event Code
- Amount Tag
- Transaction Date
- Value Date
- Debit/Credit
- Foreign Currency Amount
- Exchange Rate
- Local Currency Amount
- Related Reference
- Related Account
You can reverse only non cash based transactions.
3.6 Maintain Intra Bank Transit Account
This section contains the following topics:
3.6.1 Maintaining Intra Bank Transit Account
You can maintain intrabank transit account for each branch for receiver branch, vault and currency combination in the 'Inter Branch Transit Account Maintenance' screen. You can invoke this screen by typing 'DEDTRACC' in the field at the top right corner of the Application tool bar and clicking the adjoining arrow button.
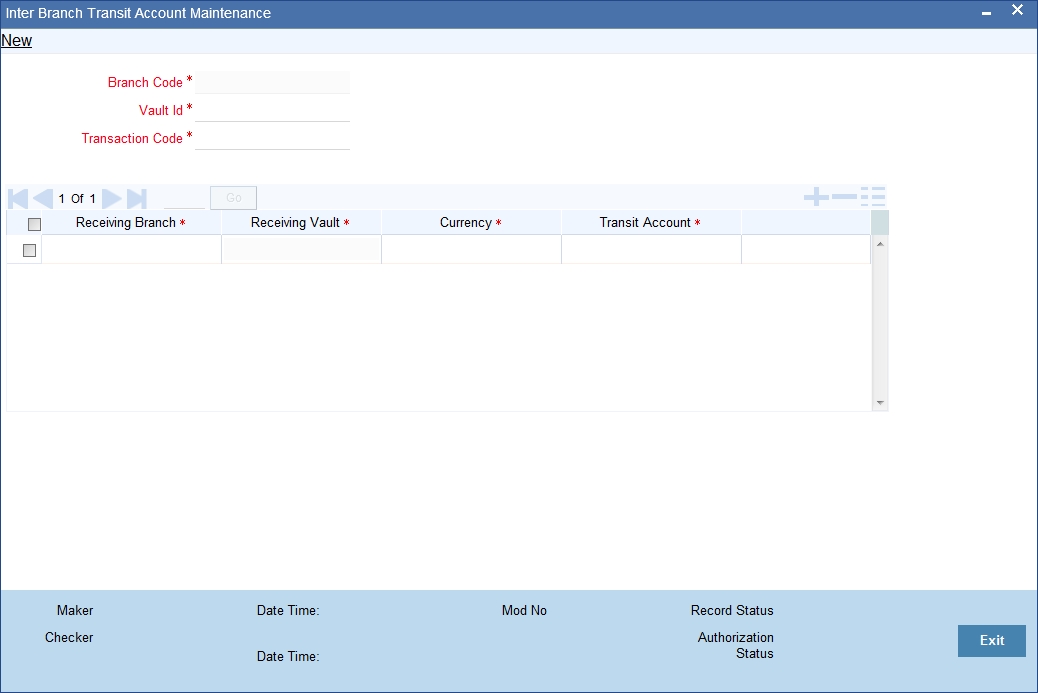
Here you can specify the following fields:
Branch Code
Specify the branch code. The adjoining option list provides all the branch codes maintained in the system. You can choose the appropriate one.
Vault
The system defaults the vault from which cash will be transferred. This is done on the basis of selected branch.
Transaction Code
Specify the transaction code. The adjoining option list provides all the valid codes maintained in the system. You can choose the appropriate one.
3.6.2 Currency Details Tab
You can specify the following details here:
Receiving Branch
Specify the destination branch to which the cash will be transferred.
Receiving Vault
The system defaults the vault in the destination branch which will receive the cash. This is done on the basis of selected branch.
Currency
The system displays the currency of the cash.
Transit GL
The system displays the transit account that is used to track the movement of cash.