3. Maintaining Customer Signatories
You can capture signatures and link them to specific customers through the following screens:
- ‘Signature Verification’ screen
- ‘CIF Signatory Details Input’ screen
The signatures can be captured through the ‘CIF Signatory Details’ screen, later on you can link them to specific accounts through the ‘Account Signatory Details’ screen.
The procedure for maintaining the database through the above functions is described subsequently.
This chapter contains the following sections:
- Section 3.1, "Customer Signature and Image Upload"
- Section 3.2, "Operations on a CIF Signatory Record"
- Section 3.3, "Customer Signature and Image History"
3.1 Customer Signature and Image Upload
This section contains the following topics:
3.1.1 Maintaining Customer Image and Signature
You can upload both signatures and images for a customer using ‘Customer Image and Signature Upload’ screen. Also you can replicate the uploaded signature to customer’s existing accounts.
You can query the signature details for customer and signature id combination from ‘Customer Signature and Image Upload’ Screen. You can also query with the help of web-service (FCUBSSV Service) using the operation name ‘QueryCustomerSignature’. On query, the system will return images in an encoded base64format. The external system will have to decode the same to get the original image/signature.
You can invoke the ‘Customer Image and Signature Upload’ screen by typing ‘STDCIFIS’ in the field at the top right corner of the Application tool bar and clicking on the adjoining arrow button.
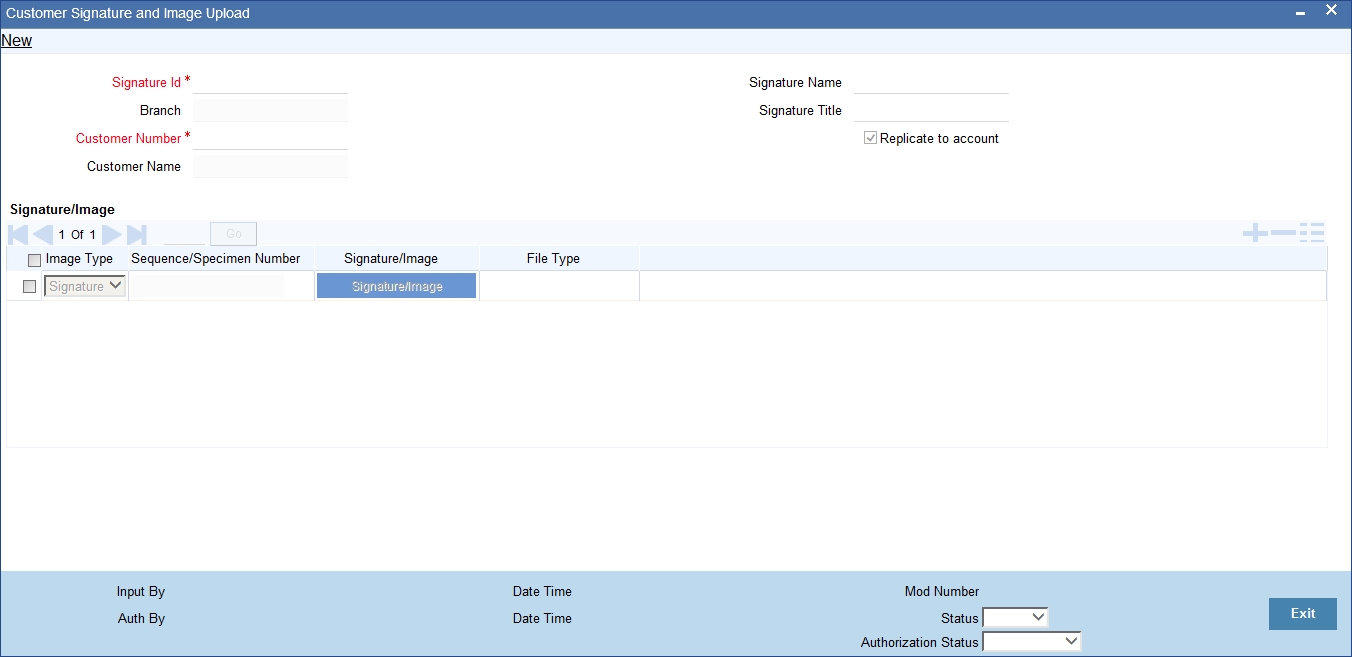
Branch
System displays the Current Branch in this field.
Customer Number
Specify the customer number from the adjoining option list.
Customer Name
The system displays the name of the specified customer ID based on the details maintained at ‘Customer Maintenance’ level
Signature ID
Customer ID is defaulted as Signature ID for the first signature upload; however, you need to specify it manually for the subsequent uploads.
Since you can maintain unlimited number of signatories for every customer, each signatory is allotted a serial ID. This serial ID is referred to as the customer signatory ID. It will be associated with the signatory for all future retrievals.
Note
This serial ID is unique across that particular CIF for which it is maintained.
Signature Name
Full name of the Customer is defaulted as signature name for the first signature upload; however, you need to specify it manually for the subsequent uploads.
Signature Title
Short name of customer is defaulted as signature title for the first signature upload; however, you need to specify it manually for the subsequent uploads.
Customer signature title describes the position occupied by that person in the organization. Typically this applies for a corporate customer.
Note
A customer can maintain one or more accounts in your bank. For each of these accounts you can maintain unlimited number of customer signatures. Hence it is essential to mention separately the signature title and name.
Replicate to Account
Check this box to enable the replication of the new signature to existing customer’s accounts during the first authorization.
Note
The system replicates signatures to the accounts for both single and joint accounts only if ‘Replicate Customer Signature’ check box is also checked at the account level.
3.1.1.1 Signature/Image Details Section
Image Type
Select the image type you want to upload from the drop-down list. This list displays the following values:
- Signature – Displayed by default
- Image – Select to upload image
Default value of this field is Signature.
Sequence/Specimen Number
System displays auto generated sequence or specimen number in this field based on the image type chosen.
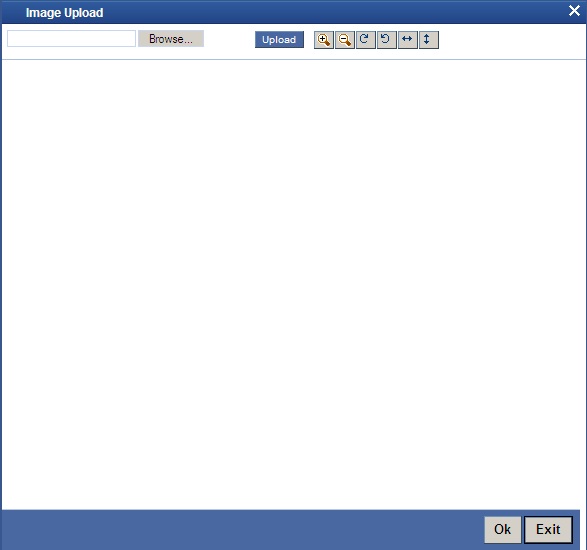
3.1.2 Signature/Image Button
Click on ‘Signature/Image’ button to upload the signature or image. The system displays the below screen:
3.1.2.1 Replicating and Closing Signature
Replication of signature happens only if ‘Replicate Customer Signature’ box is checked at both ‘Customer Image and Signature Upload’ (STDCIFIS) screen and at ‘Customer Accounts Maintenance’ (STDCUSAC). level.
Replication of customer signature details also happens for joint accounts.When customer details are changed for an account (as a part of ‘Primary Party Change’), the signature details of the new customer is replicated (based on the replication flag status).
Closing the ‘Signature ID’ at ‘Customer Image and Signature Upload’ (STDCIFIS) screen removes the record from customer accounts maintenance (STDCUSAC). Status of replication flag at signature and account level will not be checked for closure
System displays the following alert message:
‘Closing the record will remove the Signature Id across Customer and Account Maintenance’ before closing the record.
3.2 Operations on a CIF Signatory Record
This section contains the following topics:
- Section 3.2.1, "Performing Operations on CIF Signatory Record"
- Section 3.2.2, "Deleting a CIF Signatory Record"
- Section 3.2.3, "Authorizing a CIF Signatory Record"
- Section 3.2.4, "Modifying a CIF Signatory Record"
- Section 3.2.5, "Detailed Viewing of a CIF Signatory Record"
3.2.1 Performing Operations on CIF Signatory Record
Apart from maintaining CIF signatory details you can perform the following operations on a CIF signatory record:
- Delete CIF signatories
- Copy CIF signatories
- Authorize CIF signatories
- Modify CIF signatories
- View the details of customer signatories
The maintenance of CIF signatory details is within the maintenance of CIF details. Hence any operation of CIF signatory details should be done through the CIF details maintenance screen. Any operation on a stored customer signatory should be done after unlocking the CIF record.
3.2.2 Deleting a CIF Signatory Record
To delete a CIF Signatory Record, Capture ‘CIF ID’ of the record in the ‘Signature Upload’ screen and click delete icon. The customer signatory details will be deleted.
Note
To delete the details of a customer signatory, you should have access rights to delete a CIF ID.
3.2.3 Authorizing a CIF Signatory Record
Modifications to the record have to be authorized before they take effect.
Select ‘Authorize’ from the Actions menu in the Application toolbar or click authorize icon, when the record whose details you want to authorize is displayed.
You will be prompted to confirm the authorization. Once you authorize a record, your user ID will be captured in the checker field. The status of the record will be updated as ‘Authorized’.
3.2.4 Modifying a CIF Signatory Record
To make any modification on a Customer Signatory record, unlock the CIF record to which the signatory is attached and do the necessary modification in the ‘Signature Upload’ screen. When you select ‘Save’ from the Actions menu in the Application toolbar or click save icon to save the modified record, the modified fields are updated. Your user ID is captured in the maker field. The date and time of authorization is also captured.
3.2.5 Detailed Viewing of a CIF Signatory Record
You can invoke the ‘Customer Information Maintenance’ screen by typing ‘STDCIF’ in the field at the top right corner of the Application tool bar and clicking on the adjoining arrow button.
Once you do this the ‘Customer Information Maintenance’ screen is displayed. You have to click ‘Show Image’ button in this screen. The signatory details of each record are displayed one at a time. You can also print the displayed details.
3.3 Customer Signature and Image History
This section contains the following topics:
3.3.1 Viewing Customer Signature Change History
You can view the history of all the Signature/Image changes for a customer in the ‘Customer Signature and Image History’ screen.
You can invoke this screen by typing ‘STDCSHIS’ in the field at the top right corner of the Application tool bar and clicking on the adjoining arrow button..
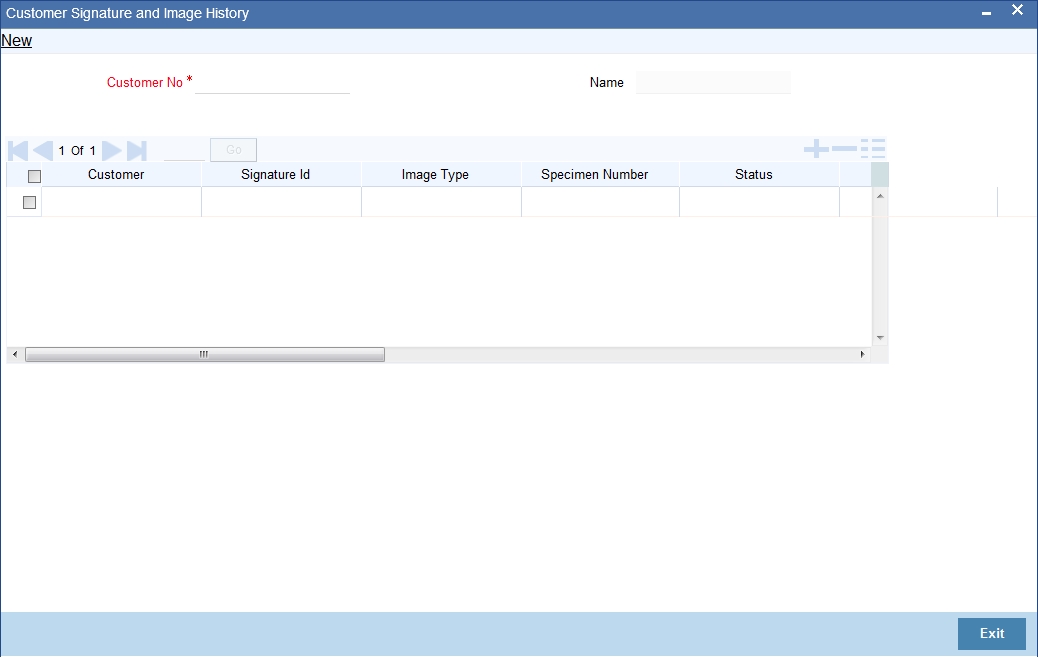
The following details are captured in this screen:
Customer Number
Select the customer number for which you want to view the signature history details, from the adjoining option list. The list displays all valid customers maintained in the system.
Name
The name of the selected customer is displayed here.
The following details pertaining to the selected account are displayed:
- Customer
- Signature ID
- Image Type
- Specimen Number
- Status
- Mod Number
- Maker ID
- Release Time
- Checker ID
- Checker Date Stamp
- File Type
- Signature/Image