| Oracle® Argus Insight Minimum Security Configuration Guide Release 8.1 E68323-01 |
|

 Previous |
Minimum Security Configuration Guide
Release 8.1
E68323-01
September 2016
This document describes how to configure security settings for the Argus Insight application. You configure these settings after you install Argus Insight. For details about installing the application, see the Oracle Argus Insight Installation Guide.
Contents
Section 1, "Configuring LDAP Authenticator Class.exe Permissions"
Section 2, "Configuring Permissions in the Windows Registry"
Section 4, "Configuring Folder Access to the Web User Account"
Section 6, "Configuring Permissions for Log/Application Files and Folders"
You need to grant permissions to the LDAP Authenticator Class.exe file, which is the executable for the Argus Insight application.
In addition, you need to create a domain user who will have access to the web servers and all network services that will be configured in Argus Insight. The instructions in this document use an example user, named safety_user. You need to substitute safety_user with the name of the domain user that you create.
|
Note: You need to complete the instructions in this section for each web server in your installation. |
To configure the permissions for the Argus Insight application:
Go to the web server.
Click Start, and select Run.
The Run command dialog box appears.
In the Open field, enter MMC comexp.msc /32, and click OK.
The Component Services screen appears.
Navigate to Console Root > Component Services > Computers > My Computer > DCOM Config.
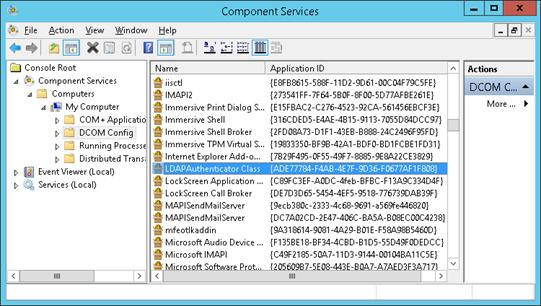
Right-click LDAP Authenticator Class (that is, Argus Insight application), and select Properties from the menu.
Click the Security tab.
Modify the Launch and Activation Permissions as follows:
Select the Customize option.
Click Edit.
The Launch and Activation Permission dialog box appears.
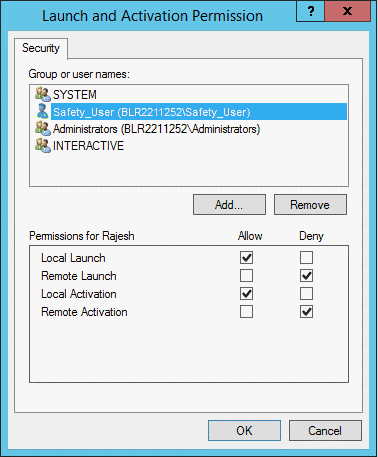
To add the domain user who will have launch and activation permissions, click Add.
For the Local Launch option and the Local Activation option, select the Allow check box.
For the Remote Launch option and the Remote Activation option, select the Deny check box.
Click OK.
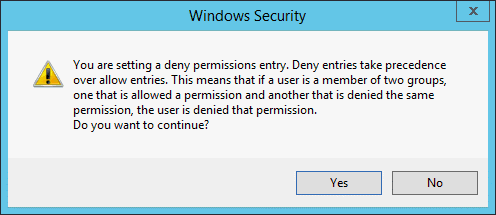
Click Yes in response to the message about Deny permissions.
Modify the Access Permissions as follows:
Select the Customize option.
Click Edit.
The Access Permission dialog box appears.
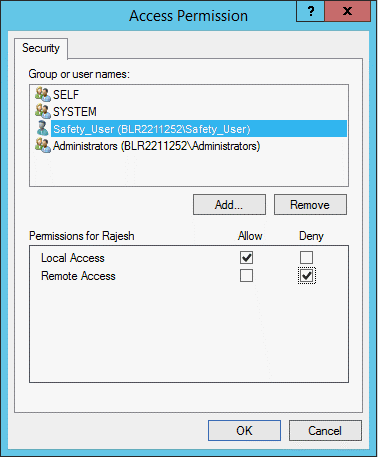
To add the domain user who will have access permissions, click Add.
For the Local Access option, select the Allow check box.
For the Remote Access option, select the Deny check box.
Click OK.
Click Yes in response to the message about Deny permissions.
Modify the Configuration Permissions as follows:
Select the Customize option.
Click Edit.
The Change Configuration Permission dialog box appears.
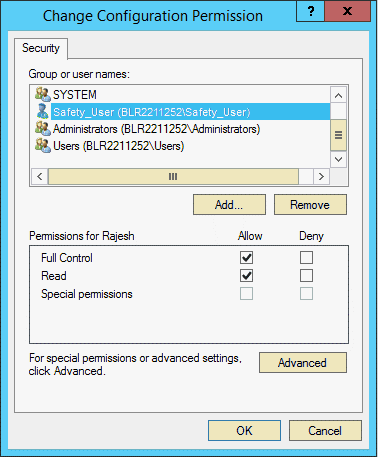
To add the domain user who will have configuration permissions, click Add.
For the Full Control option and the Read option, select the Allow check box.
Click OK.
Click OK to save the changes and close the LDAP Authenticator Class Properties dialog box.
To configure permissions in the Windows system registry:
Open the Windows Registry Editor:
Click Start, and select Run.
The Run command dialog box appears.
In the Open field, enter regedit.
Click OK.
Navigate to the following folder:
HKEY_USERS\S-1-5-20
Right-click the S-1-5-20 folder, and select Permissions.
The Permissions for S-1-5-20 dialog box appears.
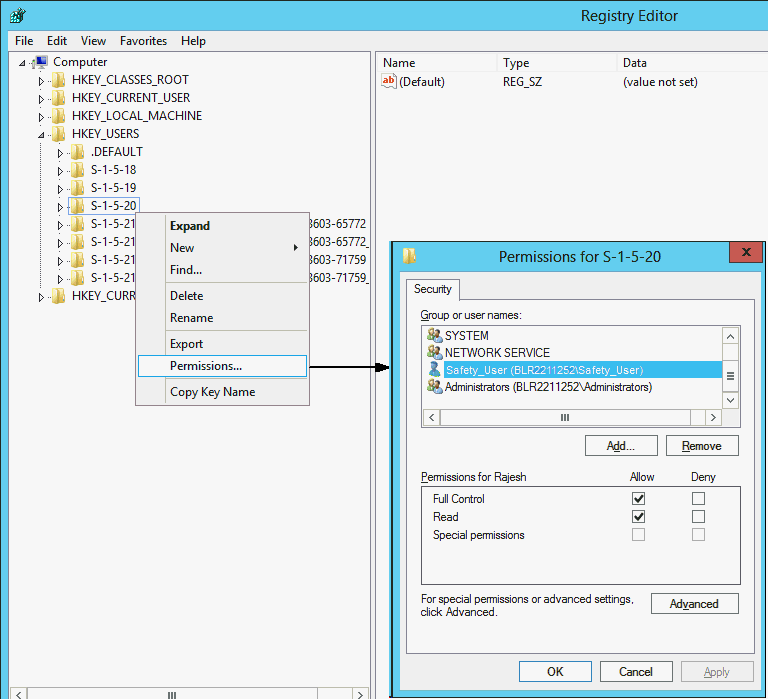
To add the domain user, click Add.
For the Full Control option, select the Allow check box.
Click OK.
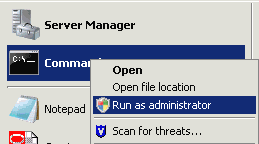
To grant permission to IIS metabase:
Use the Run as administrator option to open and run Command Prompt screen.
|
Note: Make sure you run the following command as administrator. |
Grant the safety_user permission to access IIS metabase:
C:\WINDOWS\Microsoft.NET\Framework\v2.0.50727>aspnet_regiis.exe -ga "safety_user"

This section, which describes how to configure folder access to the web user account, includes the following topics:
The instructions in this section assume your installation has a domain server and all servers are configured in that domain.
On every web server, configure Anonymous access as follows:
Navigate to Internet Information Services (IIS) Manager.
Double-click Authentication.
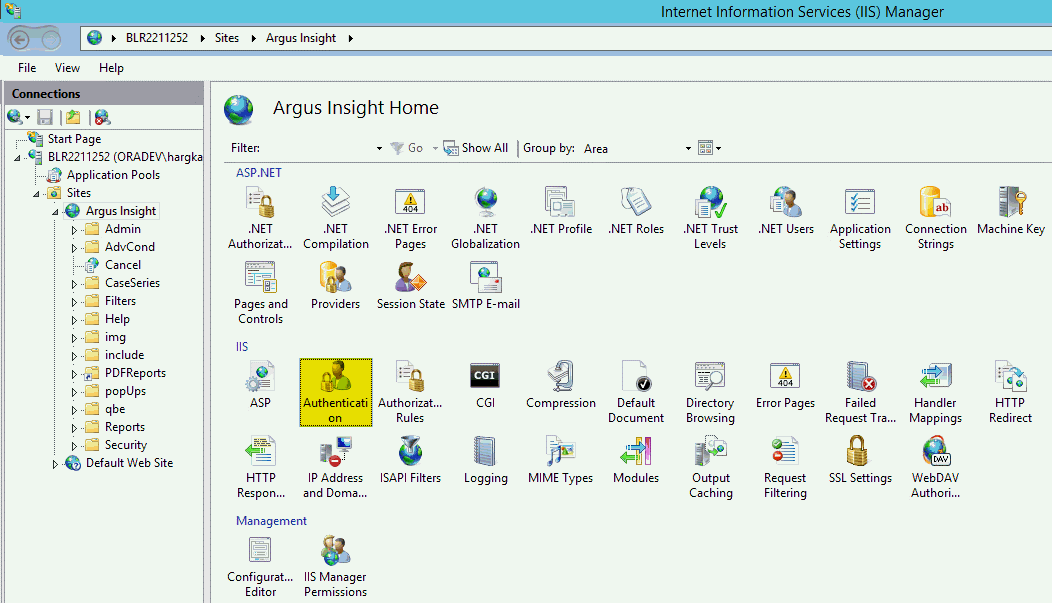
Right-click Anonymous Authentication, and from the drop-down menu, click Edit.
The Edit Anonymous Authentication Credentials dialog box appears.
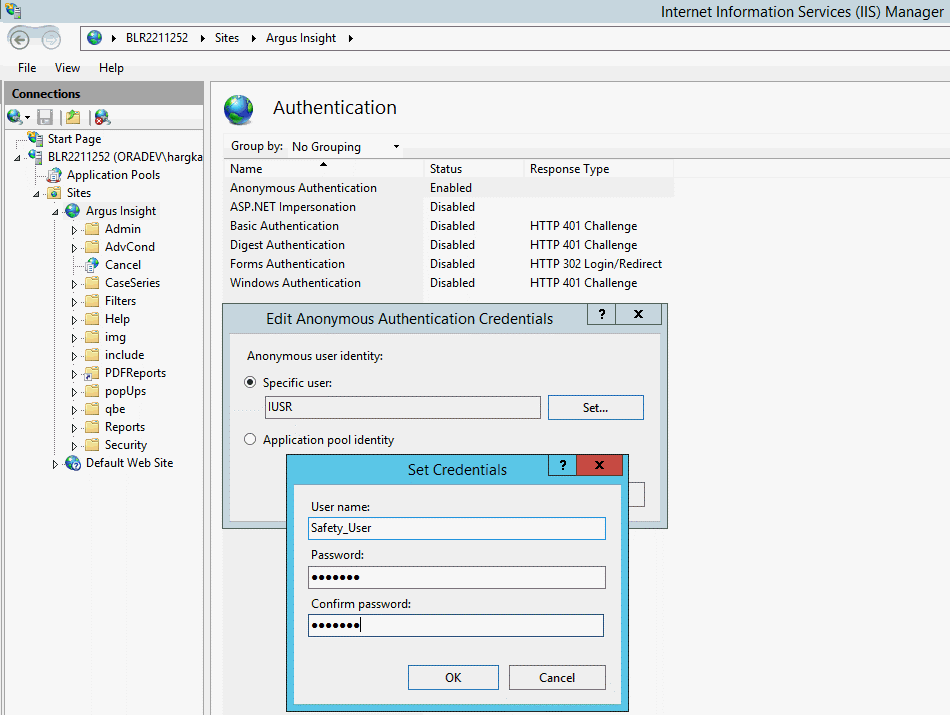
To define the user credentials for the Safety domain user (safety_user), click Set.
Click OK to save the changes.
On every web server, you must configure the following virtual directories to connect as the Safety domain user (safety_user):
Cancel
PDFReports
To configure these virtual directories:
Select one of the virtual directories, and click Basic Settings.
The Edit Application dialog box appears.
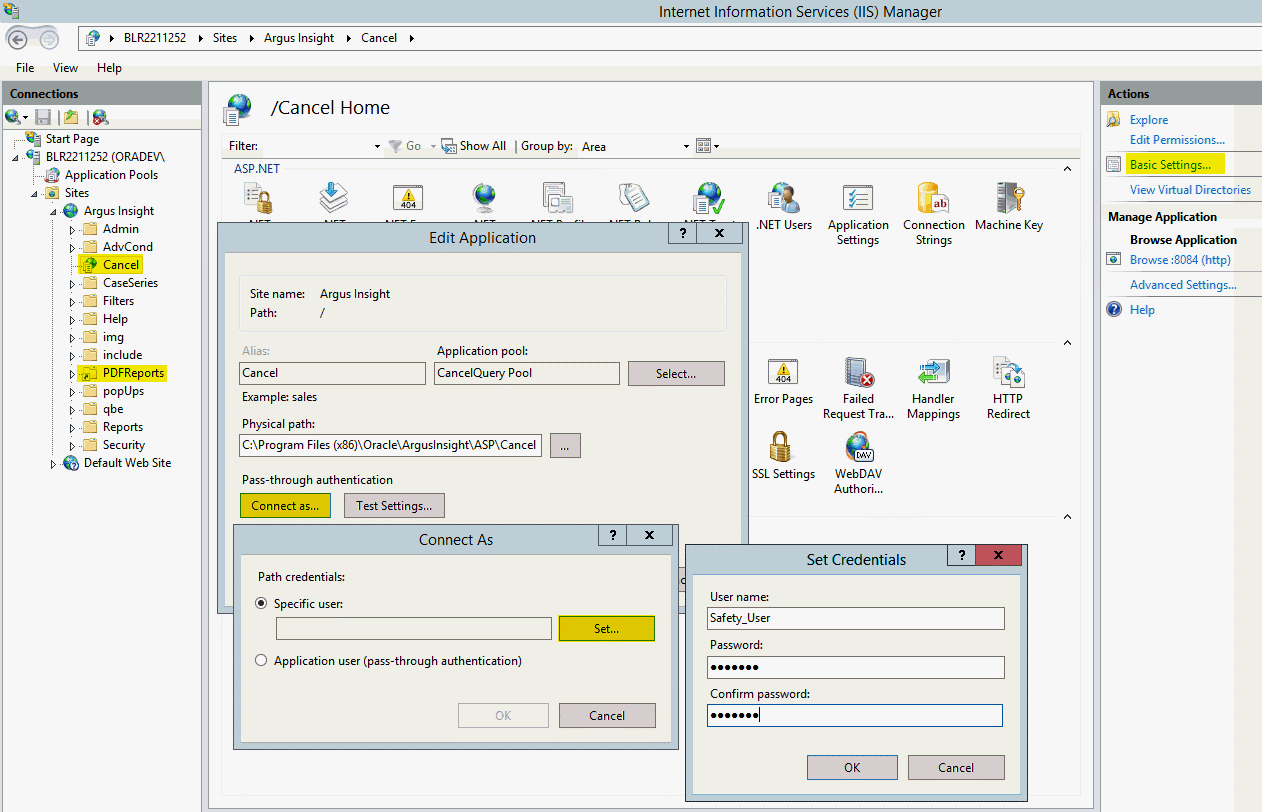
Click Connect as.
The Connect As dialog box appears.
Select the Specific user option, and click Set.
The Set Credentials dialog box appears.
Enter the user name and password for the Safety domain user (safety_user).
Click OK until all the open dialog boxes are closed.
Repeat the process for the other virtual directories.
You must configure the following application pools to run under the safety_user identity:
Argus Insight App Pool
CancelQuery Pool
To configure these pools:
Select Application Pools to open the Application Pools page.
Select one of the application pools that you must configure.
Click Advanced Settings.
The Advanced Settings dialog box appears.
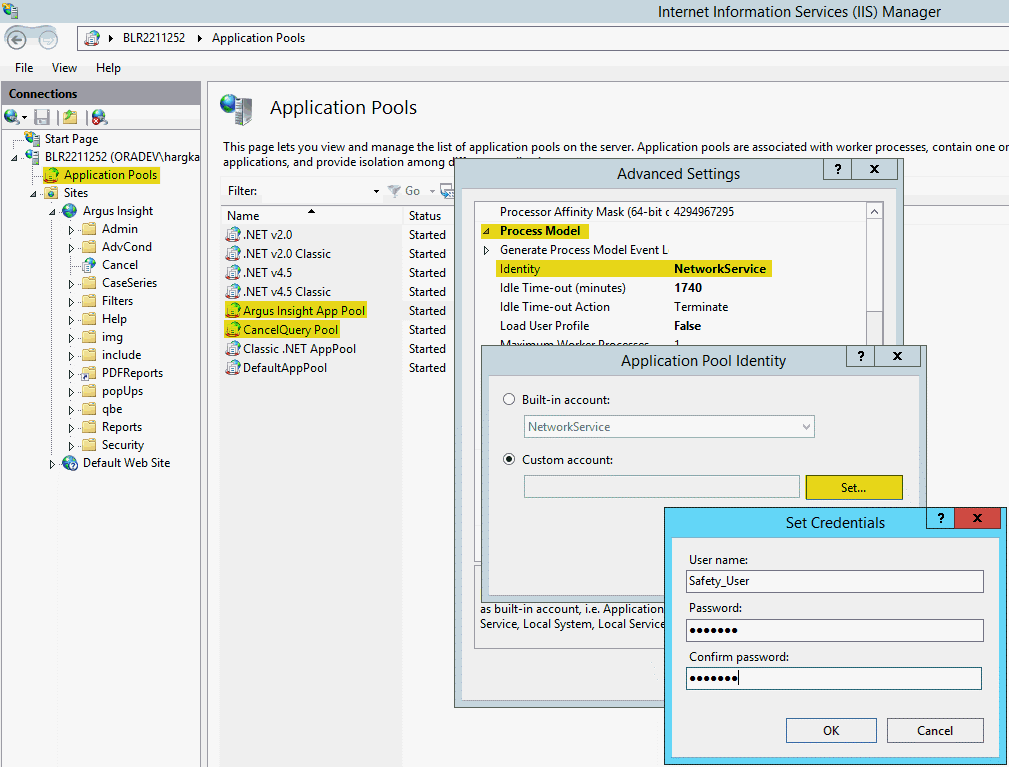
Expand Process Model.
Edit the Identity.
Select the Custom account option, and click Set.
The Set Credentials dialog box appears.
Enter the user name and password for the Safety domain user (safety_user).
Click OK until all the open dialog boxes are closed.
Repeat the process for the other application pools.
You must assign the Safety domain user (safety_user) the proper read, modify, and execute permissions for the following folders and files:
C:Windows\AI.ini
C:Windows\ArgusSecureKey.ini
C:\Temp
Insight_Installation_Directory\ArgusInsight\Bin\Log
Insight_Installation_Directory\ArgusInsight\CacheTemp
Insight_Installation_Directory\ArgusInsight\PDFReports
Insight_Installation_Directory\ArgusInsight\Upload
To configure the permissions:
Navigate to the appropriate file or folder.
Open the Permissions dialog box.
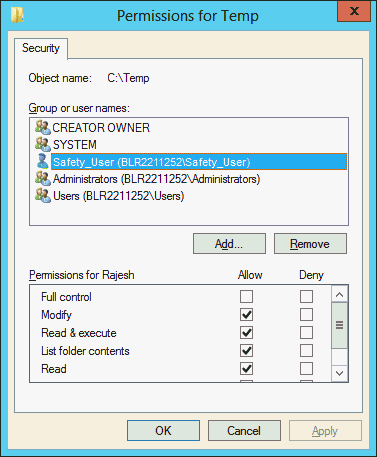
Select the Allow check box for the following permissions:
Modify
Read & execute
Read
|
Note: Do not provide Full control for any of these folders or files. |
Click OK to save the changes.
Repeat the process for the other files and folders.
To configure HTTPS:
Log in to the web server.
Start Internet Information Services (IIS) Manager.
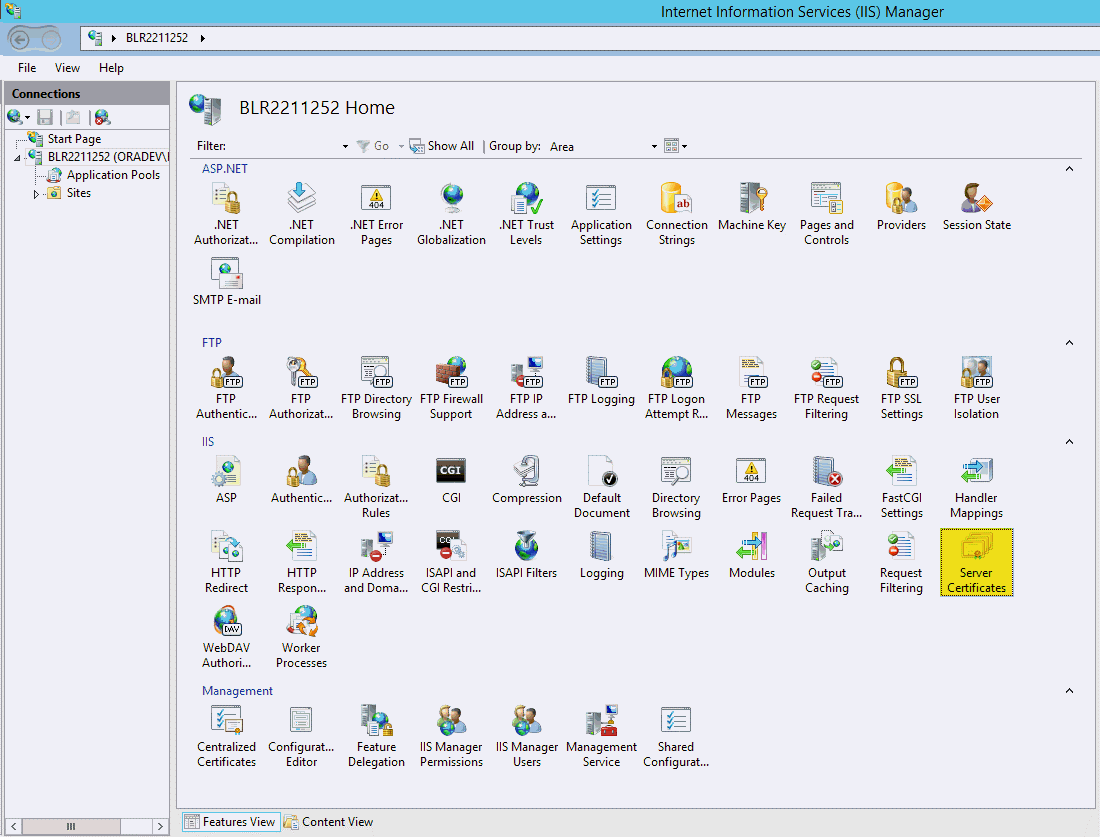
Select the server node, select the Server Certificates icon in the IIS section, and click Open Feature.
Create or import your SSL certificate.
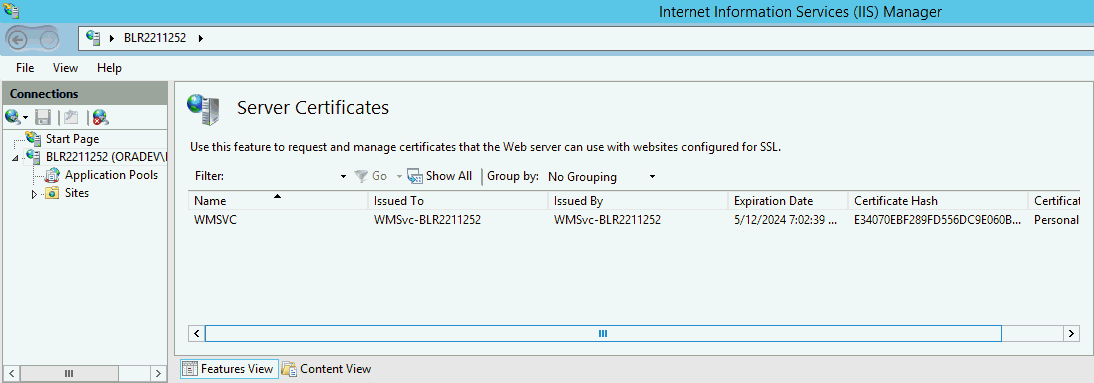
Wait until the certificate is created.
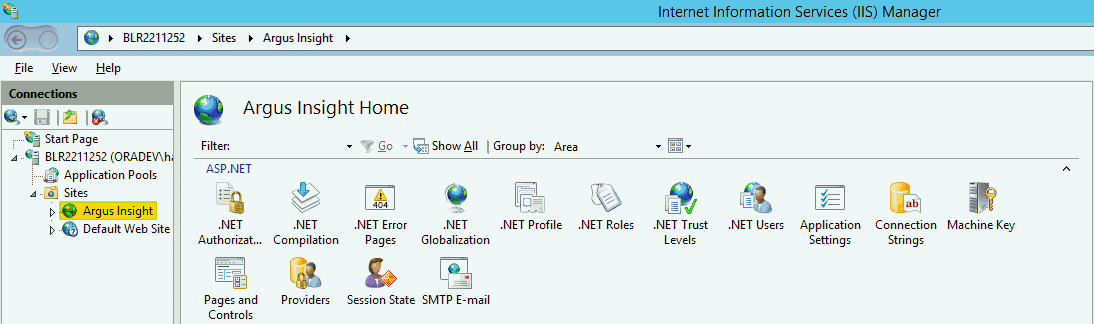
Navigate to Sites, select Argus Insight, and click Bindings.
Click Add.
The Add Site Binding dialog box appears.
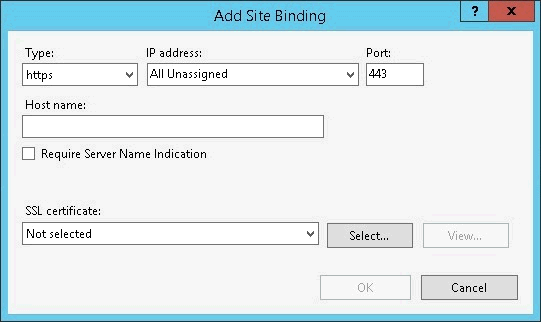
In the Type drop-down list, select https.
In the Port field, enter the SSL port to bind.
In the SSL certificate drop-down list, select Argus Insight.
Click OK to save the changes.
HTTPS is now enabled for Argus Insight.
To ensure the SSL connection is required:
Navigate to Sites, and select Argus Insight.
Select the SSL Settings icon in the IIS section.
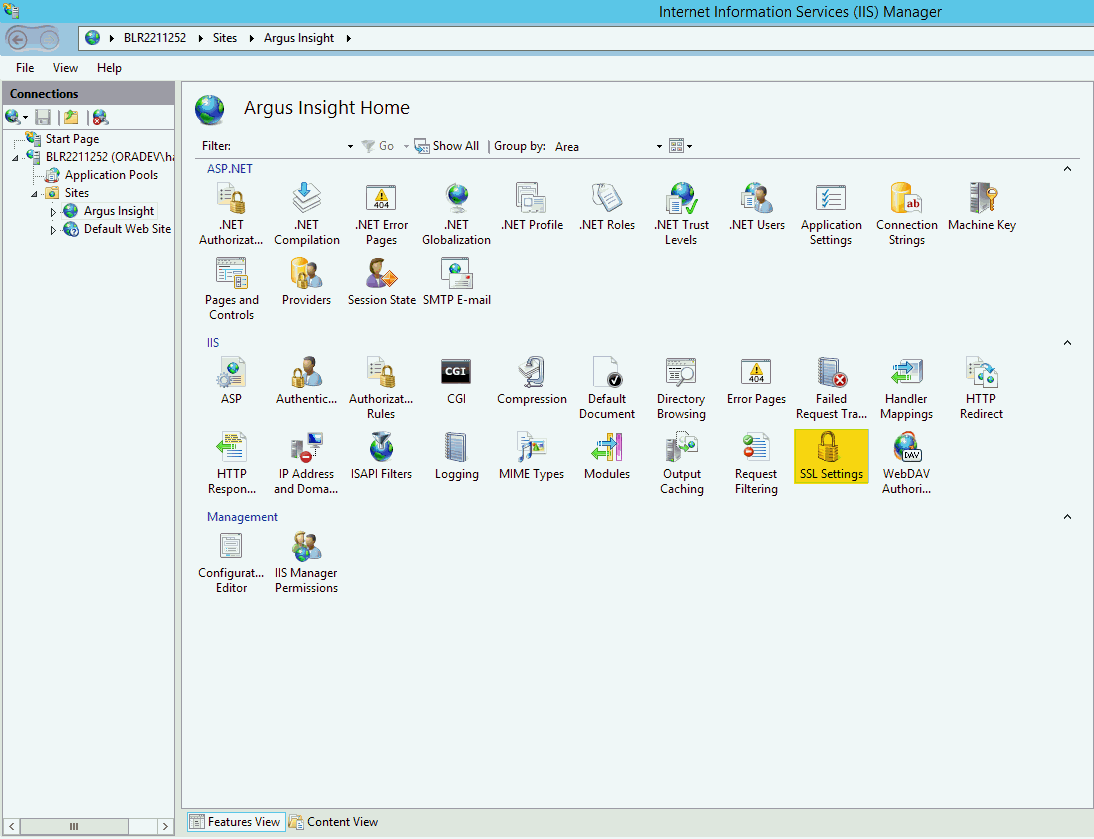
Click Require SSL.
Click Apply.
For information about Oracle's commitment to accessibility, visit the Oracle Accessibility Program website at http://www.oracle.com/pls/topic/lookup?ctx=acc&id=docacc.
Access to Oracle Support
Oracle customers have access to electronic support through My Oracle Support. For information, visit http://www.oracle.com/pls/topic/lookup?ctx=acc&id=info or visit http://www.oracle.com/pls/topic/lookup?ctx=acc&id=trs if you are hearing impaired.
Minimum Security Configuration Guide, Release 8.1
E68323-01
Copyright © 2016, Oracle and/or its affiliates. All rights reserved.
This software and related documentation are provided under a license agreement containing restrictions on use and disclosure and are protected by intellectual property laws. Except as expressly permitted in your license agreement or allowed by law, you may not use, copy, reproduce, translate, broadcast, modify, license, transmit, distribute, exhibit, perform, publish, or display any part, in any form, or by any means. Reverse engineering, disassembly, or decompilation of this software, unless required by law for interoperability, is prohibited.
The information contained herein is subject to change without notice and is not warranted to be error-free. If you find any errors, please report them to us in writing.
If this is software or related documentation that is delivered to the U.S. Government or anyone licensing it on behalf of the U.S. Government, the following notice is applicable:
U.S. GOVERNMENT RIGHTS Programs, software, databases, and related documentation and technical data delivered to U.S. Government customers are "commercial computer software" or "commercial technical data" pursuant to the applicable Federal Acquisition Regulation and agency-specific supplemental regulations. As such, the use, duplication, disclosure, modification, and adaptation shall be subject to the restrictions and license terms set forth in the applicable Government contract, and, to the extent applicable by the terms of the Government contract, the additional rights set forth in FAR 52.227-19, Commercial Computer Software License (December 2007). Oracle America, Inc., 500 Oracle Parkway, Redwood City, CA 94065.
This software or hardware is developed for general use in a variety of information management applications. It is not developed or intended for use in any inherently dangerous applications, including applications that may create a risk of personal injury. If you use this software or hardware in dangerous applications, then you shall be responsible to take all appropriate fail-safe, backup, redundancy, and other measures to ensure its safe use. Oracle Corporation and its affiliates disclaim any liability for any damages caused by use of this software or hardware in dangerous applications.
Oracle and Java are registered trademarks of Oracle and/or its affiliates. Other names may be trademarks of their respective owners.
Intel and Intel Xeon are trademarks or registered trademarks of Intel Corporation. All SPARC trademarks are used under license and are trademarks or registered trademarks of SPARC International, Inc. AMD, Opteron, the AMD logo, and the AMD Opteron logo are trademarks or registered trademarks of Advanced Micro Devices. UNIX is a registered trademark of The Open Group.
This software or hardware and documentation may provide access to or information about content, products, and services from third parties. Oracle Corporation and its affiliates are not responsible for and expressly disclaim all warranties of any kind with respect to third-party content, products, and services unless otherwise set forth in an applicable agreement between you and Oracle. Oracle Corporation and its affiliates will not be responsible for any loss, costs, or damages incurred due to your access to or use of third-party content, products, or services, except as set forth in an applicable agreement between you and Oracle.
