2. Product Definition
2.1 Introduction
The word ‘product’ is frequently used in the Oracle Lending user manuals. A ‘product’ is a specific service that is offered.
This chapter contains the following sections:
- Section 2.1, "Introduction"
- Section 2.2, "Creating a Product"
- Section 2.3, "Identifying Interest Components for a Product"
- Section 2.4, "Identifying Charge Components for a Product"
- Section 2.5, "Identifying Tax Components for a Product"
- Section 2.6, "Associating the fee component with a product"
- Section 2.7, "Setting up Accounting Details for a Product"
- Section 2.8, "Specifying Branch, Currency, and Customer Restrictions"
- Section 2.9, "Specifying Product Preferences"
- Section 2.10, "Specifying MIS Details for a Product"
- Section 2.11, "User Defined Fields for a Product"
- Section 2.12, "Associating the discount accrual preferences"
- Section 2.13, "Status control of a product"
- Section 2.14, "Specifying accrual fee details of a product"
- Section 2.15, "Associating diary events of a product"
2.1.1 Advantages of Defining a Product
The attributes that you define for a product apply on all contracts that are processed under the product. By creating a product, you construct a broad framework within which you can process contracts. This helps to minimize the details you have to capture when processing a contract.
2.2 Creating a Product
This section contains the following topics:
- Section 2.2.1, "Identifying a Product with a Code and Description"
- Section 2.2.2, "Specifying the Product Type"
- Section 2.2.3, "Specifying the Product Group"
- Section 2.2.4, "Assigning a Slogan to a Product"
- Section 2.2.5, "Defining the Life Span of a Product"
- Section 2.2.6, "Adding your Remarks"
- Section 2.2.7, "Defining the Other Attributes of a Product"
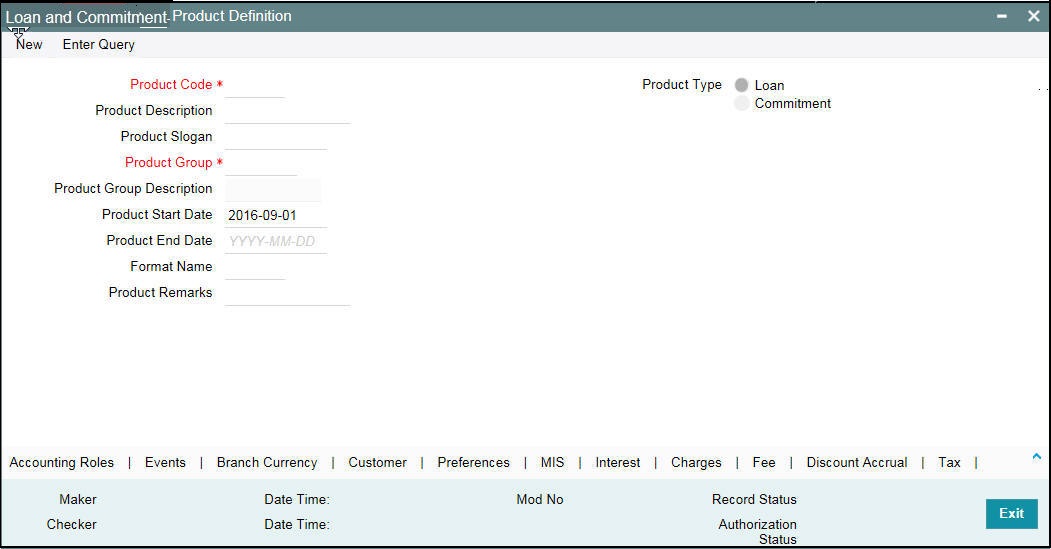
In the Product Definition screen of every module, you can enter basic information about a product such as the Product Code, the Description, and so on. The Product Definition screens of the various modules of Oracle Lending are invoked from the Application Browser.
You can invoke the ‘Loans and Commitment Product Definition’ screen by typing ‘OLDPRMNT’ in the field at the top right corner of the Application tool bar and clicking the adjoining arrow button.
Note
Product Definition screen is specific to a module. To create an LD product, for an instance, invoke the ‘Loans and Commitment Product Definition’ screen from the Application Browser. Similarly, to create an LS product, invoke the LS Product Definition screen from the Application Browser.
In a Product Definition screen, you should specify the following details for the products you create:
- A unique code to the product
- A brief description of the product
- The product type
- The product group
- A slogan for the product
- The life span of the product
- Remarks
2.2.1 Identifying a Product with a Code and Description
A ‘Product Code’ identifies a product throughout Oracle Lending. This code should be four characters in length.
When defining a new product, you should enter a code that is unique across the different modules of Oracle Lending. For instance, if you have used LC01 for a product in the Loans and Commitment module, you cannot use it as a product code in any other module.
It may be difficult to recognize a product just by its code. In the ‘Description’ field, therefore, suitably describe the product code so that it can be easily identified. This description is displayed along with the code throughout Oracle Lending.
2.2.2 Specifying the Product Type
Product categories are referred to as ‘Product Types.’ When you create a product, you must specify the type to which it belongs. For an instance, you should specify the product type as ‘Loan’ if you are defining a lending product and ‘Commitment’ if you are defining a Funds Transfer product.
2.2.3 Specifying the Product Group
Products can be categorized into groups based on the common elements that they share. You must associate a product with a group. This would facilitate retrieval of information of a class of products at one stroke.
Product Groups are maintained in the ‘Product Group Maintenance’ screen, You can invoke the ‘Product Group Maintenance’ screen by typing ‘OLDPRGRT’ in the field at the top right corner of the Application tool bar and clicking the adjoining arrow button.
2.2.4 Assigning a Slogan to a Product
You can enter a marketing slogan line for every product you create. This slogan is printed on all advices that are sent to customers who avail of the product.
For example, if you set up a Loans product , you can enter the slogan ‘Loans On Demand.’
2.2.5 Defining the Life Span of a Product
A product can be defined to be active over a specific period. When you create a product, you can specify a ‘Product Start Date’ and ‘Product End Date’ for it. The product can only be used within the specified period.That is, within the ‘Product Start Date’ and ‘Product End Date’.
If you do not specify the ‘Product Start Date’, the branch date is displayed as the ‘Product Start Date’.
If you do not specify an ‘Product End Date’ for a product, it can be used for an indefinite period.
2.2.6 Adding your Remarks
When creating a product, you can enter information about the product intended for your bank’s internal reference. This information is not to be printed on any correspondence with the customer.
2.2.7 Defining the Other Attributes of a Product
Once you have specified the basic details of a product, you can define the other attributes for it. From the ‘Loans and Commitment Product Definition’ main screen, you can move to the screen of your choice to define an attribute by clicking on the appropriate icon.
The other product attributes that you can define include:
- Interest, charges, and fees that you like to levy on contracts involving the product
- Taxes that apply on the contracts involving the product
- Type of accounts and the GL/SLs to which the accounting entries generated by contracts involving the product have to be posted
- Advices to be generated at different points in the life cycle of contracts involving the product
- List of allowed or a list of disallowed branches (of your bank) that can use a product
- List of currencies that are allowed or disallowed for a product
- Certain ‘preferences’, specific to a product
- Management Information System (MIS) details
Discount accrual, Accrual fee details, Diary events for a product. The product attributes that you can define depends on the module in which you are creating the product. For instance, the attributes that you define for a product in the Oracle Lending (OL) module vary significantly from the product attributes that you define in the Funds Transfer module. For products you create in theOL module, you can define , interest, clause, and document details, whereas, these attributes cannot apply to products you create in the Funds Transfer module.
Note
There are some fields in the product definition screens in which a value must be entered. If you try to save a product without entering details in these fields, the product is not saved. You are prompted to enter all mandatory details before attempting to save the product.
2.3 Identifying Interest Components for a Product
In Oracle Lending, the interest that applies on a contract (say, a loan) is referred to as the interest component of the contract. Calculating the interest component for a contract is achieved by:
- Creating interest rules.
- Building interest classes (specifically, for the Securities module).
- Associating a product with an interest rule (or an interest class in case of the Securities module). This rule applies on all contracts processed under the product.
- Amending, if required, certain interest details that a contract acquires from the product under which it is processed.
For more information about interest, refer to the Interest User Manual.
Click ‘Interest’ in the ‘Loans and Commitment Product Definition’ screen to invoke the ‘Interest’ screen. In this screen, you can associate the product you are creating with an Interest Rule. The attributes defined for the interest rule or class that you link to a product default to all contracts processed under the product.
Note
For products created in certain modules of Oracle Lending, you may have to specify additional interest details. These details have to be specified in the Product Preferences screen of the module. For more information about Products, refer to the respective Products User Manuals.
2.4 Identifying Charge Components for a Product
On the transactions and contracts you enter in Oracle Lending, you may opt to levy charges . You can calculate charges for a contract in the following manner:
- Define a Charge Rule.
- Build a Charge Class and associate it with a rule.
- Associate a product with charge classes. These classes apply on all contracts processed under the product.
- Amend, if required, certain charge details that a contract acquires from the product under which it is processed.
You can identify the charge component for a product in the ‘ Charges Definition’ screen. Click ‘Charges’ from the ‘Loans and Commitment Product Definition’ screen to invoke this screen.
The steps involved in processing charges for a contract, that is, defining charge rules, defining charge classes, associating charge classes with a product, and amending charge details to suit a contract are explained in the Charge and Fees User Manual.
2.5 Identifying Tax Components for a Product
In Oracle Lending, you can compute the tax that applies on a contract or deal by:
- Setting up a tax rule.
- Linking tax rules to create a tax scheme.
- Associating a product with a tax scheme. The rules that are part of the scheme applies on all contracts processed under the product.
- Amending, if required, certain tax details that a contract acquires from the product under which it is processed.
You can identify the tax components for a product in the ‘Tax Details’ screen. Click ‘Tax’ in the ‘Loans and Commitment Product Definition’ screen of any module to invoke this screen.
The steps involved in processing tax for a contract is explained in the Tax User Manual.
2.6 Associating the fee component with a product
In Oracle Lending, you have the option to collect and accrue a certain amount as fee, upfront at the time of booking a contract. These are the steps involved in processing contracts in Oracle Lending, for which the fee components need to be accrued:
- Defining a fee component
- Associating the fee component with products
- Entering the fee details at the contract level
- Accrual Processing of fee components
After defining a fee component, you need to link the fee component to a product in Oracle Lending. Consequently, you can collect and accrue fees on all contracts associated with that product.
Click ‘Fees’ in the ‘Loans and Commitment Product Definition’ screen of the (for which the fee accrual functionality is applicable) to invoke the ’Fee Details’ screen to link the fee components to a product.
For details relating to upfront fee collection, refer the Processing Upfront Fee Collection and Accruals section in the relevant modules.
2.7 Setting up Accounting Details for a Product
This section contains the following topics:
- Section 2.7.1, "Identifying the Accounting Roles and Heads for a Product"
- Section 2.7.2, "Specifying Events and Accounting Entries"
In Oracle Lending, accounting-simplistically, posting accounting entries to the appropriate ledgers maintained in your Chart of Accounts-is automated. This is achieved by defining an intricate accounting structure that includes the Chart of Accounts, Transaction Codes and Amount Tags, and by identifying accounting roles, heads, and amount tags for the products you create at your bank. As a result, the accounting entries that are generated at the various events in the life cycle of contracts are automatically posted to the ledgers specified for the product.
Before we proceed with setting up accounting details for a product, we shall discuss a few terms that are frequently used in this section.
Accounting Head
In Oracle Lending, the different General Ledgers (GLs) and Sub-Ledgers (SLs) maintained in your Chart of Accounts are referred to as accounting heads, or, account heads.
GL Types
The GL/SLs that you have maintained in your bank can be categorized into different GL Types: Asset, Liability, Income, Expense, Contingent Asset, Contingent Liability, Position GL, Position Equivalent GL, and so on. When maintaining a GL in the Chart of Accounts, you have to identify its type.
Amount Tag
A contract would typically consist of several components. For instance, a loan contract would consist of the principal, interest, charges, tax, and so on. These amounts are referred to as the “components” of a loan contract. In Oracle Lending, a unique tag called the Amount Tag identifies each component.
Accounting Roles
Accounting Roles are tags that identify the type of accounting entry that is posted to an accounting head. For instance, in the Oracle Lending (OL) module, assume you have specified the following interest for an OL product, to be collected when issuing OLs processed under the product: INTERST1 and INTERST2. The following Accounting Roles are automatically generated in Oracle Lending to identify all possible types of accounting entries involving these interest components:
INTEREST 1 |
INTEREST 2 |
Type of Accounting Entry |
INTERST1INC |
INTERST2INC |
Income |
INTERST1EXP |
INTERST2EXP |
Expense |
INTERST1PAY |
INTERST2PAY |
Payable |
INTERST1REC |
INTERST2REC |
Receivable |
INTERST1RIA |
INTERST2RIA |
Received in Advance |
INTERST1PIA |
INTERST2PIA |
Paid in Advance |
Similarly, based on your accounting set up in a module, accounting roles are automatically generated for the other components of a contract.
You can maintain the accounting details for a product in two screens:
- The Product Accounting Roles to Head Mapping Definition screen
- The Product Events Accounting Entries and Advices Maintenance screen
2.7.1 Identifying the Accounting Roles and Heads for a Product
Before you define the accounting details for a product, you should define the various components of the contracts involving the product such as interest, charges, tax, and so on.
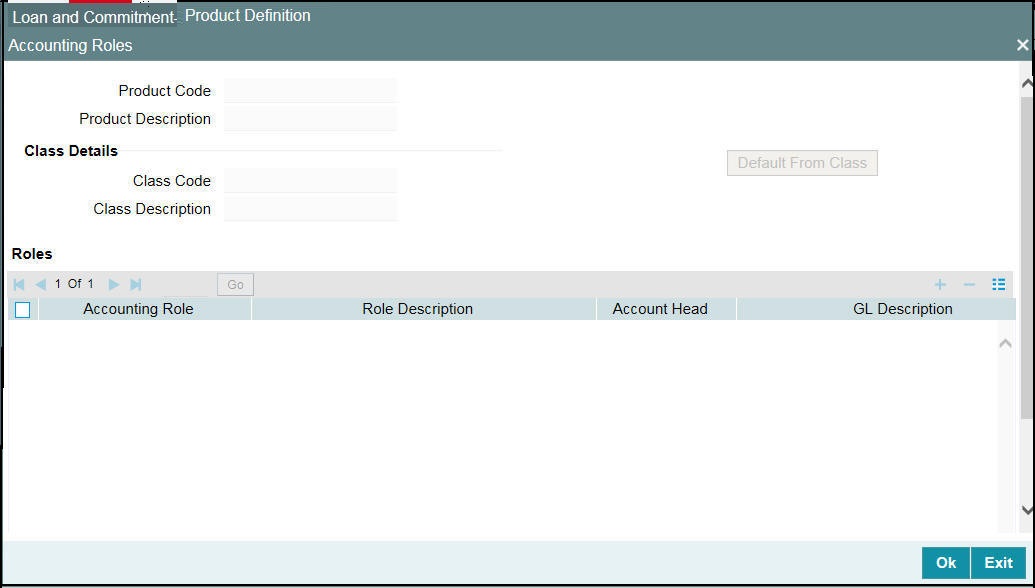
In the ‘Accounting Roles’ screen, a list of accounting roles are automatically generated based on the components you define for the product. You should map all the accounting roles that are available with the appropriate accounting heads.
You can invoke the ‘Accounting Roles’ screen by clicking Accounting Roles in the ‘Loans and Commitment Product Definition’ screen.
Adopting either of the following procedures, you can specify the accounting roles and heads for a product:
- Associating the product with an Accounting Role to Head Mapping Class. (This is possible only if you have maintained classes of Accounting Roles and Heads specifically for the module.)
- Mapping accounting roles and heads specifically for the product.
Click Default From Class’ in the ‘Accounting Roles’ screen to associate the product you are maintaining with a class of mapped roles and heads. A list of the classes that you have defined specifically for the module is displayed. Choose a class with the requisite accounting heads and roles mapped.
The procedure for setting up an Accounting Roles to Head Mapping classes is similar to mapping accounting roles and accounting heads specifically for a product.
Mapping Accounting Roles to Heads specifically for a product
If you do not use a class to define accounting role and heads for a product, in this screen, you can define them specifically for the product you are creating.
- In the ‘Accounting Role’ column, click and
then click
 to select an Accounting
Role from the drop-down list .
to select an Accounting
Role from the drop-down list .
- In the ‘Account Head’ column, clickand select an accounting head from the drop-down
list that is displayed.
- Click ‘Ok’ to map the role with the corresponding head in the Accounting Head column.
Note
If you would like to delete a role to head mapping, click the button.
2.7.2 Specifying Events and Accounting Entries
A contract goes through different stages in its life cycle. In Oracle Lending, the different stages a contract passes through in its life cycle are referred to as “events”.
At an event, typically, if you want to post the accounting entries to the appropriate account heads and generate the required advices. When setting up a product, you can define the accounting entries that have to be posted and the advices that have to be generated at the various events in the life cycle of contracts involving the product. To do this, click ‘Events’ in the ‘Loans and Commitment Product Definition’ screen.
The ‘Events’ screen is displayed.
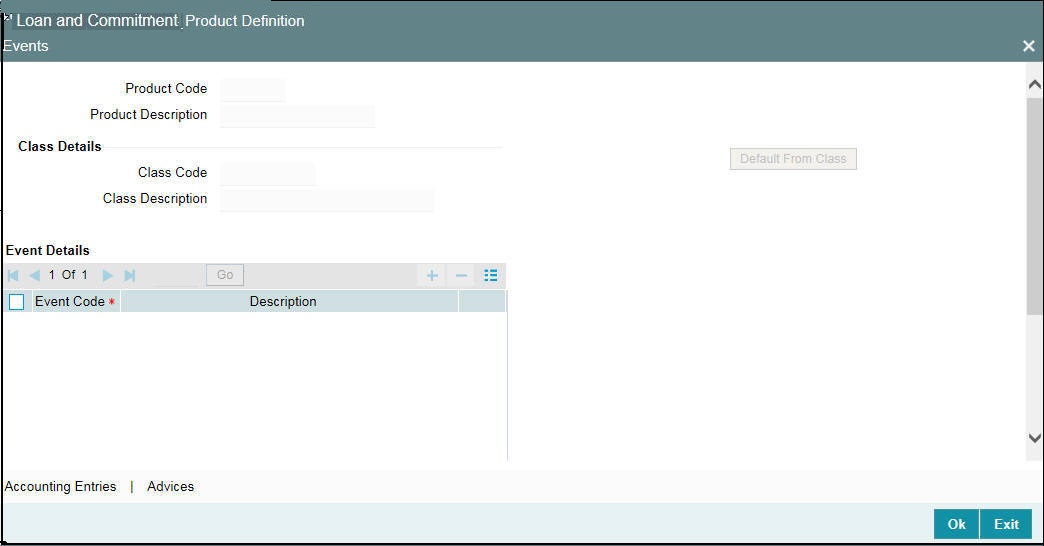
You can define the accounting entries and advices for events using either of the following methods:
- Associating a product with an Events Class. This is possible only if you have maintained Events classes specifically for the module.
- By defining event details specifically for the product.
2.7.2.1 Defining transaction types for reversal
You can invoke the ‘Reversal Type Maintenance’ screen by typing ‘OLDREVTP‘ in the field at the top right corner of the Application tool bar and clicking the adjoining arrow button.
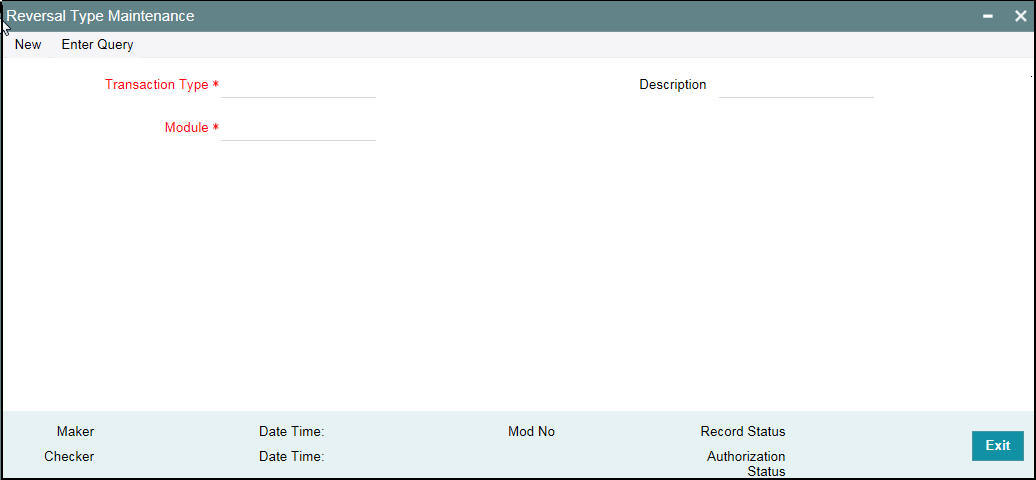
In this screen to capture the list of allowed transaction types for the product in case of a reversal.
After you invoke this screen, you can associate new transaction codes for each transaction type. During reversal of events, the system replaces the old transaction codes with the corresponding (new) transaction codes. In case no new transaction codes are associated for the old transaction code, the entries are passed with the old transaction code.
2.7.2.2 Using a class
Click ‘Default From Class’ in this screen to associate the product you are maintaining with an Events class. A list of the Events classes that you have defined specifically for the module is displayed. Choose a class with the requisite events and accounting details maintained. The product acquires the accounting entries and advices defined for the Events class you choose.
The procedure for setting up an Events class is similar to defining events and accounting details for a product.
2.7.2.3 Defining Events and Accounting Details specifically for a Product
If you do not use an events class, you should define event details specifically for the product.
Click ‘Add row’ to invoke a list of events pertaining to the module. Select an event from the list by double-clicking on it.
For every event you select, you should specify the accounting entries that should be passed and the advices that should be generated.
Click ‘Accounting Entries’ in the ‘Events’ screen to specify the accounting applicable to the event.
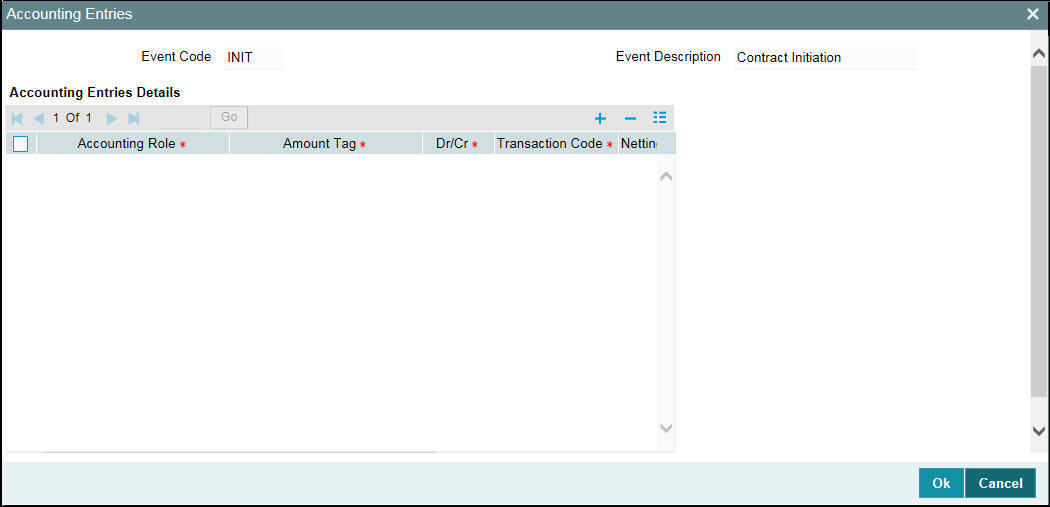
For an each event, you have to maintain the following accounting entries information.
Specifying the Accounting Role
Specify the accounting role that should be used at the event. The drop-down list displays all the accounting roles specified for the product in the Accounting Role Definition screen.
Specifying the Amount Tag
Specify the tag, which identifies the component that has to be posted to the account head.
Indicating a debit or credit
Indicate whether the accounting role you specified is for the debit or credit leg of the contract event.
Indicating the Transaction Code
Every accounting entry in Oracle Lending is associated with a Transaction Code that describes the nature of the entry. Specify the transaction code that should be used to post the accounting entry to the account head.
Indicating if accounting entries can be netted
Specify whether accounting entries should be netted at an event. You can net the accounting entries that are generated at an event if the set of entries satisfy the following criteria:
- The entries belong to the same Account and Branch
- The entries to be netted are in the same currency
- The entries have the same value date
- The exchange rate to be picked up for the entries is the same
If you want a particular leg of an accounting entry to be considered for netting (subject to the above criteria), select ‘Yes’ from the drop-down list in the Netting field against this leg.
You should define details for both the legs of an accounting entry. For each accounting entry, you should specify the details of the debit and the credit leg. Thus, the first two specifications are for one entry, the next two for another, and so on. The Transaction Code for the entry should be specified for both legs of the entries.
This netting of accounting entries is only for processing and not for message generation.
Netting outgoing payment instructions
You can net multiple entries posted into the same account for processing. Independent of this, you can net entries posted into the same account with a view to sending out netted payment instruction messages.
If you want a particular leg of an accounting entry to be considered for netting for messaging purpose, select ‘Yes’ from the drop-down list in the Msg Netting field against this leg.
For sending out payment instructions, the system identifies the netted amount based on entries in the Msg Netting field, and not based on entries in the Netting field. Therefore, you can specify an accounting entry to be considered for Msg Netting and not for Netting.
The validation criteria mentioned for the Netting field is same for the Msg Netting field also.
MIS Head
The MIS details for the online revaluation leg are taken from the MIS group maintained at the revaluation setup.Enabling online revaluation of GLs
Online Revaluation refers to revaluation done on transaction amounts during transaction posting, and not as part of an end-of-day process. You can choose for online revaluation by selecting the ‘Revaluation Requiredd’ option at the product event accounting entry maintenance for each accounting entry.
The Revaluation profit /loss is booked to the Online Profit GL or Online Loss GL that you have maintained in the revaluation set-up for the GL being revalued. If you have maintained no specific setup for the GL, then the profit/ loss is booked to the respective Profit or Loss GLs mentioned below:
- STDREALGL: For Normal Real GLs.
- STDREALAC: For Real Internal GLs of type Contract / Others and for Customer Accounts
- STDCONTGL: For Normal Contingent GLs.
- STDCONTAC: For Contingent Internal GLs of type Contract / Others.
For more information on revaluation set up, refer to the Core Services User Manual.
2.8 Specifying Branch, Currency, and Customer Restrictions
This section contains the following topics:
- Section 2.8.1, "Maintaining a List of Branch and Currency Restrictions"
- Section 2.8.2, "Restricting Customers"
From the head office of your bank, you may want to establish certain controls or standardize operations across the branches of your bank. For instance, you may want to restrict the products you offer to select branches and currencies, or allow specific branches to offer products only to a specific set of customers. You can achieve these controls by maintaining restriction lists when creating a product. When you create a product, you can specify the branches of your bank that can offer it, the currencies that are allowed or disallowed for it, and the customers who can avail it.
Note
When you create a product, it is, by default, available to all the branches of your bank, in all currencies, and for all customers.
2.8.1 Maintaining a List of Branch and Currency Restrictions
This section contains the following topics:
- Section 2.8.1.1, "Using a Branch and Currency Restrictions Class"
- Section 2.8.1.2, "Defining Branch and Currency Restrictions specifically for a product"
To maintain a list of allowed/disallowed branches and currencies, click ‘Branch Currency’ in the ‘Loans and Commitment Product Definition’ screen. The Product Branch and Currency screen is displayed.
When defining a product, you can choose to specify Branch and Currency, and Customer Restrictions either by:
- Associating the product with a Branch and Currency Restrictions Class, and a Customer Restrictions Class, or
- By defining these restrictions specifically for the product in the Branch and Currency, and Customer Restrictions section.
2.8.1.1 Using a Branch and Currency Restrictions Class
In Oracle Lending, you can define a set of branch and currency restrictions as a Branch and Currency Restrictions Class. You can maintain several restriction classes of branches and currencies.
When creating a product, you can associate it with a branch and currency restrictions class that best suits your requirement.
The manner of creating a branch and currency restrictions class is similar to defining Branch and Currency Restrictions specifically for a product.
If you want to associate a branch and currency restrictions class to a product, click ‘Default From Class’ in the ‘Branch and Currency Restriction’ screen. The product acquires the restrictions defined for the class.
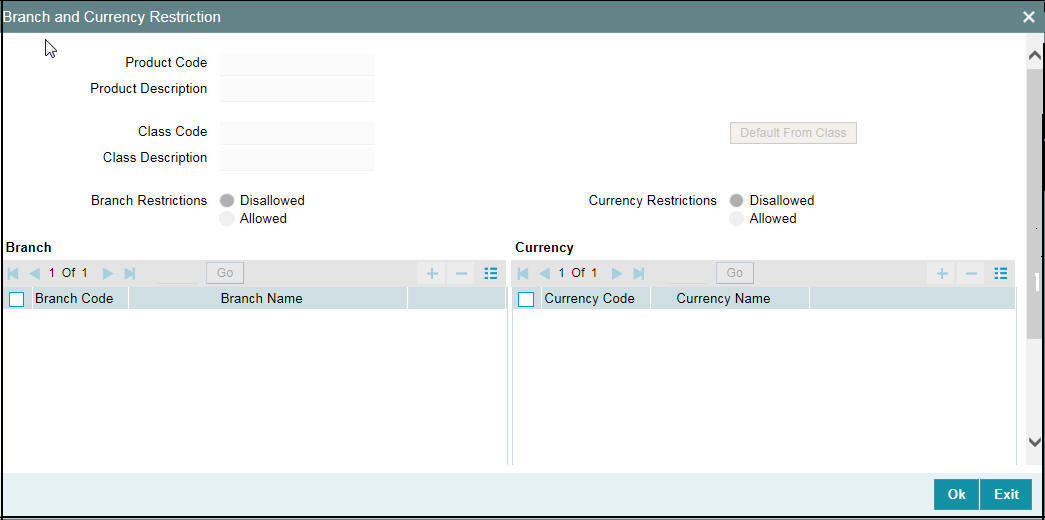
2.8.1.2 Defining Branch and Currency Restrictions specifically for a product
If you do not use a class to indicate branch and currency restrictions, you should define these restrictions specifically for the product in the Product ‘Branch and Currency Restriction’ screen.
You can specify branch and currency restrictions in the form of allowed lists or disallowed lists.
If you create ‘Allowed’ lists of branches and currencies, the product can only be offered in those branches and currencies that are part of the respective allowed lists. On the other hand, if you maintain ‘Disallowed’ lists, the product cannot be offered by the branches and currencies on the respective disallowed lists.
You can indicate whether you are maintaining an allowed or a disallowed list type by choosing the appropriate option.
Example
You have a network of twenty branches. You want to exclude six branches from dealing in loans You want all other branches to deal in loans.
Since there are more branches that can offer the facility than those that cannot, you can choose to maintain a disallowed list, and include the six disallowed branches in it.
Moving a branch or currency to the Allowed/Disallowed column
Under Branch and Currency Restrictions respectively, two columns are displayed.
- Available list
- Allowed/Disallowed list
The allowed or disallowed column that is displayed would depend on the list type that you choose to maintain. For instance, if you choose to maintain an allowed list of branches, the column would display the branches that you opt to allow.
In the Available columns, the branch and currency codes of all the branches and currencies maintained at your bank is displayed. Using the arrow keys, you can move a branch or currency to the corresponding allowed/disallowed column that you have maintained.
Confirming your specifications
After you maintain branch and currency restrictions for a product, click ‘Ok’ to confirm your specifications. Click ‘Exit’ to delete your specifications.
2.8.2 Restricting Customers
Just as you can maintain a list of allowed/disallowed branches and currencies for a product, you can maintain a list of allowed/disallowed customer categories.
You can group your customers according to the common features that they share. For example, you can group your customers into categories such as:
- Banks
- Corporate
- Financial Institutions (excluding banks)
- Individuals, and so on
You can maintain customer categories in the Customer Categories screen invoked form the Application Browser.
Maintaining Customer and Category Restrictions for a product
You can maintain customer restrictions for a product in the Product Customer and Category Restrictions screen. To invoke this screen, click ‘Customer’ in the ‘Loans and Commitment Product Definition’ screen.
Using a Customers and Categories Restrictions Class
In Oracle Lending, you can define a set of customer restrictions as a Customer Restrictions Class. You can maintain several restrictions classes of customer categories.
When creating a product, you can associate it with a customer restrictions class that best suits your requirement. The procedure for creating a customer restrictions class is similar to setting up customer restrictions for a product, as explained below.
If you want to associate a customer restrictions class to a product, click ‘Default From Class’ in the ‘Customer Restrictions’ screen. The product acquires the restrictions defined for the class.
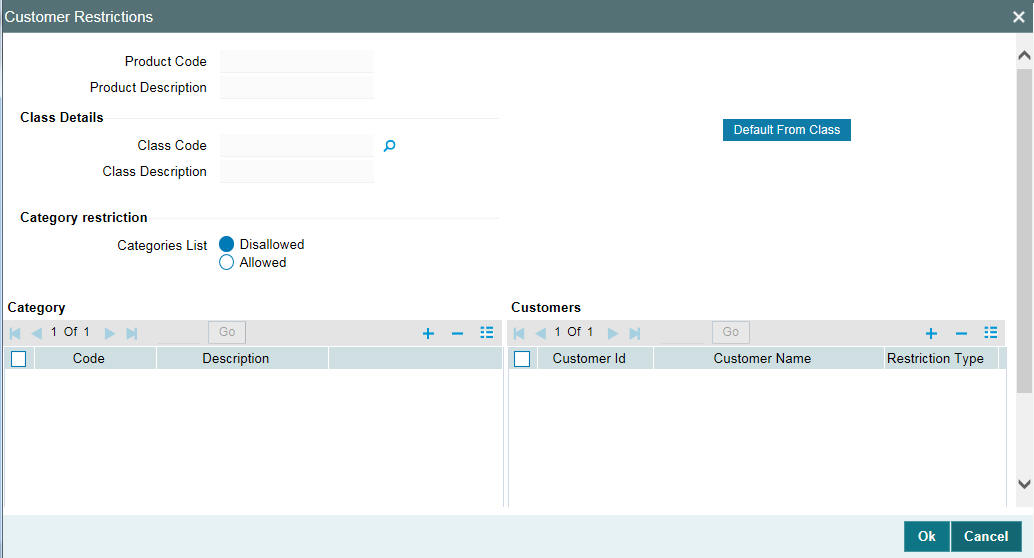
2.8.2.1 Defining Customer Restrictions specifically for a product
If you do not use a class to indicate customer restrictions, you should define these restrictions specifically for the product in the ‘Customer Restrictions’ screen.
Choosing Category Restriction
Under ‘Category restriction’, the following options are displayed:
- Allowed
- Disallowed
The ‘Allowed’ or ’Disallowed’ depends on the list type that you choose to maintain. For instance, if you choose to maintain an allowed list, the column would display those customer categories that you choose to allow.
Specifying the Customer Category
You can restrict customers from availing a product by maintaining an ‘Allowed’ list or a ‘Disallowed’ list of customer categories.
Only customer categories that are a part of an allowed list maintained for a product can avail the product. Likewise, customer categories that are part of a disallowed list cannot avail the product or service.
Exempting specific customers
You can exempt customers, belonging to a particular allowed/disallowed category, from the allowed or disallowed list that you are maintaining for a product.
Example
You have maintained Financial Institutions as a customer category, and you do not want Financial Institutions to avail a service that you offer.
You can maintain a disallowed list in the Customers and Categories Restrictions screen, and include Financial Institutions in the list.
However, you want Cavillieri and Barrett Inc., a financial institution, to avail the product you are creating.
When you include Financial Institutions in your disallowed list, all customers belonging to this category is displayed in the Customer Access column. Move to Cavillieri and Barrett on the list, and specify the Restriction Type as allowed.
Confirming your specifications
After you maintain branch and currency restrictions for a product, click ‘Ok’ to confirm your specifications. Click ‘Exit’ to delete your specifications.
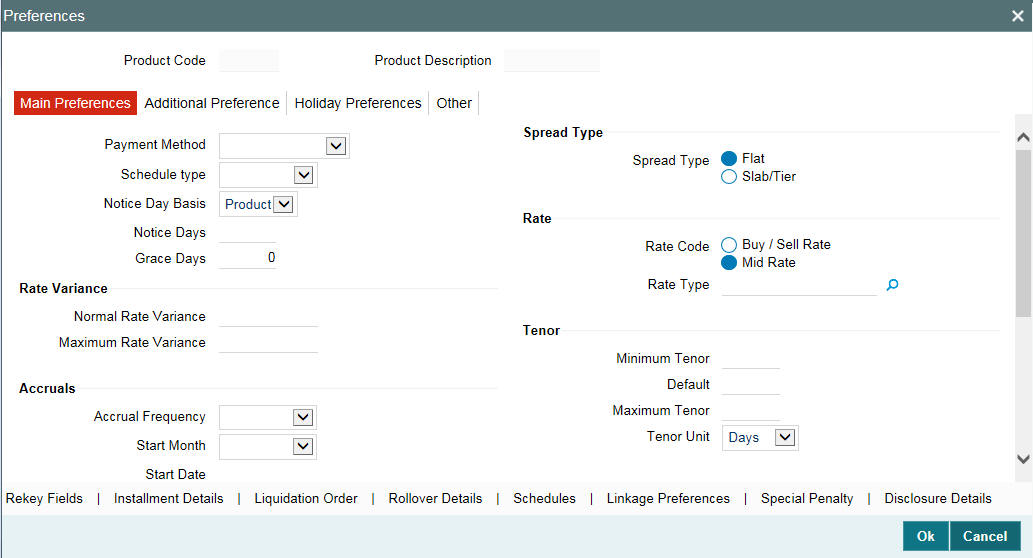
2.9 Specifying Product Preferences
‘Preferences’ are options that you can choose to give shape to a product. You can specify your preferences for the products you create in the Product Preferences screens of the respective modules. Click ‘Preferences’ in the ‘Loans and Commitment Product Definition’ screen to invoke the Product Preferences screen.
Note
- For more information about defining attributes specific to loan products, refer to the Bilateral Loans User Manual.
- Product Preferences are specific to a module. For more information, refer to the Products chapter of the respective user manuals.
2.10 Specifying MIS Details for a Product
Click ‘MIS’ in the ‘Loans and Commitment Product Definition’ screen to define the MIS details for the product you are creating.
In this screen, you should capture the following MIS details for a product.
You can link a product to an MIS Group. (If you do not want to link a product to an MIS Group, you can define the individual entities under which the product should be reviewed). If you link the product to an MIS Group, the entities defined for the group is displayed; you can change these entities. For a product, only the transaction type of MIS Class applies. The specific MIS entity (in the form of an MIS Code) is picked up, by default, only if you have defined them for the group. If not, you have to indicate the appropriate MIS code for each applicable MIS class.
If an MIS Group is linked, you can indicate whether the linkage with the group should always be maintained. If so, any change done to the MIS Group is automatically be applied to the product. If not, the entities defaulted for the product is continued even if they are changed subsequently for the group.
The details defined for the product is picked up for the contracts processed under it.
The Pool Code to which the product belongs should be defined.
Identifying the Operations MIS Group
While performing revaluation you have apportion the profits between the treasury and the respective Operations department in your bank. This internal apportioning of profits requires an Operations MIS Group to be specified at the product level.
For more information, refer to the MIS and Core Services User Manuals.
2.11 User Defined Fields for a Product
Click the ’Fields’ in the ‘Loans and Commitment Product Definition’ screen to invoke the ‘Product User Defined Fields’ screen. From the list of all the fields that you created, you can choose specific fields and make them applicable to the product. Besides, you can also specify the values that should be defaulted for the field.
Fields defined in the ‘Product User Defined Fields’ screen can be made applicable to the products that you create for the front-end modules of Oracle Lending.
The list of fields that you select for a product is applied to all transactions associated with the product. At the product level you need not capture the default value for each UDF that you associate with the product. When a contract is processed under that product, you have to indicate the value of the UDF on a mandatory basis.
Example
Assume that your bank wants to know whether a customer is a Resident or Non-resident before sanctioning a loan. Therefore, you have associated a UDF called Resident/Non-Resident with the Loan scheme – Short Term loans for Individuals. Your selection as follows
- Yes – if the customer is a Resident.
- No- if the customer is a Non-resident.
Moreover, you have specified that input to this field is mandatory. Since, you are not be able to determine this at the product level, you are allowed to save the product without capturing the default value of this UDF. For transactions processed under this product you are required to capture this information.
For more information, refer to the User Defined Fields User Manual.
2.12 Associating the discount accrual preferences
After building discount accrual fee classes you can associate the class with loans or bills products. Click ‘Discount Accrual’ in the ‘Loans and Commitment Product Definition’ screen. The ‘Discount Accrual Preference Association’ screen is displayed
To associate discount accrual fee class with a product, click ‘Default From Class’ in the ‘Discount Accrual Preference Association’ screen. Select the appropriate discount accrual fee class from the list of classes.
The attributes defined for the discount accrual fee class defaults to the product. You have the option to modify the attributes defined for the class, to suit the requirement of the product you are creating.
Alternatively, you can choose to define the discount accrual details for the product.
Note
- If the ‘Acquisition Type’ is different from what is maintained at Discount Accrual Class level then the system gives an error and contract will not save.
- You are allowed to change ‘Acquisition Type’ during the life cycle of the contract on the basis of the maintenance done at the product level.
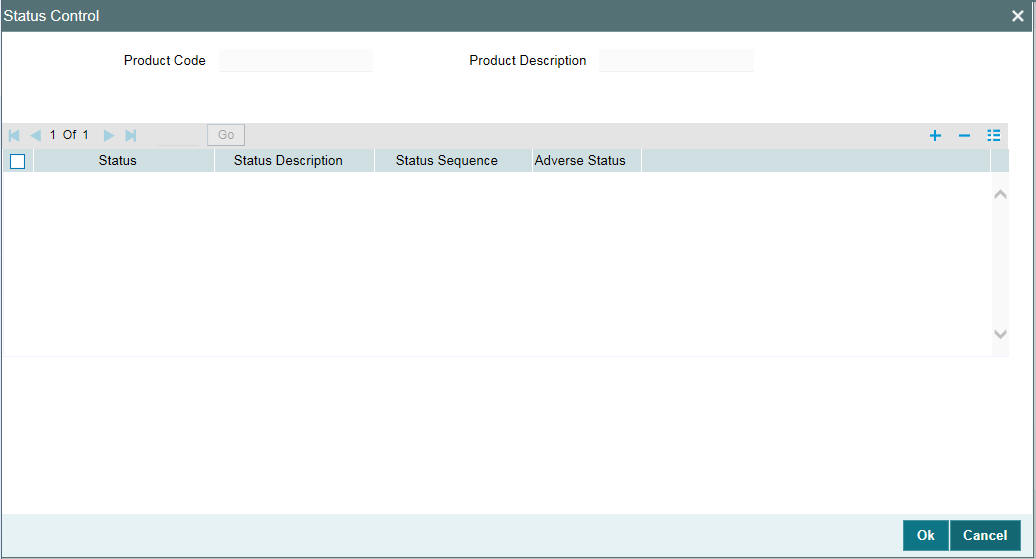
2.13 Status control of a product
When setting up a product, you should identify all possible status that contracts involving the product would move into. You should also indicate the sequence of status changes for contracts.
For more information about status control of a product, refer to Bilateral Loans User Manual.
2.14 Specifying accrual fee details of a product
After defining a fee component, you need to link the fee component to a product in Oracle Lending. Click ‘Accrual Fee Details’ in the ‘Loans and Commitment Product Definition’ screen.
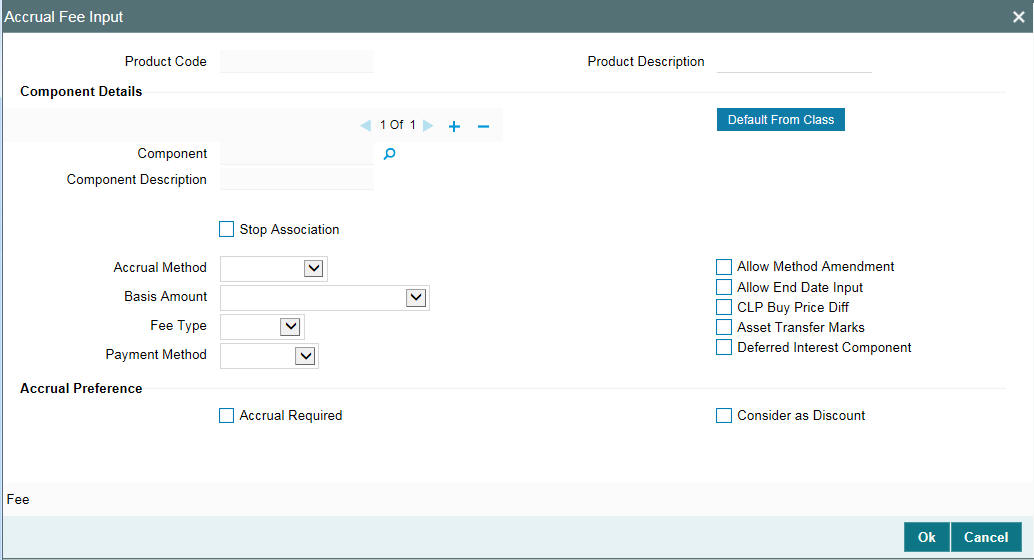
Click ‘Add Rows’to add fee components. Click ‘Default From Class’ to associate the required fee component with the product. System defaults the parameters of the selected fee component. However, you can change the parameters according to your requirements.
You need to specify the following details:
Accrual Method
Specify the accrual method from the adjoining drop-down list. This list displays the following values:
- Straight Line
- Yield
- Flat Amount
Basis Amount
Select the basis amount on which the fee component should be calculated from the adjoining drop-down list. This list displays the following values:
- Expected balance
- Expected Outstanding Facility
- Expected utilized Facility
Fee Type
Specify the fee type from the adjoining drop-down list. This list displays the following values:
- Income
- Expense
Payment Method
Specify the fee type from the adjoining drop-down list. This list displays the following values:
- Discounted
- Bearing
Allow Method Amendment
Select this box to indicate that the amendment method is allowed for the accrual fee component.
Allow End Date input
Select this box to indicate that the fee component (if applicable for the product involved in the contract) will cease to be associated with a contract on the contract ‘End Date.
CLP Buy Price Diff
Select this box to indicate that the difference between the PAR price (100%) and actual buy price is booked as fee against that component.
2.15 Associating diary events of a product
In the ‘Diary Event Maintenance’ screen, you can also specify the different diary events that would need to be processed for loan contracts using a product.
You can invoke the ‘Diary Event Maintenance’ screen by typing ‘OLDDIAEV’ in the field at the top right corner of the Application tool bar and clicking the adjoining arrow button.
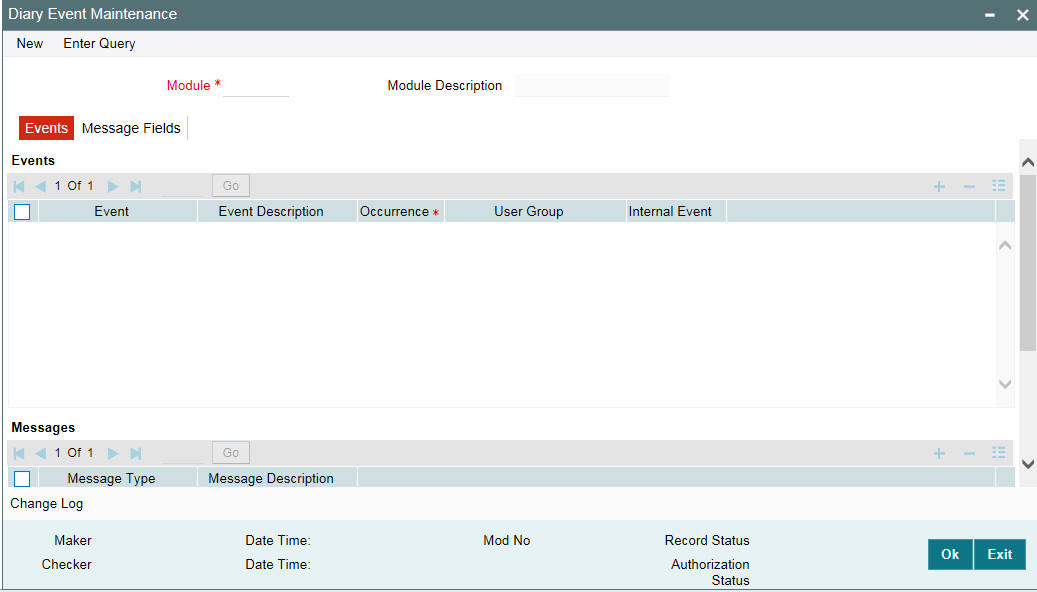
In this screen, select the ‘Event’ of the diary event that you want to associate with the product, in the ‘Event Code’ field.