5. Covenant Tracking Process
5.1 Introduction
The bank / financial organization receive a credit proposal application from client / customer for covenant process
5.2 Stages in Covenant Tracking Process
The different stages in covenant tracking process flow are designed using Oracle BPEL (Business Process Execution Language) and BPMN (Business Process Model and Notation) framework with multiple human tasks for workflow stages.
Oracle Business rules that are embedded help the dynamic creation of multiple approval stages. The different stages and sub-stages in the process flow can be summarized as follows:
- Receive covenants
- Covenants Verification
- Follow up
5.2.1 Process Flow Diagram
The process flow diagram given below illustrates the activities carried out during the different stages of the workflow.

5.2.2 Process Matrix
The process matrix given below lists out the different stages, the user role handling each stage, the function Ids involved and the exit points for each stage.
Stage |
Stage Title |
Description |
Function ID |
Exit point |
1 |
Receive covenants |
Stage to receive the covenants from the customers. Covenant related informations are displayed as part of the data entry stage. The end user will upload the received document from the customer. |
ORDCVREC |
Received Follow up |
2 |
Covenants Verification |
Stage for the reviewer to verify the covenants and track the document for closure |
ORDCVVER |
Verified Additional info |
3 |
Covenant Follow up |
Stage for follow up the covenants from the customer. |
ORDCVFUP |
Received Additional info |
Step 1. Receive Covenant Details
In this stage, the bank receives an application covenant details which will be tracked in the process. Facility will be provided to view the interaction which has been carried out with the customers and list of covenants which are pending / received from the customer.
During the BOD activity, system will initiate the task in the covenant process which are due or overdue for collect the documents
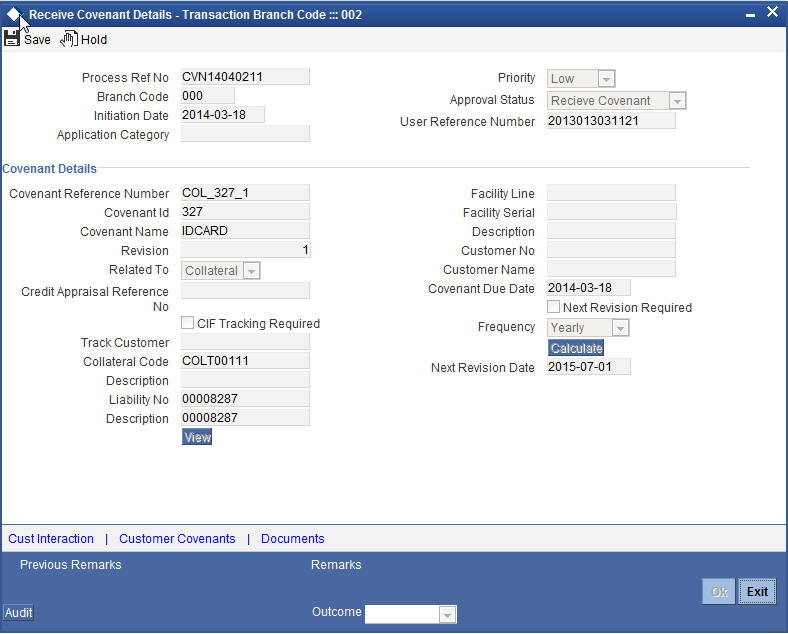
You can enter the following details:
CIF Tracking Required
Check this box to indicate whether the CIF tracking required.
Next Revision Required
Check this box to indicate whether the next revision required.
Frequency
Select a frequency according to which the Convent has to collected/revised from the drop-down list and the available options are:
- Monthly
- Quarterly
- Half Yearly
- Yearly
Next Revision Date
The system defaults next revision date whenever you click ‘Calculate’ button.However you can modify the same.
1.1 Viewing Customer Conversation
You can view the conversations which have been recorded with the customer for receiving the covenants through ‘Customer Conversation’ screen.To invoke this screen click Cust Interaction’ button in ‘Receive Covenant Details’ screen.
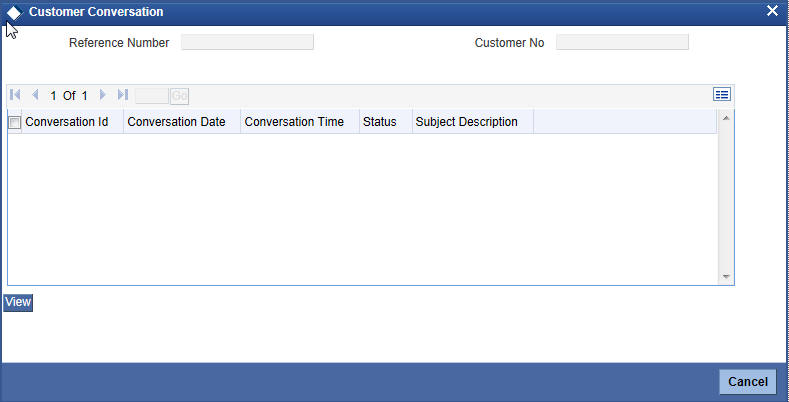
You can view the following details:
- Conversation Id
- Conversation Date
- Conversation Time
- Status
- Subject Description
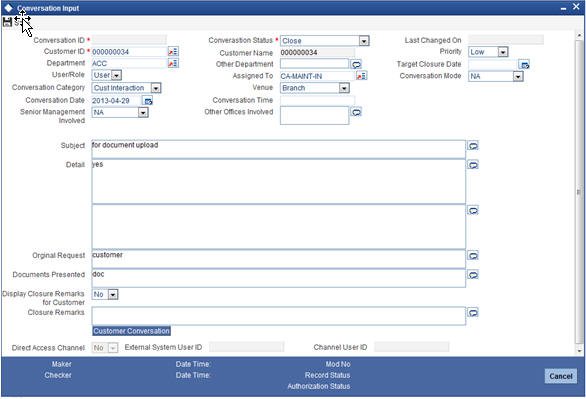
1.2 Viewing Conversation Information
You can view the conversation information for the selected conversation id through ‘Conversation Input’ screen. To invoke this screen click ‘View’ button in the ‘Customer Conversation’ screen.
1.3 Viewing Customer Covenant Details
You view the covenants which has been received or pending to receive from the customers through ‘Customer Covenant’ screen.To invoke this screen click ‘Customer Covenants’ button in ‘Receive Covenant Details’ screen.
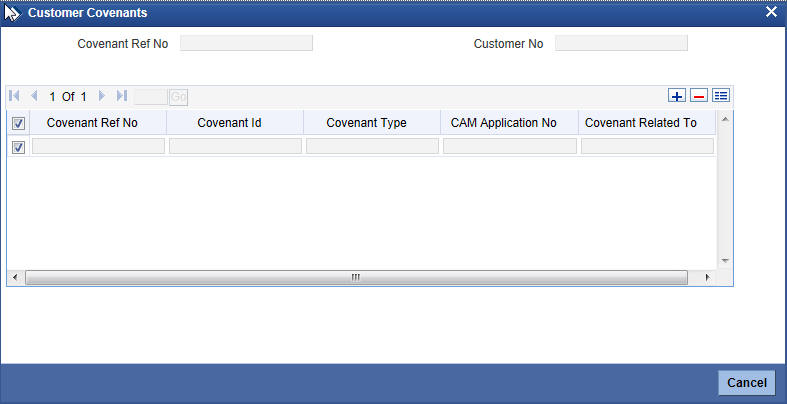
You can view the following details
- Covenant Reference number
- Customer Number
- Covenant Id
- Covenant Type
- CAM Application No
- Covenant Related To
5.2.3 Maintaining Document Details
You can maintain the customer related documents in credit appraisal management repository through the ‘Documents’ screen. Click ‘Documents’ button from Credit Appraisal Application Entry’ screen to invoke this screen.
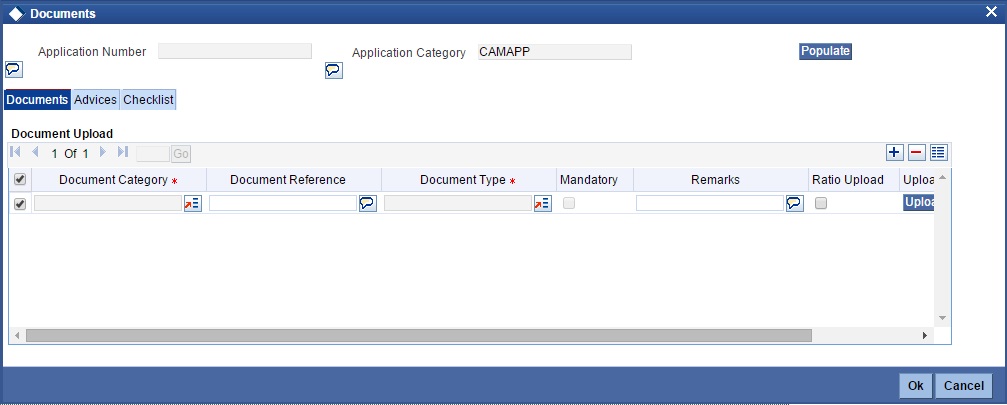
You can enter the following details:
Document Category
Specify the category of the document to be uploaded.The adjoining option list displays all the document categories maintained in the system. Select the appropriate one.
Document Reference
Specify the document reference number.
Document Type
Select the type of document.The adjoining option list displays all the document types maintained in the system. Select the appropriate one.
Mandatory
Check this box to indicate whether the document is mandatory.
Compute
Check this box to indicate whether the document to be computed.
Upload
Click ‘Upload’ button to open the ‘Document Upload’ sub-screen. The ‘Document Upload’ sub-screen is displayed below:
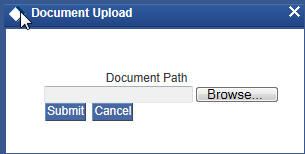
In the ‘Document Upload’ sub-screen, specify the corresponding document path and click the ‘Submit’ button. Once the document is uploaded through the upload button, the system displays the document reference number.
View
Click ‘View’ button to view the document uploaded.
Verified
Check this box to indicate whether the document to be verified.
Remarks
Specify remarks, if any.
5.2.3.1 Report Tab
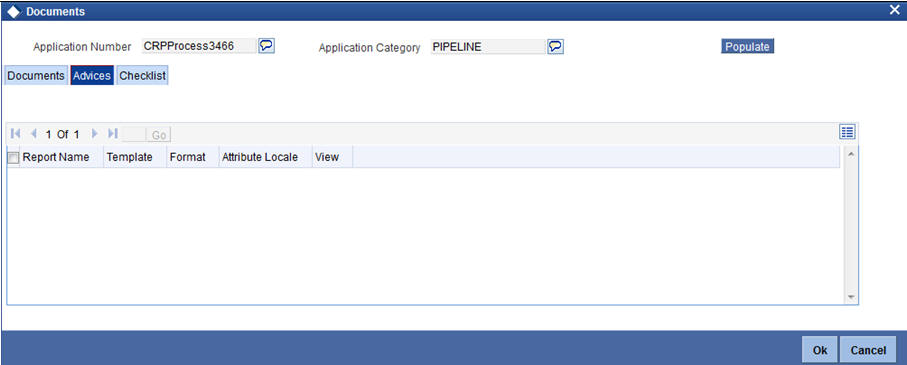
You can view the following details:
- Report Name
- Attribute Template
- Attribute Format
- Locale
- View
5.2.3.2 Checklist Tab
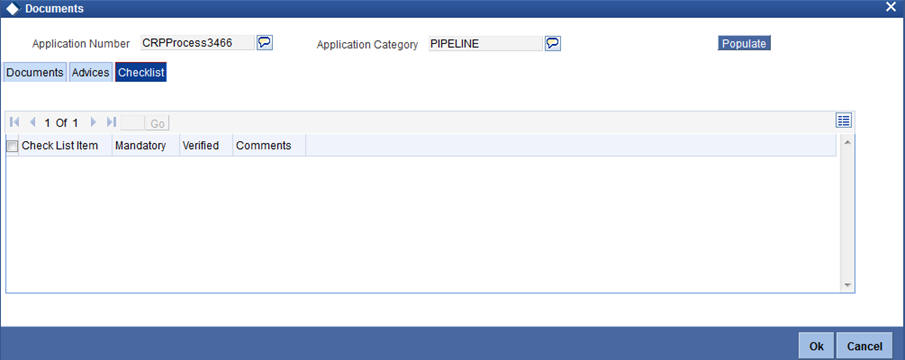
You can enter the following details:
Check List
The system will display the check list details.
Mandatory
The system will default from Documents main screen.
Verified
Check this box to indicate whether the check list items have been verified.
Comments
Specify comments, in any.
To acquire the next stage, you need to go to the ‘Task’ menu and select ‘Assigned’ under ‘Standard’ option. All tasks that have been successfully completed are listed in the right side of the screen. Select the check box against your ‘Workflow Ref No’ and click ‘Acquire’ button at the top of the screen to acquire the next stage of the task.
The system displays the system message as “xxx Acquire Successful” on successful acquisition of the task.
Task will move to Follow up stage, when the user has selected ‘Follow up’ as the outcome and save the task.
To acquire next stage select Outcome as ‘Received’ and then click ‘Ok’ to proceed to the next stage. To select the acquired task for the next stage, select ‘Acquired’ under ‘Standard’ option in the ‘Task’ menu. All the tasks that have been successfully acquired are displayed in the right side of the screen. Search for your workflow reference number and click the ‘Workflow Ref No’ to open ‘Covenant verification’ screen.
Step 2. Covenant Verification
Task will be moved to completed stage, when the user has selected ‘VERIFIED’ as the outcome and save the task.
To acquire the next stage, you need to go to the ‘Task’ menu and select ‘Assigned’ under ‘Standard’ option. All tasks that have been successfully completed are listed in the right side of the screen. Select the check box against your ‘Workflow Ref No’ and click ‘Acquire’ button at the top of the screen to acquire the next stage of the task.
The system displays the system message as “xxx Acquire Successful” on successful acquisition of the task.
Task will move to Receive covenant stage, when the user has selected ‘ADDITIONAL_INFO’ as the outcome and save the task.
Click ‘Ok’ to proceed to the next stage. To select the acquired task for the next stage, select ‘Acquired’ under ‘Standard’ option in the ‘Task’ menu. All the tasks that have been successfully acquired are displayed in the right side of the screen.
Step 3. Covenant Follow up
Task will be moved to covenants Verification stage, when the user has selected ‘RECEIVED’ as the outcome and save the task.
To acquire the next stage, you need to go to the ‘Task’ menu and select ‘Assigned’ under ‘Standard’ option. All tasks that have been successfully completed are listed in the right side of the screen. Select the check box against your ‘Workflow Ref No’ and click ‘Acquire’ button at the top of the screen to acquire the next stage of the task.
The system displays the system message as “xxx Acquire Successful” on successful acquisition of the task.
Task will move to Receive Covenants stage, when the user has selected ‘Additional Info’ as the outcome and save the task.