| Oracle® Retail Integration Bus Installation Guide Release 13.1.1 |
|
 Previous |
 Next |
This section provides detailed steps for installing the Integration Gateway Services (IGS) .ear file. The instructions below cover the following topics:
Prerequisites
Preparing the WebLogic Server (WLS)
Deploying the IGS .ear file
Testing the IGS using the WLS test page
Installation of the IGS .ear file requires the following:
WebLogic Server
AQ 11g database
Oracle Retail Integration Bus (already running)
Each .ear file or ejb-jar file containing the services should be deployed on its own WebLogic instance.
To avoid confusion when naming the WebLogic instance, it is recommended that the .ear file name is used (without the extension) along with underscore, wls_instance. For example, if the .ear file is rms-service.ear, the instance name is rms-service_wls_instance.
|
Note: Before deploying the IGS .ear file, be sure to create RIB AQ JMS Topics. For information, see Chapter 4, "Run the RIB Application Installer". |
Create a datasource for IGS, pointing to the RIB AQ JMS server, as follows:
Navigate to the Summary of JDBC Data Sources screen using the Services > JDBC > Data Sources menu.
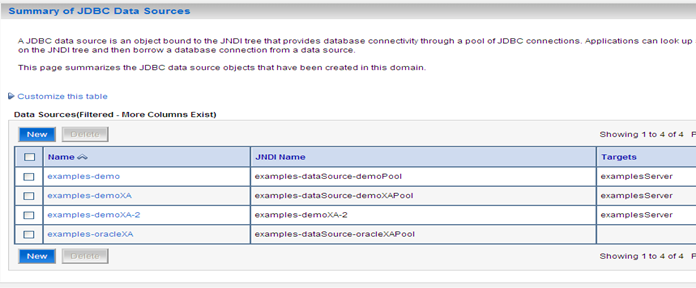
Click New to open the Create a New JDBC Data Source screen. Enter the following values:
| Field Name | Value |
|---|---|
|
Name |
igs-ojms-managed-datasource |
|
JNDI Name |
IGSOracleAQJmsDs |
|
Database Type |
Oracle |
|
Database Driver |
Oracle |
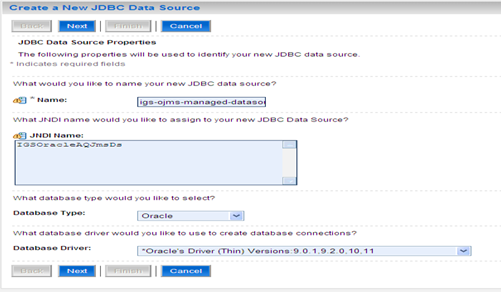
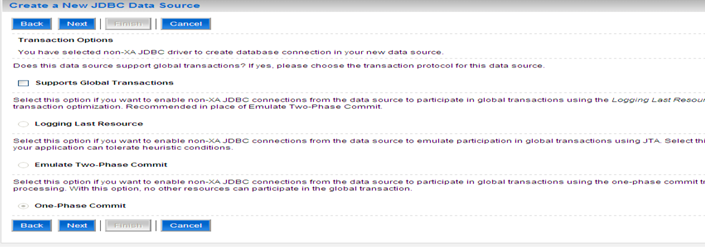
Also on the Create a New JDBC Data Source screen, uncheck "Supports Global Transactions."
Also on the Create a New JDBC Data Source screen, enter the following database details:
Database Name
Host Name
Port
Database User Name
Password
Confirm Password
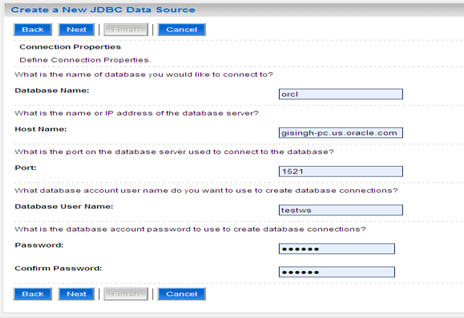
Also on the Create a New JDBC Data Source screen, verify the configuration details, as shown below:
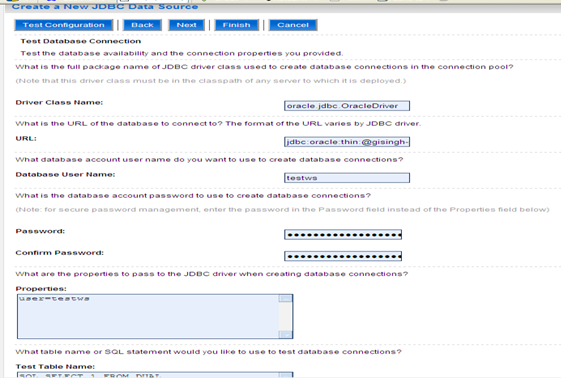
At the top of the screen, click Test Configuration to ensure the server is able to connect to the database. Note the message at the top of the following screen: "Connection test succeeded."
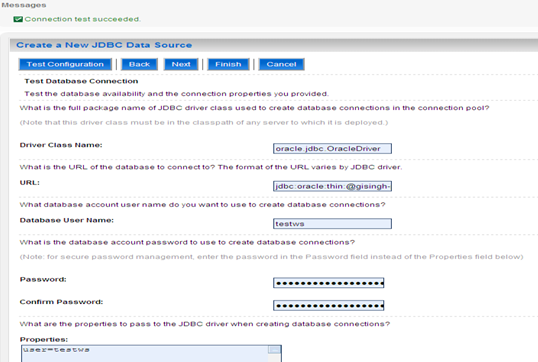
Also on the Create a New JDBC Data Source screen, select the target server under Select Targets. Click Finish.

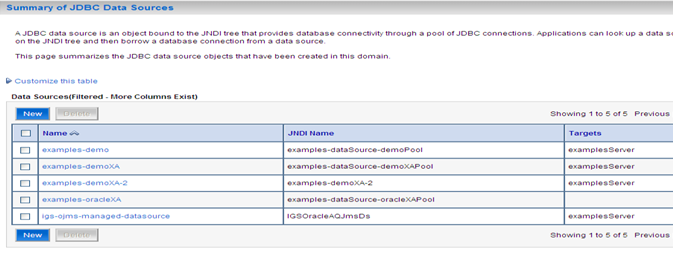
Upon clicking Finish, the newly created data source should appear in the list of data sources (on the Summary of JDBC Data Sources screen).
Complete the following steps to deploy the IGS .ear file.
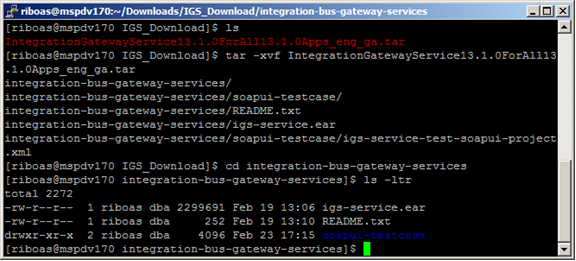
Download the IntegrationGatewayService13.1.1ForAll13.1.1Apps.tar to a temporary location.
Run the following command for extracting the contents of the .tar file:
$ tar -xvf IntegrationGatewayService13.1.1ForAll13.1.1Apps_eng-ga.tar
Navigate to the "integration-bus-gateway-services" directory to see the contents:
$ cd integration-bus-gateway-services
$ ls -ltr
Navigate to the WL_Server > Deployments screen to view the list of deployed applications on the Summary of Deployments screen.
|
Note: To re-deploy an application that is already deployed, click Delete first to "undeploy" the application. Then continue with the following steps. |
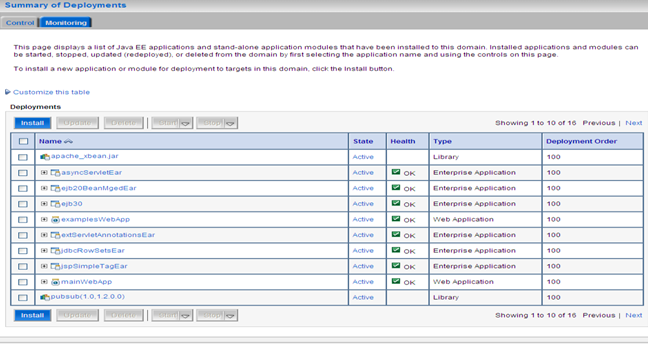
On the Summary of Deployments screen, click Install to open the Install Application Assistant screen.

On the Install Application Assistant screen, click the "upload your file(s)" link to display the Deployment Archive field.

In the Deployment Archive field enter the .ear file location of the local server, as shown below:
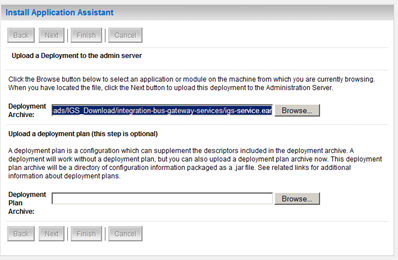
Click Next to view the following portion of the Install Application Assistant screen:
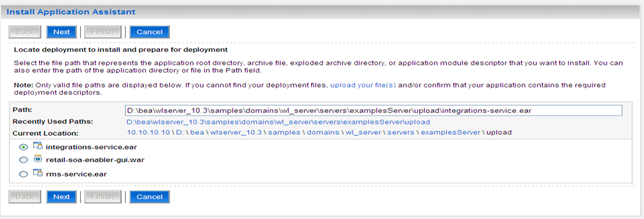
Click Next to move on to the portion of the Install Application Assistant screen shown below. Click the "Install this deployment as an application" radio button.

Click Next to display a list of Optional Settings. Leave the default values as they are shown below:
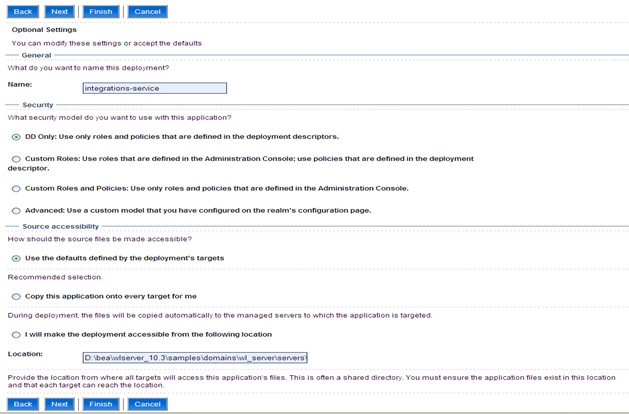
Click Next to view the following portion of the Install Application Assistant screen. Select the "No, I will review the configuration late" radio button.
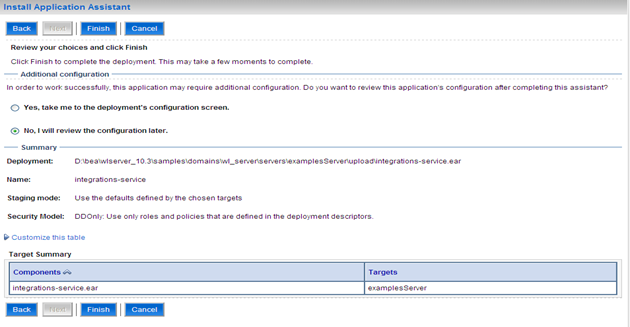
Click Finish to start the deployment process and return to the list of deployed applications.
Clicking Finish in the last set of instructions opens the Deployments screen shown below. Each application has a link to all of its modules and components.
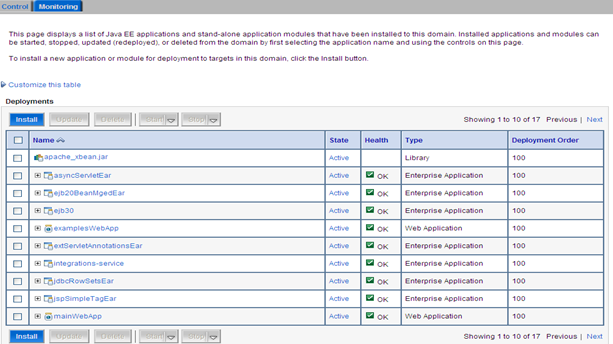
In the list of applications, click on the plus sign (+) beside integrations-service to display the modules and components associated with it.
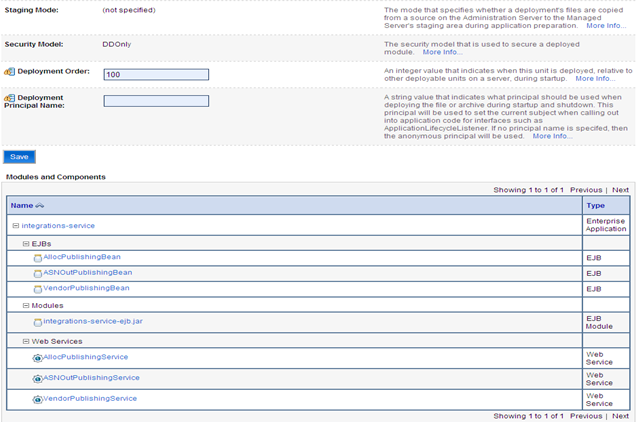
Under Modules and Components, click on any Web service to view a list of Web service details, as shown below.

In the Settings for AllocPublishingService screen, click the Testing tab.

Click the Test Client link to open the Web service test client page:
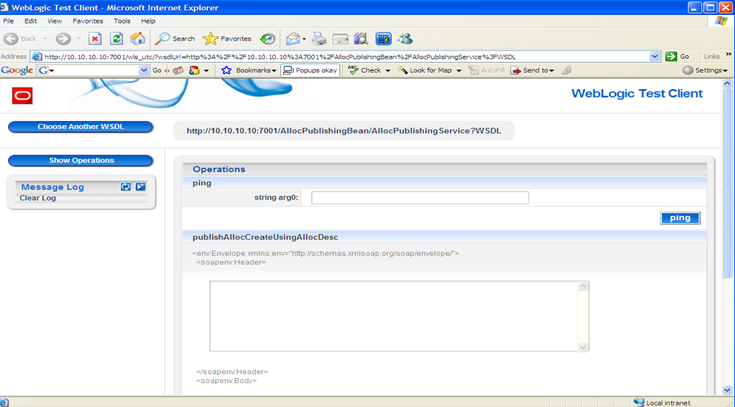
Modify the SOAP request body as needed. Click on the method required to invoke the corresponding method of the Web service. Once the method call is complete, the SOAP response will display in the same page.