| Oracle® Retail Service Backbone Developers Guide 14.0 E49441-01 |
|

 Previous |
 Next |
Alerts are generated by OSB monitoring framework and they help to diagnose problems when they occur. Oracle Service Bus provides two types of alerts:
SLA Alerts
Pipeline Alerts
Pipeline alerts can be raised in the message flow of the proxy service. You can use the alerts in a message flow for:
Detecting business errors in a message flow.
Indicating business occurrences.
SLA alerts are raised in Oracle Service Bus to indicate potential violation of the Service Level Agreements (SLAs). You can use SLA alerts for:
Monitoring and generating email notification of WS-Security errors
Monitoring the number of messages passing through a particular pipeline
Detecting the violation of service level agreements with third-party products
Detecting a non-responsive endpoint
Consider the following use case to verify the service level agreements:
Assume that a particular proxy service is generating SLA alerts due to slow response time. To investigate this problem, you must log in to the Oracle Service Bus Administration Console and review the detailed statistics for the proxy service. At this level, you can identify that a third-party web service invocation stage in the pipeline is taking a lot of time and is the actual bottleneck.
You can use these alerts as the basis for negotiating SLAs. After successfully negotiating SLAs with the third-party web service provider, you should configure alert metrics to track the web service provider's compliance with the new agreement terms.
There are different ways to add SLA alerts and Business alerts in RSB decorator projects. SLA alerts can be added from OSB console after the decorator has been deployed in a OSB server. Pipeline alerts can be added from either OEPE or from OSB console. It is recommended to add pipeline alerts in the OEPE and then export the decorator jar.
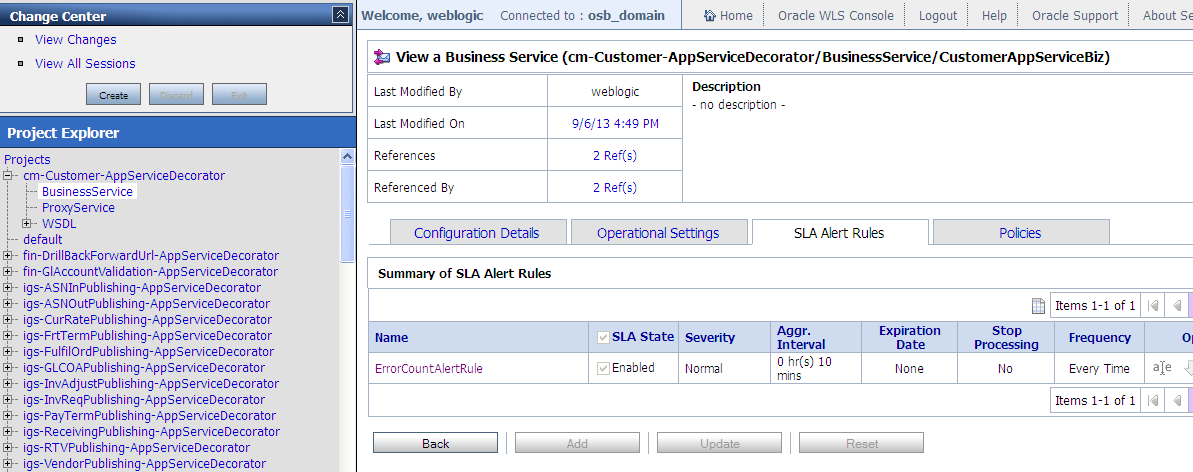
RSB decorator jars have a default SLA alert configured for each proxy and business service. The default alert rule name is ErrorCountRule. This alert is configured to generate an SLA alert whenever an error condition occurs in the message flow. This is just a sample SLA alert. It is recommended to delete this rule and create a new rule for the actual SLA criteria for that environment.
SLA alerts are operational settings and they can be added or modified only from OSB console. Follow the steps to delete the default alert rule and add a new rule:
Log in to OSB console and access the Projects page.
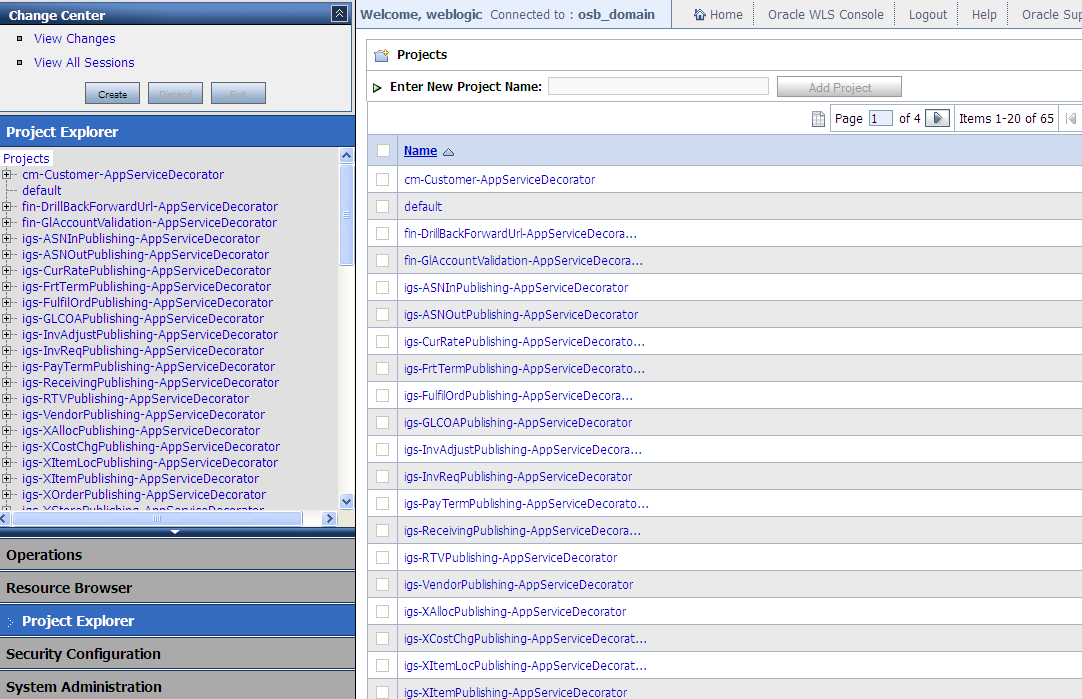
Click the project for which you want to modify SLA alert.
The steps to add or modify an SLA alert are same for both business service and proxy service. In this example, we will show steps for a business service. Browse to the business service and go to SLA Alert Rules tab of that service.
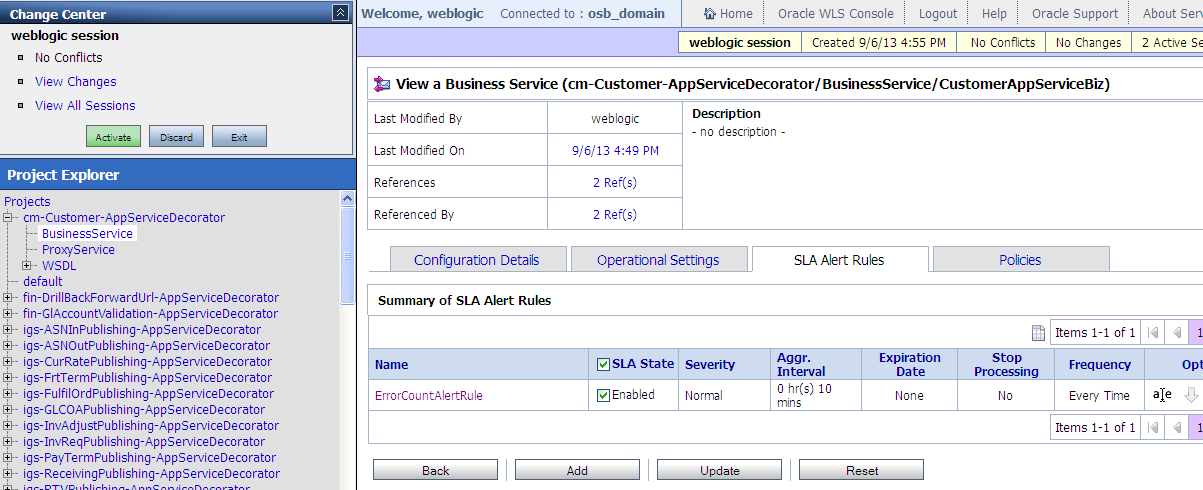
Click Create in Change Center to create a new session.
Click Delete in the alert rule row.
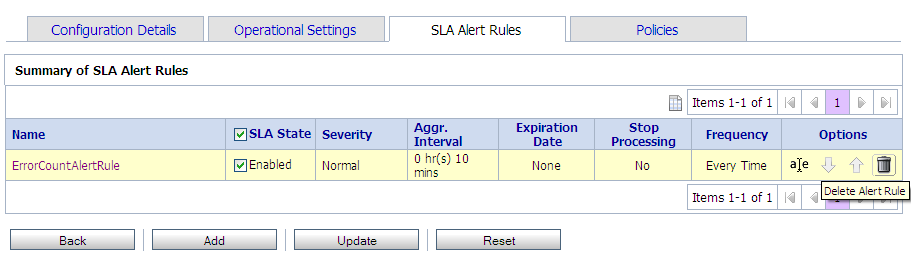
The rule is deleted.
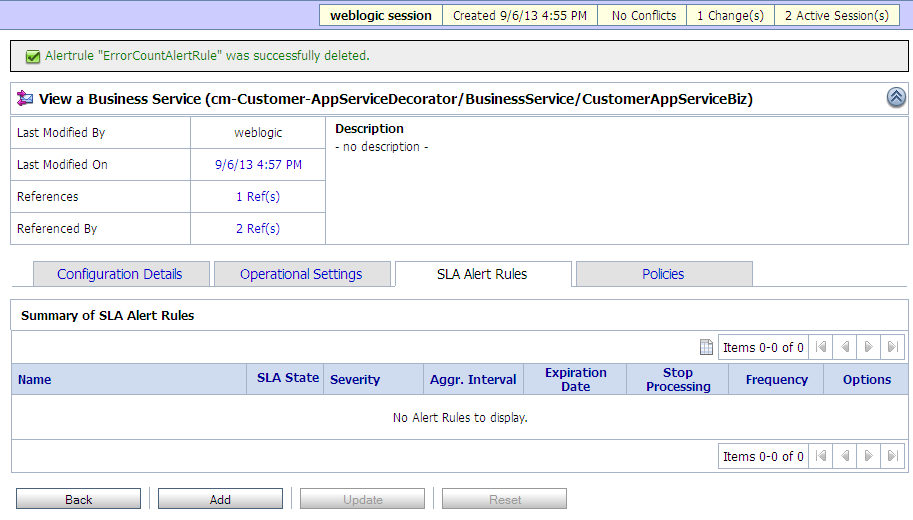
Click Add at the bottom to add a new rule.
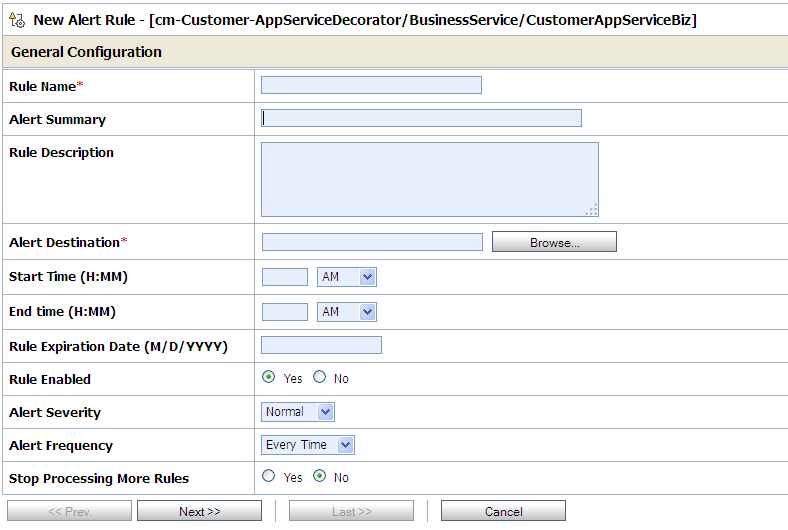
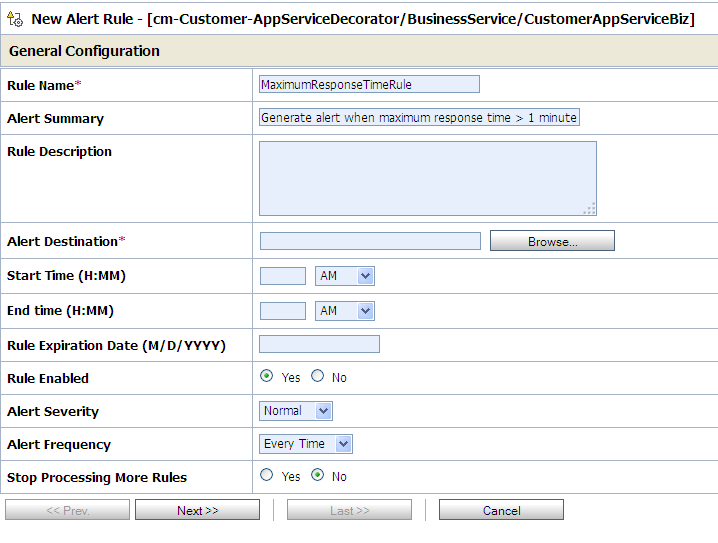
Enter appropriate values for Rule Name and Alert Summary fields. It is recommended to have a good summary of why this alert rule should be generated. Having proper description of all fields will be useful when looking at rules in RIC console and it will help better in diagnosing the issues.
For Alert Destination, click the Browse button. It shows the list of all alert destinations in the OSB server. You can select the default alert destination or create a new destination and choose that.
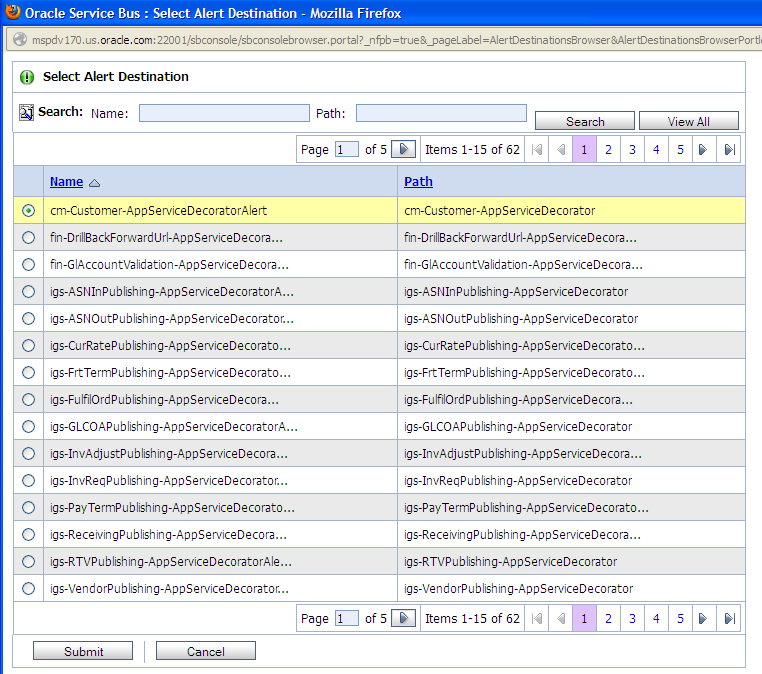
Click Submit to select the alert destination.
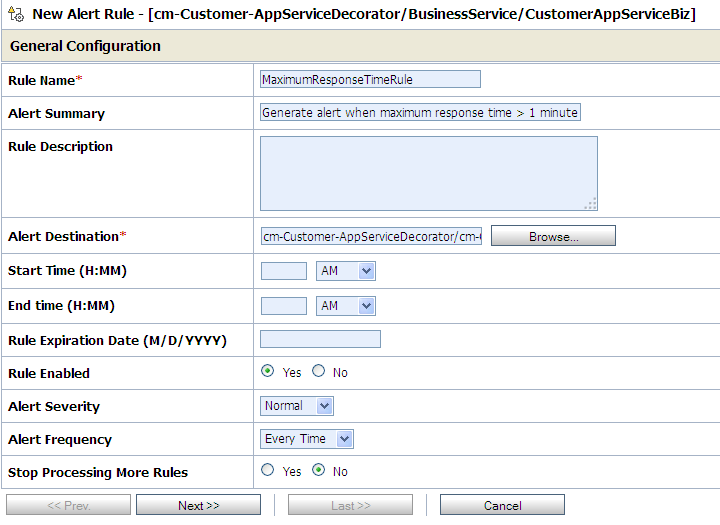
Click Next. In the next page you can build the expression which defines the criteria for alert rule.
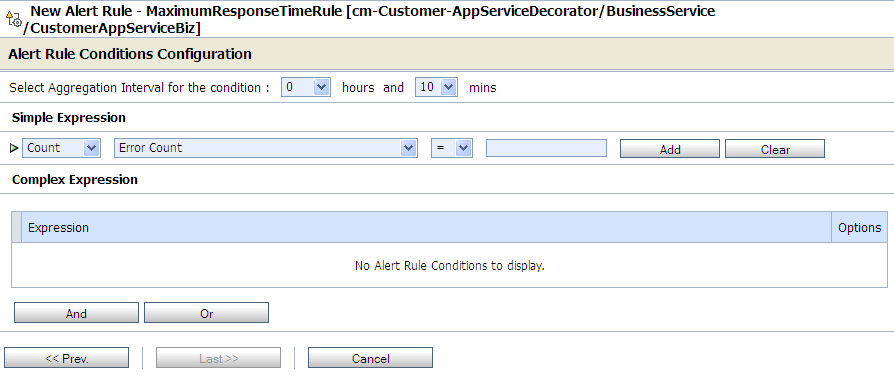
Now in the Simple Expression area, you can build the expression for which you want to generate SLA alert. In this example, we will build an expression to generate an SLA alert whenever the response time of business service is more than one second.
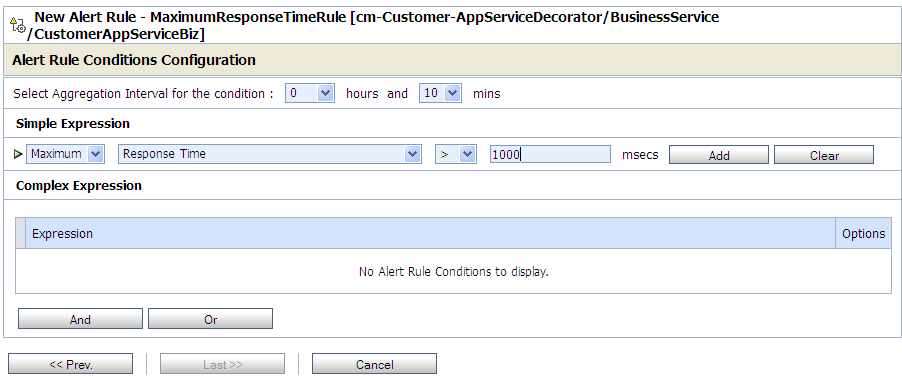
Click Add.
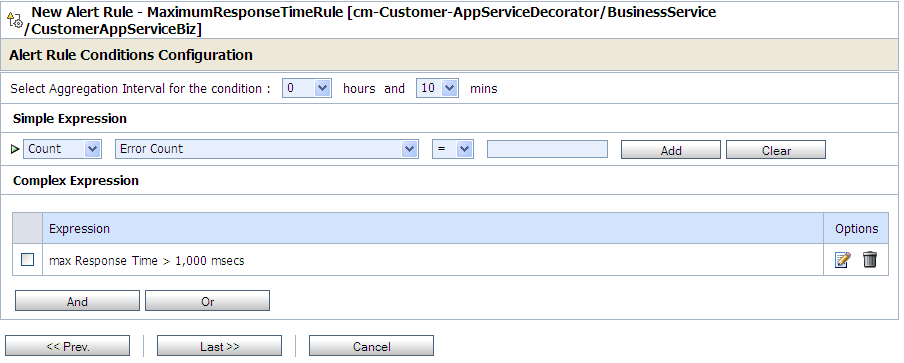
You can build more complex expression using And and Or buttons to build the rule. After the rule expression is built, click Last.
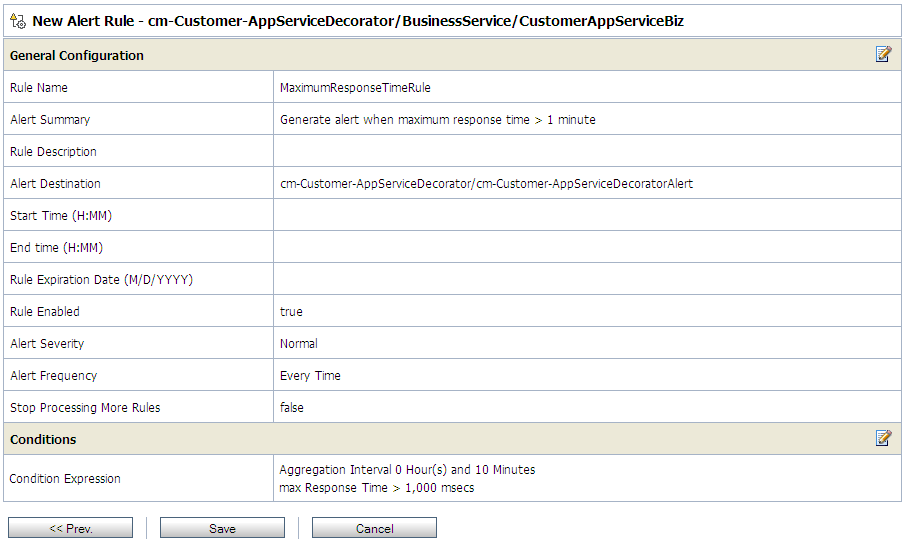
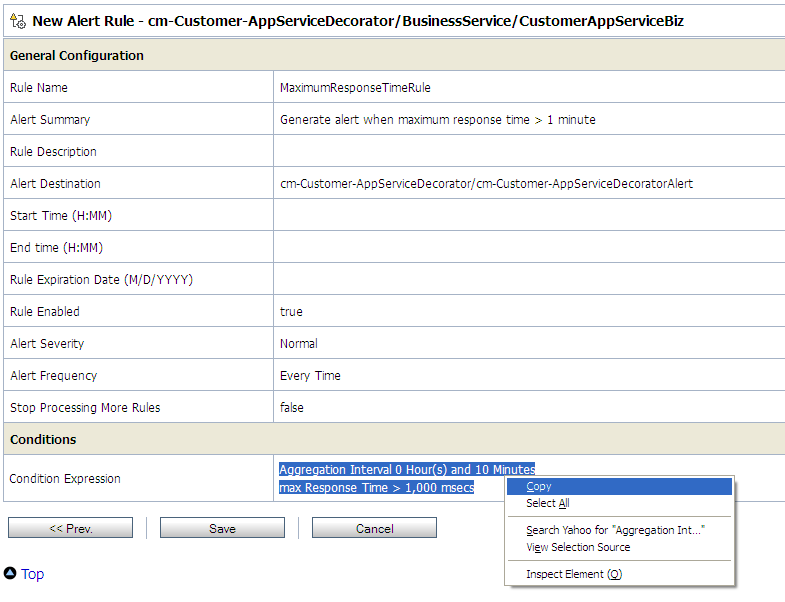
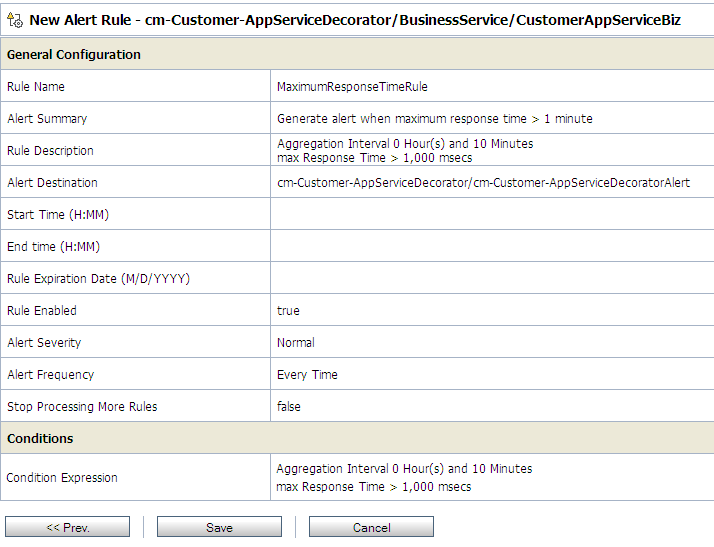
In the above page, you will see all the details about the new rule. Note that the Rule Description field is empty. We recommend that the condition expression is copied into the description field as well, so that when the SLA alert is displayed in the RIC, the exact condition of causing the alert is also displayed. The condition expression is not available in RIC, but the description field is available. Therefore we should have a good description for the alert. Follow the steps to copy the condition expression into the description field.Right-click the expression string and select copy.
Click Prev button twice.
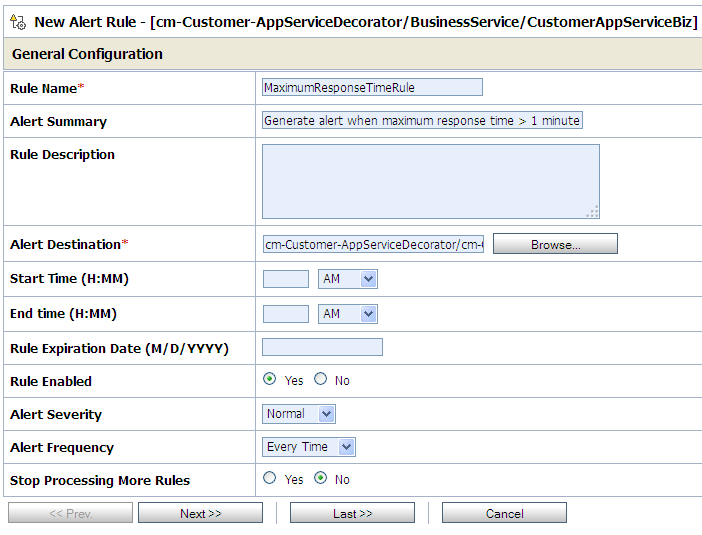
Paste the condition expression into the Rule Description field.
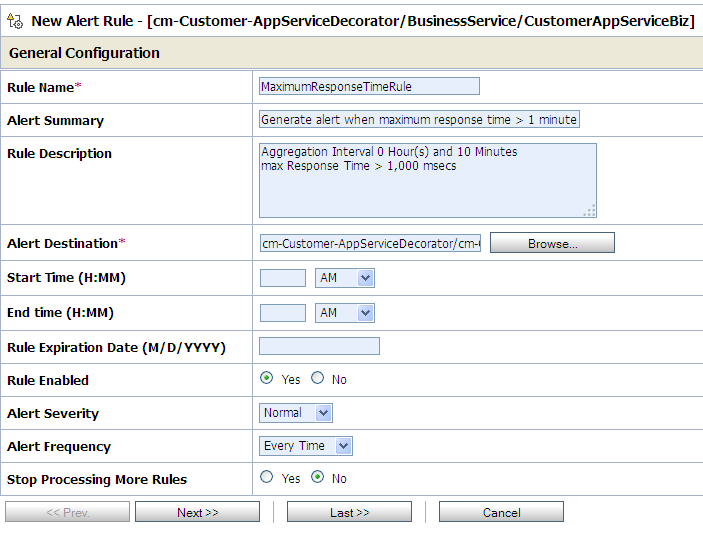
Click Last>> to go to last page.
Click Save.

Click Activate and then Submit to commit the changes in server.
This completes the steps to create new SLA alert rule.
|
Note: SLA alerts are operational settings and can be added and modified only from OSB console. If the decorator jar is re-deployed on the server, remember that all the operational settings and SLA alerts will be lost. After deploying the new decorators, the SLA alerts will need to be created again. |
Pipeline alerts are also called Business Alerts in RSB context. The reason for calling them business alerts is that they are used mostly to identify unusual business conditions or errors. For example, a customer may want to see an alert whenever a request is made with a very large amount.
Pipeline alerts can be added in proxy services only. In RSB decorators, the message flow is defined in local proxy services. Therefore any new pipeline alerts should be added in local proxy service.
In this example, we will take an oms-CustomerOrderService where a business alert needs to be raised when grand total > 500000. The following steps are for adding a new pipeline alert:
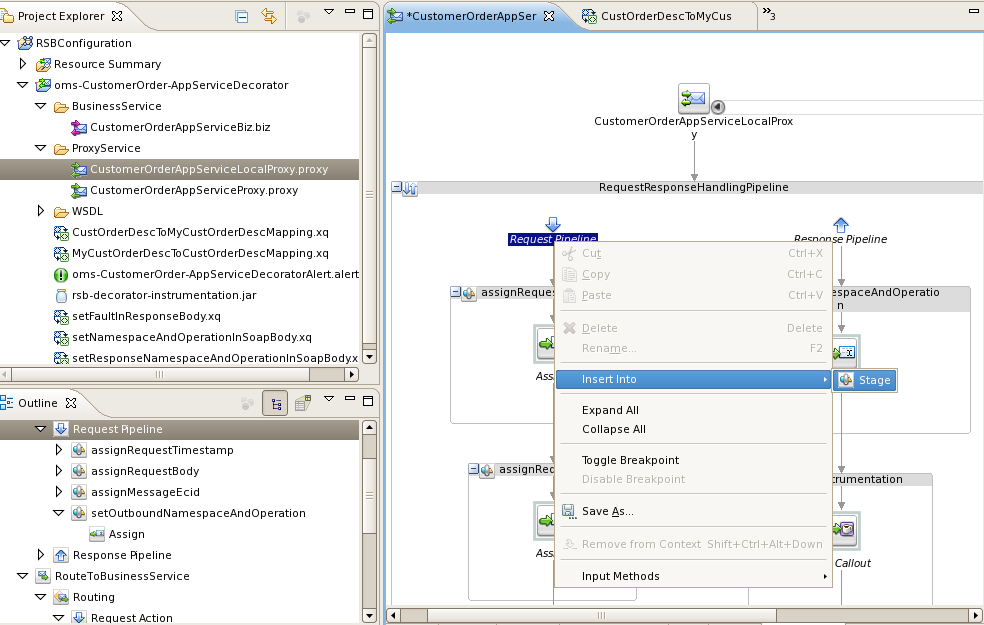
Right-click Request Pipeline, select Insert Into >Stage to add a new stage as shown below:
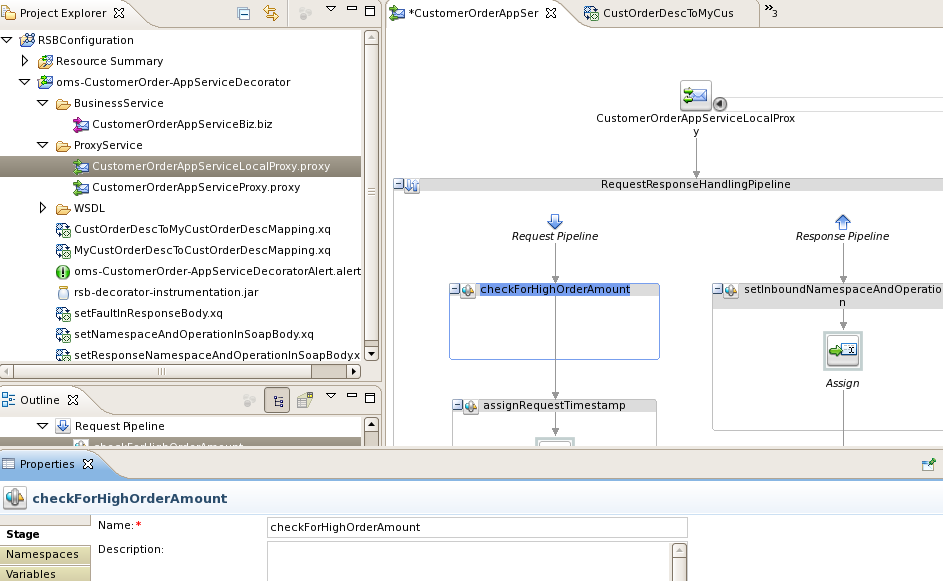
Enter appropriate name for the stage.
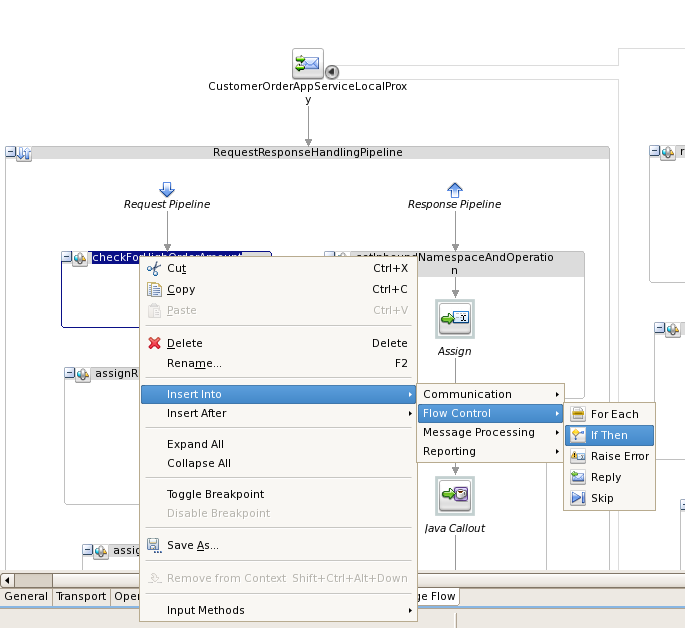
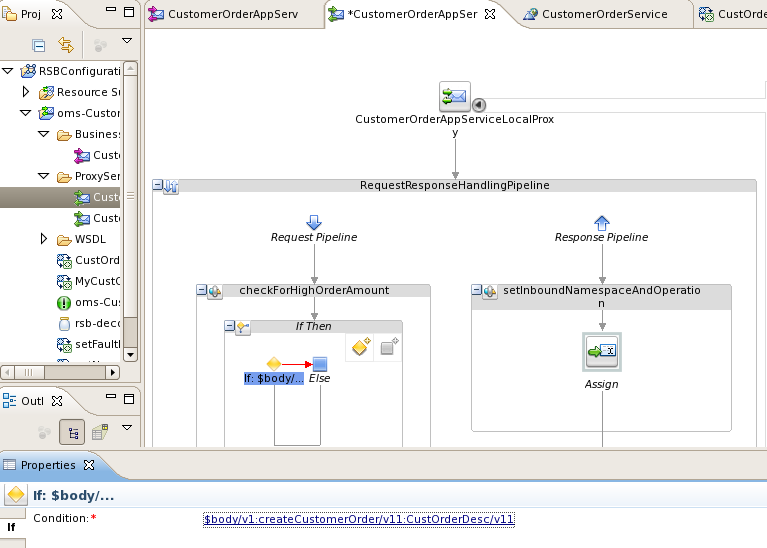
In the stage, add a new If Then flow, right click the stage added above, select Insert Into> Flow Control > If Then as shown below:
The If Then flow is added as shown below:
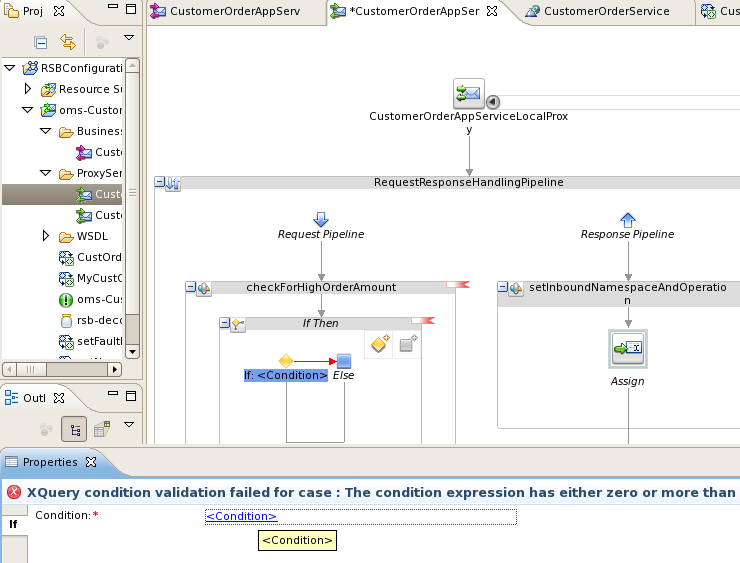
For the first If condition, click the <Condition> link and access Condition Builder tab.
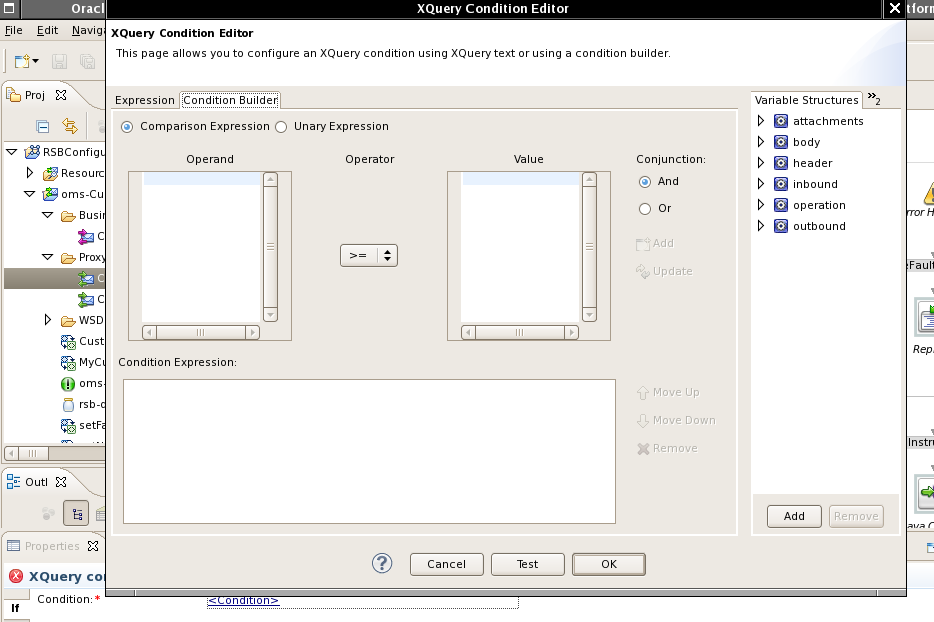
In this screen you can build the expression for the alert rule. Select the request schema element for the operation:
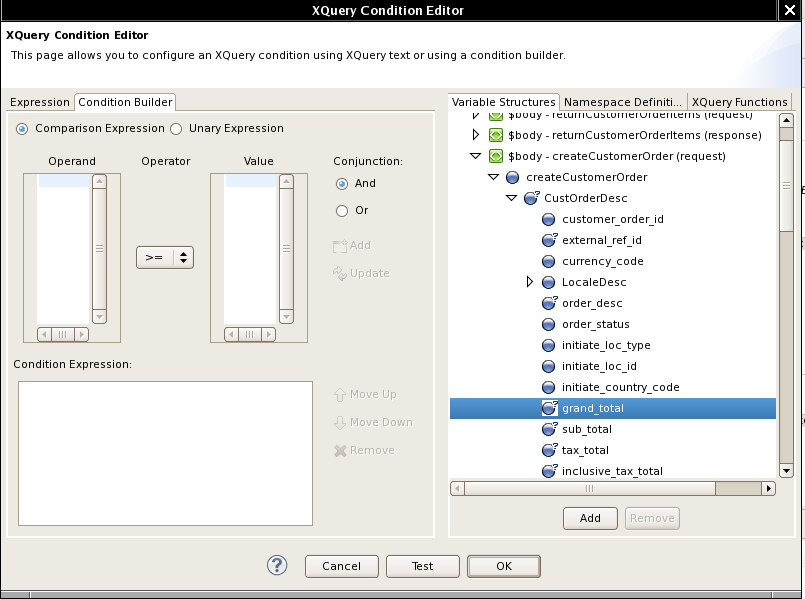
Drag the element to Operand window:
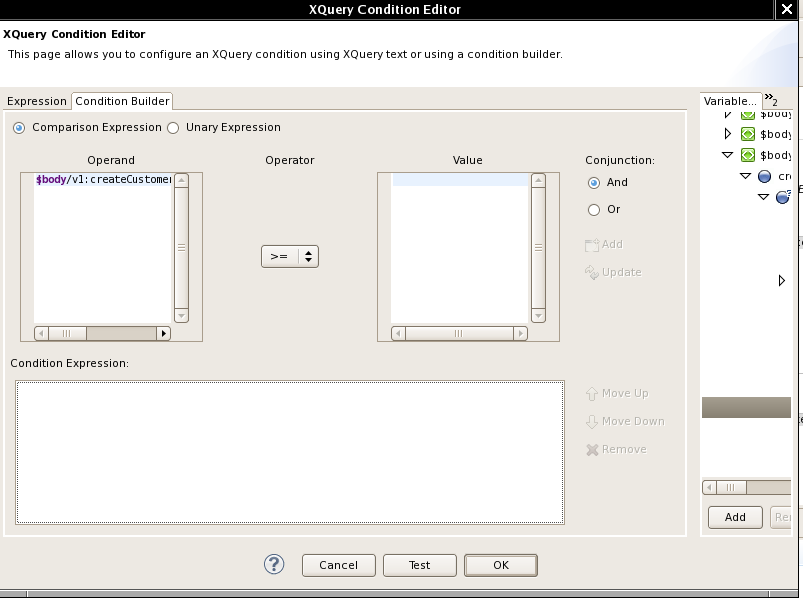
Select the Operator and enter a Value for comparison.

Click Add to add the condition to Condition Expression window.
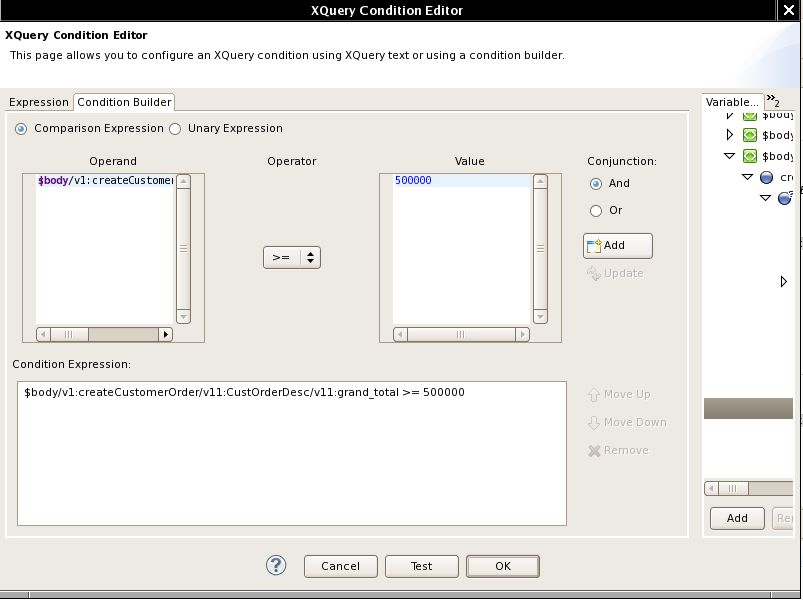
You can build more complex expression using And and Or buttons. We will keep it simple here. After building the condition expression, click OK.
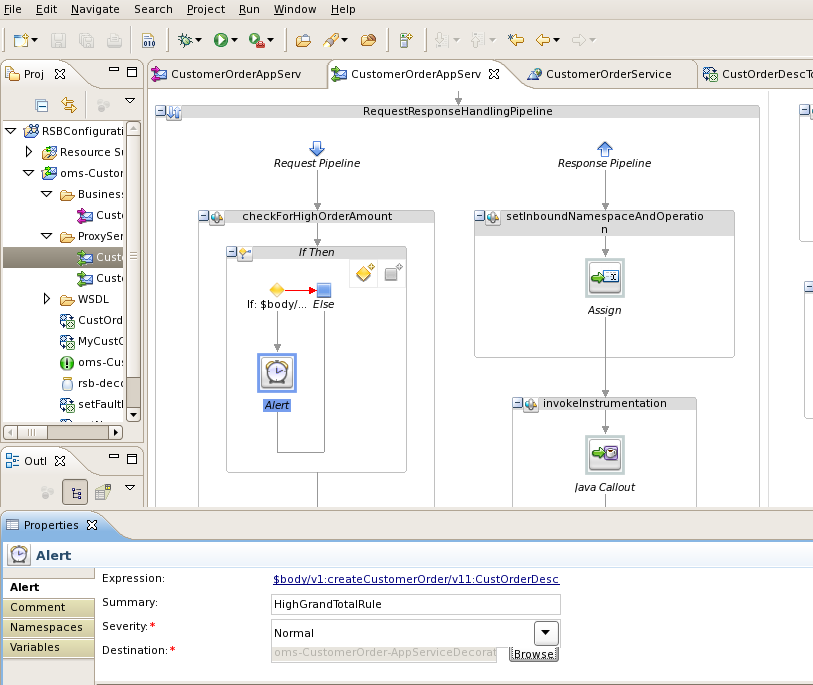
Now we need to add Alert action for this If condition as shown below:
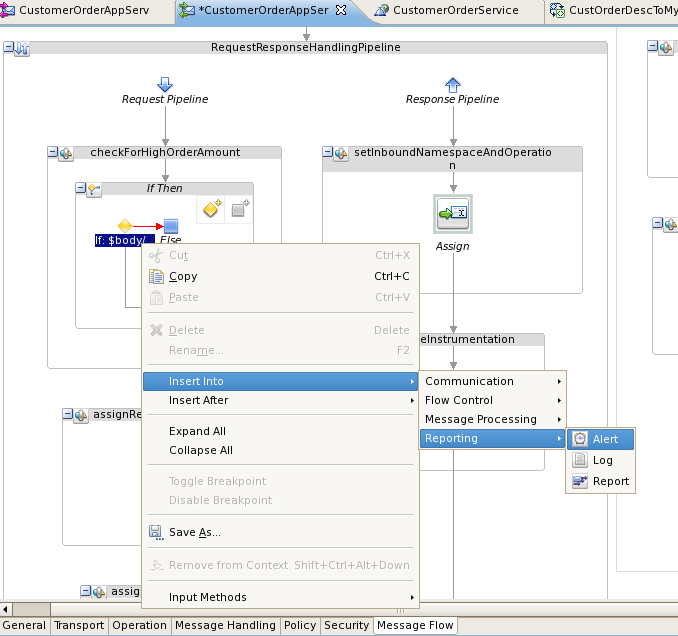
The alert action gets added, right click the If condition added in the above steps, select Insert Into > Reporting > Alert as shown:
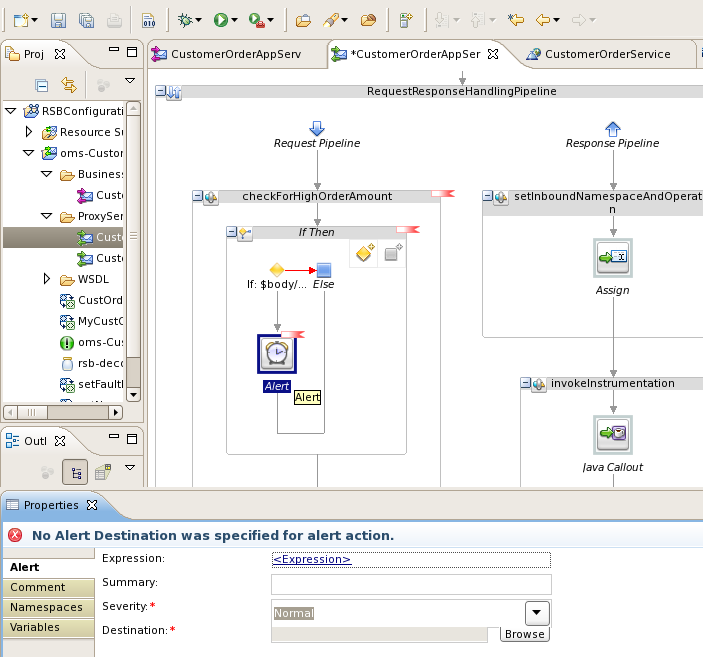
In the Expression field, you can enter the xml that you want to see in alert description when alert is generated. For example, you may want to see the whole SOAP body which caused the alert to be generated or a subset of the SOAP body. Click the <Expression> link to select the XML.
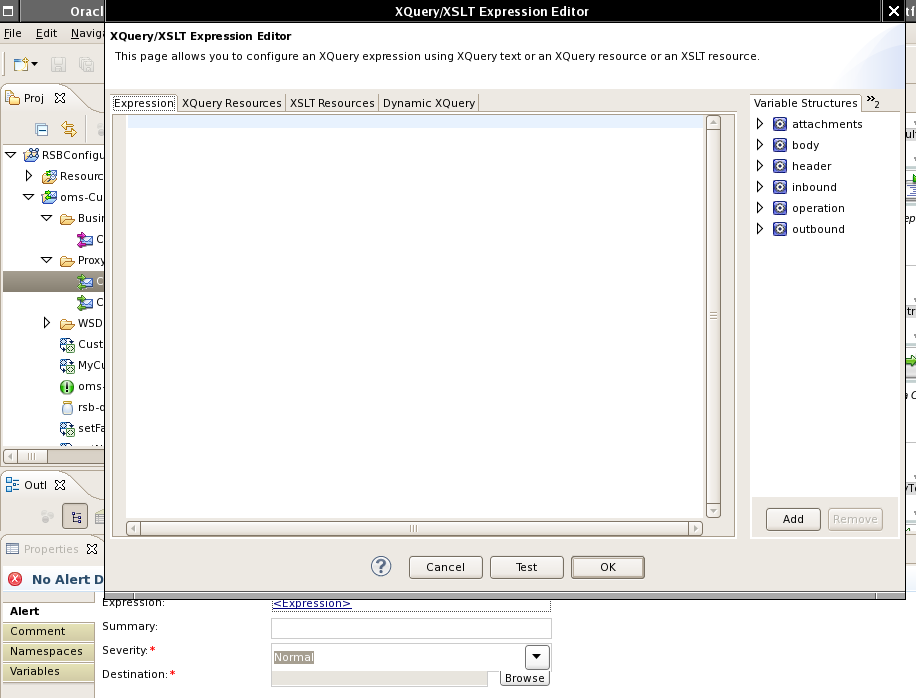
In this example, we will add CustOrderDesc element to the expression.
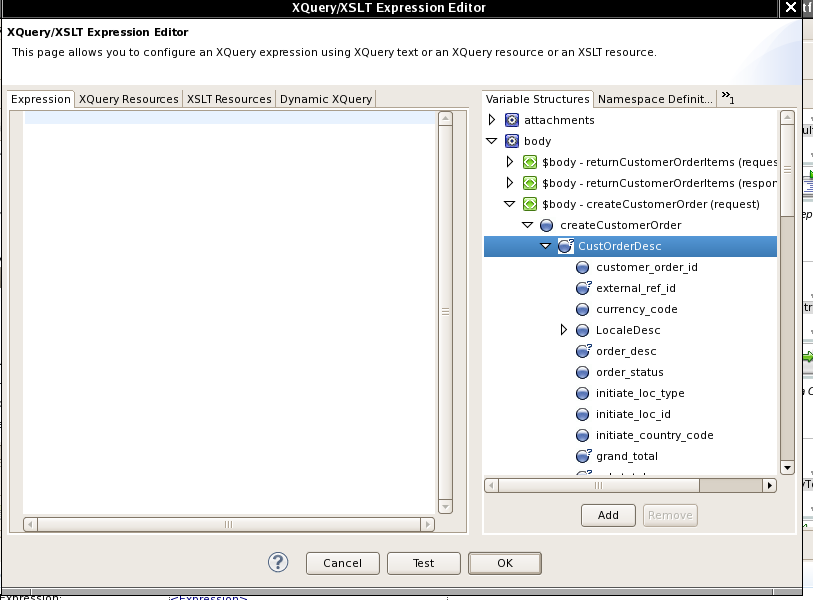
Drag CustOrderDesc to the Expression window.
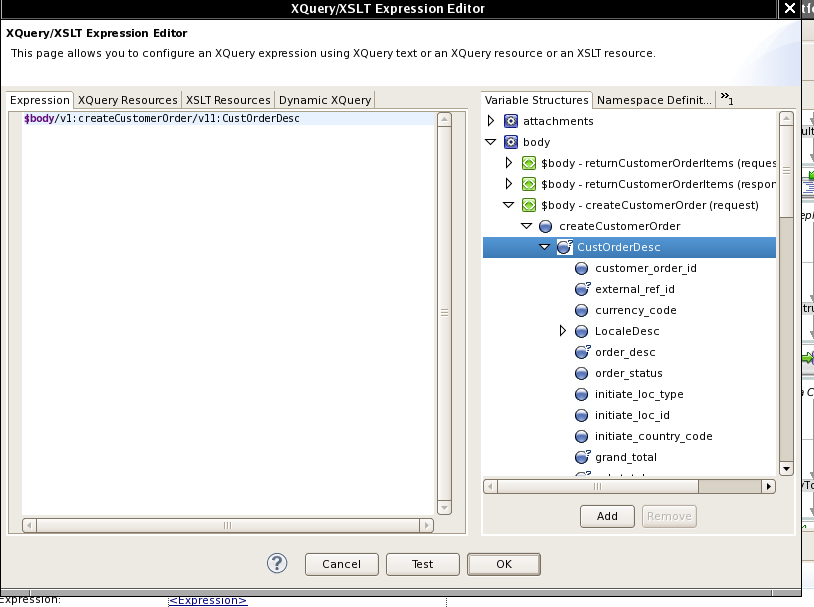
Click OK. In the Summary field, enter an appropriate name for the alert.

Select Destination for the Alert. You should select the destination that was created by default in this project. Click Browse.
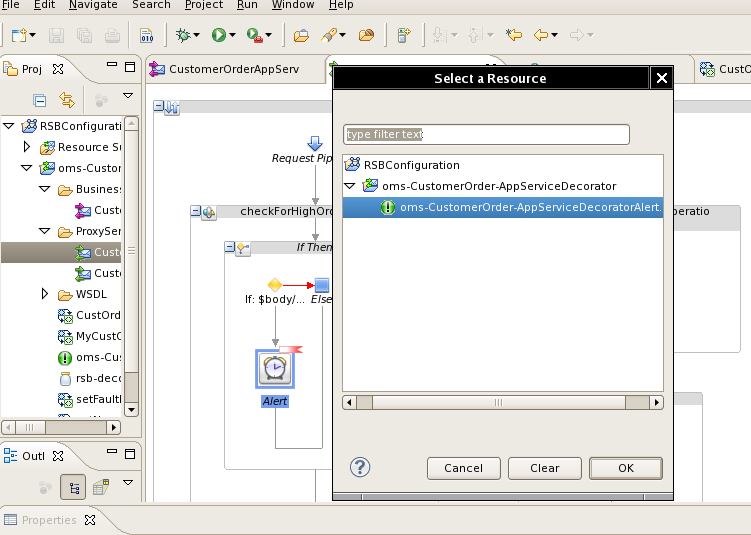
Click OK to close the dialog box.
This finishes up the steps for adding new business alert to a message flow in a decorator.
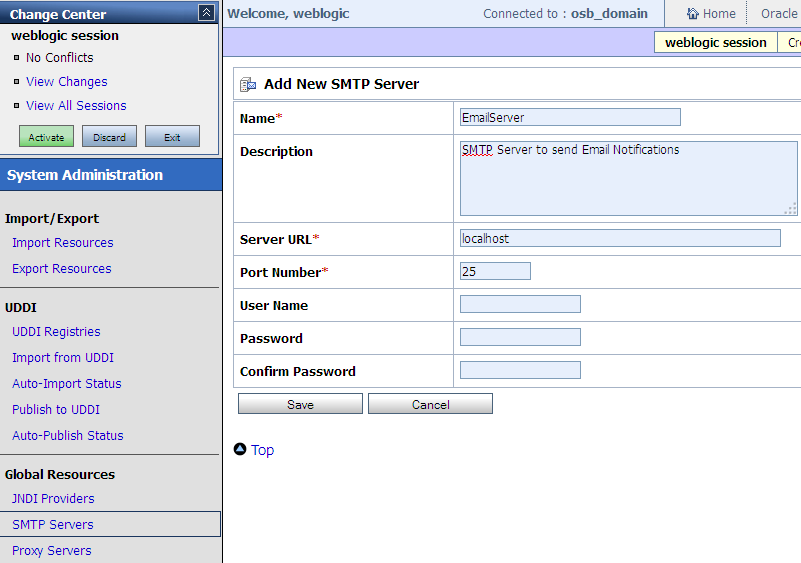
The default alert destination created by RSB only sends alerts on OSB reporting provider JMS. The alert destination can also be configured to send email notifications; this will be useful to get immediate notifications for SLA alerts. For generating email notifications first step is to create SMTP server configuration in OSB server. You need to have a SMTP server running and URL, port number information available. Following are the steps to create SMTP server configuration using OSB console:
Create a new session in OSB console.
Go to System Administration > SMTP Servers page.
Click Add.
Provide a name for the server.
Provide URL of the SMTP server. If the SMTP server is running on localhost, then the URL will be localhost.
Enter SMTP port number, generally it is 25.
If it is secured, then provide username/password. Generally it is not required when running on localhost.
Click Save. Click Activate and Submit to commit changes to the server.
This completes the steps for creating SMTP server configuration. Following is a screenshot of this:
After creating SMTP server configuration, we need to update alert destination to use the SMTP server for sending notifications.
Create a new session in OSB console.
Go to Project Explorer tab and browse to the project for which you want to modify the alert destination. In this example, we will update cm-Customer-AppServiceDecorator project. When you click the project; it shows the list of files in that project. The default alert destination follows the naming convention as <appName>-<ServiceName>-AppServiceDecoratorAlert. So the file name here will be cm-Customer-AppServiceDecoratorAlert.
Click the alert destination to go to alert destination configuration page.
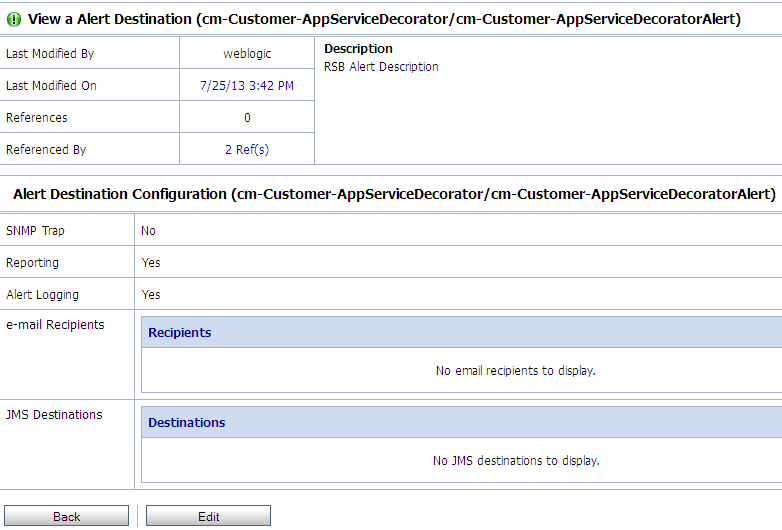
Click Edit.
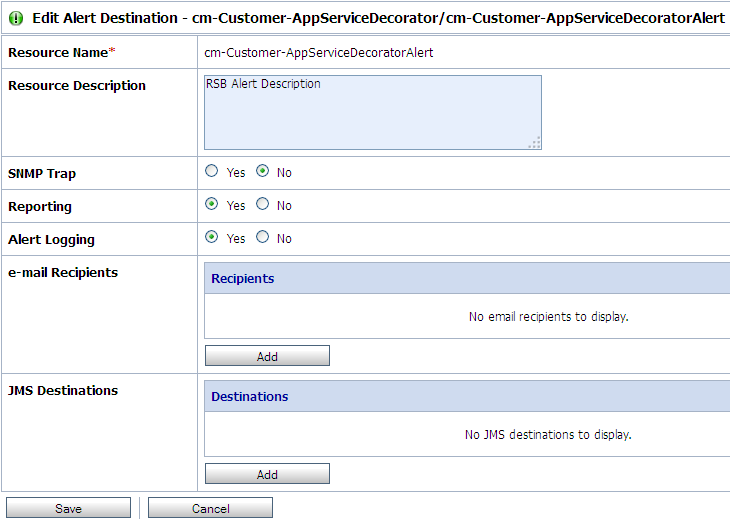
In the e-mail Recipients section, click Add button. In the next page, you need to provide details about senders and receivers of e-mail notifications as shown below:
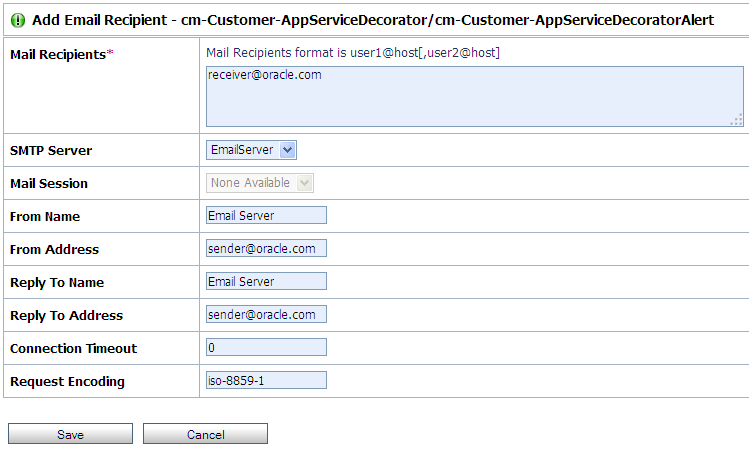
Mail Recipients: This needs the email addresses of the persons who should receive email notification.
SMTP Server: Select the name of the SMTP server that was created earlier.
From Name: The name of the person on whose behalf the notification is sent.
From Address: Email address of the person on whose behalf the notification is sent.
Reply To Name: Name of the person which should show in reply-to field of the email.
Reply To Address: Email address which should show in reply-to field of email.
Click Save after entering all the values. Click Activate and Submit to commit changes to the server. This completes the steps required for setting up email notifications for alerts.
|
 Copyright © 2013, Oracle and/or its affiliates. All rights reserved. Legal Notices |
|