| Oracle® Retail Integration Bus Support Tools Guide 14.0 E49454-01 |
|

 Previous |
 Next |
The Oracle Retail Integration Bus (RIB) Deployment Configuration File Editor is an application for configuring the rib-deployment-env-info.xml file. The editor simplifies the alteration of the XML file by hiding the raw text form of XML. It provides an interface for adding, removing, and rearranging XML elements. It also provides an interface for editing the contents of elements.
The tool is located in the RDMT package and installed with RDMT in the <rib-home>/tools-home/RDMT directory. It is available as a menu selection from the ribadmin sub menu.
|
Note: The editor is a GUI application. To execute it on a host other than the one on which RDMT is installed, use an X server, such as Exceed, and set the DISPLAY environment variable. |
All rib-app-builder tools use the rib-deployment-env-info.xml as the single source of truth about the deployment configuration.
All tools use the values in this file. Editing the file directly affects the compilation, configuration, and deployment of the rib-apps. Use extreme caution and understand the ramifications of the values being manipulated.
Before editing the source file in rib-home, make a backup of the file and place it securely outside of rib-home. Do not create a backup in the rib-home.
This section describes the steps you should take to edit the rib-deployment-env-info.xml.

From the menu bar, select File.
Click Open.
Navigate to the directory containing rib-deployment-env-info.xml.
Select the rib-deployment-env-info.xml file to open it.
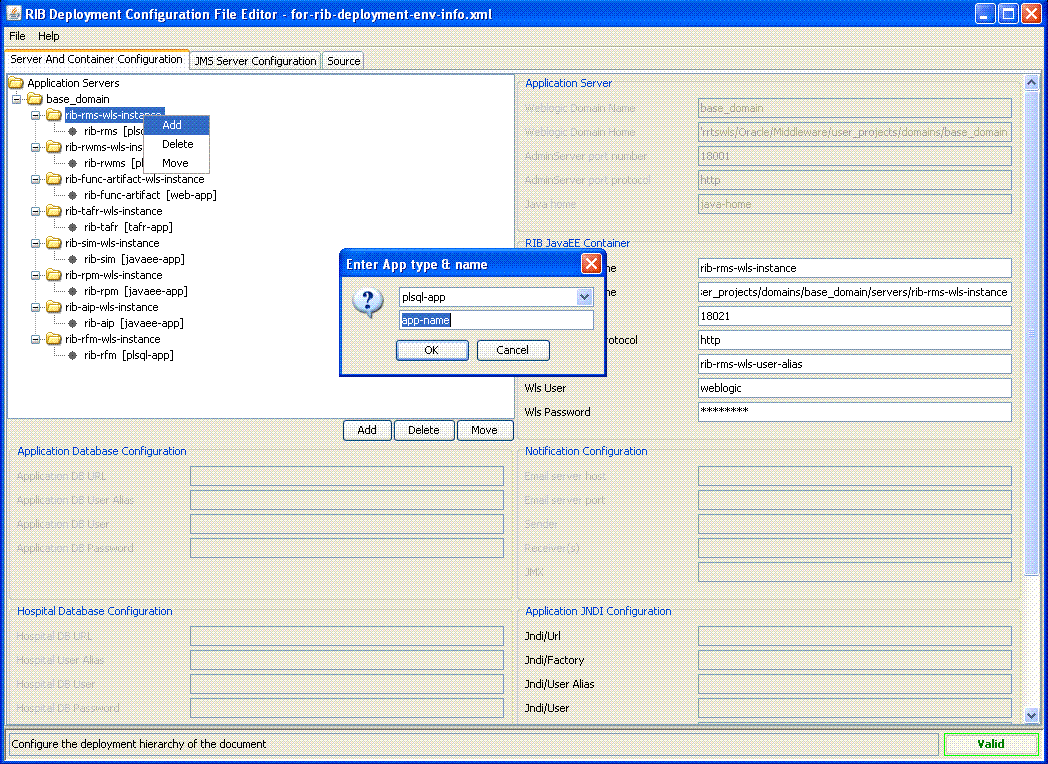
Take the following step to add an application:
Right-click the WLS instance to which you want to add the application. Select Add. Alternatively, select the WLS instance to which you want to add the application and click Add in the Document window.
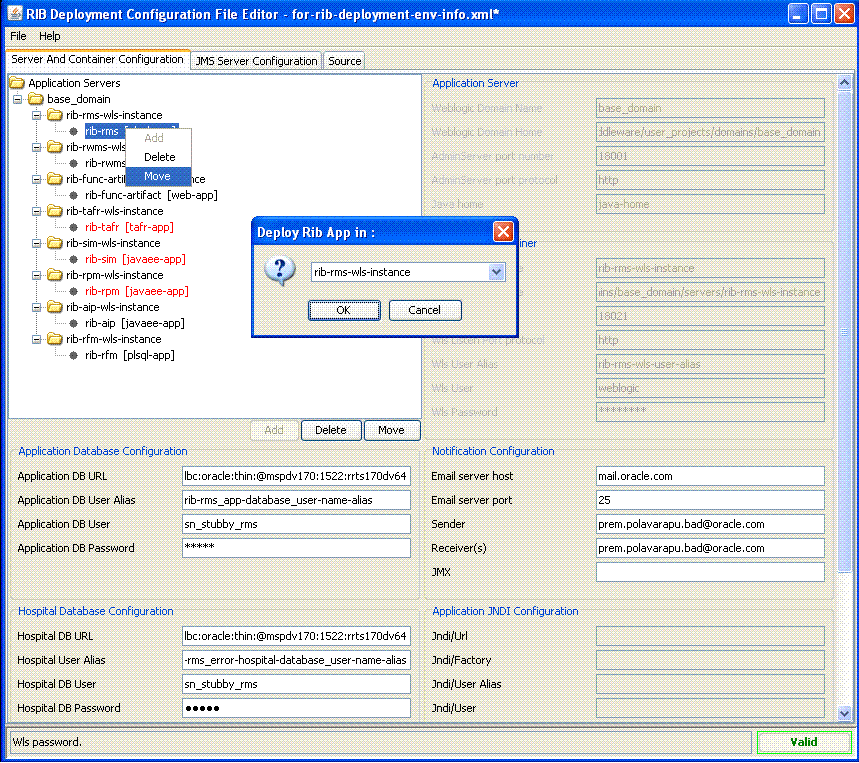
Take the following step to move an application:
Right-click the WLS instance that you want to move. Select Move. Alternatively, select the WLS instance you want to move and click Move in the Document window.
Take the following step to delete an application:
Right-click the application you want to delete. Select Delete. Click Yes to confirm. Alternatively, select the application you want to delete and click Delete in the Document window. Click Yes to confirm.
Take the following step to add a WLS instance:
Right-click the WLS domain to which you want to add a WLS instance. Select Add. Alternatively, select the WLS domain to which you want to add a WLS instance and click Add in the Document window.
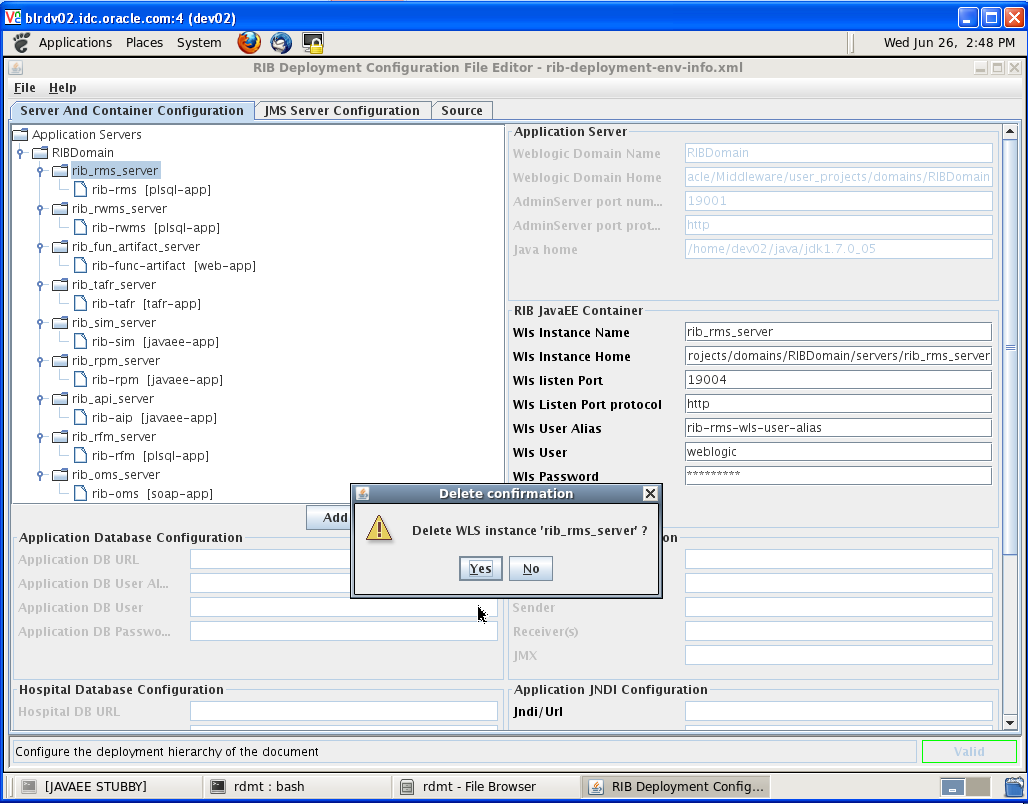
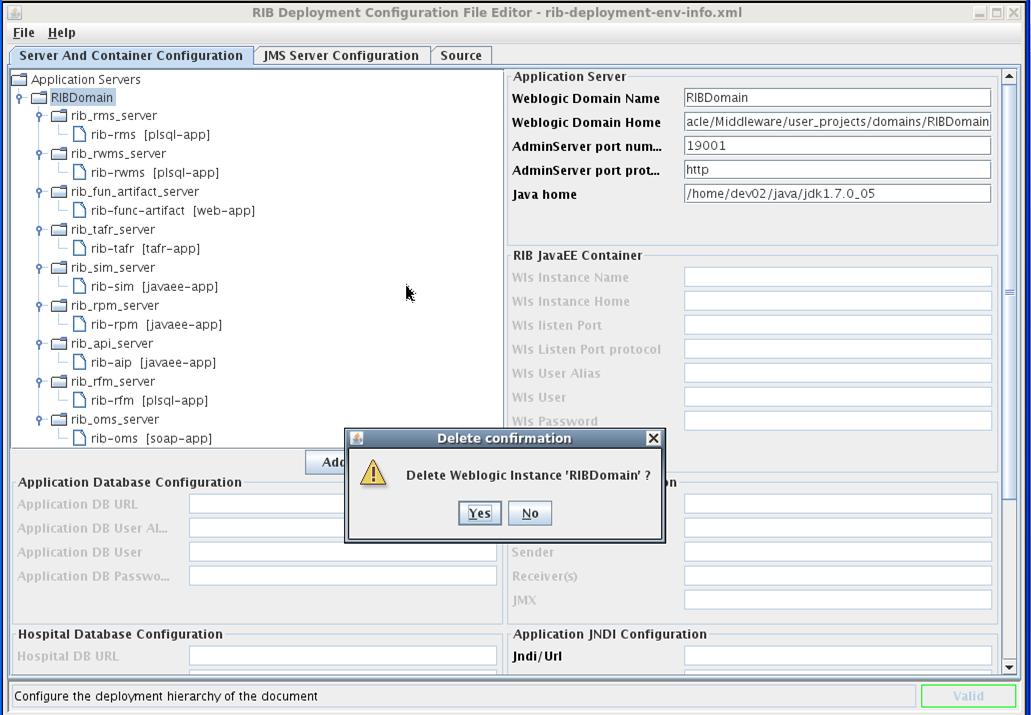
Take the following step to delete a WLS instance:
Right-click the WLS instance you want to delete. Select Delete and click Yes to confirm. Alterbatively, select the WLS instance you want to delete and click Delete in the Document window. Click on Yes to confirm.
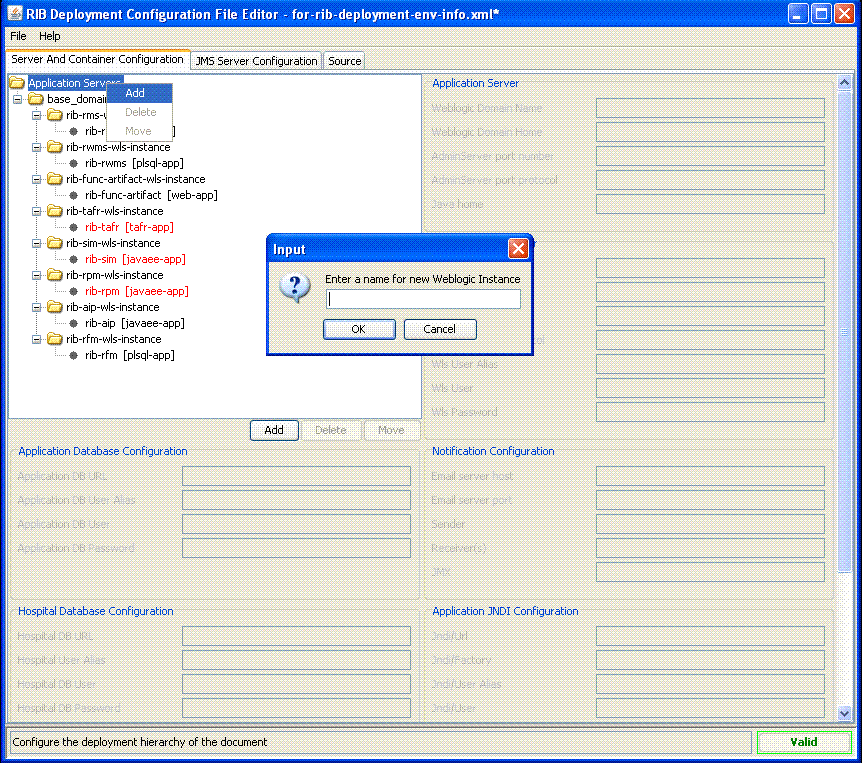
Take the following step to add an application server instance:
Right-click on the Application Servers node. Select Add. Alternatively, select the application servers node and click Add in the Document window.
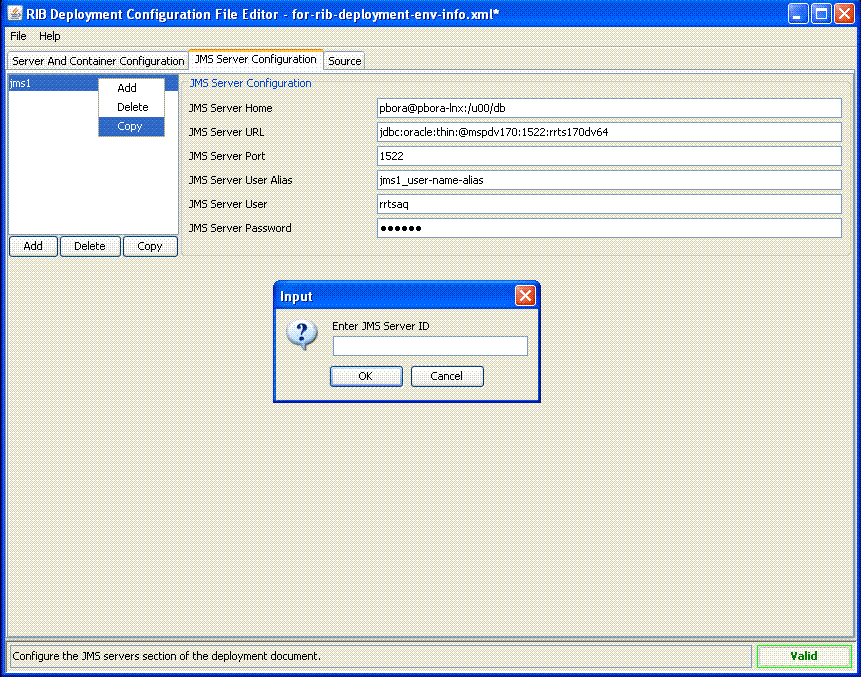
Take the following step to add a JMS server instance:
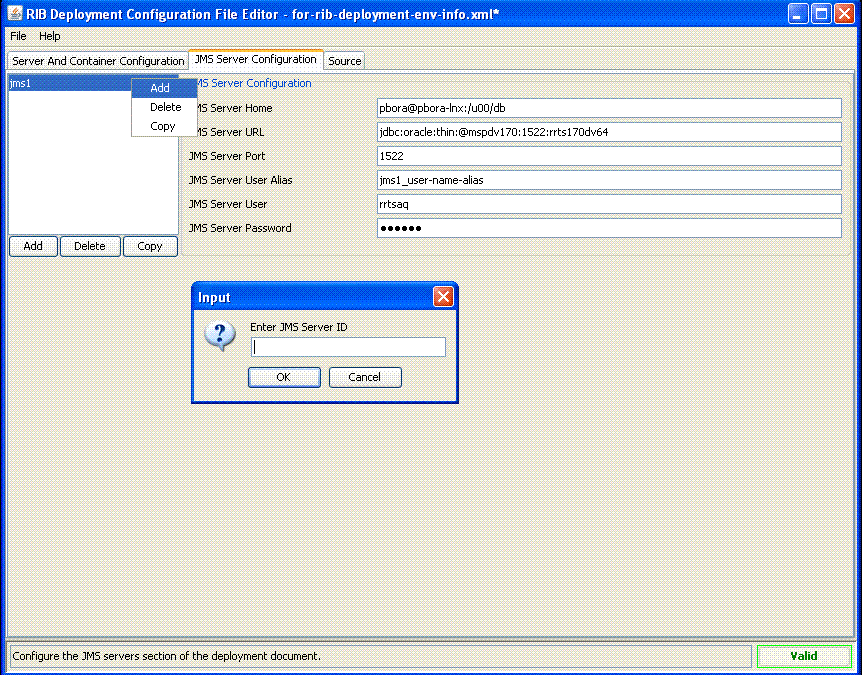
Right-click in the JMS Servers Configuration Panel. Select Add. Alternatively, click the Add button in the Document window.
|
 Copyright © 2013, Oracle and/or its affiliates. All rights reserved. Legal Notices |
|