| Oracle® Retail Financial Integration for Oracle Retail Merchandise Operations Management and Oracle Financials Installation Guide Installation Guide Release 16.0.023 E92036-01 |
|

 Previous |
 Next |
| Oracle® Retail Financial Integration for Oracle Retail Merchandise Operations Management and Oracle Financials Installation Guide Installation Guide Release 16.0.023 E92036-01 |
|
Previous |
Next |
This chapter includes:
It is assumed Oracle Data Integrator has already been configured with the appropriate details for your installation. This ODI installation location is referred to as ODI_INSTALL_DIR for the remainder of this chapter.
Log in to the UNIX server as a user who has sufficient access to run sqlplus from the Oracle Database installation.
Create the retail-financial-integration-solution in <INSTALL_DIR> folder.
From the ORFI server, copy the <INSTALL_DIR>/retail-financial-integration-solution/etl-based-integration folder to <INSTALL_DIR>/retail-financial-integration-solution folder on the ODI server.
|
Note: All references to the ODI server are indicative of RfiBulkServer. |
Before you run the ODI Master and Work database user, make sure that the following tablespace has been created in the database: ODI_DATA. Below is a sample tablespace creation statement for this tablespace. Oracle Retail recommends the use of locally managed tablespaces with automatic extent and segment space management.
|
Note: These tablespaces are not sized for a production environment. The customer's Database Administrator should create the tablespace based on their datacenter database architecture and size it appropriately based on expected data volume for their peak data usage. |
CREATE TABLESPACE ODI_DATA DATAFILE
'<datafile_path>/odi_data01.dbf' SIZE 500M
AUTOEXTEND ON NEXT 100M MAXSIZE 2000M
EXTENT MANAGEMENT LOCAL
SEGMENT SPACE MANAGEMENT AUTO
;
You must create an ODI Master Repository schema using a create_user.sql that comes with installer distribution. This will be used to execute ODI Interface at run time. This create_user.sql script can be used for this:
$INSTALL_DIR/retail-financial-integration-solution/etl-based-integration/retail-to-ebsfin-etl-flows/setup-data/ddl/create_user.sql
The script takes three arguments on the command line in sqlplus: username, password, and ODI Master tablespace.
For example: SQL> @create_user.sql <ODI Master Schema> <ODI Master Schema Password> <ODI Master tablespace name>
Review this script and run it as a user with adequate permissions, such as SYSTEM.
You must create an ODI Work Repository schema using a creat_user.sql that is included with the installer distribution. This will be used to execute ODI Interface at run time. This create_user.sql script can be used for this:
$INSTALL_DIR/ retail-financial-integration-solution\service-based-integration\install\setup-data\ddl create_user.sql
Or
The script takes three arguments on the command line in sqlplus: username, password, and ODI Work tablespace.
For example: SQL> @create_user.sql <ODI Work Schema> <ODI Work Schema Password> <ODI Work tablespace name>
Review this script and run it as a user with adequate permissions, such as SYSTEM.
|
Note: If you have not had a master and work repository created, you need to create it beforehand as described in the Oracle Data Integrator administrator guide or follow the steps given below. |
Run the below SQL. This should return 2 records each with name of the ODI Master & ODI Work repository schema names given in the previous two steps. Proceed further only if query gives you two records with schema names provided by you in the previous steps. If not ensure to successfully execute above two steps with help of DBA:
SQL> select * from all_users where username in (<ODI Work Schema>, <ODI Master Schema >);
Please replace <ODI Work Schema> & <ODI Master Schema> with the names given while creating Master and Work repository schema.
Prerequisite:
Make sure database schemas for Master and Work Repositories are present in the ODI database.
|
Note: These schema creation steps are done as part of ODI setup tasks in this chapter. |
Make sure the RFI_ODI_TEMP schema exists in the E-Business Suite or PeopleSoft database (Based on your integration financials application).
|
Note: These schema creation steps are done as part of "Create the ODI Staging Database User" in chapter 5. |
Make sure the ORFI infrastructure database setup is completed.
|
Note: These schema creation steps are done as part of "Create the ORFI Database User" in chapter 3. |
Give database administrator privileges to the schema in the E-Business Suite OR PeopleSoft database depending on which is your integrating Financials system
Use the following procedure to create the Master Repository:
Launch Oracle Data Integrator (ODI) Studio to create a Master Repository:
Click File->New and select "Master Repository Creation Wizard" and click OK.
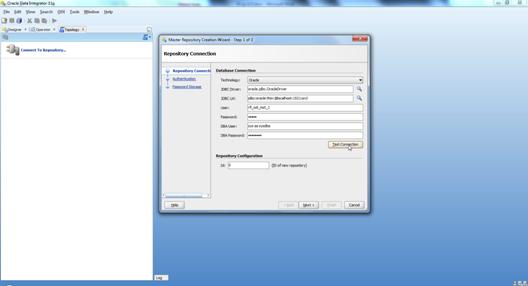
Enter the Master Repository Database connection details and click Next.
Database Connection - Enter valid Master Repository schema details.
|
Note: In JDBC url field, use the OdiMasterDataSource/ jdbcUrl entered in rfi-deployment-env-info.json file. You have to enter sysdba credentials in DBA User and DBA Password fields. |
Repository Configuration - Enter any ID other than 804 or 805 in the Id field.
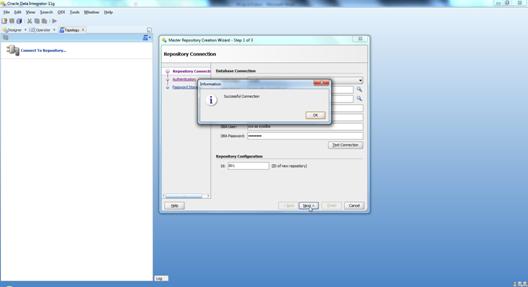
Test your credentials information using the Test Connection button. If you are successful, click OK in the Information popup and then click Next.
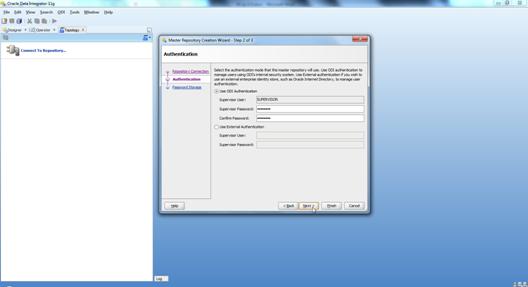
Enter <supervisor password> and click Next.
|
Note: This password will be used in further installation steps, so keep a record of it. |
Click Finish.
Click OK.
Use the following procedure to create the Work Repository:
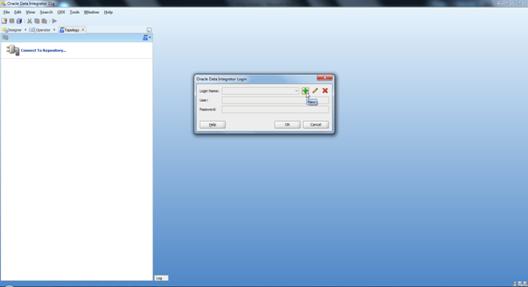
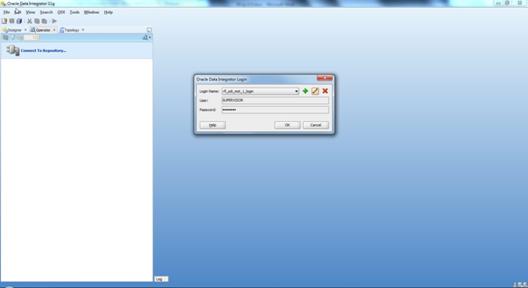
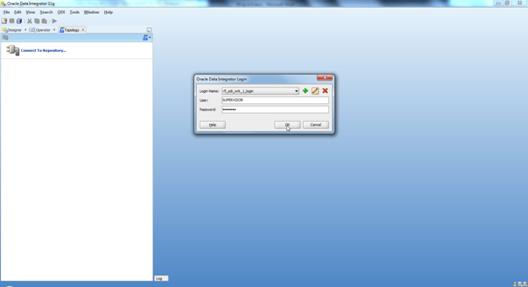
Select the ODI Menu->Connect option to log in to the Master Repository in Oracle Data Integrator (ODI) Studio to create a Work Repository.
Create Master Repository login credentials by selecting the + button from the Oracle Data Integrator Login dialog.
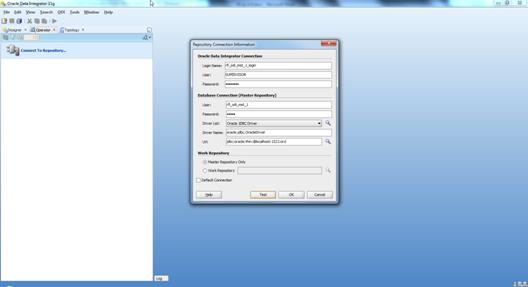
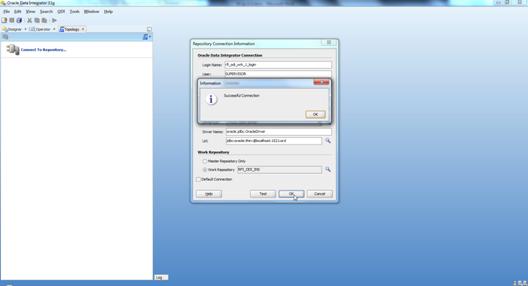
Update the Repository Connection Information as below:
Oracle Data Integrator Connection:
Login Name: <Login Name>
User: <Enter "SUPERVISOR" in this field>
Password: <supervisor password>
|
Note: See ODI documentation for information on users with the correct (supervisor level) permissions. The SUPERVISOR user is created by ODI and has the correct permissions by default. |
Database Connection (Master Repository):
Enter Master Repository database credentials for User and Password fields.
Select "Oracle JDBC Driver" from the drop-down list for Driver List field.
Enter Url (use the OdiMasterDataSource/ jdbcUrl entered in rfi-deployment-env-info.json file) field as shown below:
jdbc:oracle:thin:@<host>:<port>:<sid>
Work Repository:
Select the Master Repository Only option.
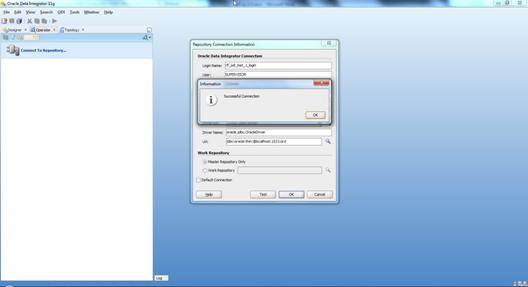
Test your credentials information using the Test button. If you are successful then click OK.
Select OK from Oracle Data Integrator Login dialog.
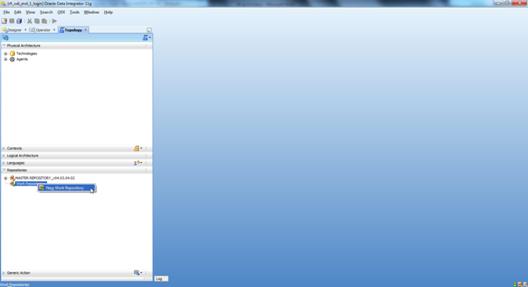
From the Topology tab, select Repositories and then right-click on the Work Repositories. Select the New Work Repository option.
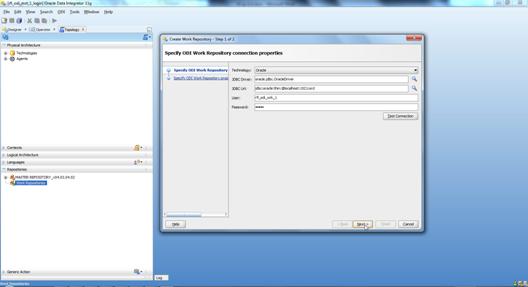
Enter the work repository database credentials details.
Test your credentials information using the Test button. If you are successful then click Next.
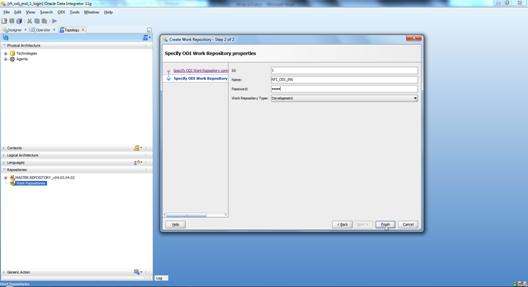
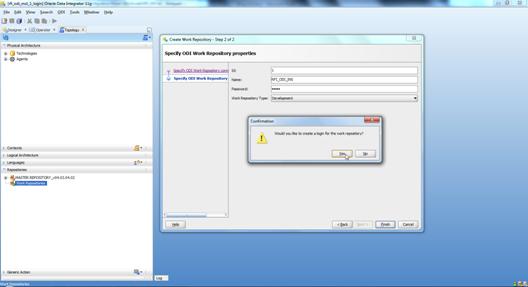
Update ODI Work Repository properties:
Enter any ID other than 804 or 805 (For EBS integration) / 501 or 502 (For PeopleSoft Integration) in the Id field.
Enter Name and Password (should be SUPERVISOR user and <supervisor password>) for work repository and click Finish.
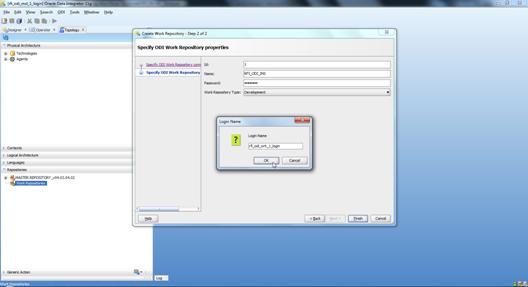
Click Yes to create an ODI login for the work repository.
Enter the ODI work repository login name in the dialog.
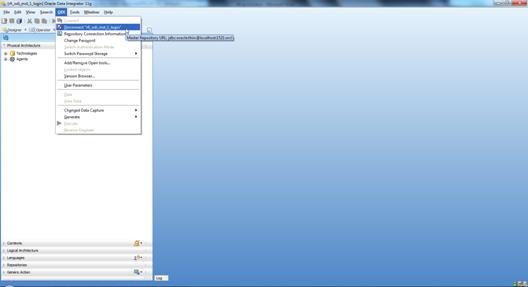
Select the ODI Menu->Disconnect option to connect to the Work Repository.
Select the ODI Menu->Connect option.
From the ODI Login popup, select Login Name from dropdown list (select the name you created in step7).
Enter user as "SUPERVISOR".
Enter <supervisor password>.
Select the Edit option.
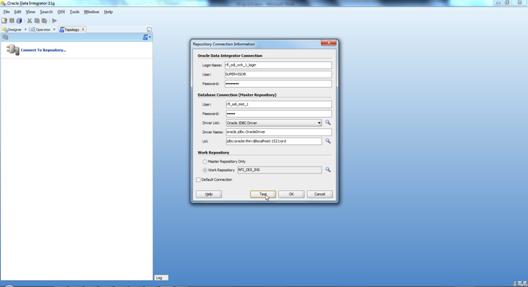
Validate the Repository Connection Information:
Oracle Data Integrator Connection
Login Name: <work repository login name>
User: <"SUPERVISOR">
Password: <supervisor password>
Database Connection (Master Repository)
Validate the Master Repository database details.
Work Repository
Select the Work Repository option and select the repository you just created.
Test your credentials information using the Test button. If you are successful then click OK.
Select OK from Oracle Data Integrator Login dialog.
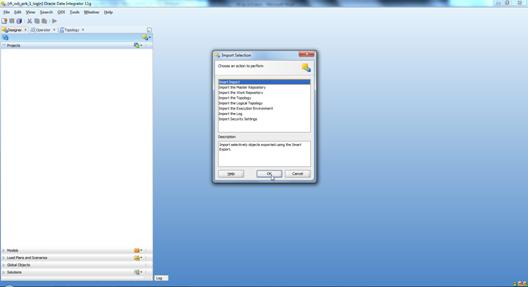
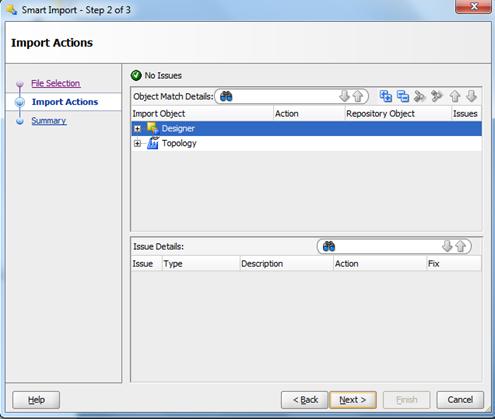
Use the following procedure to import ODI interfaces using Smart Import:
Log in to the Work Repository in Oracle Data Integrator (ODI) Studio to import all the interfaces:
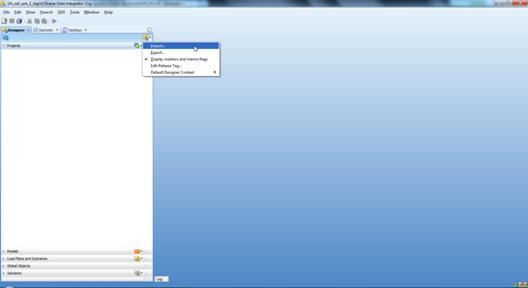
Select the Import option from the Designer tab.
Select the Smart Import option on the Import Selection dialog and click OK.
If integration is with EBS, then
Select SmartExport_RMS_EBS_Account_Entry.xml file in the File Selection Field and click Next. This file can be found in $INSTALL_DIR/retail-financial-integration-solution/etl-based-integration/retail-to-ebsfin-etl-flows/retail-to-ebsfin-odi-project/WorkRepository/.
If integration is with PeopleSoft, then
Select SmartExport_RMS_PSFT_Account_Entry.xml file in the File Selection Field and click Next. This file can be found in $INSTALL_DIR/retail-financial-integration-solution/etl-based-integration/retail-to-psftfin-etl-flows/retail-to-psftfin-odi-project/WorkRepository/.
Click Next.
Click Finish.
Similarly, perform Smart Import for the other ODI Interfaces listed below based on whether integrating financial applications is EBS or PeopleSoft
If EBS then,
SmartExport_ReIM_EBS_Account_Entry.xml
SmartExport_ReIM_EBS_Invoice_Entry.xml
If PeopleSoft then
SmartExport_ReIM_PSFT_Account_Entry.xml
SmartExport_ReIM_PSFT_Invoice_Entry.xml
For EBS Integration:
In Topology, under Physical Architecture, Technologies -> Oracle, update the Database Connection details in the Physical Server and Physical schema as shown in the table below.
Table 9-1 Database Connection Details - Physical Server and Physical Schema
| Physical Server (Data Server) | Physical Schema | |||
|---|---|---|---|---|
|
Name |
Definition > Connection |
JDBC |
Schema (Schema) |
Schema (Work Schema) |
|
EBIZ DS |
User: <APPS Schema Name> Password: <APPS Schema Password> |
Update EBS JDBCUrl |
APPS Schema |
RFI_ODI_TEMP Schema |
|
EBIZ_AP |
User: <AP Schema Name> Password: <AP Schema Password> |
Update EBS JDBCUrl |
AP Schema |
RFI_ODI_TEMP Schema |
|
RETAIL DS |
User: <RMS User Schema Name> Or <BDI RFI Schema Name>(On Hybrid Cloud) Password: <RMS User Schema Password> Or <BDI RFI Schema Password>(On Hybrid Cloud) |
Update RMS Or BDI RFI (On Hybrid Cloud) JDBCUrl |
RMS Schema Owner Or BDI RFI Shema Owner (On Hybrid Cloud) |
RMS Schema Owner Or BDI RFI Shema Owner (On Hybrid Cloud) |
|
RFI_LOGS |
User: <ORFI Schema Name> Password: <ORFI Schema Password> |
Update ORFI JDBCUrl |
ORFI Schema |
ORFI Schema |
|
RFI_RETAIL_XREF |
User: <ORFI Schema Name> Password: <ORFI Schema Password> |
Update ORFI JDBCUrl |
ORFI Schema |
ORFI Schema |
For EBIZ DS, EBIZ_AP, provide the E-Business Suite database connection.
For RETAIL DS, provide the Retail database connection.
For RFI_LOGS, RFI_RETAIL_XREF provide the ORFI Infrastructure database connection.
Click Test Connection on the physical server to verify that the connection information is correct.
In the physical schema, verify that the context (Global and RETL_TO_EBIZ) is mapped to the logical schemas as shown in the table below. If the mapping is missing, map the logical schemas as shown in the table below.
Table 9-2 Logical Schema Mapping
| Physical Schema | Logical Schema |
|---|---|
|
EBIZ DS.APPS |
EBIZ_GL |
|
EBIZ_AP.AP |
EBIZ_AP |
|
RETAIL DS.RMS Or BDI_RFI_INT_SCHEMA (On Hybrid Cloud) |
Retail |
|
RFI_LOGS.RFI |
RFI_LOGS |
|
RFI_RETAIL_XREF.RFI |
RFI_RETAIL_XREF |
For PeopleSoft Integration:-
In Topology, under Physical Architecture, Technologies -> Oracle, update the Database Connection details in the Physical Server and Physical schema as shown in the table below.
Table 9-3 Database Connection Details - Physical Server and Physical Schema
| Physical Server (Data Server) | Physical Schema | |||
|---|---|---|---|---|
|
Name |
Definition > Connection |
JDBC |
Schema (Schema) |
Schema (Work Schema) |
|
PEOPLESOFT DS |
User: <APPS Schema Name> Password: <APPS Schema Password> |
Update PeopleSoft JDBCUrl |
SYADM Schema |
RFI_ODI_TEMP Schema |
|
RETAIL DS |
User: <RMS User Schema Name> Password: <RMS User Schema Password> |
Update RMS JDBCUrl |
RMS Schema Owner |
RMS Schema Owner |
|
RFI_LOGS |
User: <ORFI Schema Name> Password: <ORFI Schema Password> |
Update ORFI JDBCUrl |
ORFI Schema |
ORFI Schema |
|
RFI_RETAIL_XREF |
User: <ORFI Schema Name> Password: <ORFI Schema Password> |
Update ORFI JDBCUrl |
ORFI Schema |
ORFI Schema |
For PEOPLESOFT DS, provide the PeopleSoft Suite database connection.
For RETAIL DS, provide the Retail database connection.
For RFI_LOGS, RFI_RETAIL_XREF provide the ORFI Infrastructure database connection.
Click Test Connection on the physical server to verify that the connection information is correct.
In the physical schema, verify that the context (Global and RETL_TO_PSFT) is mapped to the logical schemas as shown in the table below. If the mapping is missing, map the logical schemas as shown in the table below.
In this section, you need to do similar things to the three packages in ORFI. In this guide we only use the Migrate RMS to EBIZ Acc Entry Package / Migrate RMS to PSFT Acc Entry Package, for example.
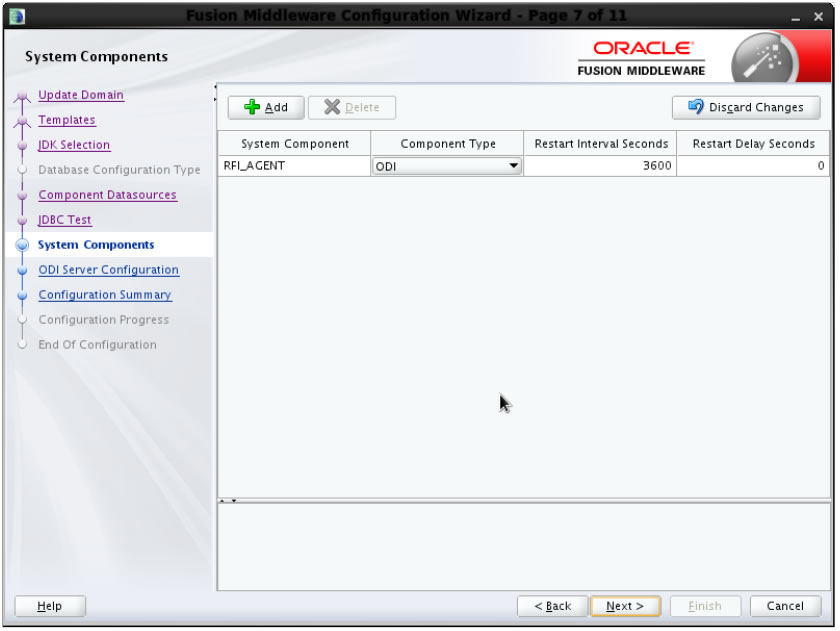
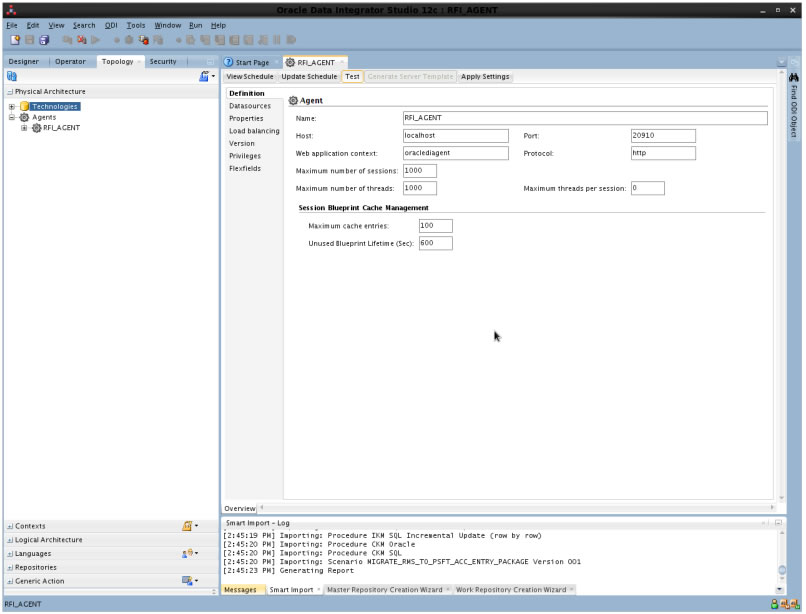
In ODI Topology, navigate to Physical Architecture -> Agents.
Make sure the RFI_AGENT is available and default to port 20910
The following steps are provided as guidance and can be found in ODI documentation.
These graphical UI steps will guide you for standalone ODI agent configuration, starting and testing the agent. ODI 12c agent configuration is now graphical wizard tool. The domain is similar to WLS domain.
Navigate to <odi install directory>Oracle/Middleware/Oracle_Home/odi/common/bin.
In Unix:
./config.sh
For Windows:
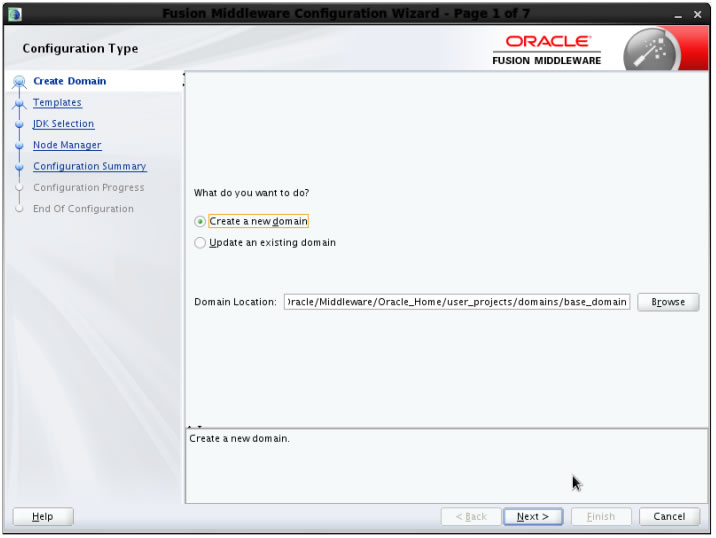
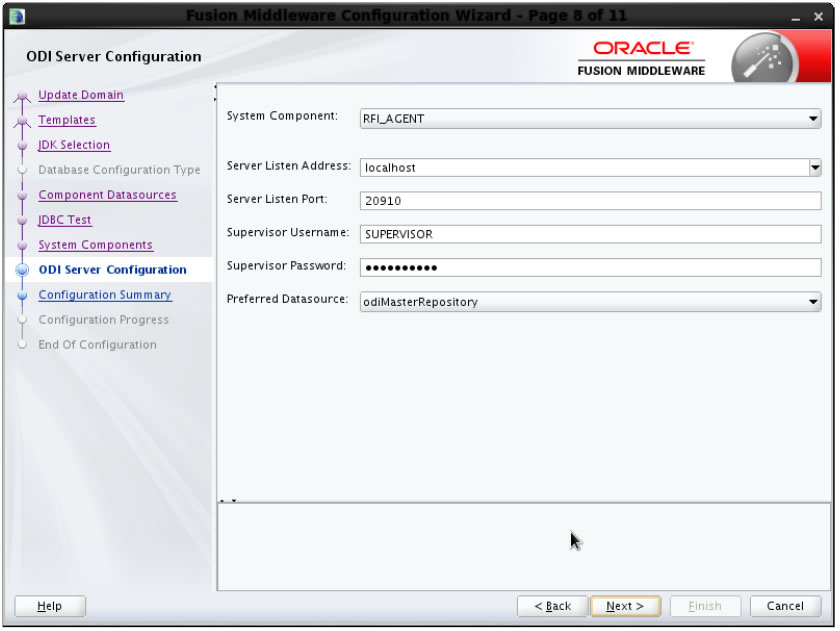
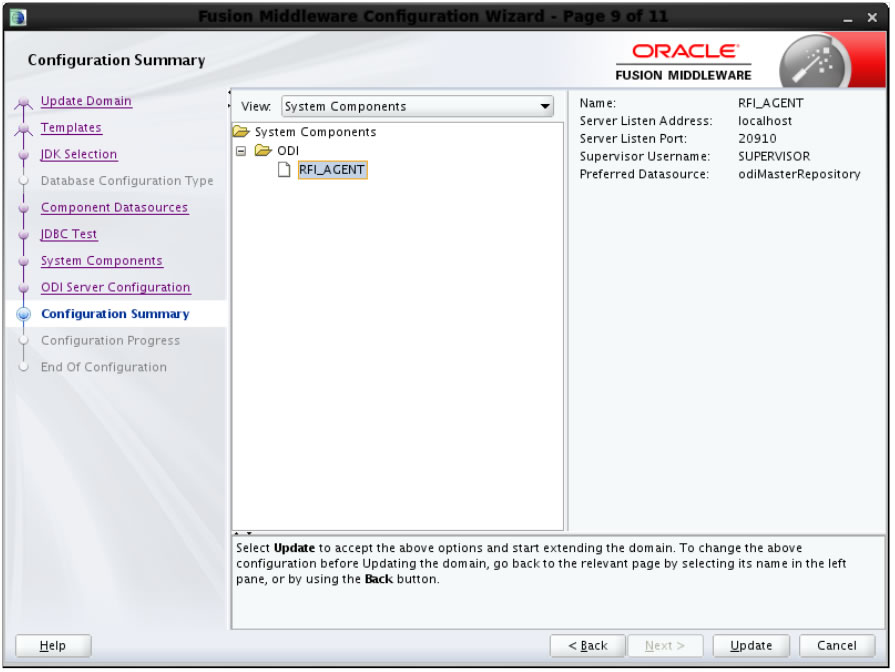
The configuration wizard pops up. Select the "Create a new domain" option.
After providing/chosing the domain location, Click Next.
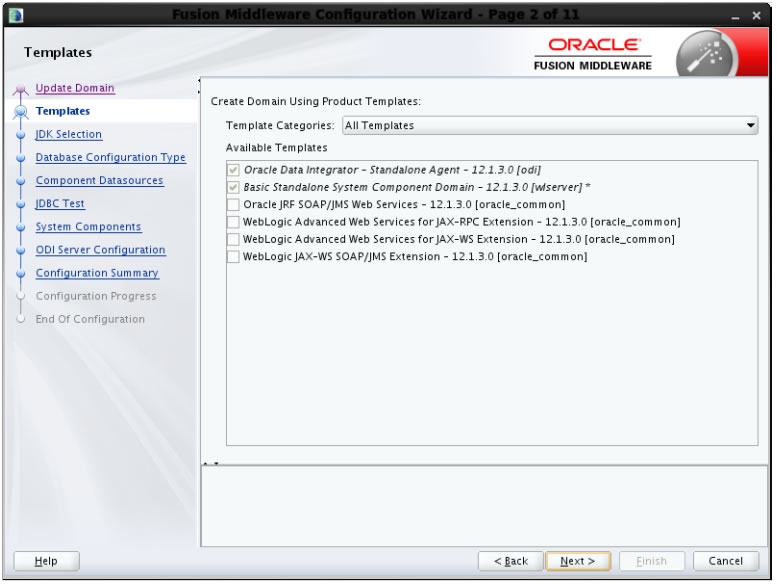
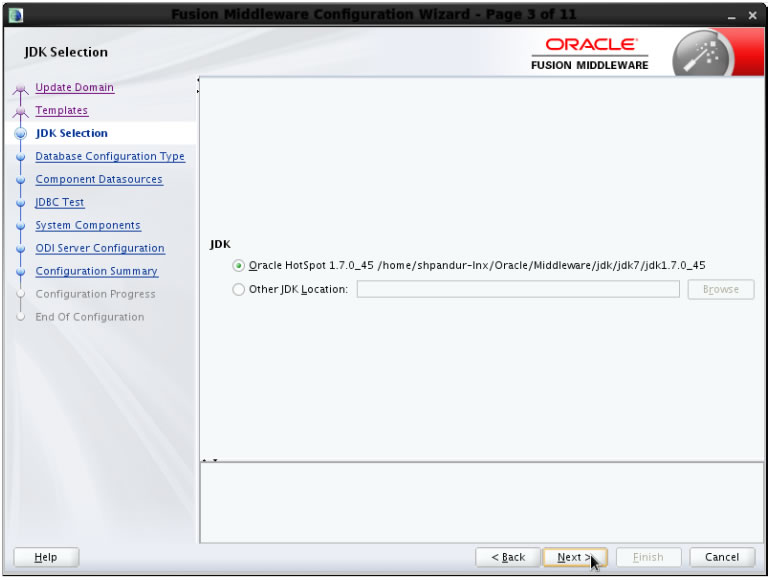
Chose the first checkbox, Oracle Data Integrator-Standalone Agent -12.2.1.2.0.
Chose the JDK path.
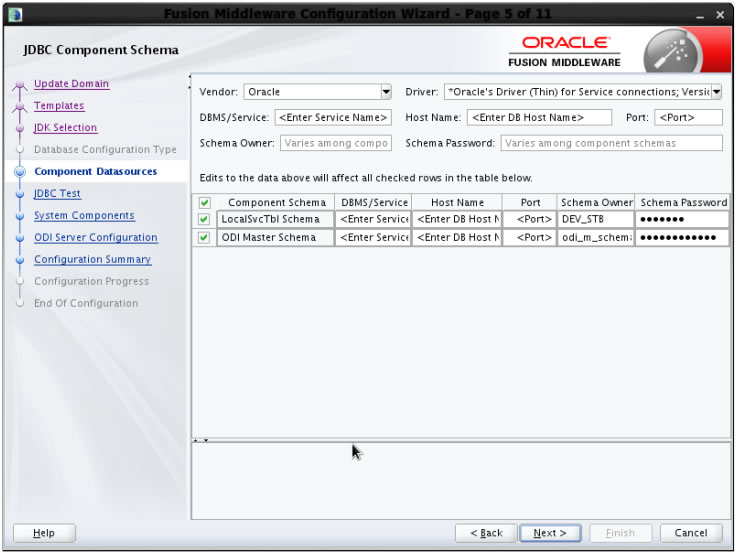
Enter DBMS/Service information (not a database instance) example orcl.example.com and enter DB host name, port information.
Enter dev_stb schema hostname, service and port information and also password, this is the services related table that would be been created using RCU. Enter similar information for ODI master schema.
To start the RFI_AGENT agent
Navigate to location where you created the odi base domain, refer to first step.<Domain home>Oracle/Middleware/Oracle_Home/user_projects/domains/base_domain/bin and type.
agent.sh -NAME=RFI_AGENT -PORT=20910
You should see:
<date and time> NOTIFICATION ODI-1111 Agent RFI_AGENT started. Agent version: 12.2.1.2 - date. Port: 20910. JMX Port: 21910.
Do not close the window.
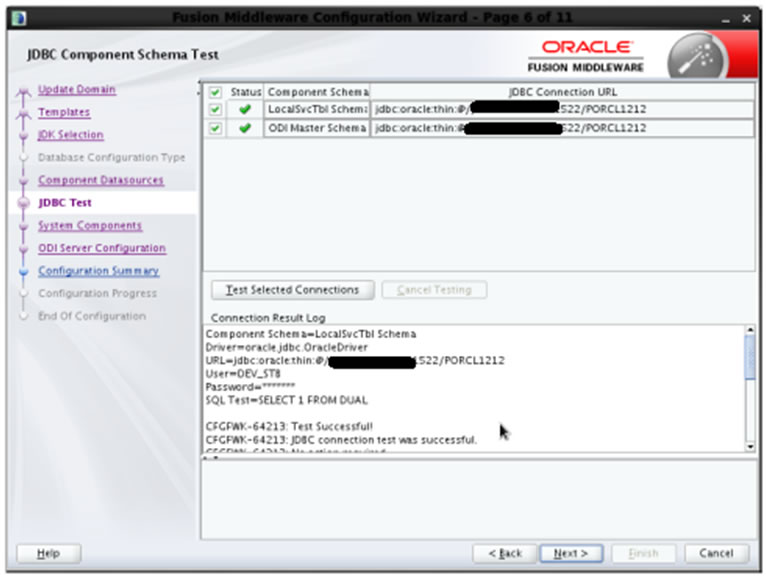
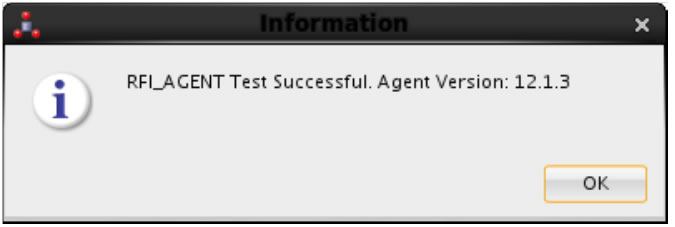
To test if the agent is successfully running:
Log into ODI with appropriate credentials and navigate to Topology tab. On the physical agent section, expand Agents, and click on RFI_AGENT. On the right pallet, click on 'Test' tab.
You should see this message.
The following scripts are located in <ODI_INSTALL_DIR>/oracledi/agent/bin/.
You need to configure odiparams.sh script to schedule an ODI agent. This odiparams.sh script is located in <ODI_INSTALL_DIR>/oracledi/agent/bin/odiparams.sh
You need to run encode.sh script to generate your password in the encoded format and this is used in odiparams.sh script.
The script takes one argument on the command line: password.
Example: prompt$ encode <password>
sh encode.sh <password>
Modify odiparams file. Set the following lines as indicated in order to connect them to the work repository. For example:
In Windows OS (odiparams.bat),
set ODI_MASTER_DRIVER=oracl.jdbc.driver.OracleDriver
set ODI_MASTER_URL=<JDBC Connection URL to ODI>
set ODI_MASTER_USER=<ODI Master Schema>
set ODI_MASTER_ENCODED_PASS=<ODI Master Schema password>
set ODI_SUPERVISOR=SUPERVISOR
set ODI_SUPERVISOR_ENCODED_PASS=<ODI SUPERVISOR password>
set ODI_SECU_WORK_REP=<ODI Work Repository name>
In Linux/Unix OS (odiparams.sh),
ODI_MASTER_DRIVER=oracle.jdbc.driver.OracleDriver
ODI_MASTER_URL=<JDBC Connection URL to ODI>
ODI_MASTER_USER=<ODI Master Schema>
ODI_MASTER_ENCODED_PASS=<ODI Master Schema password>
ODI_SUPERVISOR=SUPERVISOR
ODI_SUPERVISOR_ENCODED_PASS=<ODI SUPERVISOR password>
ODI_SECU_WORK_REP=<ODI Work Repository name>
Use the agent.sh script to start an agent.
Example:
prompt$ agent "-NAME=<physical agent name>"
prompt$ agent "-NAME=RFI_AGENT"
sh agent.sh "-NAME=<physical agent name>
You should see a message that the agent is started successfully.
Test the agent to ensure it is up and running. Click on the Test portion of the menu (View Schedule, Update Schedule, Test, and Generate Server Template). Agent Test Successful message should be displayed.
In ODI designer, navigate to Load Plans and Scenarios, and select scenario MIGRATE_RMS_TO_EBIZ_ACC_ENTRY_PACKAGE if integrating with EBS. While integrating with PeopleSoft then MIGRATE_RMS_TO_PSFT_ACC_ENTRY_PACKAGE
Select Existing Scheduling. Make sure the context is set to RETL_TO_EBIZ and the agent is selected as RFI_AGENT
You need to select an Execution option based on the ORFI requirement and then save the changes.
Similarly, schedule the scenarios for the other ODI Interfaces
LOAD_REIM_TO_EBS_INVOICE_ENTRY_PACKAGE if integrating with EBS. While integrating with PeopleSoft then REIM_TO_EBS_ACCOUNT_ENTRY_DATA_MIGRATION if integrating with EBS. While integrating with PeopleSoft then
Load ReIM To PSFT Acct Entry PKG