| Oracle® Retail Service Backbone Oracle® Retail Service Backbone Implementation Guide Release 16.0.027 E94820-01 |
|

 Previous |
 Next |
| Oracle® Retail Service Backbone Oracle® Retail Service Backbone Implementation Guide Release 16.0.027 E94820-01 |
|
Previous |
Next |
RSB comes with following supporting tools to help the implementation.
There are two types of SIT tools: JSIT and PSIT. SIT tools are used to mimic provider edge applications. JSIT mimics Java applications and PSIT mimics PLSQL applications.
Since RSB is an integration product, it cannot be tested standalone. Ideally it needs the edge applications deployed. SIT tools comes handy in situations where one or more edge applications are not available. The role of the edge application can be taken by the SIT tool. In fact, RSB configuration can be validated without even a single edge app.
A single instance of JSIT/PSIT can mimic one or more edge apps.
The SIT Tool distribution is a separate download. In this release SIT tools are supported only on JEE 7 servers (e.g., WebLogic 12c Release 2 (12.2.1.3.0)).
JSIT delivers a Java EE application called javaee-service-interface-tester-<version>.ear. The RSE generated Java EE provider ejb-jar for a provider edge application gets merged into the JSIT ear (javaee-service-interface-tester-<version>.ear) at application assembly time and can be deployed to Glassfish (Java EE 7) and WebLogic 12c Release 2 (12.2.1.3.0) (Java EE 7+) application server. After deployment, all the web services in the RSE ejb-jar get exposed by the JSIT ear. You can use any WSDL consumer API/Tool to call the web services immediately after deployment without any lengthy configuration process.
SOAP-UI works very well to create the service consumer (WSDL client) without having to write any code, but application developers can use any API of their choice to call the WSDL based web service. When the web service gets called the JSIT engine will generate a mock but fully defined response soap xml with dummy data. It generates a hash of the request soap xml and persist the request/response data for future/subsequent use. The user can modify and fine tune their response soap xml by editing the persisted data using the JSIT webapp which is also included in the JSIT ear (javaee-service-interface-tester-<version>.ear).
The JSIT Tool can be accessed through the URL http://<hostname>:<port>/javaee-service-interface-tester-web16.0.027
Download and extract JavaEeSit16.0.027ForAll16.x.xApps_eng_ga.zip
Copy javaee-service-interface-tester-<version>.ear to an install stage folder, referred as SIT_JAVAEE_APP_HOME.
Download and save RSE generated JavaEE ejb-jar (<app>-service-ejb.jar) in SIT_JAVAEE_APP_HOME. <app> is the application name that hosts the application service. For example, sim-service-ejb.jar.
Merge the two components:
jar -uvf javaee-service-interface-tester-<version>.ear <app>-service-ejb.jar
The above command can be repeated with any number of <app>-service-ejb.jar files.
Open WebLogic 12c Release 2 (12.2.1.3.0) Console.
Go to the Deployments page and click Install. Upload or browse to javaee-service-interface-tester-<version>.ear. Click Next.
Select Install this deployment as an application. Click Next.
Select the target server. Click Next.
Click Finish to Deploy.
Configure a group and user for JSIT. Click Security Realms.
Click the default realm.
Click the Groups tab. Add a group called sitadmin.
Click the Users tab. Add a new user. Add the new user to the sitadmin group.
|
Note: Do not change the default application name. It must be kept as javaee-service-interface-tester-<version>. JSIT web app is accessible athttp://<host>:<port>/javaee-service-interface-tester-web-<version>/faces/index.xhtml. |

This section describes the PSIT related details.
To install and set up PSIT, take the following steps:
Extract the PlsqlSit16.0.027ForAll16.x.xApps_eng_ga.tar
For example, tar -xvf PlsqlSit16.0.027ForAll16.x.xApps_eng_ga.tarThis creates plsql-service-interface-tester.
Update database details in psit.properties available under plsql-service-interface-tester/conf folder.
Launch SIT Menu to perform plsql sit operations.
For example, sh sitmenu.sh
SIT Menu looks as shown in following window: 
Database Credential Setup is a onetime operation. It is done corresponding to server details provided in psit.properties files. Make sure that server name, port and sid are correct before performing this step.
Select Menu Option 1 to setup Database credentials.
Console provides with option to add/modify/delete credentials. Select appropriate option and once done, press D to return to the main menu.
It is a one-time process which creates oracle objects in the database. Before starting the setup, make sure that all Oracle objects (that is, sqls) are copied into Scripts folder from the retail-public-payload-database-object-types-<version> located under RibFuncArtifact<Version>ForAll<version>Apps_eng_ga. Only the scripts present in the scripts folder are executed for schema setup.
Select Menu Option 2 to start the setup.
On success, console returns Schema Setup Complete message with no errors or exceptions.
Configuring Service(s) operation creates procedures and implements procedure body in database. It takes ServiceProviderDefLibrary.xml from plsql-service-interface-tester/conf location as input and generates StoredProcedureMetaData.xml. By default, a ServiceProviderDefLibrary.xml is provided in the conf folder.
Select Menu Option 3 to start the configuring service(s) listed in ServiceProviderDef.xml.
On success, console returns Configuration Complete message with no errors or exceptions.
Get the live/deployed RSE generated web services (for example, PayTermService) WSDLs
Your Web Browser > WebLogic Deployment page > RSE generated Web Service's ear > Testing > Expand Service (for example, PayTerm) > Under Testing point, click? WSDL > Copy the WSDL URL from browser.
Start SOAPUI and create a new project (if needed) to import the WSDL.
Right click and add/import the WSDL into the project.
Open Request 1 window for your test web service operation.
Edit the SOAP Request XML in the request editor. Find ? and replace-all with 1 for a quick test or hand edit the request xml with your test data.
Click the > (submit request) button on top. If everything went okay you should get a SOAP response XML (not fault) in the response window.
The SOAP response XML is a mock response, automatically generated by PSIT.
Take the following steps to deploy the ear file:
The plsql-service-interface-tester-app-16.0.027.ear is available in PlsqlSit16.0.027ForAll16.x.xApps_eng_ga.tar download.
Edit psit.properties with database credentials of PSIT schema
Execute the Menu Option 4 from SIT Menu, this option updates the ear file with database credentials provided in psit.properties.
Deploy the ear file on the application server.
Configure a group and user for PSIT. To do this, log in to the WebLogic console and click Security Realms.
Click the default realm.
Click the Groups tab. Add a group called sitadmin.
Click the Users tab. Add a new user. Add the new user to the sitadmin group.
Verify the UI is accessible from by using launch option from the WebLogic console.
Retail Integration Console (RIC) is a web based application distributed along with RSB. This application is deployed as a part of the RSB installation. The application can be access by the URL http://<host>:<port>/rsb-admin. 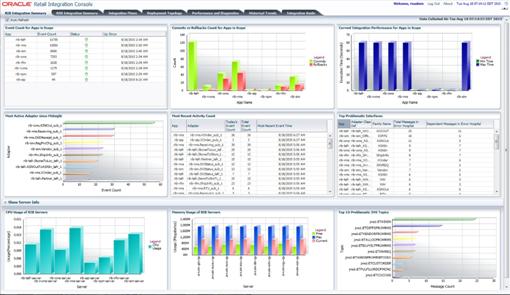
|
Note: Review the Oracle Retail Service Backbone Integration Console Guide for more details. |
