| Oracle® Retail Integration Bus Oracle® Universal Service Mapper User Guide Release 16.0.3 F29160-01 |
|

 Previous |
| Oracle® Retail Integration Bus Oracle® Universal Service Mapper User Guide Release 16.0.3 F29160-01 |
|
Previous |
This chapter describes the steps you should take to deploy the Universal Service Mapper web application.
Before you begin installing Universal Service Mapper web application, make sure you have the database schema created for Universal Service Mapper.
Follow the instructions in "Understanding the Installation Prerequisites" to install WebLogic 12.2.1.4 and create a domain.
Start the Admin and Managed servers.
To deploy the USM Web Application .ear file, do the following:
Download UniversalServiceMapper16.0.3ForAll16.x.xApps_eng_ga.zip.
Unzip the downloaded archive. The usm_home directory will be created under the current directory:
unzip UniversalServiceMapper16.0.3ForAll16.x.xApps_eng_ga.zip
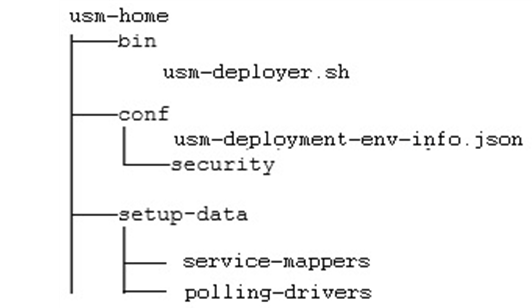
This command extracts the archive. The relevant directories for the installation are shown below (There are more directories than what is shown):
Open the usm-deployment-env-info.json file for editing:
cd usm-home/conf/
vi usm-deployment-env-info.json
Modify the DataSourceDef and MiddlewareServerDef with information that is specific to your environment.
By default, the JSON files should have placeholders for the USMDataSource. This connection is mandatory and needs to be available during deployment.
The following table summarizes the values that needs to changed specific to environment:
| USMDataSource -> jdbcUrl | Database details of the server where USM default data source schema is hosted. |
| USMAppServer -> weblogicDomainName | Name of the domain where the USM application is going to be deployed. |
| USMAppServer -> weblogicDomainHome | Absolute path to the domain. (starts from the root directory) |
| USMAppServer -> weblogicDomainAdminServerUrl | Admin server URL link of the domain. |
| USMAppServer -> weblogicDomainAdminServerProtocol | Web Protocol to be used in the domain. (Can be t3, unsecure or t3s, secure) |
| USMAppServer -> weblogicDomainAdminServerHost | Admin server host name. (domain.example.name.com) |
| USMAppServer -> weblogicDomainAdminServerPort | Admin server host port number |
| USMAppServer -> weblogicDomainTargetManagedServerName | Name of the managed server where USM will be deployed. |
| USMAppServer -> USMAdminUiUrl | Complete URL link that would be used to access the USM application. (http://<host_name>:<managed_sever_port>/) |
| RibLgfAdminAppServer -> appAdminUiUrl | Complete URL link to the deployed RIB-LGF application (http://<host_name>:<managed_sever_port>/) |
| loadUsmData | Flag to determine whether a new copy of the usm-data folder needs to be created when redeploying.
[Note: This flag to be set to true when new template changes or USM engine changes are to be brought into effect during a redeployment.] |
|
Note: The alias names in the configuration files should not be changed. |
The following is an example configuration:
"DataSourceDef":{
        "UsmDataSource":{
             "dataSourceName":"UsmDataSource",
             "dataSourceClass":"oracle.jdbc.pool.OracleDataSource",
             "dataSourceJndiName":"jdbc/UsmDataSource",
             "jdbcUrl":"jdbc:oracle:thin:@//dbhost.example.com:1521/pdborcl",
             "jdbcUserAlias":"UsmDataSourceUserAlias",
             "jdbcUser":"GET_FROM_WALLET",
             "jdbcPassword":"GET_FROM_WALLET",
         }
}
"MiddlewareServerDef":{
"UsmAppServer": {
                "weblogicDomainName": "usm_domain",
                "weblogicDomainHome":
"/u00/webadmin/oracle/middleware_1221/user_projects/domains/usm_domain",
                "weblogicDomainAdminServerUrl": "t3://localhost:7001",
                "weblogicDomainAdminServerProtocol": "t3",
                "weblogicDomainAdminServerHost": "localhost",
                "weblogicDomainAdminServerPort": "7001",
                "weblogicDomainAdminServerUserAlias": "usmServerAdminServerUserAlias",
                "weblogicDomainTargetManagedServerName": "AdminServer",

                "usmAdminUiUrl":"http://localhost:7001/usm/",
                "usmAdminUiUserGroup":"UsmAdminGroup",
                "usmAdminUiUserAlias":"usmAdminUiUserAlias",
                "usmAdminUiUser":"GET_FROM_WALLET",
                "usmAdminUiPassword":"GET_FROM_WALLET",

                "usmOperatorUiUserGroup":"UsmOperatorGroup",
                "usmOperatorUiUserAlias":"usmOperatorUiUserAlias",
                "usmOperatorUiUser":"GET_FROM_WALLET",
                "usmOperatorUiPassword":"GET_FROM_WALLET",

                "usmMonitorUiUserGroup":"UsmMonitorGroup",
                "usmMonitorUiUserAlias":"usmMonitorUiUserAlias",
                "usmMonitorUiUser":"GET_FROM_WALLET",
                "usmMonitorUiPassword":"GET_FROM_WALLET",
            }
   },"RibLgfAdminAppServer": {
               "appAdminUiUrl":
"http://rtg:8022/rib-lgf-services-web/resources/publisher/publish",
               "appAdminUiUserAlias":"ribLgfAdminUrlUserAlias",
               "appAdminUiUser":"GET_FROM_WALLET",
               "appAdminUiPassword":"GET_FROM_WALLET",
           }
       },
       "USMApplication":{
          "appName":"universal-service-mapper",
          "loadUsmData":"false",
          "USMAppUses":[
             "UsmDataSource",
              "UsmAppServer",
              {
                 "RemoteAppServers":[
                    "RibLgfAdminAppServer"
                 ]
              }
       ]
   }
|
Note: Do not delete anything from theUSMAppServer section of the JSON file. |
Run the deployer script to create the datasource and deploy USM Web Application.
$cd usm-home/bin/
$sh usm-deployer.sh -setup-credentials -deploy-usm-app
Enter the parameter value that is prompted by the script.
Bounce the WebLogic Server hosting the USM Web Application.
Restrict Access to the USM home folder:
$cd ..
$chmod -R 700 usm-home
If you have already configured the credentials and can use the same credentials (typically when redeploying the app), you can run the deployer with the -use-existing-credentials option as follows, and you will not be prompted for the credentials again for the deployment.
sh usm-deployer.sh -use-existing-credentials -deploy-usm-app
After you deploy the server successfully, USM Web Application can be accessed using the following URL:
http://<host-server>:<managed-server-port>/usm/
After deployment, perform the following procedures.
There are a few changes that have to be made in the USM UI once the application is deployed to access the Projects and templates available.
To do that, follow the "Provide User Access to a Project" procedure in "USM User Interface" to give access to a specific user alias named usmAdminUiUserAlias.
Once the USM UI is up, do the following:
Log into the application and proceed to the Configurations tab.
Click the Edit USM Configurations sub-tab in the Configurations tab.
Select the external_env_info.json file from the drop down list box.
Change the following field:
{"name":"usm_url_key", "value": "[http://<hostname>:<port_number> /]"}
Save the file.
Next select the external_env_info.LogFireIntegration.json file from the drop down list.
Change the following fields:
{"name": "LogFire_Host_Url_Key", "value": "https://<hostname>:<port_
number>/rgbu_test"}
{"name": "RibLgf_Host_Url_Key", "value": "http://<hostname>:<port_number>/rib-lgf-services-web/resources/publisher/publish"}{"name":"rib_lgf_host_UrlSecurityPolicyKey", "value": "PolicyC"}
